


✨🎀Hello DIYHub community and LIKETU friends!✨🎀
I hope you are feeling great today. As you can see today I bring you a mini tutorial of this beautiful big and red bow so that you are is trend with this vibe of the girls 🎀coquettes🎀 so I decided to join also to this trend of this beautiful trend and to be able to bring you this craft. Here the materials you will use:
Materials:
🎀Scissors.
🎀Pencil for marking.
🎀Recyclable paper.
🎀Hot silicone.
🎀Fabric (I used red satin fabric).
🎀Hair clip.
🎀Thread of the color you are going to make the bow.
🎀Water.
Steps to follow:
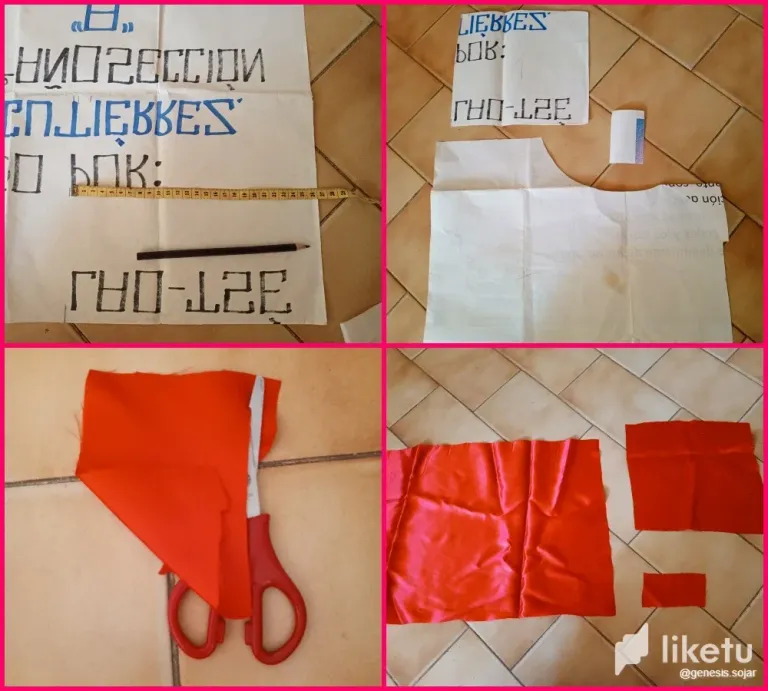
✨💐Step 1: We are going to cut out the patterns so on our recyclable paper we will trace a square 26cm long by 24cm wide. Then we are going to make a rectangle 49cm long by 37cm wide and finally a small rectangle 10cm long by 6cm wide. We cut out the patterns, transfer them to the fabric and cut out again leaving the squares and rectangles that you see in the image.
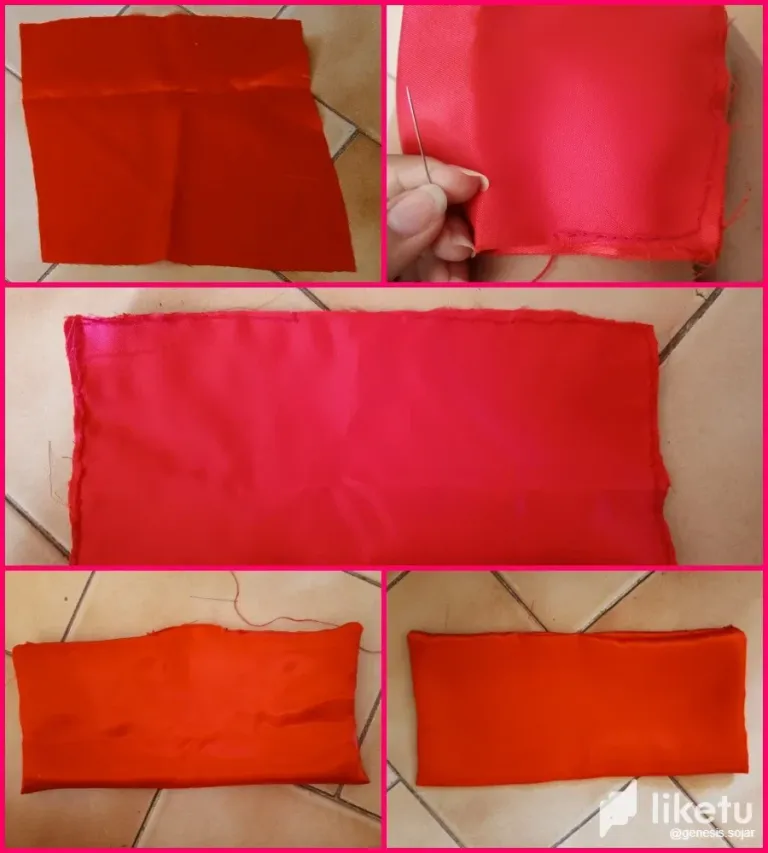
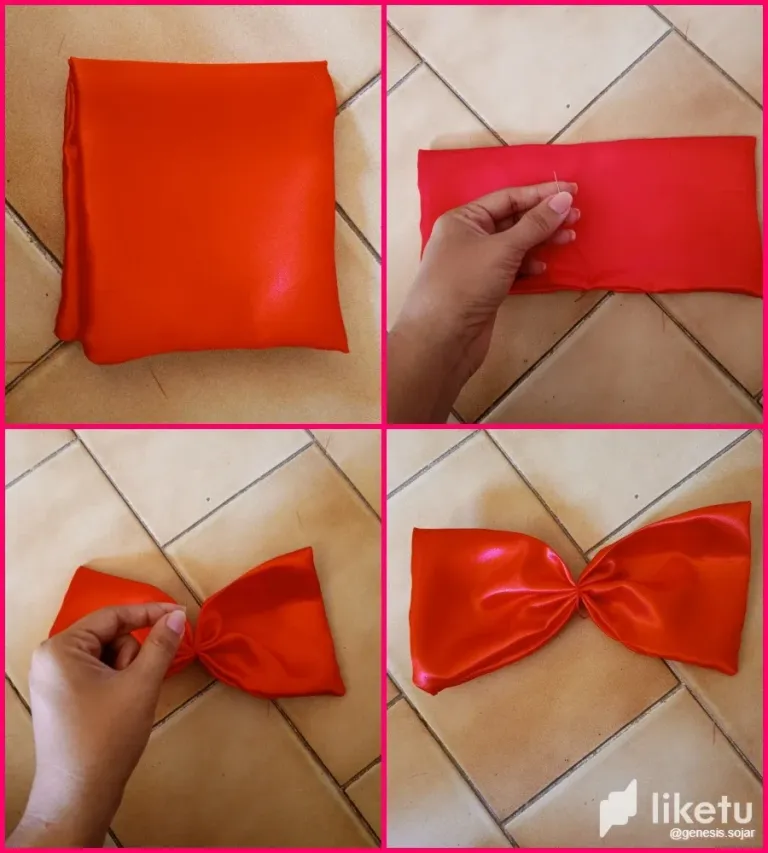
✨💐 Step 2: With everything cut out, we will take the fabric of the 26cmx24cm square and fold it in half on the wide part and sew around one centimeter from the edge leaving 5cm of the middle part without sewing. Once sewn, we will cut the excess fabric trying not to cut the seam and trimming the corners. On the part where we do not sew, we turn it around and the corners can be stretched or removed with the help of a stick or scissors until we have a completely uniform rectangle. Once this is done, we are going to sew the middle part to close it. When finished we fold in half of the rectangle and introduce a needle and thread through this to form the bow securing it with a knot.
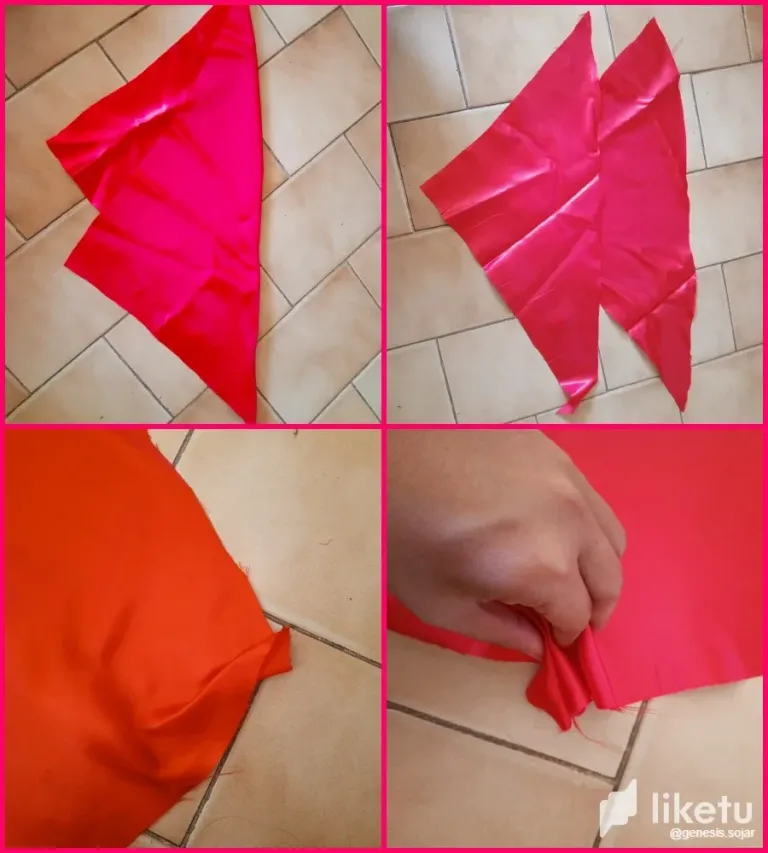
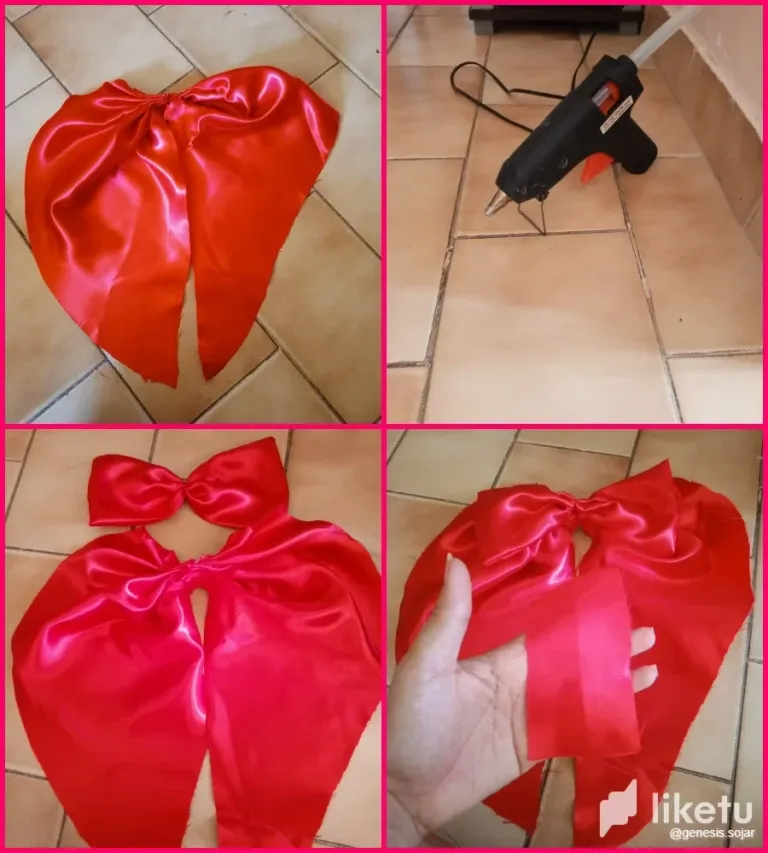
✨💐Step 3: To make the loop frills we will need the larger rectangle. From the corner of the longest part we fold downwards, we arrange the ends well thing that they are even so that we get the same size. You will need to fix the fabric to be able to cut it out. Cut carefully from end to end and we have the two parts that will hang from the ribbon. We will place the fabric and we will use the longest straight part and we start to gather or make folds and with the help of needle and thread we sew one centimeter from the edge until we reach the end, we pull the thread and you will notice that you have finished the first holan and we repeat the same with the other piece of fabric.
✨💐Step 4: Once the holans are ready, we will join them with thread, but I joined them with hot silicone. You will sew or glue them in the middle so that they are together and hanging. After this we will glue the bow with the help of the hot silicone in the part where they were sewn. With the last rectangle we will fold it in half and surround the middle of the bow, we will take the clamp, apply hot silicone and thus we finish our red bow coquette.
The result is as shown in the last pictures, did you like it? I did and you can even make it as a gift for a friend, cousin or even if you are a mother, you can make it for your little girl or girl. It was a pleasure to stop by and bring you this beautiful tutorial, see you in the next post xoxo.
Camera used Tecno Spark 10 pro phone.
I used Deepl.com translator free version.
✨🎀¡Hola comunidad de DIYHub y amigos de LIKETU!✨🎀
Espero se encuentren muy bien el día de hoy. Como pueden ver hoy les traigo un mini tutorial de este hermoso lazo grande y rojo para que estén es tendencia con esta vibra de las chicas 🎀coquettes🎀 por lo que decidí sumarme también a este trend de esta tendencia tan bonita y poder traerles esta manualidad. Aquí los materiales que utilizaran:
Materiales:
🎀Tijera.
🎀Lápiz para marcar.
🎀Papel reciclable.
🎀Silicón caliente.
🎀Tela (yo utilicé tela raso roja).
🎀Pinza de cabello.
🎀Hilo del color que vayas a hacer el moño.
🎀Aguja.
Pasos a seguir:
✨💐Paso 1: Vamos a recortar los patrones por lo que en nuestro papel reciclable trazaremos un cuadrado de 26cm de largo por 24 cm de ancho. Luego vamos a realizar un rectángulo de 49 cm de largo por 37 de ancho y por ultimo un rectángulo pequeño de 10 cm de largo por 6cm de ancho. Recortamos los patrones, los pasamos a la tela y volvemos a recortar dejando los cuadrados y rectángulos que observas en la imagen.
✨💐 Paso 2: Con todo recortado, tomaremos la tela del cuadrado de 26cmx24cm y lo doblaremos por la mitad de la parte ancha y coseremos alrededor a un centímetro de la orilla dejando 5cm de la parte del medio sin coser. Ya costurado, cortaremos la tela sobrante tratando de no cortar la costura y recortando las esquinas. Por la parte donde no costuramos le damos vueltas y las esquinas la podemos estirar o sacar con ayuda de un palito o tijera hasta que nos quede un rectángulo totalmente uniforme. Hecho esto, vamos a coser la parte del medio para cerrarla. Al terminar doblamos por la mitad del rectángulo e introducimos una aguja e hilo por este para formar el moño asegurándolo con un nudo.
✨💐Paso 3: Para elaborar los holanes del lazo vamos a necesita el rectángulo más grande. De la esquina de la parte más larga doblamos hacia abajo, acomodamos bien las puntas cosa que queden a la par para que nos quede del mismo tamaño. Necesitaran fijar la tela para poder recortarla. Recortamos con mucho cuidado de punta a punta y así tenemos las dos partes que colgaran del lazo. Colocaremos la tela y utilizaremos la parte recta más larga y comenzamos a fruncir o a hacer pliegues y con ayuda de aguja e hilo costuramos un centímetro de la orilla hasta llegar al final, jalamos el hilo y van a notar que tienen terminado el primer holan y repetimos lo mismo con el otro pedazo de tela.
✨💐Paso 4: Una vez listo los holanes, los uniremos con hilo, pero yo los uní con silicón caliente. Los coserán o pegarán en medio de tal forma que queden juntos y colgando. Después de esto pegaremos el moño con ayuda del silicón caliente en la parte donde cosieron. Con el ultimo rectángulo lo doblaremos por la mitad y rodearemos el medio del lazo, tomaremos la pinza, le aplicamos silicón caliente y así terminamos nuestro Lazo rojo coquette.
El resultado es como queda en las ultimas fotos, ¿te gustó? A mí sí y hasta puedes hacerlo para regalarlo a una amiga, o prima o hasta si eres madre, hacerlo para tus pequeñas o pequeña. Fue un gusto pasar por aquí y traerles este hermoso tutorial, nos vemos en el próximo post xoxo.
La cámara utilizada es un teléfono Tecno Spark 10 pro.
Usé el traductor Deepl.com.
For the best experience view this post on Liketu
