E N G L I S H
Versión en español más abajo
Greetings community. I hope you are very well and that you had a fantastic week and if not, well the weekend is here to make things better wujujuuu!
I've been a bit busy, but always keeping an eye on the community and the initiatives taking place here. For example, the one from the DIY community that proposes us to bring works made in paper or Origami for the community.
I've been seeing some great works and I was encouraged to bring you something quite special, at least very special for me.
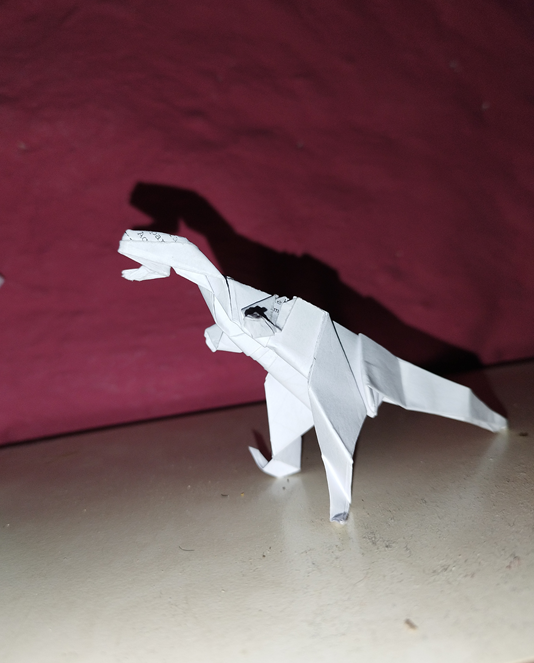
A velociraptor made out of paper!
I am not a great expert in Origami and I have been learning during the process. For example, the importance of a suitable paper to make these works and the more elaborate or larger, the paper is crucial.
You can do your tests as I did, I started with some white sheets of recyclable letter size bond paper that I had. Then I tried tissue paper and finally crepe paper. I had all these materials at home, waiting to be used. Of course, all papers work, but you have to put in a lot more effort to achieve the details you want and depending on the material the project may last longer or not. For example, if you use bond paper sheets, you will have to make the folds with more force and if you need to fold more sheets it will cost more to do it, besides these sheets tend to disarrange the work as they want to return to their natural position. Now, if you use a stronger type of sheet, it will be more and more difficult to fold. On the other hand, if you use a very light type of sheet, such as tissue paper, you will be able to fold it comfortably, but the folds or creases that you can make are very easily lost and if you need to use them as a guide to make a fold that you require, it will be very difficult, the paper will not have the guide, no matter how hard you mark it, it will tend to fold in any direction and will give you a lot of problems if you have a very complex work to do.
The sheet I used for the project I am presenting to you is a small square of crepe paper about 16.6 cm square. The larger the dimensions of the square, the larger our Velociraptor.
There are many better papers, just go to the internet and put in the search engine "origami paper" and you will find a great variety dedicated to this art, I will try to test some of these papers for a future project.
In the video, you will also notice some of the difficulties I had with the paper I used, for example, it did not fold as I wanted, then with a little calm and delicacy I started to orient the paper in the direction I was looking for. Of course, sure if we get more technical in this area, is that if the paper did not yield as it should be, then it is because I did not make a previous step correctly, I did not bend firmly enough, ...
Well, now I have made some screenshots of the video with the intention of explaining the work for those who like to read more. I hope it is understood.
At first I was looking to make a smaller frame than the original, but with the folds distributed in a certain way internally to be able to stretch later the two sides of the frame in a diamond shape.
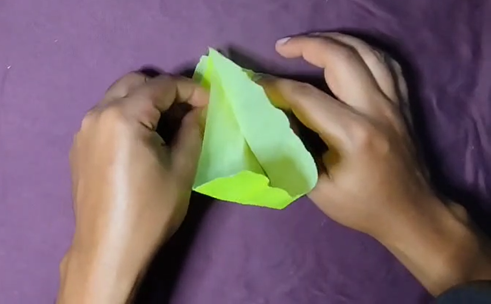
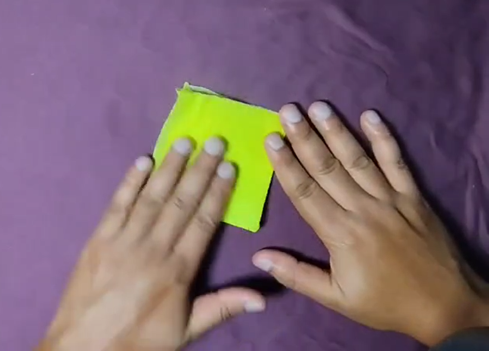
These folds in the square that we designed, are in order to create an elongated diamond on each of the faces. You could notice that I try to create some folds that will serve to give the direction to the sides of my diamond, each diamond was made in the same way. Two small scalene right triangles are made (triangles whose sides are different and one of their internal angles is 90 degrees), which when both are joined by their sharpest vertex will form a new triangle in this case will be isosceles (triangle with two equal sides). Then, I hold the same vertex with the fold inwards and pull the front face of the new triangle upwards until the diamond is formed. As a guide, always use the symmetry of the triangles and the lines that are being drawn (the center line, the fold lines).
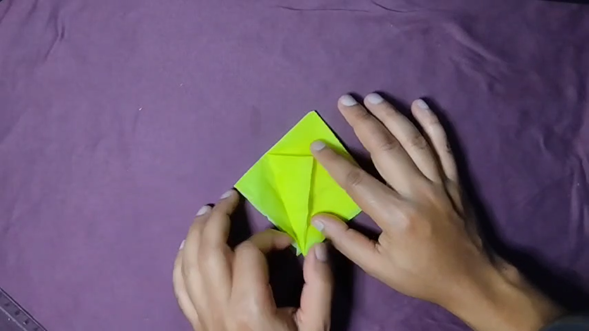
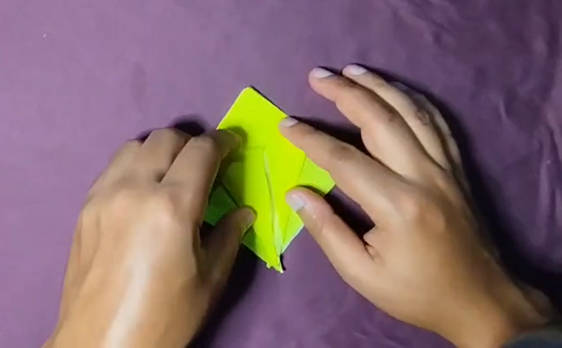
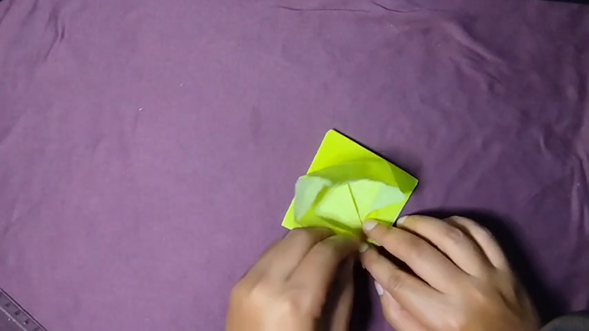
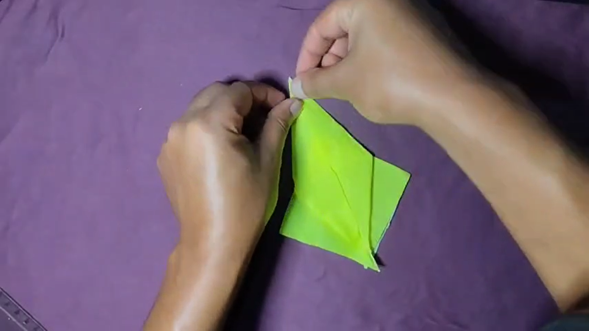
This new diamond will be on hold for the next step later. Now, you will work on the other side of the square which will have a rather diamond shape. Take one of the vertices of this square. I started with the right one. But you can easily do the process from the left one, following the sequence well. From this corner you will form a new right triangle. When you fold it, mark it with enthusiasm. Then unfold and by means of this new edge marked on the paper, you will be guided to form a new diamond, where this edge that was marked will represent the middle line of the diamond on its front face. It will look like a kind of arrow.
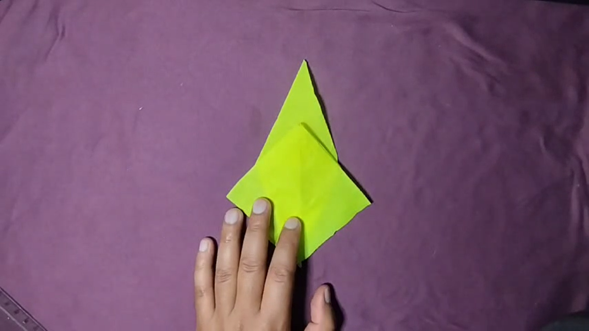
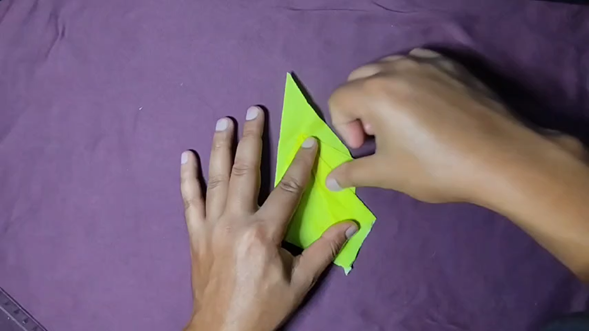
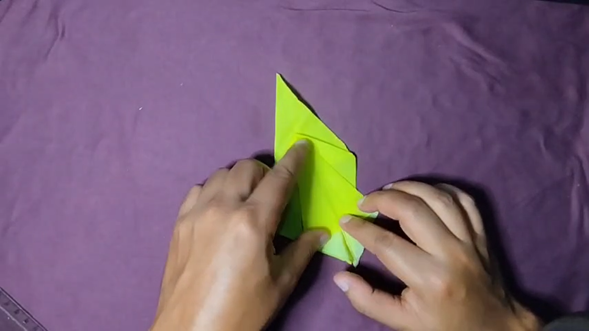
The same procedure that was performed on the face of the previous square, will be performed on the bottom of this arrow that was formed. Use the center line of the arrow as a guide. That is, form two right triangles that meet at a vertex and that give the impression of forming a new isosceles triangle, hold the internal folds that you made at the lower vertex, and stretch the upper face upwards until you form a new diamond.
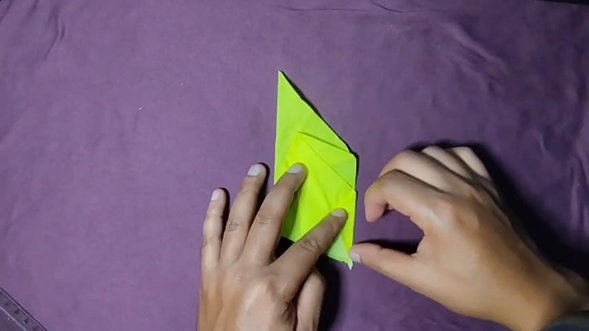
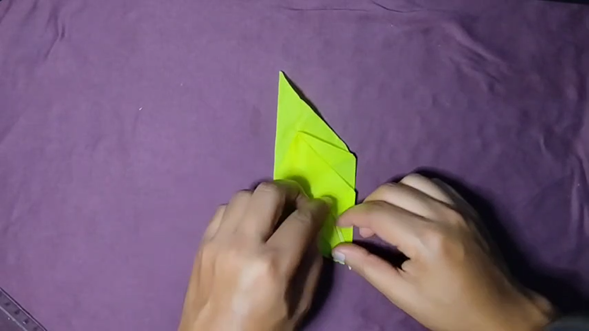
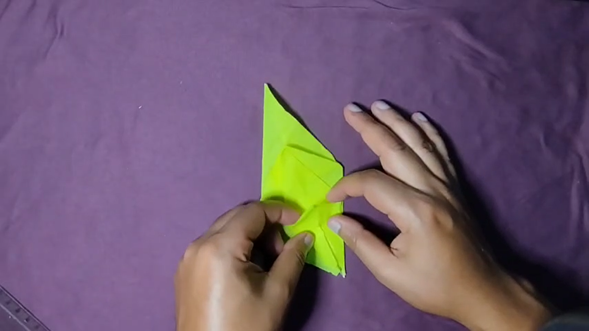
Up to this point it will look like you are making concentric diamonds. In this last one that is formed, fold its top point as far as the paper will allow and then fold the entire top diamond also along its center line. With the intention of looking for the other half of the square that we have not touched (the left vertex).
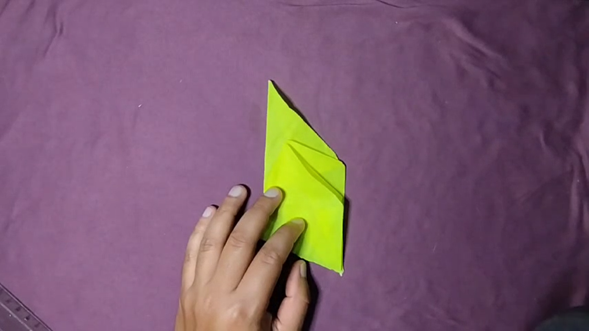
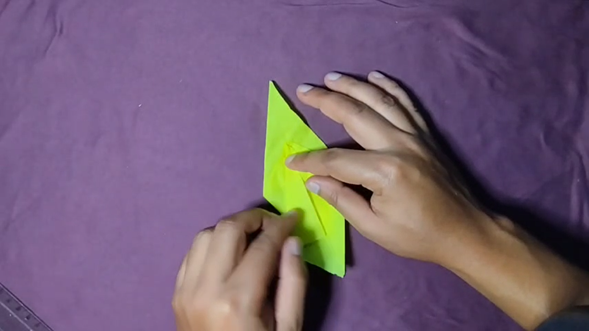
In this new vertex will be performed the same procedure that was performed to the right vertex of the square. It will form a right triangle, then unfold it and along the line that was marked will go flattening the paper until this line forms a central line of the front face that will be formed in a kind of arrow.
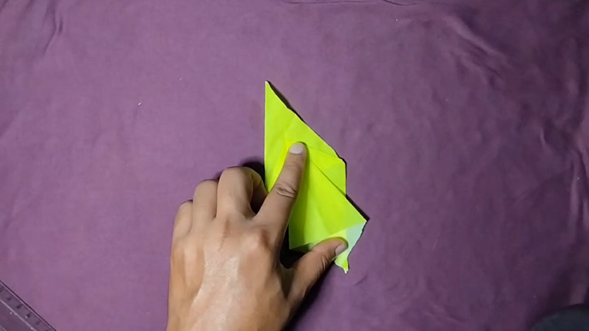
In the same way, you will fold the bottom folds of this kind of arrow, with the intention of forming another new diamond. Form two right triangles, then take the bottom inner fold of these and then pull the paper upwards until you get the shape, then fold the top tip as far as the paper will allow.
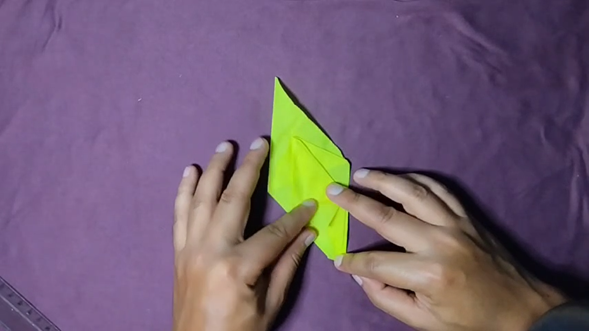
Now, let's work on the face of the first diamond we formed. At the bottom you will see two right triangles that the paper already shaped. Each of these, you will bend them towards the inside of the diamond.
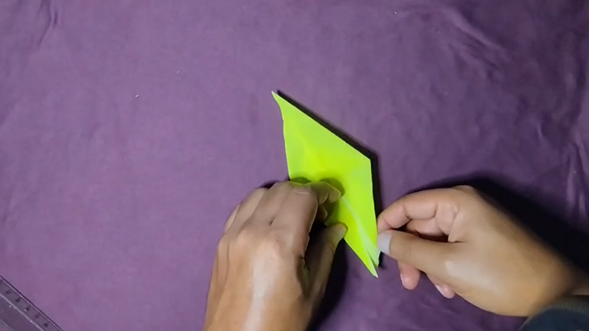
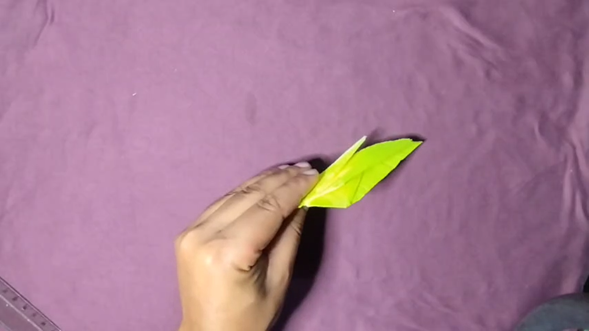
These would be the legs of our dinosaur. Now, we are going to bend all along the center line of the diamonds, so that the legs are facing outward.
At this point, we will only make the shape of the legs, we will not yet give it its final shape. This is done by making a fold where the joints closest to the body would be.
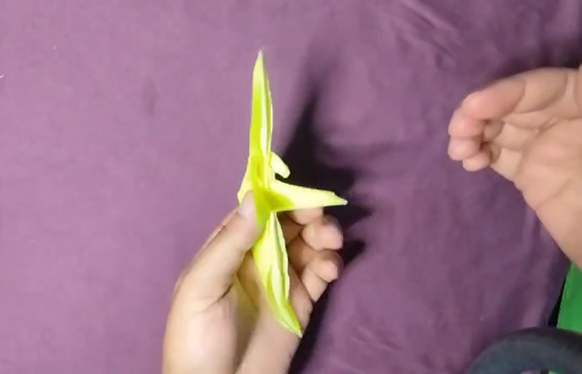
Now, let's give a better shape to the body. To do this, open the diamond again, in the inner part you will find a diamond vertex, this will bend it in the direction of the arms of the animal. Leaving the wide and thinner parts where anatomically, they should be (giving shape to the velociraptor's body).
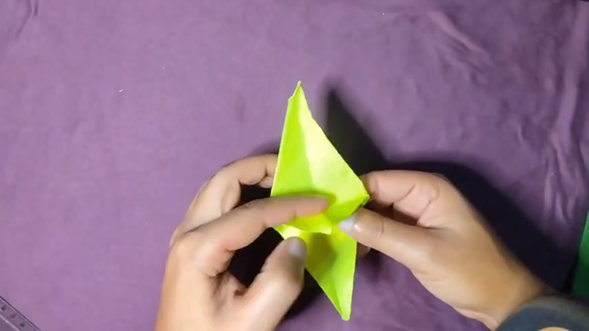
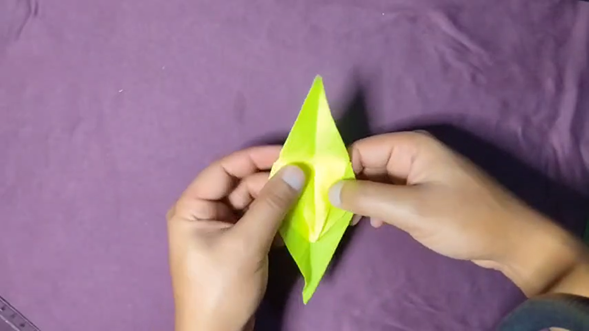
To make it stand, you will fold the entire top diamond towards the center and then create a new fold upwards (you will fold very close to the center of the diamond and then stretch it upwards again). Finally, you will create some rectangular triangles on all sides of the diamond, with the intention of making the body thinner so that it does not look like a leaf with legs.
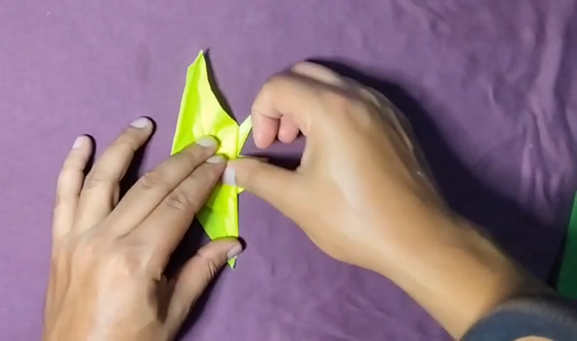
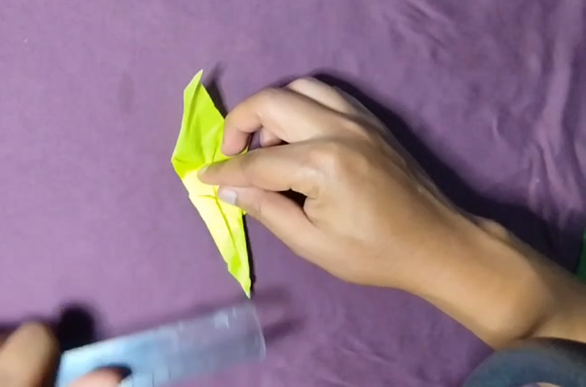
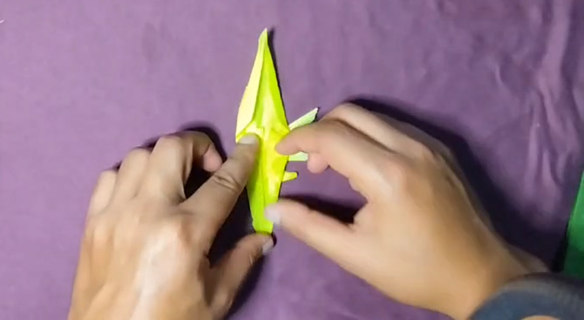
Note that the fold or triangles we form are bigger in the direction of the small arms than in the tail part.
You can fold the body again in the central part and start with the details on the head and legs.
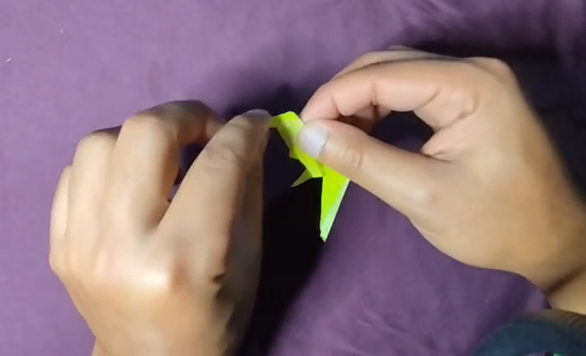
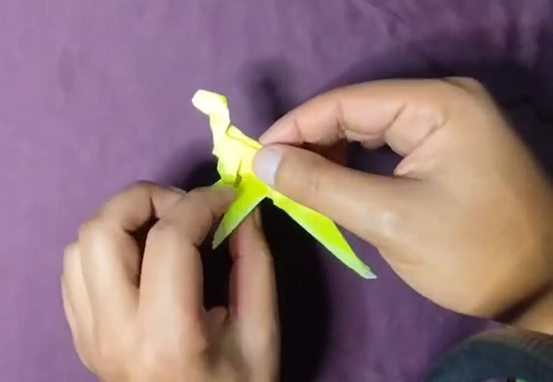
You will see that the new figure is thinner and already presents a more comfortable shape to give the final details. The head has to be lifted, so you have to make the fold in a certain way upwards to form the neck and then give direction to the head so that it is lifted and forward.
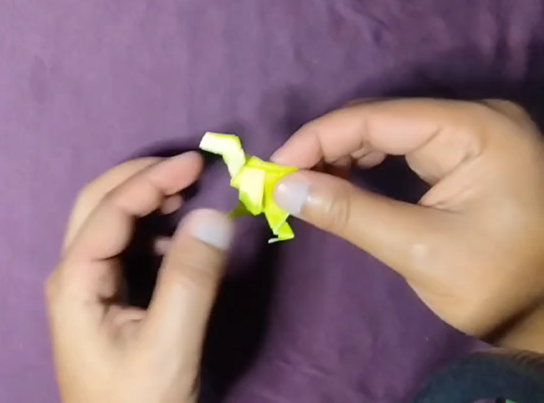
Then, you can work on the legs as you wish. That is, making folds where the joints of the animal would be, elbow, knee, wrists, ankles, hands, feet.
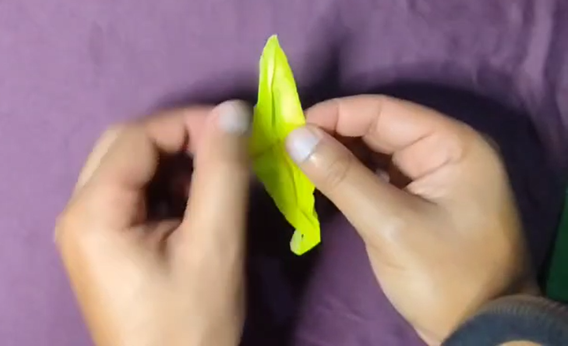
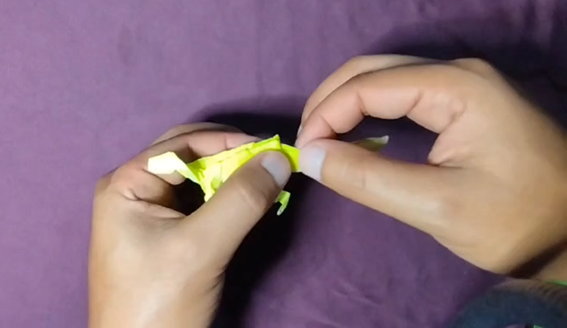
Finally, to better demarcate the shape of the tail, open the work again, turn the tail downwards always respecting the lines and bend it upwards again, but making a fold almost in the center of the body. Here, you can lift the tail a little and give some effects of movement to the tail.
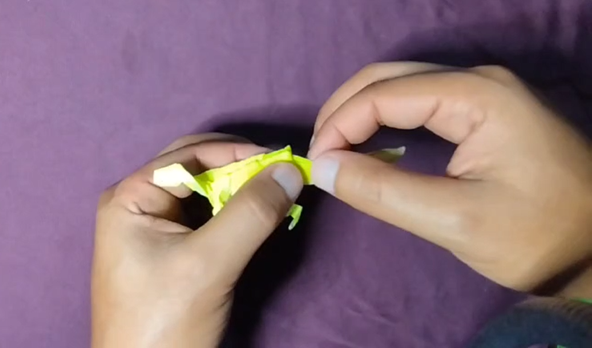
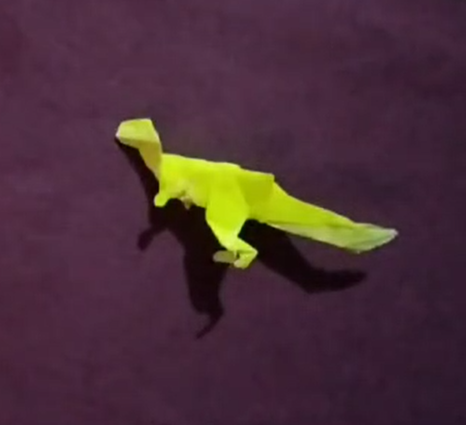
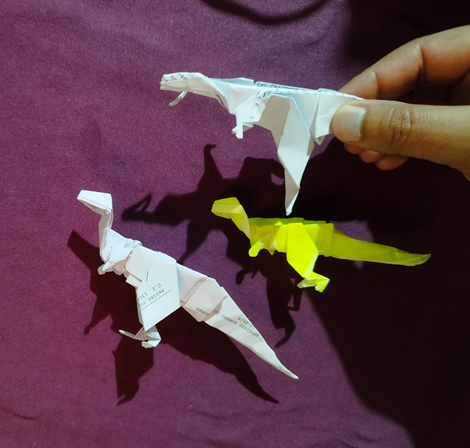
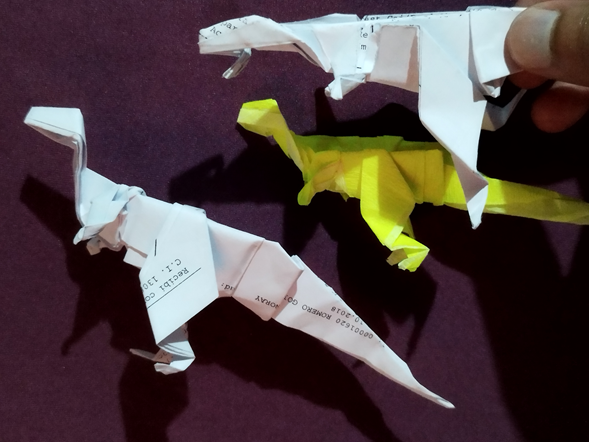
This is my project for the community. Sorry for the length, I wanted to go into as much detail as I could so you could replicate the process. I hope you liked it a lot and if you plan to do it please feel free to tag me, Happy weekend!
E S P A Ñ O L
Saludos comunidad. Espero estén muy bien y que hayan tenido una fantástica semana y si no fue así, bueno el fin de semana ya llegó para mejorar las cosas ¡wujuuu!
He estado algo ocupado, pero siempre pendiente de la comunidad y por supuesto, las iniciativas que se están llevando a cabo aquí. Por ejemplo, la de la comunidad de DIY que nos propone traer trabajos hechos en papel u Origami para la comunidad.
He estado viendo algunos trabajos geniales y me animé a traerles algo bastante especial, por lo menos muy especial para mí.

¡Un velociraptor hecho en papel!
No soy un gran experto en el Origami y he estado aprendiendo durante el proceso. Por ejemplo, la importancia de un papel acorde para realizar estas obras y mientras más elaboradas o grandes, el papel es crucial.
Pueden ir realizando sus pruebas como lo hice yo, que comencé con algunas hojas blancas de papel bond de tamaño carta reciclables que tenía. Luego, probé con papel de seda y por último crepé. Todos estos materiales los tenía en casa, esperando a ser utilizados. Por supuesto, todos los papeles sirven, pero hay que dedicarle mucho más esfuerzo para lograr los detalles que se quieren y dependiendo del material el proyecto puede durar más o no. Por ejemplo, si utilizas hojas de papel bond, tendrás que hacer los pliegues con mayor fuerza y si necesitas doblar más hojas cuesta más hacerlo, además estas hojas tiendan a desacomodar el trabajo a medida que estas quieren regresar a su posición natural. Ahora, si utilizas un tipo de hoja más fuerte, será cada vez más difícil doblar. En cambio, si utilizas un tipo de hoja muy ligero, como el papel de seda, podrás doblarlo con comodidad, pero los pliegues o doblez que puedas hacer se pierden muy fácilmente y si necesitas utilizarlos de guía para hacer un doblez que requieras, se te hará muy difícil, el papel no tendrá la guía, por más fuerte que la marques, tenderá a doblarse en cualquier dirección y te dará muchos problemas si tienes un trabajo muy complejo que hacer.
La hoja que utilicé para el proyecto que les estoy presentando es un pequeño recuadro de papel crepé de unos 16,6 cm cuadrados. Mientras más grandes las dimensiones del cuadrado, más grande nuestro Velociraptor.
Hay muchos mejores papeles, solo con pasar por internet y colocar en el buscador “papel de origami” encontrarán una gran variedad dedicados a este arte, trataré de probar alguno de estos papeles para un futuro proyecto.
En el video, también podrán notar, algunas de las dificultades que tuve por el papel que usé, por ejemplo, no se doblaba como yo quería, entonces con un poco de calma y delicadeza empecé a orientar al papel en la dirección que yo buscaba. Por supuesto, seguro si nos colocamos más técnicos en esta área, es que si el papel no cedió como debía ser, entonces es porque no hice un paso previo correctamente, no doblé con suficiente firmeza, …
Bueno, ahora he realizado algunas capturas de pantalla del video con la intención de explicar el trabajo para esos que les gusta más leer. Espero se entienda.
Al principio estaba buscando realizar un cuadro menor al original, pero con los pliegues distribuidos de cierta manera internamente para poder estirar posteriormente las dos caras del cuadro en forma de diamante.


Estos dobleces en el cuadrado que diseñamos, son con el fin de buscar crear un diamante alargado en cada una de las caras. Se pudieron dar cuenta, que trato de crear unos pliegues que servirán para darle la dirección a los lados de mi diamante, cada diamante se realizó de la misma manera. Se hacen dos pequeños triángulos rectángulos escalenos (triángulos cuyos lados son distintos y uno de sus ángulos internos es de 90 grados), que al ser unidos ambos por su vértice más agudo formarán un nuevo triángulo en este caso será isósceles (triángulo con dos lados iguales) Luego, sujeto el mismo vértice con el doblez hacia dentro y se jala la cara del frente del nuevo triangulo hacia arriba hasta formar el diamante. De guía, utilice siempre la simetría de los triángulos y las líneas que se van trazando (la línea central, las líneas de dobleces)


Este nuevo diamante quedará en espera para la siguiente etapa más tarde. Ahora, trabajará por la otra cara del cuadrado que tendrá una forma de rombo más bien. Tome uno de los vértices de este cuadrado. Yo comencé por el derecho. Pero fácilmente el proceso lo puede hacer desde el izquierdo, siguiendo bien la secuencia. Desde esta esquina va a forma un nuevo triángulo rectángulo. Cuando doble, márquelo con entusiasmo. Luego desdoble y por medio de esta nueva arista marcada en el papel, va a guiarse para formar un nuevo diamante, donde esta arista que se marcó representará la línea media del diamante en su cara frontal. Quedando como una especie de flecha.


El mismo procedimiento que se realizó en la cara del cuadrado anterior, se realizará en la parte inferior de esta flecha que se formó. Utilice de guía la línea central de la flecha. Esto es, forme dos triángulos rectángulos que se unen en un vértice y que llega a dar la impresión de formar un nuevo triángulo isósceles, sostenga los pliegues internos que realizó en el vértice inferior y estire la cara superior hacia arriba hasta formar un nuevo diamante.


Hasta aquí le parecerá que está realizando diamantes concéntricos. En este último que se forma, dobla su punta superior hasta donde el papel le permita y luego dobla todo el diamante superior también por su línea central. Con la intención de buscar la otra mitad del cuadrado que no hemos tocado (el vértice izquierdo)


En este nuevo vértice se realizará el mismo procedimiento que se realizó al vértice derecho del cuadrado. Formará un triángulo recto, luego lo desdobla y por la línea que se marcó irá aplastando el papel hasta que esta línea forme una línea central de la cara frontal que se formará en una especie de flecha.

De igual manera, doblará los pliegues inferiores de esta especie de flecha, con la intención de formar otro nuevo diamante. Forma dos triángulos rectángulos, luego toma el pliegue inferior interno de estos y luego jala el papel hacia arriba hasta conseguir la forma, luego dobla la punta superior hasta donde el papel le permita.

Ahora, trabajemos en la cara del primer diamante que formamos. En la parte inferior podrá ver dos triángulos rectos que el papel ya dio la forma. Cada una de estas, las doblará hacia el interior del diamante.


Estas que formó vendrían siendo las patas de nuestro dinosaurio. Ahora, vamos a doblar por toda la línea central de los diamantes, de manera que las patas queden mirando hacia afuera.
En este punto, solo haremos la forma de las patas, aún no le daremos su forma final. Esto se hace haciendo un doblez en donde estarían las articulaciones más cercanas al cuerpo.

Ahora, vamos a darle una mejor forma al cuerpo. Para ello, vuelva a abrir el diamante, en la parte interna encontrará un vértice de diamante, este lo doblará en dirección hacia los brazos del animal. Dejando las partes anchas y más finas donde anatómicamente, deberían estar (dándole forma al cuerpo del velociraptor)


Para que se sostenga, va a realizar un doblez de todo el diamante superior hacia el centro y luego creará un pliegue nuevo hacia arriba (doblará muy cercano del centro esta punta del diamante y luego la volverá a estirar hacia arriba) Por último creará unos triángulos rectángulos en todos los lados del diamante, con la intención de hacer más delgado el cuerpo y que no parezca una hoja con patas.


Dese cuenta que el doblez o los triángulos que formamos son mayores en la dirección de los brazos pequeños que en la parte de la cola.
Puede doblar nuevamente el cuerpo por la parte central y empezar con los detalles en la cabeza y las patas.


Verá que la nueva figura, está más delgada y ya presenta una forma más cómoda para dar los últimos detalles. La cabeza, tiene que levantarse, así que debe realizar el doblez de cierta manera hacia arriba para formar el cuello y luego darle dirección a la cabeza para que quede levantada y hacia delante.

Luego, puede trabajar las patas a gusto. Esto es, haciendo doblez en donde estarían las articulaciones del animal, codo, rodilla, muñecas, tobillos, manos, pies.


Por último, demarcar mejor la forma de la cola, vuelve a abrir el trabajo, giras la cola hacia abajo respetando siempre las líneas y vuelve a doblarla hacia arriba, pero realizando un doblez casi en el centro del cuerpo. Aquí, puedes levantar un poco la cola y darle algunos efectos de movimiento a la cola


Este es mi proyecto para la comunidad. Disculpen lo extenso, quise abordar cada detalle que pudiera para que pudieran replicar el proceso. Espero les haya gustado mucho y si lo piensan hacer por favor, no duden en etiquetarme. ¡Feliz fin de semana!
▶️ 3Speak