

Greetings my beloved ones. Today we will learn how to easily create a banner to close your publications.
Canva is a very friendly website that allows you to create designs of all kinds and for every need, you can use your creativity, because the bank of images, videos, gifs, among others is quite large and the coolest thing is that all are free of copyright. You can have two versions, the free version, which limits you to certain more advanced features and the premium version, a paid version that has endless freedoms to create and of course everything is of better quality.
Its interface is very easy to work with and has unlimited amounts of templates, packages, resources, filters, options that will undoubtedly enhance your design, photography and even multimedia content, something delicate, beautiful and even fun.
You can do everything online, for this you need to have internet service. After finishing your project, you can download it in the formats you want.
It is a very popular website to use in our Hive to decorate and beautify our publications, but if we go to a more general sense, this tool is used by many people working in all social networks, no doubt, it is a powerful and very useful editing tool.
To start using it, we start from the fact that you must log in or register as appropriate, in this way, everything you do will always be saved in your profile.

Saludos amados míos. Hoy aprenderemos cómo elaborar de forma sencilla un banner para cierre de tus publicaciones.
Canva es una web bastante amigable que te permite crear diseños de todo tipo y para toda necesidad, de ello te puedes valer de tu creatividad, pues el banco de imágenes, vídeos, gifs, entre otros es bastante amplio y lo más genial es, que todos son libres de derechos de autor. Puedes tener dos versiones, esta la versión gratuita, que te limita ciertas funciones más avanzadas y esta la versión premium, una versión paga que tiene un sin fin de libertades para crear y por supuesto todo es de mejor calidad.
Si interfaz es muy sencilla de trabajar y posee cantidades ilimitadas de plantillas, paquetes, recursos, filtros, opciones que sin duda realzarán tu diseño, fotografía incluso contenido multimedia, de algo delicado, hermoso y hasta divertido.
Todo lo puedes hacer de forma online, para ello necesitas tener servicio de internet. Luego de terminar tu proyecto, puedes descargarlo en los formatos que desees.
Es una web de uso muy popular en nuestro Hive para decorar y embellecer nuestras publicaciones, pero si vamos a un sentido más general, esta herramienta es usada por muchas personas que trabajan en todas las redes sociales, sin duda, es una potente y muy útil herramienta de edición.
Para comenzar a usarla, partimos desde que debes iniciar sesión o registrarte según el caso, de esta manera, todo lo que hagas siempre quedará guardado en tu perfil.

Step by Step / Paso a paso

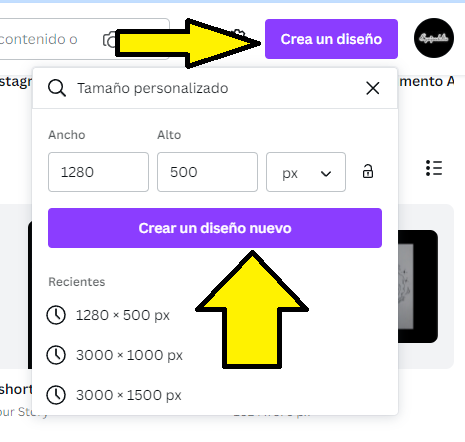

Once you have completed your registration and logged in, you can choose from the templates and custom sizes offered in the top bar, but in this case, we are going to create a banner to close our publications.
To do this you need to click on the option Create a design the most suitable measures for this case are: 1280 wide by 500 high and the measurement scale in pixels (px) then click on Create a new design.

Una vez completaste tu registro e iniciaste sesión, puedes escoger entre las plantillas y tamaños personalizados que te ofrece en su barra superior, pero en este caso, vamos a crear un banner para cierre de nuestras publicaciones.
Para ello necesitas hacer clic en la opción Crea un diseño las medidas más idóneas para este caso son: 1280 de ancho por 500 de alto y la escala de medición en Píxeles (px) seguidamente has clic en Crear un diseño nuevo

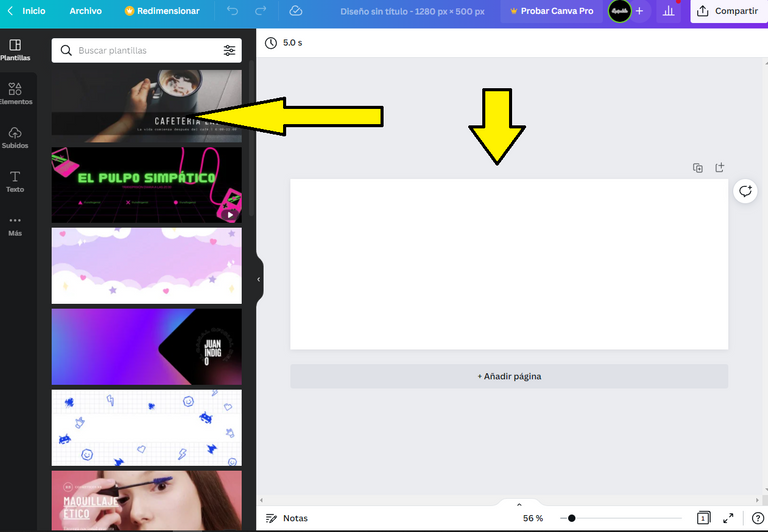

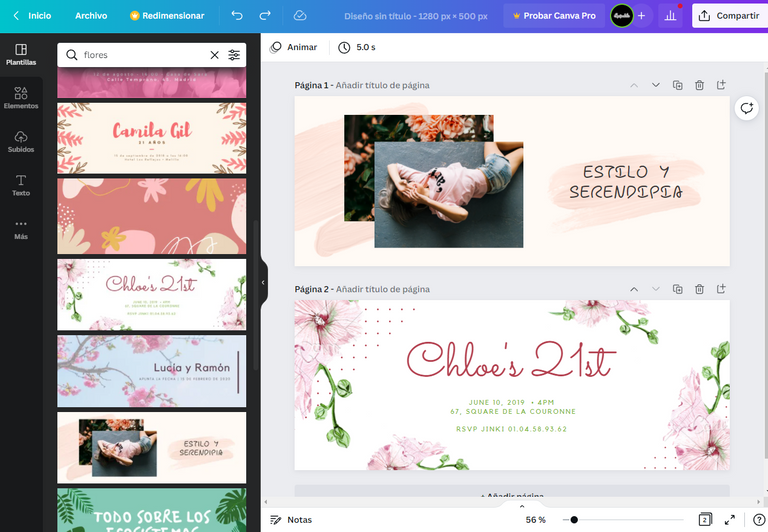
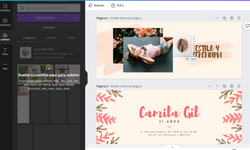
It will show you a blank canvas, in the left panel it will show you a number of templates that you can apply to the design, you can choose one or several and merge them by opening a new canvas at the bottom like the image below.
If you are looking for a template on a specific theme, you can make use of the search engine and place the word there, it will automatically display a new customized view of options to create and edit.

Te mostrará un lienzo en en blanco, en el panel izquierdo te mostrará una cantidad de plantillas que puedes aplicar al diseño, puedes elegir una o varias y fusionarlas abriendo un nuevo lienzo en la parte inferior como la imagen a continuación.
Si buscas una plantilla sobre un tema en específico, puedes hacer el uso del buscador y colocar la palabra allí, automáticamente se desplegará una nueva vista personalizada de opciones para crear y editar.

 👉
👉 
Medibang Paint Pro

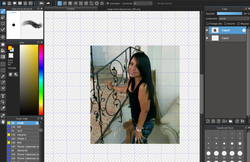
In Canva you can also edit your images, but for more professional editions I prefer to use my favorite design program, so for the image of the person or the creation of the logo, I edit it in Medibang like so many tutorials I have shown you here and in my Youtube Channel.
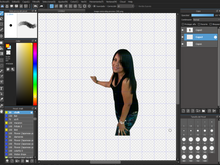
Once I have the base image I proceed to remove the background with the very careful use of the eraser tool.

En Canva también puedes editar tus imágenes, pero para ediciones más profesionales prefiero usar mi programa predilecto de diseño, así que para la imagen de la persona o la creación del logo, lo edito en Medibang como tantos tutoriales que te he mostrado aquí y en mi Canal Youtube.
Una vez tengo la imagen base procedo a quitarle el fondo con el uso muy cuidadoso de la herramienta borrador.

 👉
👉 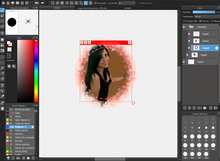

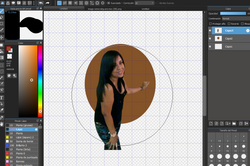
Once we remove the background we proceed as usual to apply the background.
Open a folder behind the image and open a new canvas.
Place a large dot of the color of your choice with the Pen (ink) brush, select the dot (Ctrl+T) and drag it to the desired position and size.
Open a new canvas and select the crop option that appears at the top right where the folders and canvases are opened. From there you can open new canvases and continue working on the image without leaving the edges.
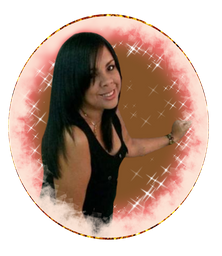
I applied the same color palette that I will use in the banner, this will give it harmony.
For the background details I used the following brushes: Chalk, Airbrush and Glitter2.
For the golden border, I used my custom brush gold2 and the ellipse tool, this way I guarantee that the border will be perfect and delicate.
Save the project in PNG format. It looks like this:

Una vez quitamos el fondo procedemos como de costumbre a aplicarle el fondo.
Abre una carpeta detrás de la imagen y abre un nuevo lienzo.
Coloca un punto grande del color de tu preferencia con el pincel Pluma (tinta), selecciona el punto (Ctrol+T) y arrastra a la posición y tamaño deseado.
Abre un nuevo lienzo y selecciona la opción recorte que aparece en la parte superior derecha donde se abren las carpetas y lienzos. A partir de allí puedes ir abriendo lienzos nuevos y continuar trabajando sobre la imagen sin salirte de los bordes.
Apliqué la misma paleta de colores que emplearé en el banner, esto le dará armonía.
Para los detalles de fondo usé los pincles: Chalk, Aerógrafo y Brillante2.
Para el borde dorado, usé mi pincel personalizado oro2 y la herramienta elipse, de esa forma garantizo que el borde quede perfecto y delicado.
Guarda el proyecto en formato PNG. Quedando de esta manera:

 👉
👉 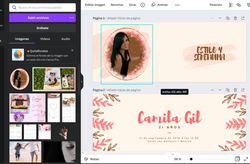

From the location of the file where you saved it, select and drag it to the web, you will automatically have it there ready to work. From here the magic starts to happen.
Start organizing and editing your own template, in this case I used several from where I got the details.
I always look at the personality details of those who hire my services, as this person is a writer and her personality is very jovial and cheerful, I thought it was right to use a palette of warm colors and pastels, this is in case, the client leaves the possibility to work freely and does not require a specific color palette.

Desde la ubicación del archivo donde lo guardaste, selecciona y arrastra a la web, automáticamente la tendrás allí lista para trabajar. A partir de aquí comienza a ocurrir la magia.
Comienza a organizar y editar tu propia plantilla, en este caso usé varías de donde obtuve los detalles.
Siempre me fijo en los detalles de personalidad de quienes contratan mis servicios, como esta persona es escritora y su personalidad es muy jovial y alegre, me pareció correcta usar una paleta de colores cálidos y pasteles, esto es en caso, el cliente deje la posibilidad de trabajar libremente y no exija una paleta de colores específica.

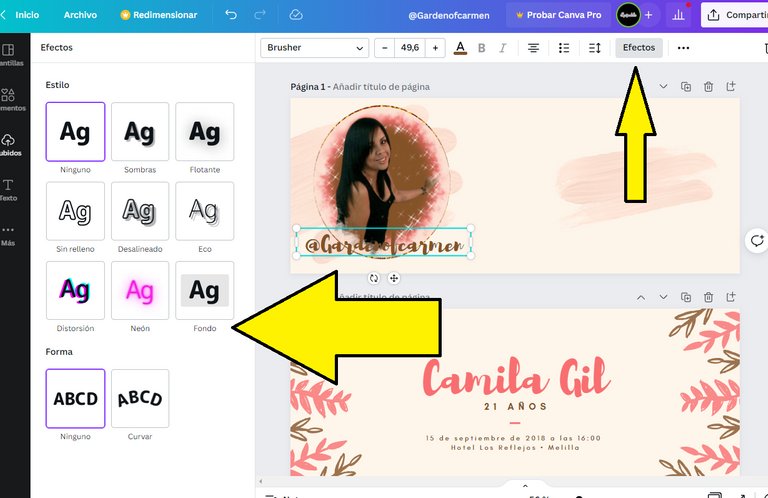

To create effects on the letters, you select the same, automatically displays the option Effects and a number of options for editing, from there you can apply various styles to your liking.
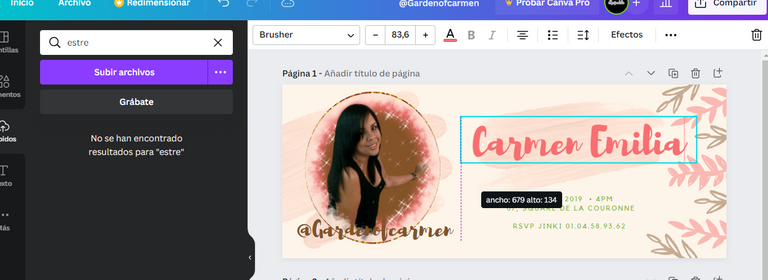
You can manipulate the size of your font by manually enlarging or enlarging it, as well as adjusting its position in the desired place.

Para crear efectos en las letras, seleccionas la misma, automáticamente se despliega la opción Efectos y una cantidad de opciones para edición, desde allí puedes aplicar varios estilos a tu gusto.
Puedes manipular el tamaño de tu fuente agrandando, o alargando manualmente. de la misma forma ajustar su posición en el lugar deseado.

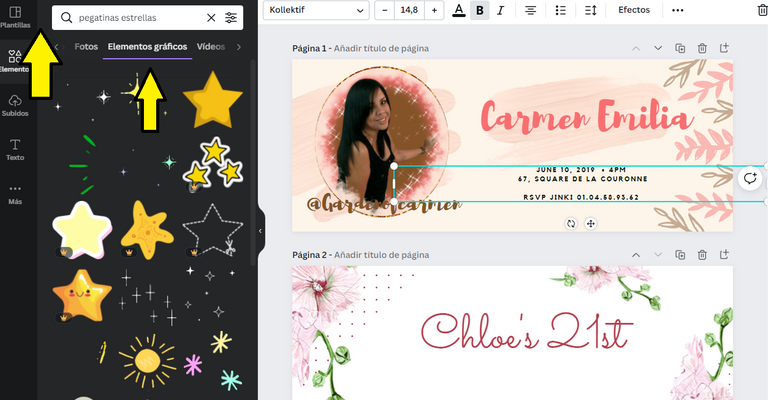

If you would like to add additional details such as: Images, Gifs, even multimedia, we have the search system and the infinite range of plugins.
If you are looking for gifs, type in the search engine Stickers followed by the specific image and select the option Graphic Elements.
Find the image of your choice and you just need to click on it to have it on your canvas.
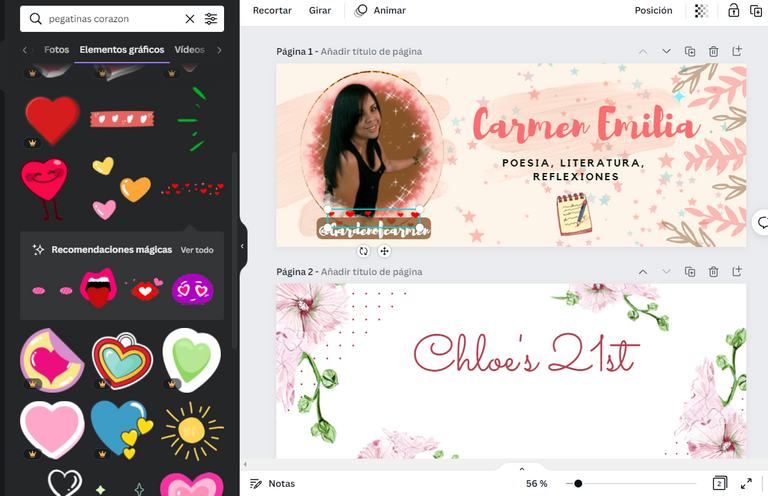
There you can adjust it to the desired size and place. I love stickers, they are so much fun, so I used a lot of them, like in the following image:

Si gustas agregar detalles adicionales como: Imágenes, Gifs, incluso multimedia, tenemos el sistema de búsquedas y la infinita gama de complementos.
Si buscas gifs, escribe en el buscador Pegatinas seguido de la imagen específica y selecciona la opción Elementos Gráficos
Encuentra la imagen de tu gusto y solo necesitas hacer clic en ella para tenerla en tu lienzo.
Allí ya puedes ajustarla al tamaño deseado y lugar deseado. me encantan las pegatinas, son muy divertidas, así que usé muchas, como en la siguiente imagen:

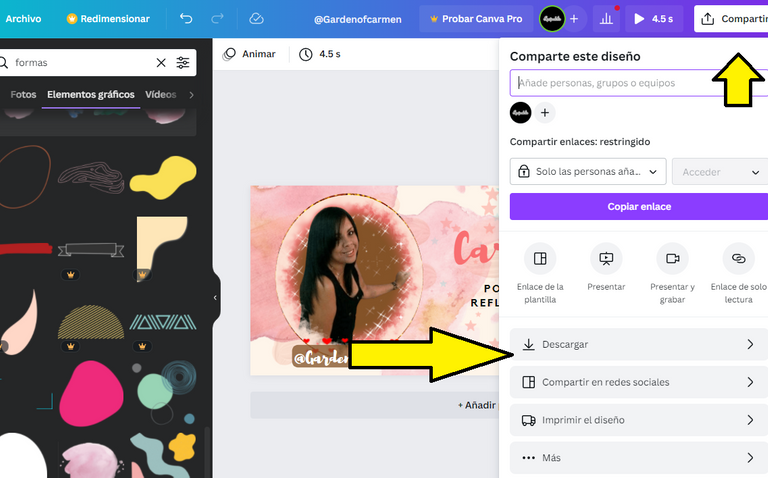

Once you finish editing your project or banner, you only need to save it in the desired format, to do this select the option Share then Download There you will have several options available, select the one of your preference in my case I chose to download it in GIF format.
That's all my dear ones, I hope you find it useful, soon and with God's favor, we will talk more about this online tool to design, so stay tuned to my publications.
It is a pleasure to serve you, see you in my next publication, many blessings to you.

Una vez que terminas con la edición de tu proyecto o banner, solo necesitas guardarlo en el formato deseado, para ello seleccionamos la opción Compartir luego en Descargar Allí tendrás varias opciones disponibles, selecciona la de tu preferencia en mi caso elegí descargarlo en formato GIF.
Es todo mis queridos, espero te sea de utilidad, próximamente y con el favor de Dios, hablaremos más de esta herramienta online para diseñar, así que atento a mis publicaciones.
Es un placer servirte, nos vemos en mi siguiente publicación, muchas bendiciones para ti.

Work completed / Trabajo terminado

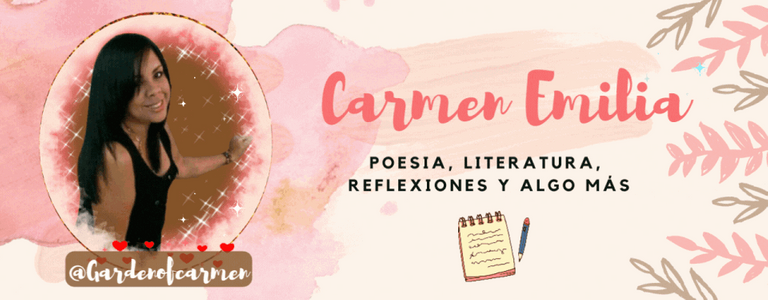
This design has been created for @gardenofcarmen for exclusive use in their publications, of which I release all my rights of authorship, the use of it does not need my mention.
Este diseño ha sido creado para @gardenofcarmen para uso exclusivo en sus publicaciones, del cual libero todos mis derechos de autoría, el uso de la misma no necesita mi mención.

Resources / Recursos

Time Lapse: 7 hours.
Program: MediBang Paint Pro.
Graphics tablet: Huion (Usb Pen Tablet). Model 420.
Pincel personalizado: Oro2
Pinceles Medibang: Pluma tinta, aerógrafo, Brillante2, Chalk.
Herramientas: Capas, recorte, Elipse, borrador.
Canva Gifs, covers, efects, editions

I'm a contributor of royalty-free images
Soy contribuyente de imágenes libres de derechos de autor

My youtube channel - game Play
My youtube channel - arts and crafts

Hacks, DIY, Crafts, handmade arts Community
Discord


