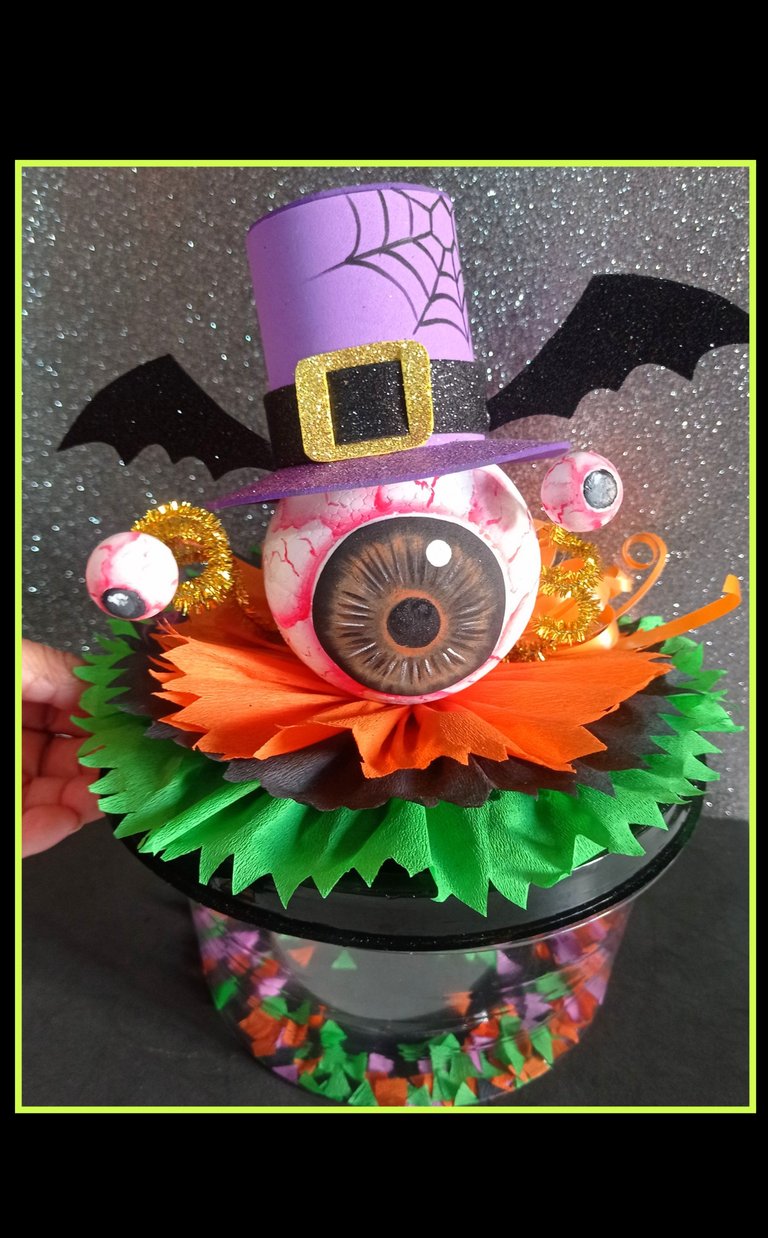

Buenas noches queridos creadores y amigos que hoy me visitan.
Cómo están?
Vas a utilizar:
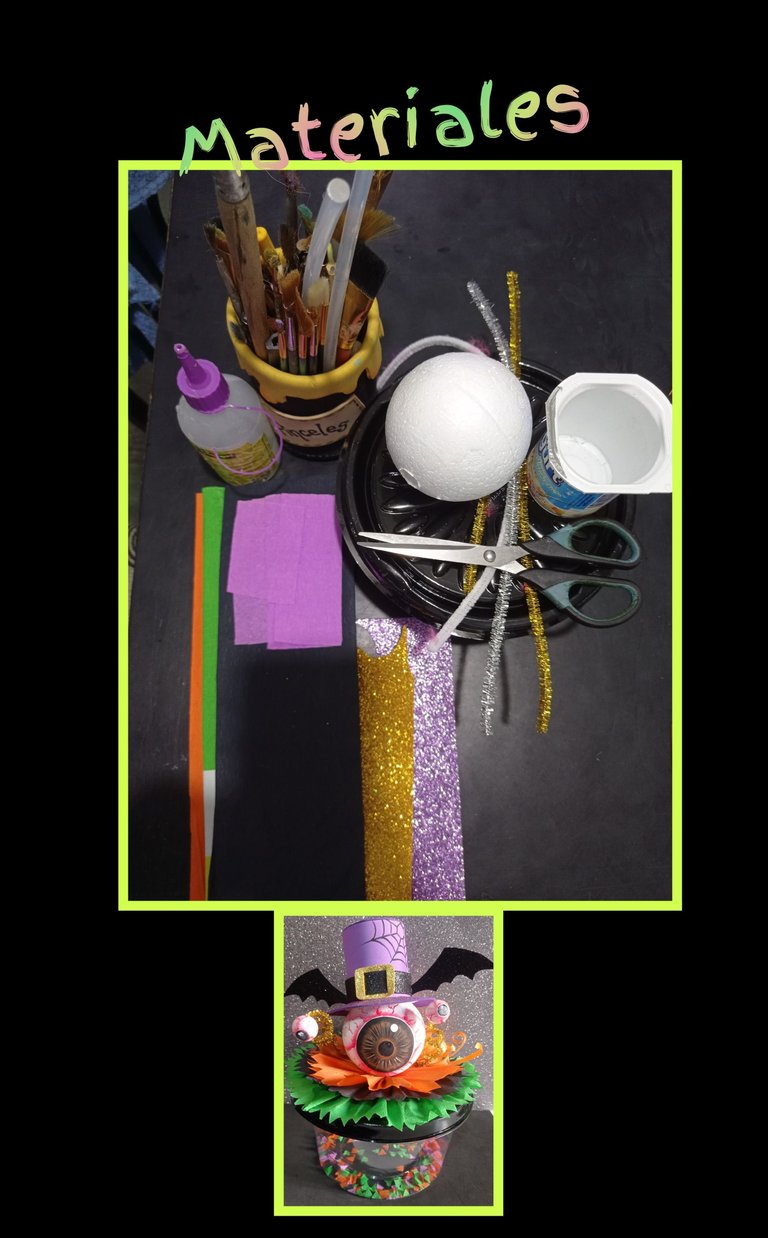
| Envase para tortas o dulces | Esfera de icopor |
|---|---|
| Papel crepé | Foami mate y escarchado |
| Pinturas y pinceles | Limpia pipas |
| Tijera | Silicón |
| Envase descartable de yogurt | |
| Lápiz y plancha eléctrica |
Comencemos:
Paso 1:
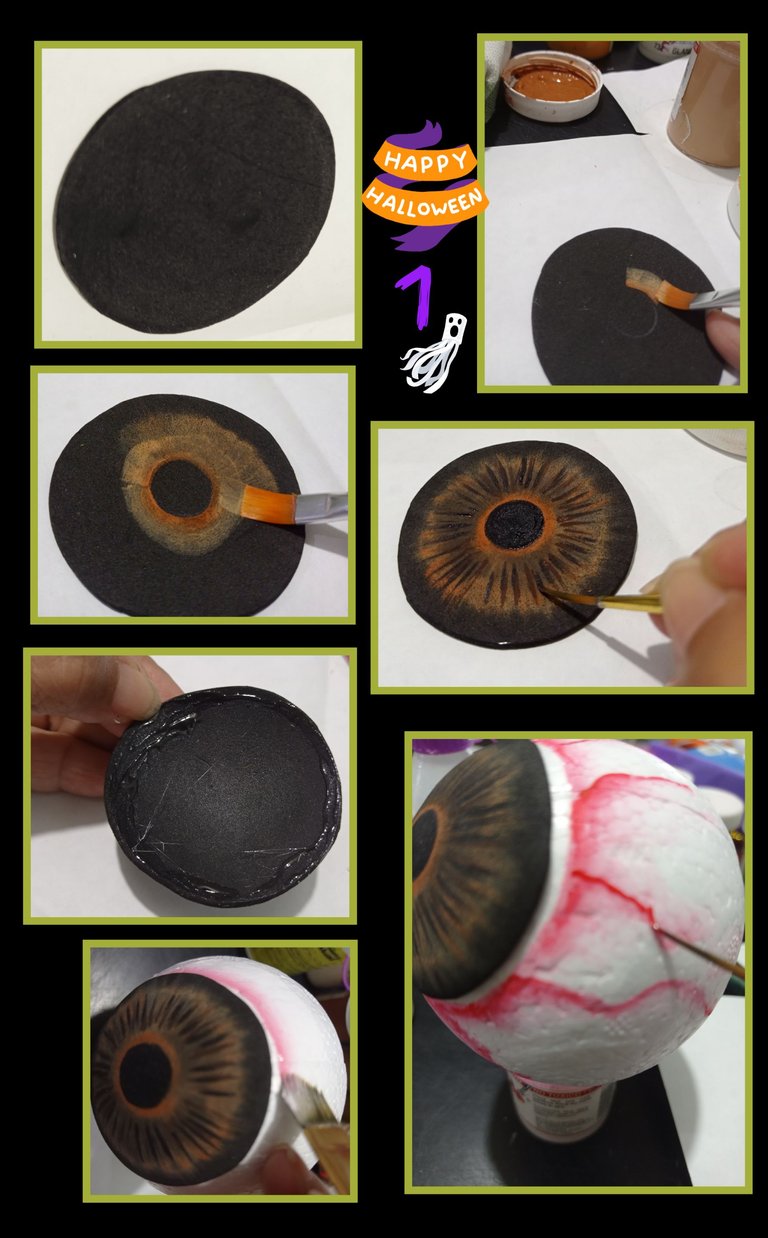
Ojo:
- Recorta un círculo en foami negro, dependiendo del tamaño de la esfera. luego marca en el centro un círculo pequeño y comienza a pintar de adentro hacia afuera con pintura color marrón dando trazos como barriendo, después con un pincel fino o marcador haz lineas por todo el contorno como se vé en la foto.
- Después calienta la plancha y coloca el círculo para que se termoforme y se pueda adaptar a la esfera de icopor.
Ahora aplica silicón en la orilla y pega a la esfera. - Pinta el contorno del iris en la esfera y luego con delineador pinta semejando venas con pintura roja.
Paso 2:
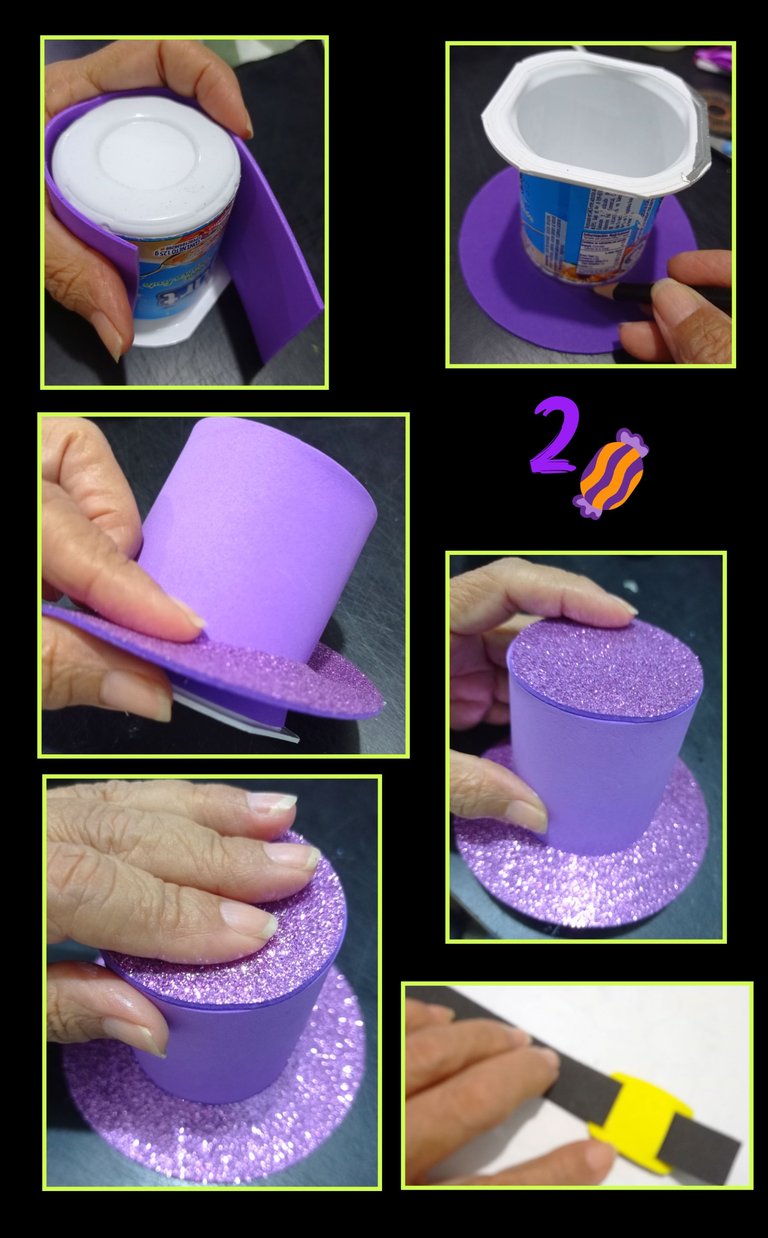
Sombrero:
- Recorta una tira del ancho y altura del envase de yogurt, después recorta un círculo y marca el contorno del envase y saca el centro.
- Aplica silicón y forra el envase, luego inserta el ala del sombrero, aplica silicón y pega la tapa.
- Ahora recorta en foami negro una tira de 2cm de ancho para hacer la correa del sombrero, luego recorta un cuadrado en foami dorado y redondea las esquinas, haz dos cortes e inserta lo que será la hebilla.
Paso 3:
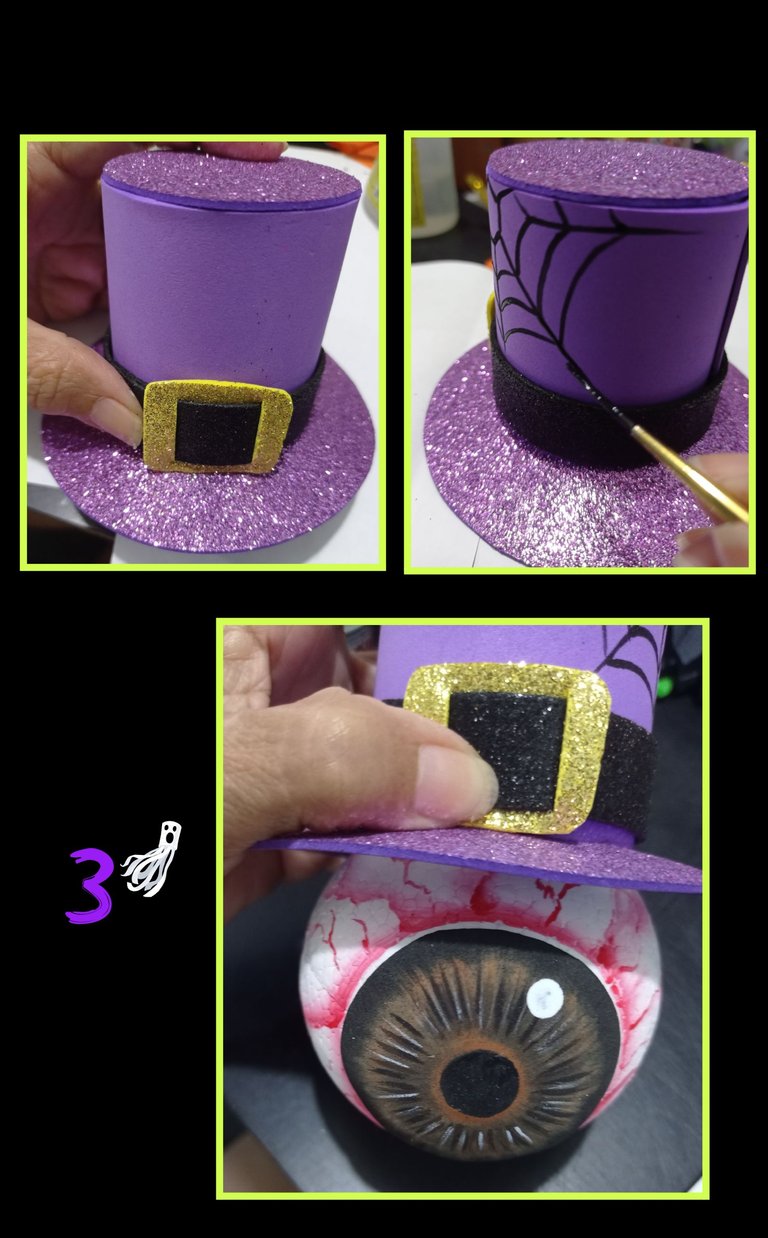
- Así quedará el sombrero forrado.
- Ahora puedes decorar pintando una tela de araña y deja secar.
- Hecho esto, pega el sombrero al ojo con silicón.
Paso 4:
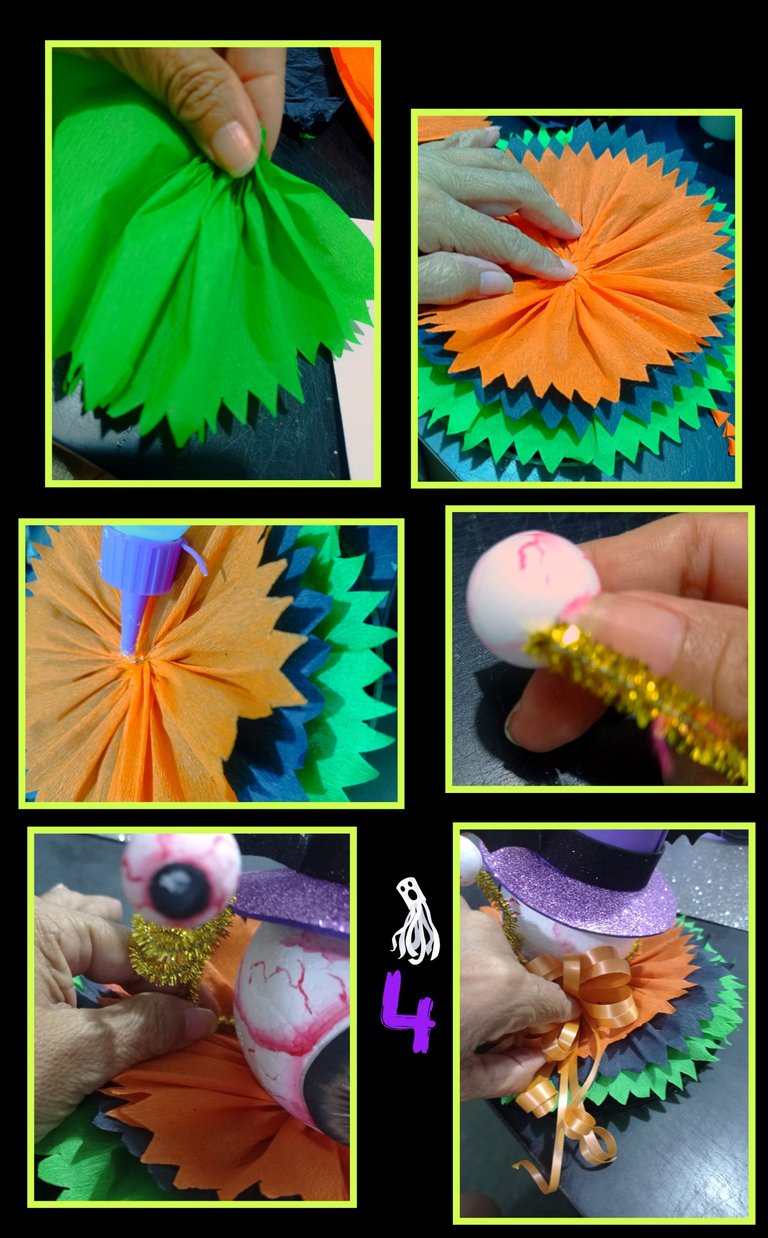
- Recorta en papel crepé 3 tiras largas de 9, 8 y 7cms de ancho, arrucha uno a uno y pega por capas sobre la tapa del envase formando círculos y deja secar. (Ver foto).
- Ahora aplica silicón en el centro y para que pegue bien.
- Pinta 2 mini ojitos e inserta en cada extremo un limpia pipas y tuerce en forma de espiral o da la forma que quieras.
- Pega el ojo a la base y luego pega los limpia pipas.
- Aparte haz un lazo de cinta y pega en la parte trasera.
Paso 5:
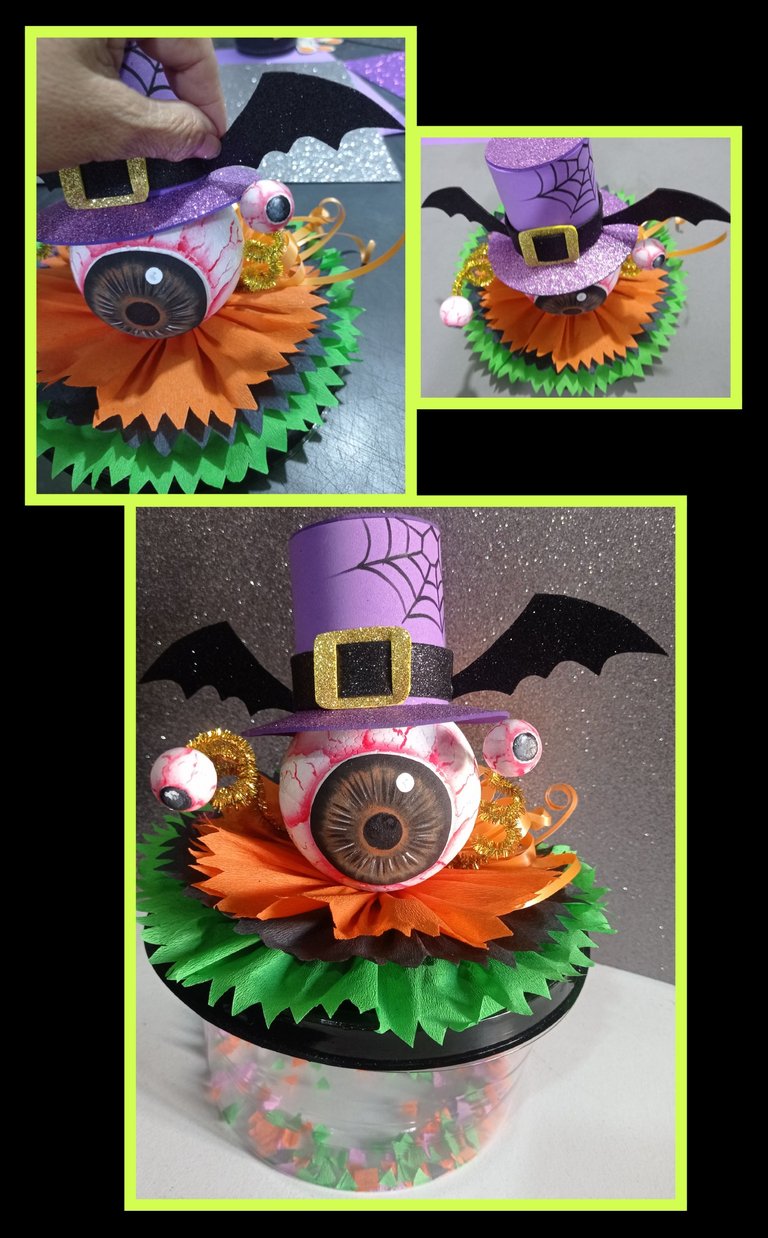
- Por último pega alas de murciélagos en la correa del sombrero-
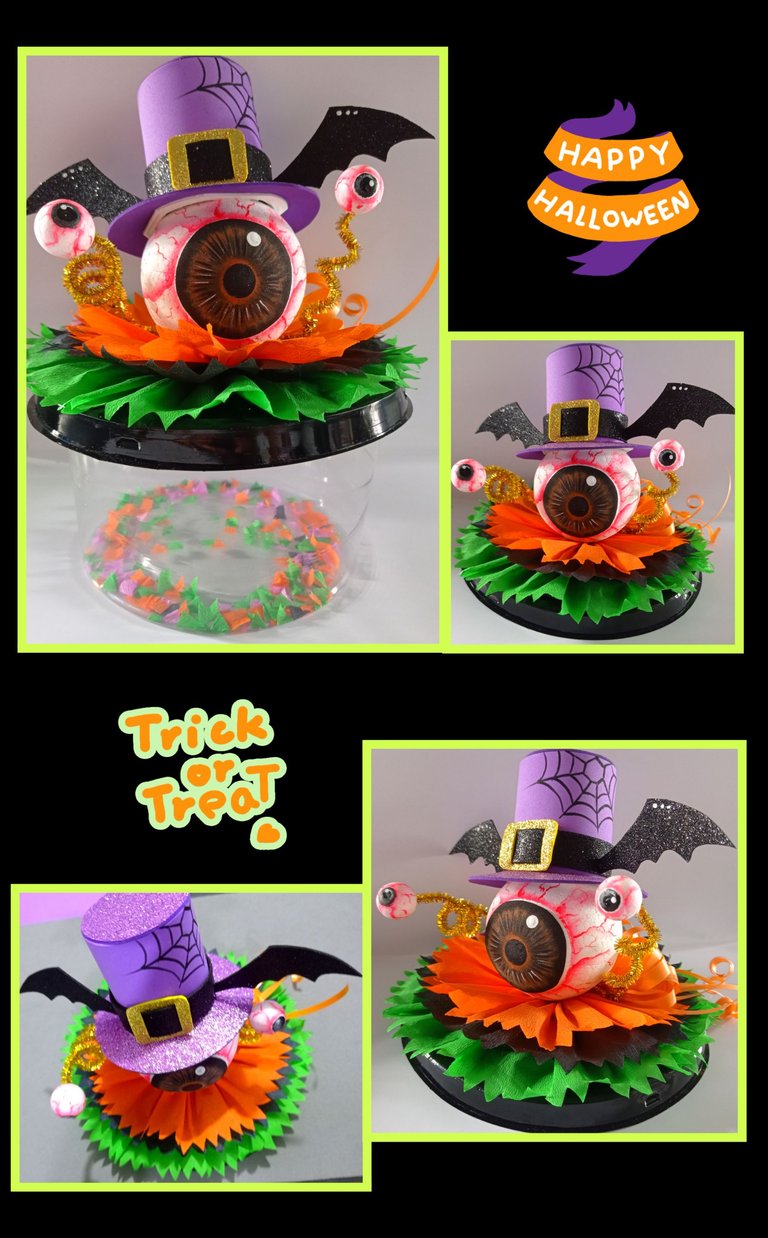
Ahora te muestro el resultado final!
Es un Adorno fácil y sencillo de realizar.
Fuente:https://es.pinterest.com/pin/197314027412436741/
Las fotos capturadas con mi Redmi Note 9
y editadas con GridArt.


Ahora me despido deseando mi paso a paso te guste y sirva de guía.
Saludos y muchas gracias por tu visita.


English:
Good evening dear creators and friends who visit me today.
How are you?
So join me to learn!!!
You will be using:

| Cake or candy container | Isopor sphere |
|---|---|
| crepe paper | matte and frosted Foami |
| Paints and brushes | Pipe cleaners |
| Scissors | Silicone |
| Yoghurt disposable container | |
| Pencil and electric iron |
Let's get started:
Step 1:

Eye:
- Cut out a circle in black foami, depending on the size of the sphere. then mark a small circle in the center and start painting from the inside out with brown paint, then with a fine brush or marker make lines all around the contour as shown in the photo.
- Then heat the iron and place the circle so that it thermoforms and can be adapted to the sphere.
Now apply silicone on the edge and glue to the sphere. - Paint the outline of the iris on the sphere and then with eyeliner paint it resembling veins with red paint.
Step 2:
Sombrero:

- Cut out a strip the width and height of the yogurt container, then cut out a circle and mark the outline of the container, and draw out the center.
- Apply silicone and line the container, then insert the brim of the hat, apply silicone and glue on the lid.
- Now cut out a 2cm wide strip of black foami to make the hat strap, then cut out a square in gold foami and round the corners, make two cuts and insert what will be the buckle.
Step 3:

- This is how the lined hat will look like.
- Now you can decorate by painting a spider web and let it dry.
- Once this is done, glue the hat to the eye with silicone.
Step 4:

- Cut 3 long strips of crepe paper of 9, 8 and 7cms wide, crumple one by one and glue in layers on the lid of the container forming circles and let dry (see photo).
- Now apply silicone in the center so that it sticks well.
- Paint 2 mini eyes and insert a pipe cleaner at each end and twist into a spiral or whatever shape you want.
- Glue the eye to the base and then glue the pipe cleaners.
- Separately make a ribbon bow and glue to the back.
Step 5:

- Finally glue bat wings to the hat strap.
Now I show you the final result!
It is an easy and simple Ornament to make.

Fuente:https://es.pinterest.com/pin/197314027412436741/
The photos captured with my Redmi Note 9
and edited with GridArt


Now I say goodbye wishing you like my step by step and serve as a guide.
Greetings and thank you very much for your visit.


