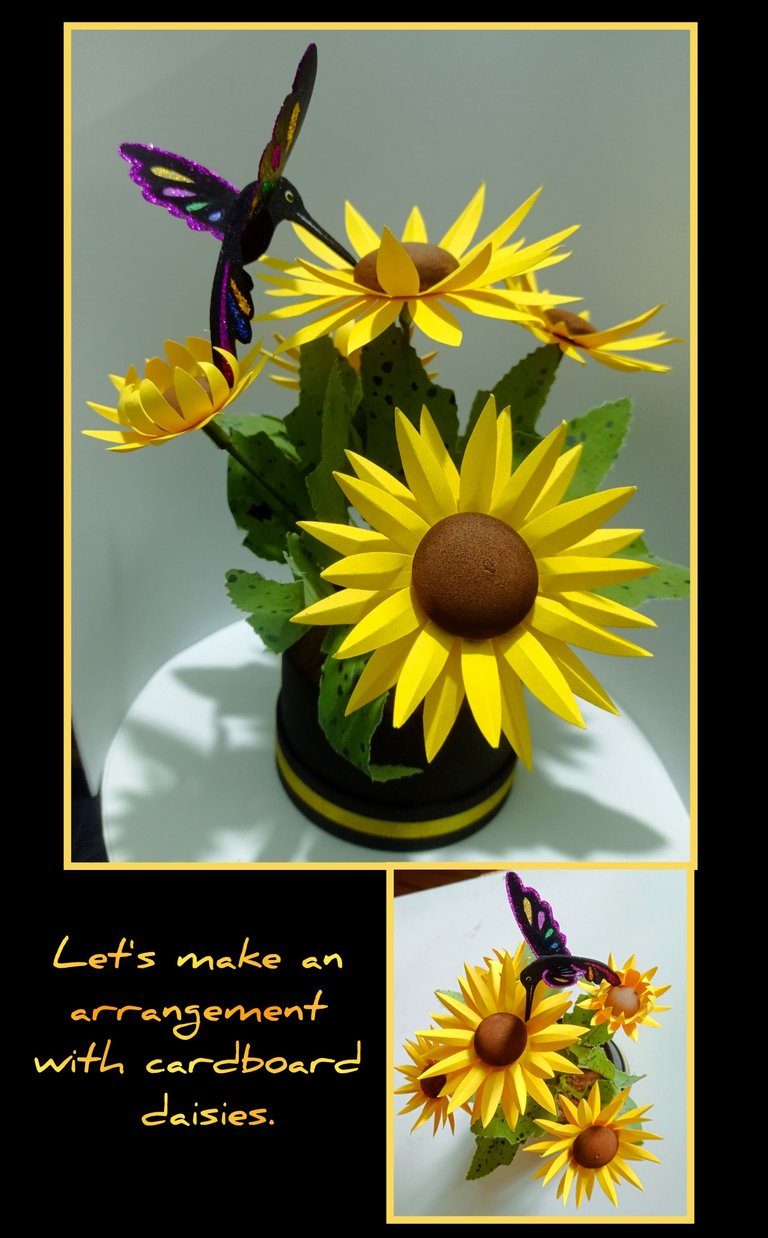
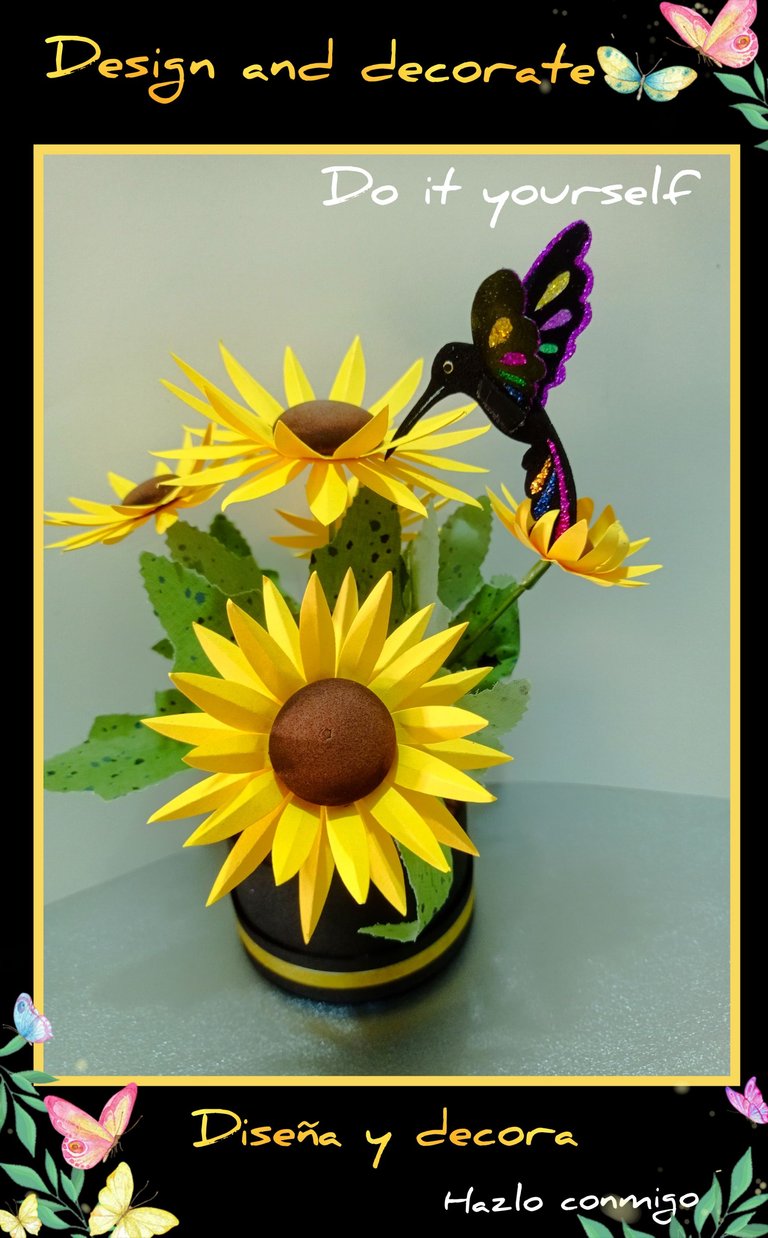
Buenas noches mis queridos creadores y amigos que hoy me visitan.
Así que te invito a que me acompañes.
Necesitarás:
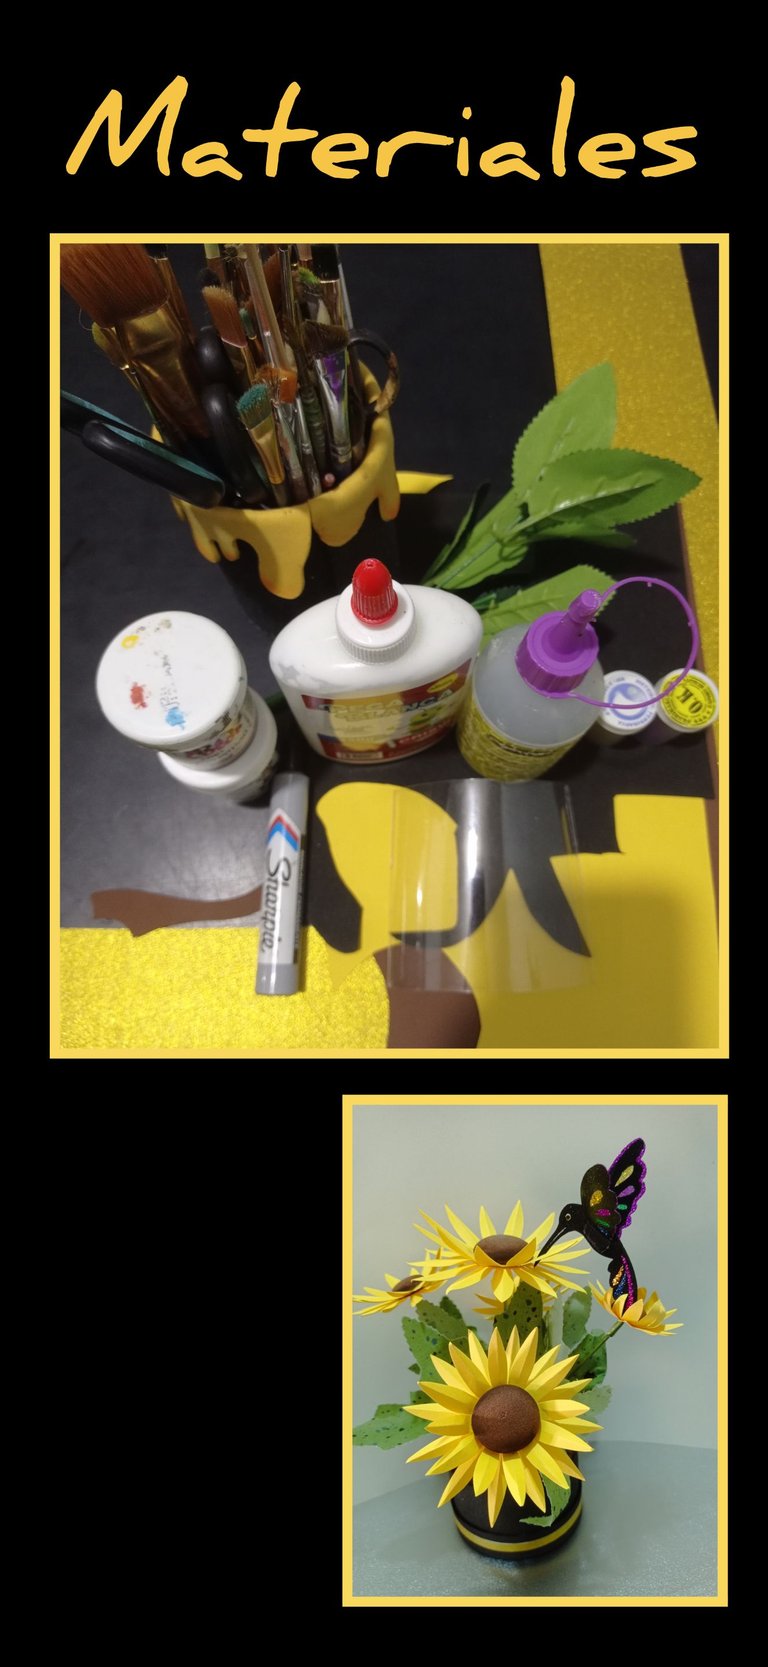
| Cartulina escolar | Foami |
|---|---|
| Acetato de botella | Tallo de hojas |
| Marcador | Escarchas de colores |
| Cola blanca y silicón | Pinturas y pinceles |
| Tubo de cartón | Icopor |
| Papel crepé | Plancha eléctrica |
| Dibujo de colibrí | Molde de margaritas |
Comencemos:
Paso 1:
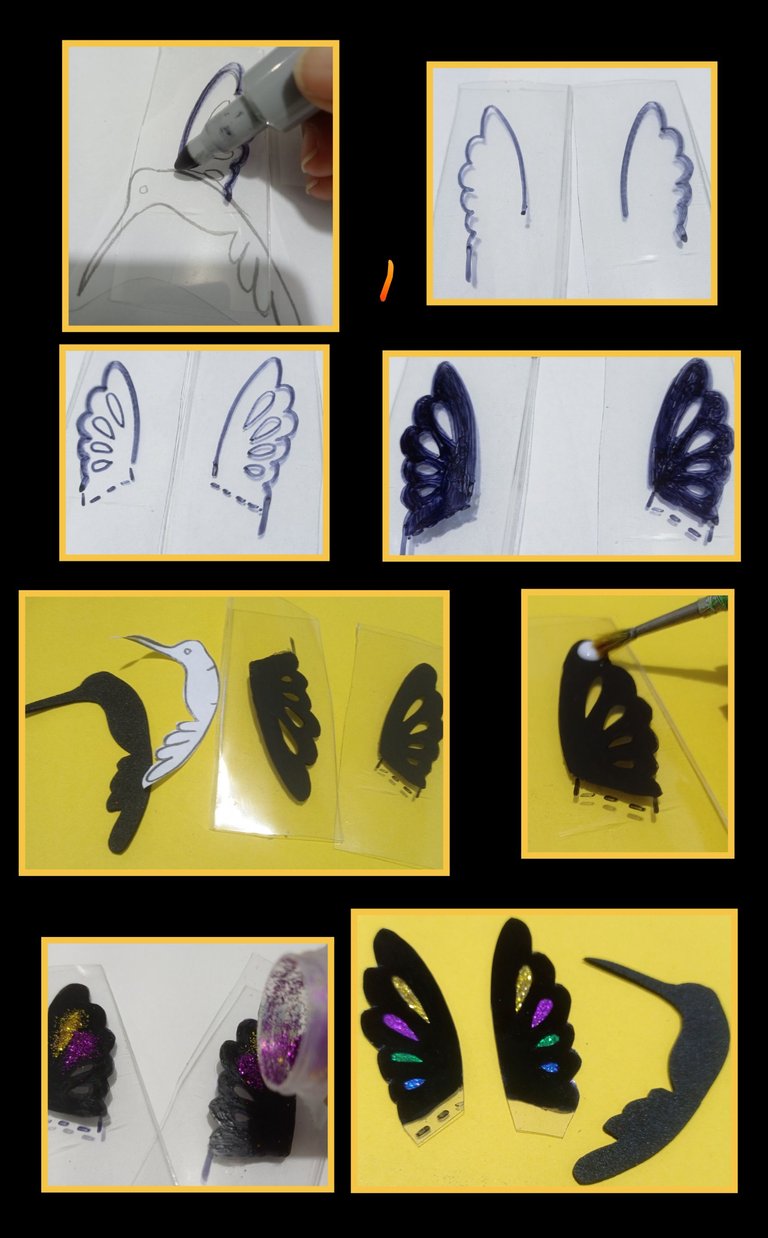
Colibrí:
- Coloca el acetato sobre el dibujo del colibrí y calca con marcador un par de alas, primero el borde, luego dibuja los centros de las alas y rellena con marcador como se muestra en la foto.
- Luego recorta en foami negro el cuerpo del colibri y rellena con pintura negra las alas y deja secar, después aplica una capa de cola blanca para sellar la pintura.
- Ahora aplica cola blanca en los centros y rellena con escarcha de colores.
Paso 2
Margaritas:
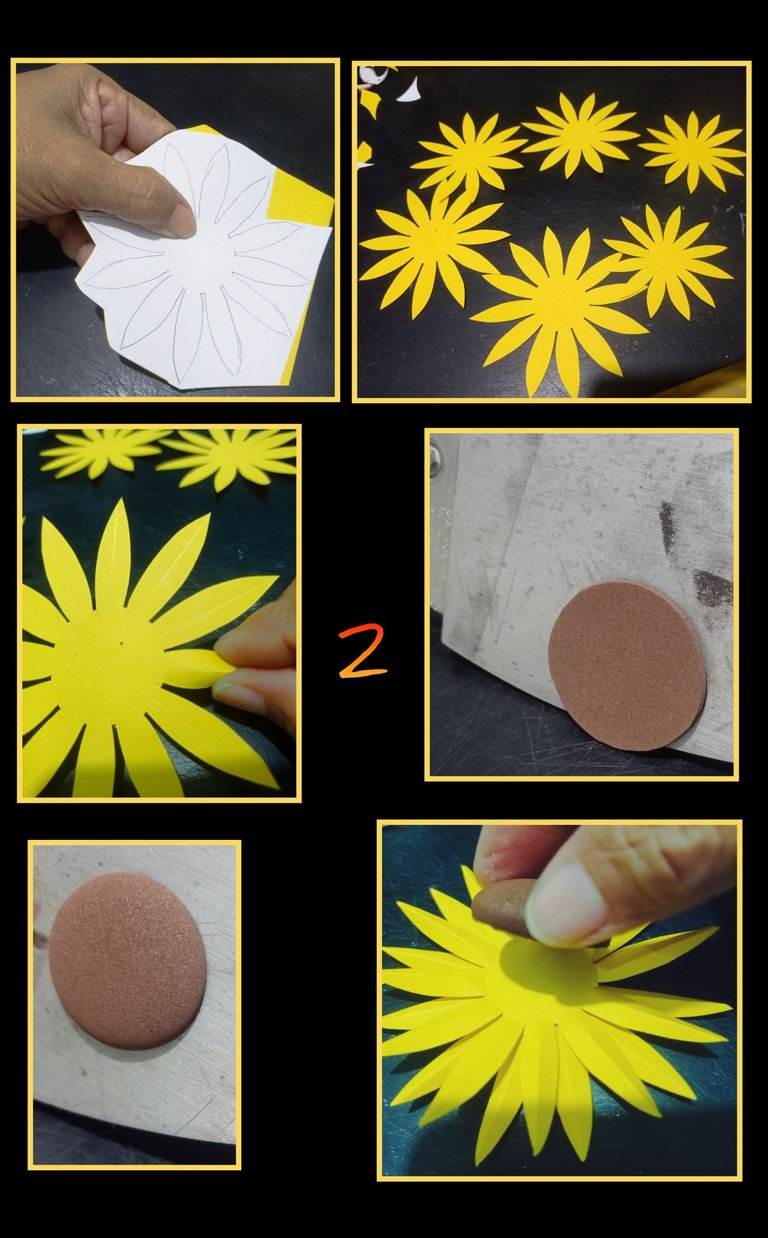
- Coloca el molde de las margaritas sobre pedazos de cartulinas y recorta un par de pétalos para cada flor, recortarás las que necesites, luego dobla cada pétalo por la mitad, así harás con las flores grandes y medianas.
- Luego recorta en foami círculos, calienta la plancha y coloca a termoformar y retira.
- Ahora aplica silicón y pega un par de pétalos, deja secar y luego aplica silicón por todo el contorno del centro de foami y pega a la flor.
Paso 3:
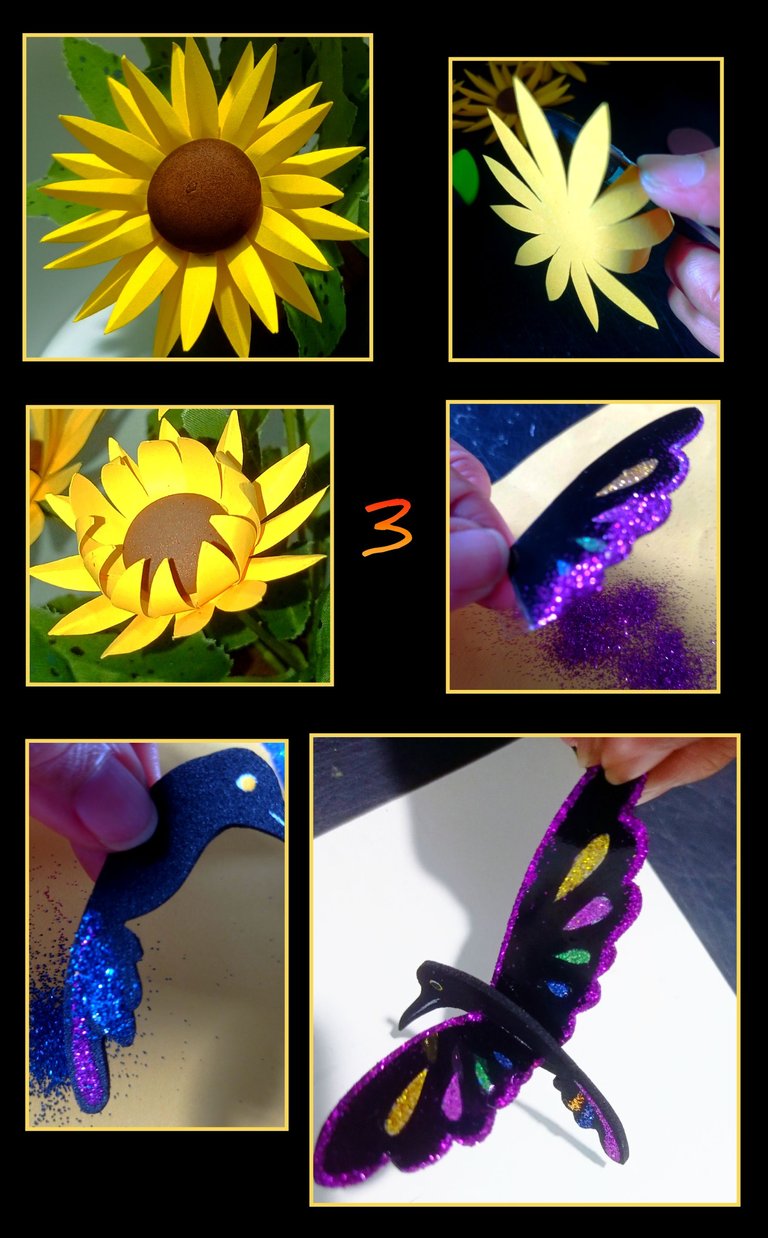
- Así queda armada la margarita grande y para las pequeñas, recorta y risa con la tijera los pétalos para formar tipo capullos.
- Luego volvemos con las alas, aplicamos por todo el borde o contorno cola blanca y rocía con escarcha.
- Pinta los ojos y delínea el pico, también puedes aplicar escarcha en la cola del pajarito.
- Luego pega las alas al cuerpo con silicon.
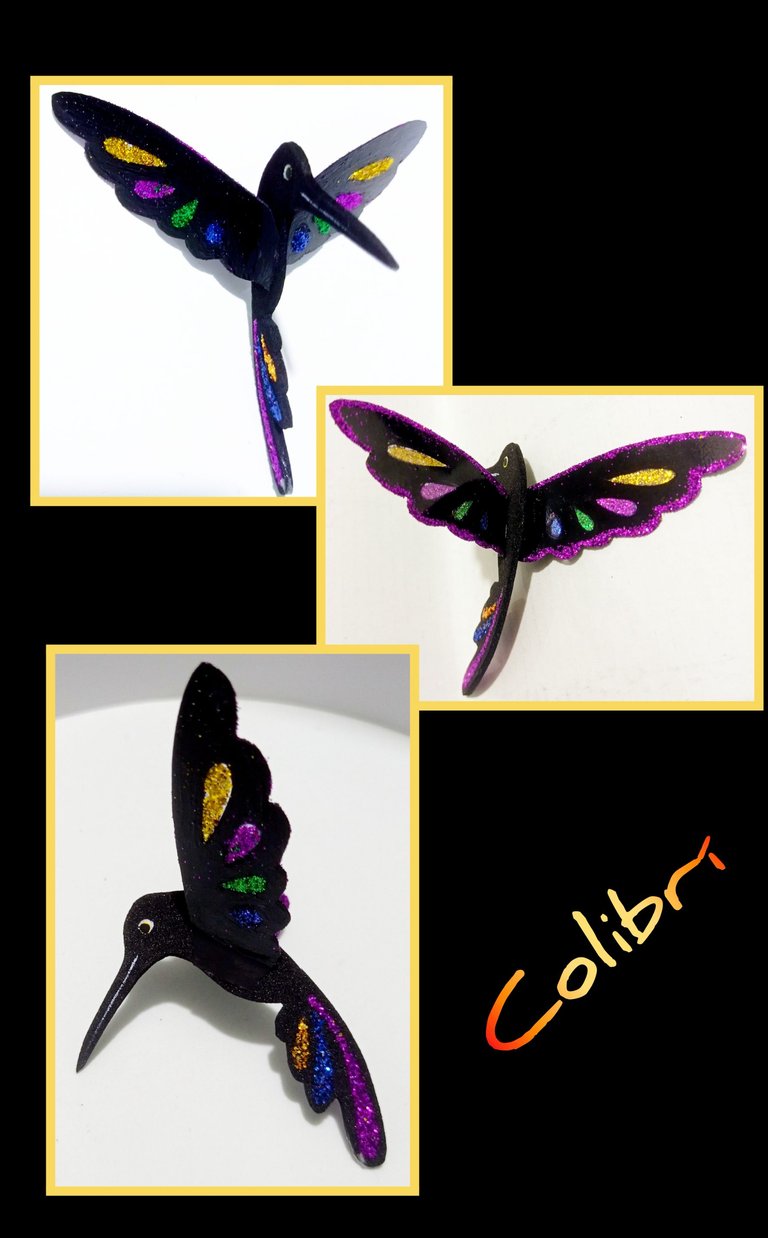
Así quedará listo el colibrí!
Paso 4
Base del arreglo:
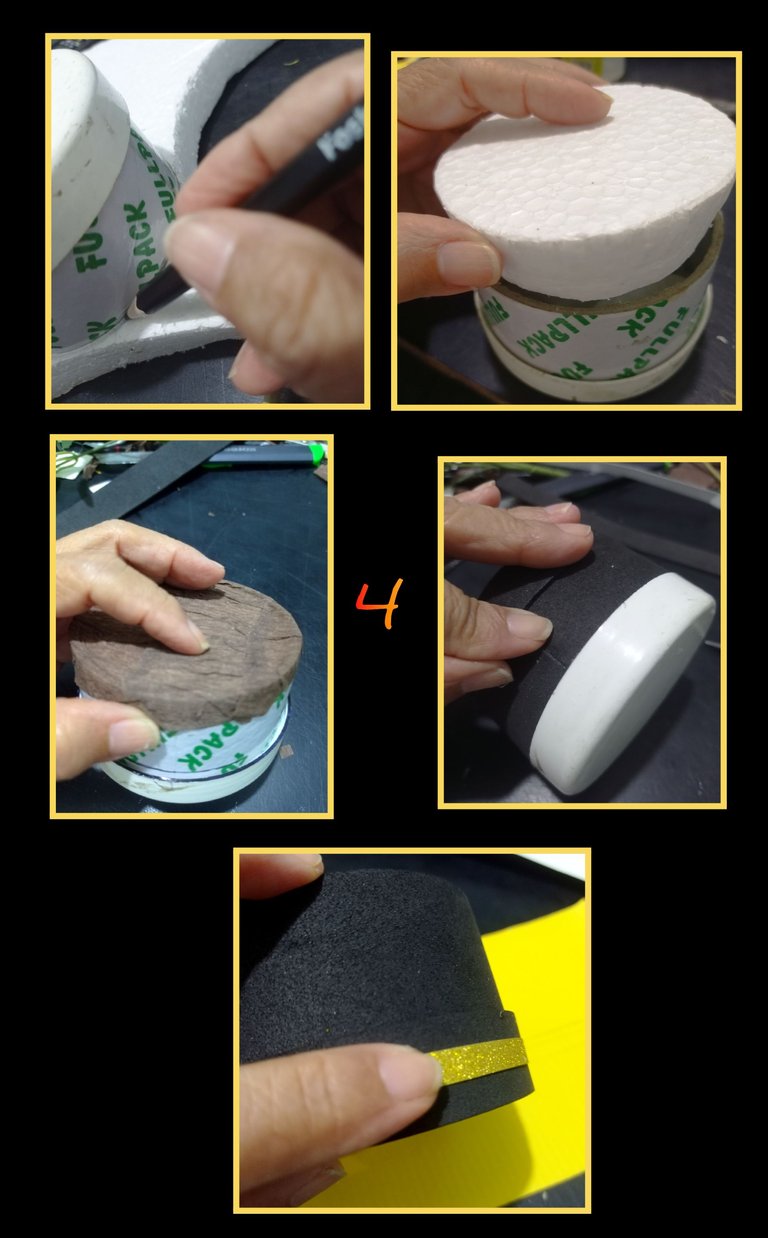
- Coloca al tubo de cartón una tapa plástica o pega un cartón de base, luego marca sobre el icopor todo el contorno del tubo y recorta el círculo.
- Luego aplica silicón por el borde de icopor e inserta en el tubo de cartón, luego con papel crepé forra la parte superior.
Luego recorta una tira de foami negro y forra el tubo de cartón y decora con una cinta dorada.
Paso 5:
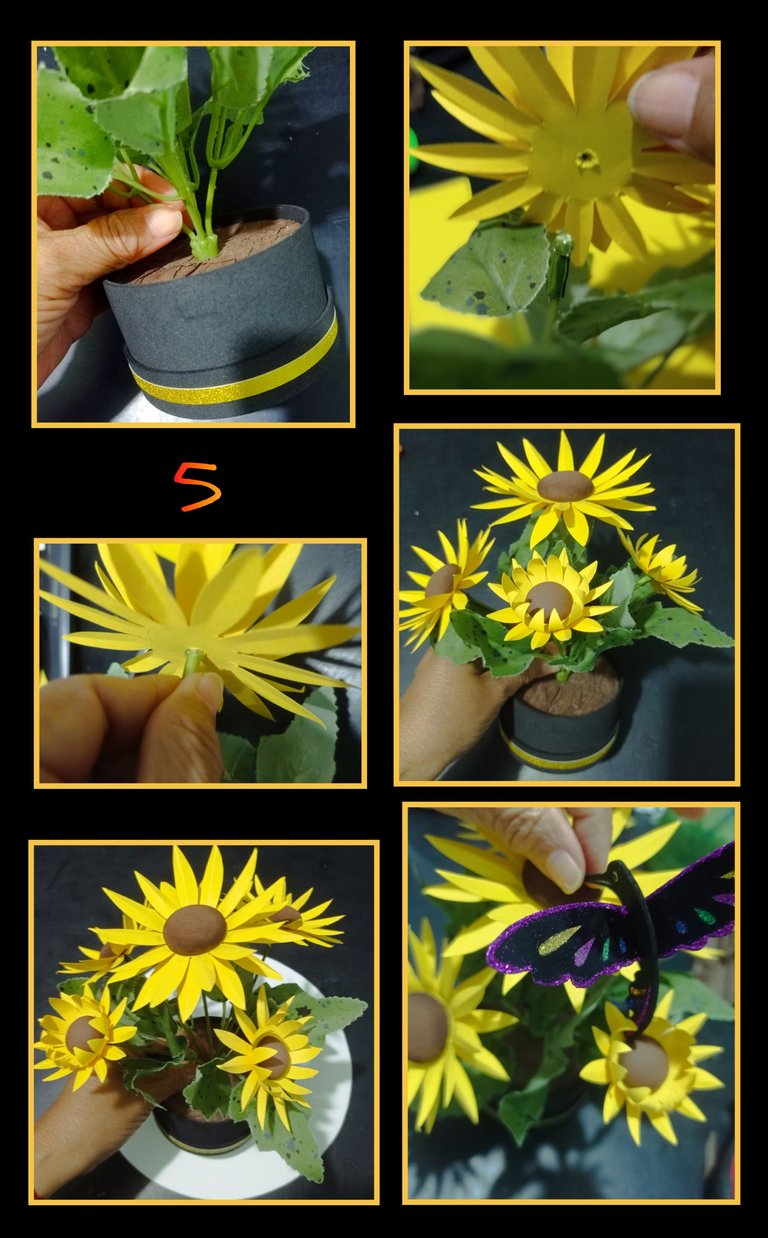
Armar el arreglo:
- Haz un orificio en en centro de la base, aplica silicón en el tallo de hojas e inserta y deja secar.
- Haz un orificio en la parte inferior de cada flor, aplica silicón e inserta en cada una de las ramas, por último pega el colibrí o coloca en el sitio de tu preferencia.
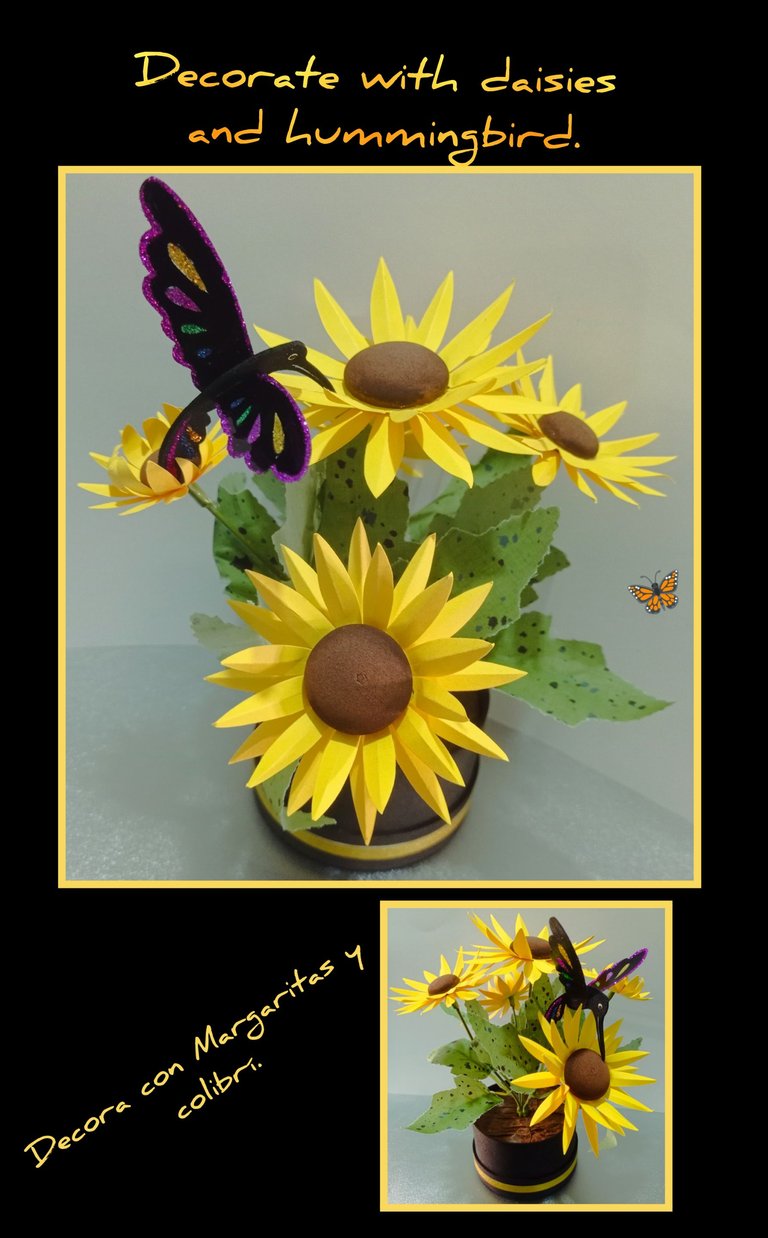
Y ahora te muestro el resultado final!

Fuentes:
https://es.pinterest.com/pin/476255729362260109/
https://es.pinterest.com/pin/476255729362242318/
Teléfono: Redmi Note 9
Etiquetas: HTML
Editor de fotos: GridArt.
Llegó la hora de despedirme, esperando y deseando mi tutorial sea útil y de tu agrado y que te sirva como guía a la hora de elaborar tu proyecto.
Muchas gracias por tu visita y apoyo y si tienes alguna duda o sugerencia será bien recibida.
Recuerda siempre pasar por aquí.!
Saludos.
English:


Good evening my dear creators and friends who visit me today.
Welcome everyone, I hope this week is blessed and of much benefit to all.
Today I will show you a tutorial that you can learn how to make:
- Daisies of cardboard and foami.
- A cute hummingbird with acetate from plastic bottles.
- Using a fabric leaf stem.
- Line and decorate a cardboard tube to create a nice arrangement and decorate a place in your home or office.
So I invite you to join me.
You will need:

| School poster board | Foami |
|---|---|
| Bottle acetate | Leaf stalk |
| Marker | Colorful frosting |
| White glue and silicone | Paints and paintbrushes |
| Cardboard tube | Icopor |
| Crepe paper | Electric iron |
| Hummingbird drawing | Daisy mold |
Let's get started:
Step 1:

Hummingbird:
- Place the acetate over the hummingbird drawing and trace with marker a pair of wings, first the edge, then draw the centers of the wings and fill with marker as shown in the photo.
- Then cut out in black foami the body of the hummingbird and fill with black paint the wings and let dry, then apply a coat of white glue to seal the paint.
- Now apply white glue to the centers and fill with colored frosting.
Step 2

Daisies:
- Place the daisy mold on pieces of cardstock and cut out a couple of petals for each flower, you will cut out as many as you need, then fold each petal in half, this is how you will do with the large and medium flowers.
- Then cut out circles in foami, heat the iron and place to thermoform and remove.
- Now apply silicone and glue a couple of petals, let dry and then apply silicone all around the center of the foami and glue to the flower.
Step 3:

- This is how the big daisy is assembled and for the small ones, cut and laugh with the scissors the petals to form buds.
- Then come back with the wings, apply white glue all around the edge or outline and sprinkle with frosting.
- Paint the eyes and outline the beak, you can also apply frosting on the tail of the bird.
- Then glue the wings to the body with silicone.
***The hummingbird is ready to go!

Step 4

Base of the arrangement:
- Attach a plastic lid or glue a cardboard base to the cardboard tube, then mark the entire outline of the tube on the sponge and cut out the circle.
- Then apply silicone around the edge of the cardboard and insert it into the cardboard tube, then line the top with crepe paper.
Then cut out a strip of black foami and line the cardboard tube and decorate with a gold ribbon.
Step 5:

Assemble the arrangement:
- Make a hole in the center of the base, apply silicone to the leaf stem and insert and let dry.
- Make a hole in the bottom of each flower, apply silicone and insert in each of the branches, finally glue the hummingbird or place in the place of your choice.
And now I show you the final result!

Sources:
https://es.pinterest.com/pin/476255729362260109/
https://es.pinterest.com/pin/476255729362242318/

Phone: Redmi Note 9
Tags: HTML
Photo Editor: GridArt.

It's time to say goodbye, hoping and wishing that my tutorial will be useful and to your liking and that it will serve as a guide when developing your project.
Thank you very much for your visit and support and if you have any doubt or suggestion it will be well received.
Remember to always stop by here!
Greetings.


