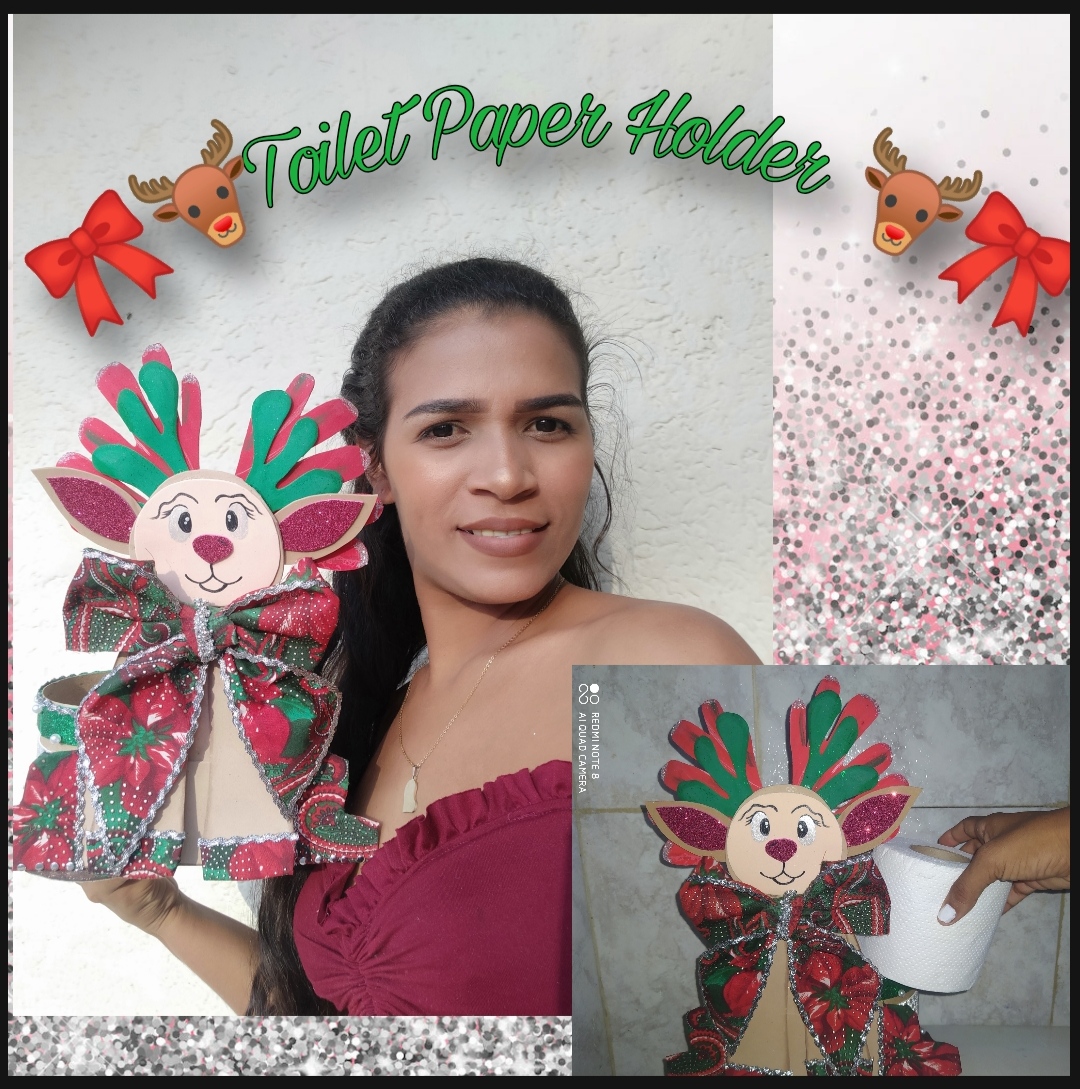
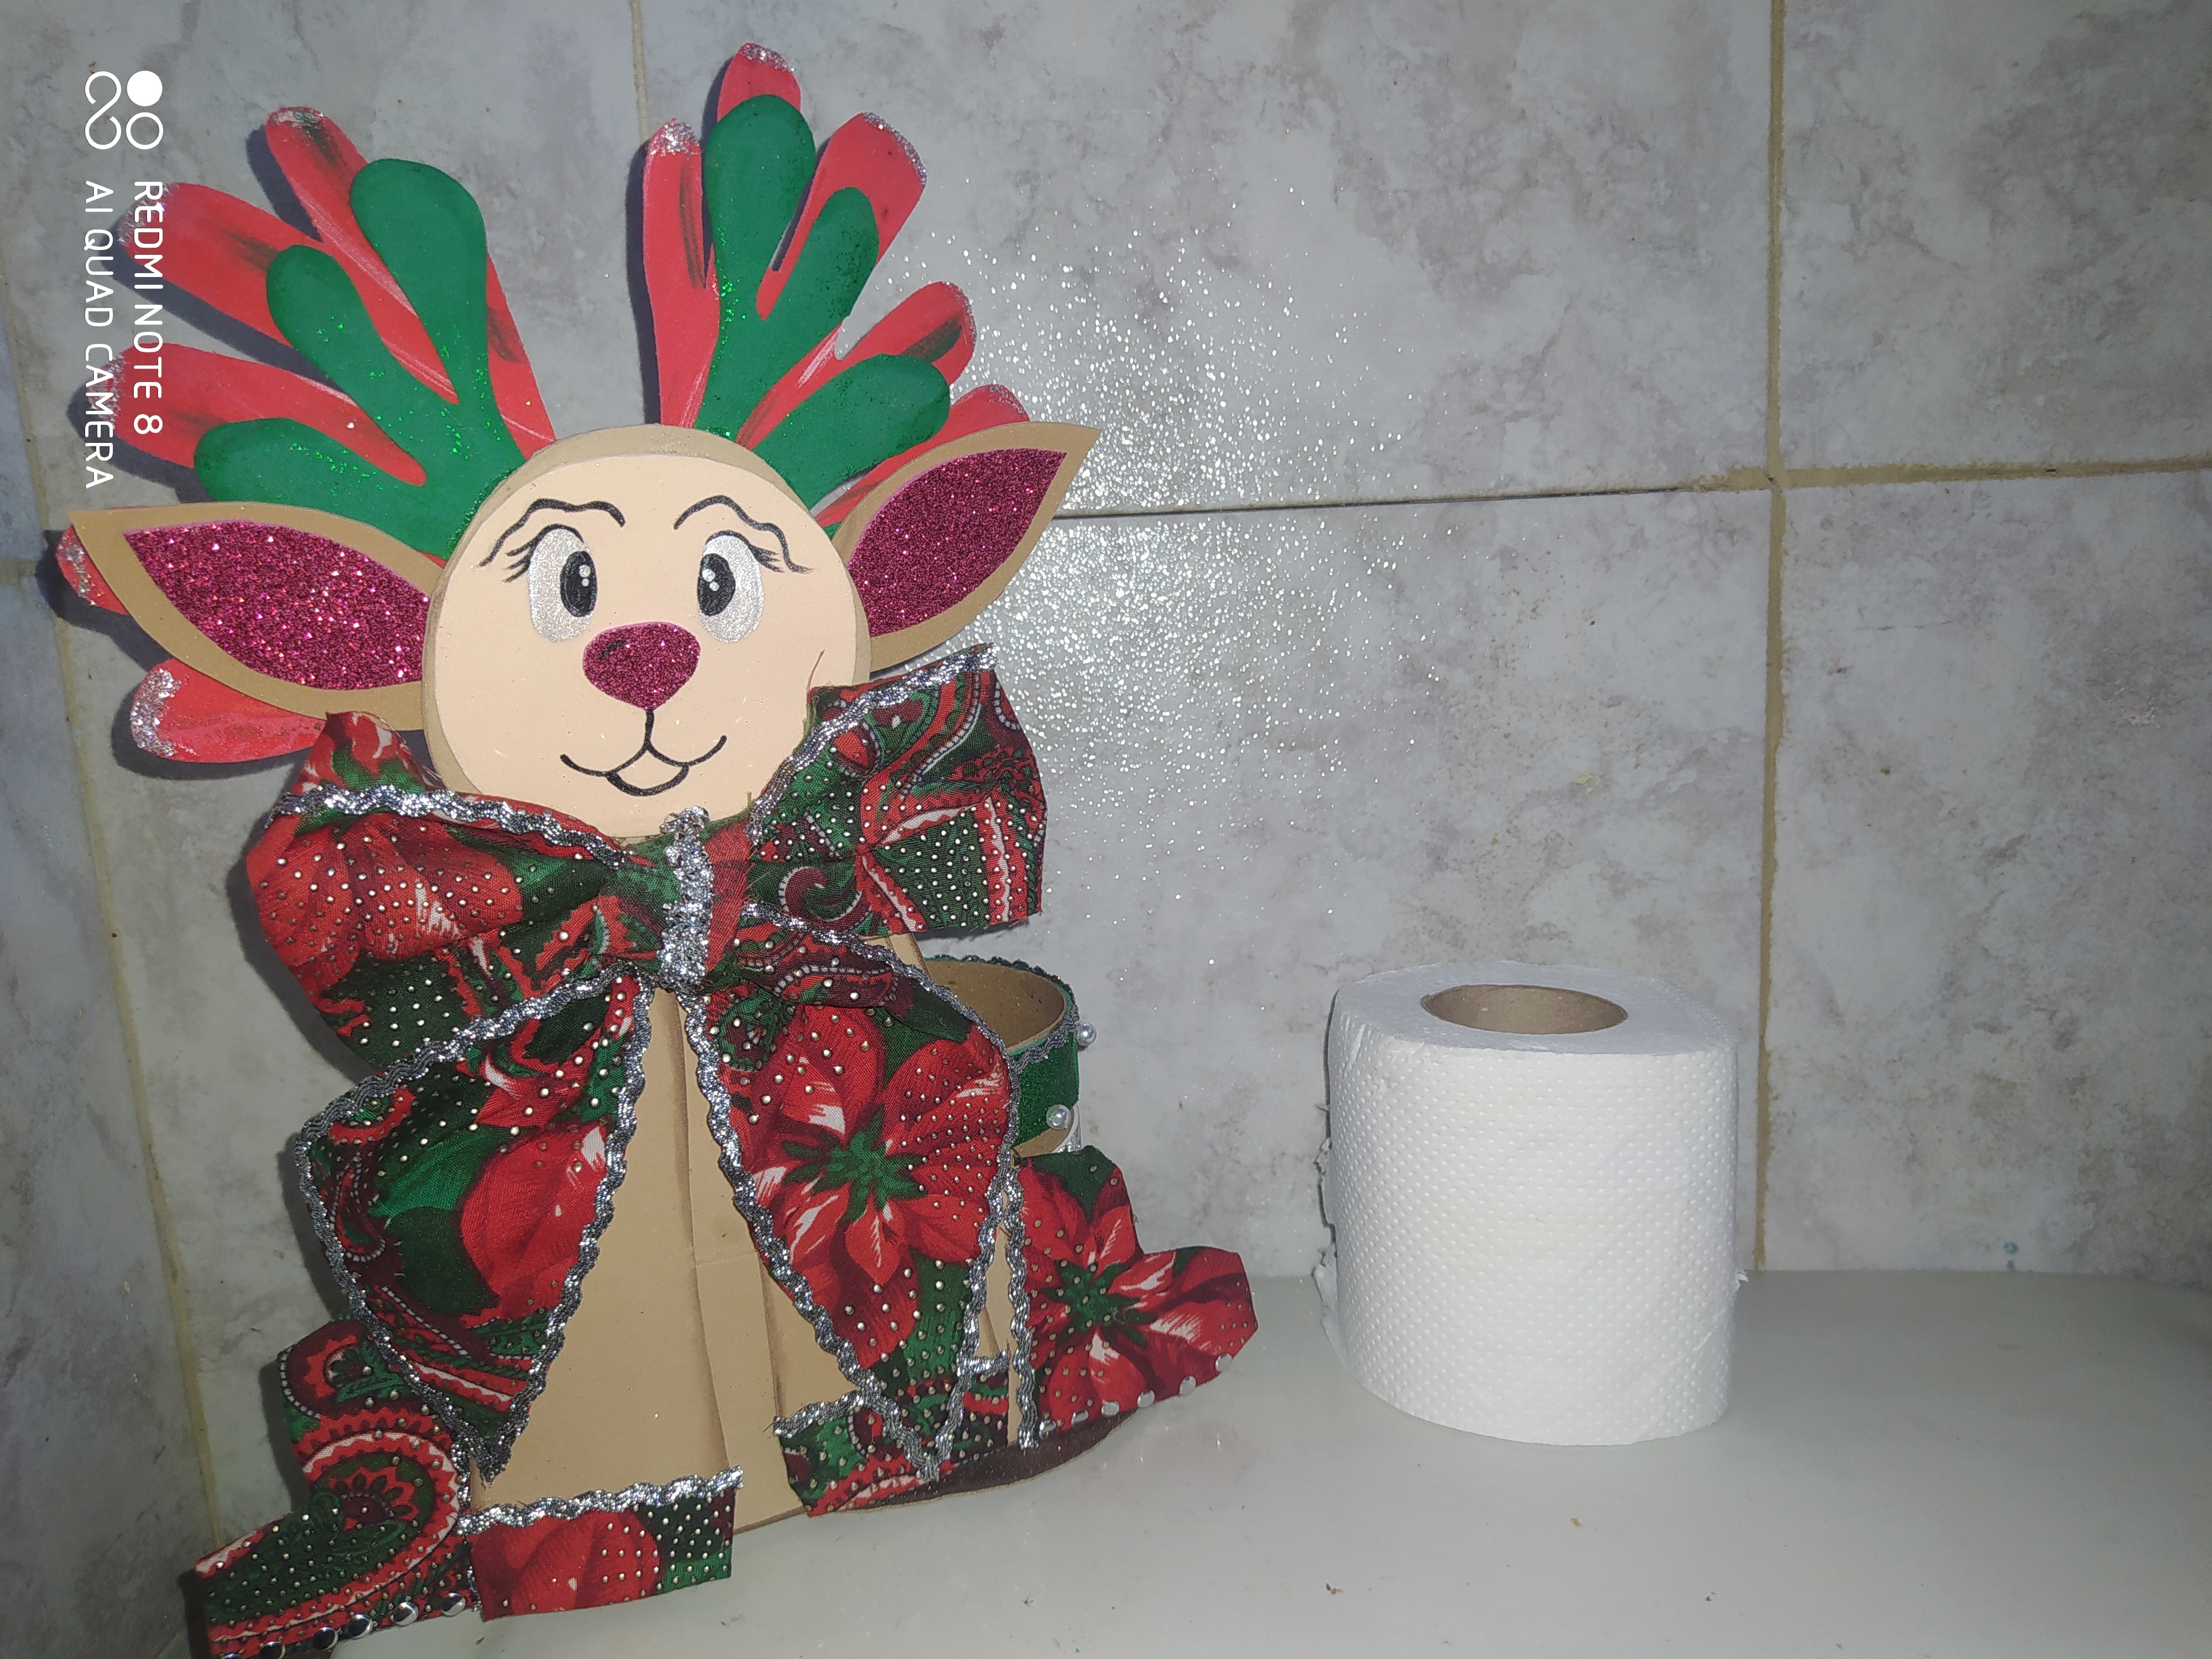
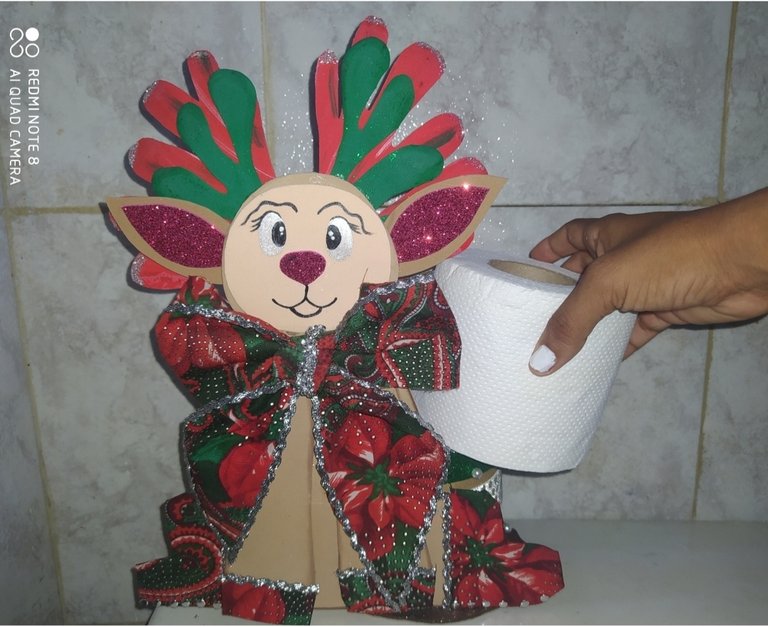
Good evening Hive platform and @diyhub community, blessings to all my reader friends, pleased to share content with you, tonight I bring you a Christmas ornament taking advantage of the fact that we are in this beautiful time and we all want to decorate our home, for this reason I made a toilet paper holder for our bathroom in the shape of a reindeer and a Christmas theme. It should be noted that I really like this time of year and I will be sharing with you various ornaments that I will be making to decorate our home. Below I will show you the steps to follow for this beautiful piece, I hope you like it as much as I do. Without further ado to add greetings and blessings.
Buenas noches plataforma de Hive y comunidad de @diyhub bendiciones para todos mi amigos lectores, complacida de compartir contenidos con ustedes, la noche de hoy les traigo un adorno de navidad aprovechando que estamos en esta hermosa época y todos queremos decorar nuestro hogar, por ello elabore un porta papel higiénico para nuestro baño con forma de reno y temática navideña, cabe descartar que me gusta mucho esta epoca y estaré compartiendo con ustedes varios adornos que estaré realizando para decorar nuestro hogar, a continuación les mostrare los pasos a seguir para esta hermosa pieza, espero les guste tanto como a mi.
Sin más que agregar saludos y bendiciones.
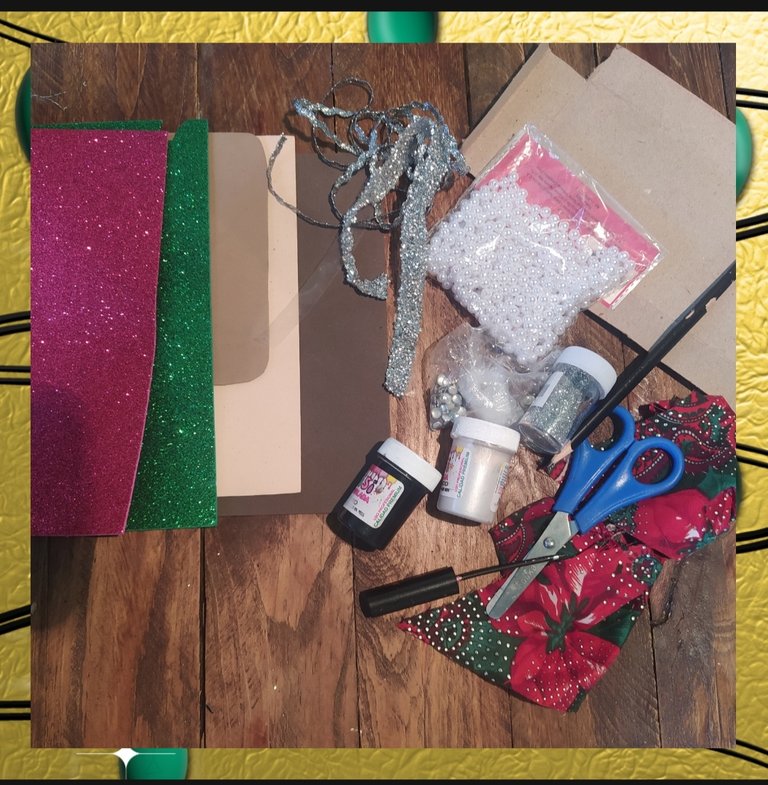
Used materials :
•Cardboard
•Liquid silicone
•Silver ribbon
•White pearls
•Scissors
•Pencil
•Frost
•White cold paint
•Black cold paint
•Brush
• Flower printed fabric
•Frosty red foam
•Frosty green foam
•Dark brown foam
•Light brown foam
•Skin-colored foam
Materiales utilizados :
•Carton
•Silicon líquido
•Cinta plateada
•Perlas blancas
•Tijera
•Lapiz
•Escarcha
•Pintura al frio blanca
•Pintura al frio negra
•Pincel
• Tela estampada de flores
•Foami rojo escarchado
•Foami verde escarchado
•Foami marrón oscuro
•Foami marrón claro
•Foami color piel .
🦌🧻🚽 Step for making a toilet paper holder:
🦌🧻🚽 Paso para la elaboración de un porta papel higiénico:
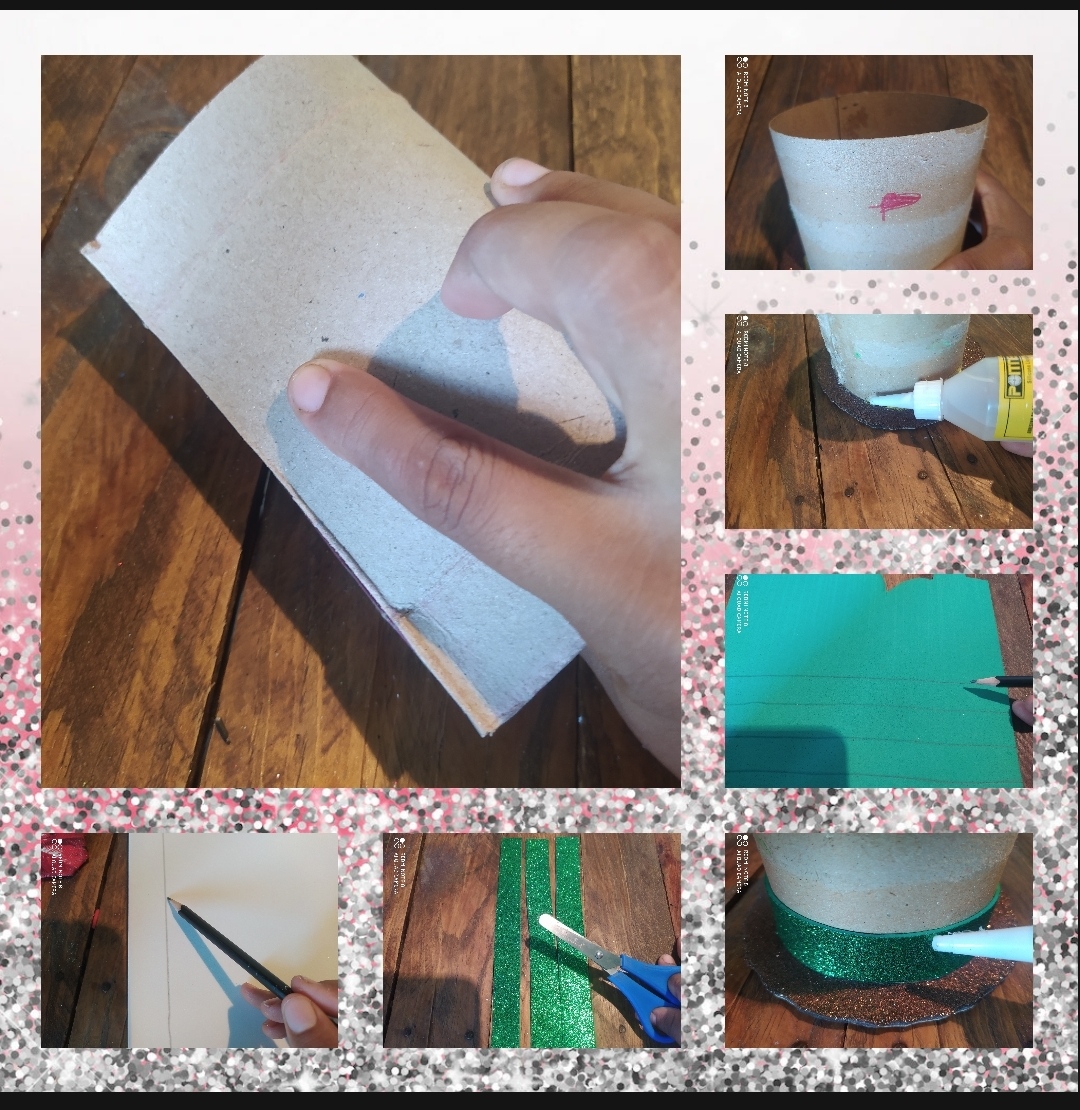
🦌First step:
In this step we assemble our base with the cardboard, it is cut out and left in the shape of a rectangle, the two ends are joined leaving a cylinder, the base of this is marked, brown foam is glued to it, and the assembled cylinder is glued, in The frosty green foam is marked with stripes, these are cut out and glued to our base on the bottom and on the top, in the center a silver one is glued and on the edge the silver tape is glued.
🦌Primer paso :
En este paso armamos nuestra base con el cartón ,se recorta y se deja en forma de rectángulo ,se unen las dos puntas dejando un cilindro ,se marca la base de este ,se le pega foami marrón ,y se pega del cilindro armado ,en el foami verde escarchado se marcan una franjas ,estás se recortan y se le pega a nuestra base en la parte de abajo y en la parte de arriba ,en el centro se le pega una plateado y en la orilla se le pega la cinta plateada .
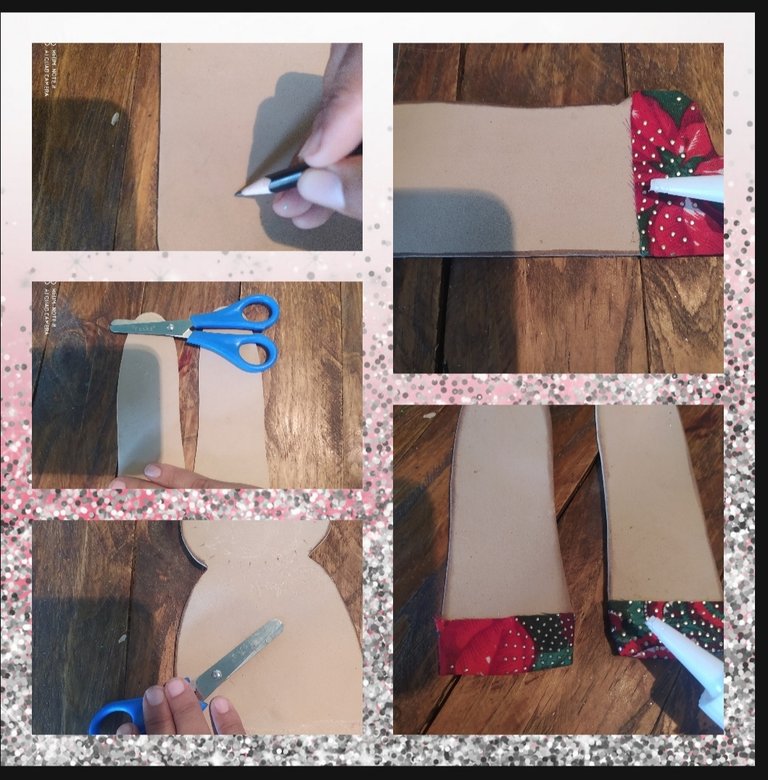
❄️ Second step:
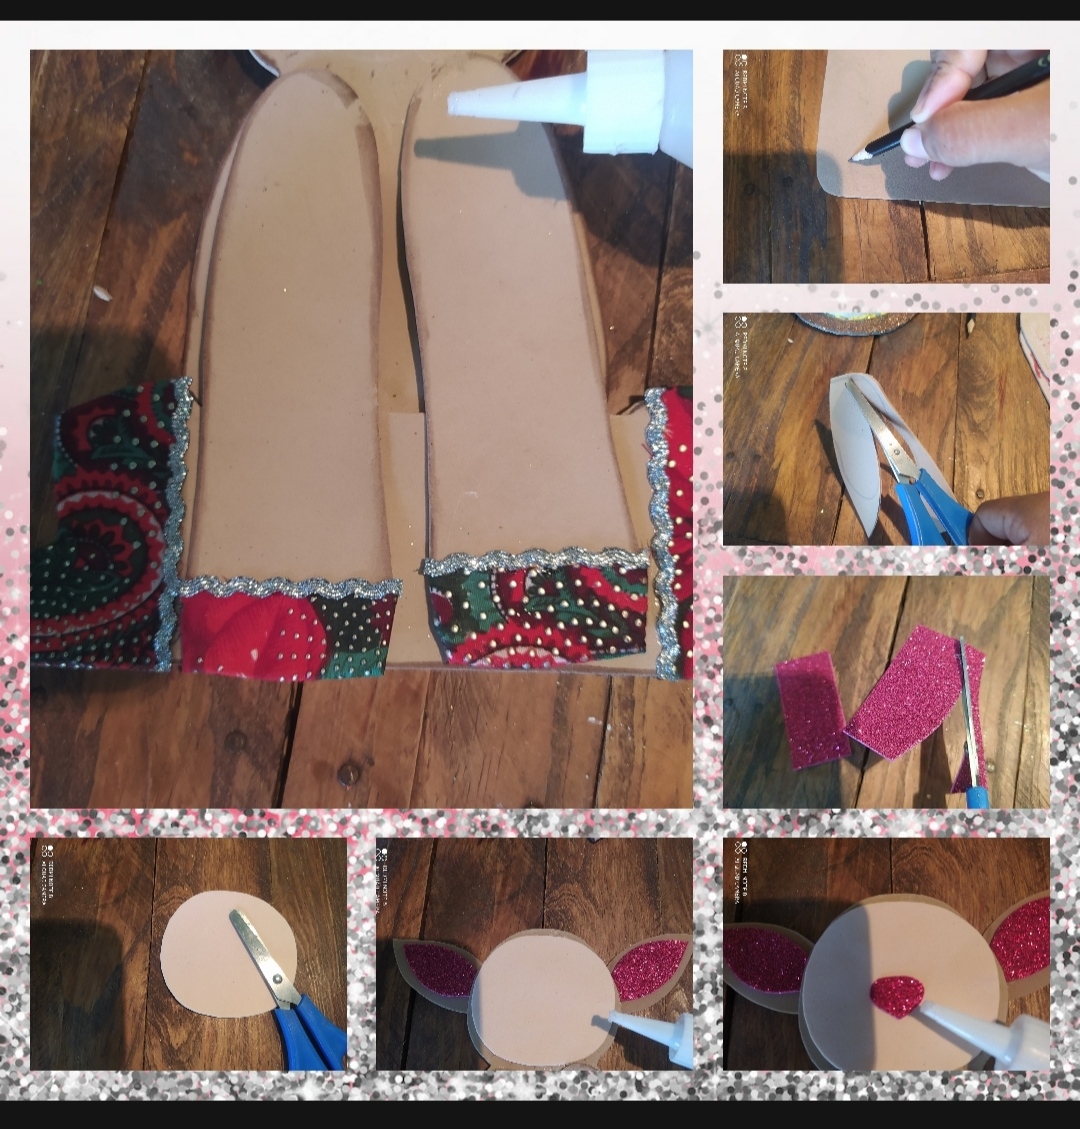
When we have the assembled base of this ornament, we are going to proceed to make the theme, in this case it will be a beautiful reindeer, to create this, we mark the body, the legs, in the light brown foam and all this is cut out followed by That the flower fabric is glued to the tip of the legs and the silver ribbon along the edge of it, this will look like this.
❄️ Segundo paso:
Cuando tenemos la base armada de este adorno ,vamos a proceder hacer la temática ,en este caso será un hermoso reno , para la creación de este ,se marca el cuerpo ,las patas ,en el foami marrón claro y todo esto se recorta seguido de que se le pega la tela de flores en la punta de las patas y la cinta plateada por la orilla de esta ,esto nos quedará así .
🦌 Third step:
Then, we mark the ears in the brown foam and in the frosty red, we also cut out a circle. Once we have all the pieces, we assemble our reindeer in the following way, we glue this aforementioned to the head, we Cut out the nose and glue it on, and finally the legs are paid off.
🦌 Tercer paso :
Luego ,se marca las orejas en el foami marrón y en el rojo escarchado ,también se recorta un círculo , Una vez que se tiene todas las piezas ,armamos nuestro reno de la siguiente manera, se le pega esto antes mencionado a la cabeza ,se recorta la nariz y se le pega ,y por último se.le pagan las patas .
❄️Fourth step:
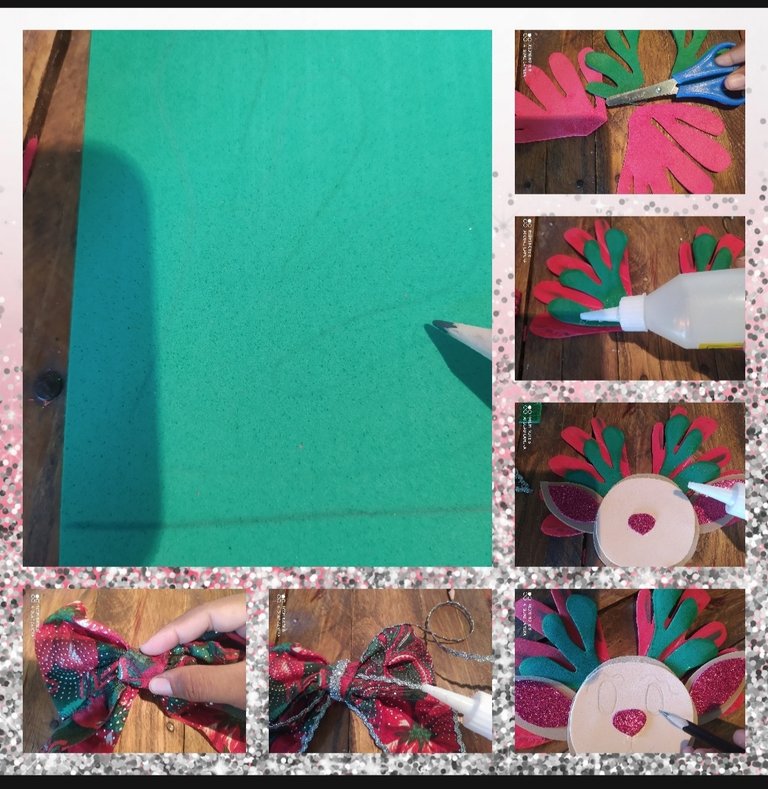
On the red and green foam, mark the reindeer's antlers, one larger than the other, they are cut out, then the smallest antler is glued on top of the large one, this is glued to the head, and the eyes and mouth are marked, with The fabric is made into a bow, and with the Silver tape it is glued along the entire edge of the bow 🎀.
❄️Cuarto paso:
En el foami rojo y verde se marca los cuernos del reno uno más grande que el otro ,se recortan ,después se pega el cuerno más pequeño encima del grande esto se le pega a la cabeza , y se le marca los ojos y boca , con la tela se arma un lazo ,y con la cinta Plateada se le pega por toda la orilla del lazo 🎀.
🦌Fifth step:
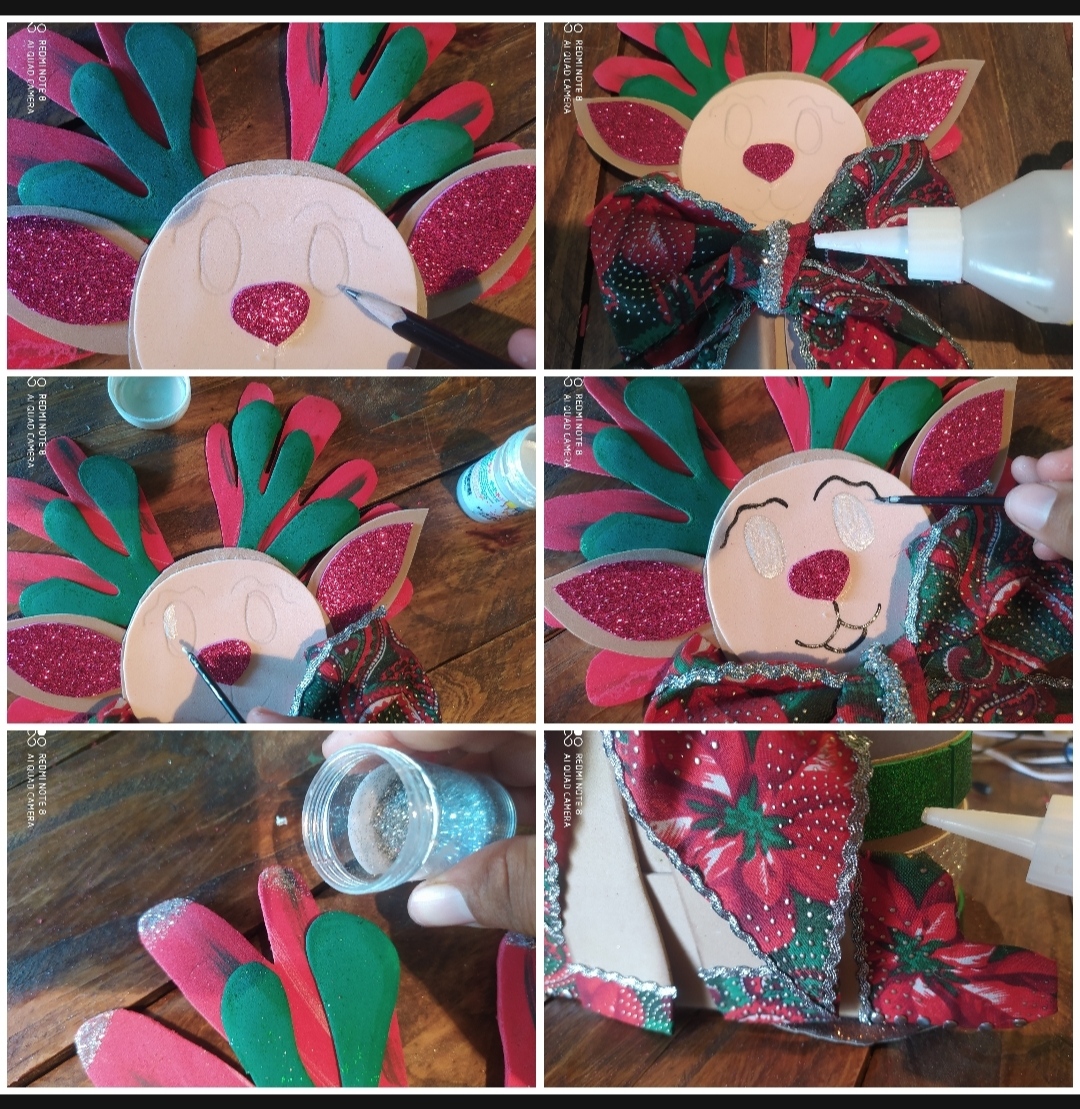
To complete this creation, the eyes are painted with white cold paint, the mouth and eyebrow are highlighted with black paint, silver glitter is put on the tips of the antlers and the reindeer is glued when it is ready from the base to the bottom. one side of it, and the pearls are glued to said base.
🦌Quinto paso :
Para culminar está creación ,se pintan los ojos con la pintura al frio blanca ,se remarcan la boca y ceja con la pintura negra , se le pone escarcha plateada en las puntas de los cuernos y se pega el reno cuando está listo de la base hacia un lado de esta ,y se le pegan las perlas en dicha base .
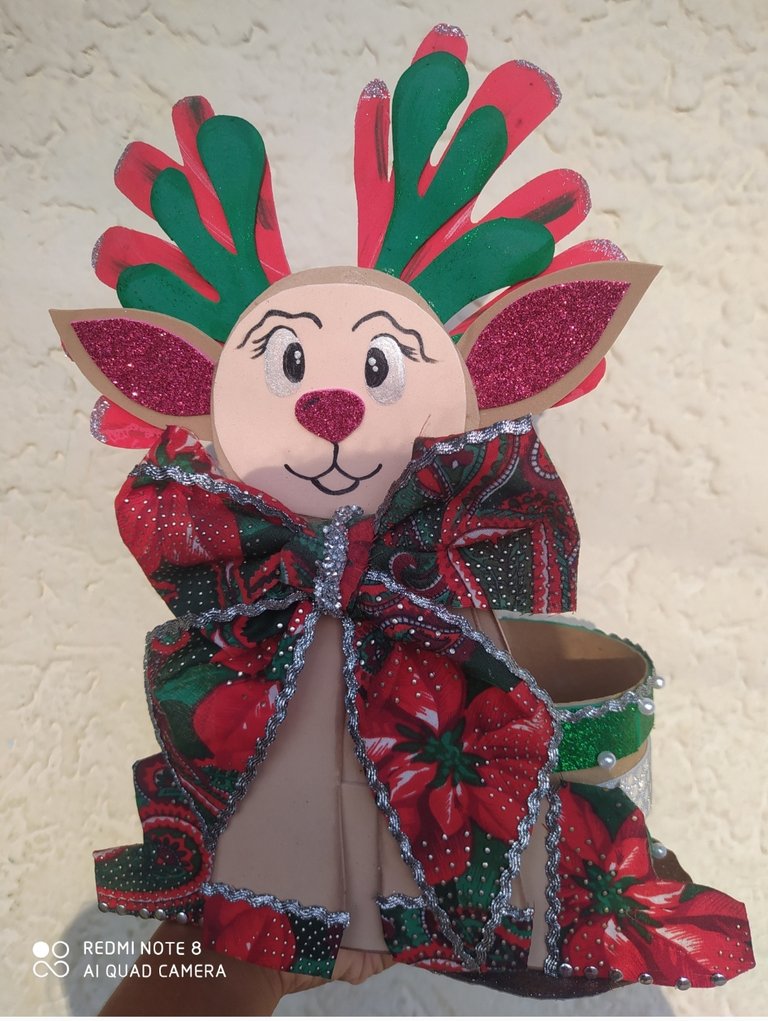
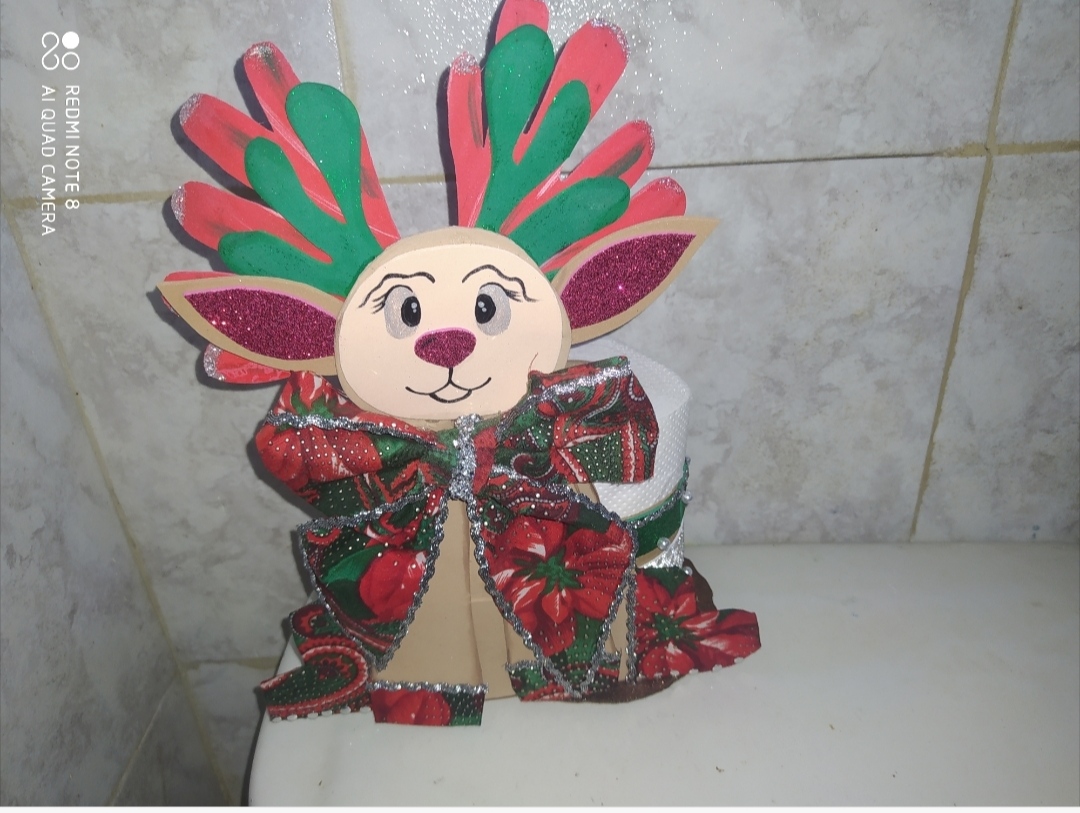
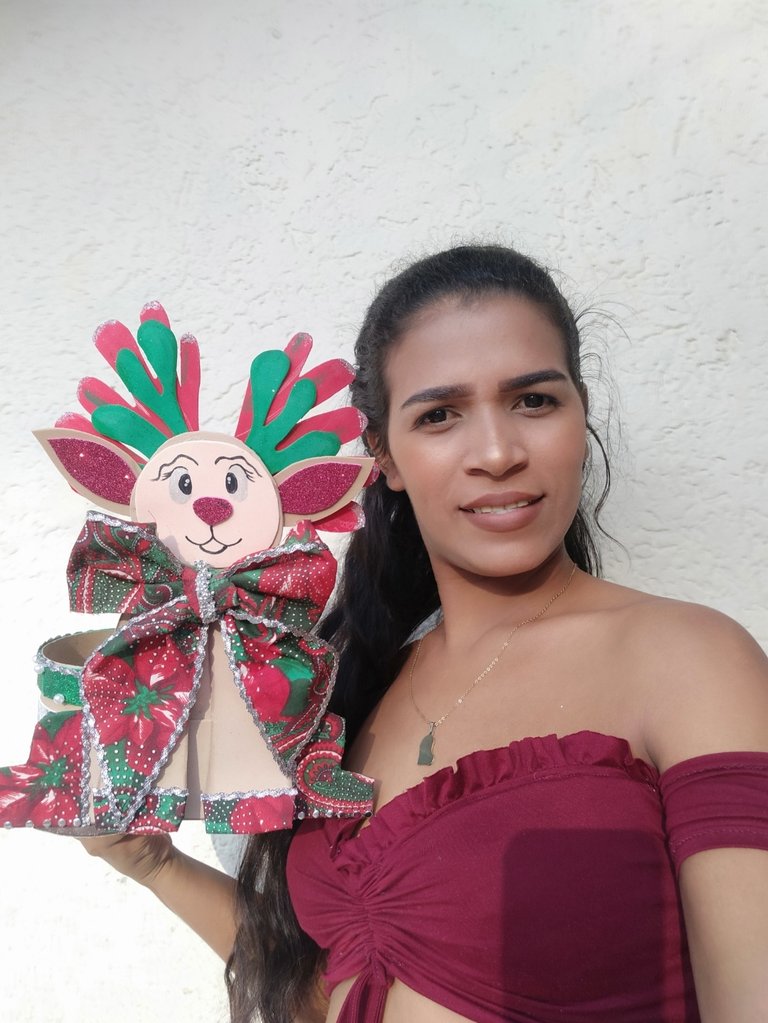
This way we will have this toilet paper holder to decorate our bathroom, I hope you like the result.
De esta manera nos quedará este porta papel higiénico para decorar nuestro baño, espero les guste el resultado.
Greetings to everyone in this community and Merry Christmas, we will see you another time with more content.
Saludos para todos en esta comunidad y Feliz navidad, nos veremos en otra oportunidad con más contenido.
📸The photos are my property, they were taken with my Redmi Note 8, my photos were edited with the Picsart app and I used Google translator.
📸Las fotos son de mi propiedad fueron tomadas con mi Redmi Note 8 ,mis fotos fueron editadas con la app Picsart y utilice traductor de Google.


