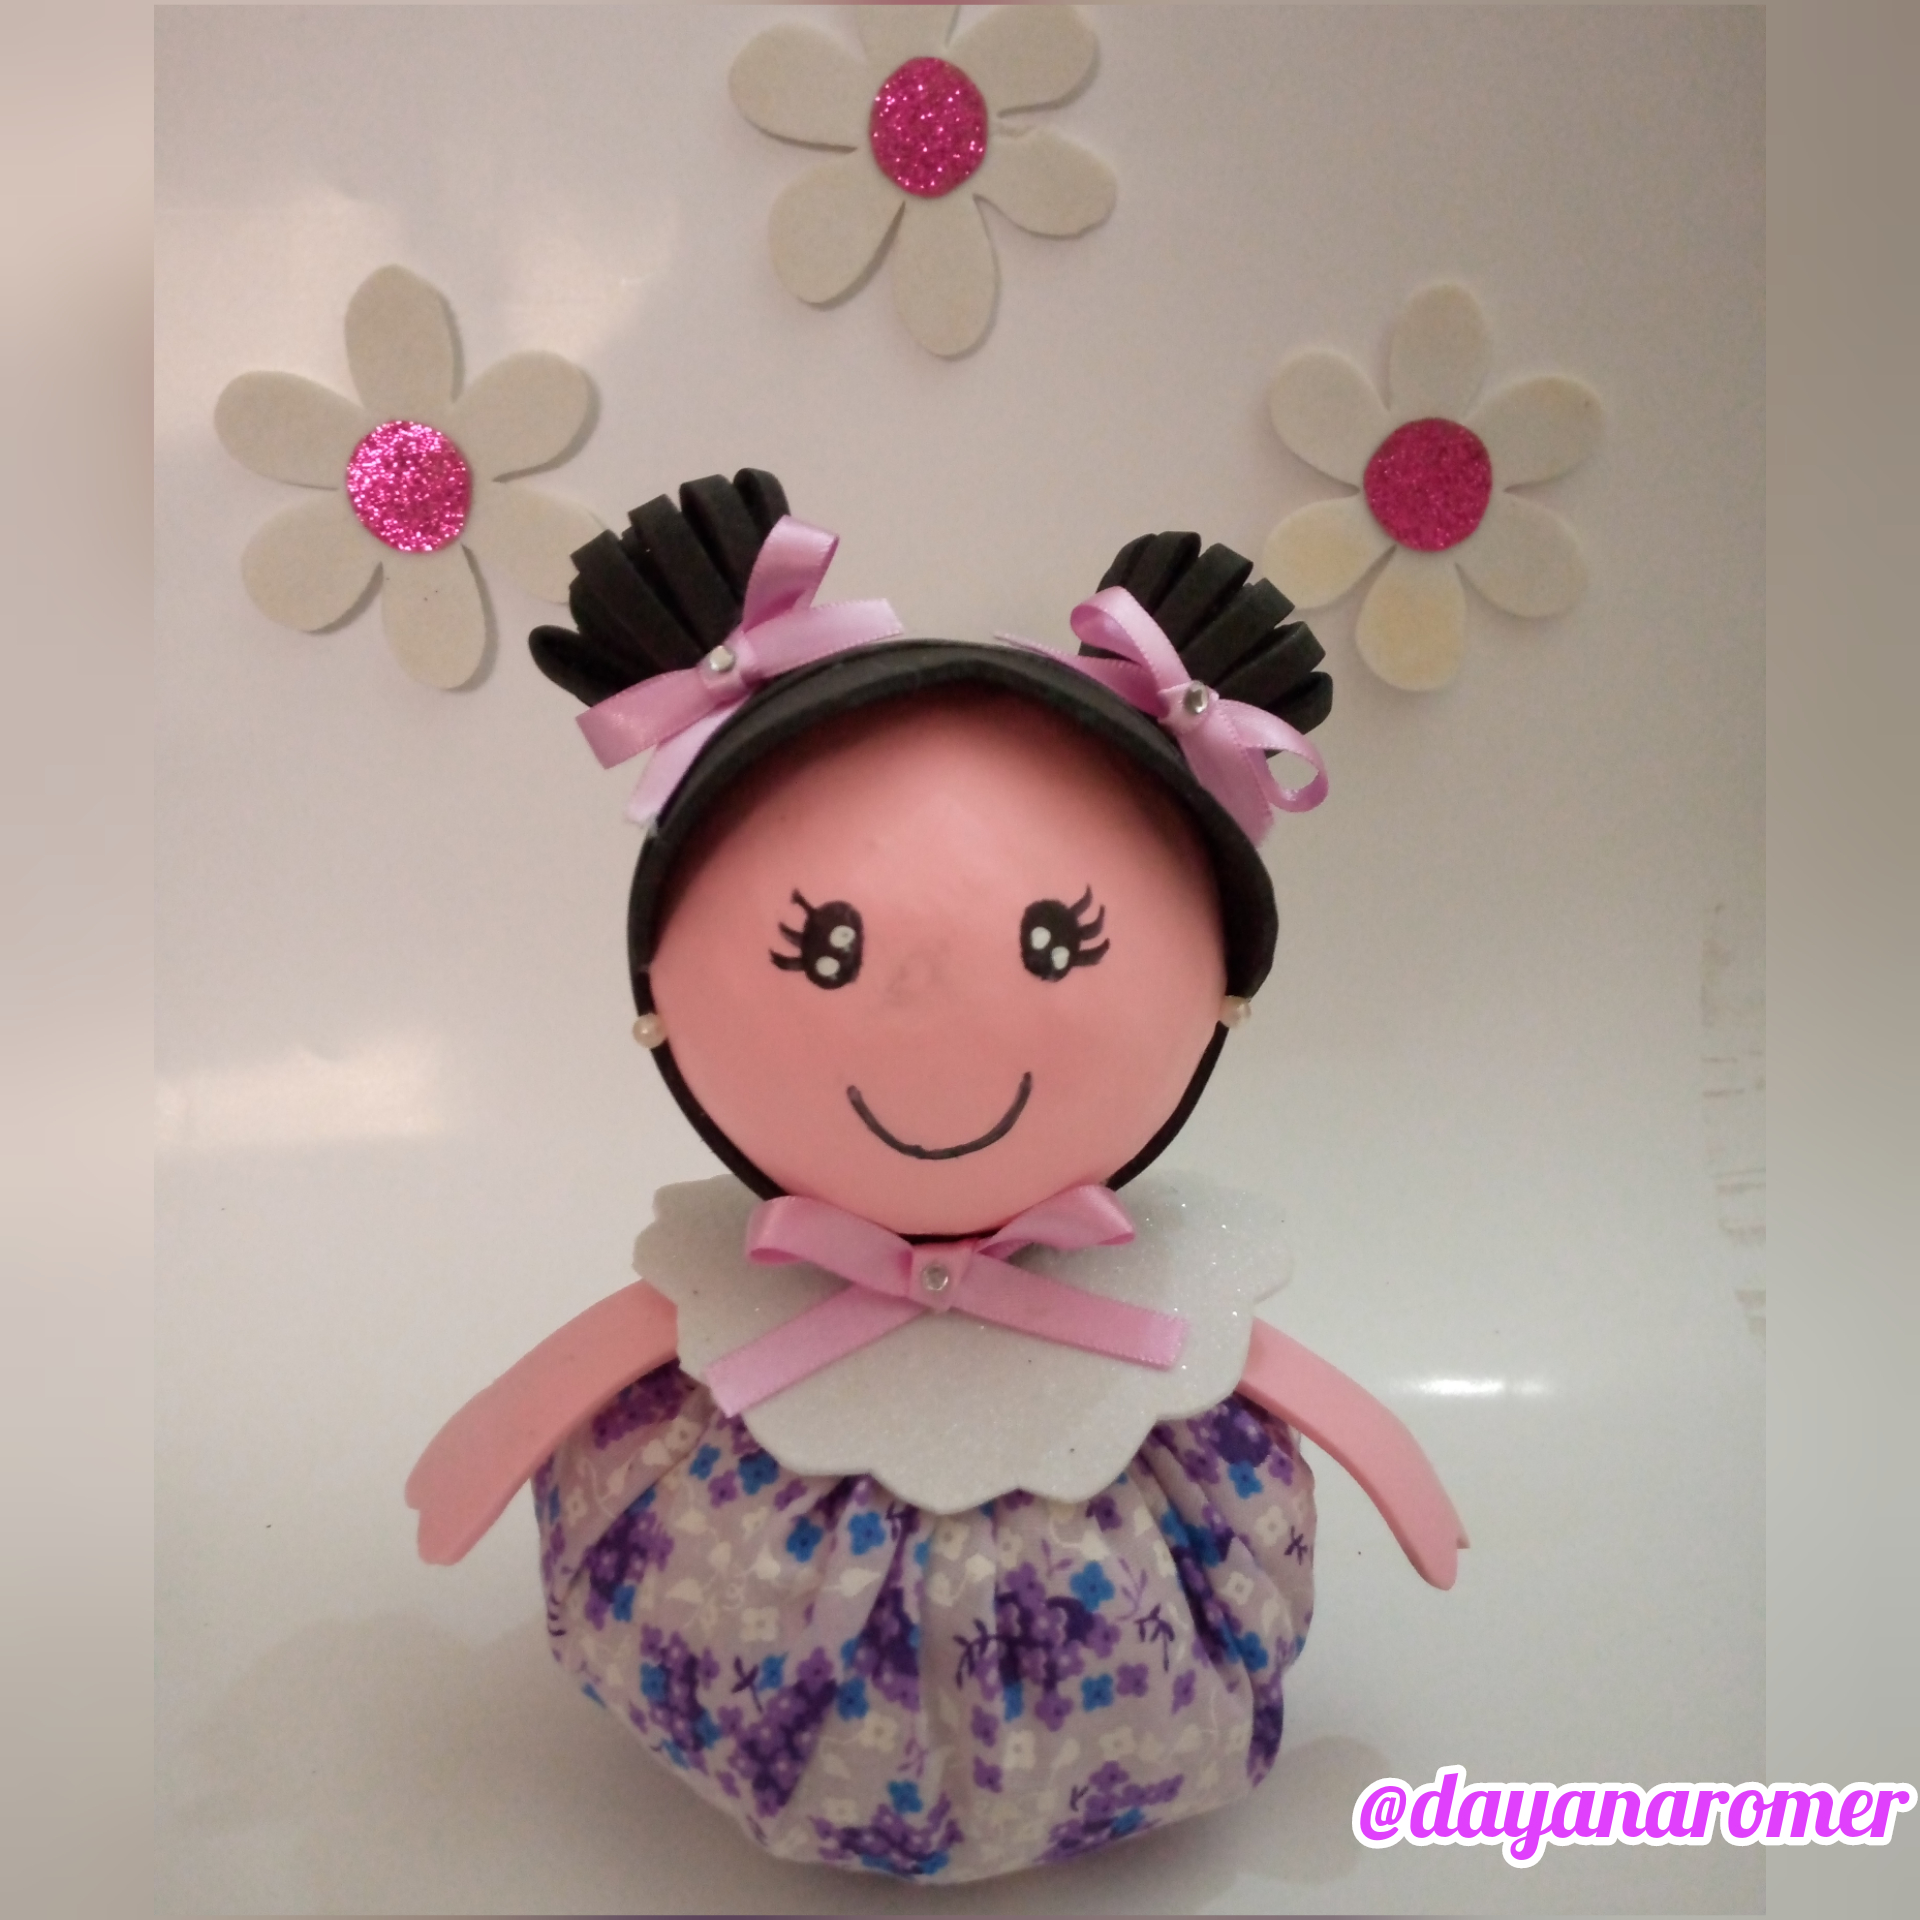
Muy buenas tardes apreciados amigos creativos, amantes de las manualidades y de crear, espero se encuentren excelente, hoy quiero compartirles como hacer una linda muñeca hecha con foami y tela.
Ideal para las princesas de la casa, para obsequiar y también podemos darle la utilidad de alfiletero espero les guste tanto como a mi, les muestro su elaboración.
Very good afternoon dear creative friends, lovers of crafts and create, I hope you are excellent, today I want to share with you how to make a cute doll made with foami and fabric.
Ideal for the princesses of the house, to give as a gift and we can also give the utility of pincushion I hope you like it as much as I do, I show you its elaboration.
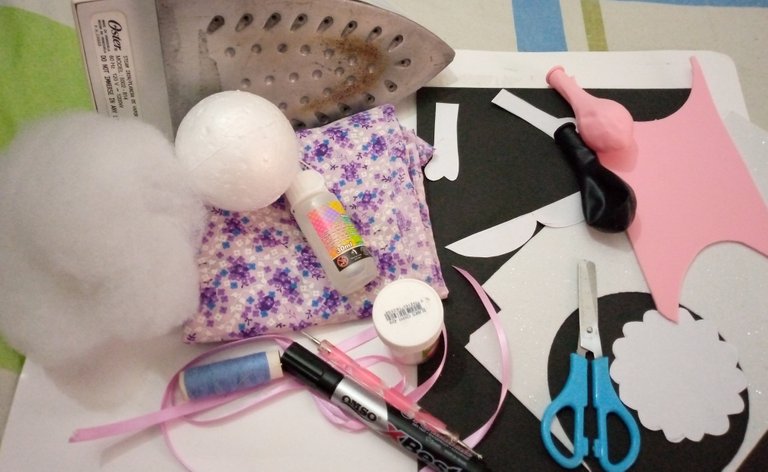
Necesitaremos
- Una esfera de anime de 8cm de diámetro
- 2 globos, negro y rosado
- Foami rosado, negro, blanco
- Tela estampada
- Hilo y aguja
- Relleno de almohada
- Listón color lila
- 2 perlas pequeñas
- 3 piedras decorativas
- Plancha de ropa
- Silicón
- Tijera
- Moldes de brazos, cabello, cuello
- Marcador negro
- Pintura blanca
We will need
- An anime sphere of 8cm in diameter.
- 2 balloons, black and pink
- Pink, black and white Foami
- Printed fabric
- Thread and needle
- Pillow stuffing
- Lilac ribbon
- 2 small beads
- 3 decorative stones
- Clothes iron
- Silicone
- Scissors
- Molds for arms, hair, neck
- Black marker
- White paint
Paso a paso
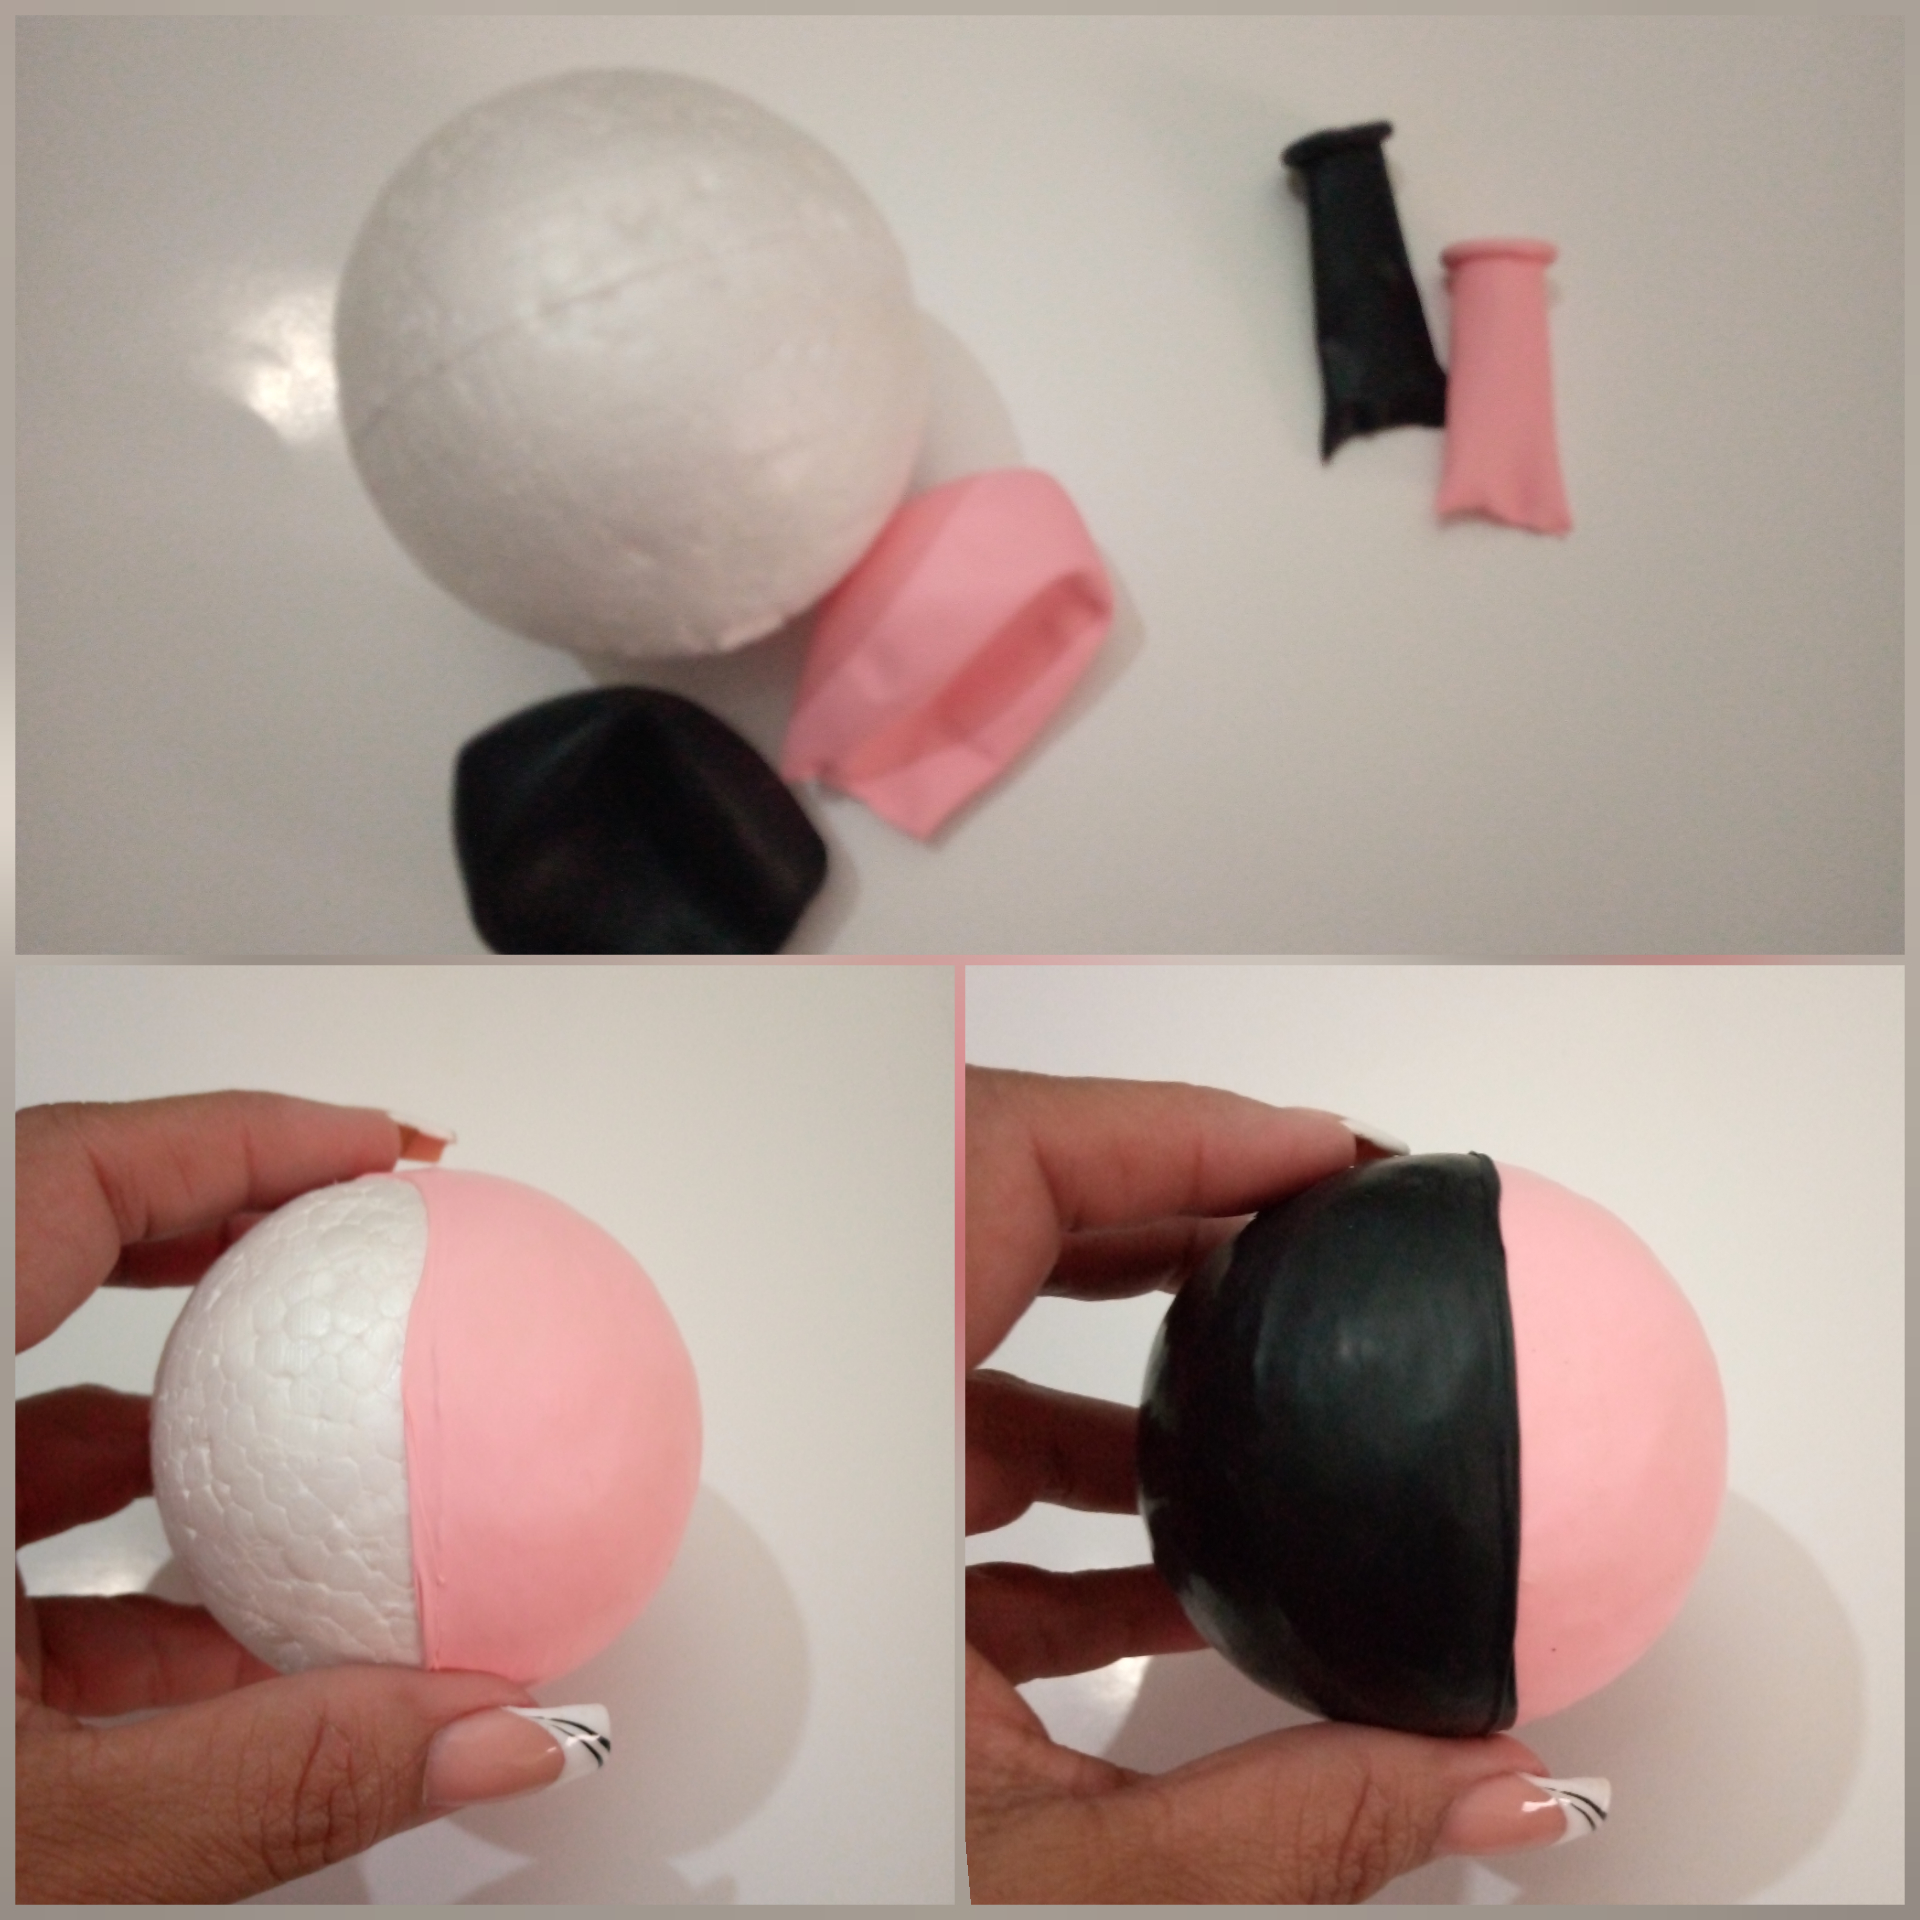
1- Cortaremos los globos hasta donde empieza la parte circular y forramos la esfera de anime con la mitad de cada color, colocamos en primer lugar el rosado y luego el negro.( también puedes utilizar foami para este paso, calientas con la plancha y lo colocas sobre la esfera dándole forma y recortas cada mitad)
Step by step
1- Cut the balloons up to where the circular part begins and line the anime sphere with half of each color, place first the pink and then the black (you can also use foami for this step, heat it with the iron and place it on the sphere giving it shape and cut out each half).
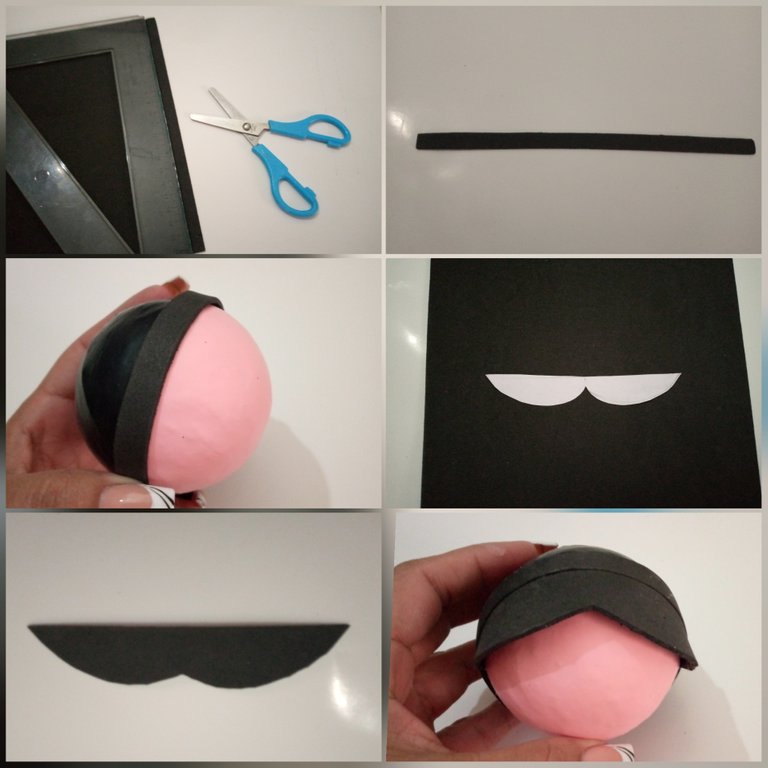
2- Recorta un tira de foami negro de 1 cm de ancho y pega en el centro de la esfera, entre los dos colores para tener un mejor acabado, luego copia, recorta el molde del cabello sobre el foami negro y pega en la parte frontal superior.
2- Cut a strip of black foami 1 cm wide and paste in the center of the sphere, between the two colors to have a better finish, then copy, cut out the hair mold on the black foami and paste on the upper front part.
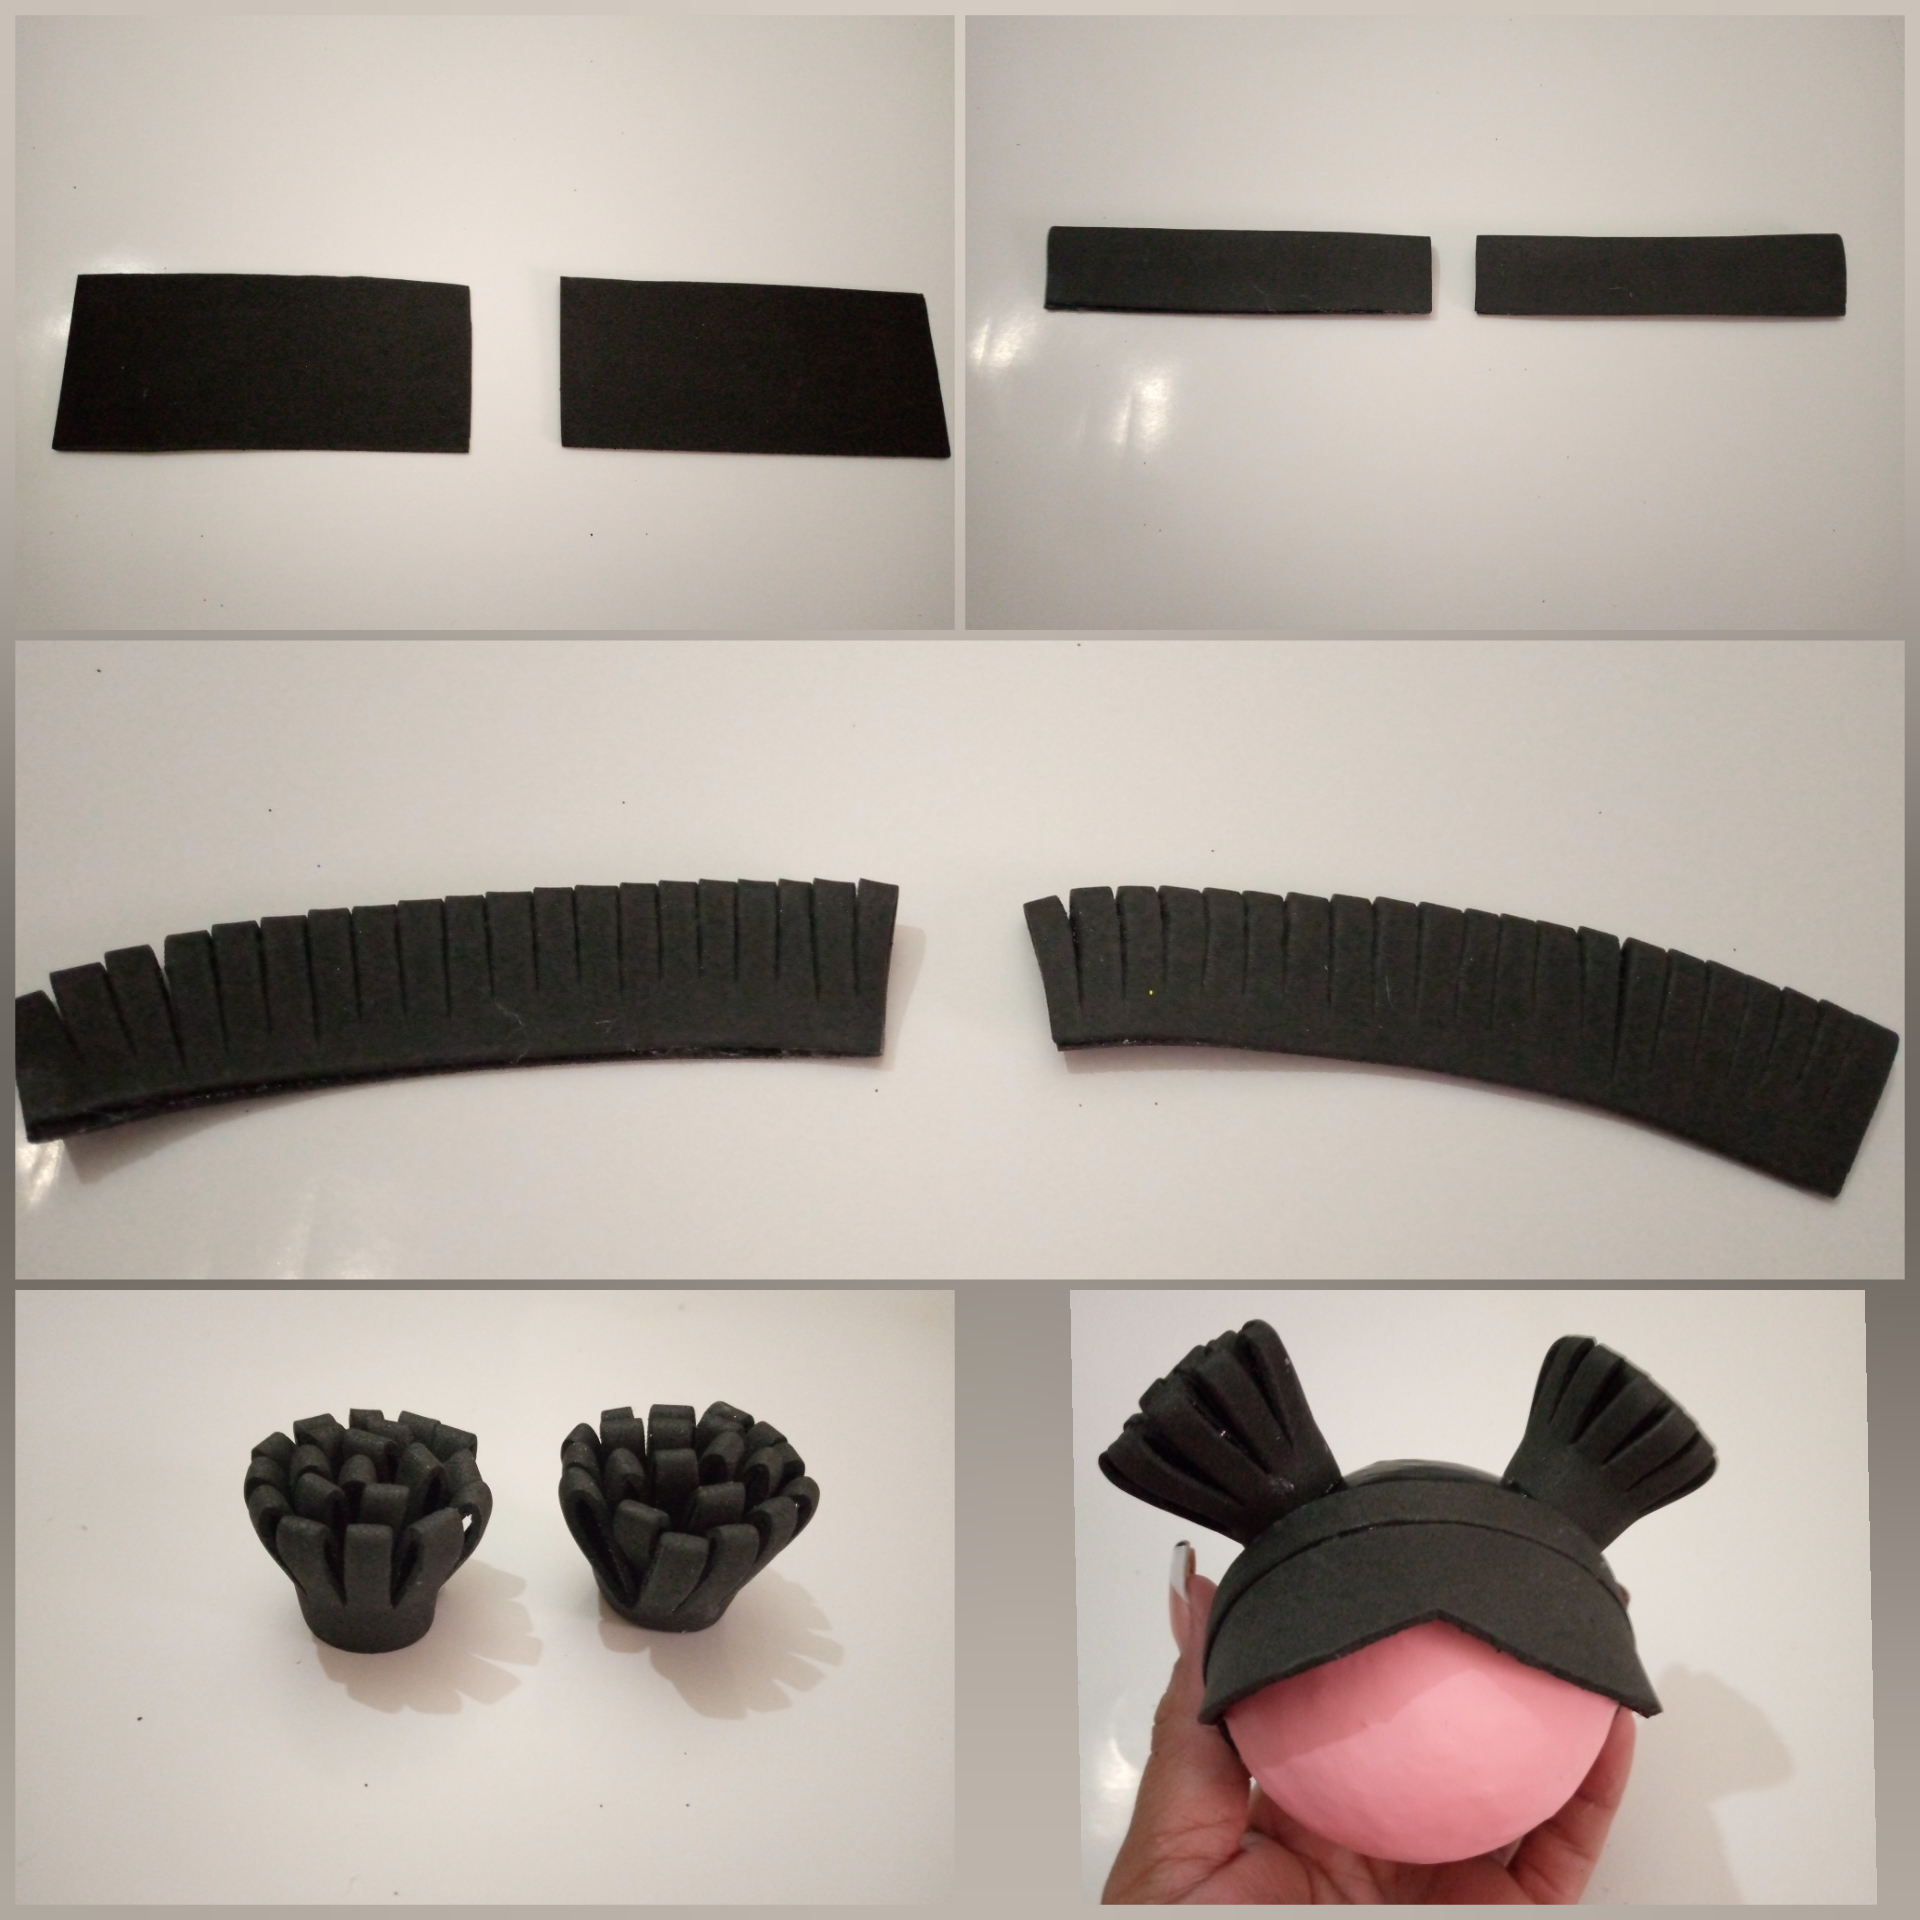
3- Recorta 2 rectángulos de 11x5 cm del foami negro, dobla a la mitad y pega, haz varios cortes en la parte superior, enrolla y pega, tendremos dos monos, pega sobre la esfera.
3- Cut out 2 rectangles of 11x5 cm from the black foami, fold in half and glue, make several cuts in the upper part, roll and glue, we will have two monkeys, glue on the sphere.
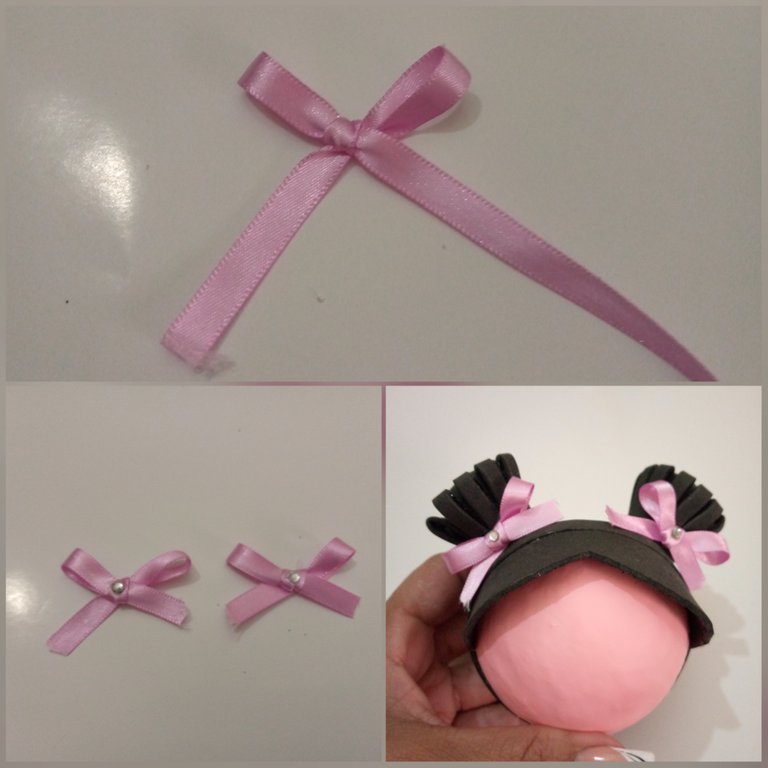
4- Realiza 2 lindos lazos con el listón, decora con una piedra y anexarlos a los moños.
4- Make 2 pretty bows with the ribbon, decorate them with a stone and attach them to the bows.
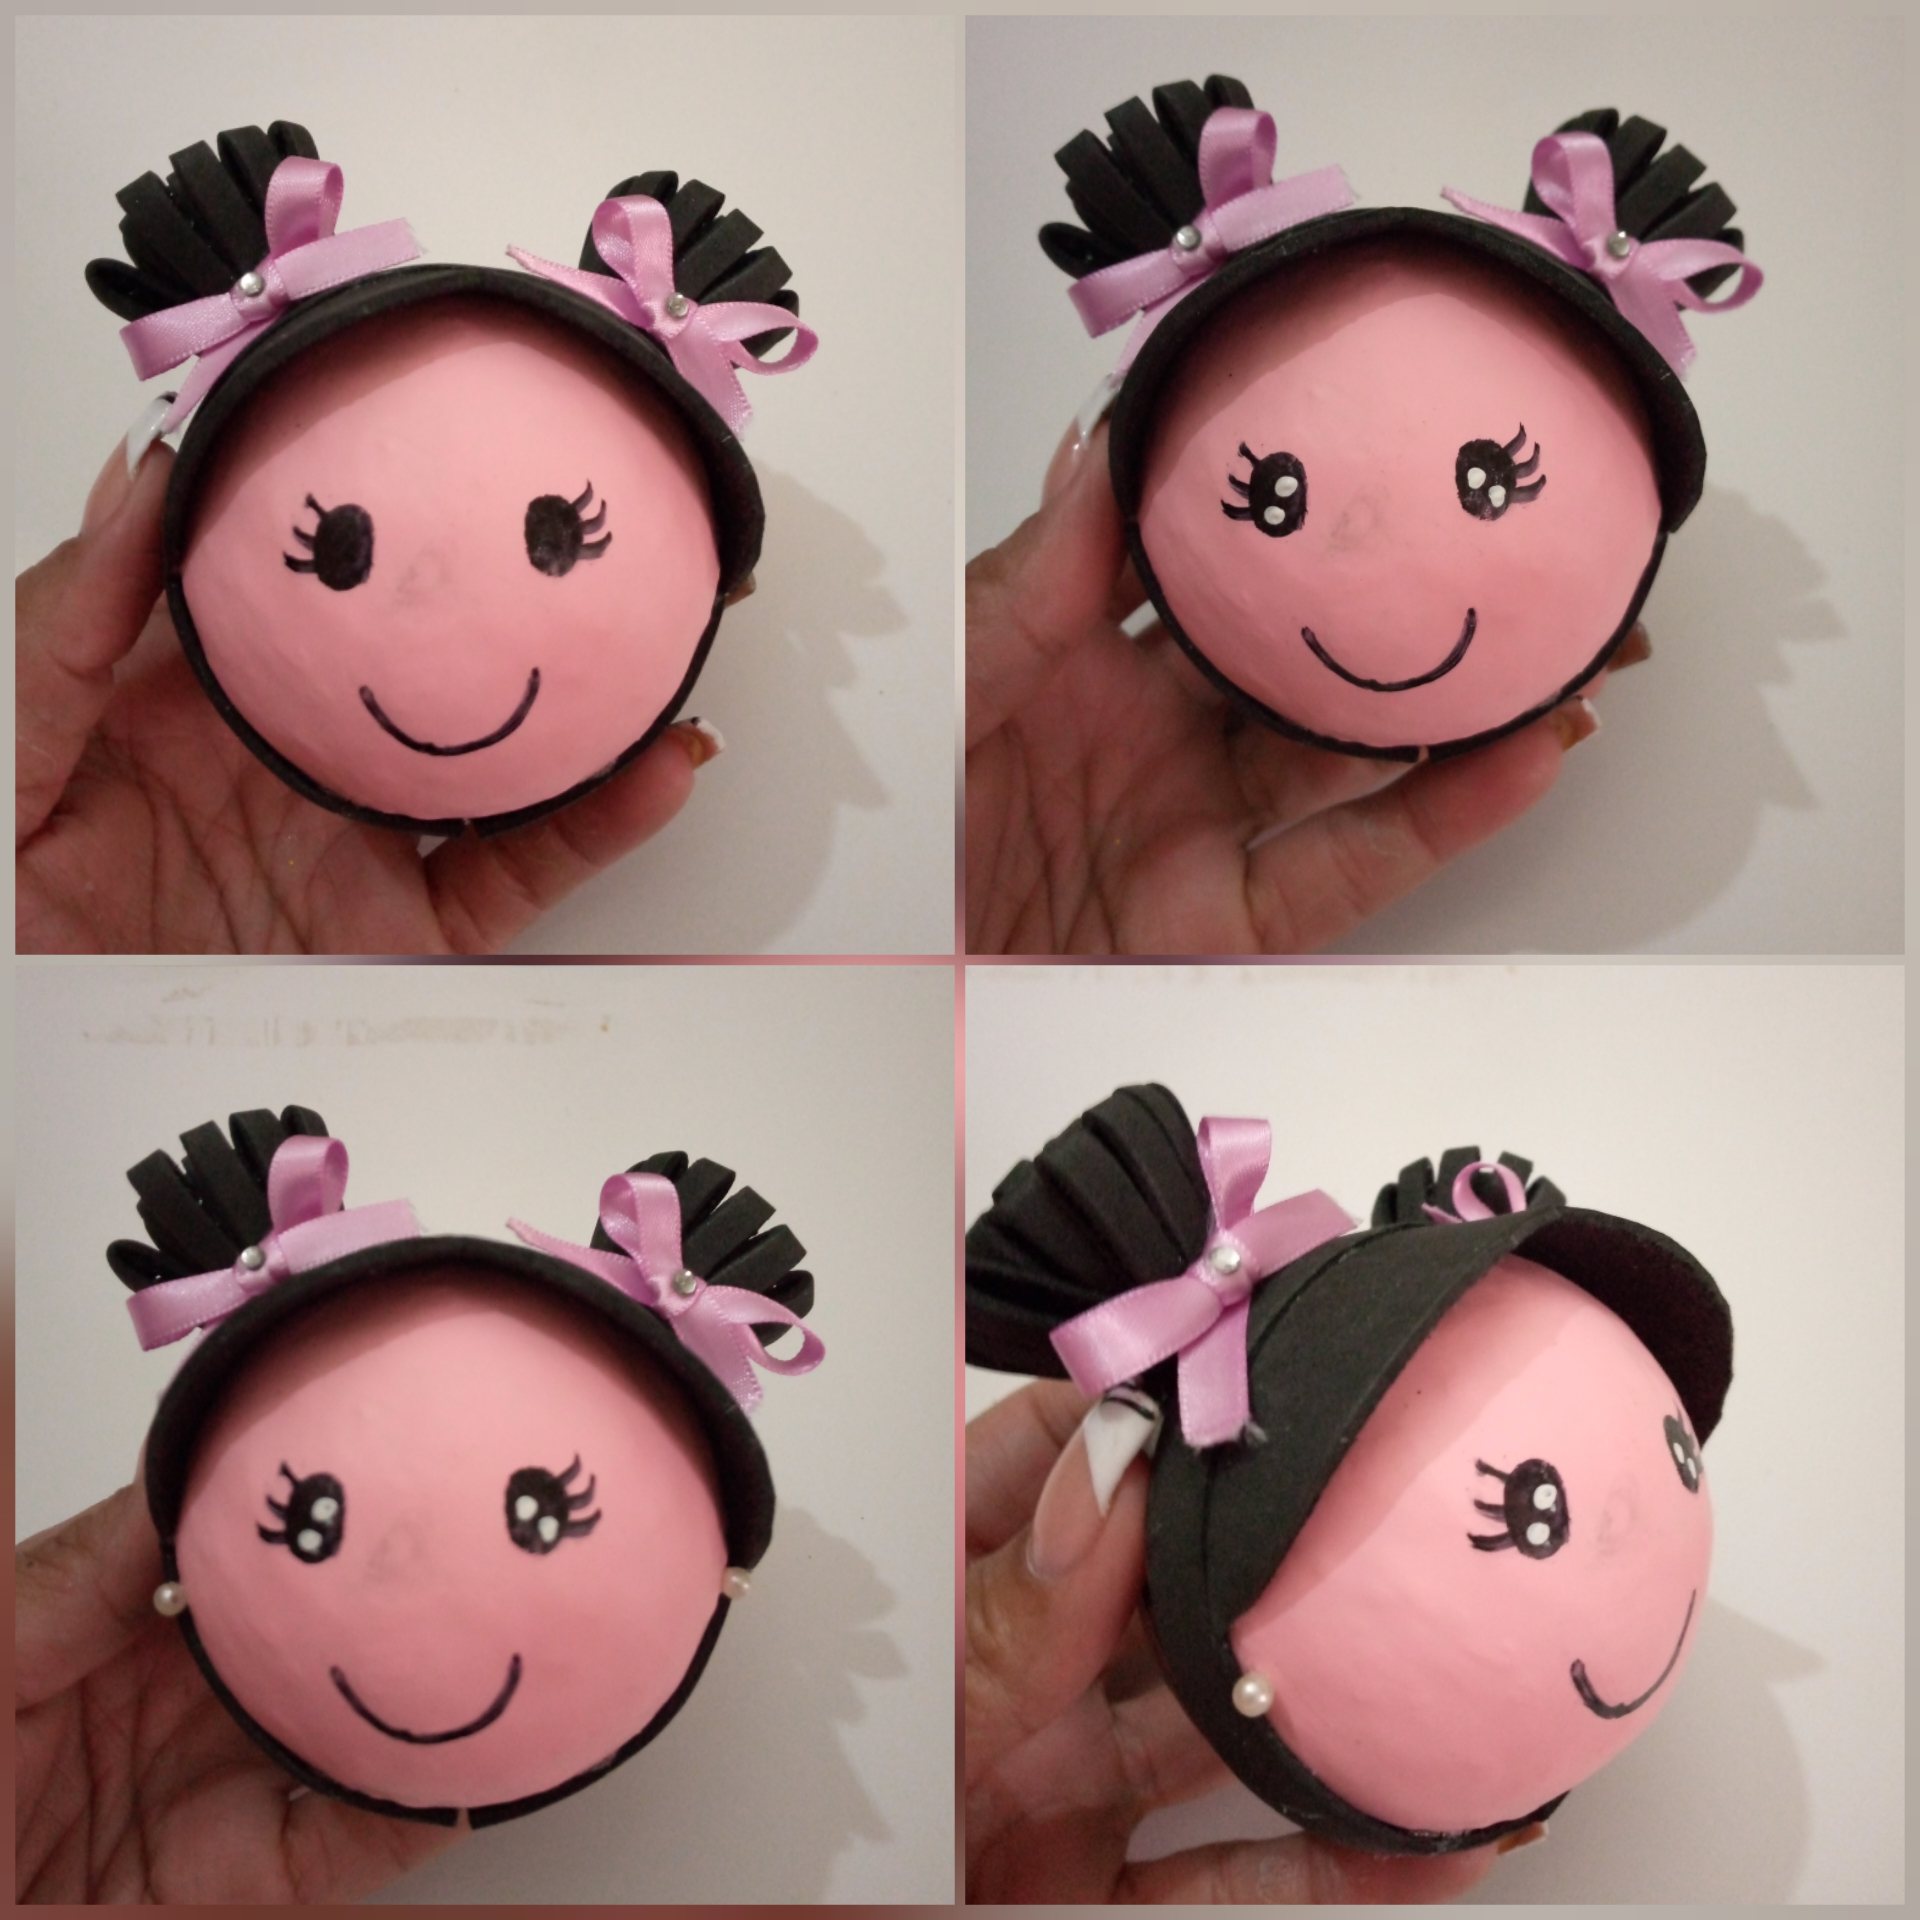
5- Continuamos haciendo un lindo rostro con el marcador negro, con la pintura blanca le damos brillo a los ojos haciendo dos puntos dentro de ellos, y para terminar con la cabeza, pega las perlas como sus aretes
5- We continue making a nice face with the black marker, with the white paint we give brightness to the eyes making two dots inside them, and to finish with the head, glue the pearls as her earrings.
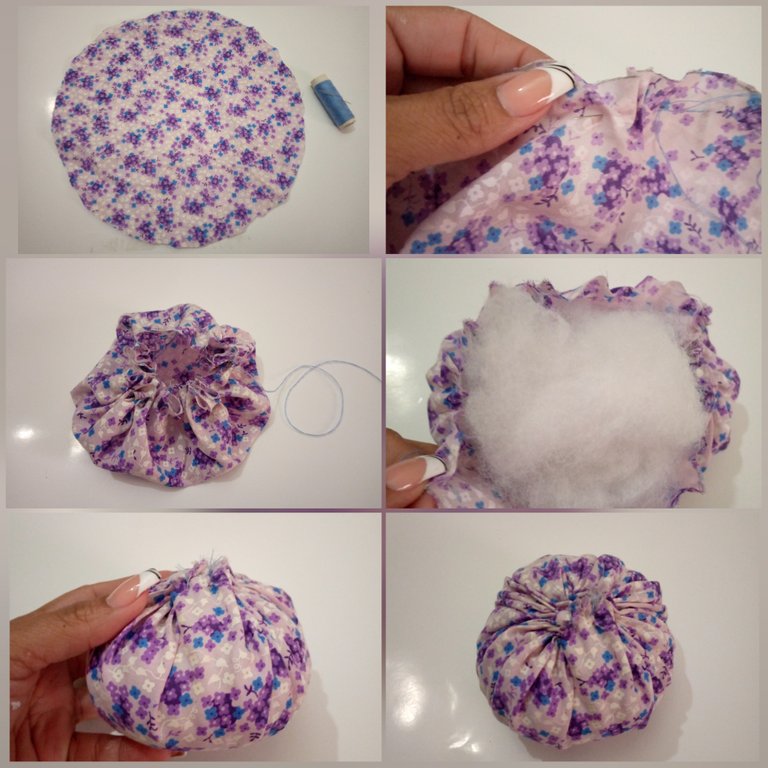
6 - Para el cuerpo recortamos la tela de forma circular con un diámetro de 24cm, cosemos el borde con puntadas y jalar el hilo, colocamos el relleno y cerramos.
6 - For the body we cut the fabric in a circular shape with a diameter of 24cm, sew the edge with stitches and pull the thread, place the stuffing and close.
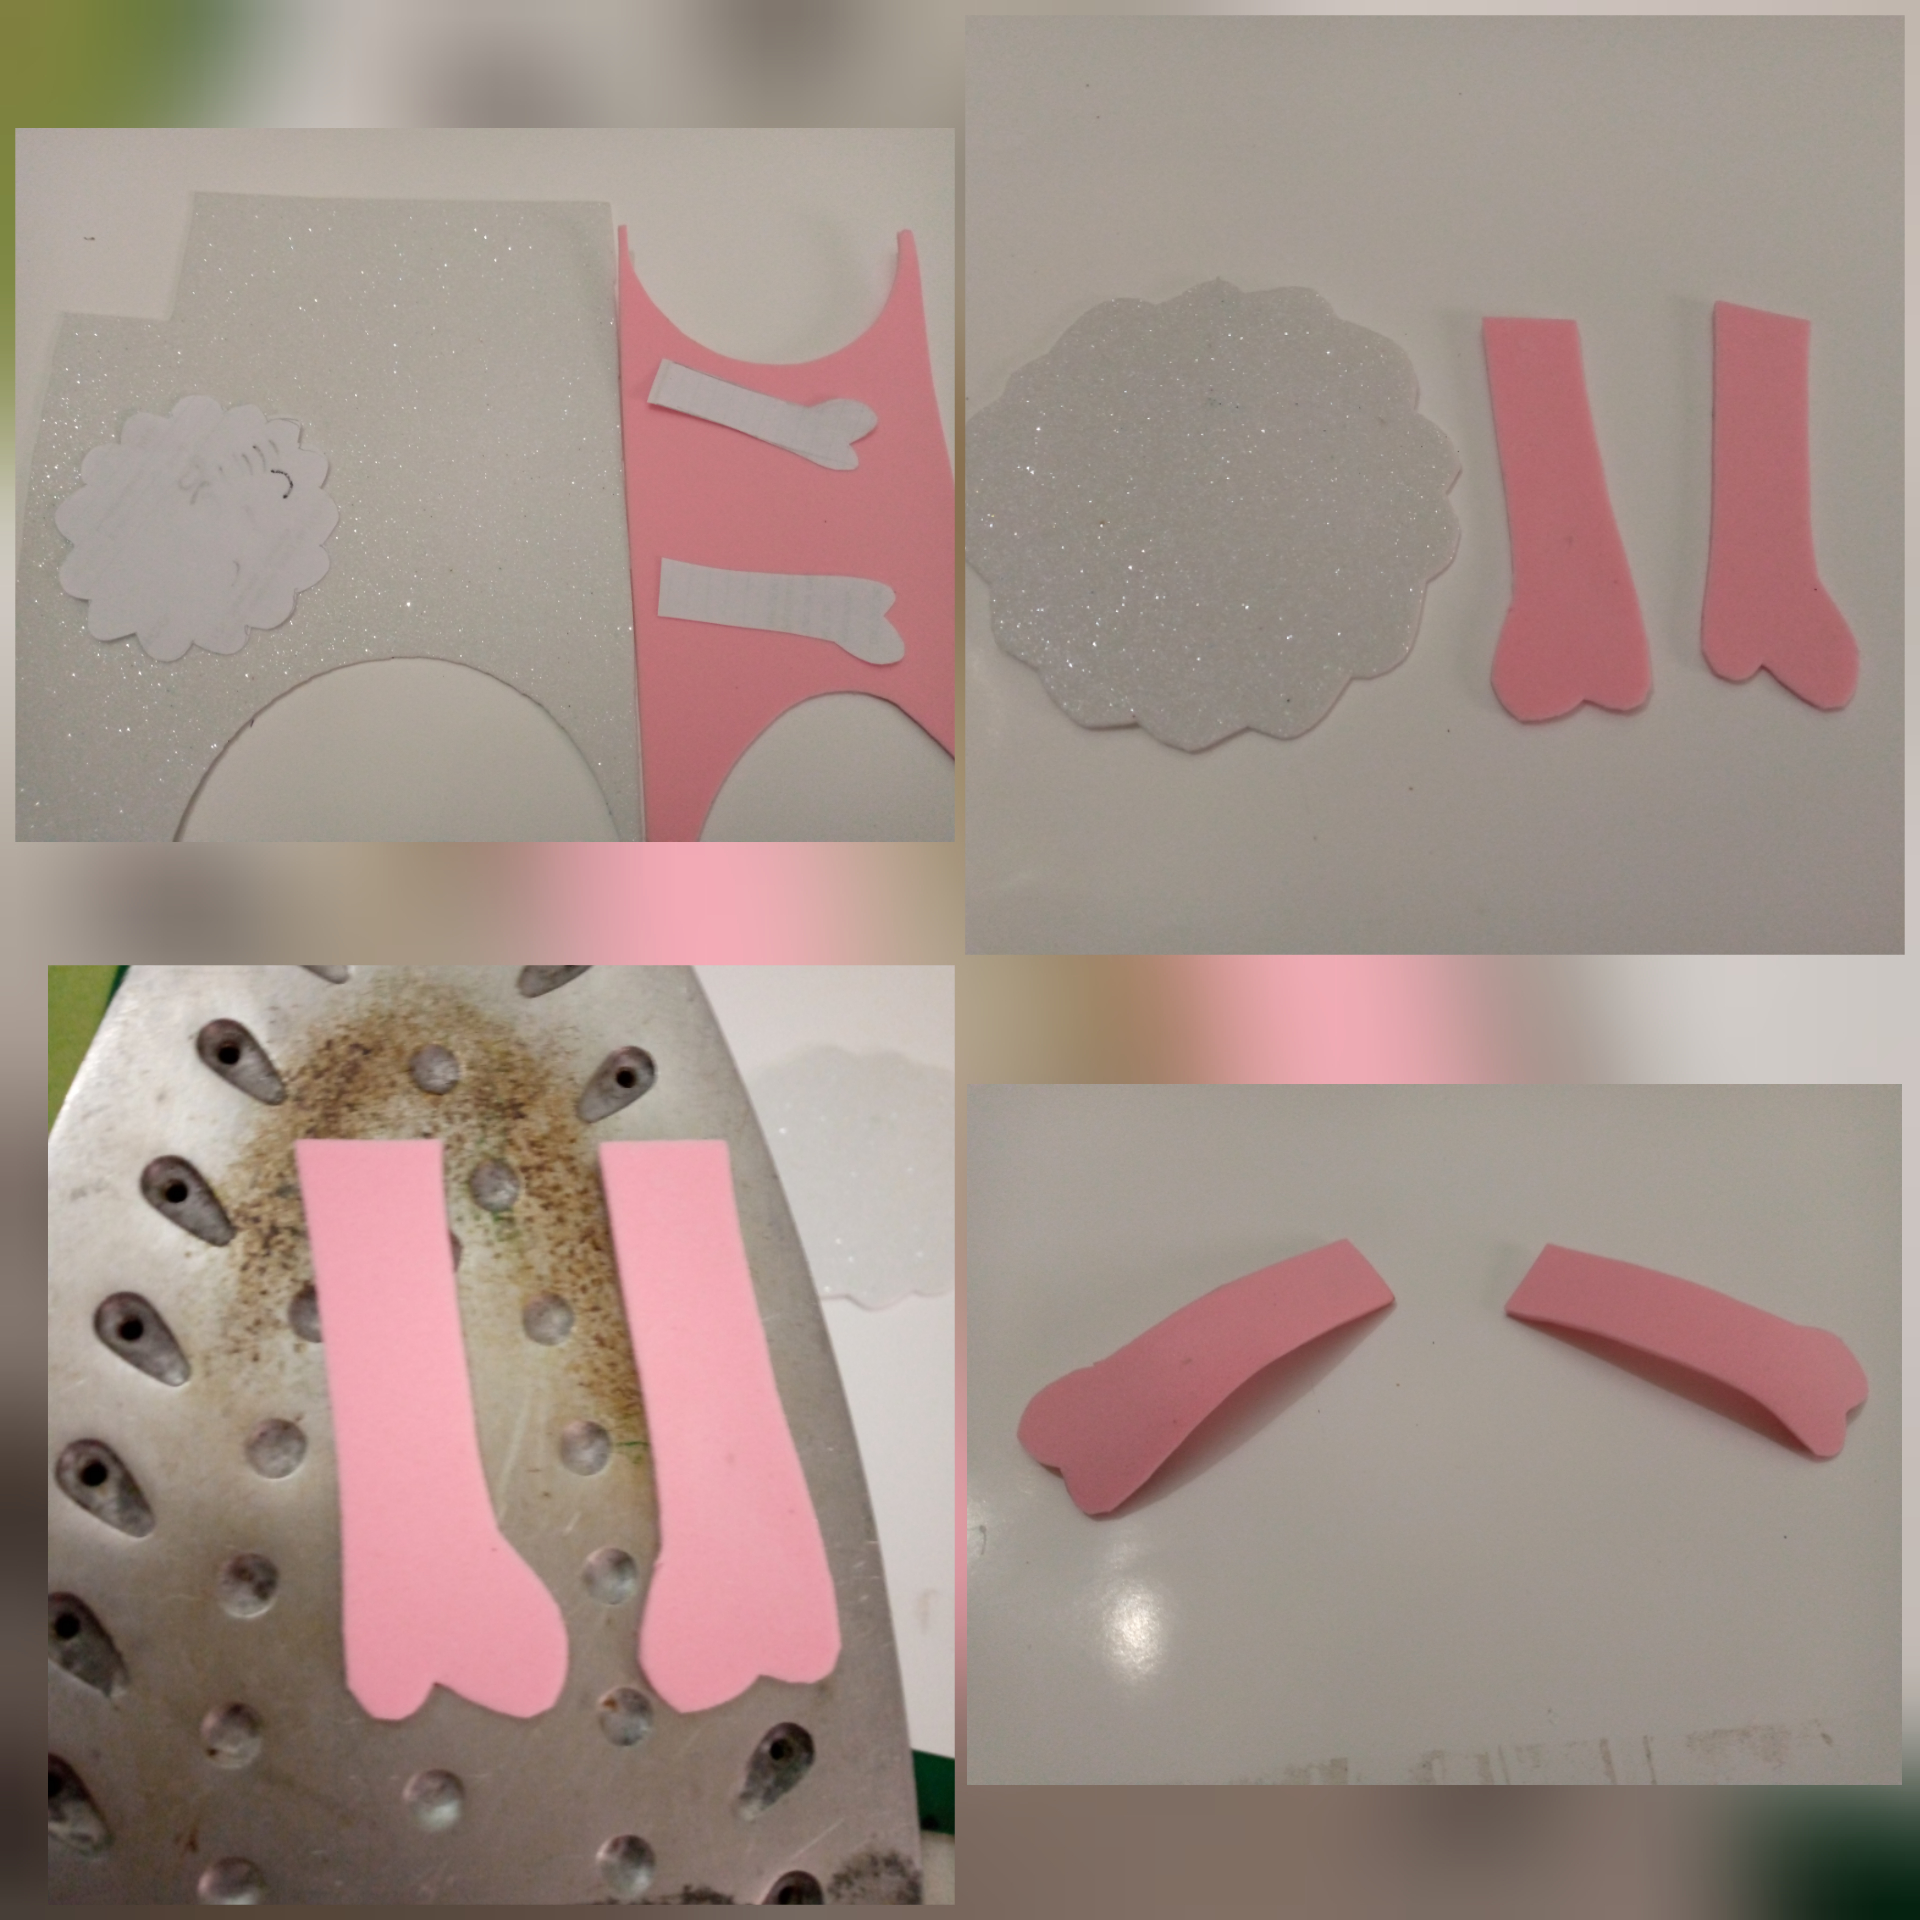
7- Copia y recorta los moldes restantes sobre su color correspondiente, coloca los brazos en la plancha un poco caliente y damos forma.
7- Copy and cut out the remaining molds on their corresponding color, place the arms on the iron a little hot and give shape.
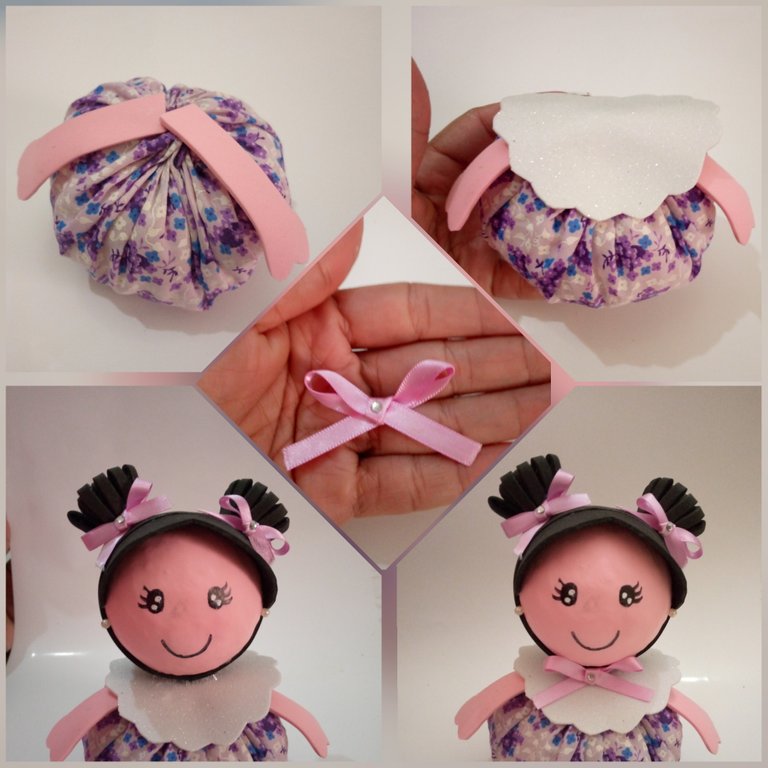
8- Pegamos los brazos arriba del cuerpo, luego el cuello, posteriormente, la cabeza y para finalizar, realiza otro lazo y pega en cuello.
8- Glue the arms on top of the body, then the neck, then the head and to finish, make another loop and glue on the neck.
Resultado
Result
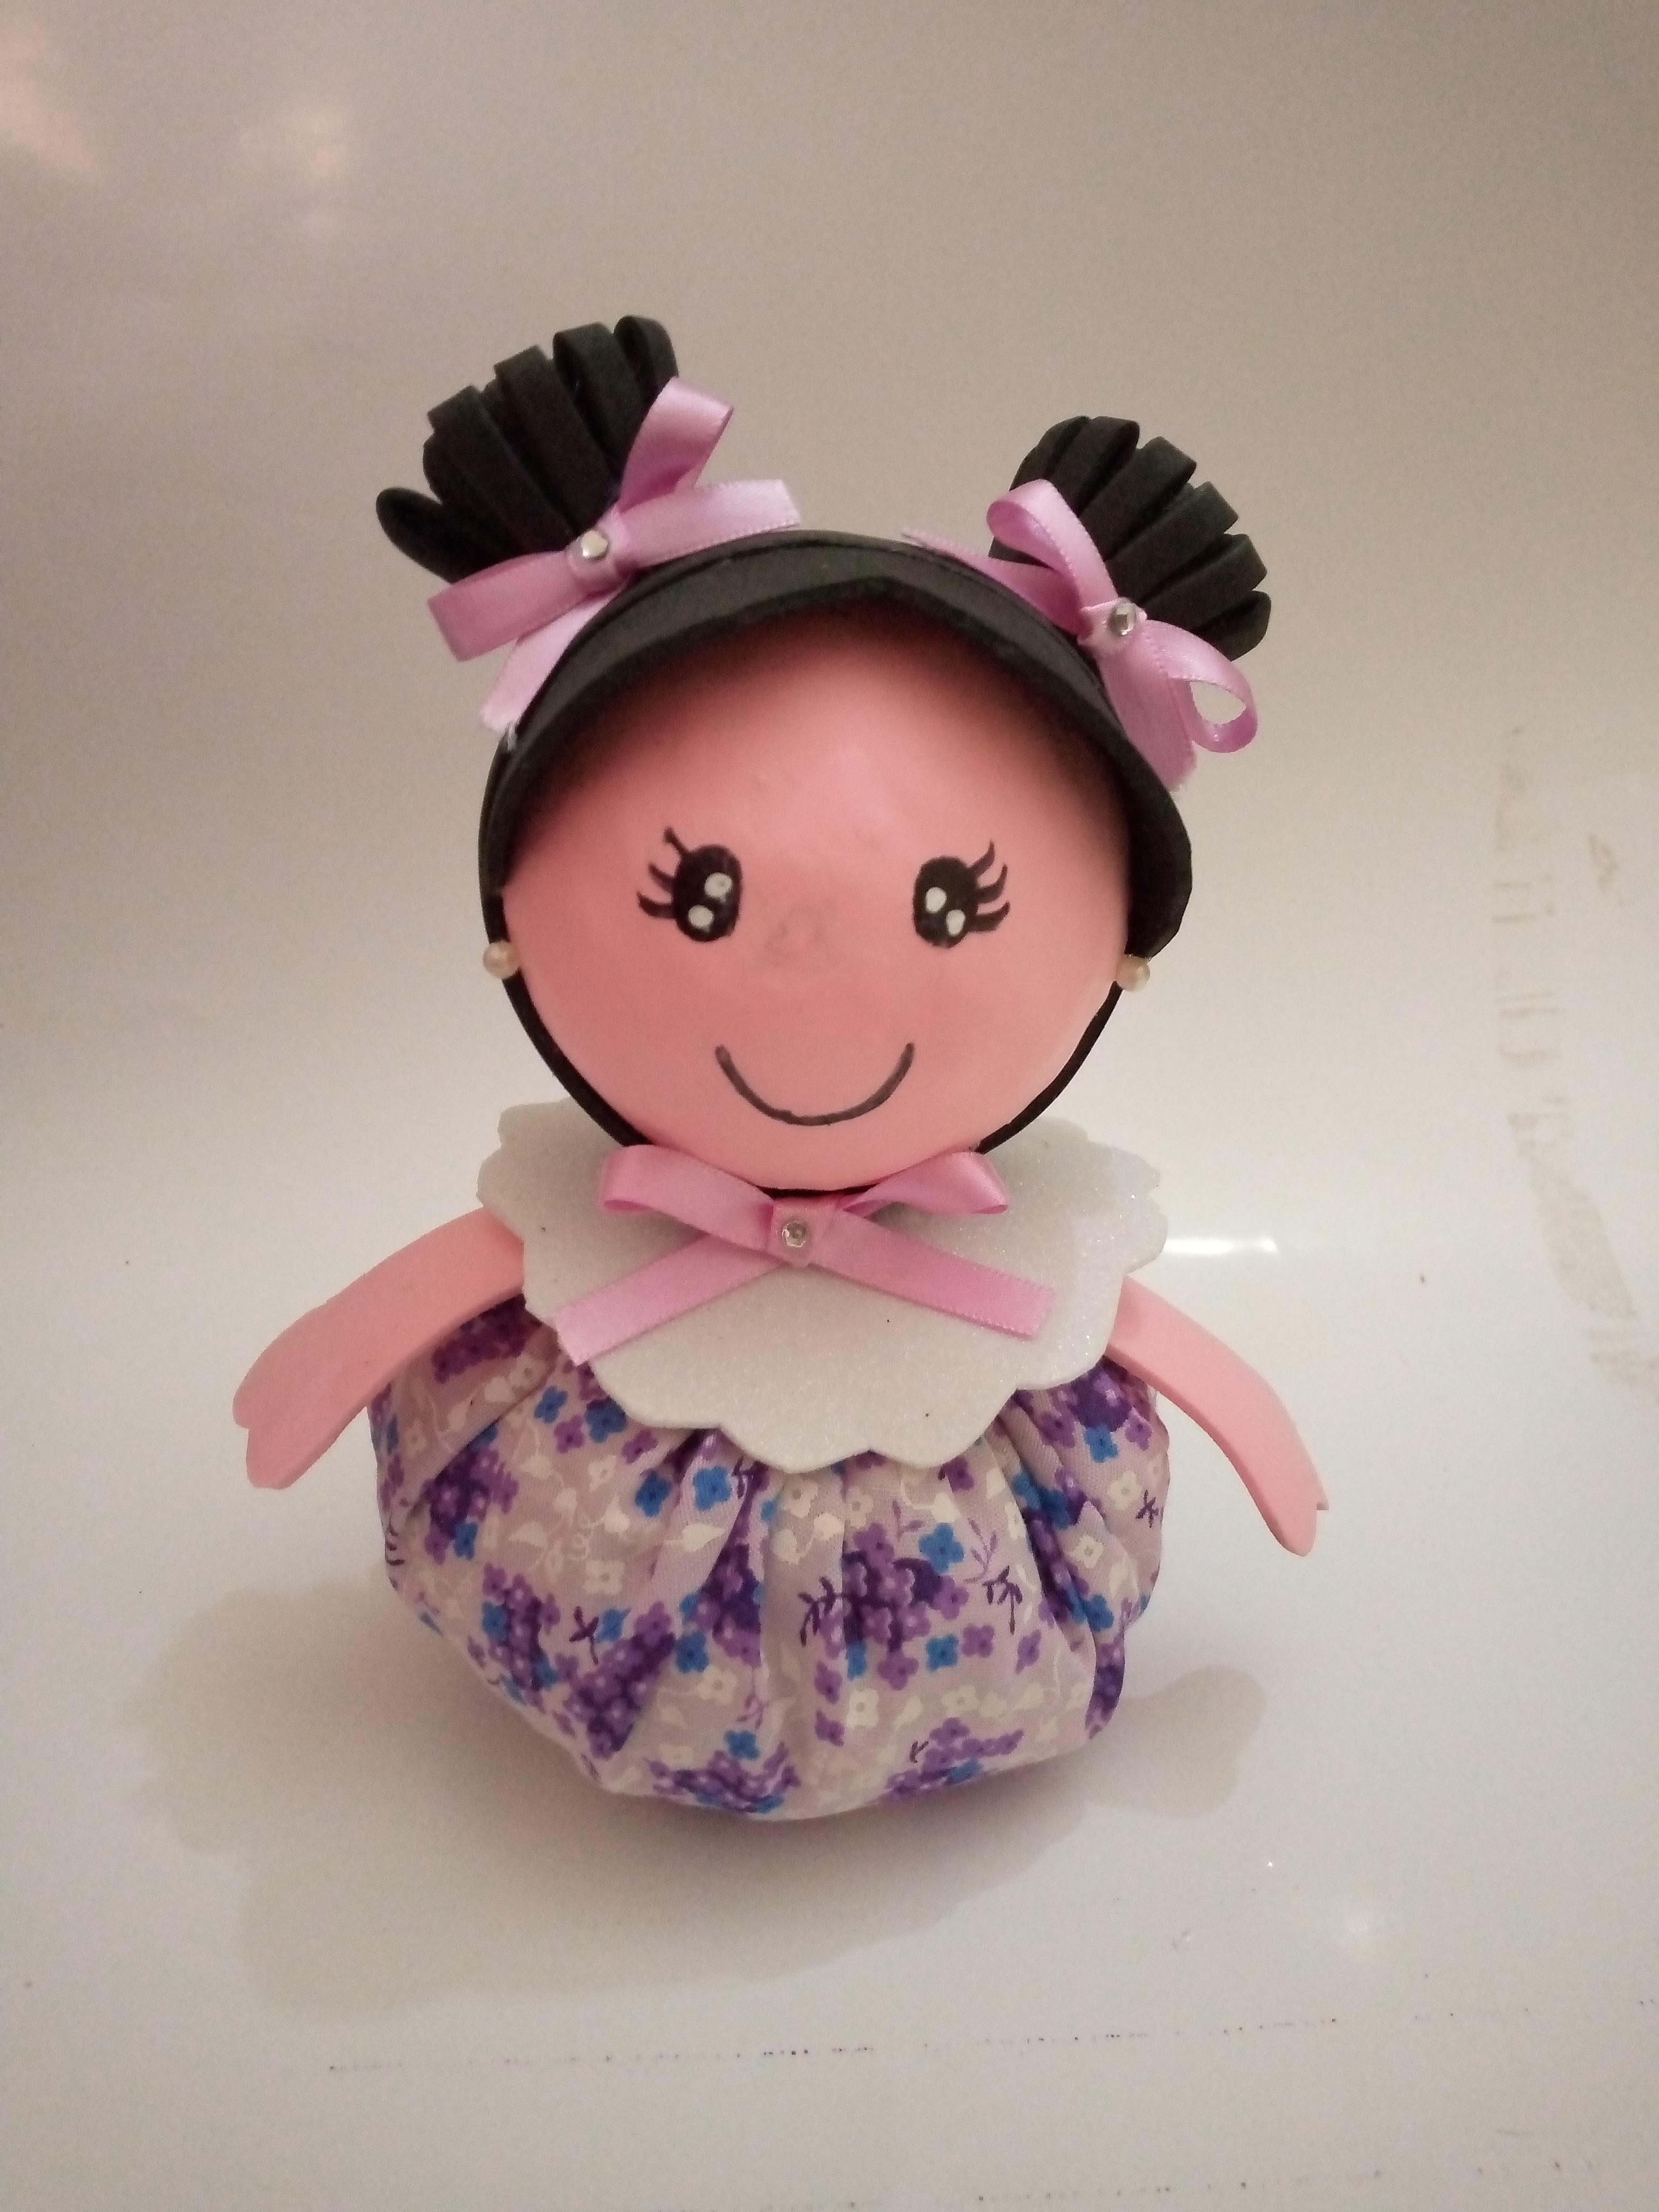
Que linda quedo! no es nada complicado hacerla amigos, espero haya sido de su agrado, muchas gracias por visitar mi blog, nos vemos pronto, Dios les bendiga!
It's not complicated at all, I hope you liked it, thank you very much for visiting my blog, see you soon, God bless you!
@dayanaromer
Editadas con inShop.
Traducido con Deepl traductor.
All photos are my own, taken with my Tecno Spark 6 go cell phone.
Edited with inShop.
Translated with Deepl translator.
