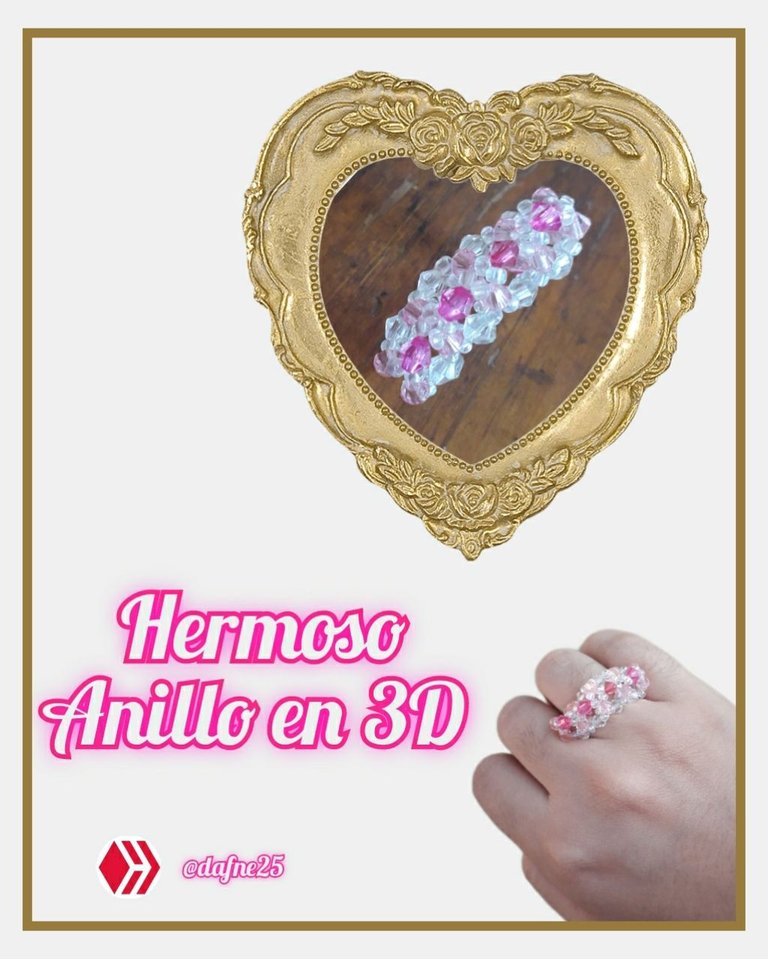

Buenas tardes queridos amigos de Hive y Jewelry, cómo están?, espero que muy bien. En esta hermosa noche les quiero compartir un hermoso anillo en 3D hecho con cristales en dos tonos de rosado, cristales trasparentes y mostacillas trasparentes. Es muy fácil de hacer pero eso no implica que sea rápido, yo tarde un poco en terminarlo porque hay que darle una forma de prisma triangular, lo que es sencillo pero lleva la mayor parte del procedimiento del anillo.
Los Materiales que vamos a necesitar son:
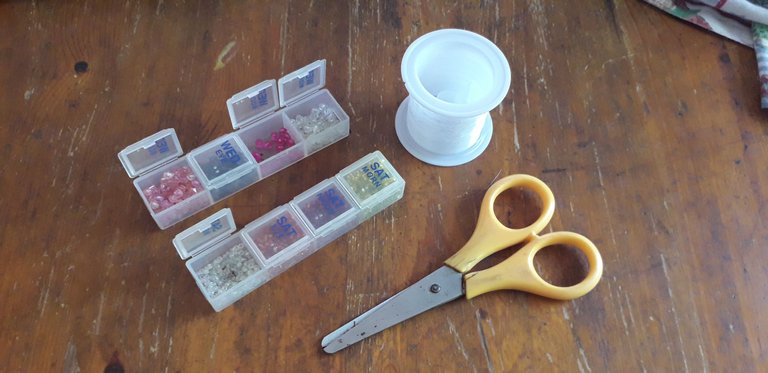
16 Cristales de 3mm color rosado claro
16 Cristales de 3mm trasparentes
Mostacillas trasparentes
1.5 mt de nylon 0,3
Procedimiento
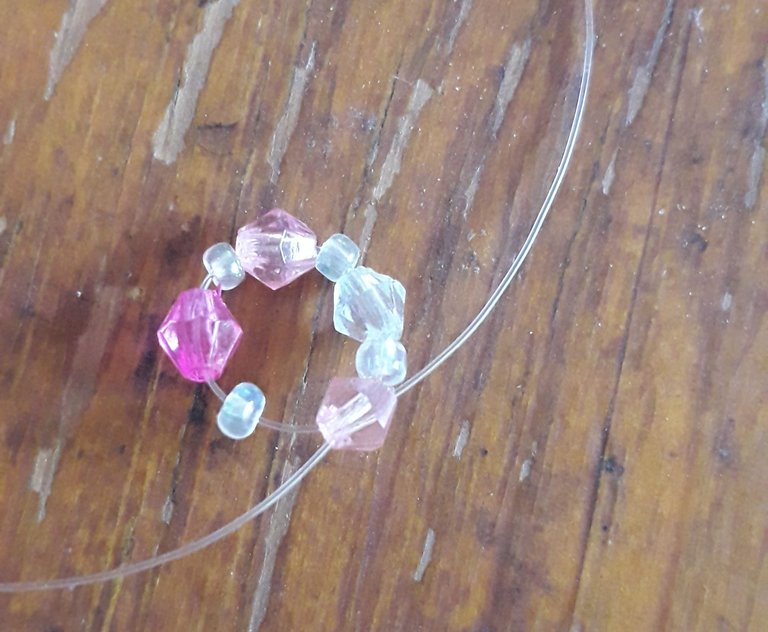
Insertamos en el nylon una mostacilla trasparente, un cristal fucsia, una mostacilla trasparente, un cristal rosado claro, una mostacilla trasparente, un cristal trasparente, una nueva mostacilla trasparente y cruzamos por un nuevo cristal de color rosado claro.
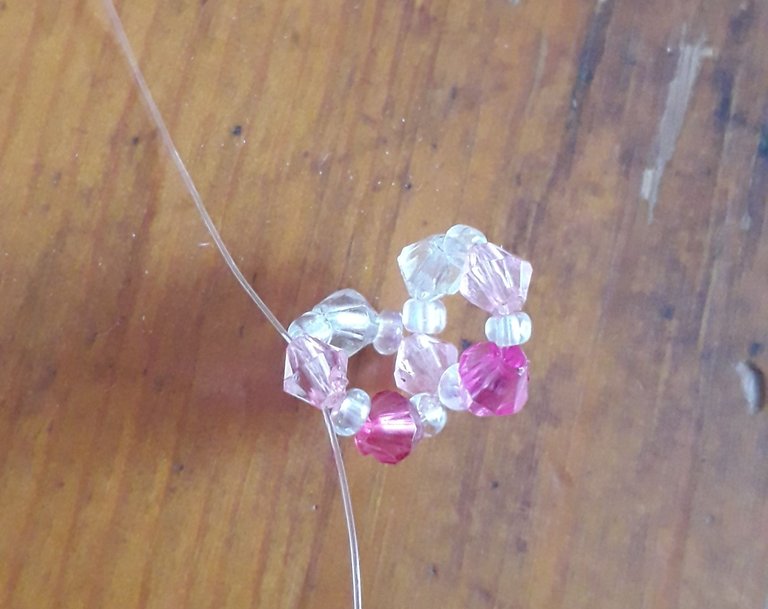
Agregamos en el nylon del lado donde se encuentra el cristal fucsia una mostacilla trasparente, un cristal fucsia y una nueva mostacilla trasparente, en el otro nylon vamos a insertar una mostacilla trasparente, un cristal transparente, una mostacilla trasparente y cruzamos por un nuevo cristal rosado claro.
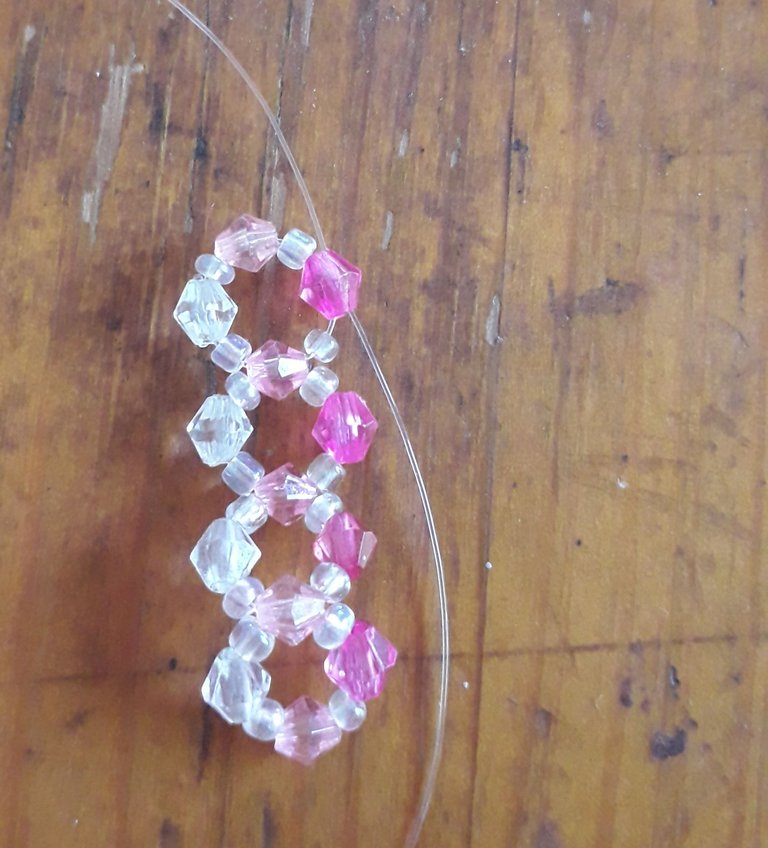
Repetimos el paso anterior una vez más teniendo pendiente el color del cristal según el lado en que se encuentren, todos los cristales de color fucsia en un lado, los cristales trasparentes en el otro lado y los cristales rosados claro en el centro. Luego en el nylon del lado del cristal trasero vamos a insertar una mostacilla trasparente, un cristal trasparente, una mostacilla, un cristal rosado claro, y una nueva mostacilla, en el otro nylon vamos a insertar una mostacilla trasparente y cruzamos por un nuevo cristal fucsia.
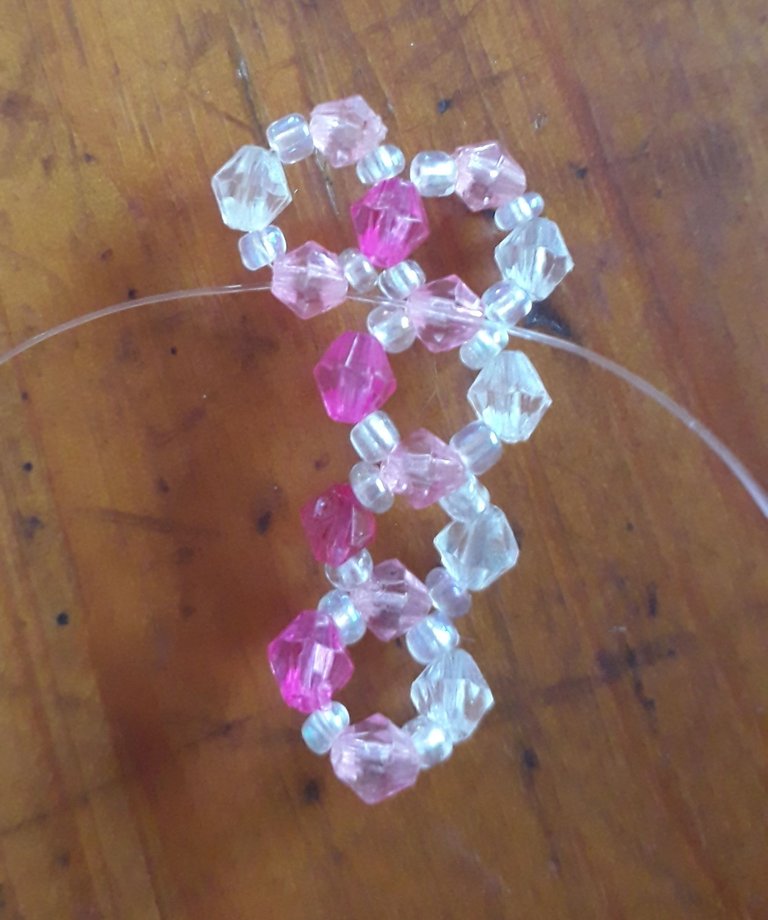
Ahora vamos a insertar en el nylon de afuera una mostacilla trasparente, un cristal rosado claro, una nueva mostacilla, un cristal transparente y una mostacilla, en el otro nylon vamos a agregar una mostacilla trasparente y cruzamos por un nuevo cristal de color rosado claro.
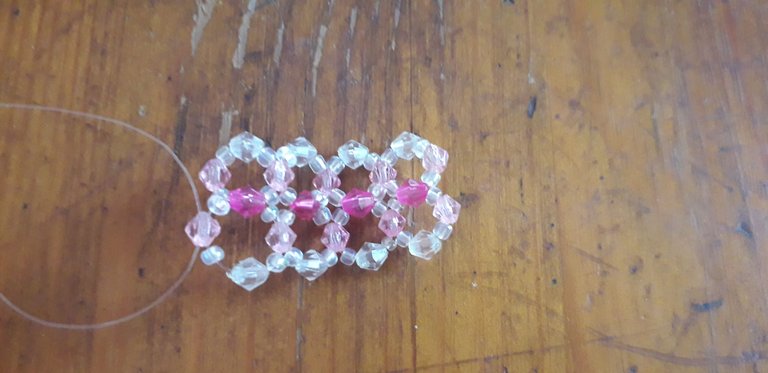
En el nylon de adentro añadimos una mostacilla trasparente, pasamos el nylon por el siguiente cristal fucsia de pasos anteriores y añadimos una nueva mostacilla trasparente, en el otro nylon agregamos una mostacilla, un cristal transparente, una mostacilla trasparente y cruzamos por un nuevo cristal rosado claro. Hacemos esto dos veces más.
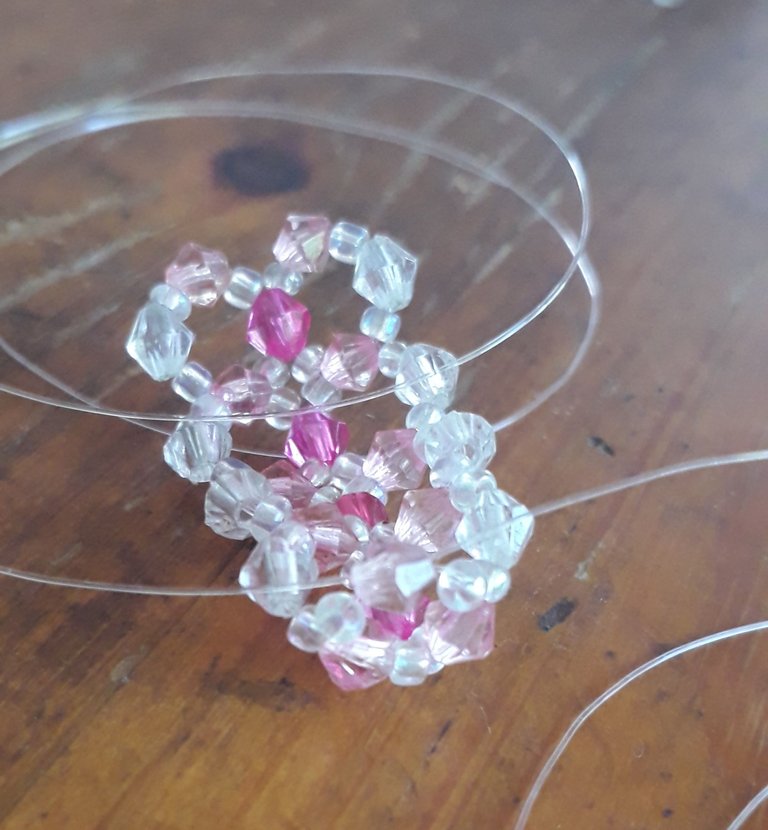
Ahora en el nylon de adentro insertamos una mostacilla trasparente, pasamos el cristal rosado claro del lado y añadimos una mostacilla más, en el otro nylon agregamos una mostacilla trasparente y cruzamos por un nuevo cristal rosado claro.
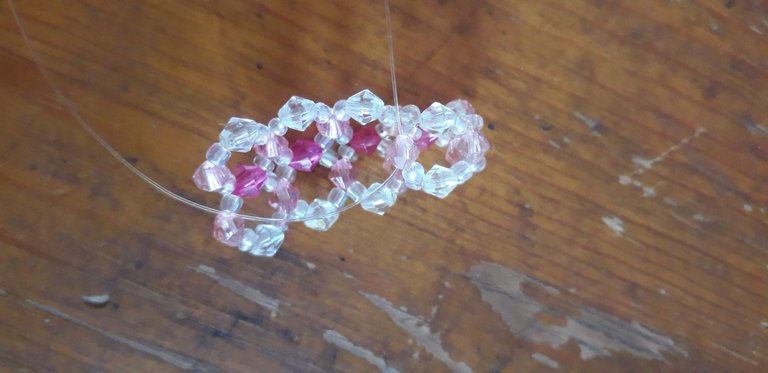
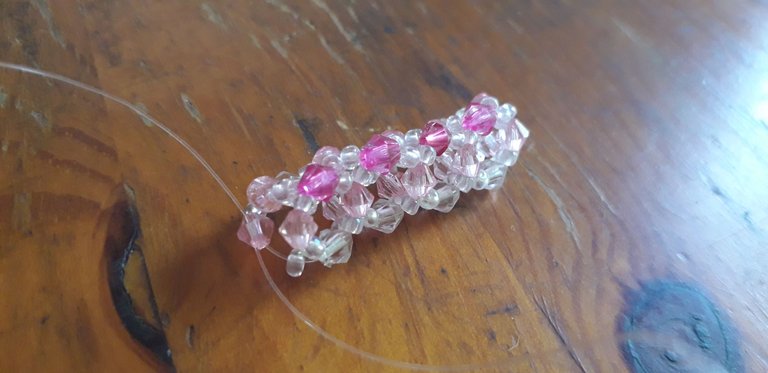
En cada nylon añadimos una mostacilla trasparente, pasamos el siguiente cristal trasparente de los lados, añadimos una mostacilla trasparente y cruzamos nuevamente por un nuevo cristal rosado claro. Hacemos esto hasta terminar el largo que hicimos.
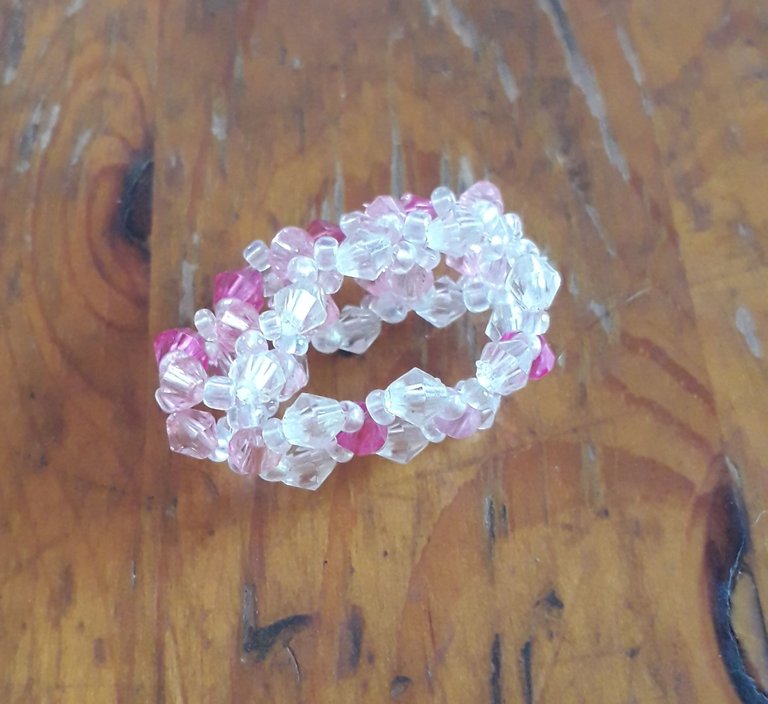
Por último vamos a hacer el resto del anillo, para esto vamos a insertar en cada nylon una mostacilla trasparente, un cristal trasparente, una mostacilla trasparente y cruzamos por un nuevo cristal fucsia, volvemos a intentar en cada nylon una mostacilla trasparente, un cristal trasparente, una mostacilla trasparente y cruzamos por un nuevo cristal rosado claro, seguimos así intercalando los cristales del centro en fucsia y rosado claro hasta completar el largo que se ajuste a nuestro dedo anular. Luego agregamos en cada nylon nuevamente una mostacilla, un cristal trasparente, una mostacilla y cruzamos por el cristal rosado claro del otro extremo del anillo, hacemos un nudo doble y cortamos el nylon que haya sobrado. Y listo, terminamos.
Hasta la próxima 👋
Créditos
Traductor: App DeepL
Editores de fotos usados: editor de fotos Polish y Canva.

Good evening dear friends of Hive and Jewelry, how are you, I hope very well. On this beautiful evening I want to share with you a beautiful 3D ring made with crystals in two shades of pink, transparent crystals and transparent beads. It is very easy to make but that does not imply that it is fast, it took me a little while to finish it because you have to give it a triangular prism shape, which is simple but takes most of the ring procedure.
The Materials we are going to need are:

16 crystals of 3mm light pink color
16 clear 3mm crystals
Transparent beads
1.5 mt of nylon 0,3

We insert into the nylon a clear bead, a fuchsia crystal, a clear bead, a clear pink crystal, a clear bead, a clear bead, a clear crystal, a new clear bead, and cross through a new light pink crystal.

We add in the nylon on the side where the fuchsia crystal is located a transparent bead, a fuchsia crystal and a new transparent bead, in the other nylon we will insert a transparent bead, a transparent crystal, a transparent bead, a transparent bead and cross through a new light pink crystal.

We repeat the previous step one more time keeping in mind the color of the crystal depending on which side they are on, all the fuchsia crystals on one side, the clear crystals on the other side and the light pink crystals in the middle. Then in the nylon on the back crystal side we will insert a clear bead, a clear crystal, a bead, a light pink crystal, and a new bead, in the other nylon we will insert a clear bead and cross through a new fuchsia crystal.

Now we are going to insert in the outside nylon a clear bead, a light pink crystal, a new bead, a clear crystal and a bead, in the other nylon we are going to add a clear bead and cross through a new light pink crystal.

On the inside nylon we add a clear bead, pass the nylon through the next fuchsia crystal from previous steps and add a new clear bead, on the other nylon we add a bead, a clear crystal, a clear bead, a clear bead and cross through a new light pink crystal. We do this two more times.

Now on the inside nylon we insert a clear bead, pass the clear pink crystal on the side and add one more bead, on the other nylon we add a clear bead and cross through a new clear pink crystal.


On each nylon we add a clear bead, pass the next clear crystal from the sides, add a clear bead and cross again through a new clear pink crystal. We do this until we finish the length we made.

Finally we are going to make the rest of the ring, for this we are going to insert in each nylon a transparent bead, a transparent crystal, a transparent bead and cross through a new fuchsia crystal, we try again in each nylon a transparent bead, a transparent crystal, a transparent crystal, a transparent bead and cross through a new light pink crystal, we continue this way interspersing the crystals in the center in fuchsia and light pink until we complete the length that fits our ring finger. Then we add in each nylon again a bead, a clear crystal, a bead and cross through the light pink crystal at the other end of the ring, we make a double knot and cut the nylon that is left over. And that's it, we're done.

Until next time 👋
Credits
Translator: App DeepL
Photo editors used: Polish photo editor and Canva.