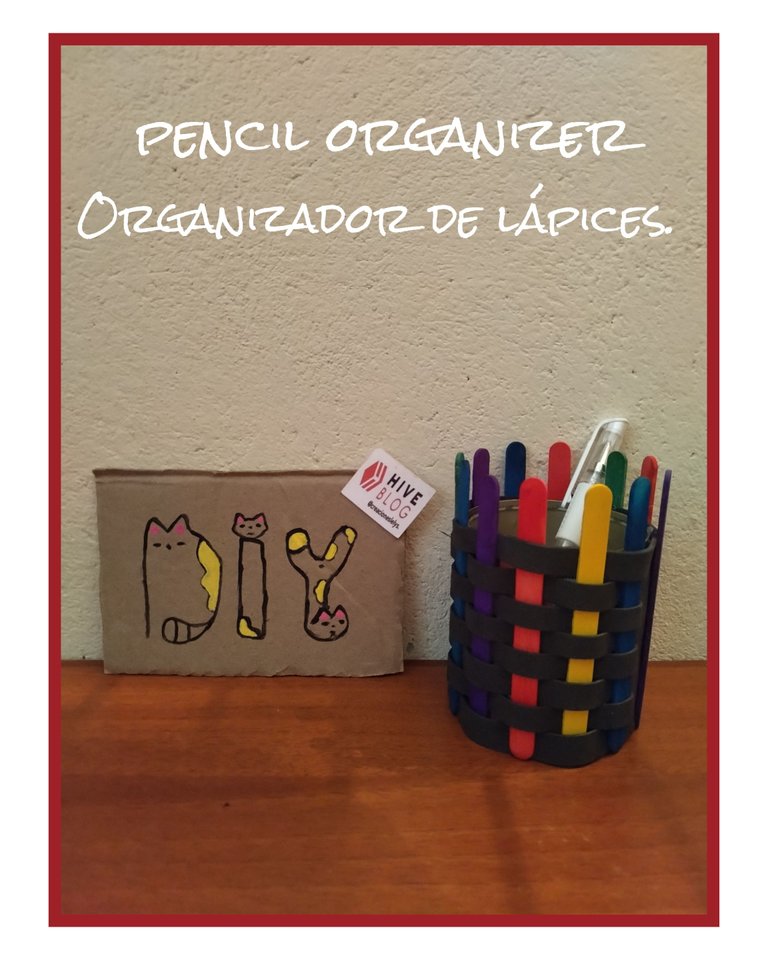
PENCIL ORGANIZER.
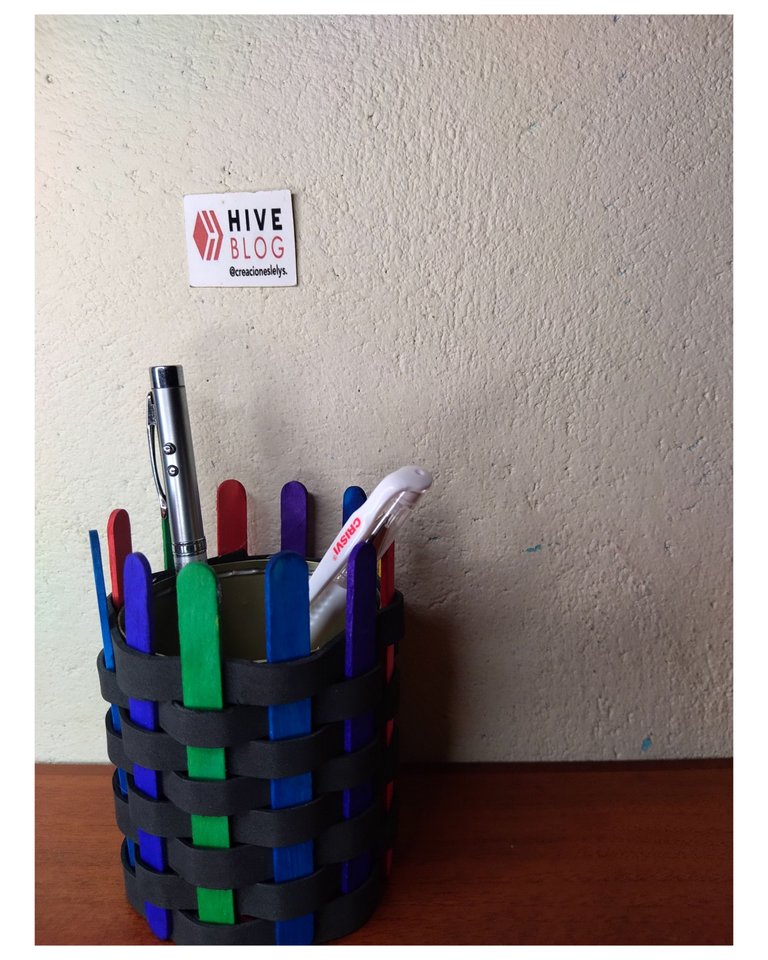
Hola amigos, deseando que estén muy bien. Por aquí les traigo un nuevo tutorial. Vamos a sacar provecho de esas paletas de madera que una vez pintamos y luego no usamos en ningún proyecto, nos quedaron sobrantes o simplemente las compramos y nada se nos había ocurrido hacer con ellas. Pon manos a la obra y busca tus materiales al instante, esta idea te resultará muy útil y además decorativa.
Hello friends, wishing you well. Here I bring you a new tutorial. We are going to take advantage of those wooden pallets that we once painted and then did not use in any project, we were left over or simply bought them and nothing had occurred to us to do with them. Get to work and look for your materials instantly, this idea will be very useful and decorative.
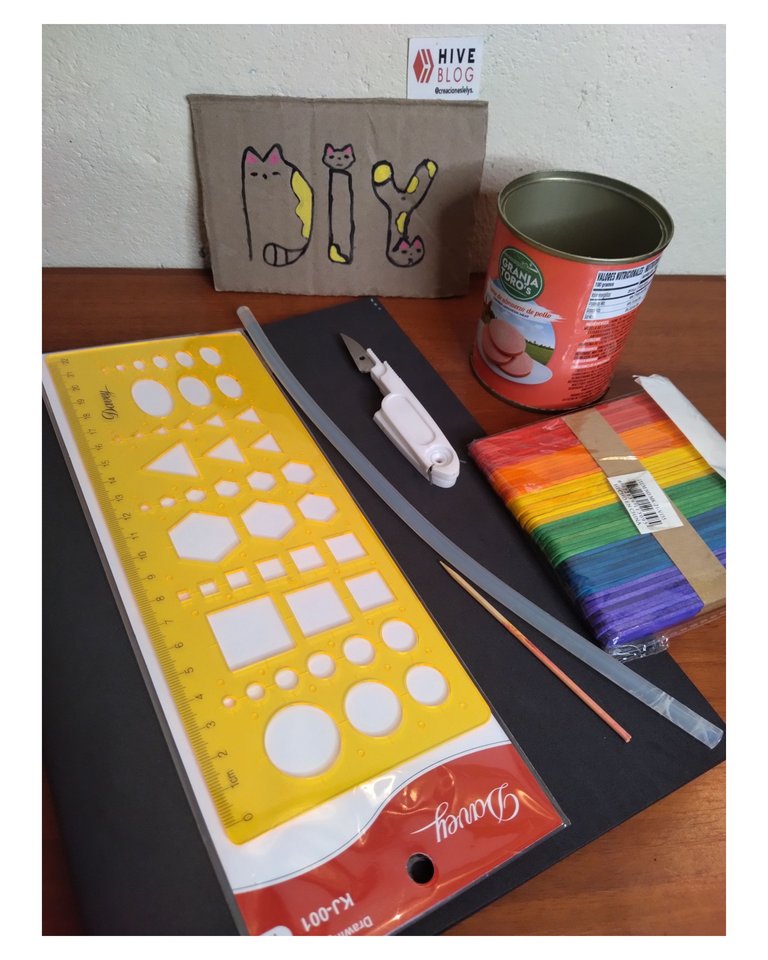
- Paletas de maderas pintadas de diferentes colores.
- Foami color negro.
- Regla.
- Tijeras.
- Palito de madera.
- Lata reciclada.
- Silicón caliente (en barra).
- Pistola para silicón.
- Exacto.
- Pinza plana.
- Wooden pallets painted in different colors.
- Foami black color.
- Ruler.
- Scissors.
- Wooden stick.
- Recycled can.
- Hot silicone (in bar).
- Silicone gun.
- Exact.
- Flat tweezers.
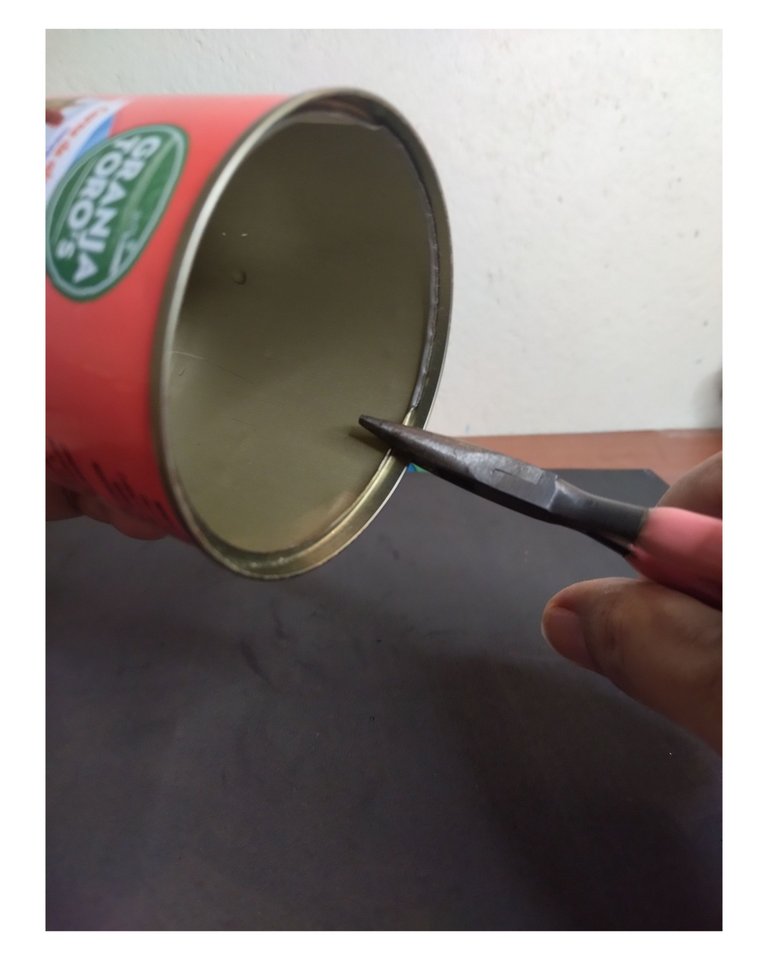
- Lo primero que haremos es eliminar los filos internos que tiene la lata, para ello vamos a aplanar estos filos usando una pinza o alicate plano. De esta manera estaremos seguros de no lastimarnos al usar la lata.
- The first thing we will do is to eliminate the internal edges that the can has, for this we are going to flatten these edges using a pliers or flat pliers. This way we will be sure not to hurt ourselves when using the can.
- Tomamos el foami color negro para tomar la medida de alto y largo que necesitamos para cubrir la lata. El largo debe tener unos centímetros más, que no quede justo.
- We take the black foami to measure the height and length we need to cover the can. The length should be a few centimeters longer, so that it is not just right.
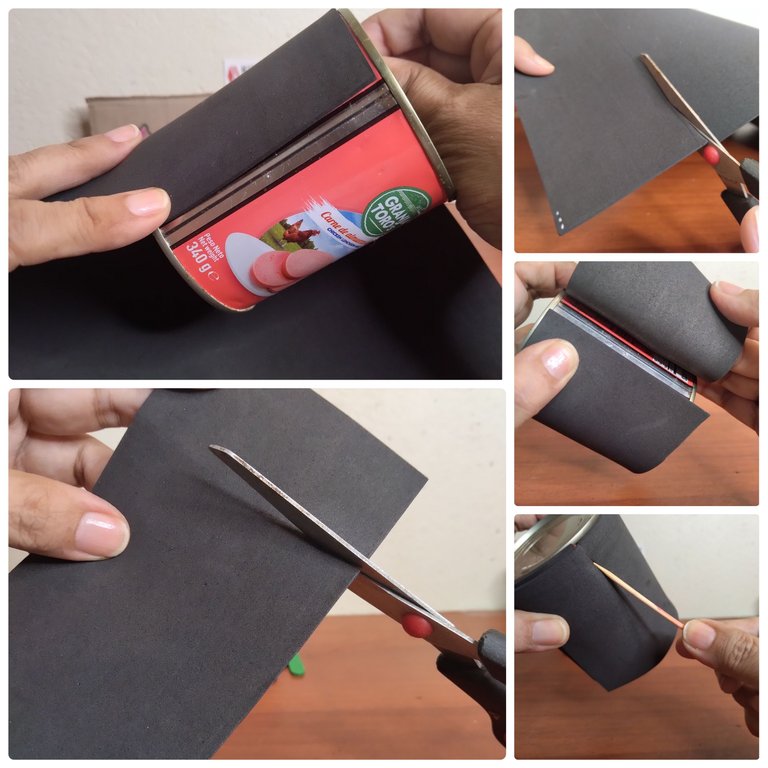
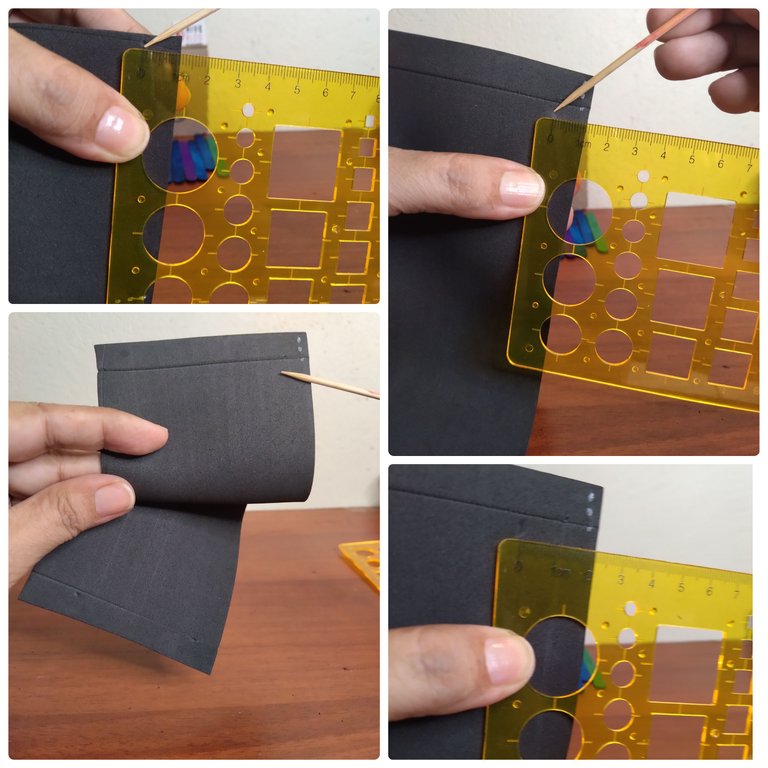
- Vamos a medir y marcar 1cm desde el borde hacia adentro en cada uno de los extremos del foami con el que cubriremos la lata.
- Luego en el recuadro central vamos a medir y marcar para hacer listones de 1cm cada uno.
- We are going to measure and mark 1cm from the edge inwards on each of the ends of the foami with which we will cover the can.
- Then in the central box we are going to measure and mark to make strips of 1cm each.
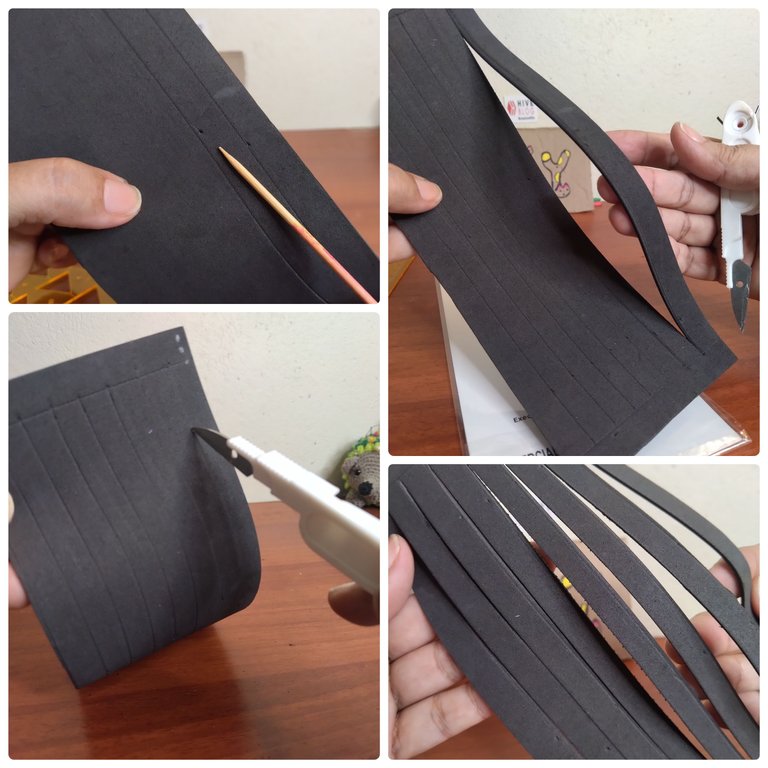
- Una vez marcados todos los cm tomamos el exacto y vamos a cortar justo por las líneas trazadas de manera horizontal (los listones) con mucho cuidado de no cortar hacia los extremos del foami. Mira las imágenes para que tengas mejor idea del procedimiento para el realizar este paso.
- Para facilitar el trabajo coloca el foami sobre un trozo de cartón. Pasa el exacto sobre la línea dos o tres veces suavemente. Puedes usar la regla para mayor precisión.
- Once we have marked all the cm we take the exact cm and we are going to cut just along the lines drawn horizontally (the strips) being very careful not to cut towards the ends of the foami. Look at the images to get a better idea of the procedure for this step.
- To make the work easier, place the foami on a piece of cardboard. Pass the exacto over the line two or three times gently. You can use the ruler for more precision.
Estas paletas yo las tenía guardadas desde hace un tiempo, recuerdo que salí a comprar unas esferas de anime y las vi a buen precio, traje dos paquetes y solo he usado uno. Ahora encontré un nuevo proyecto para estrenarme el segundo paquete y estoy encantada con el resultado. Se hace muy fácilmente y rápido. Lo mejor es que también pude reciclar una lata que recién había desocupado, nunca están de más los organizadores porque en mi casa abundan los lápices por todas partes, así que lo mejor es tenerlos organizados en una linda lapicera.
These palettes I had them saved for a while, I remember I went out to buy some anime spheres and I saw them at a good price, I brought two packs and I have only used one. Now I found a new project to release the second package and I am delighted with the result. It is very easy and quick to make. The best thing is that I was also able to recycle a can that I had just vacated, organizers never hurt because in my house there are plenty of pencils everywhere, so the best thing is to have them organized in a nice pen.
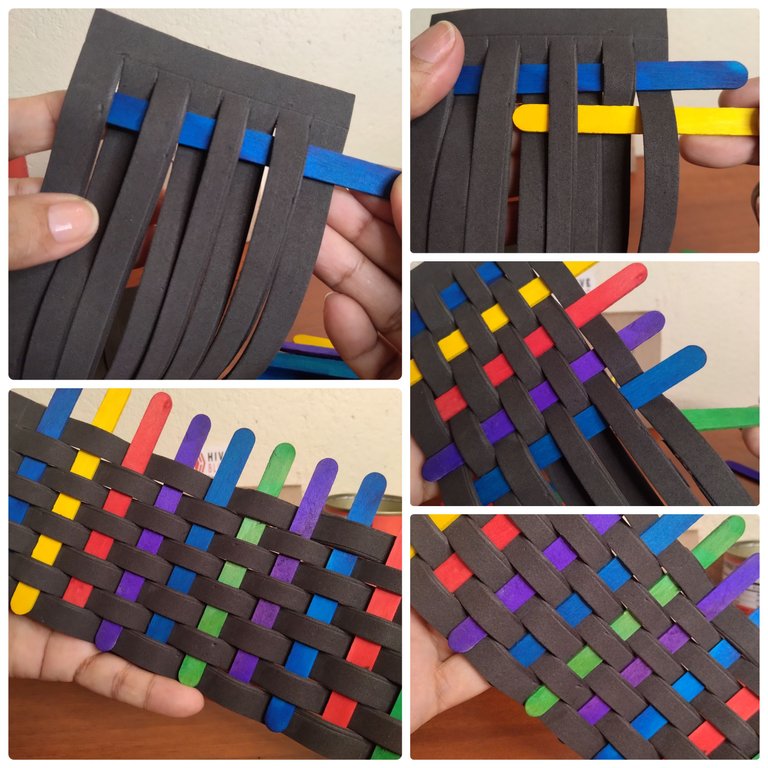
- Ahora que ya cortamos todas las líneas vamos a pasar cada una de las paletas por entre los listones, así como pueden ver. Es algo así como hacer un tejido de cestas, empezamos pasando una paleta desde arriba del primer listón, después el segundo lo pasamos desde abajo y así continuamos la secuencia hasta tener todas las paletas entretejidas.
- Al finalizar lo que haremos es acomodar cada paleta, en la parte de abajo deben quedar al ras del foami para que permita que se pare la lata sin desequilibrio. Y la parte de arriba quedará de adorno y le dará más altura al organizador.
- Now that we have cut all the lines we are going to pass each one of the pallets through the strips, as you can see. It is something like making a basket weaving, we start passing a pallet from above the first ribbon, then the second one we pass it from below and so we continue the sequence until we have all the pallets interwoven.
- At the end what we will do is to arrange each palette, at the bottom should be flush with the foami to allow the can to stand without imbalance. And the top part will remain as an ornament and will give more height to the organizer.
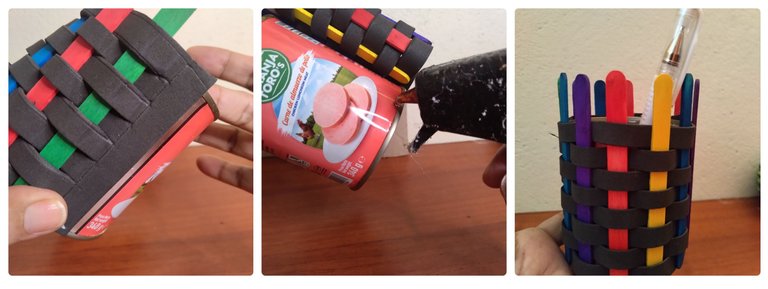
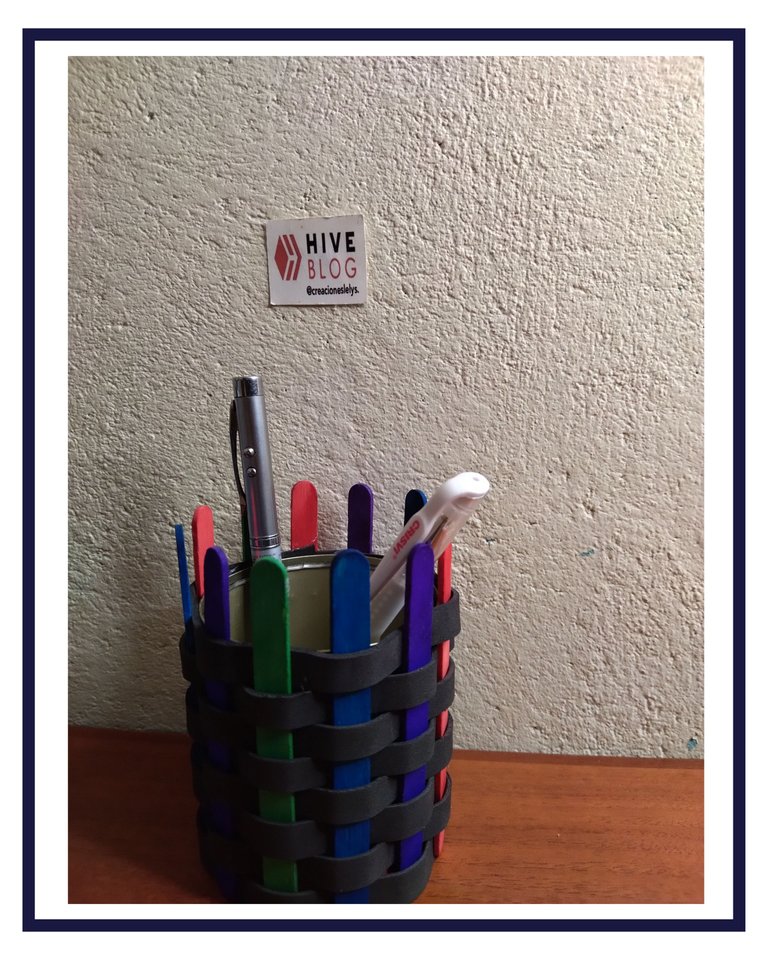
- Tomamos el foami ya decorado y lo pegamos sobre la lata para cubrirla toda. Es importante dejar los cm extras en el foami ya que al meter las paletas esta medida varía. De este modo ya tendremos terminado nuestro hermoso, útil y decorativo organizador.
Todas las fotos son de mi propiedad. Edité con Polish. Usé el traductor de Deepl. Muchas gracias por tu visita. Bendiciones.
- We take the foami already decorated and stick it on the can to cover it all. It is important to leave the extra cm on the foami since this measurement varies when we put the pallets in the tin. This way we will have finished our beautiful, useful and decorative organizer.
All photos are my property. I edited with Polish. I used Deepl translator. Thank you very much for your visit. Blessings.
