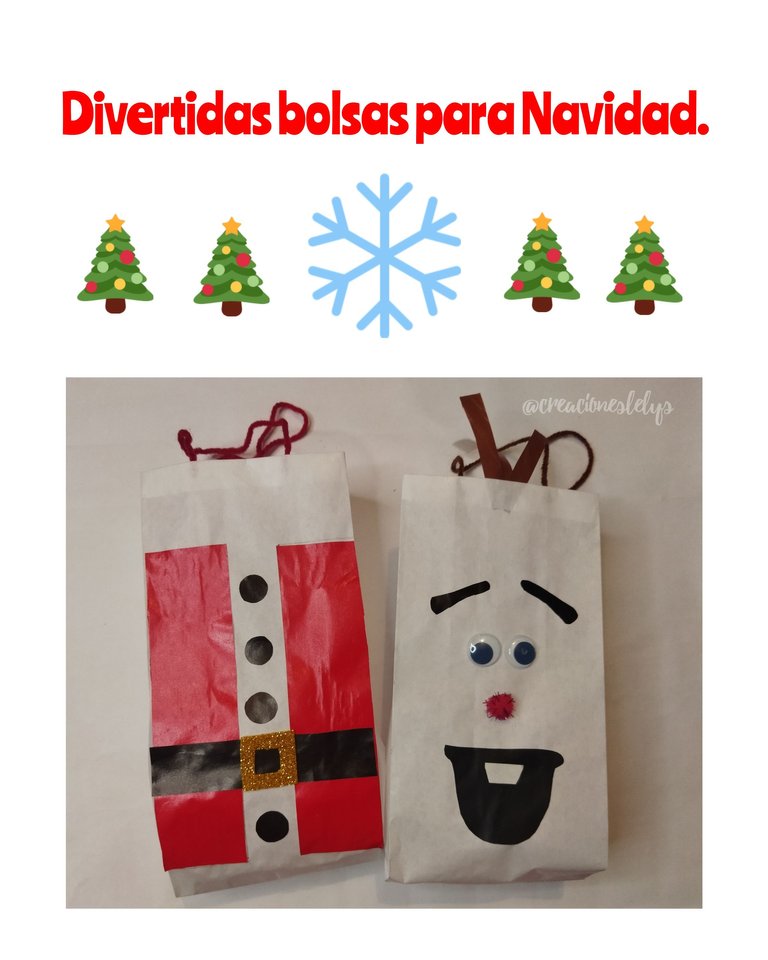
Divertidas bolsas navideñas.
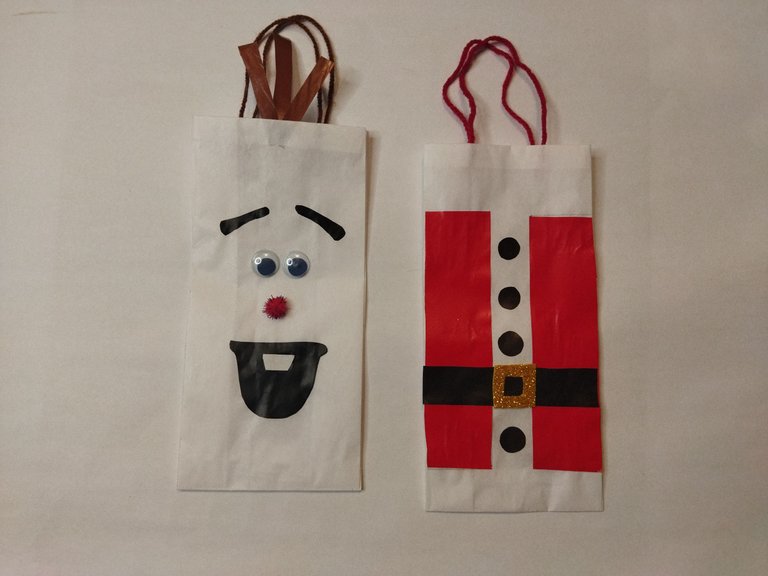
Hola amigos. Bienvenidos a mi blog. El día de hoy quiero presentarles una manualidad muy relajante. Se trata de la elaboración de lindas y muy divertidas bolsas para usar en estas fechas decembrinas.
Me gusta tener en casa diferentes tipos de bolsas, a pesar de que en las compras siempre traemos las bolsas donde no entregan los productos, también es bueno tener bolsas de papel pequeñas y medianas. En mi casa solemos realizar empanadas con frecuencia, para regalarlas usamos este tipo de bolsas. Igualmente son muy útiles por si queremos hacer algún obsequio pequeño o simplemente guardar algo. Entonces se me ocurrió hacer más divertidas estas bolsas aprovechando que se acerca la navidad.
Fun Christmas bags.
Hello friends. Welcome to my blog. Today I want to present you a very relaxing craft. It is the elaboration of cute and very fun bags to use in these decembrinas dates.
I like to have different types of bags at home, even though when shopping we always bring the bags where the products are not delivered, it is also good to have small and medium sized paper bags. In my house we often make empanadas, and to give them as gifts we use this type of bags. They are also very useful if we want to make a small gift or just keep something. So I thought of making these bags more fun, taking advantage of the approaching Christmas.
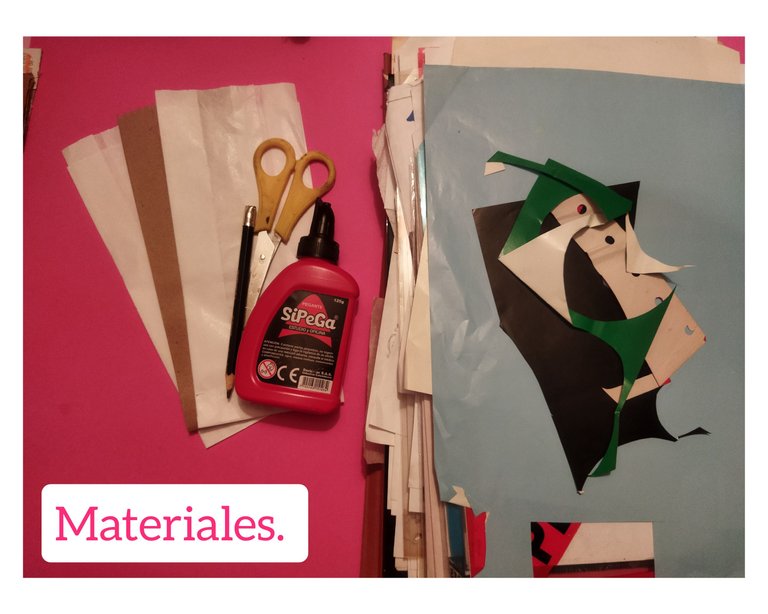
🤶 Bolsas de papel pequeñas. Estas bolsas que utilicé hoy son de color blanco.
🎄 Papel lustrillo. Es un papel muy fino y delicado. Su aspecto es brillante.
🤶 Pegamento blanco.
🎄 Tijeras.
🤶 Ojos plásticos. Un par.
🎄 Foami escarchado color dorado.
🤶 Un pompón color rojo.
🎄 Estambre escolar colores rojo y marrón. Solo un poco.
🤶 Regla.
🎄 Lápiz de grafito.
🎄MATERIALS TO BE USED:🎄
🤶 Small paper bags. These bags I used today are white.
🎄 Lustrillo paper. It is a very thin and delicate paper. Its appearance is shiny.
🤶 White glue.
🎄 Scissors.
🤶 Plastic eyes. One pair.
🎄 Gold colored frosted foami.
🤶 One red pompom.
🎄 School yarn in red and brown. Just a little bit.
🤶 Ruler.
🎄 Graphite pencil.
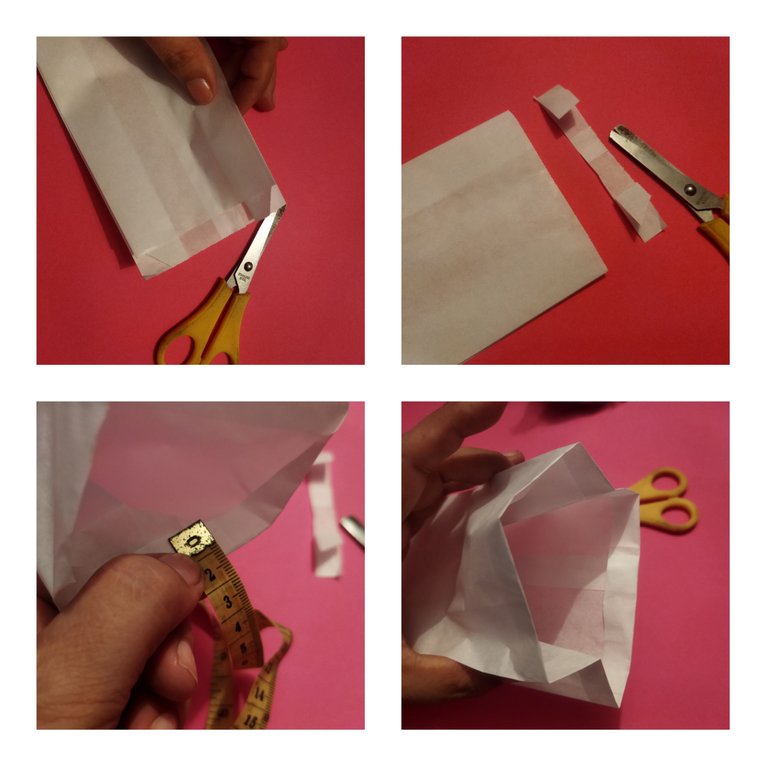
🎄 Debemos comenzar igualando la parte alta de la bolsa. Para ello cortamos al nivel del lado más corto. Se elimina más o menos 1 cm. Luego medimos 1 cm desde la orilla para luego doblarla hacia adentro. Se coloca un punto de pegamento para que quede fijo este doblez.
🤶PROCESS FOR ELABORATION:🤶
🎄 We must start by equalizing the top of the bag. To do this we cut at the level of the shorter side. It is removed plus or minus 1 cm. Then we measure 1 cm from the edge to then fold it inward. Place a dot of glue to fix this fold.
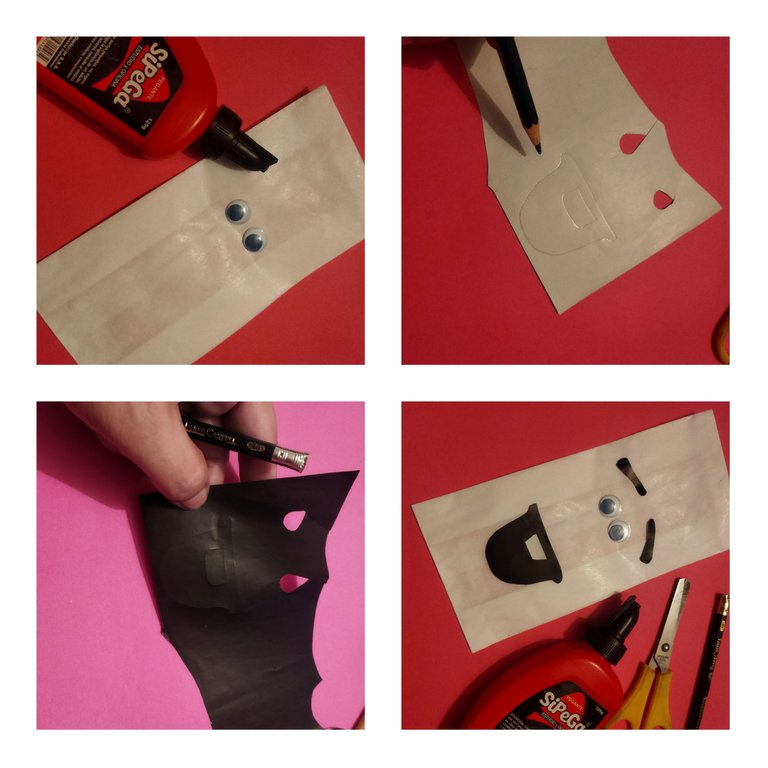
🤶 El segundo paso es colocar los ojos para visualizar el área en la que vamos a trabajar. Usaremos para fijarlos un poco de pegamento. Mientras seca este pegamento vamos dibujando y recortando en el papel lustrillo color negro la boca y las cejas del reno que será la figura con la que decoraremos esta bolsa. En papel blanco dibujamos y recortamos la forma de un diente. Es importante utilizar pegamento blanco en capas muy delgadas porque este papel es muy fino y delicado.
🤶 The second step is to place the eyes to visualize the area we are going to work on. We will use some glue to fix them. While the glue dries, we draw and cut out the mouth and eyebrows of the reindeer on the black lustrillo paper, which will be the figure with which we will decorate this bag. On white paper we draw and cut out the shape of a tooth. It is important to use white glue in very thin layers because this paper is very thin and delicate.
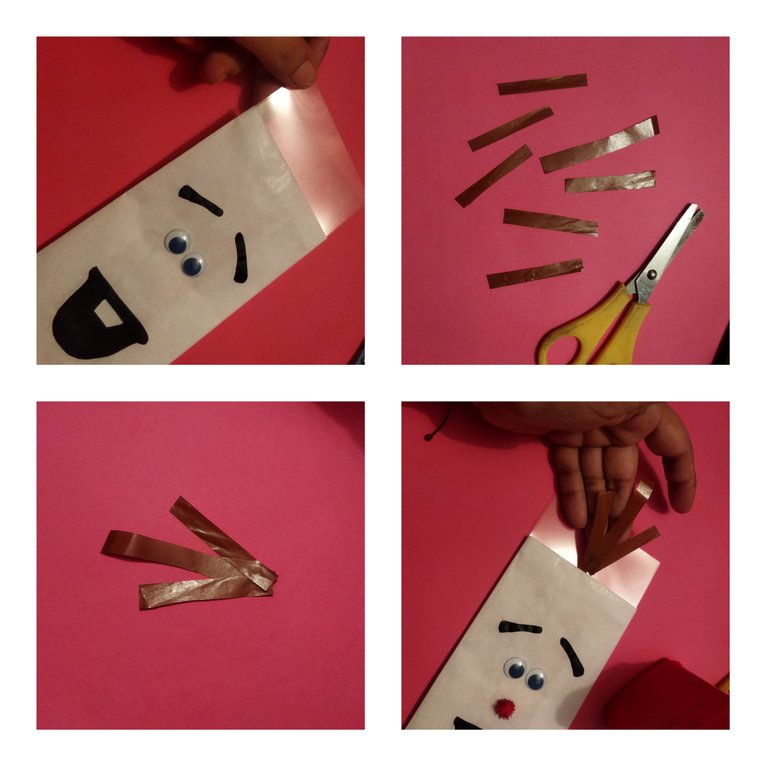
🎄 En papel lustrillo color marrón vamos a dibujar y cortar tres listones pequeños, no muy delgados. Estos los vamos a unir en una de sus puntas con pegamento blanco. Luego lo pegaremos en la parte interna de la bolsa en solo uno de sus lados de arriba. Yo les recomiendo utilizar un trozo de plástico dentro de la bolsa para cuidar de que no se manche de pega toda la bolsa.
🎄 On brown luster paper we will draw and cut three small strips, not too thin. We are going to join them at one of their ends with white glue. Then we will glue it on the inside of the bag on only one of its top sides. I recommend using a piece of plastic inside the bag to make sure the glue doesn't stain the whole bag.
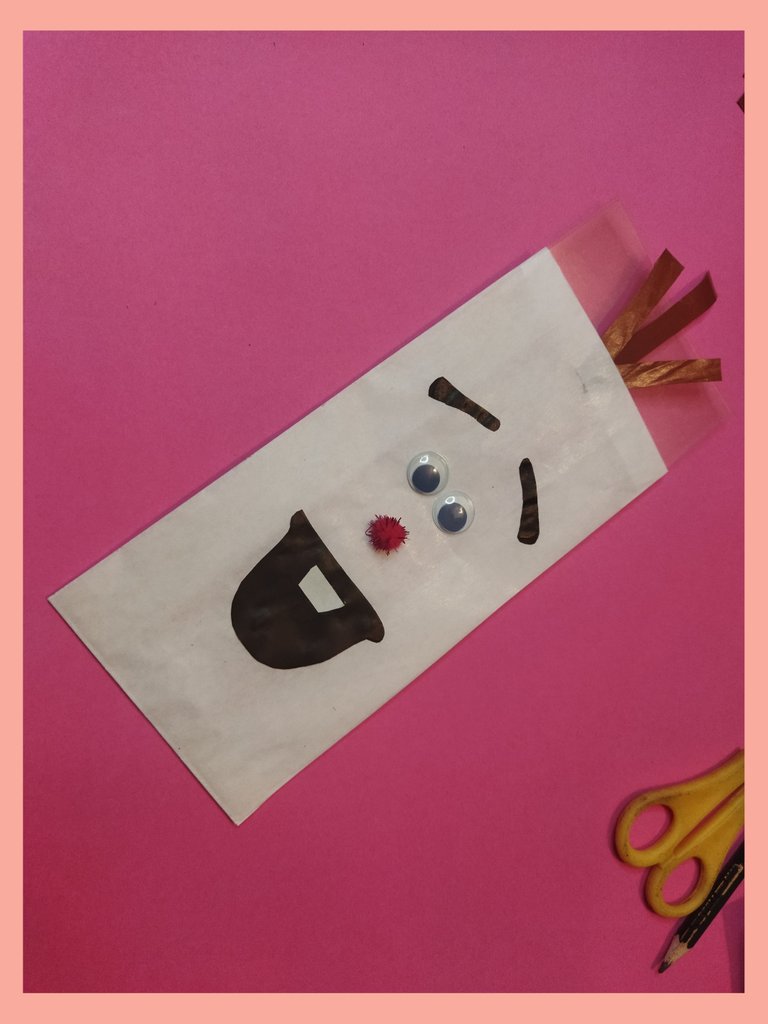
🤶 Dejamos que seque y luego ya podremos usarla.
🤶 We let it dry and then we can use it.
🙋 Estas bolsas quedan muy lindas decoradas. Podemos convertir unas bolsas blancas y delicadas en bolsas muy divertidas. Aquí te muestro otro modelo que puedes realizar:
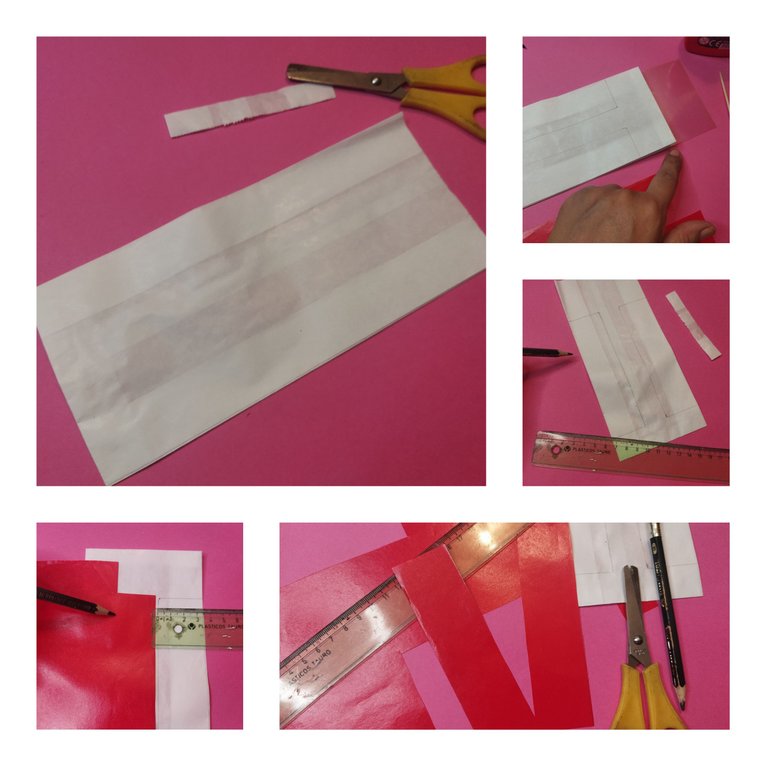
🎄 Empezamos igualando la parte alta de la bolsa. Luego doblamos 1 cm hacia adentro y colocamos pegamento. En este diseño usaremos papel lustrillo color rojo, negro y foami dorado. Vamos a trabajar dejando espacios en blanco en la parte superior (3 cm) y en la parte inferior (2 cm) de la bolsa. Cortamos dos listones sobre el papel de color rojo. Estos deben medir lo necesario para cubrir los laterales de la bolsa respetando los espacios en blanco ya marcados y 2 cm entre ellos. Para medir usamos la regla y marcamos con el lápiz.
🙋 These bags look so cute decorated. We can turn some delicate white bags into very fun bags. Here I show you another model that you can make:
🎄 We start by matching the top of the bag. Then we fold 1 cm inwards and place glue. In this design we will use red and black lustrillo paper and gold foami. We are going to work leaving blank spaces at the top (3 cm) and at the bottom (2 cm) of the bag. Cut two strips on the red paper. These should measure what is necessary to cover the sides of the bag respecting the blanks already marked and 2 cm between them. To measure we use the ruler and mark with the pencil.
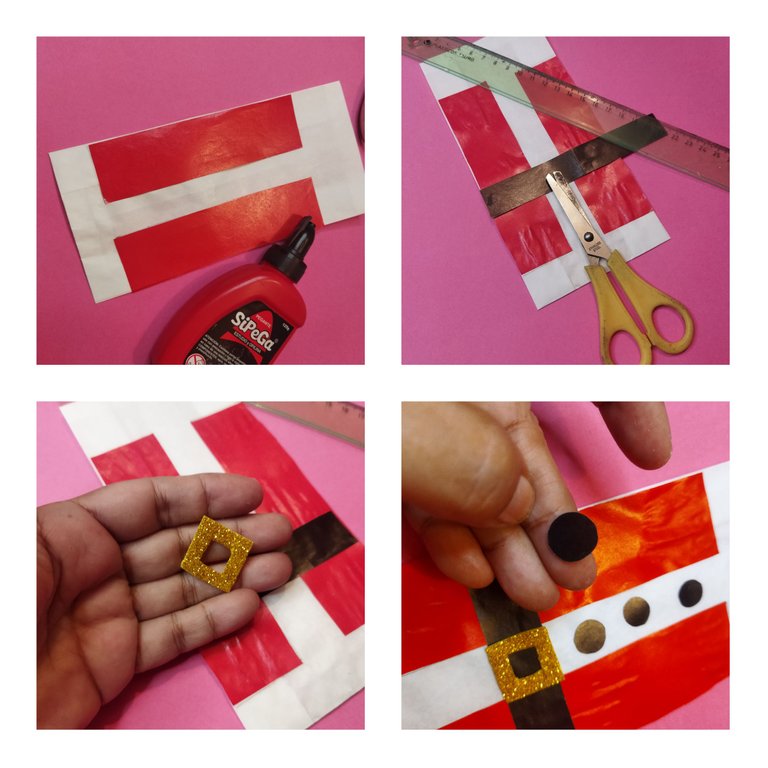
🤶 Es importante colocar el trozo de plástico dentro de la bolsa antes de comenzar a pegar el papel. Sobre el papel de color negro dibujamos y cortamos formas circulares para semejar los botones del saco de Santa, este diseño es muy lindo. Sobre el foami escarchado color dorado dibujamos un cuadrado proporcional al tamaño del listón negro que hace de cinturón. Cortamos la parte de adentro del cuadrado y lo pegamos en el medio del listón negro para simular la hebilla.
🤶 It is important to place the piece of plastic inside the bag before starting to glue the paper. On the black paper we draw and cut circular shapes to resemble the buttons of Santa's bag, this design is very nice. On the gold frosted foami we draw a square proportional to the size of the black ribbon that makes the belt. Cut the inside of the square and glue it in the middle of the black ribbon to simulate the buckle.
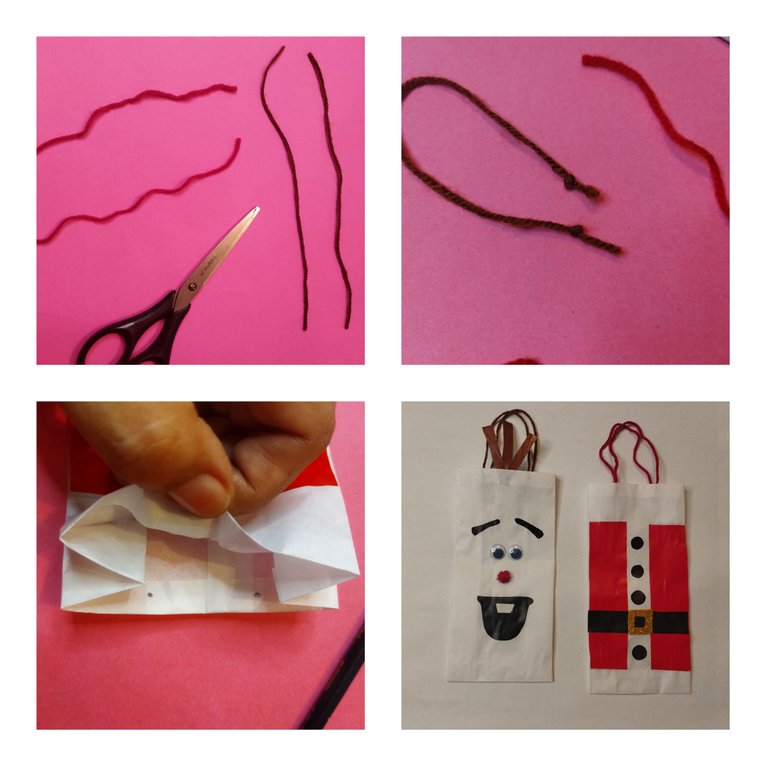
🎄 Finalmente cortamos los hilos para hacer las cuerdas de agarre de las bolsas. Como son bolsas largas estas tiras deben ser cortas. Usé estambre marrón para la bolsa de reno y estambre rojo para la bolsa de Santa. Corté el hilo de 12 cm cada uno, en cada extremo realicé un nudo. Estos hilos los pegué en la parte de adentro de las bolsas. Quedaron muy bien y lindas las bolsitas.
🎄 Finally we cut the threads to make the strings to hold the bags. Since they are long bags these strips should be short. I used brown yarn for the reindeer bag and red yarn for the Santa bag. I cut the yarn to 12 cm each, at each end I tied a knot. I glued these threads to the inside of the bags. The bags turned out very nice and pretty.
🙋 Espero que te hayan gustado estos modelos de bolsas navideñas. Todas las fotos son de mi propiedad. Edité con Polish. Usé el traductor de Deelp. Muchas gracias por tu apoyo ❤️🤶💙
🙋 I hope you liked these Christmas bag patterns. All photos are my property. I edited with Polish. I used Deelp translator. Thanks so much for your support ❤️🤶💙
