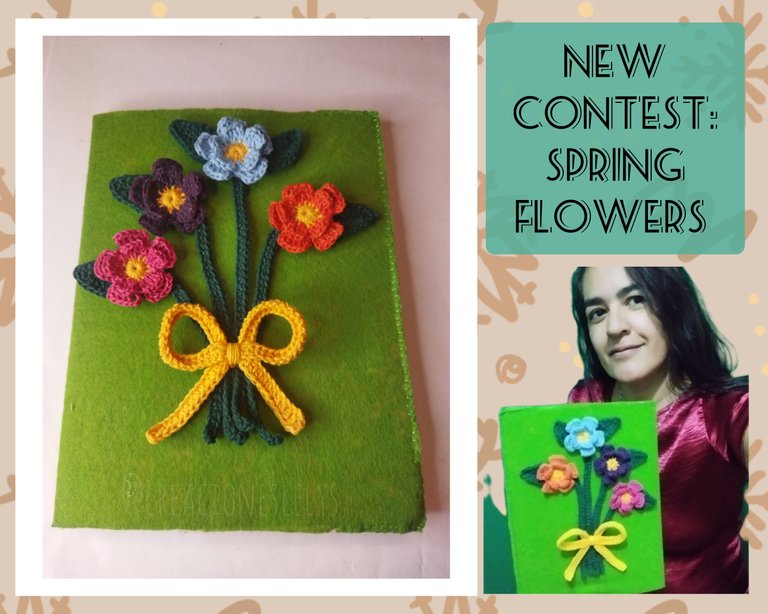
Español.
Hola amigos de esta linda comunidad. Envío un saludo y fuerte abrazo de agradecimiento para la amiga @equipodelta por mantener estos espacios disponibles para nosotros.
El día de hoy estamos de fiesta, la fiesta de las flores porque apenas entramos a la comunidad somos grata y hermosamente sorprendidos con hermosos jardines 💐 estoy sumamente emocionada porque todas y cada una de las presentaciones o entradas para este concurso están verdaderamente hermosas, originales y auténticas. Las flores elaboradas con material reciclado me enamoran, los felicito a todos 🤗
Para mi entrada a este colorido y primaveral reto elegí realizar flores tejidas; este es un proyecto que tenía pendiente, el cual ya tenía planeado desde que inició el año. Solo faltaba concretarlo y aproveché de ejecutarlo con premura para poder participar. Ahora ya tengo un nuevo proyecto concluido y un lindo regalo para mí. Espero que sea del agrado de todos.

No los voy a sorprender, lo sé 😏 porque mi pasión es tejer y cada oportunidad que vea propicia para mostrar todo lo que podemos lograr mediante el tejido, la aprovecharé. Es por ello que valiéndome de los conocimientos adquiridos decidí realizar FLORES DOBLES DE CINCO PÉTALOS porque son flores muy representativas de la época de primavera. Estas flores suelen ser pequeñas, muy coloridas y abundantes. Solemos llamarlas flores silvestres, ellas decoran como alfombras las sabanas o superficies terrestres en cualquier parte del mundo. Por eso me encantan.
Sin más, paso a describir el proceso para la elaboración de esta linda flor. Para realizarla solo basta conocer los puntos básicos del crochet: punto cadena, punto bajo, punto deslizado, punto alto, anillo mágico.
FLORES DOBLES DE CINCO PÉTALOS.
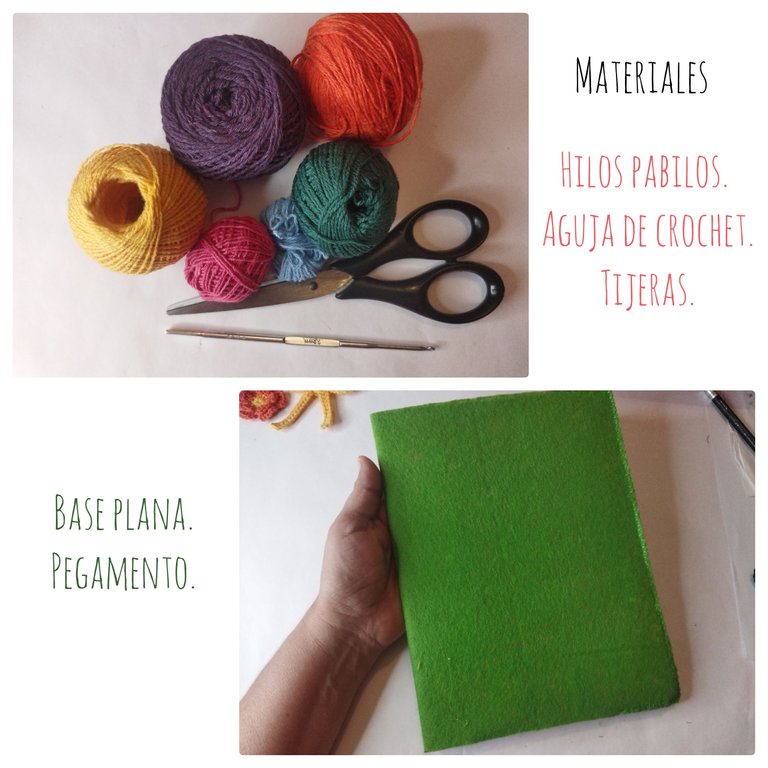
Los materiales que necesitaremos para hacer la flor son los siguientes:
- Hilos pabilos de variados colores.
- Aguja de crochet de 2,5mm.
- Tijeras.
PROCEDIMIENTO PARA LA ELABORACIÓN DE LA FLOR:
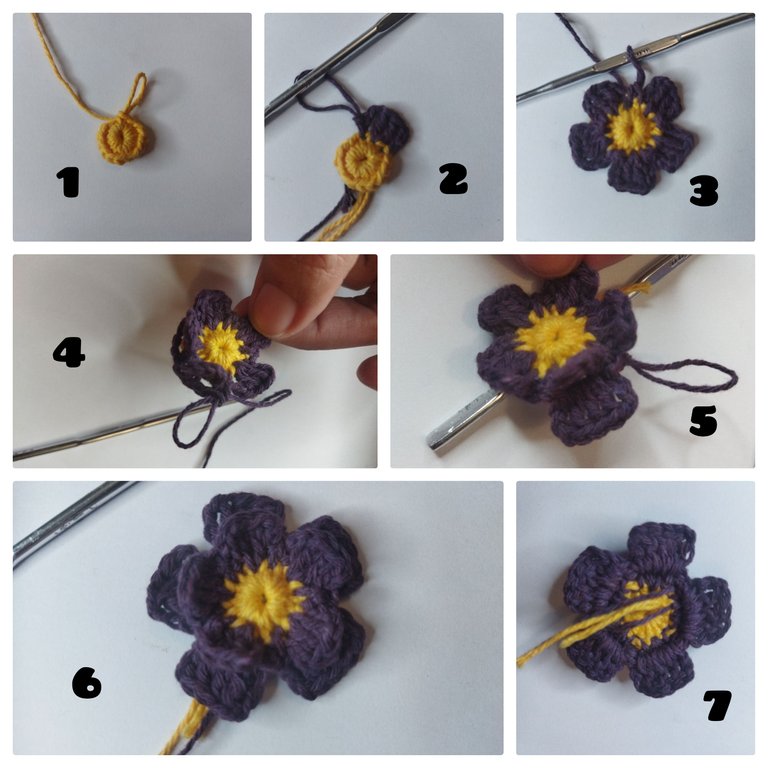
- Iniciamos tejiendo un anillo mágico con hilo color amarillo. Dentro del anillo tejemos 15 puntos bajos. Antes de cerrar la vuelta hacemos un cambio de hilo a color morado. Hacemos 1 punto deslizado.
- Tejemos la segunda vuelta iniciando con 3 puntos cadenas, pasamos al siguiente punto levantando 2 puntos altos en ese mismo punto, levantamos 3 puntos cadenas y entramos en el siguiente punto con 1 punto deslizado. Seguidamente nos pasamos al punto que viene con otro punto deslizado. HEMOS TEJIDO EL PRIMER PÉTALO. Para tejer los otros cuatro pétalos solo vamos a repetir la misma secuencia.
- Al finalizar la vuelta de los cinco pétalos hacemos 1 punto bajo en el primer punto de la vuelta. Después tejemos 3 puntos cadenas y entramos en el bucle visible que quedó entre los dos pétalos de la vuelta anterior. REPETIMOS HASTA TERMINAR LA VUELTA.
- Al terminar la vuelta anterior cerramos con 1 punto deslizado. Inmediatamente entramos al espacio de las tres cadenas que hicimos y tejemos 1 punto deslizado, 3 puntos altos, 3 puntos cadenas y 1 punto deslizado. Después nos pasamos al otro espacio con 1 punto deslizado y REPETIMOS LA SECUENCIA hasta terminar de tejer los cinco pétalos. Al finalizar cerramos con 1 punto deslizado. NO OLVIDEN ESCONDER LAS HEBRAS SOBRANTES.
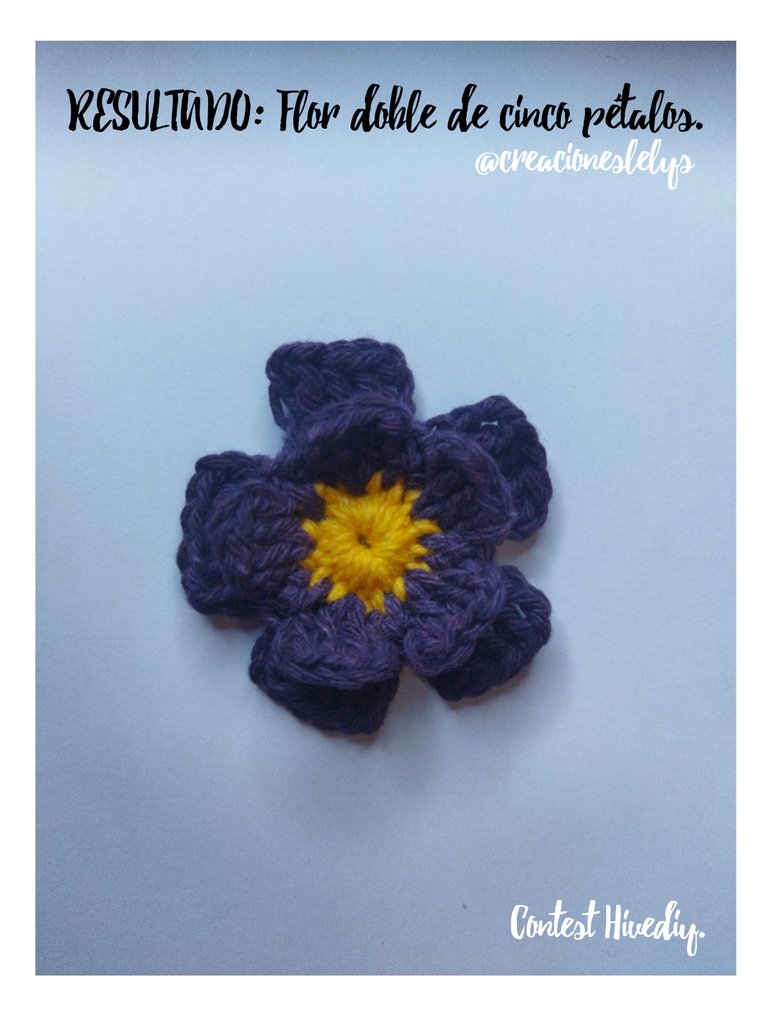
Así debe verse nuestra linda flor. Como esta podemos hacer de diferentes colores y crear con ella lindos y vistosos proyectos.
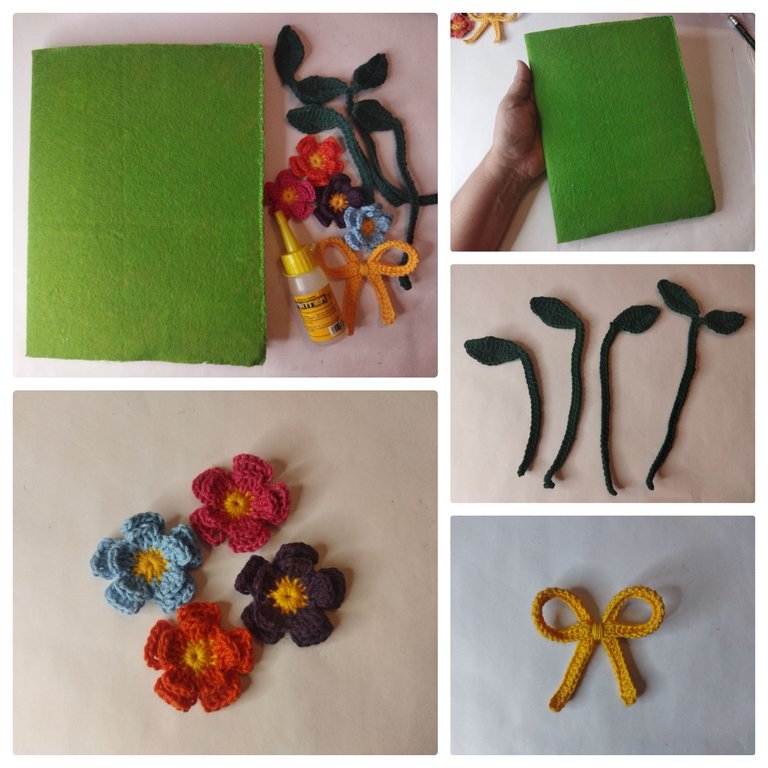
En mi proyecto estas florecitas necesitan su tallo y las hojas. Por lo que ahora les voy a describir cómo realicé cada una de estas partes.
- Tallos y hojas para las flores: con hilo de color verde vamos a tejer el tallo y las hojas que necesitemos, si las queremos con dos hojas debemos comenzar tejiendo una hoja, luego el tallo y por último la segunda hoja.
- Teje 13 puntos cadenas. Luego sigue esta SECUENCIA por ambos lados de los puntos:
1pd-1pb-2pma-2pa-1pad-2pa-2pma-1pb-1pd. - Después de completar las secuencias vamos a tejer 40 puntos cadenas. En cada uno de esos puntos hacemos 1 punto bajo. Al llegar al último punto tejemos 13 puntos cadenas y REPETIMOS la secuencia antes realizada en la primera hoja. Cerramos con 1 punto deslizado y cortamos el hilo.
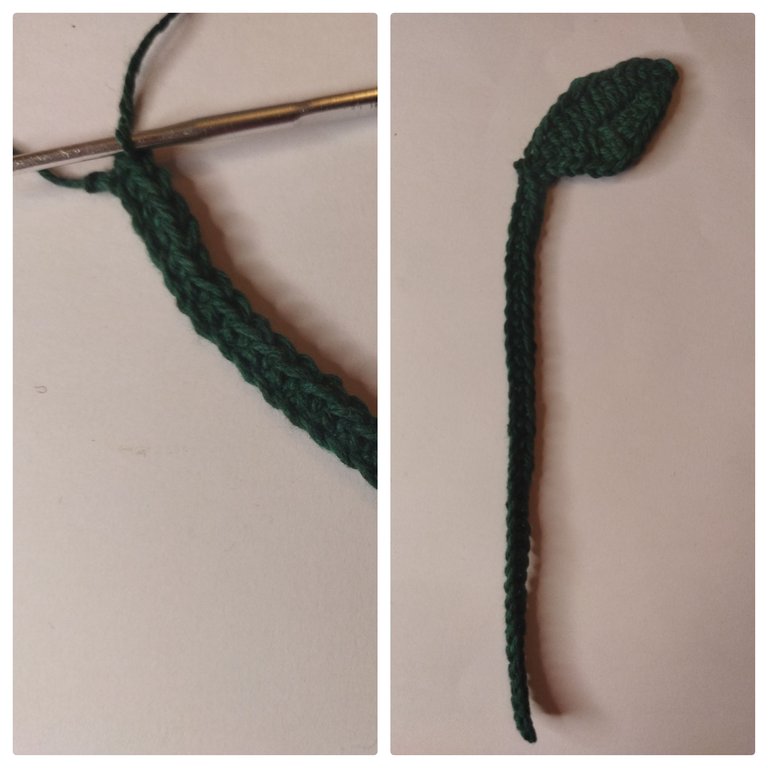
Para los otros tallos varía la cantidad de cadenas para los tallos: 35, 30, y 25 puntos cadenas.
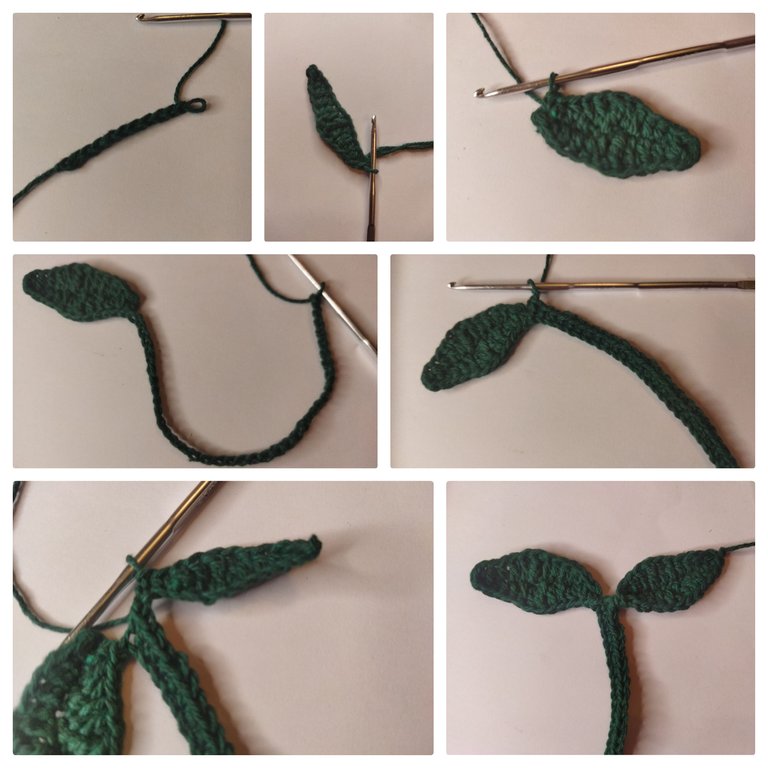
- Los siguientes tallos los tejemos siguiendo los mismos pasos. Para que la hoja nos quede del lado izquierdo del tallo empezamos tejiendo la hoja.
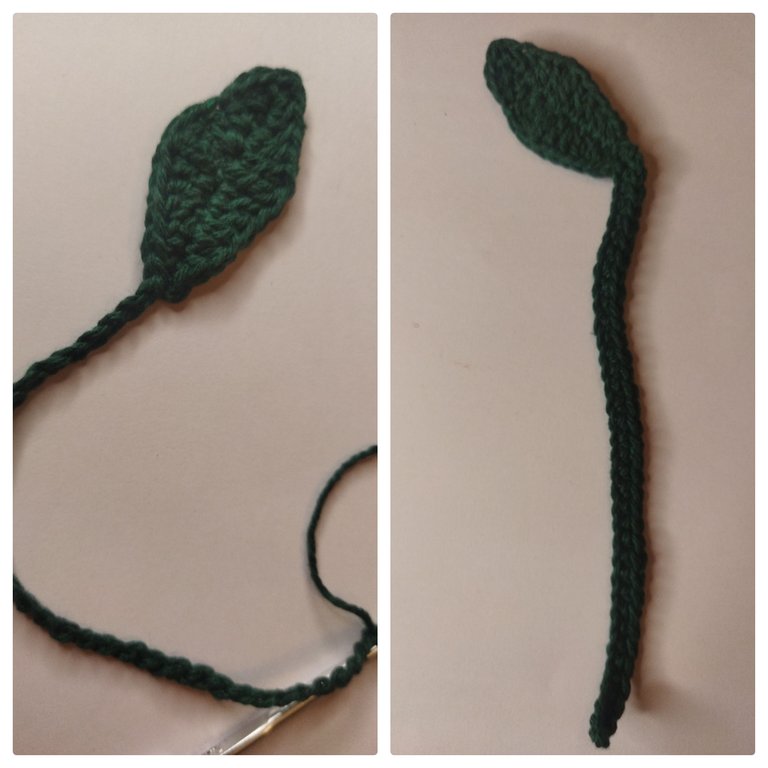
- Para que la hoja nos quede del lado derecho del tallo, empezamos tejiendo el tallo.
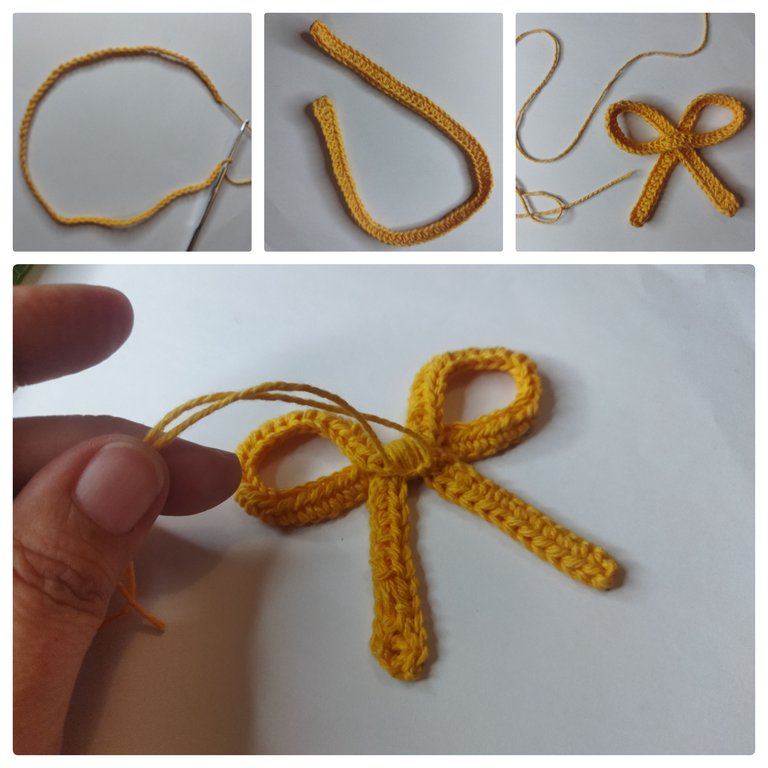
- En mi proyecto también es necesario tejer un lazo. Entonces con el hilo color amarillo vamos a tejer 80 puntos cadenas. Después sobre cada punto tejemos 1 medio punto alto. Al finalizar cerramos con 1 punto deslizado. Cortamos y ocultamos la hebra.
- Hacemos con este cordón un lazo, el cual ajustaremos con un trozo de hilo amarillo.
PRESENTACION DE MI PROYECTO USANDO LA FLOR DOBLE DE CINCO PÉTALOS.
Como mencioné un poco más arriba, para hacer mi proyecto necesité una base plana, las flores, los tallos, las hojas y un lazo tejido. Además usé pegamento para fijar cada una de las partes a la base.
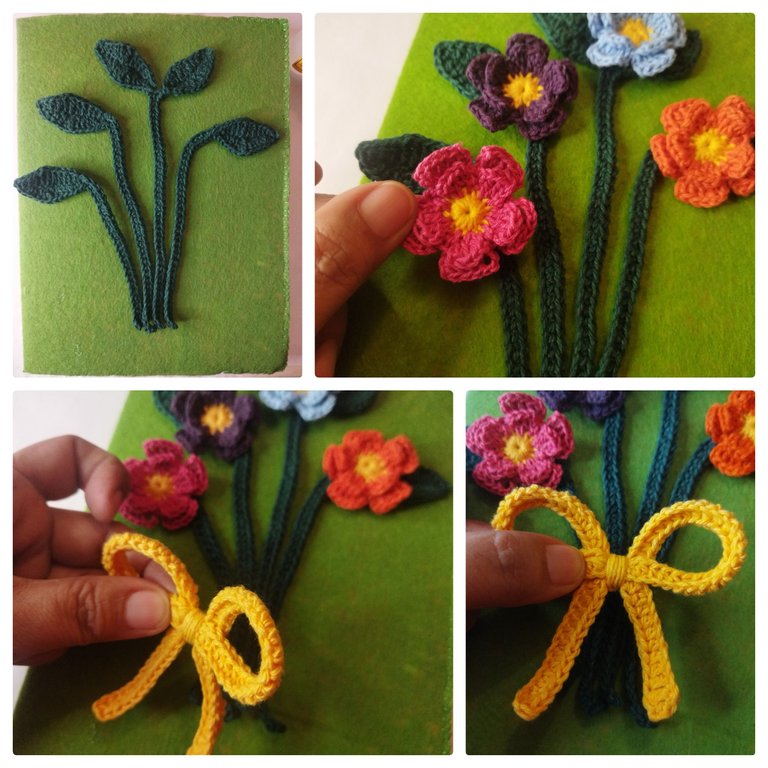
Como pueden apreciar elegí decorar la portada de mi cuaderno de notas con un hermoso ramo de flores. Así que sólo bastó ordenar cada tallo, colocar entre las hojas una flor y colocar en la parte baja de los tallos el lindo lazo amarillo.
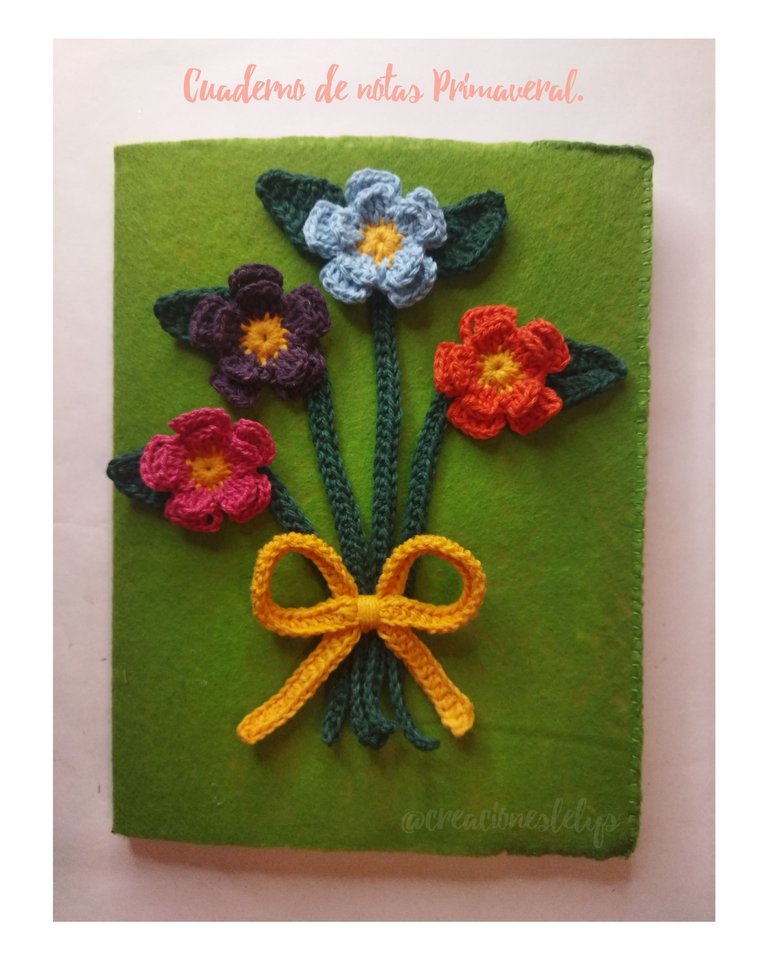
- De este modo he culminado mi tan anhelado proyecto. ¡Me gusta mucho el resultado! Ahora tengo mi nuevo cuaderno lindo y presentable con las hermosas flores que tejí para mostrar en este concurso.
Estoy muy feliz por haber participado. Espero que las amigas @mariajcastro28 y @katiuskamata se animen a participar, aún hay tiempo.
Muchísimas gracias por el apoyo brindado. Todas las fotos son de mi propiedad. Edité con Polish. Usé el traductor de Deepl. Suerte para todos los participantes. Bendiciones 🙏
English.

Hello friends of this beautiful community. I send a greeting and a big hug of gratitude to the friend @equipodelta for keeping these spaces available for us.
Today we are having a party, the flower party because as soon as we enter the community we are pleasantly and beautifully surprised with beautiful gardens 💐 I am extremely excited because each and every one of the submissions or entries for this contest are truly beautiful, original and authentic. Flowers made from recycled material make me fall in love, I congratulate you all 🤗.
For my entry to this colorful and springtime challenge I chose to make woven flowers; this is a project I had pending, which I had already planned since the beginning of the year. It only needed to be done and I took the opportunity to execute it in a hurry in order to be able to participate. Now I have a new finished project and a nice gift for me. I hope it will be to everyone's liking.

I'm not going to surprise you, I know 😏 because my passion is knitting and every opportunity I see to show everything we can achieve through knitting, I will take advantage of it. That's why using the knowledge I have acquired I decided to make FIVE-PETAL DOUBLE FLOWERS because they are very representative flowers of the spring season. These flowers are usually small, very colorful and abundant. We usually call them wildflowers, they decorate like carpets the savannahs or land surfaces anywhere in the world. That is why I love them.
Without further ado, I will describe the process for the elaboration of this beautiful flower. To make it, you just need to know the basic crochet stitches: chain stitch, single crochet, slip stitch, double five-petal flowers.
DOUBLE FLOWERS WITH FIVE PETALS.
The materials we will need to make the flower are as follows:
- Pabilos threads of various colors.
- Crochet needle of 2.5mm.
- Scissors.

PROCEDURE FOR THE ELABORATION OF THE FLOWER:
- We start by knitting a magic ring with yellow yarn. Inside the ring we knit 15 single crochet stitches. Before closing the row, we change the yarn to purple. We knit 1 slip stitch.
- We knit the second row starting with 3 chain stitches, we move to the next stitch raising 2 double crochet stitches in the same stitch, we raise 3 chain stitches and enter the next stitch with 1 slip stitch. Then we move to the next stitch with another slip stitch. WE HAVE KNITTED THE FIRST PETAL. To knit the other four petals we just repeat the same sequence.
- At the end of the row of five petals we knit 1 single crochet in the first stitch of the row. Then we knit 3 chain stitches and enter the visible loop that was left between the two petals of the previous row. REPEAT UNTIL THE END OF THE ROW.
- At the end of the previous row we close with 1 slip stitch. Immediately enter the space of the three chains we made and knit 1 slip stitch, 3 double crochet, 3 chain stitches and 1 slip stitch. Then we move to the other space with 1 slip stitch and REPEAT THE SEQUENCE until we finish knitting the five petals. At the end we close with 1 slip stitch. DON'T FORGET TO HIDE THE EXCESS STRANDS.

This is how our beautiful flower should look like. We can make this flower in different colors and create beautiful and colorful projects with it.

In my project these little flowers need their stem and leaves. So now I am going to describe how I made each of these parts.
- Stems and leaves for the flowers: with green yarn we are going to knit the stem and the leaves we need, if we want them with two leaves we must start knitting one leaf, then the stem and finally the second leaf.
- Knit 13 chain stitches. Then follow this SEQUENCE on both sides of the stitches:
1pd-1pb-2pma-2pa-1pad-2pa-2pma-1pb-1pd. - After completing the sequences we will knit 40 chain stitches. In each of these stitches we knit 1 single crochet. When we reach the last stitch we knit 13 chain stitches and REPEAT the sequence previously done on the first leaf. Close with 1 slip stitch and cut the yarn.
For the other stems the number of chains for the stems varies: 35, 30, and 25 chain stitches.

- The following stems are knitted following the same steps. To keep the leaf on the left side of the stem, we start by knitting the leaf.

- To keep the leaf on the right side of the stem, we start knitting the stem.

- In my project it is also necessary to weave a loop. So with the yellow yarn we are going to knit 80 chain stitches. Then over each stitch we knit 1 half stitch. At the end we close with 1 slip stitch. We cut and hide the strand.
- We make with this cord a loop, which we will adjust with a piece of yellow thread.

PRESENTATION OF MY PROJECT USING THE FIVE PETAL DOUBLE FLOWER.
As I mentioned a little above, to make my project I needed a flat base, the flowers, stems, leaves and a woven ribbon. I also used glue to attach each of the parts to the base.

As you can see I chose to decorate the cover of my notebook with a beautiful bouquet of flowers. So all I had to do was to arrange each stem, place a flower between the leaves and place the pretty yellow ribbon at the bottom of the stems.

- This is how I finished my long-awaited project, I really like the result! Now I have my new notebook nice and presentable with the beautiful flowers I knitted to show in this contest.

I am very happy to have participated. I hope friends @mariajcastro28 and @katiuskamata are encouraged to participate, there is still time.
Thank you very much for your support. All photos are my property. I edited with Polish. I used Deepl translator. good luck to all participants. Blessings 🙏

