Español:
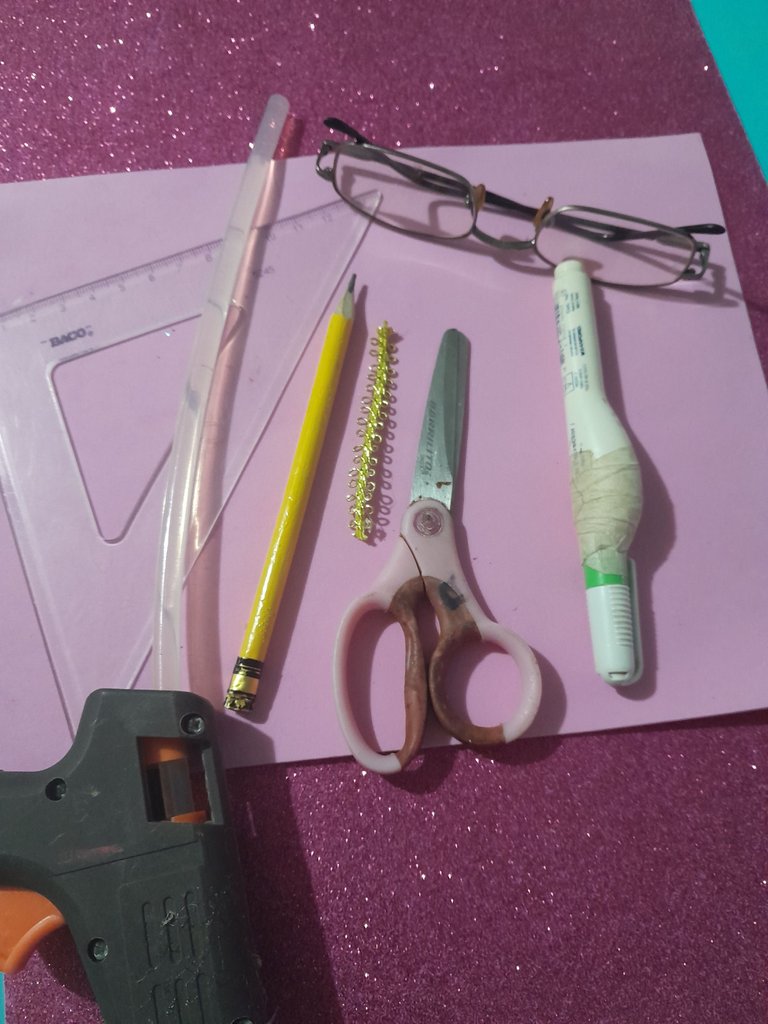
Materiales:
- Foami rosado.
- Silicon en barra.
- Corrector.
- Lápiz.
- 1 pedacito de cinta decorativa dorada.
- Tijera.
- Regla.
English:
Materials:
- Pink foami.
- Silicon stick.
- Concealer.
- Pencil.
- 1 piece of gold decorative ribbon.
- Scissors.
- Ruler.

Español:
Paso 1:
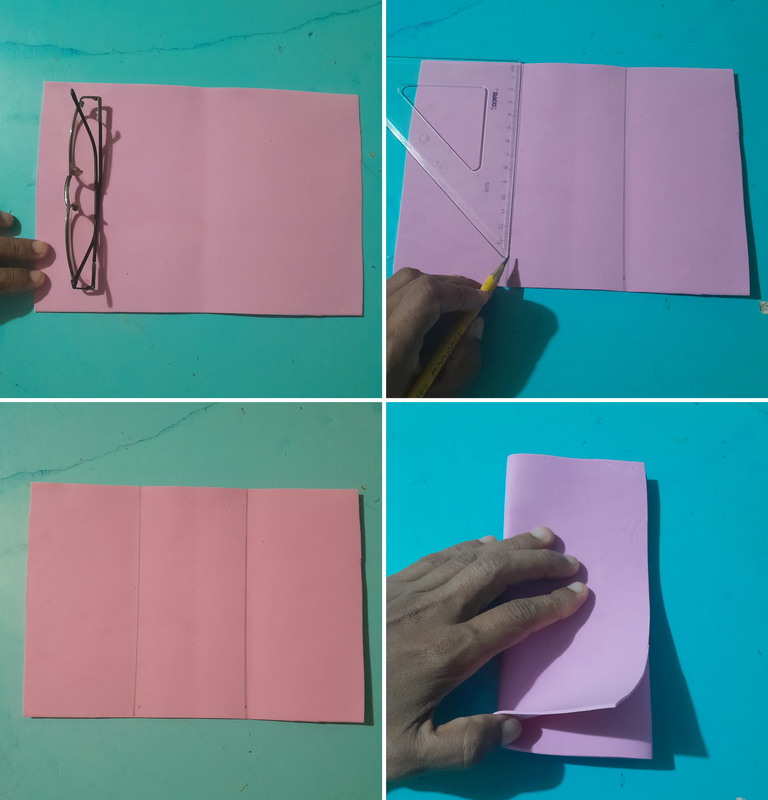
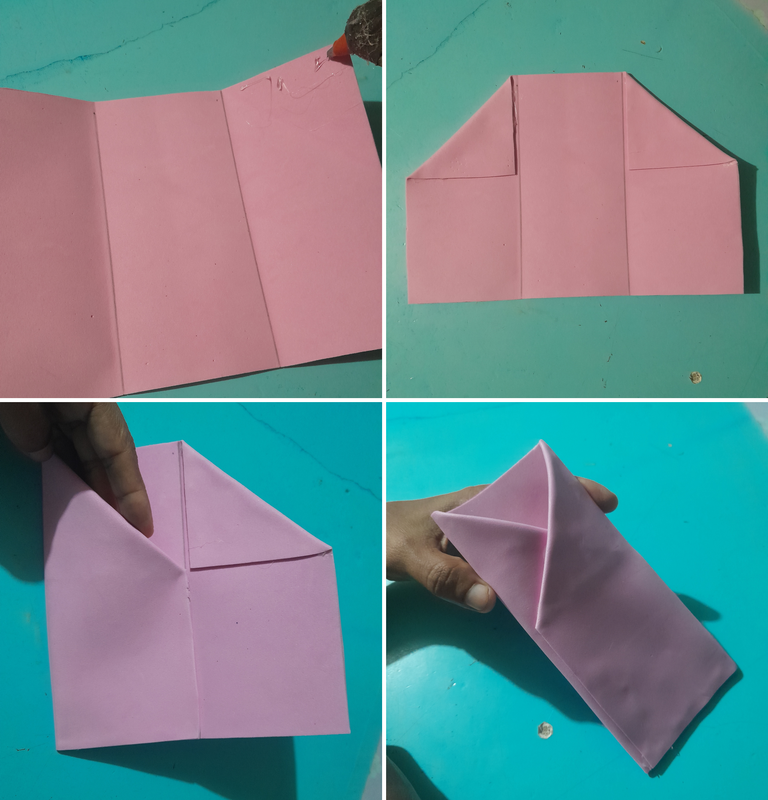
- Tomamos la medida de los lentes en el foami, para que el estuche quede a la medida exacta a los lentes, tomando en cuenta de dejar un centímetro más por ambos lados para cuando se vaya a pegar.
- Luego medimos el foami en 3 partes iguales, así como lo muestro en la foto, después doblamos por donde hicimos la marca con la ayuda de los dedos le hacemos un poco de presión para que el foami se remarque mejor.
English:
Step 1:
- We measure the size of the lenses on the foami, so that the case fits the exact size of the lenses, taking into account to leave an extra centimeter on both sides for when it is going to be glued.
- Then we measure the foami in 3 equal parts, as shown in the picture, then we fold where we made the mark with the help of our fingers we make a little pressure so that the foami is remarked better.

Español:
Paso 2:
- Ahora pegamos con silicon caliente las dos puntas de arriba, haciendo un dobles hacia abajo, quedando como forma de una casa.
- Seguimos pegando el borde de abajo y los lados, primero de un lado, después el otro lado dejando la parte superior suelta, para dejar la abertura del estuche.
English:
Step 2:
- Now we glue with hot silicone the top two ends, making a double downwards, leaving the shape of a house.
- We continue gluing the bottom edge and the sides, first one side, then the other side leaving the top part loose, to leave the opening of the case.

Español:
Paso 3:
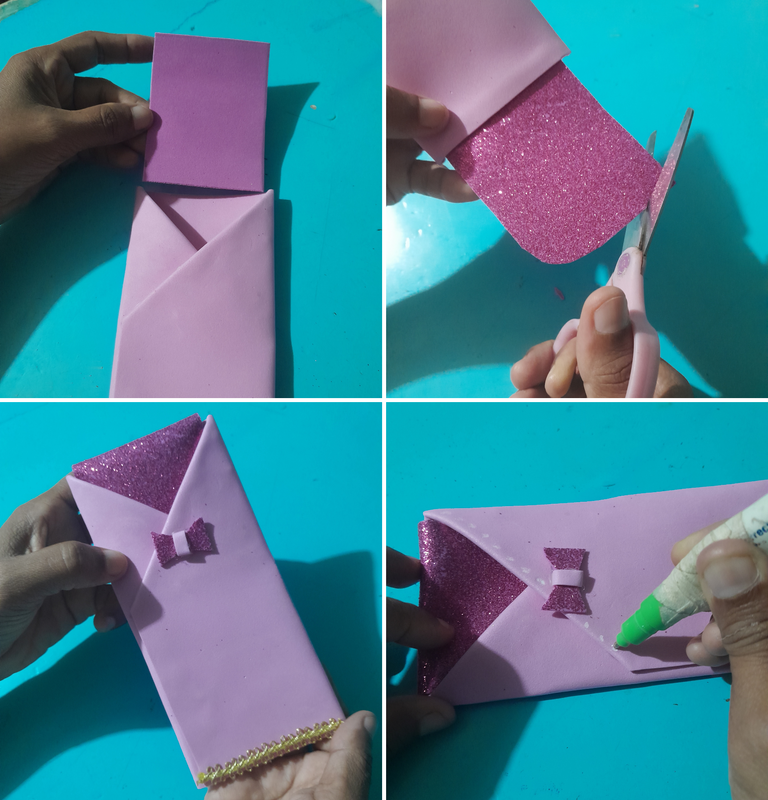
- Luego hacemos la tapa del estuche con el foami escarchado, recortando un rectángulo del tamaño de la abertura y pegamos por la parte de adentro, después con la tijera recortamos las puntas e introducimos hacia dentro.
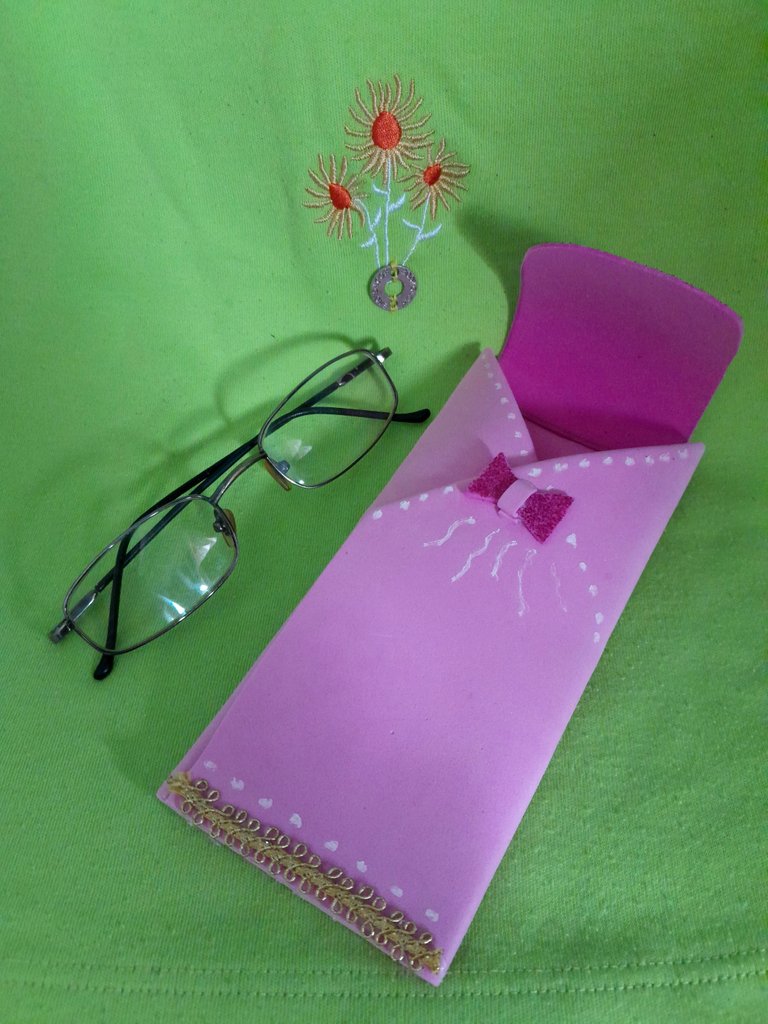
- Para terminar, decoramos nuestro estuche haciendo un lazito con el mismo foami y lo pegamos en el medio, también pego la cinta decorativa en la parte inferior del estuche y por último dibujo unos puntos con el corrector. ( la decoración la pueden hacer a su gusto.)
English:
Step 3:
- Then we make the lid of the box with the frosted foami, cutting out a rectangle the size of the opening and glue it on the inside, then with the scissors we cut the ends and insert them inside.
- To finish, we decorate our case making a bow with the same foami and glue it in the middle, I also glue the decorative ribbon on the bottom of the case and finally I draw some dots with the concealer (the decoration can be done to your liking).

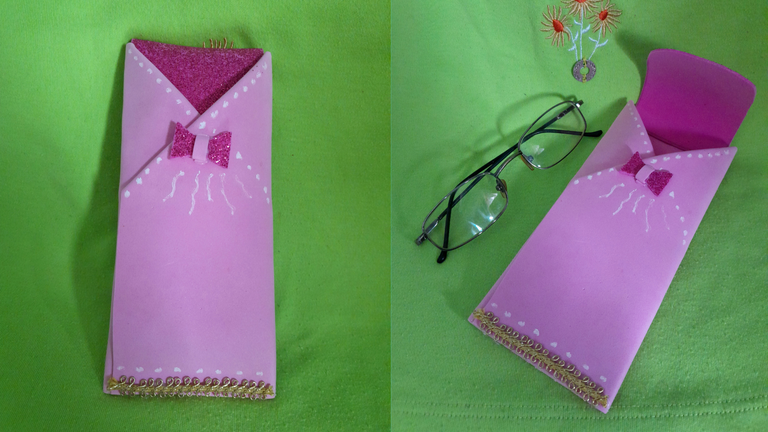
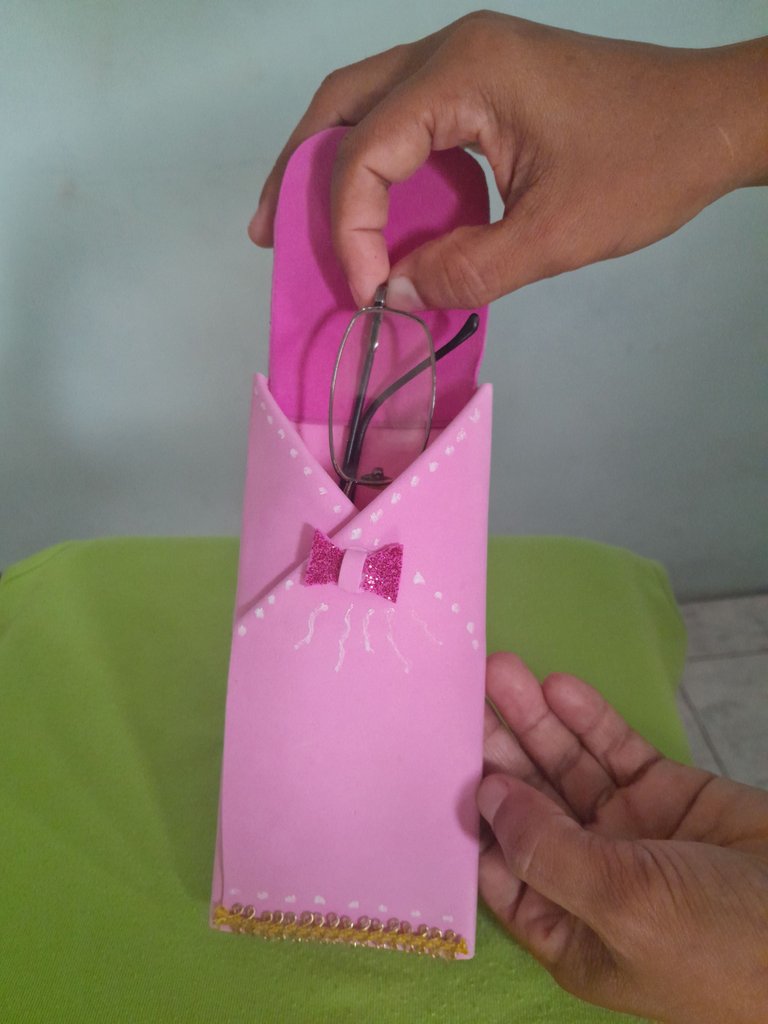
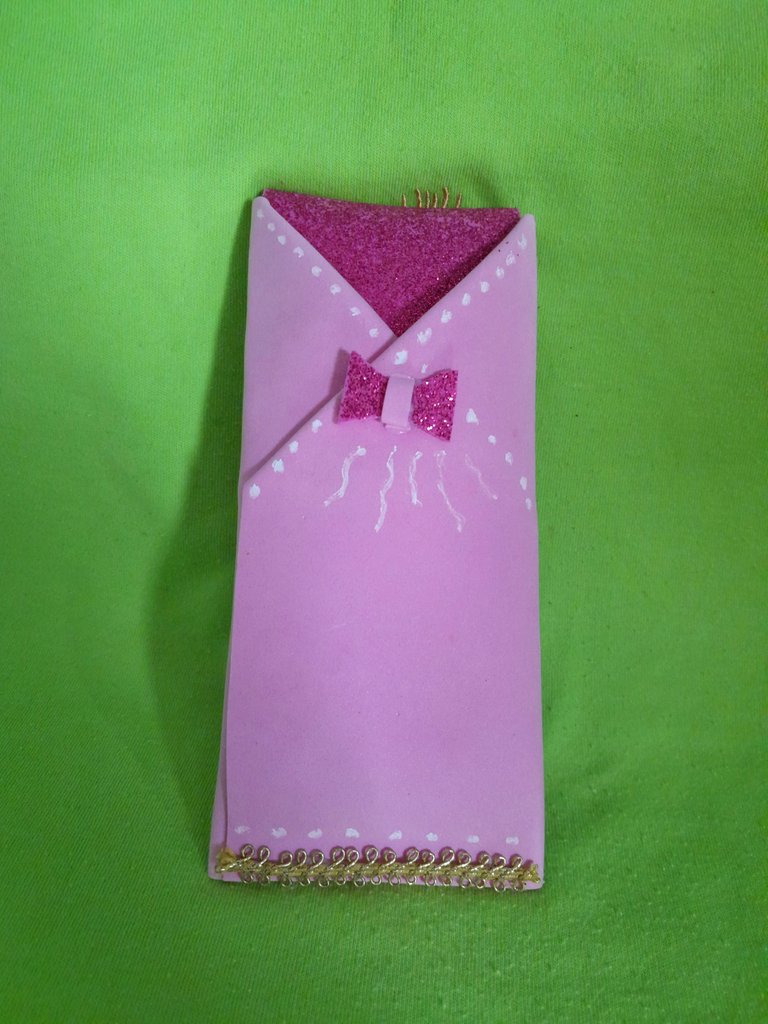
Resultado final, saludos bendiciones para todos.
Final result, greetings and blessings to all.
Todas las fotos son de mi autoría y editadas con Canva.Traductor: DeepL Translate.
All photos are my own and edited with Canva.Translator: DeepL Translate.
