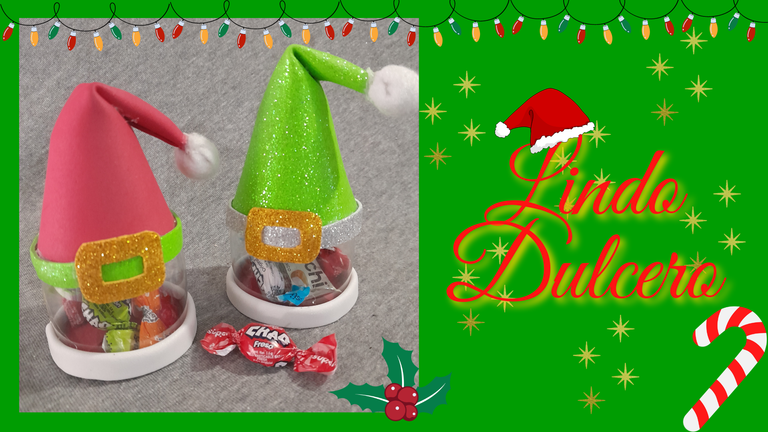
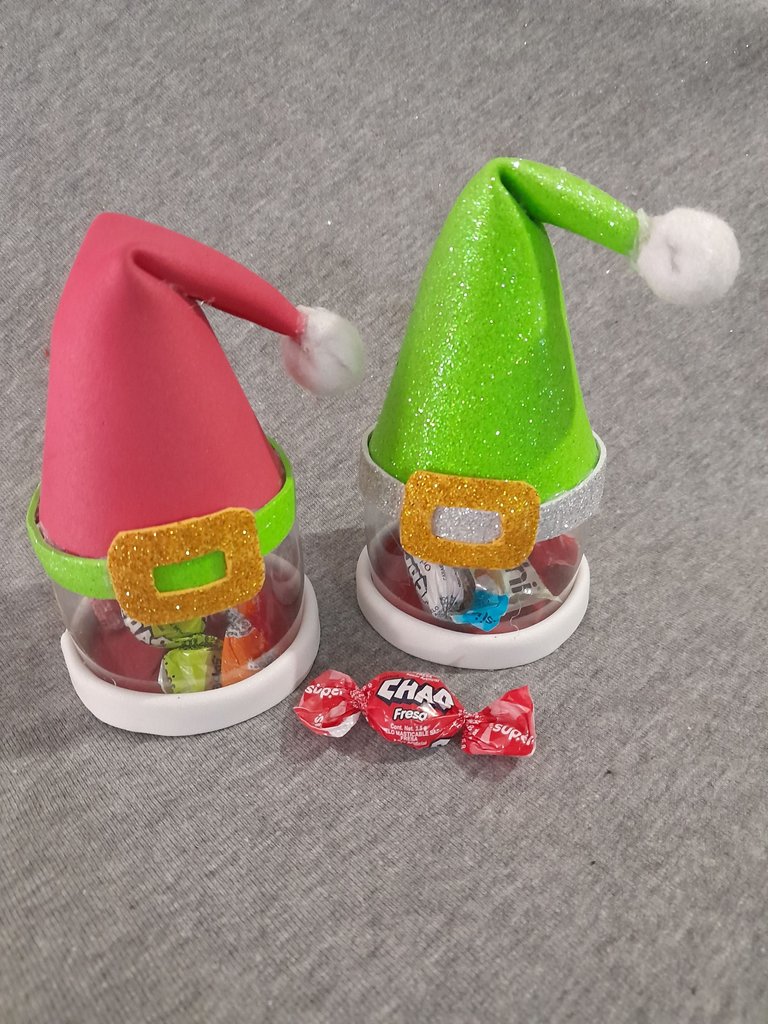
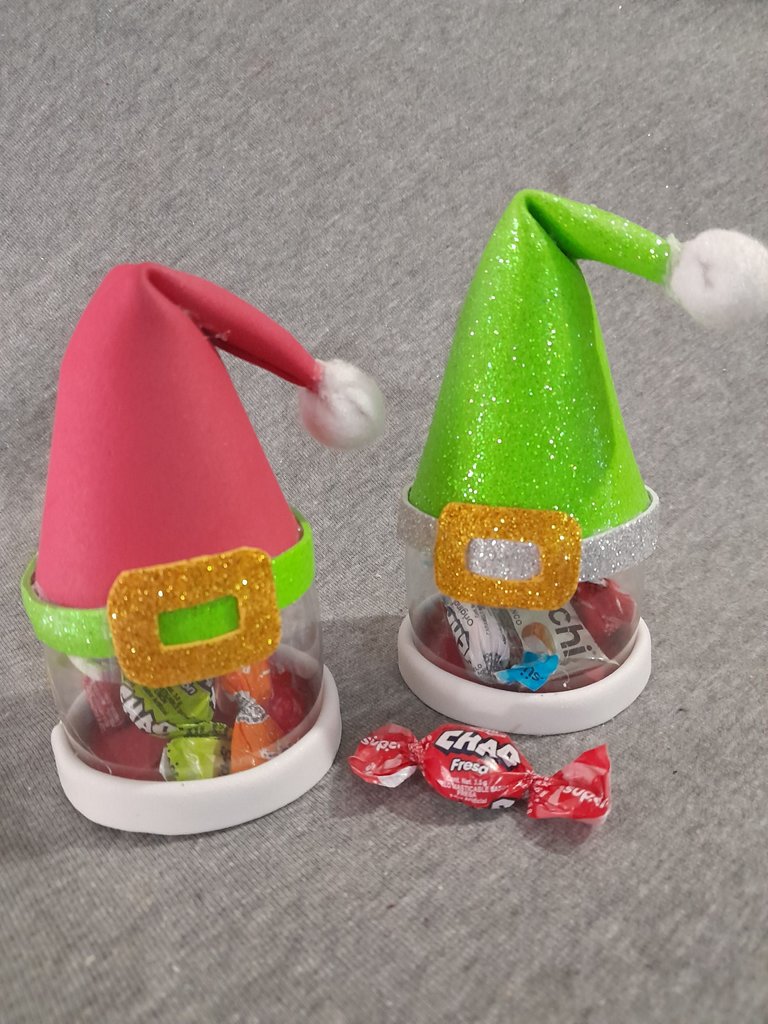
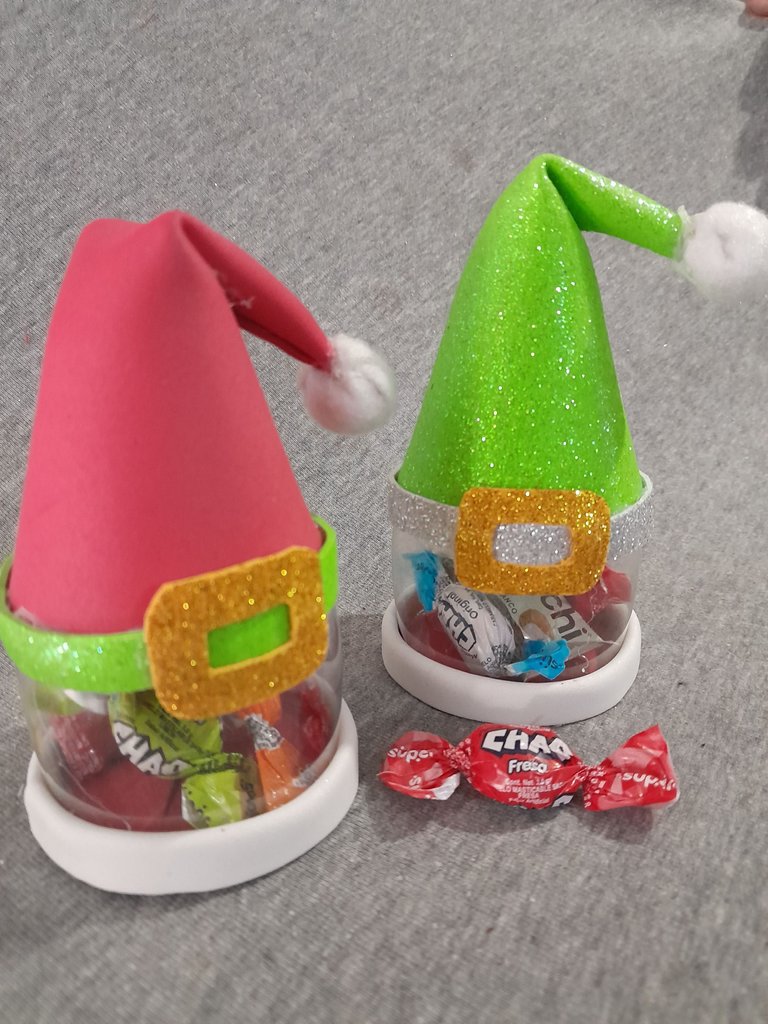
Welcome to my blog my beautiful people, I hope you are well. Continuing with the Christmas theme I want to show you how to make a nice candy box, ideal to give as a gift in this time of joy and sharing with family and friends.
Español:
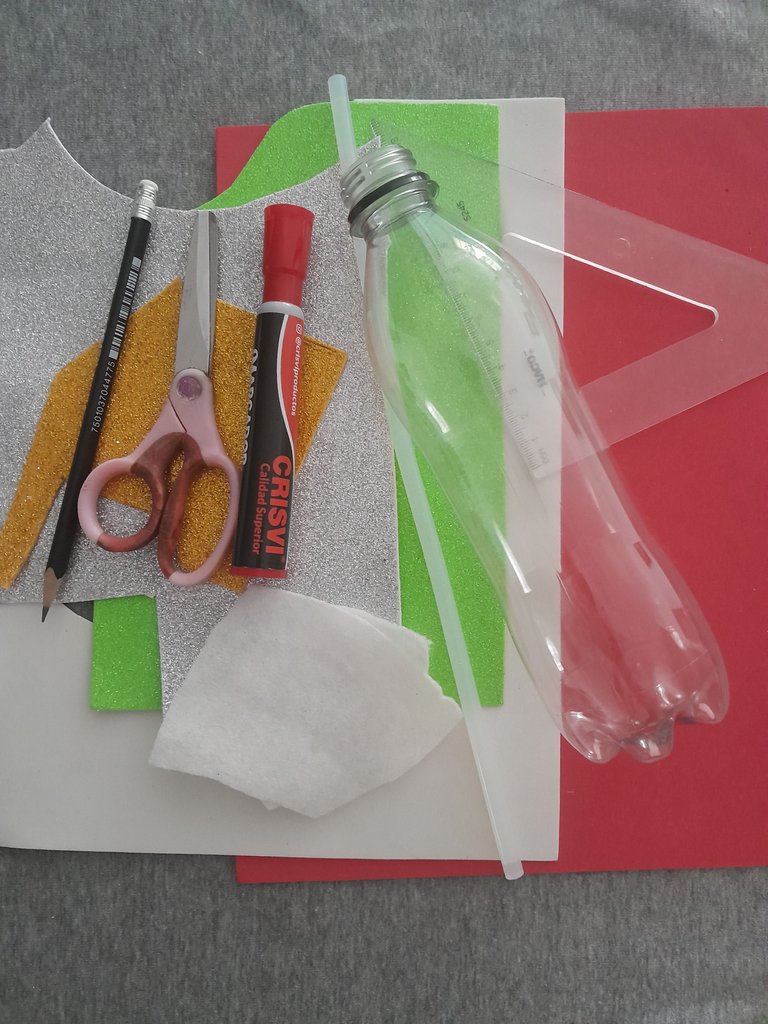
Materiales:
- Foami rojo, verde, blanco, amarillo.
- Frasco de plástico.
- Fieltro blanco.
- Marcador.
- Silicon.
- Lapiz.
- Tijera.
- Regla.
English:
Materials:
- Red, green, white, yellow Foami.
- Plastic bottle.
- White felt.
- Marker.
- Silicon.
- Pencil.
- Scissors.
- Ruler.

Español:
Paso 1:
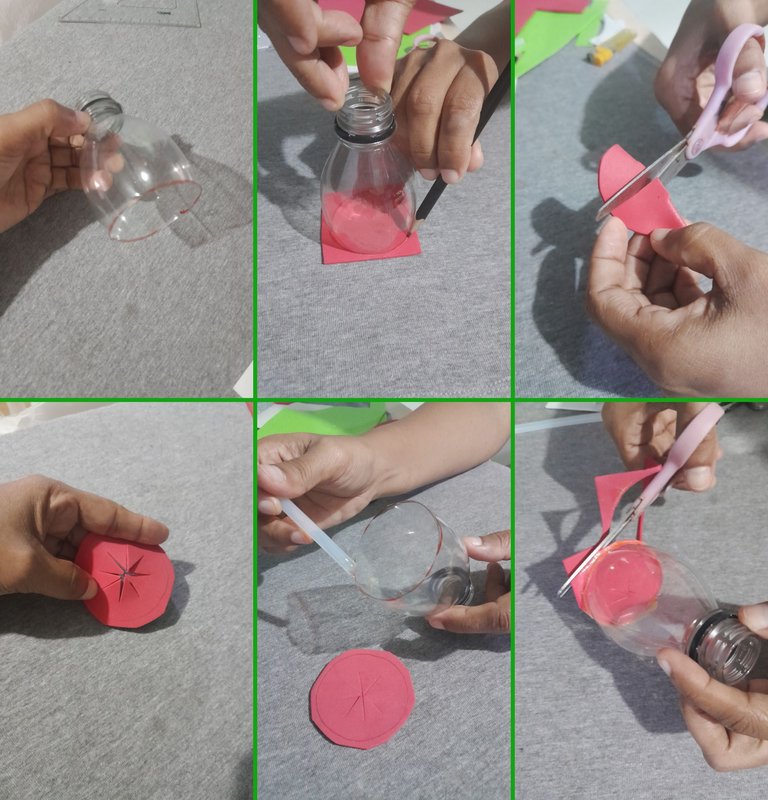
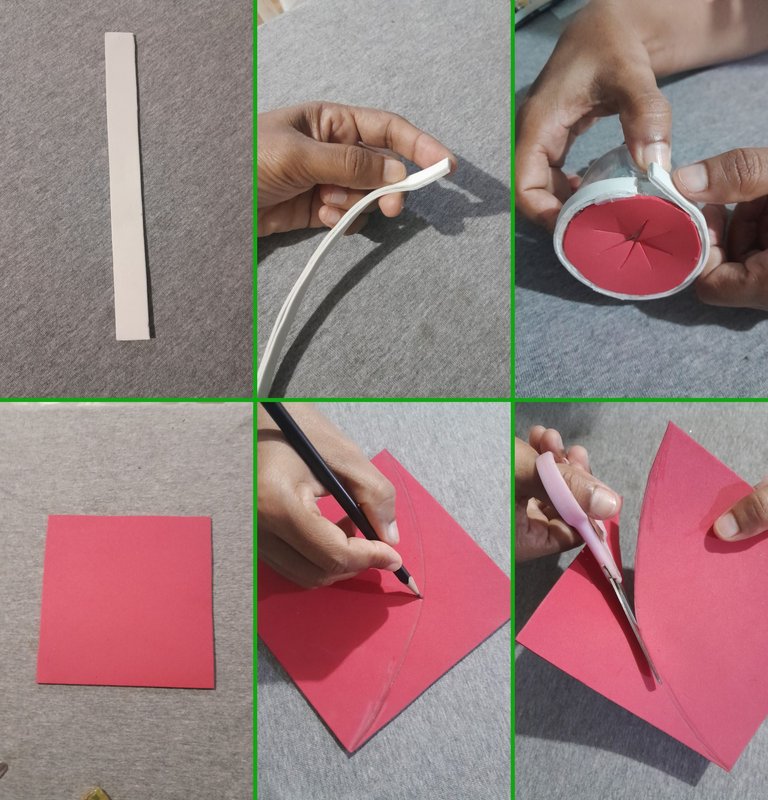
- Con el marcador marcamos todo el borde del frasco plástico a una altura de 10 cm tomando en cuenta que yo utilice un frasco pequeño, porque también lo pueden realizar del tamaño de su preferencia, luego lo recortamos y procedo a marcar en el foami rojo el círculo de la base del dulcero, lo doblamos en dos y realizamos varios cortes con la tijera así como lo muestro en la foto, después colocamos silicon por el borde del frasco y lo pegamos a la base de foami, luego recortamos el sobrante de la base.
English:
Step 1:
- With the marker we mark the entire edge of the plastic jar at a height of 10 cm taking into account that I used a small jar, because you can also make it the size of your preference, then we cut it and proceed to mark on the red foami the circle of the base of the candy box, we fold it in two and make several cuts with the scissors as shown in the photo, then we put silicone on the edge of the jar and glue it to the foami base, then cut the excess of the base.

Español:
Paso 2:
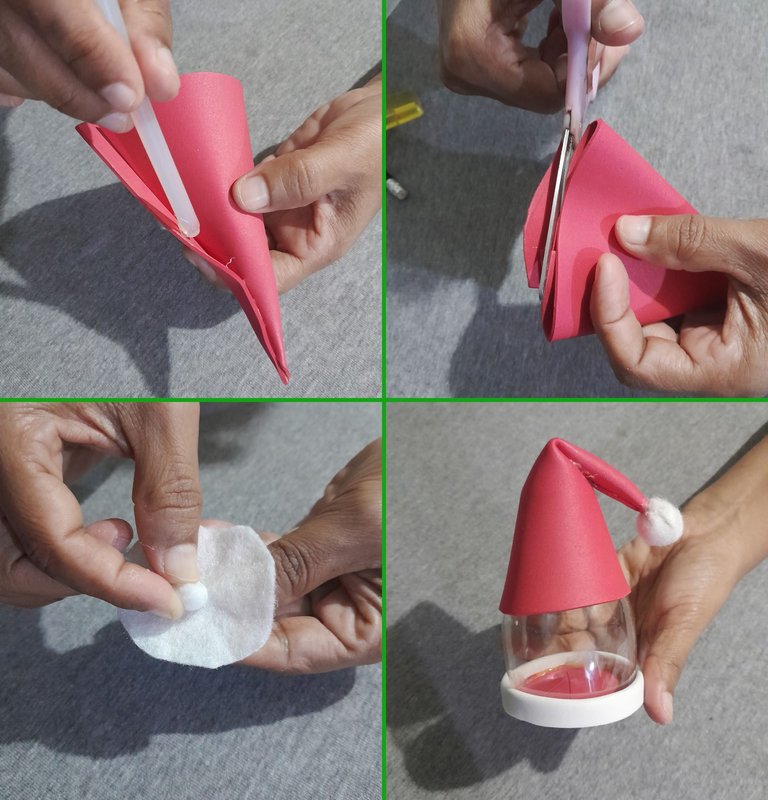
- Ahora marcamos y recortamos 1 tira de foami blanco de 2 cm de ancho, lo doblamos en dos pegando con silicon caliente quedando un tira doble de 1 cm, Luego la pegamos por todo el alrededor del frasco junto con la base.
- Luego continuamos con el gorro, recortamos un cuadrado de 14 en el foami rojo, después marcamos con el lápiz una linea semi curva desde una esquina a la otra y recortamos por toda la linea.
English:
Step 2:
- Now we mark and cut 1 strip of white foami of 2 cm wide, we fold it in two and glue it with hot silicone leaving a double strip of 1 cm, then we glue it all around the bottle together with the base.
- Then we continue with the cap, we cut a square of 14 in the red foami, then we mark with the pencil a semi curved line from one corner to the other and cut all along the line.

Español:
Paso 3:
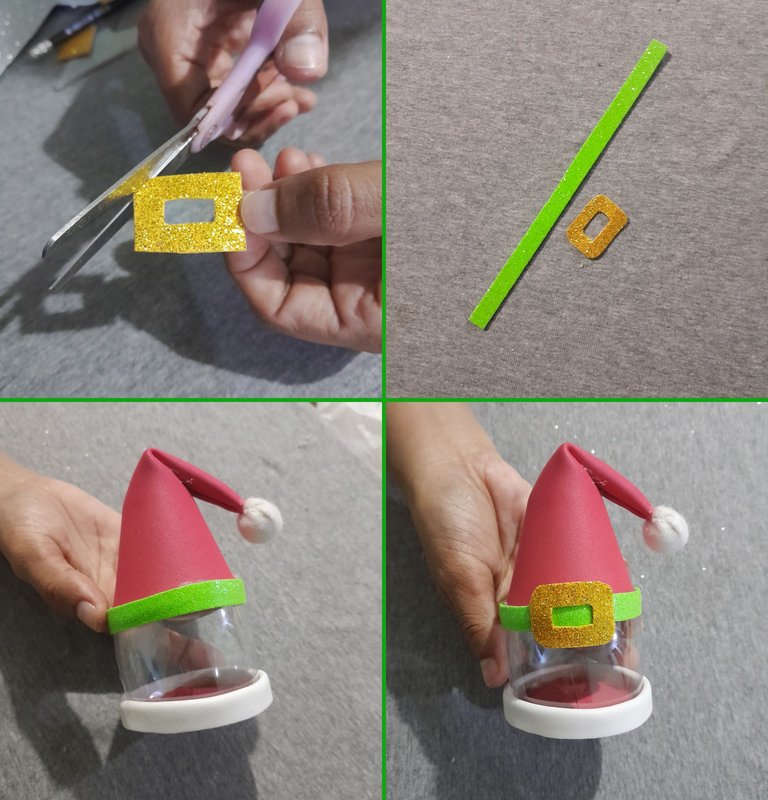
- Después que recortamos en el foami por toda la linea semi curva, pegamos ambos lados en forma de cono, luego doblamos dejando la parte que pegamos atrás y recortamos para nivelar los bordes, luego hago una bolita con el pedacito de fieltro blanco vamos pegando con mucho cuidado con silicon y pegamos la bolita en la punta del gorro. Continuo pegando con silicon por el lado de adentro del borde del gorro colocandolo al frasco.
English:
Step 3:
- After we cut out the foami along the semi-curved line, we glue both sides in the shape of a cone, then we fold leaving the part we glued behind and we cut to level the edges, then I make a little ball with the little piece of white felt, we glue very carefully with silicone and we glue the little ball on the tip of the hat. I continue gluing with silicone on the inside of the rim of the cap, placing it on the jar.

Español:
Paso 4:
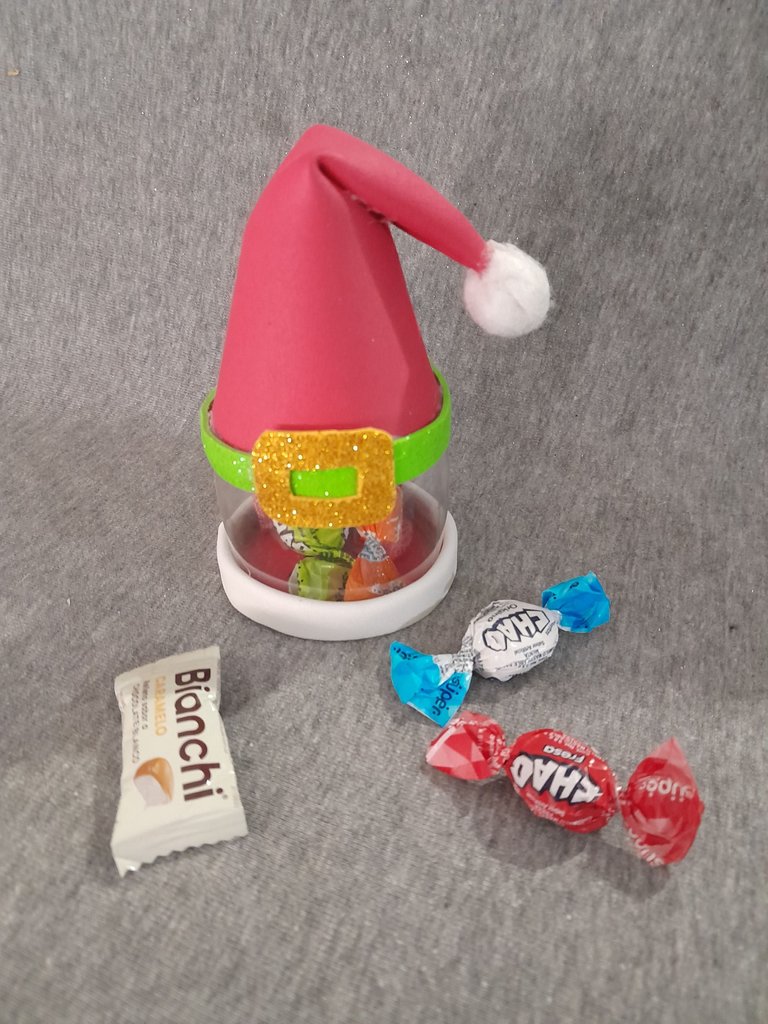
- Ahora hacemos un diseño en forma de cinturón, recortando un rectángulo en el foami amarillo dejando una abertura en el centro de 1 cm de ancho y 2 cm de largo eso va depender del tamaño del cinturón, luego le cortamos las puntas; también recortamos 1 tira de 1 cm de ancho de foami verde para completar el cinturón, y lo pegamos al borde del gorro.
Así tendremos un lindo dulcero con diseño navideño, para obsequiar y compartir en esta época navideña.
English:
Step 4:
- Now we make a design in the shape of a belt, cutting a rectangle in the yellow foami leaving an opening in the center of 1 cm wide and 2 cm long that will depend on the size of the belt, then we cut the ends; we also cut 1 strip of 1 cm wide green foami to complete the belt, and we glue it to the edge of the hat.
This way we will have a nice candy box with a Christmas design, to give as a gift and share this Christmas season.

Espero que les haya gustado mi resultado final. Saludos feliz día.
I hope you liked my final result. Greetings happy day.
Todas las fotos son de mi autoría y editadas con Canva.
All the photos were taken by me and edited with Canva.
