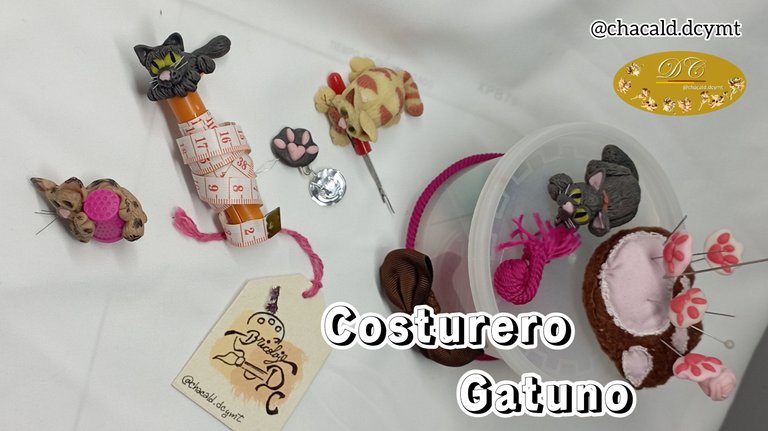
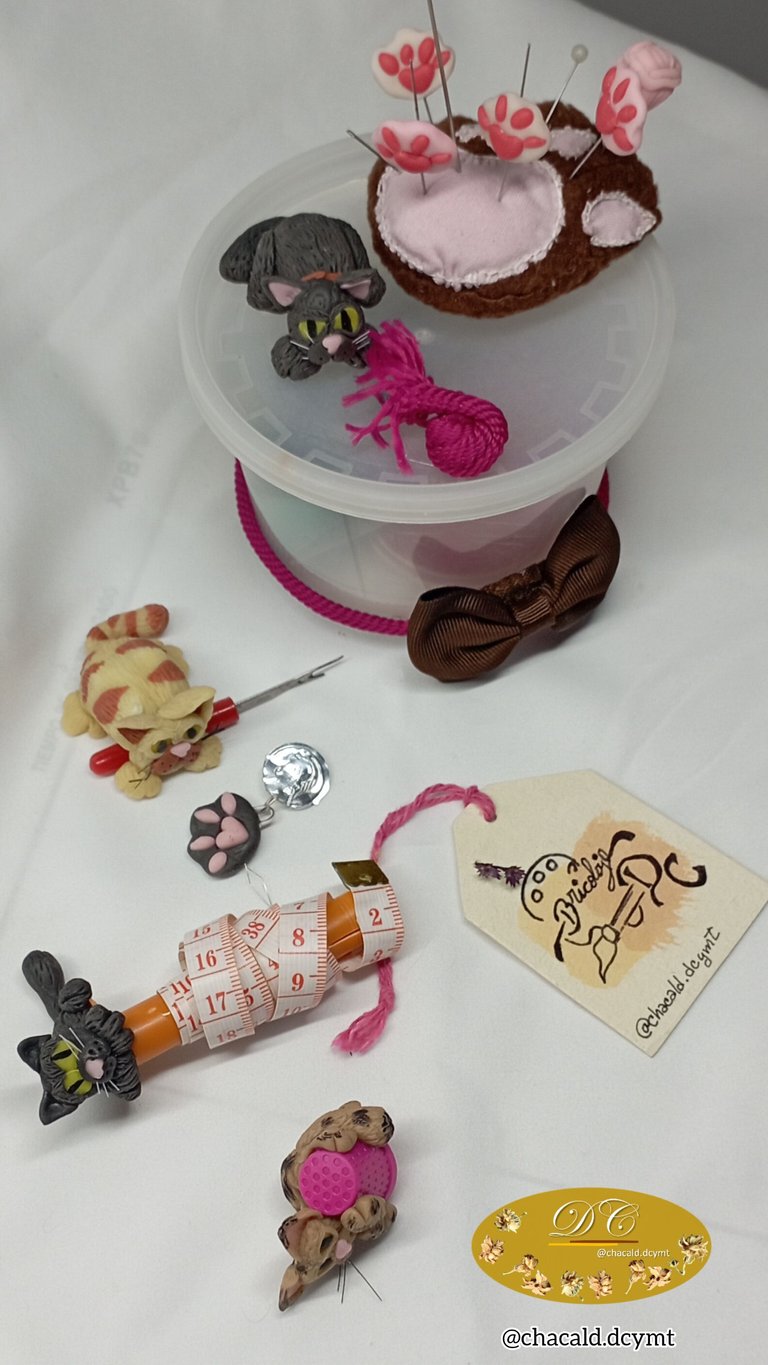
¡Saludos amigos amantes de las artes manuales! Sean bienvenidos una vez más a mi taller Bricolaje DC. Hoy me gustaría compartir la segunda parte de mi entrada al concurso Tributo a los gatos de @diyhub, en esta oportunidad con un costurero gatuno. Acompáñenme y les enseño el proceso.
Un costurero podría tener muchas cosas adentro como un cartabón, enhebrador de agujas, dedal, hilos, imperdibles, tijera, agujas. Mi idea fue personalizar todos estos instrumentos de costura y que mejor forma que con la temática de gatitos.
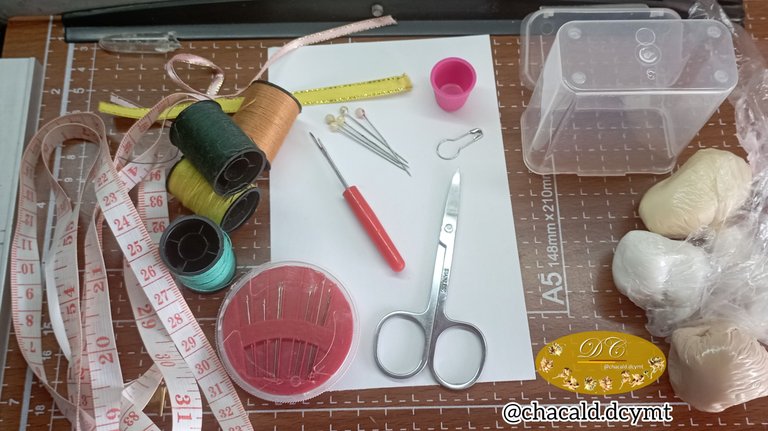
Vamos a necesitar un recipiente plástico con tapa para hacer nuestro costurero, dedal, enhebrador de agujas, tubino de hilo vacío, cartabón, saca costuras, masa de porcelana fría, cordón y lazo, silicona, pegamento de carpintería, plastico transparente, resina y un alfiler.
Greetings friends who love handicrafts! Welcome once again to my workshop Bricolage DC. Today I would like to share the second part of my entry to the Tribute to Cats contest by @diyhub, this time with a catty sewing kit. Join me and I'll show you the process.
A sewing box could have a lot of things inside like a bevel, needle threader, thimble, threads, safety pins, scissors and needles. My idea was to personalise all these sewing tools and what better way than with a kitten theme.
We are going to need a plastic container with a lid to make our sewing box, thimble, needle threader, empty thread tube, bevel, seam ripper, cold porcelain dough, string and ribbon, silicone, carpentry glue, transparent plastic, resin and a pin.
Hice un gatito para adornar cada pieza. El proceso de elaboración es básicamente el mismo. Lo que cambia son los colores, las posiciones en que están los gatitos y el instrumento que adornan. Entonces voy a explicar uno solo de ellos.
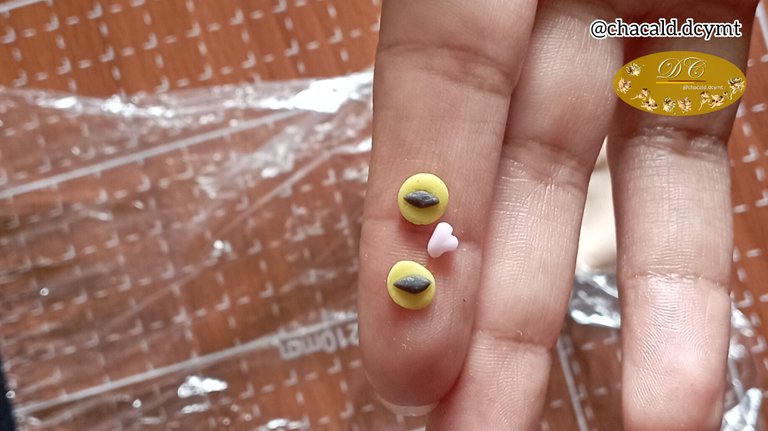
Ojos y nariz de gato:
Tomamos una diminuta porción de masa de porcelana fría de color negro y vamos a hacer un par de rombos. Dejamos secar al aire.
Luego tomamos unas pequeñas bolitas de masa de color amarillo y las aplanamos tratando que queden del mismo tamaño. Tomamos los rombos y los incrustamos. Dejamos secar al aire. Para la nariz necesitamos una diminuta bolita de masa de color rosado claro, le damos forma de corazón y marcamos los orificios. Dejamos secar todas las piezas.
I made a kitten to decorate each piece. The elaboration process is basically the same. What changes are the colours, the positions of the kittens and the instrument they adorn. So I will explain just one of them.
Cat eyes and nose:
We take a tiny piece of cold porcelain dough of black colour and we are going to make a couple of rhombuses. Let it dry in the air.
Then we take a few small balls of yellow dough and flatten them so that they are the same size. We take the lozenges and embed them. Let them air dry. For the nose we need a tiny ball of light pink dough, we shape it into a heart and mark the holes. Let all the pieces dry.
Cabeza de gato:
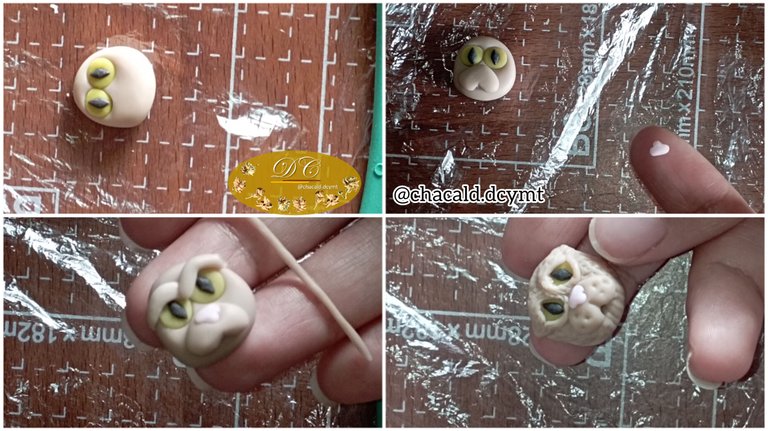
Para la cabeza tomamos una bolita de masa del color de nuestra preferencia. Vamos a aplanar un poco y con una gota de pegamento fijamos los ojos.
Luego tomamos una bolita de masa del mismo color de la cabeza y le vamos dar forma de corazón. Incrustamos la nariz y con el alfiler hacemos pequeños rasguños como si fuera el pelaje del gato.
Cat's head:
For the head we take a ball of dough in the colour of our choice. We flatten it a bit and with a drop of glue we fix the eyes.
Then take a ball of dough of the same colour as the head and shape it into the shape of a heart. Embed the nose and make small scratches with the pin as if it were the cat's fur.
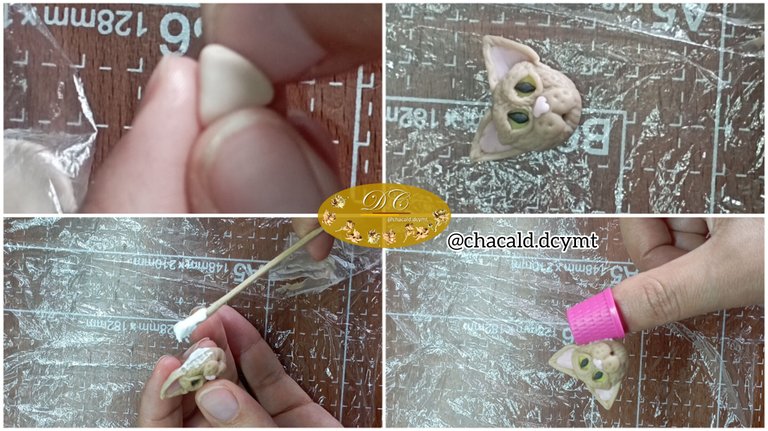
Hacemos los triángulos de las orejas y pegamos sobre la cabeza. Podemos incrustar algunos pelos de cepillo para simular los bigotes.
We make the triangles of the ears and glue them on the head. We can embed some brush hairs to simulate the moustaches.
Patas y cola de gato:
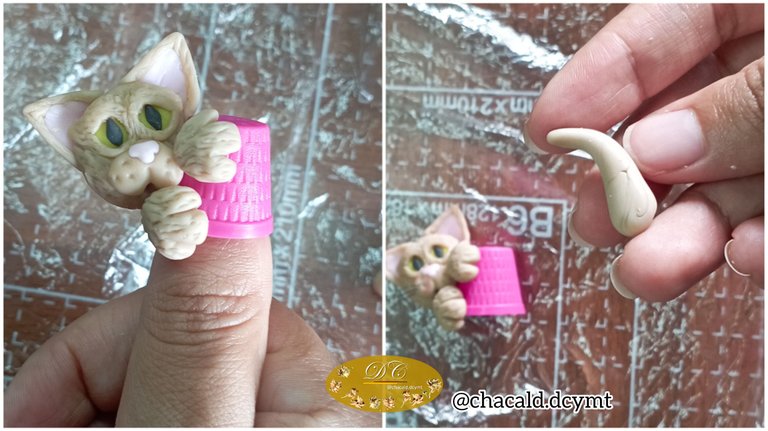
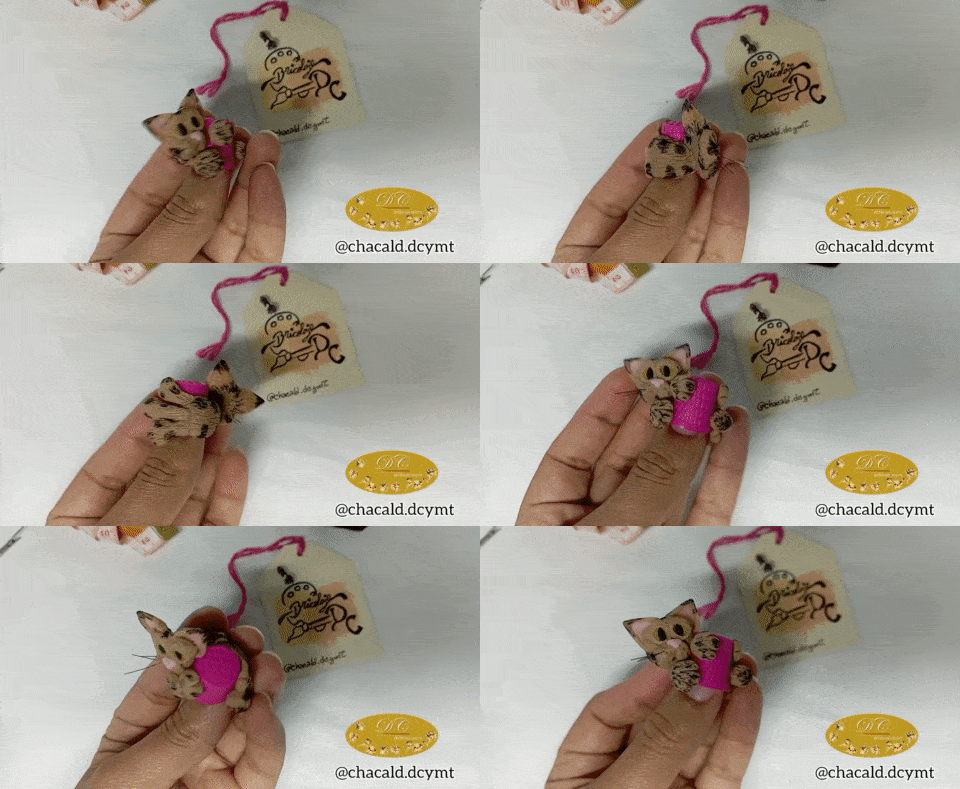
Las patas de gato seran bolitas de masa del mismo color de la cabeza. Le damos la textura del pelaje con el alfiler y pegamos al instrumento de costura, en este caso el dedal. Luego hacemos la cola con un una bolita de masa que le daremos forma de gota alargada. Con el alfiler marcamos el pelaje.
Cat's paws and tail:
The cat's paws will be little balls of dough in the same colour as the head. We give the texture of the fur with the pin and stick it to the sewing instrument, in this case the thimble. Then we make the tail with a ball of dough in the shape of an elongated drop. With the pin we mark the fur.
Cuerpo de gato:
Tomamos una bolita en forma de gota del mismo color de las demás partes del cuerpo del gato. Marcamos el pelaje con el Alfiler y tratamos que unir todas las piezas para que no se noten separadas. Pegamos al dedal y vamos a pegar la cola.
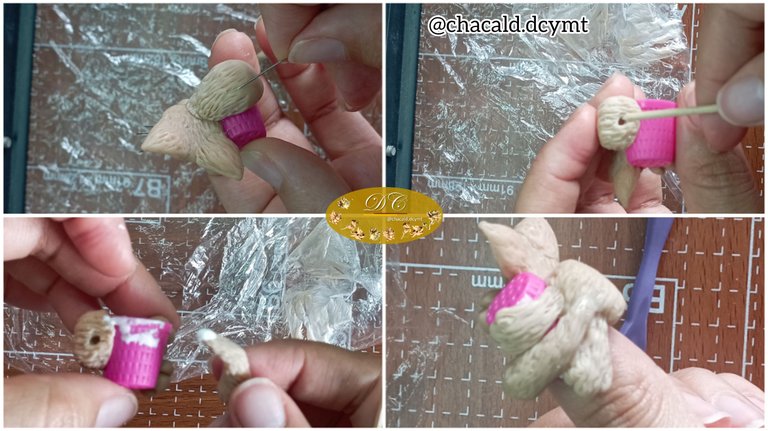
Y así queda nuestro pequeño gatito. Después vamos a repetir esto con cada instrumento que queremos decorar y cuando están nuestros gatitos listos aplicamos una capa de resina para proteger las piezas, dejamos secar por 8 horas en un lugar ventilado y listo.
And this is how our little kitten looks like. Then we are going to repeat this with each instrument we want to decorate and when our kittens are ready we apply a layer of resin to protect the pieces, let them dry for 8 hours in a ventilated place and that's it.
En la tapa del recipiente, pegué el Alfiletero gatuno que hice en la primera parte de mi participación.
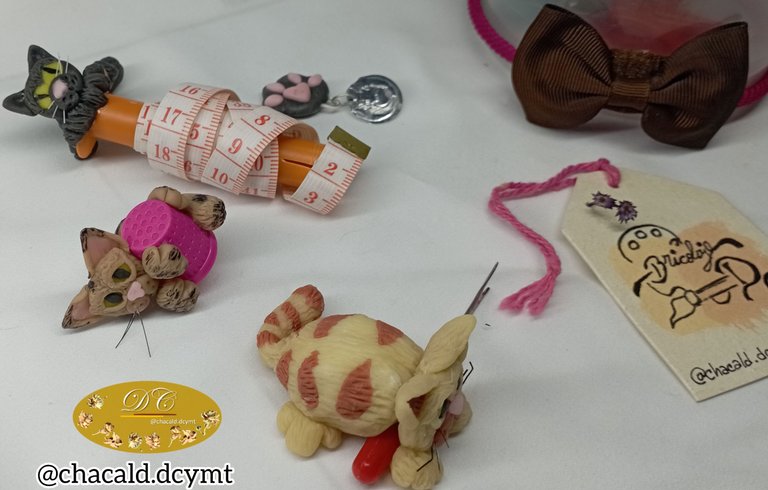
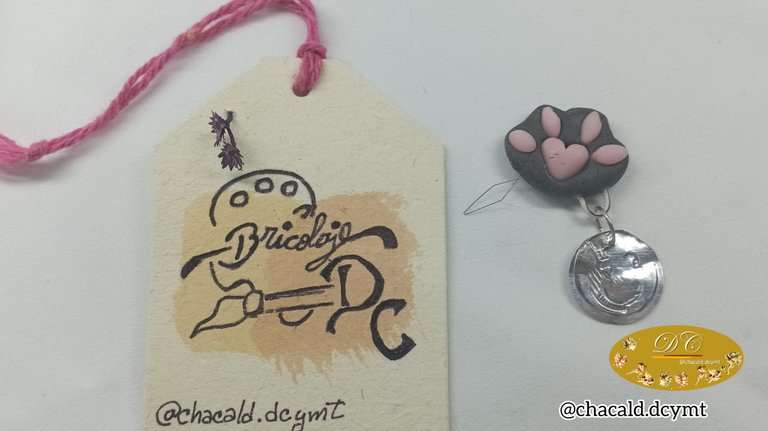
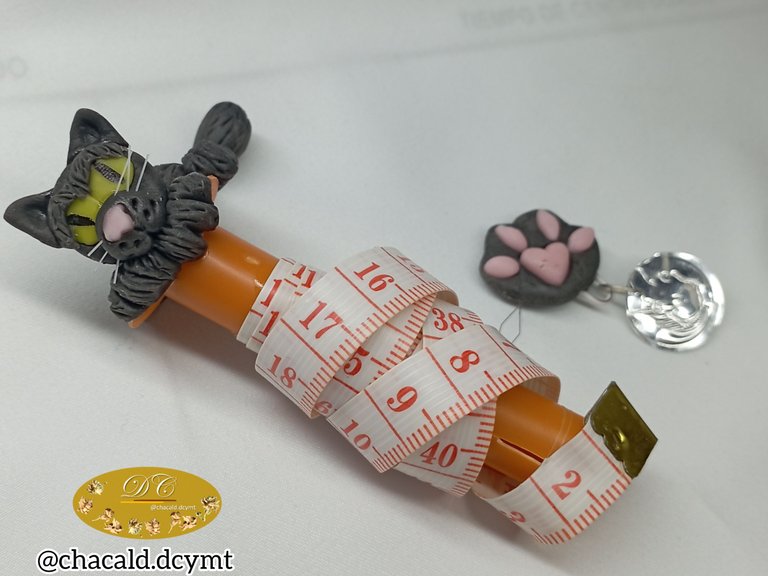
Espero les guste mi pequeño homenaje a los amantes de los gatos. Nos vemos en una próxima oportunidad. Chao!
I hope you like my little tribute to cat lovers. See you next time. Bye!

Original content by the author.
Resources: App: Canva / Giphy / Inshot
📷 Redmi 10 Smartphone
Translation done with Deepl.com
✿ All Rights Reserved || © @chacald.dcymt 2023 ✿
💌 Discord: chacald.dcymt#3549
Twitter @chacald1
_
Contenido original del autor.
Recursos: App: Canva / Giphy / Inshot
📷 Redmi 10 Smartphone
Traducido con Deepl.com
✿ Todos los Derechos Reservados || © @chacald.dcymt 2023 ✿
💌 Discord: chacald.dcymt#3549
Twitter @chacald1


