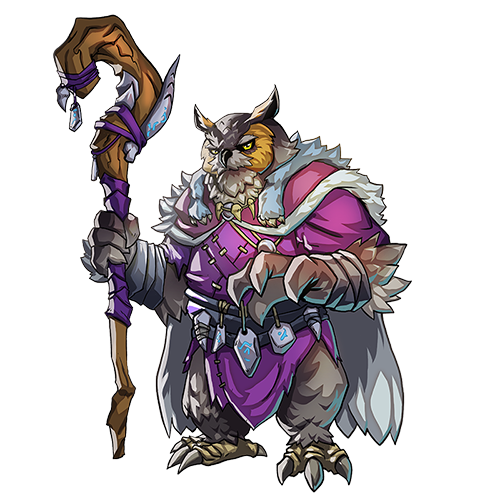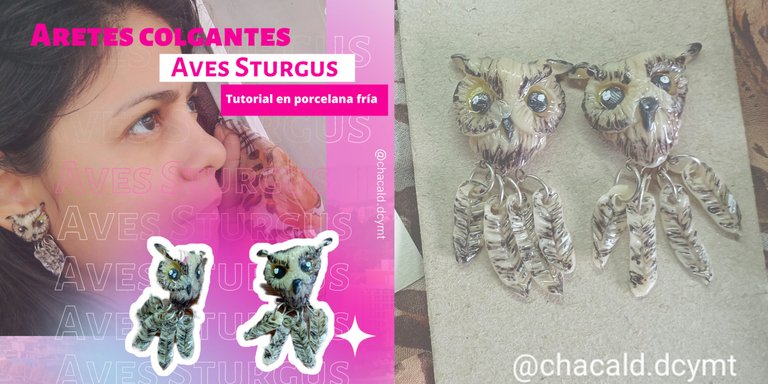
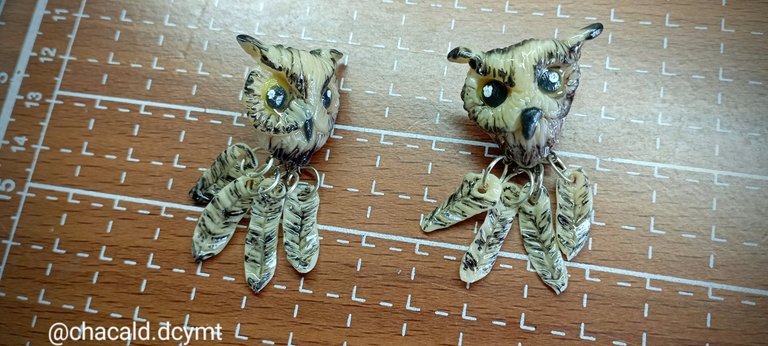
¡Saludos amigos amantes de las artes manuales! Sean bienvenidos una vez más a mi taller Bricolaje DC. Hoy me gustaría compartir la primera pieza de una colección que he creado inspirada en una carta del popular juego de Hive Splinterland, a la que llamo Aretes colgantes Aves Sturgus.
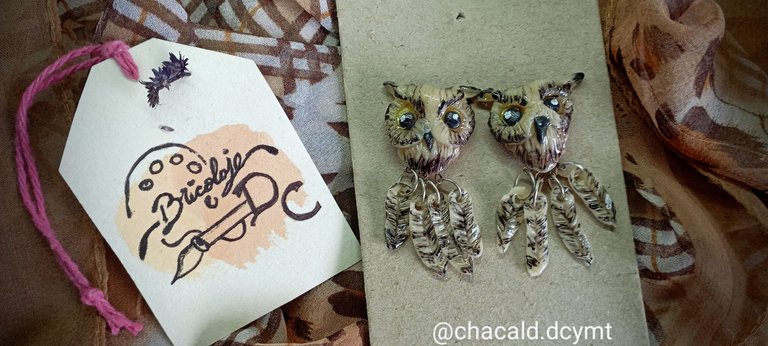
Esta pieza de joyería, la he realizado en porcelana fría. Mi idea era que se pudiera apreciar la cara del búho en la parte que va en la oreja y las plumas del ave colgando, ya que los aretes colgantes son mis favoritos.
! [Click here to read in english]
Aves Sturgus dangling earrin
Cold porcelain tutorial
Greetings friends who love handicrafts! Welcome once again to my workshop Crafting DC. Today I would like to share the first piece of a collection I have created inspired by a card from the popular Hive game Splinterland, which I call Aves Sturgus dangling earrings.
This piece of jewellery is made in cold porcelain. My idea was that you could appreciate the owl's face in the part that goes in the ear and the feathers of the bird hanging, as dangling earrings are my favourite.

Para este proyecto vamos a necesitar los siguientes materiales:
Masa de porcelana fría
Acuarelas
Pincel
Pegamento de carpintería
Resina
Guantes y mascarilla
8 Argollas de bisutería medianas
Trozo de alambre de bisutería
Marcador punta fina de color negro
Base para aretes con topes de silicón
Alfiler
Estecas de moldear
! [Click here to read in english]
For this project we will need the following materials:
Cold porcelain dough
Watercolours
Brush
Carpentry glue
Resin
Gloves and mask
8 medium-sized costume jewellery rings
Piece of costume jewellery wire
Black fine tip marker
Base for earrings with silicone stops
Pin
Moulding sticks

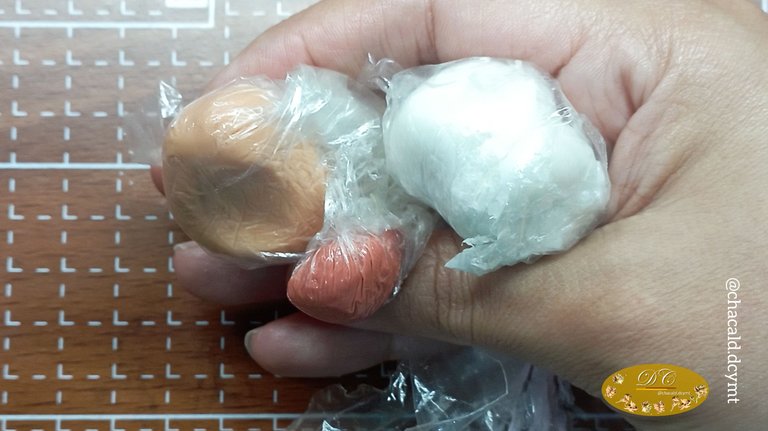
Lo primero que haremos, será darle color a la masa con la acuarela. Necesitamos un color terracota para la base y color beige claro para darle forma al búho y a las plumas. Tambien un trozo pequeño de color negro para los ojos y los pico y un trozo de color amarillo para los ojos.
! [Click here to read in english]
The first thing we will do is to colour the dough with watercolour. We need a terracotta colour for the base and a light beige colour to shape the owl and the feathers. Also a small piece of black for the eyes and beak and a piece of yellow for the eyes.
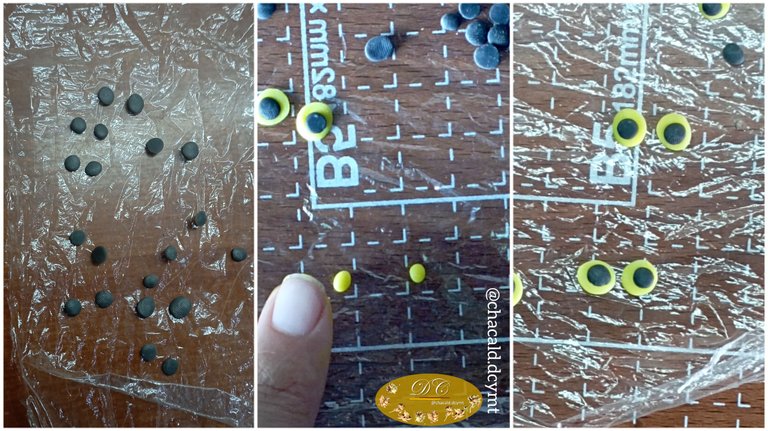
Una vez lista la masa de colores, vamos a hacer las piezas que necesitamos que esten secas y endurecidas primero para incrustar sobre el cuerpo del búho, como lo son los ojos y el pico. Necesitamos 2 pares de ojos y 2 picos.
Para hacer los ojos, vamos a tomar pequeñas bolitas de color negro y las aplanamos. Esto será el centro del ojo. Dejamos secar al aire hasta que se endurezca, aproximadamente 2 horas.
Luego tomamos una porcion más grande de masa de color amarillo y aplanamos, vamos a colocar pegamento en la pieza de color negro y la incrustamos sobre la de color amarillo. Dejamos secar.
! [Click here to read in english]
Once the coloured dough is ready, we are going to make the pieces that we need to be dry and hardened first to embed on the owl's body, such as the eyes and the beak. We need 2 pairs of eyes and 2 beaks.To make the eyes, we are going to take small black balls and flatten them. This will be the centre of the eye. We let it air dry until it hardens, about 2 hours.
Then we take a larger portion of yellow dough and flatten it, we will put glue on the black piece and embed it on the yellow one. Let it dry.
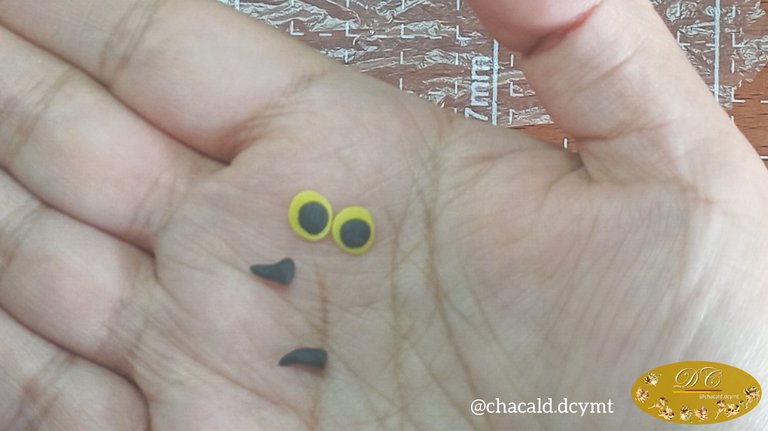
Para los picos, haremos unos pequeños triángulos y doblamos una de sus puntas hacia atrás. Dejamos secar todas las piezas para comenzar a trabajar el cuerpo de los búhos.
! [Click here to read in english]
For the beaks, we will make small triangles and fold one of their ends backwards. Let all the pieces dry and start working on the body of the owls.
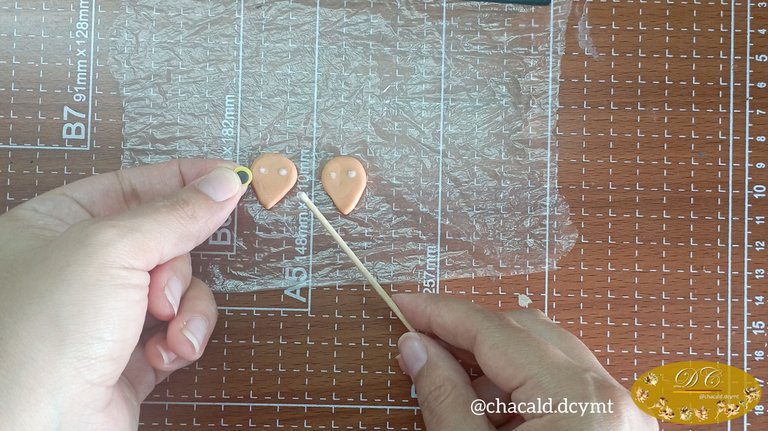
El cuerpo de los aretes como tal será una gota de masa de color terracota, aplanamos un poco y aplicamos pegamento en donde vamos a incrustar los ojos.
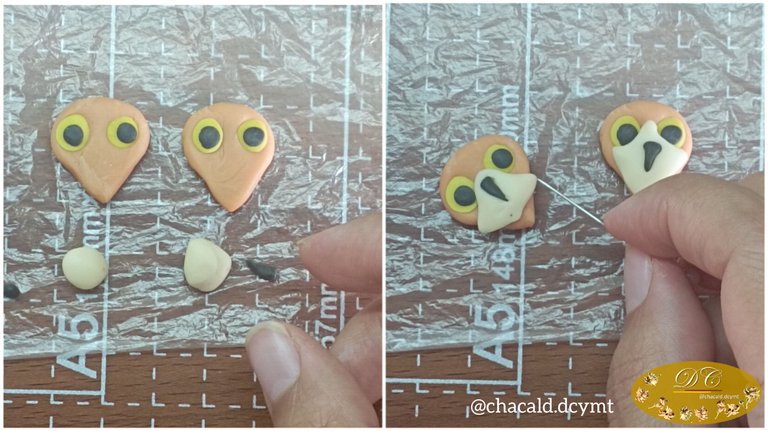
Luego hacemos un triángulo color beige y pegamos debajo de los ojos, incrustamos el pico presionando para que se hunda en la masa y con el alfiler vamos a dar textura para simular las plumas del ave.
! [Click here to read in english]
The body of the earrings as such will be a drop of terracotta coloured dough, we flatten it a little and apply glue where we are going to embed the eyes.Then we make a beige triangle and glue it under the eyes, we embed the beak pressing so that it sinks into the dough and with the pin we are going to give texture to simulate the bird's feathers.
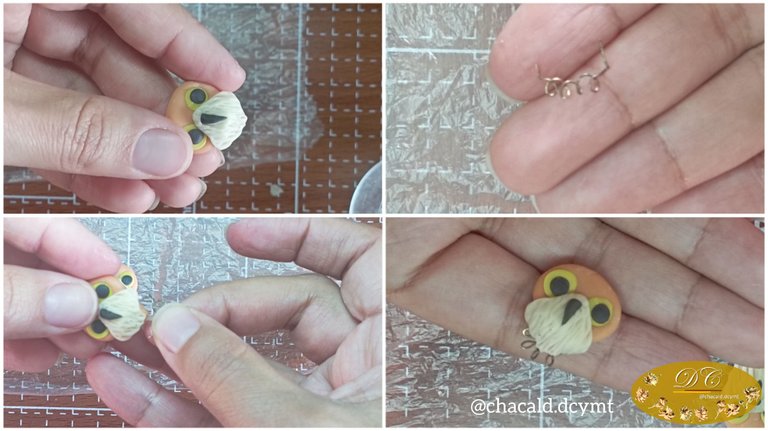
Con el alambre haremos una pieza para colgar las plumas. Serán 4 plumas por lo que podemos darle 4 vueltas en un palito de madera y estirar para que quede plano. Aplicamos pegamento en las puntas del alambre y lo incrustamos en la parte de abajo del cuerpo. Dejamos secar.
! [Click here to read in english]
With the wire we will make a piece to hang the feathers. There will be 4 feathers so we can twist it 4 times on a wooden stick and stretch it so that it is flat. Apply glue to the ends of the wire and embed it in the bottom of the body. Let it dry.
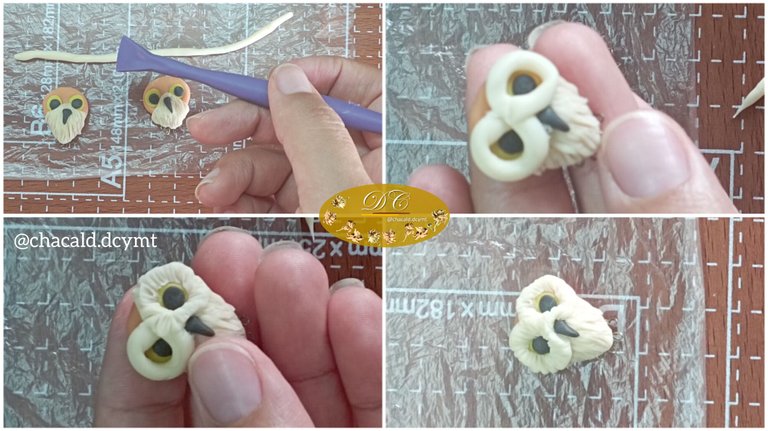
Para las plumas de los ojos, tomamos un cilindro fino de masa color beige y la colocamos con pegamento al contorno de los ojos. Luego con el alfiler hacemos marcas desde el ojo hacia afuera.
! [Click here to read in english]
For the eye feathers, we take a thin cylinder of beige dough and place it with glue around the eyes. Then with the pin we make marks from the eye outwards.
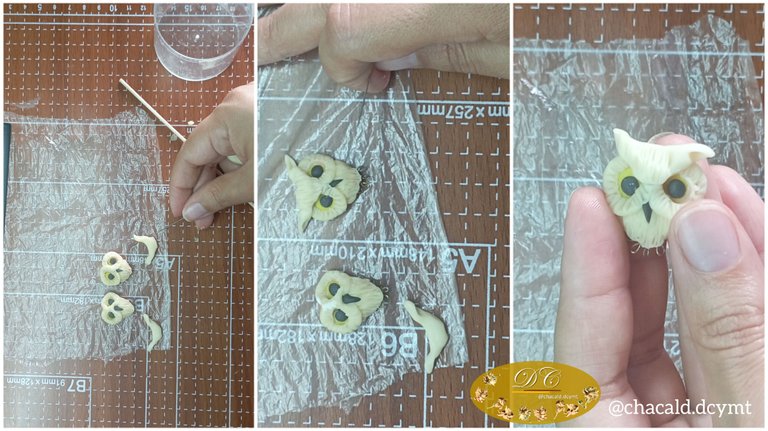
Para las cejas y las orejas de los búhos, tomamos un triángulo y le cortamos uno de sus extremos. Pegamos sobre los ojos y con el alfiler damos la textura de plumas.
! [Click here to read in english]
For the owls' eyebrows and ears, we take a triangle and cut off one end. We glue over the eyes and with the pin we give the texture of feathers.
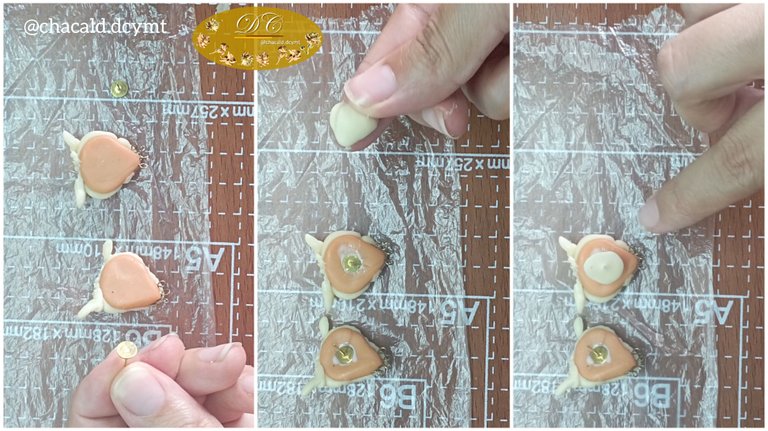
Es el momento de colocar la base de aretes. Damos vuelta al búho y aplicamos pegamento, colocamos la pieza sin el tope y vamos a colocar una pequeña bolita de masa de color beige aplanada. Con el alfiler damos textura y dejamos secar.
! [Click here to read in english]
Now it's time to place the earring base. We turn the owl over and apply glue, we place the piece without the top and we are going to place a small flattened beige ball. With the pin we give texture and let it dry.
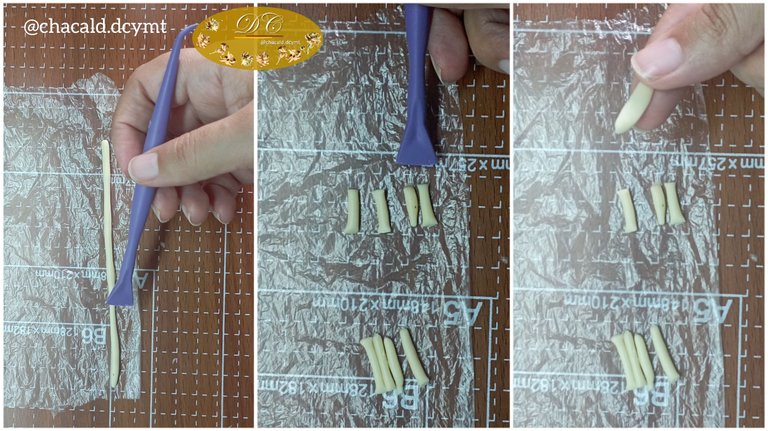
Para hacer las plumas, vamos a tomar un cilindro y cortaremos 4 cilindros pequeños y 4 grandes.
Aplanamos con los dedos y con la esteca de espatula marcamos una línea en el centro. Con el alfiler marcamos los lados de las plumas. Y con un palito de madera vamos a hacer la perforación para colgar las plumas al búho. Dejamos secar.
! [Click here to read in english]
To make the feathers, we will take a cylinder and cut 4 small and 4 large cylinders.Flatten with your fingers and mark a line in the centre with the spatula stake. With the pin we mark the sides of the feathers. And with a wooden stick we will make the perforation to hang the feathers to the owl. Leave to dry.
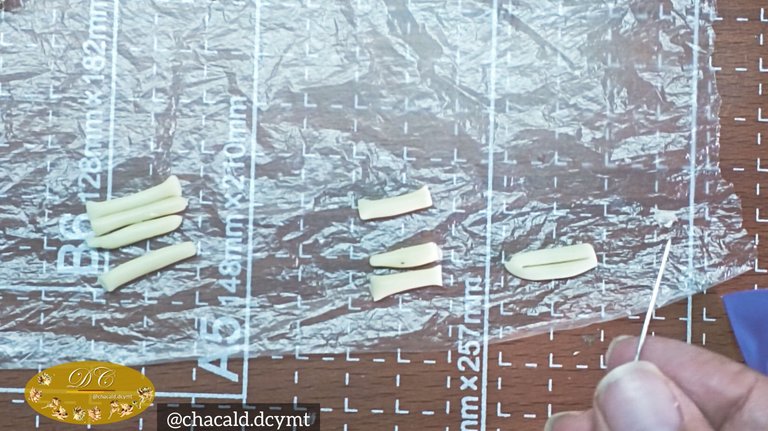
Vamos a dar unos trazos con el marcador a cada pieza ya seca y estamos listos para el acabado.
! [Click here to read in english]
We are going to give a few strokes with the marker to each dry piece and we are ready to finish.
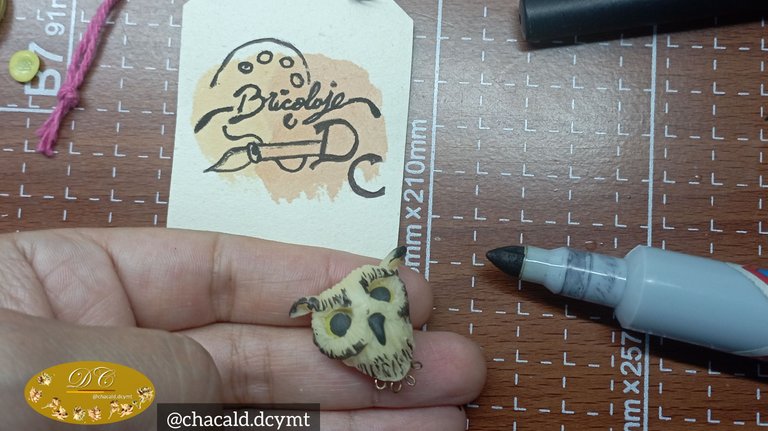

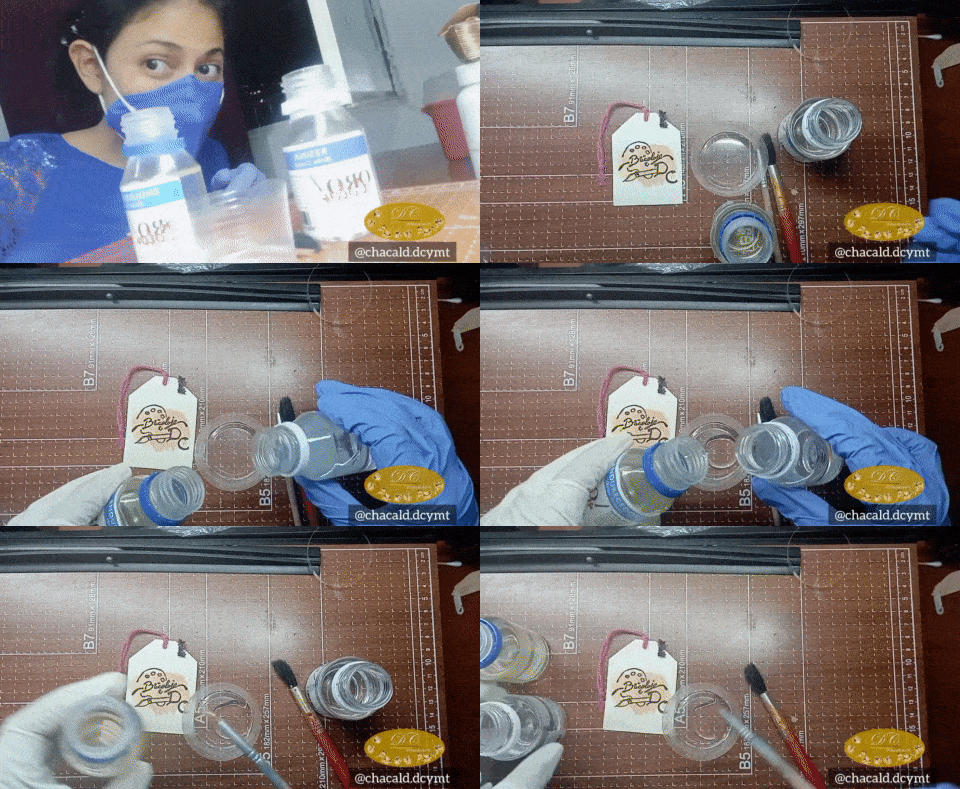
Para el acabado necesitamos darle una capa de resina a todas las piezas. Debemos utilizar guantes y mascarilla por seguridad.
Necesitamos un papel plástico transparente para colocar las piezas, dejando la parte de atrás pegada al papel por si se pega con la resina.
Combinamos el líquido de ambos frascos el de resina y el endurecedor. Aplicamos una capa y dejamos secar durante 8 horas.
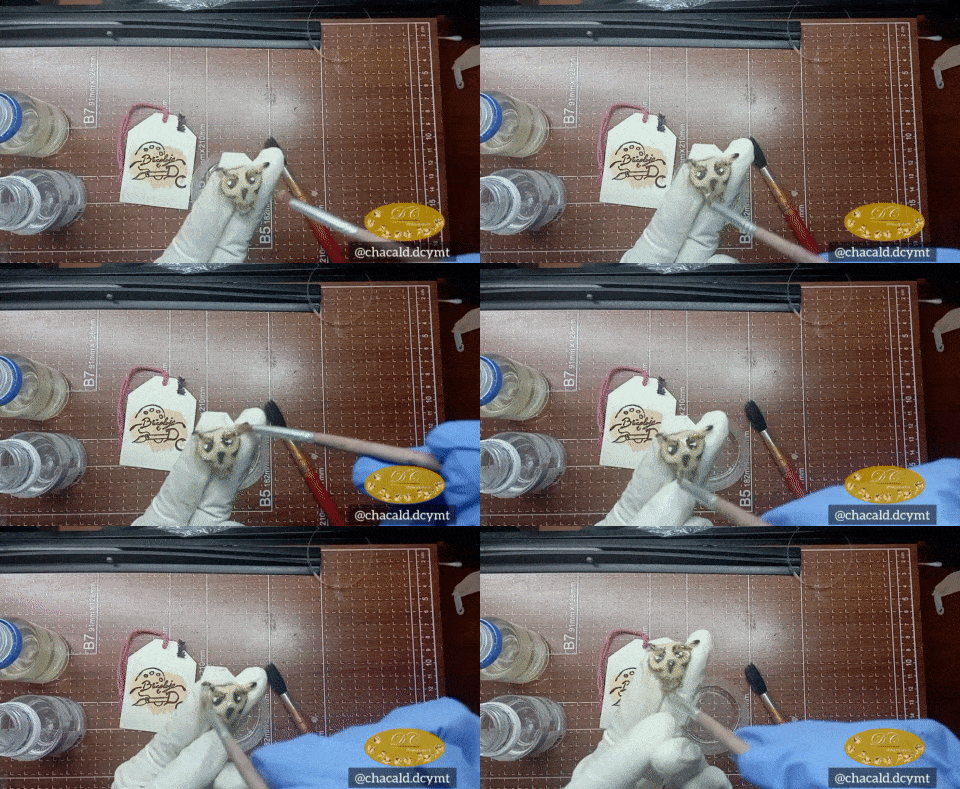
Luego colocamos las argollas y las plumas colgantes y listo. Así quedan nuestros aretes.
! [Click here to read in english]
For the finishing we need to coat all the pieces with resin. We must use gloves and a mask for safety.We need a transparent plastic paper to place the pieces, leaving the back of the pieces stuck to the paper in case it sticks to the resin.
Combine the liquid from both bottles, the resin and the hardener. Apply a layer and let it dry for 8 hours.
Then we place the earrings and the hanging feathers and that's it. This is how our earrings look like.
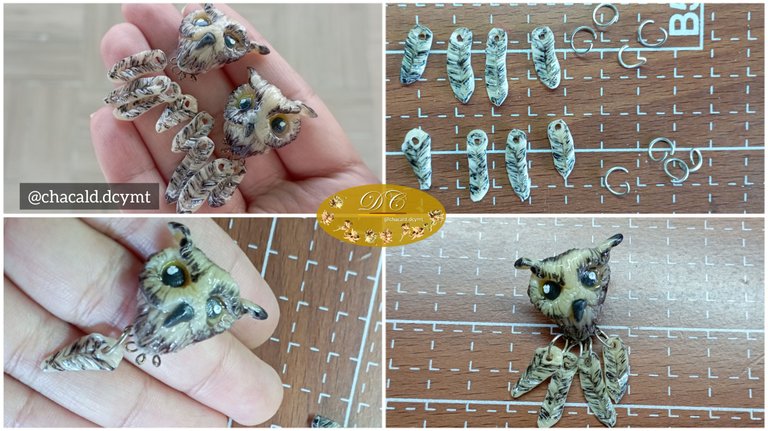
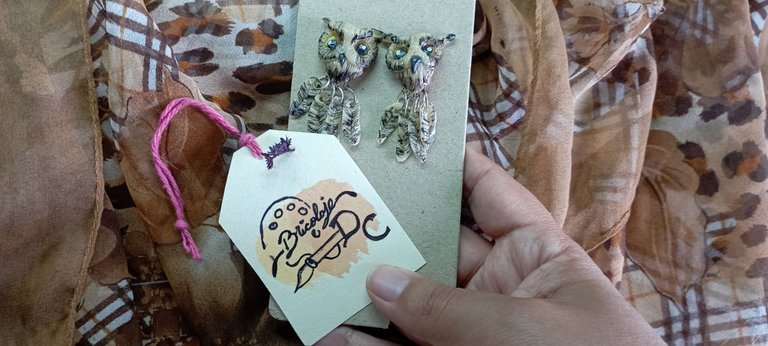
Espero les guste mi trabajo y nos vemos en una próxima oportunidad. Chao!
! [Click here to read in english]
I hope you like my work and I'll see you next time.Bye!
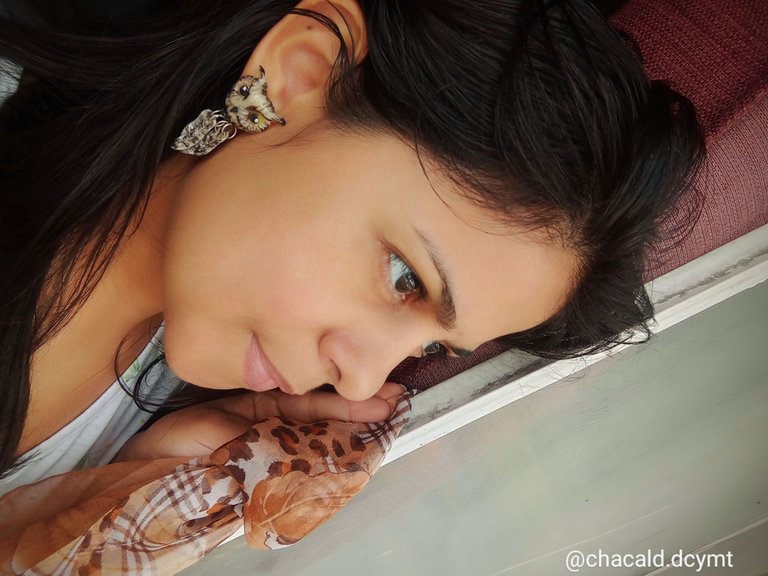

Original content by the author.
Resources: App: Canva / Giphy / Inshot
📷 Redmi 10 Smartphone
Translation done with Deepl.com
✿ All Rights Reserved || © @chacald.dcymt 2023 ✿
💌 Discord: chacald.dcymt#3549
Twitter @chacald1
_
Contenido original del autor.
Recursos: App: Canva / Giphy / Inshot
📷 Redmi 10 Smartphone
Traducido con Deepl.com
✿ Todos los Derechos Reservados || © @chacald.dcymt 2023 ✿
💌 Discord: chacald.dcymt#3549
Twitter @chacald1
