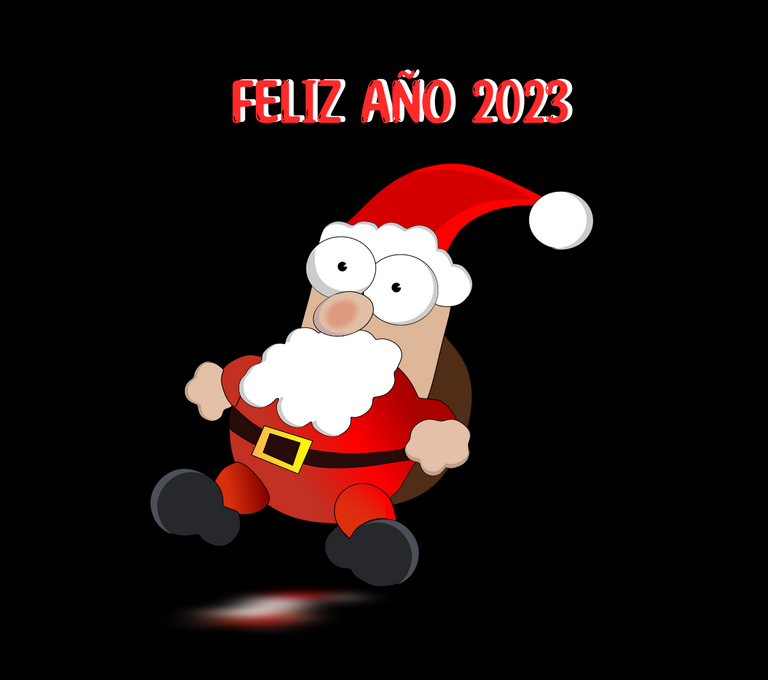
Saludos amigos de Hive, quiero desearles a todos un feliz año 2023, que venga lleno de mucha salud y prosperidad para toda la comunidad de nuestro blockchain de Hive, para finalizar el año, hoy les traigo una pequeña ilustración de Santa Claus que realicé en el programa vectorial Inkscape, a continuación les presente los pasos.
Paso 1:
Abrimos el programa Inkscape, y dibujamos los dos ojos con la herramienta de crear círculos de forma ovalada, y con la otra herramienta de curvas Bézier se traza el cabello encima de ambos ojos.
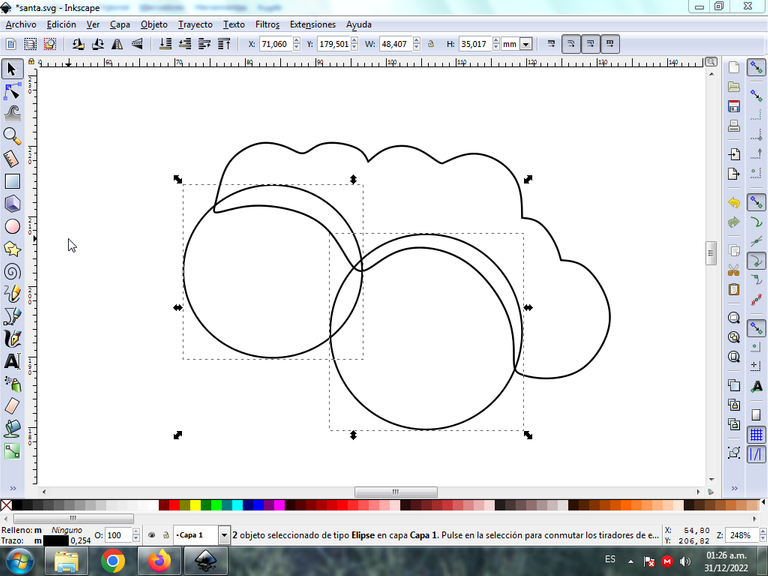
En la herramienta de curvas Bézier en la parte de Modo, escogemos la opción de crear trayecto Bspline.
Paso 2:
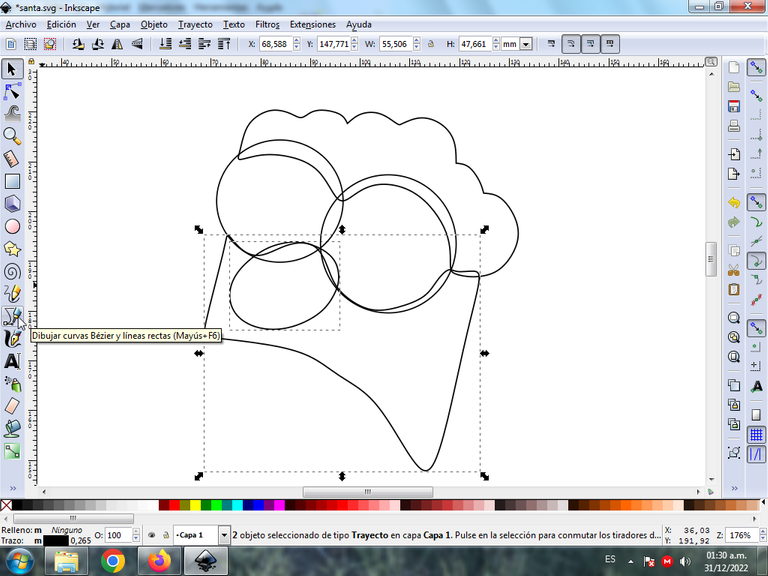
Continuamos trazando la nariz y la cara de Santa con la herramienta de curvas Bézier.
Paso 3:
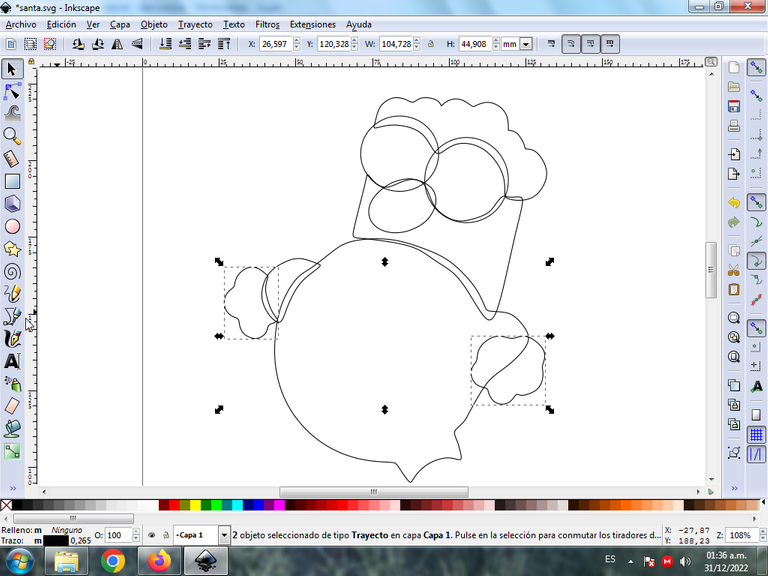
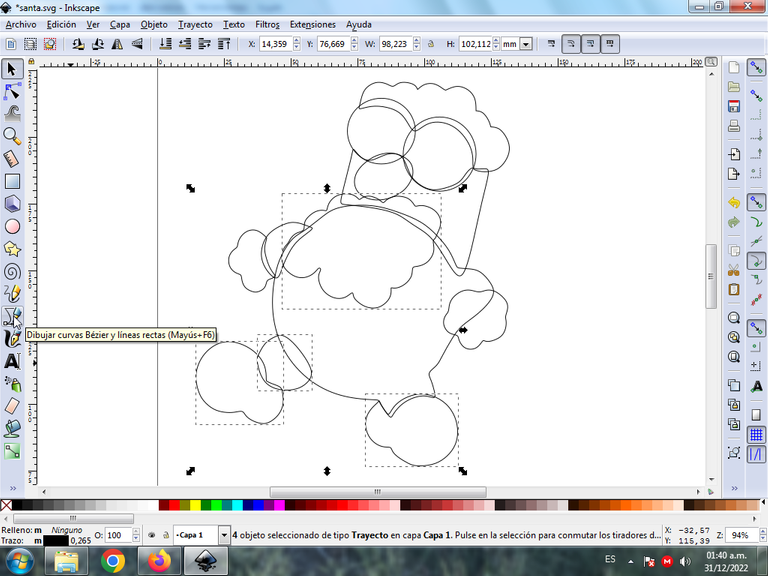
Seguidamente se traza parte del cuerpo y las dos manos con la misma herramienta.
Paso 4:
En la parte inferior dibujamos las dos piernas y la barba, con la opción de curvas Bézier.
Paso 5:
Se traza el cinturón, el gorro con la herramienta de curvas Bézier y dos círculos pequeños en ambos ojos, abriendo un poco el círculo.
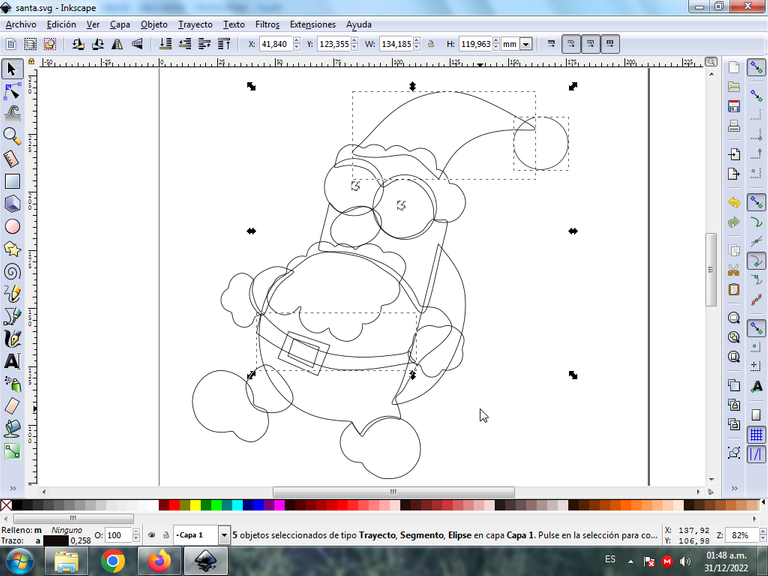
Cuando se dibuja el círculo, con la opción de crear círculos, esto lo configuramos con un inicio y un fin cuya numeración es de 341, para que no se cierre completamente.
Paso 6:
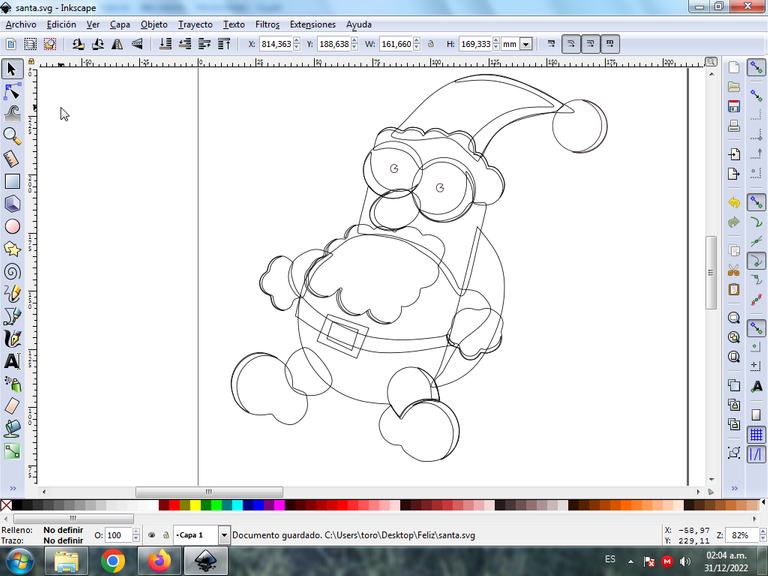
Se realizan diferentes trazos en varias partes del cuerpo de Santa en ojos, piernas, brazos y el gorro para darle un mayor efecto al dibujo.
Paso 7:
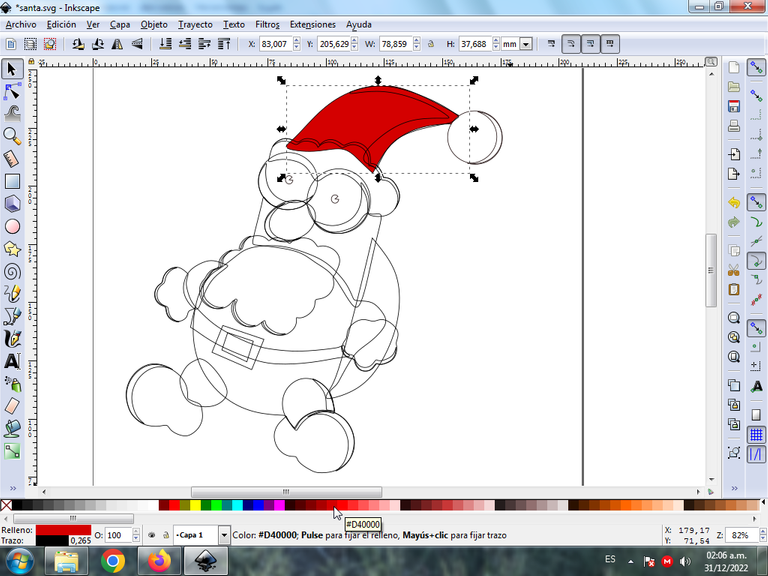
Una vez listo, coloreamos cada una de las figuras, seleccionando primero la figura y luego en la paleta de colores que está en la parte inferior de la aplicación.
Paso 8:
Seguimos aplicando los colores a las demás partes del la figura de Santa Claus.
Paso 9:
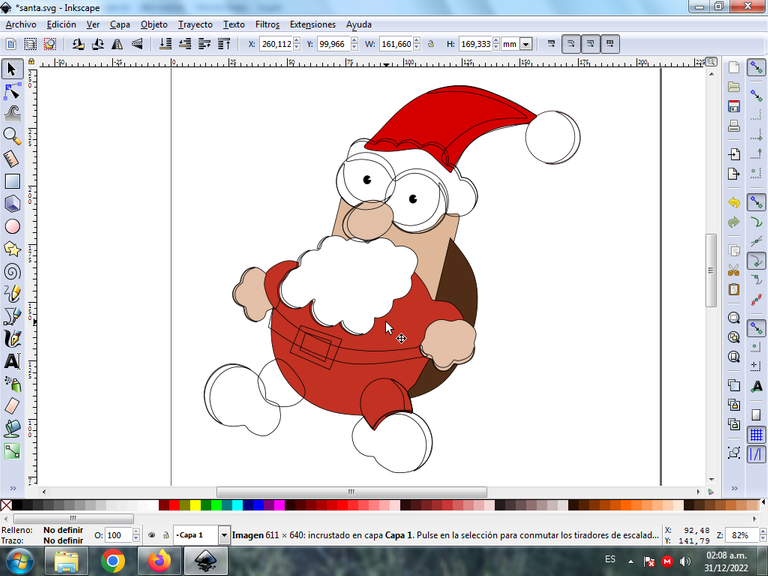
Las diferentes formas se escogen un color gris para finalizar los colores de la figura.
Paso 10:
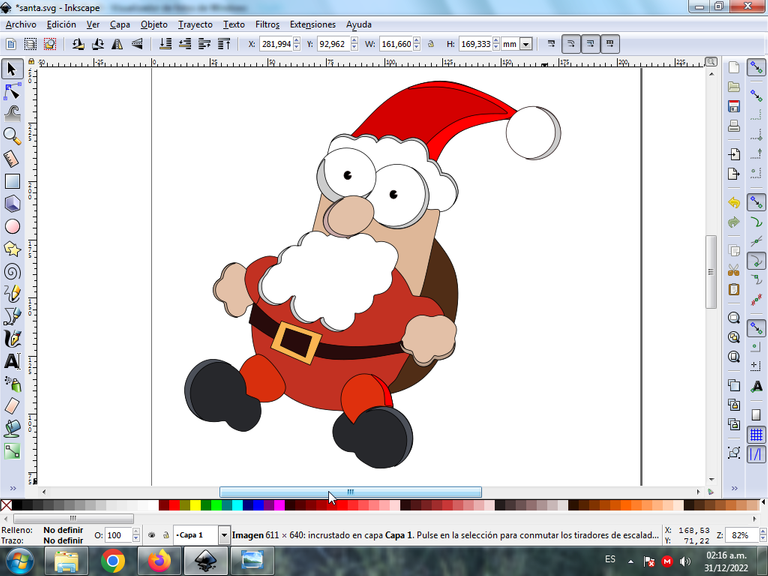
Procedemos a quitar cada uno de los bordes de algunas figuras, le damos clic en Objeto – Rellenos y Bordes.
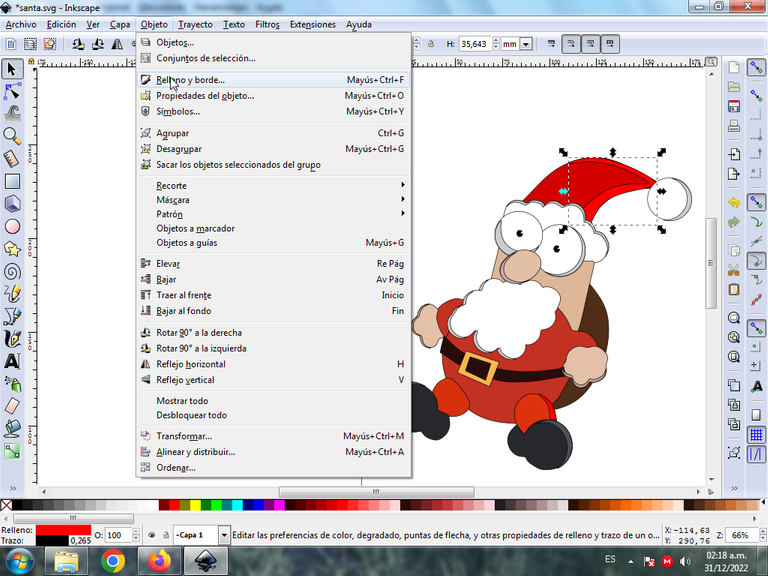
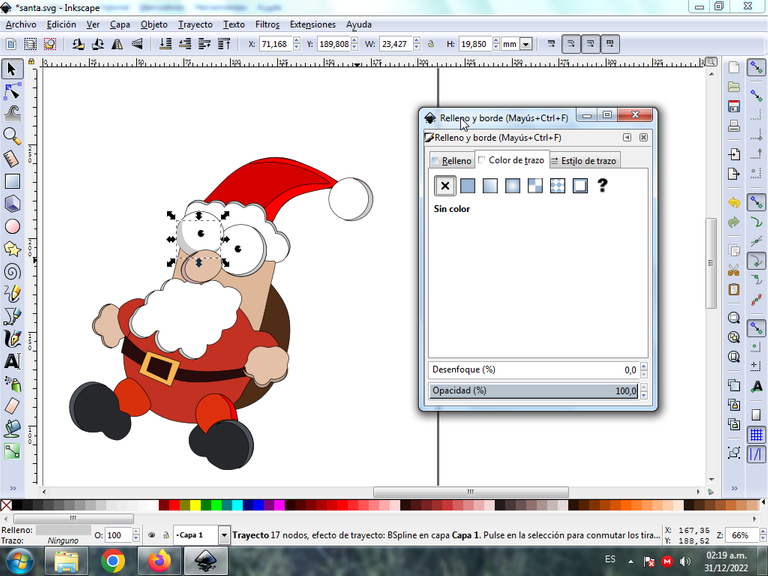
Hacemos clic en la pestaña color de trazo y luego en la X para borrar el borde.
Paso 11:
Se aplica el paso 9 al resto de la figura y este es el resultado final.
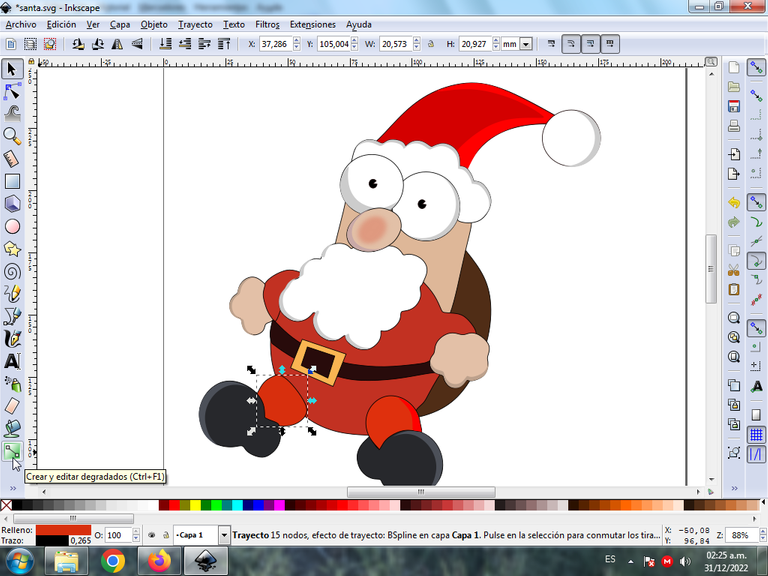
Paso 12:
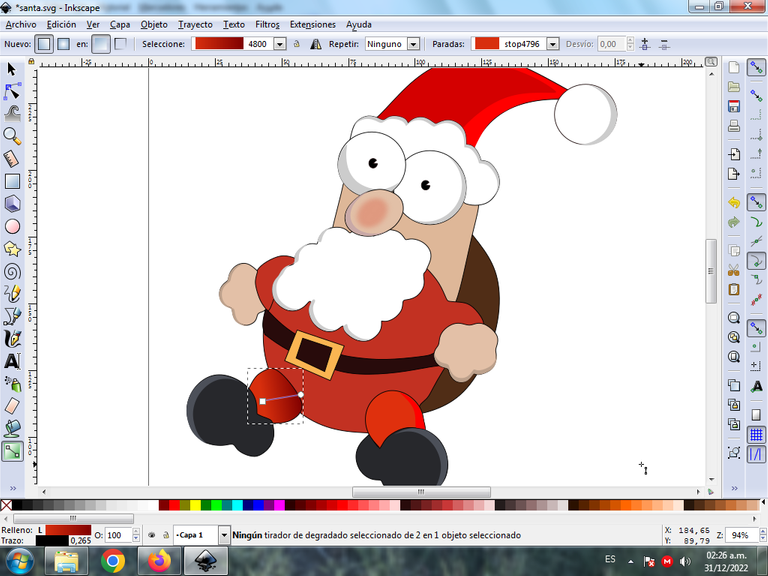
Aplicamos un degradado en algunas partes de la figura, se selecciona en el primer punto un color y luego en el segundo otro más claro para darle un mejor efecto.
Paso 13:
Insertamos un fondo color negro, se duplica toda la figura con la tecla Control + D y aplicamos un desenfoque para darle el efecto de sombra. Escribimos las palabras Feliz Años 2023 con la opción de crear y editar objeto de texto en la parte superior, luego se duplica, se aplica un color blanco la que está destraz y rojo la que está a nivel superior para darle efecto 3d al texto.De esta forma terminamos el dibujo de Santa Claus.
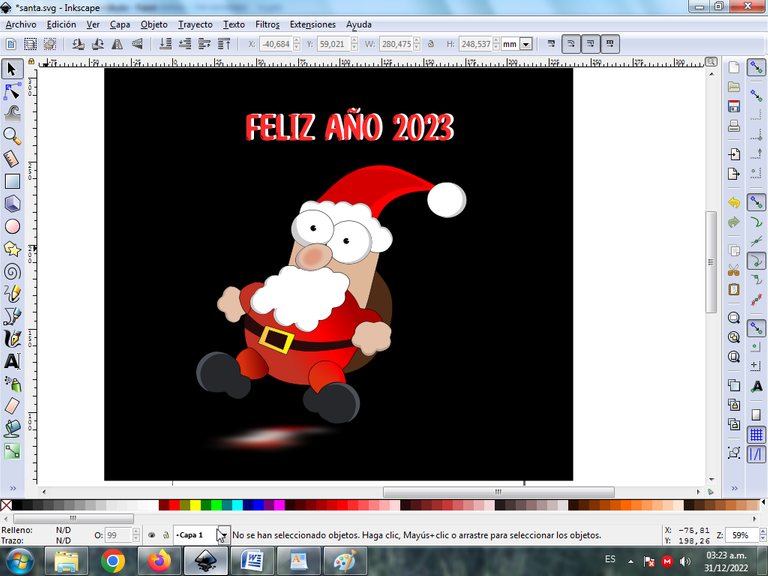

Imagen de Referencia Fuente
Espero que les haya gustado mi dibujo de Santa Claus, nos vemos el año 2023, en una próxima publicación.
English
Greetings friends from Hive, I want to wish everyone a happy year 2023, which comes full of health and prosperity for the entire community of our Hive blockchain, to end the year, today I bring you a small illustration of Santa Claus that I made in the Inkscape vector program, then we present the steps.

Step 1:
We open the Inkscape program, and we draw the two eyes with the tool to create oval-shaped circles, and with the other tool of Bézier curves we trace the hair above both eyes.

In the Bézier curves tool in the Mode part, we choose the option to create a Bspline path.
Step 2:
We continue to trace Santa's nose and face with the Bézier curve tool.

Step 3:
Next, part of the body and both hands are traced with the same tool.

Step 4:
In the lower part we draw the two legs and the beard, with the option of Bézier curves.

Step 5:
Draw the belt, the hat with the Bézier tool and two small circles on both eyes, opening the circle a little.

When the circle is drawn, with the option to create circles, we configure this with a start and an end whose numbering is 341, so that it does not close completely.
Step 6:
Different strokes are made in various parts of Santa's body in eyes, legs, arms and the hat to give a greater effect to the drawing.

Step 7:
Once ready, we color each of the figures, first selecting the figure and then in the color palette that is at the bottom of the application.

Step 8:
We continue applying the colors to the other parts of the figure of Santa Claus.

Step 9:
The different shapes are chosen a gray color to finish the colors of the figure.

Step 10:
We proceed to remove each one of the edges of some figures, we click on Object – Fills and Borders.

We click on the stroke color tab and then on the X to delete the border.

Step 11:
Step 9 is applied to the rest of the figure and this is the final result.

Step 12:
We apply a gradient in some parts of the figure, a color is selected in the first point and then in the second a lighter one to give it a better effect.

Step 13:
We insert a black background, duplicate the whole figure with the Control + D key and apply a blur to give it the shadow effect. We write the words Happy Years 2023 with the option to create and edit the text object at the top, then it is duplicated, a white color is applied to the one at the bottom and red to the one at the top level to give the text a 3d effect. In this way we finish the drawing of Santa Claus.


Reference Image Source
I hope you liked my drawing of Santa Claus, see you in 2023, in a future publication.


