
Para los que no conocen este programa, está basado en el sistema operativo bajo software libre, pero también está disponible en diferentes en plataformas como Windows, Mac OS X y se puede descargar en este enlace
Paso 1:
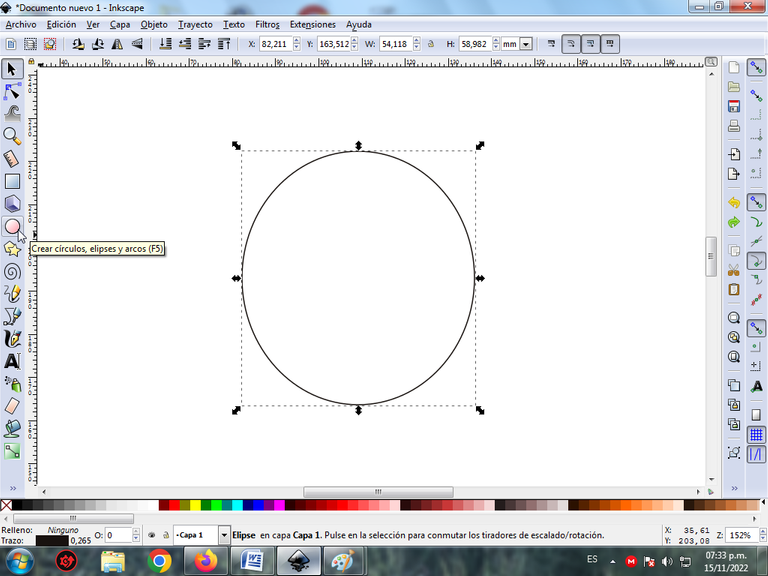
Abrimos el programa Inkscape, y trazamos un círculo ovalado en la opción de crear círculos de la barra de herramientas que está al lado izquierdo.
Paso 2:
En la parte superior de la esfera, dibujamos la siguiente figura en la opción de dibujar curvas Bézier.
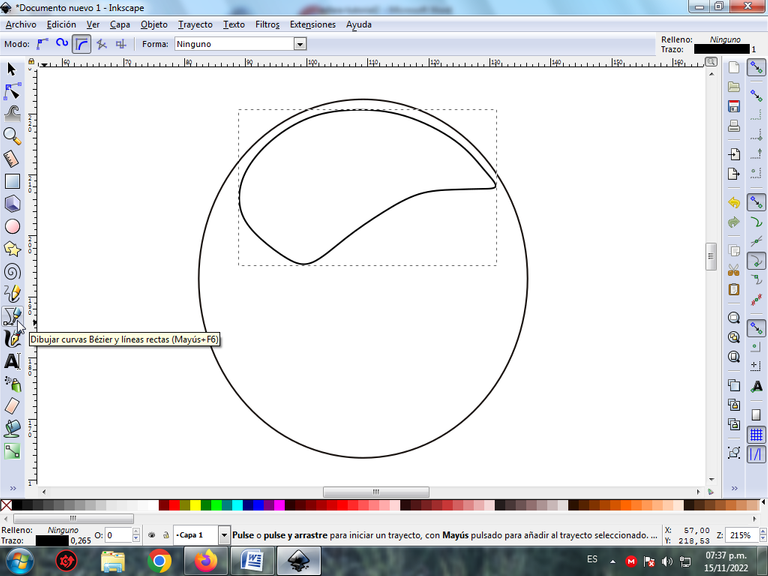
Para hacer los trazos quede en forma de curvas, dentro de esta opción se utiliza crear trayecto BSPline.
Paso 3:
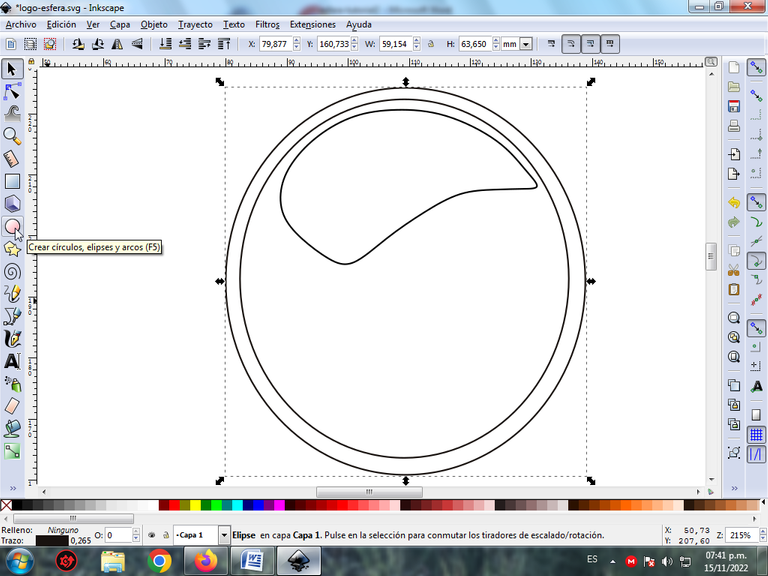
Trazamos otro círculo un poco más grande, con la opción de crear círculos de la barra de herramientas.
Paso 4:
Seguidamente se traza con la herramienta de curvas Bézier la siguiente figura, sobre el círculo.
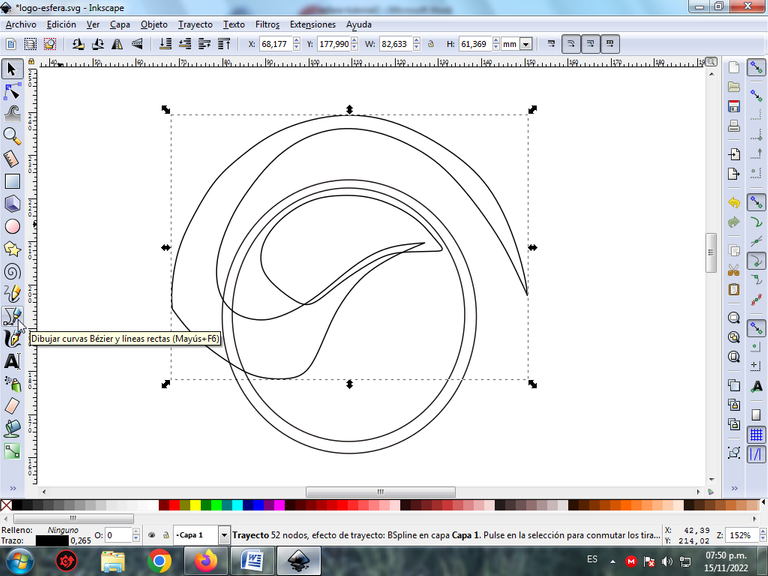
En esta opción debemos seleccionar donde dice Crear trayecto BSpline.
Paso 5:
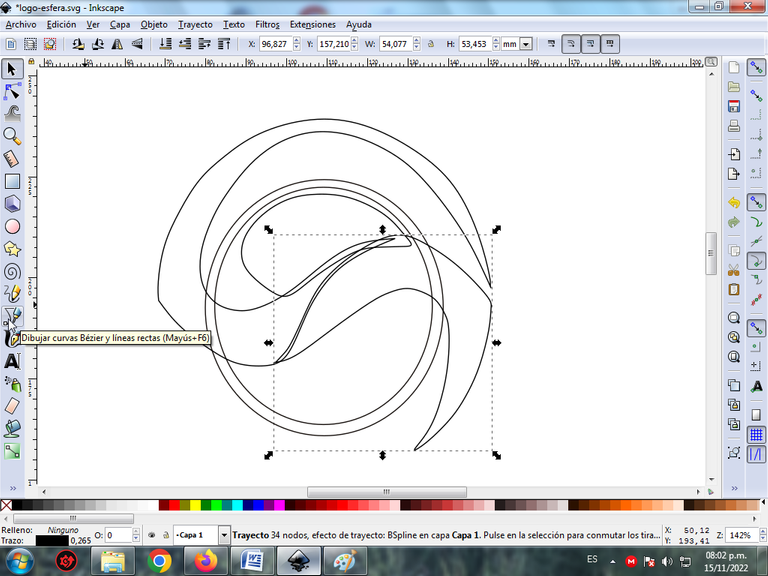
Continuamos dibujando otra figura del lado derecho, utilizando la misma herramienta.
Paso 6:
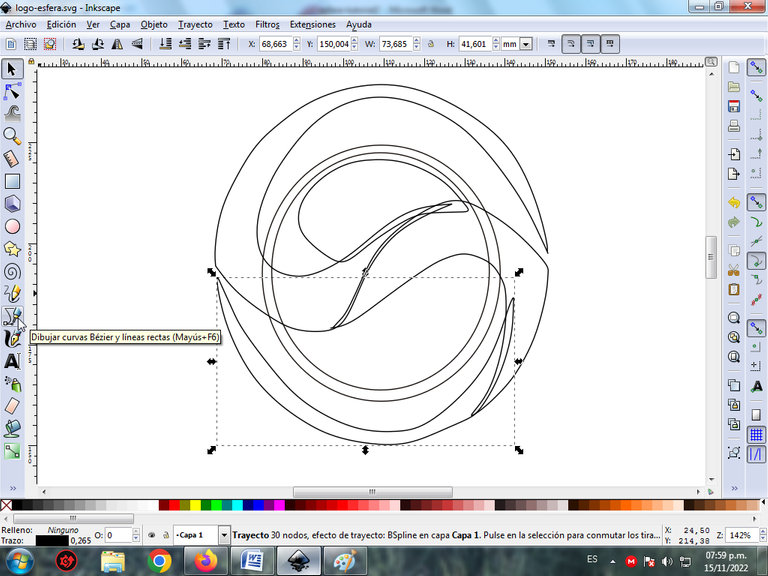
Se traza otra figura para completar una esfera dividida en tres partes, con la herramienta de curvas Bézier.
Paso 7:
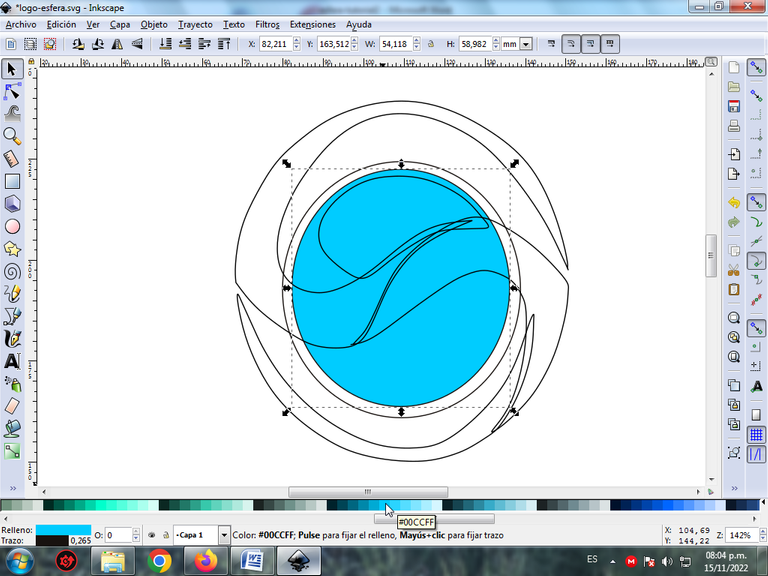
Ahora procedemos a aplicar un color a cada una de las partes del logo, se selecciona el círculos y escogemos el color azul claro en la paleta de colores que está en la parte inferior.
Paso 8:
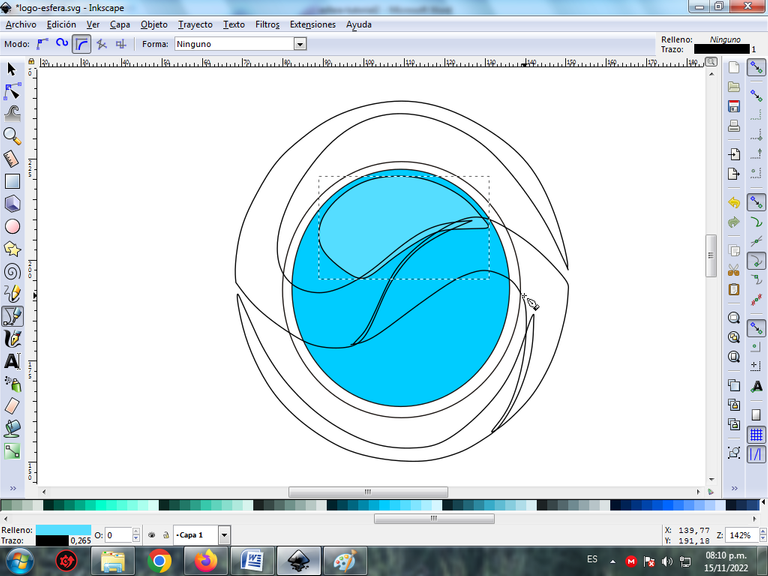
Luego seleccionamos la figura que está dentro del círculo y se la aplica un color azul más claro, con el mismo paso anterior.
Paso 9:
Aplicamos un color morado más oscuro al círculo más grande.
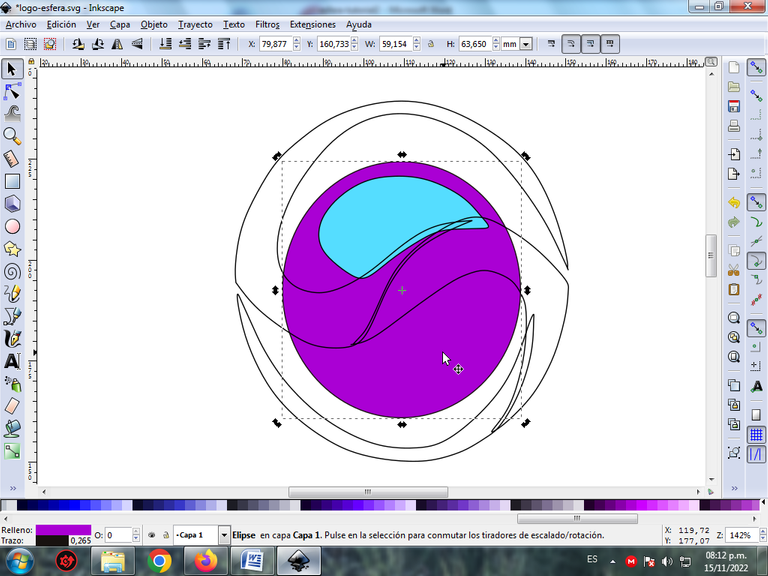
Se baja un nivel, presionando clic en esta opción.
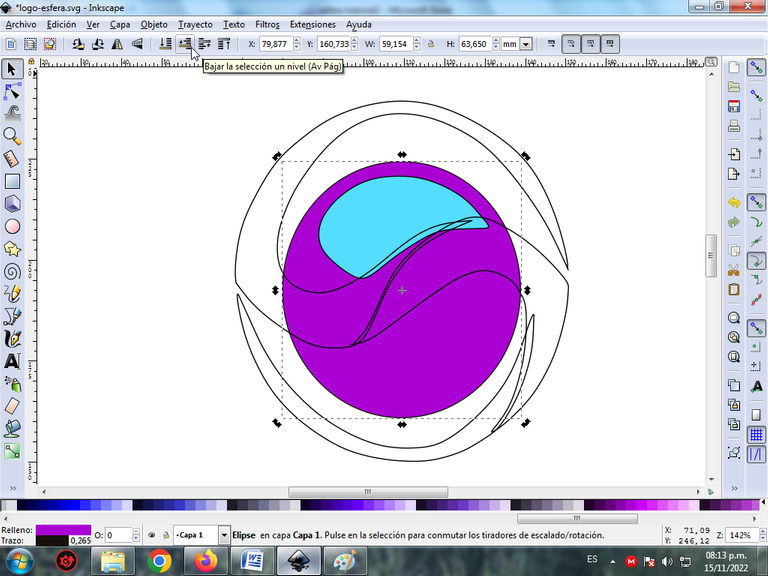
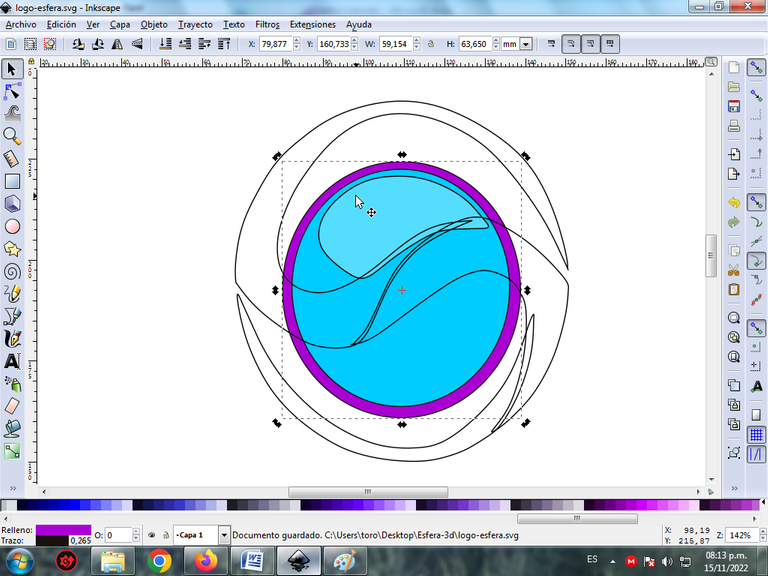
Quedando de esta forma.
Paso 10:
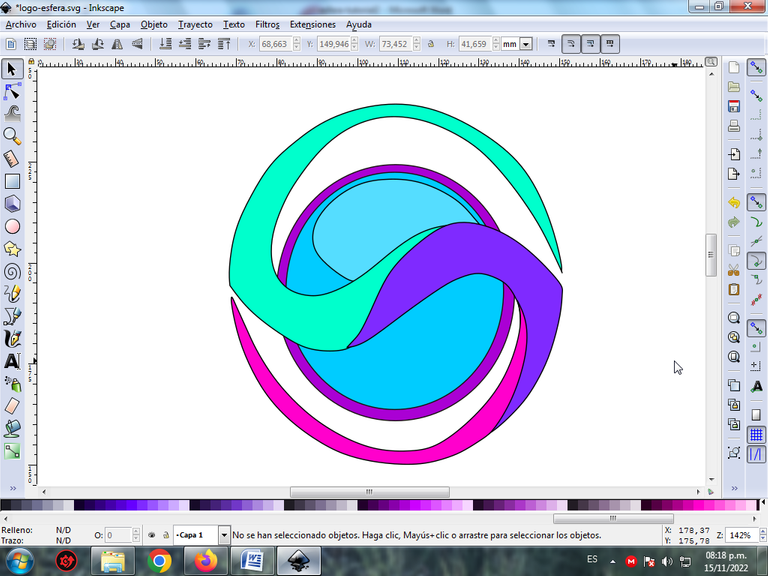
Terminamos de colorear el resto de las figuras y este es el resultado final.
Paso 11:
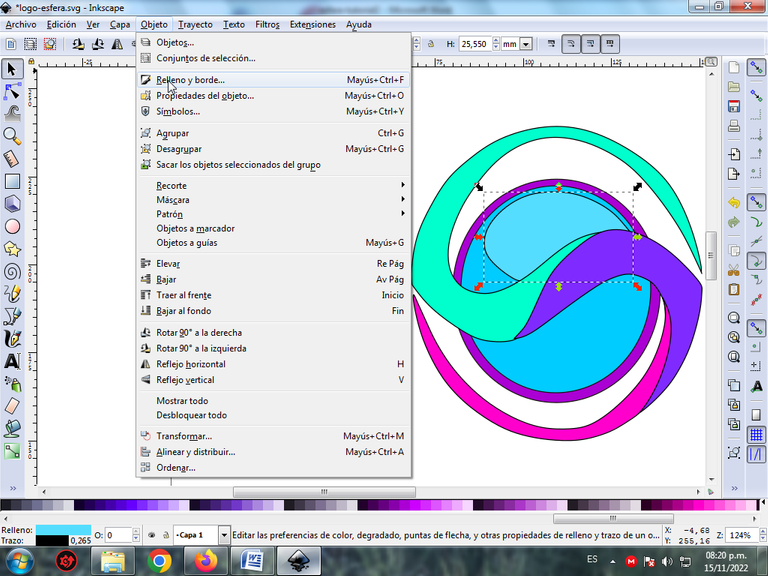
Se eliminar cada uno de los bordes de la figura para darle un mejor acabado, se selecciona la figura, luego hacemos clic en la barra de menú Objeto – Rellenos y Bordes.
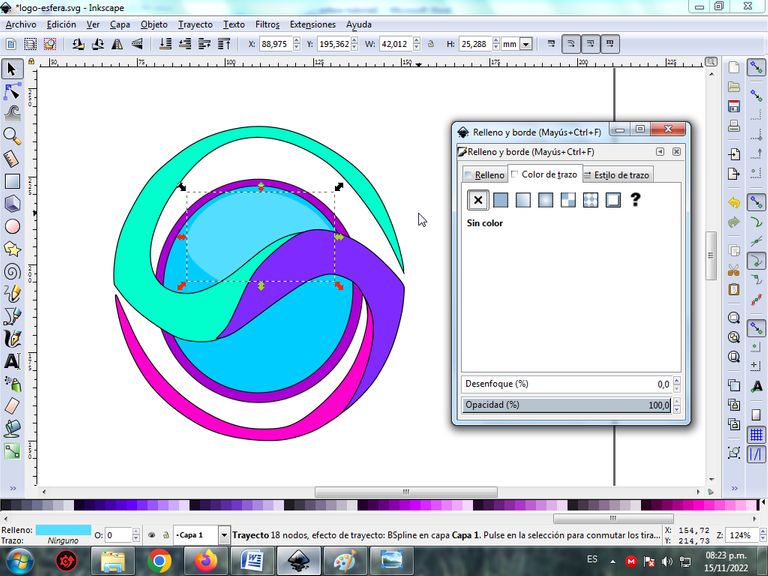
Nos desplazamos a la pestaña color de trazo y le damos clic en la X para borrar los bordes de la figura.
Paso 12:
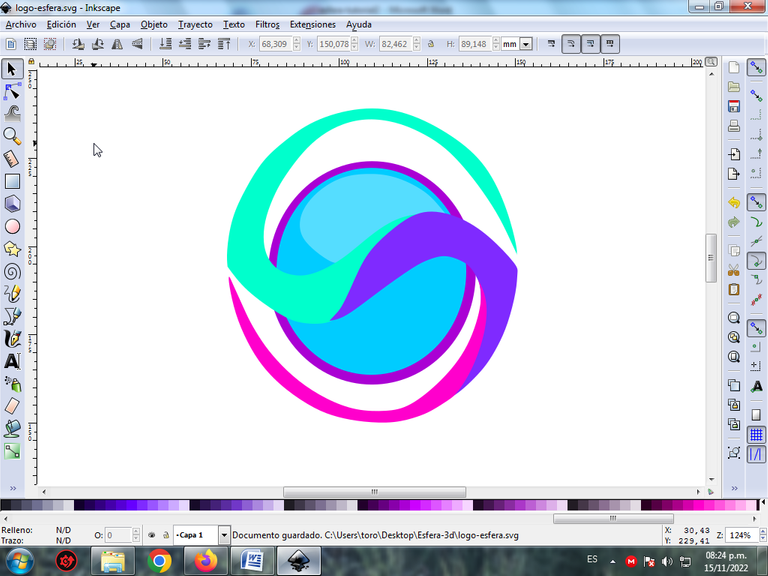
Se aplica el paso 11 en el resto de cada una de las figura y nos queda de esta forma.
Paso 13:
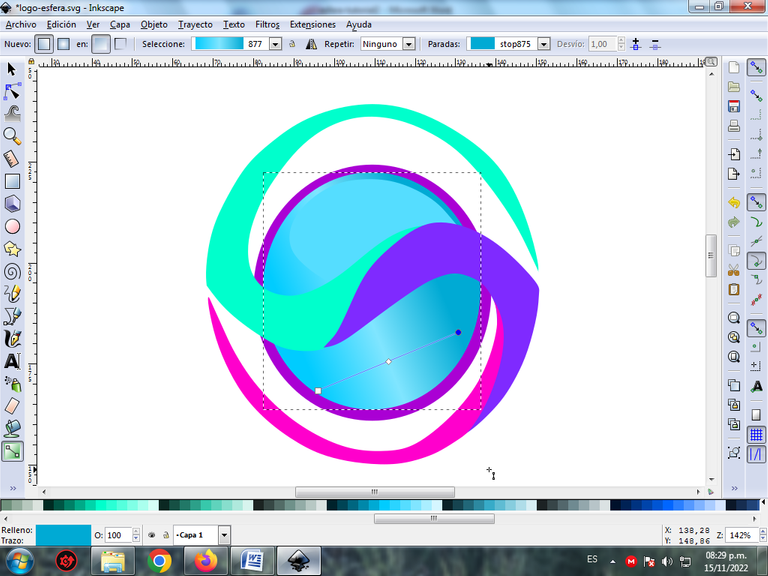
Para darle mayor efecto, procedemos a darle el degradado a la figura, se selecciona y le damos clic en crear y editar degradado.
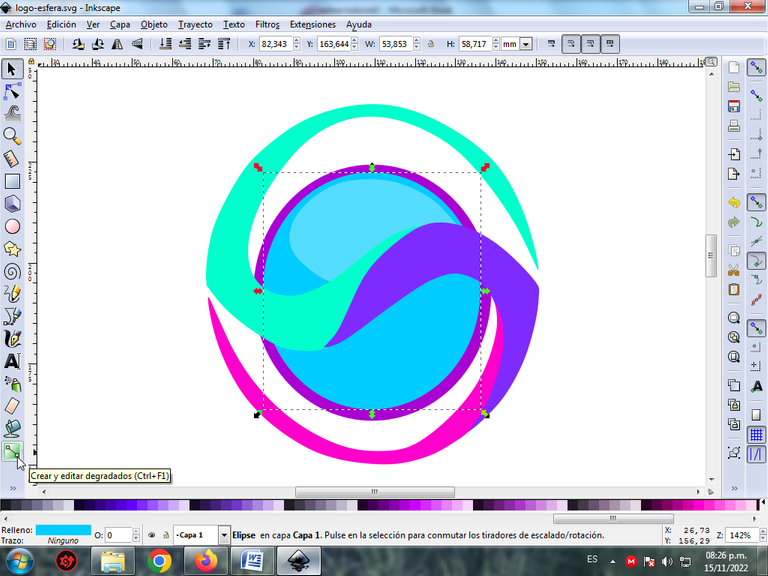
Se selecciona un color más claro y otro oscuro en cada uno de los puntos, presionando clic.
Paso 14:
Se selecciona todo el logo, lo duplicamos con la combinación de teclas Ctrl + D y luego se aplica un desenfoque de 12,3 porciento, esta opción se encuentra en la barra de menú Objeto – Rellenos y Bordes. Insertamos un fondo color negro y de esta forma terminamos nuestra ilustración.
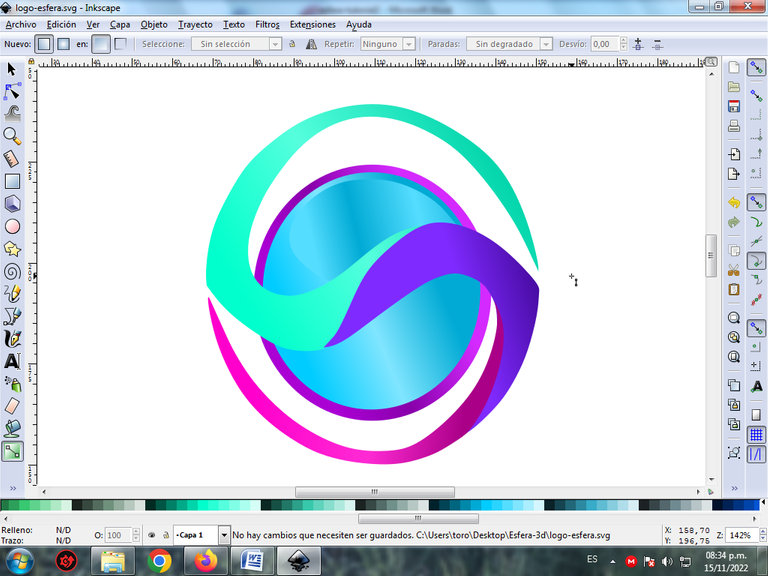
Imagen de Referencia Fuente
Espero que les haya gustado este diseño, nos vemos en una próxima publicación.
English
For those who do not know this program, it is based on the operating system under free software, but it is also available on different platforms such as Windows, Mac OS X and can be downloaded at this [link](https://inkscape.org/ version /inkscape-1.2.1/)

Step 1:
We open the Inkscape program, and draw an oval circle in the option to create circles in the toolbar that is on the left side.

Step 2:
At the top of the sphere, we draw the following figure in the option to draw Bézier curves.

To make the strokes be in the form of curves, within this option you use create BSPline path.
Step 3:
We draw another slightly larger circle, with the option to create circles from the toolbar.

Step 4:
Next, the following figure is drawn with the Bézier curve tool, on the circle.

In this option we must select where given Create BSpline path.
Step 5:
We continue drawing another figure on the right side, using the same tool.

Step 6:
Another figure is drawn to complete a sphere divided into three parts, with the Bézier curves tool.

Step 7:
Now we proceed to apply a color to each of the parts of the logo, select the circles and choose the light blue color in the color palette at the bottom.

Step 8:
Then we select the figure that is inside the circle and apply a lighter blue color to it, with the same previous step.

Step 9:
We apply a darker purple color to the larger circle.

You go down one level by clicking on this option.

Staying this way.

Step 10:
We finished coloring the rest of the figures and this is the final result.

Step 11:
Each one of the edges of the figure will be eliminated to give it a better finish, the figure is selected, then we click on the menu bar Object – Fills and Borders.

We move to the stroke color tab and click on the X to delete the borders of the figure.

Step 12:
Step 11 is applied to the rest of each of the figures and we are left this way.

Step 13:
To give it a greater effect, we proceed to give the figure a gradient, select it and click on create and edit gradient.

A lighter color and a darker color are selected at each of the points, by clicking.

Step 14:
The entire logo is selected, we duplicate it with the Ctrl + D key combination and then a 12.3 percent blur is applied, this option is found in the Object – Fills and Strokes menu bar. We insert a black background and in this way we finish our illustration.

Reference Image Source
I hope you liked this design, see you in a next publication.

Vote la-colmena for witness By @ylich


