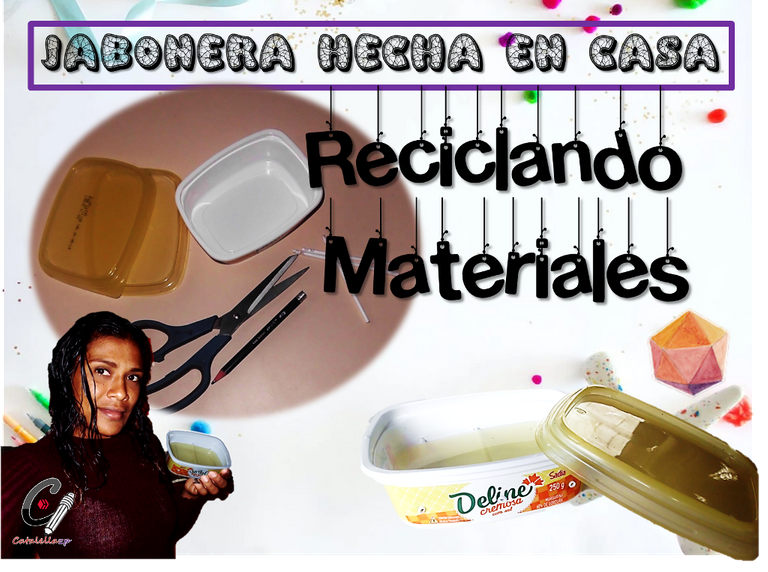
Hola amigos de DIY Hub, para mí es un placer poder participar en esta comunidad y me presento ante ustedes, mi nombre es Denys y mi usuario en la plataforma es @catalellazp, tengo 4 años en la plataforma, aunque confieso que estuve un tiempo inactiva por cuestiones de trabajo, me he reintegrado poco a poco y esta es una oportunidad de diversificar mi contenido mostrando y compartiendo cosas prácticas que podemos hacer con materiales de reciclaje.
Además de conocer nuevos compañeros acá en la comunidad, ya que me he dado cuenta de que ha crecido muchísimo en estos últimos tiempos.
Sin más que agregar mis amigos, en esta ocasión quiero mostrarles como hacer una jabonera con materiales de reciclaje, muy fácil y en muy pocos pasos.
La idea la conseguí ayer en la noche mientras visitaba la casa de una amiga que me invito a comer un caldo de gallina (riquísimo), en la parte del fregadero que tiene en el patio, cuando fui a lavar la taza, note el envase con el jabón y me dio curiosidad, al tomarlo en mis manos me di cuenta
Que era totalmente fantástico "una jabonera".
Me dije: ¡debo hacer una!
Y así fue, de regreso a casa fue muy fácil conseguir los palillos y ya en casa tenía el envase, al despertar hoy fui lo primero que hice después de desayunar y ahora les mostraré el paso a paso para que ustedes lo puedan hacer también.
Hello friends of DIY Hub, for me it is a pleasure to participate in this community and I introduce myself to you, my name is Denys and my user on the platform is @catalellazp, I have 4 years on the platform, although I confess that I was inactive for a while due to work issues, I have gradually rejoined and this is an opportunity to diversify my content showing and sharing practical things we can do with recycled materials.
In addition to meeting new colleagues here in the community, as I have realized that it has grown a lot in recent times.
Without more to add my friends, this time I want to show you how to make a soap dish with recycled materials, very easy and in very few steps.
I got the idea last night while visiting a friend's house who invited me to eat a chicken broth (delicious), in the part of the sink she has in the yard, when I went to wash the cup, I noticed the container with the soap and I was curious, when I took it in my hands I realized that it was totally fantastic "a soap dish".
That it was totally fantastic "a soap dish".
**I said to myself: "I must make one!
And so it was, back home it was very easy to get the chopsticks and at home I had the container, when I woke up today I was the first thing I did after breakfast and now I will show you the step by step so you can do it too.

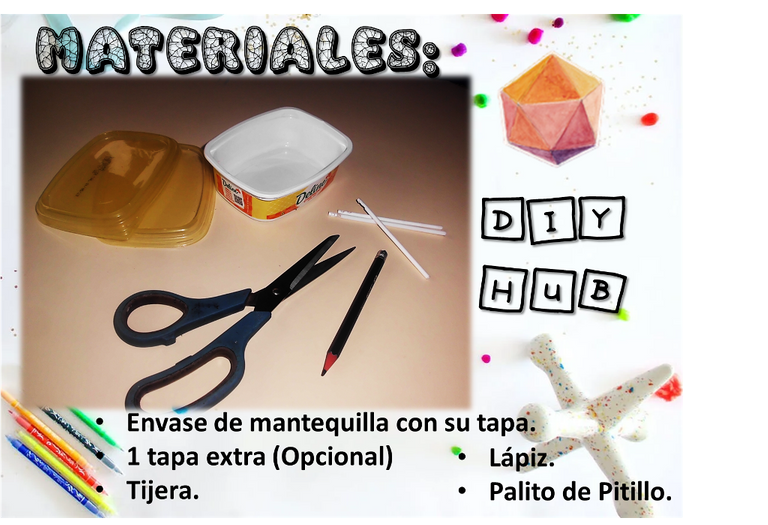
- Envase de mantequilla con su tapa.
- Una tapa extra (opcional).
- Tijeras.
- Lápiz.
- Palillos de Chupeta.
- Butter container with lid.
- An extra lid (optional).
- Scissors.
- Pencil.
- Lollipop sticks.

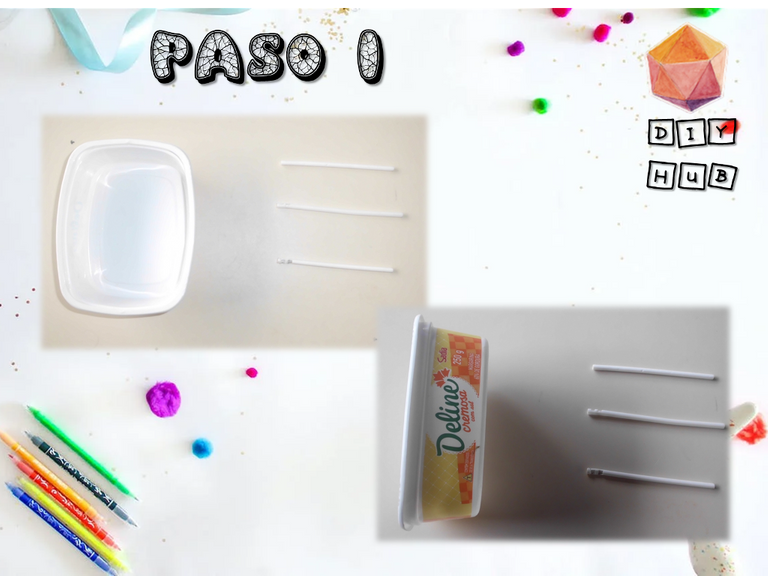
- Primer paso: tomamos los palillos, nuestro envase y un lápiz, en este caso tengo un palillo más largo que los otros dos, este será para colocarlo en el medio, ya que esa parte del envase es un poco más ancha. Procedemos a marcar el sitio donde vamos a hacer los agujeros, serán un total de 6, 3 de cada lado.
- First step: we take the toothpicks, our container and a pencil, in this case I have a toothpick longer than the other two, this will be to place it in the middle, since that part of the container is a little wider. We proceed to mark the place where we are going to make the holes, there will be a total of 6, 3 on each side.
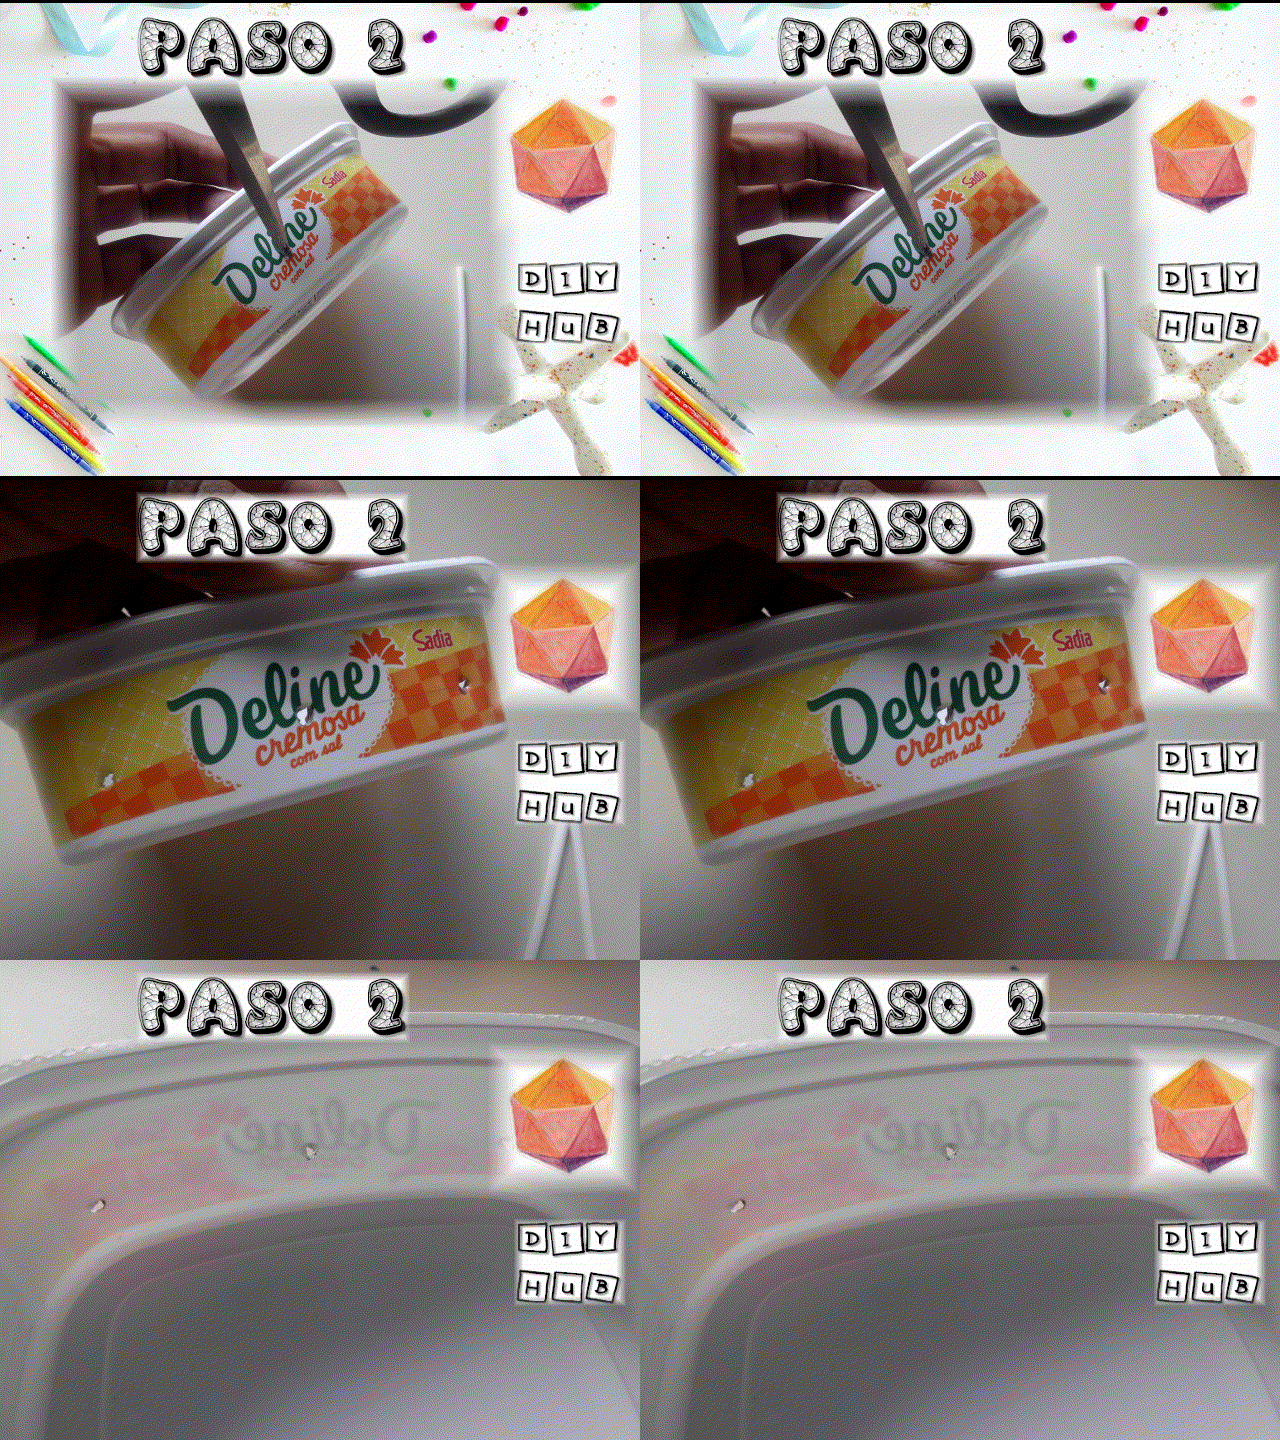
- Segundo Paso: En este paso procederemos a abrir los hoyitos, yo utilicé la tijera, ya que el material del envase es bastante delgado. En caso de ser un material plástico más grueso podríamos usar un clavo caliente, un cautín, etc.
- Second Step: In this step we will proceed to open the holes, I used the scissors, since the material of the container is quite thin. In case it is a thicker plastic material we could use a hot nail, a soldering iron, etc.
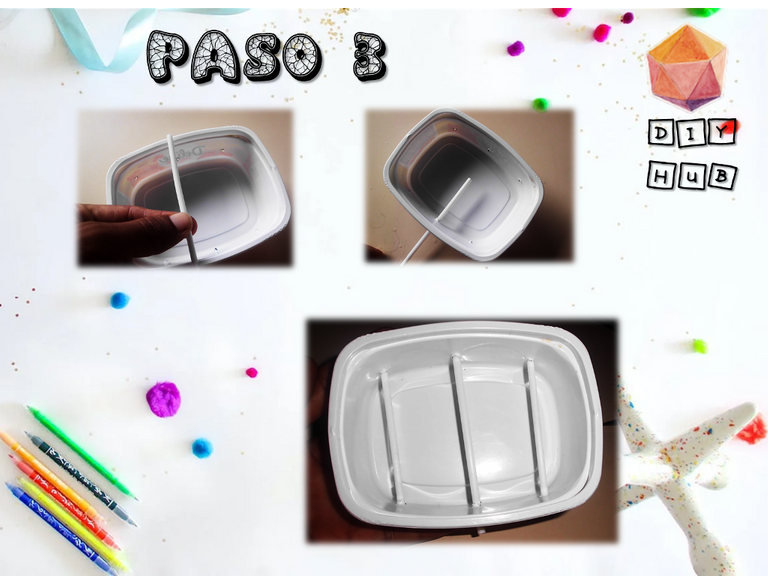
- Tercer Paso: Ahora vamos a introducir los palillos en los hoyos, atravesándolos de un lado al otro de manera horizontal.
- Step 3: Now we are going to insert the toothpicks into the holes, crossing them horizontally from one side to the other.
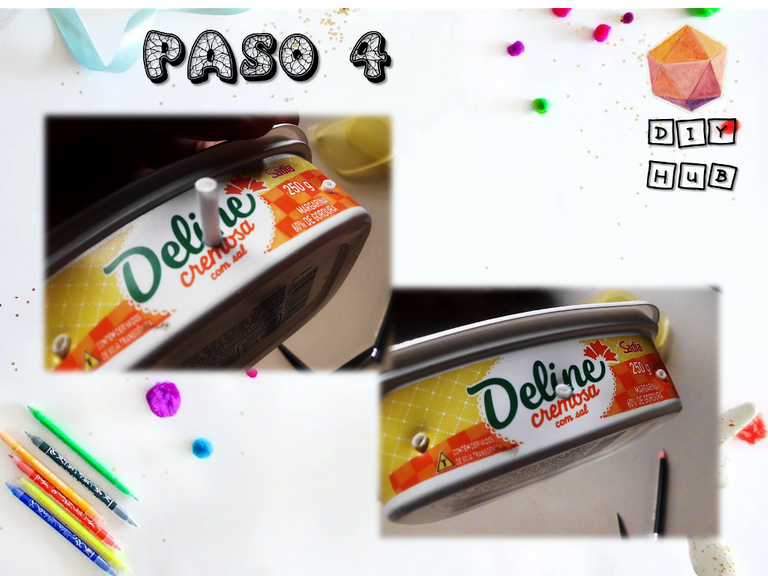
- Cuarto Paso: Ya que los palitos son un poco más largos que el envase, quedaron sobrando parte de ellos, los cuales corte con la tijera.
- Fourth Step: Since the sticks are a little longer than the container, there were some of them left over, which I cut with the scissors.
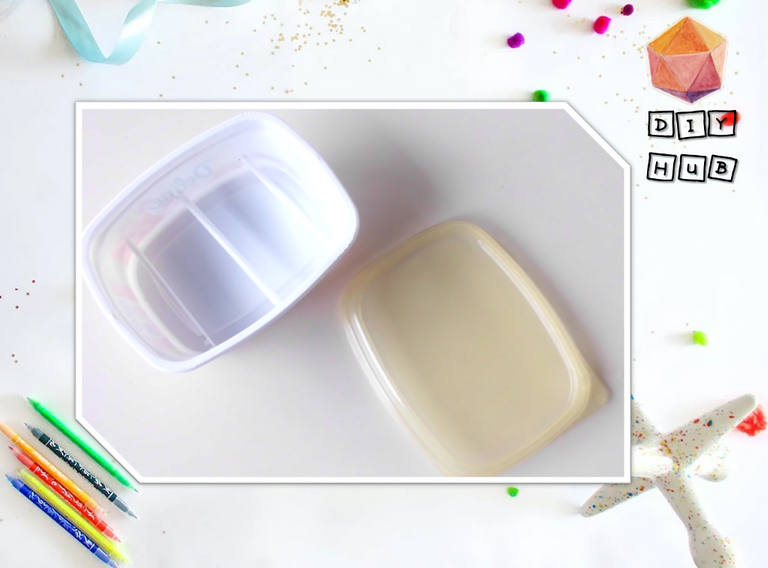
- Casi Listo: Nos quedará como acá en la foto, pero allí aún falta algo.
- Almost Ready: It will look like here in the picture, but there is still something missing.
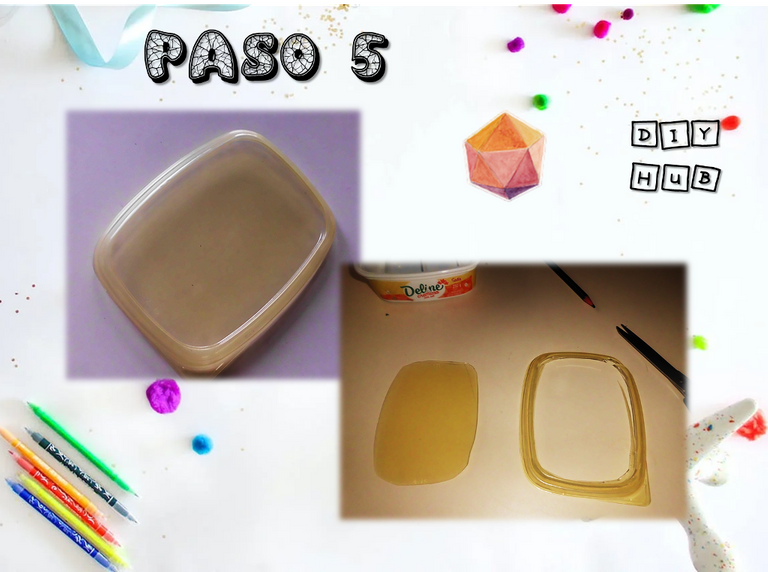
- Quinto Paso: Tomaremos una de las dos tapas y le cortaremos todo el borde, que solo nos quede la parte plana del centro.
- Fifth Step: We will take one of the two lids and cut off the entire edge, leaving only the flat part in the center.
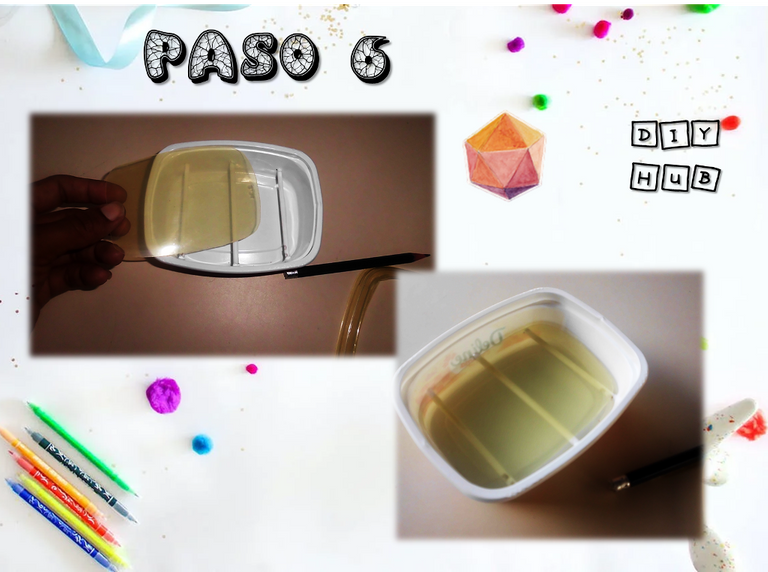
- Sexto Paso: Recortaremos un poco las orillas de manera que encaje en el envase sobre los palillos, esta lámina nos servirá de soporte para el jabón.
- Sixth Step: Cut a little bit of the edges so that it fits into the container on the sticks, this sheet will serve as a support for the soap.

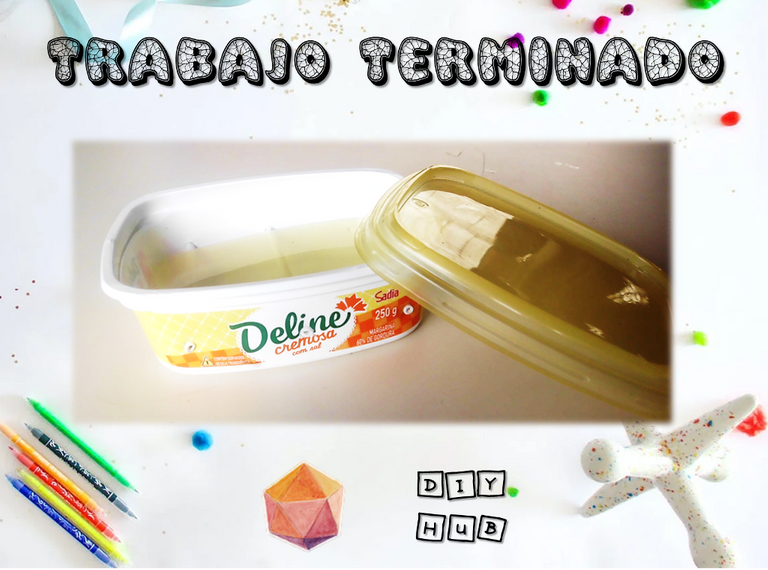
Así amigos en muy pocos pasos hice la jabonera, los incentivo a hacer una ustedes mismos, fue un placer poder compartir esta experiencia con ustedes, espero sus comentarios y opiniones.
So friends in very few steps I made the soap dish, I encourage you to make one yourselves, it was a pleasure to share this experience with you, I look forward to your comments and opinions.

Traductor utilizado:
Imagen de fondo para portada tomada de:
Editor de la portada utilizado:
Microsoft Power Point

Gif Realizado con VSDC


