Haz tu propia franela en casa paso a paso | Make your own flannel at home step by step

in #hive-1305603 years ago


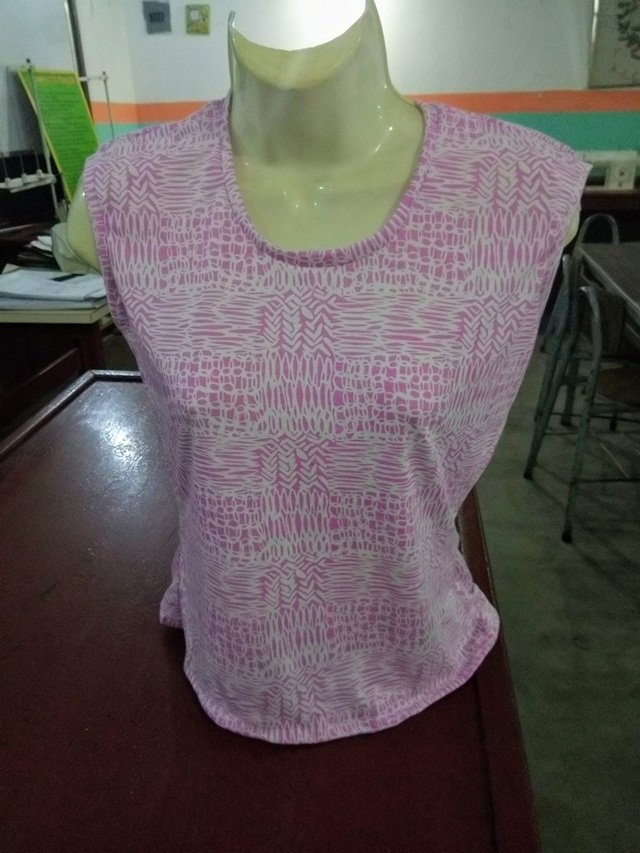
foto final.jpg

Hola amigos :D, ¡bienvenidos a un nuevo tutorial de costura ! , espero que se encuentren muy bien y saludables, en esta ocasión les quiero enseñar el procedimiento para elaborar una franela, franelilla, (tiene varios nombres dependiendo de la región). Me siento muy feliz de compartir con ustedes cómo realice mi primera franela la cual voy a utilizar para dormir porque la tela que utilice (tela de franela) es muy suavecita y fresca, si tu casa es muy calurosa como lo es la mia te aseguro que usar franelas con este tipo de tela será tu salvación xD . Podemos utilizar una máquina de coser o también podemos coser a mano, obviamente la segunda opción te llevará más tiempo pero sigue siendo una buena opción si aun no tienes una máquina o si quieres practicar la alta costura :D porque si no lo sabías la alta costura es mayormente costura a mano a la perfección y muy poco se utiliza la máquina de coser..¡Comencemos!

Hello friends, welcome to a new sewing tutorial, I hope you are very well and healthy, this time I want to show you the procedure to make a flannel, flannel, (it has several names depending on region of). I am very happy to share with you how I made my first flannel which I am going to use to sleep because the fabric I use (lycra cotton) is very soft and fresh, if your house is very hot like mine I assure you that I use flannels with this type of fabric will be your salvation xD. We can use a sewing machine or we can also sew by hand, obviously the second option will take more time but it is still a good option if you don't have a machine yet or if you want to practice haute couture :D because if you didn't know haute couture it's mostly hand sewing to perfection and very little use of the sewing machine. Let's get started!

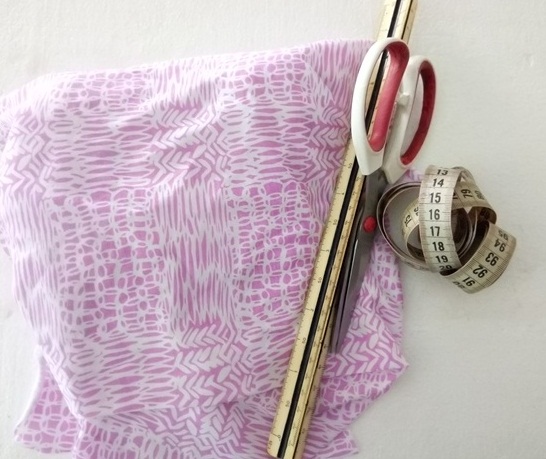
Materiales - Materials

  • 75 cm de tela cotton lycra
  • Hilo
  • Aguja y alfileres
  • Cinta métrica
  • Papel bond
  • Regla de 30 cm
  • Regla de 60 cm (opcional)
  • 75 cm of cotton lycra fabric
  • Thread
  • Needle and pins
  • Measuring tape
  • Bond paper
  • 30 cm ruler
  • 60 cm ruler (optional)


1  materiales.jpg


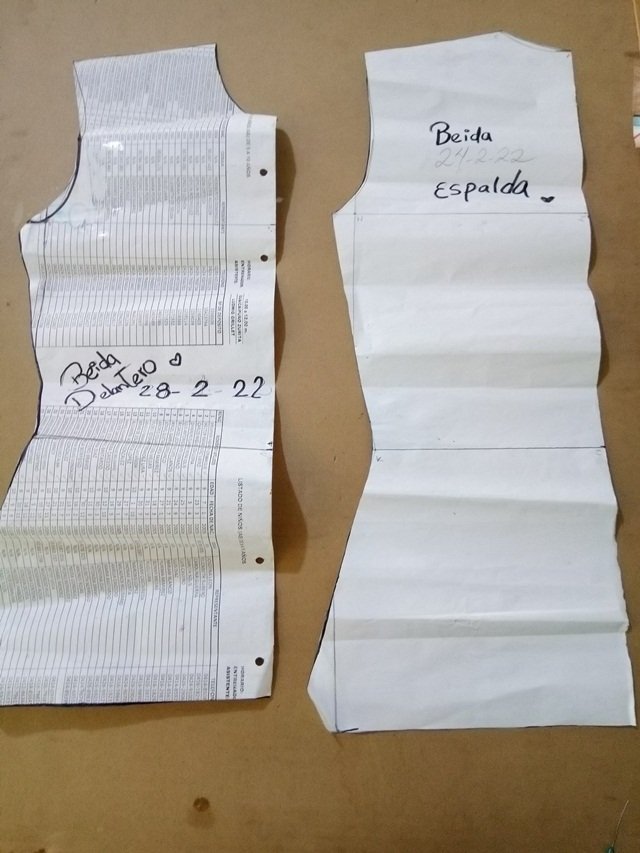
1.Lo primero que haremos será realiza nuestros patrones o también pueden comprarlos dependiendo de su talla. La elaboración de patrones utilizando nuestras medidas anatómicas tiene un proceso de elaboración comprensible sin embargo es un proceso extenso de explicar por lo que si deseas aprender cómo elaborar tus propios patrones puedes avisarme en los comentarios y yo con gusto hago un post dedicado únicamente a la toma de medidas y elaboración del patrón base femenino
1. The first thing we will do is make our patterns or you can also buy them depending on your size. The elaboration of patterns using our anatomical measurements has an understandable elaboration process, however, it is an extensive process to explain, so if you want to learn how to elaborate your own patterns, you can let me know in the comments and I will gladly make a post dedicated solely to taking of measurements and elaboration of the female base pattern

2- paso1.jpg


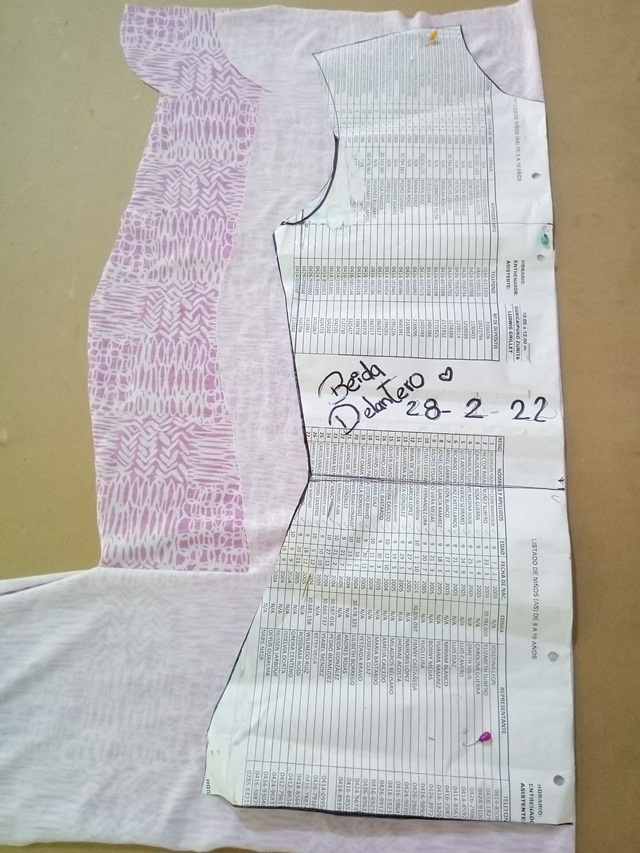
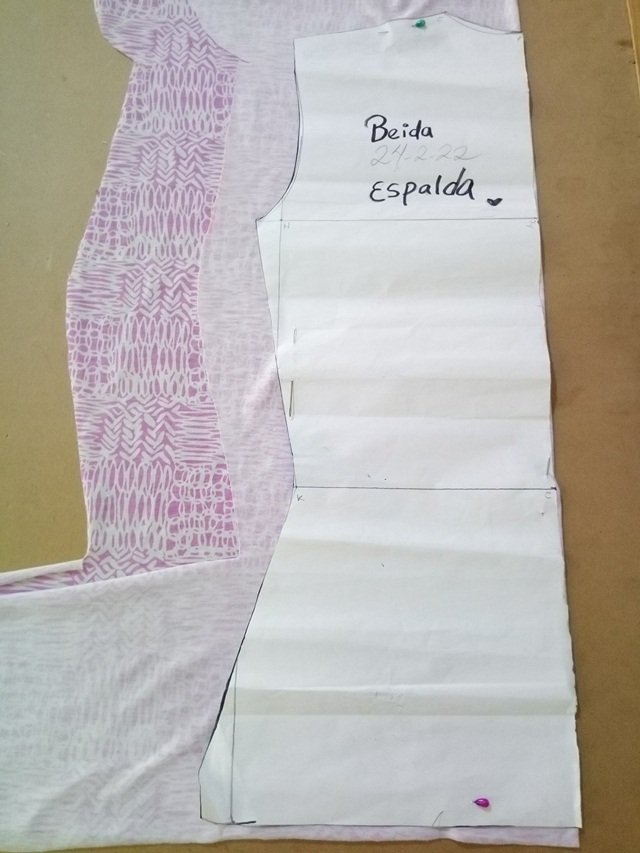
2.Los patrones de blusas o camisas estan elaborados con la cuarta parte de nuestro cuerpo lo que significa que en la mayoría de los casos la tela debe estar doble al momento de marcar y cortar. En las imagenes yo les hice una demostración sobre cómo colocar el patrón delantero y el patrón de espalda
2. The patterns of blouses or shirts are made with the fourth part of our body, which means that in most cases the fabric must be doubled when marking and cutting. In the images I made a demonstration on how to place the front pattern and the back pattern
3 - paso2.jpg

4 - paso2-1.jpg


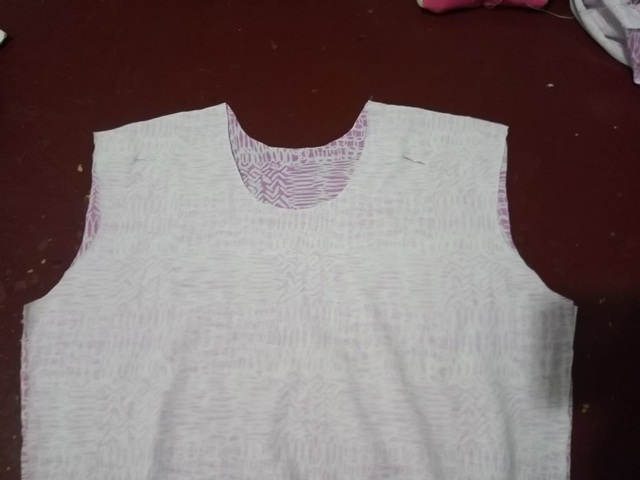
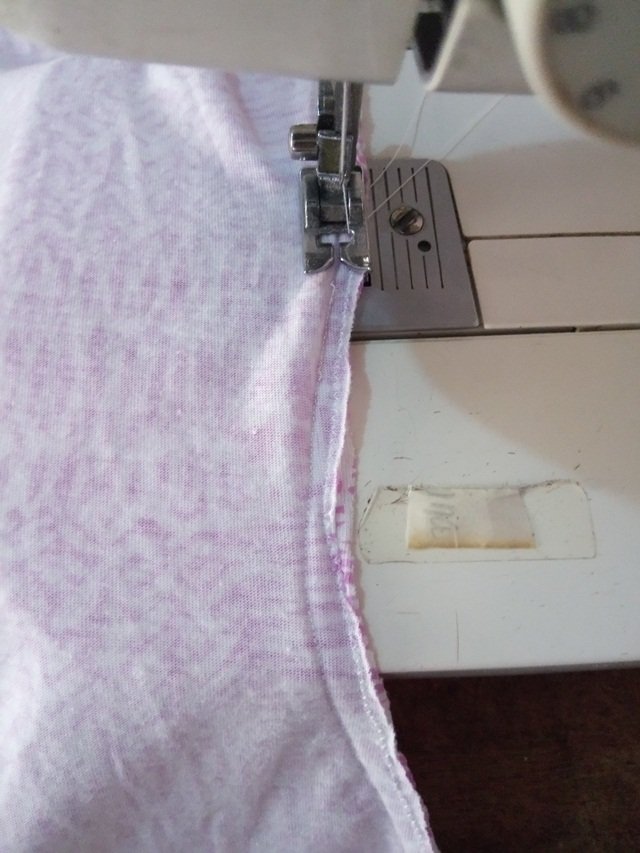
3. Seguidamente amigos vamos a colocar la pieza de espalda y encima colocamos la pieza delantera para coser los hombros primero con costura recta y luego con zig zag. Si aun no posees una máquina de coser puedes coser a mano utilizando el "punto atrás" o "pespunte". Luego repetimos el mismo procedimiento con ambos costados
3. Then friends we are going to place the back piece and on top we place the front piece to sew the shoulders first with a straight seam and then with a zig zag. If you do not yet have a sewing machine you can sew by hand using the "backstitch" or "stitch". Then we repeat the same procedure with both sides
5 - paso3.jpg


5 - paso3-1.jpg


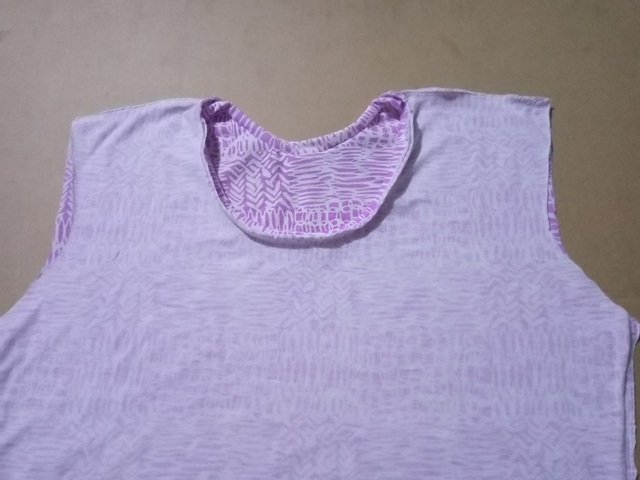
4. Seguidamente vamos a coser el cuello y la forma en que lo cosí es idéntica a la forma de coser los , asi que se lo estaré explicando en el siguiente paso;)
4. Next we are going to sew the collar and the way I sewed it is identical to the way I sew the , so I'll be explaining it to you in the next step ;)

6 - paso4.jpg


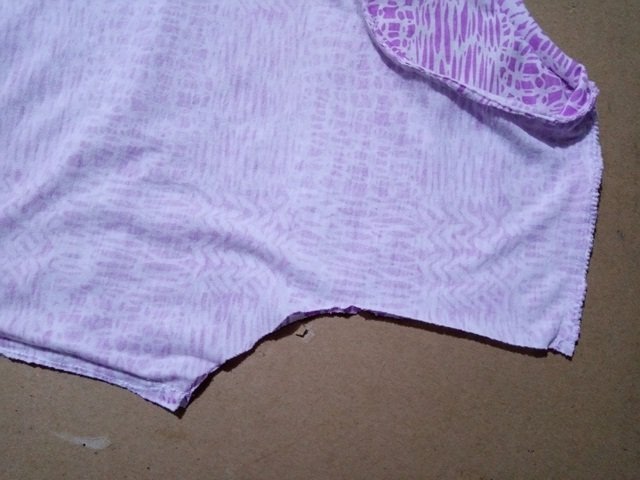
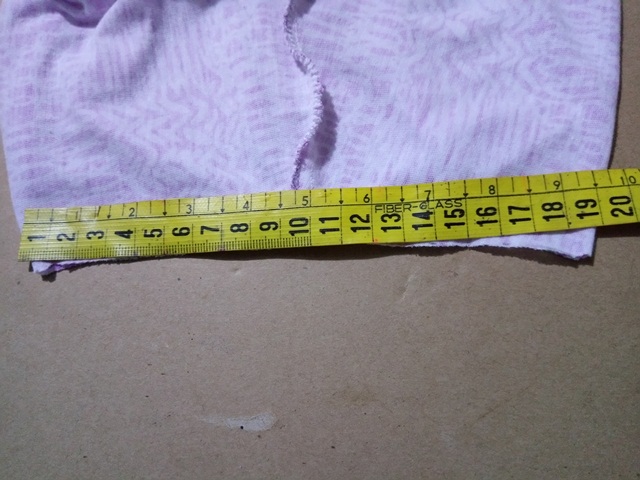
5.Como esta franela no lleva mangas debemos colocarle un sesgo que será de la misma tela. Primero debemos colocar la franela sobre la mesa y unimos la punta del hombro con la punta del costado para formar una linea recta , luego vamos a medir ese espacio y el resultado lo vamos a multiplicar por dos. En este caso la medida me da 19 cm y el doble son 38 cm, seguidamente vamos a cortar una tira que tenga de ancho 5cm (es una medida estandar) y de largo 38 cm (en mi caso)
5. As this flannel does not have sleeves, we must place a bias that will be of the same fabric. First we must place the flannel on the table and join the point of the shoulder with the point of the side to form a straight line, then we are going to measure that space and we are going to multiply the result by two. In this case the measurement gives me 19 cm and double is 38 cm, then we are going to cut a strip that is 5 cm wide (it is a standard measure) and 38 cm long (in my case)
7 - paso5.jpg


8 - paso5-1.jpg

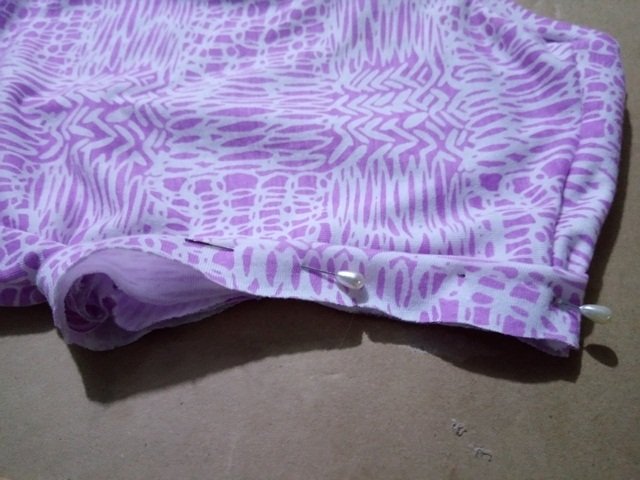
Al largo total de la tira de tela le debes restar 4cm, si estas utilizando una tela que estira demasiado como la tela microdurazno le debes restar de 8 a 10 cm , Luego vamos a unir y coser ambos extremos de la tira y los doblamos hacia la mitad, seguidamente montamos la tira sobre la sisa de la franela y cosemos con costura recta y zigza o si es costura a mano lo puedes hacer con punto atrás
You must subtract 4cm from the total length of the strip of fabric, if you are using a fabric that stretches too much, such as micropeach fabric, you must subtract 8 to 10 cm, then we are going to join and sew both ends of the strip and fold them towards the half, then we mount the strip on the armhole of the flannel and sew with a straight and zigzag seam or if it is hand sewing you can do it with back stitch

9 - paso5-2.jpg


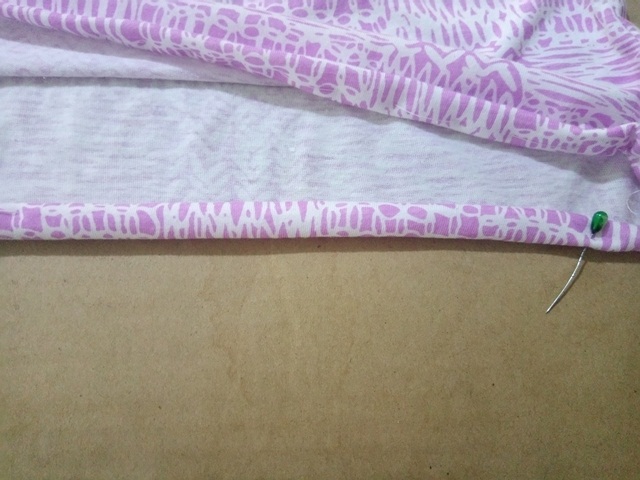
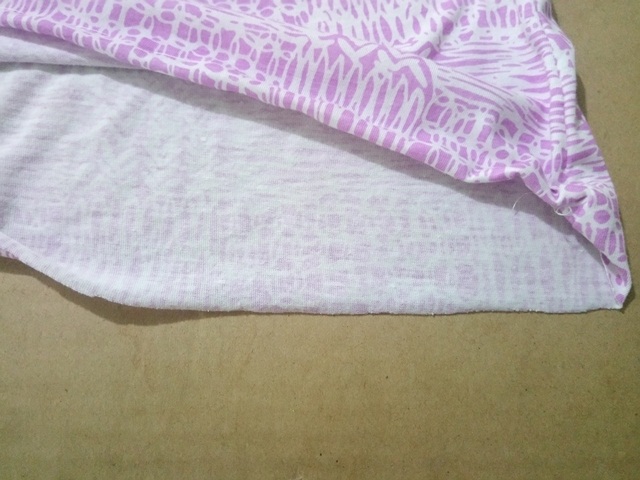
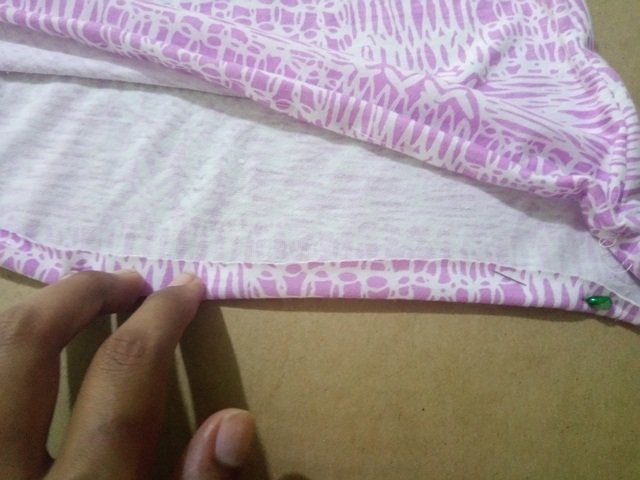
6.Casi terminamos amigos , solo nos queda coser el ruedo de la franelilla y para este paso doblamos un poquito la tela y seguidamente la volvemos a doblar, luego debemos coser por toda la orilla superior con puntada recta y algunas personas utilizan la aguja doble
6. We are almost finished friends, we only have to sew the hem of the flannel and for this step we fold the fabric a little and then we fold it again, then we must sew along the entire upper edge with a straight stitch and some people use the double needle
10 - paso6.jpg

11  - paso6-1.jpg


12 - paso6-2.jpg


Terminamos ♥ Finished ♥

foto final.jpg


Espero que les haya gustado y sobretodo que les sea de utilidad este paso a paso, muchas gracias por su visita, hasta la proximaaa:*
I hope you liked it and above all that this step by step is useful to you, thank you very much for your visit, until next time:*

Las imágenes fueron tomadas por mi persona @beidacarolina para ser publicadas exclusivamente en hive. Para editar las fotos utilice PhotoScape y para traducir el texto utilice Traductor de Google :)

The images were taken by my person @beidacarolina to be published exclusively on hive. To edit the photos use PhotoScape and to translate the text use Google Translate :)

Sort:  
Thank you for sharing this amazing post on HIVE!
  • Your content got selected by our fellow curator @rezoanulvibes & you just received a little thank you via an upvote from our non-profit curation initiative!

  • You will be featured in one of our recurring curation compilations and on our pinterest boards! Both are aiming to offer you a stage to widen your audience within and outside of the DIY scene of hive.

Join the official DIYHub community on HIVE and show us more of your amazing work and feel free to connect with us and other DIYers via our discord server: https://discord.gg/mY5uCfQ !

If you want to support our goal to motivate other DIY/art/music/homesteading/... creators just delegate to us and earn 100% of your curation rewards!

Stay creative & hive on!