DIY Te enseño a elaborar una rosa de tela paso a paso 🌹 | DIY I teach you how to make a fabric rose step by step 🌹

in #hive-1305603 years ago

¡Hola amigos!, espero que se encuentren muy bien y que hayan pasado un excelente día San Valentín, somos conscientes de que el cariño hacia nuestros seres queridos se debe expresar siempre así sea con pequeños gestos aunque es bueno que exista un día especial en el calendario como el 14 de febrero para conmemorar el amor y la amistad☺️😍
Hello friends!, I hope you are very well and that you have had an excellent Valentine's Day, we are aware that affection towards our loved ones should always be expressed even with small gestures, although it is good that there is a special day in the calendar as february 14 to commemorate love and friendship☺️😍

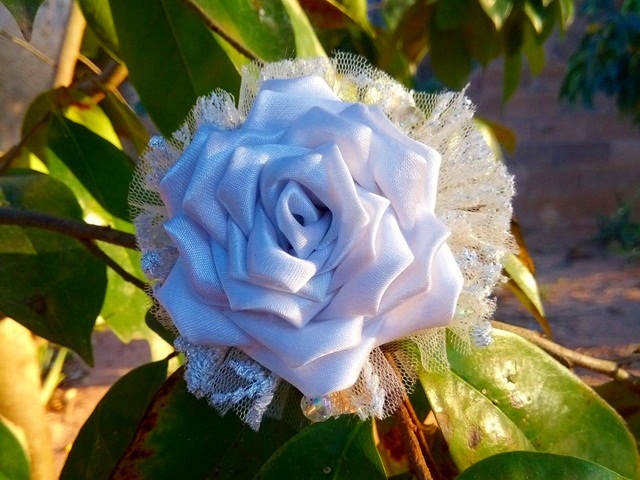
En esta oportunidad quiero compartir con ustedes la elaboración de una rosa hecha con tela, normalmente este tipo de flores artesanales las suelen elaborar con cintas pero aunque sea un poquito más complejo también las podemos hacer utilizando tela, quedan igual de bellas y de un metro de tejido salen bastantes rosas
In this opportunity I want to share with you the elaboration of a rose made with fabric, normally this type of artisan flowers are usually made with ribbons but although it is a little more complex we can also make them using fabric, they are just as beautiful and one meter long. fabric many roses come out

final11.jpg


Materiales - Materials

  • Tela de razo
  • Tela verde
  • Encendedor
  • Vela
  • Tijera
  • Lapicero
  • Pitillo
  • Razo fabric
  • Green cloth
  • Lighter
  • Candle
  • Scissor
  • Pen
  • Skinny


1.jpg


Elaboración - Elaboration

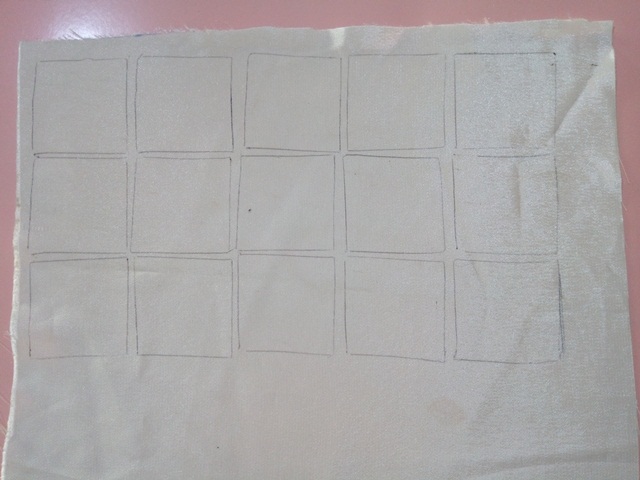
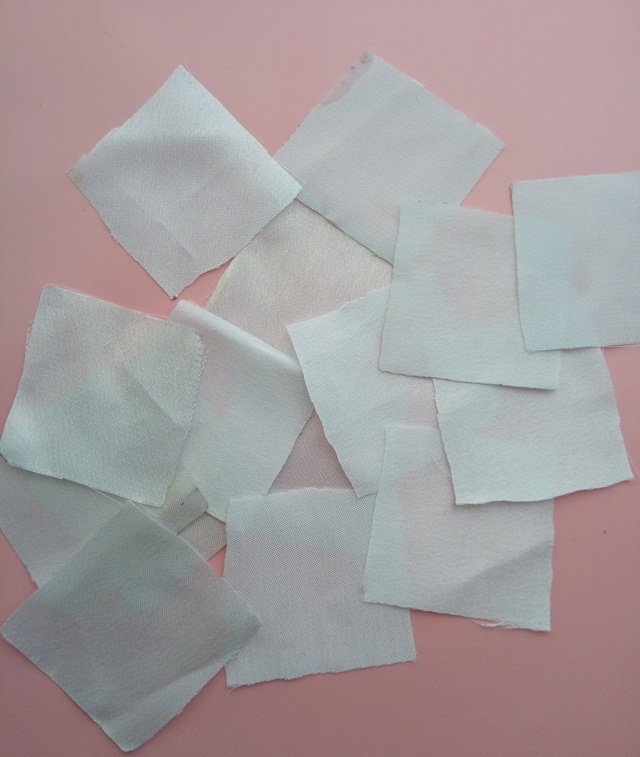
Paso 1. Lo primero que haremos es trazar los cuadros sobre la tela. El tamaño de los cuadros depende de cuán grande queremos que sea los pétalos de la rosa, en este caso yo trace 20 cuadritos de 5 centímetros cada uno. Luego vamos a recortar cada cuadrito y si utilizamos tela de razo o una tela que deshilache mucho debemos sellar los bordes con un yesquero, encendedor o una vela . Si tienes un cautín en casa en lugar de utilizar la tijera puedes utilizar el cautín para recortar el cuadro de tela y al mismo tiempo sellar , de esta manera será menos trabajo pero debes de tener más cuidado 👀
Step 1. The first thing we will do is trace the squares on the fabric. The size of the squares depends on how big we want the rose petals to be, in this case I drew 20 squares of 5 centimeters each. Then we are going to cut out each square and if we use razo fabric or a fabric that frays a lot, we must seal the edges with a tinderbox, lighter or a candle. If you have a soldering iron at home instead of using scissors you can use the soldering iron to cut out the fabric square and at the same time seal it, this way it will be less work but you must be more careful👀
paso 1.jpg


paso 1-2.jpg


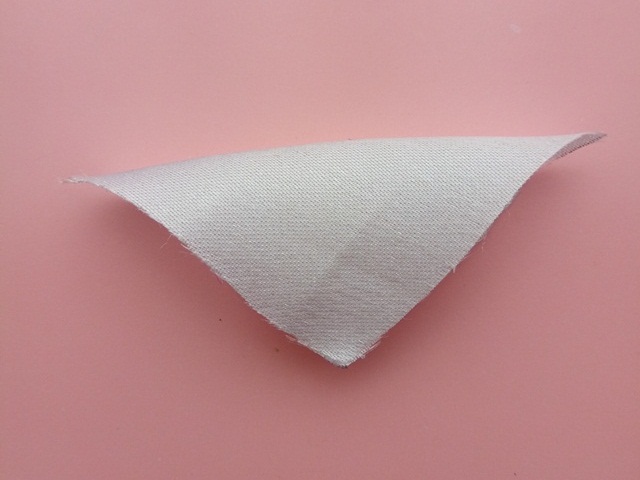
Paso 2. Ahora vamos a formar los pétalos. Primero tomamos un cuadro de tela de y unimos dos extremos formando un triángulo.
Step 2. Now we are going to form the petals. First we take a square of fabric and join two ends to form a triangle

paso 2.jpg


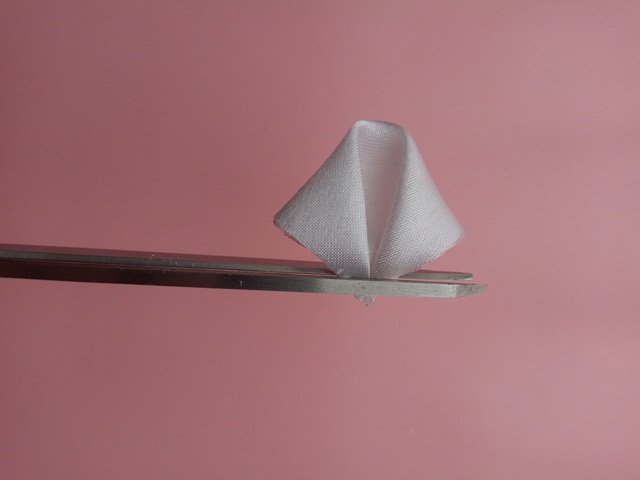
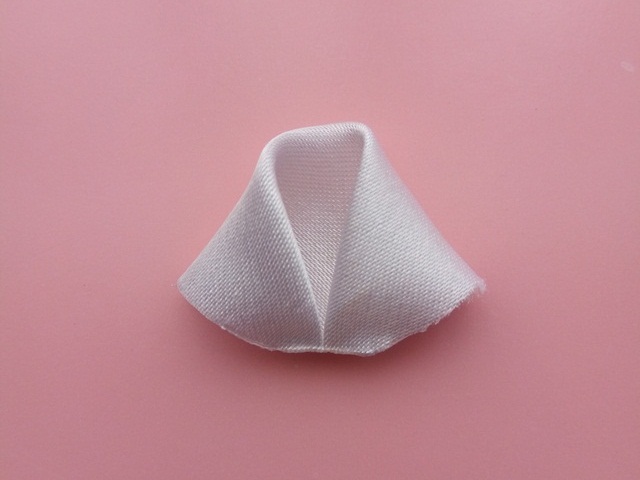
Luego vamos a unir ambas puntas laterales hacia la punta inferior, cortamos un pequeño excedente de tela y con la ayuda de un encendedor sellamos la parte inferior del pétalo.
Then we are going to unite both lateral ends towards the lower end, we cut a small excess of fabric and with the help of a lighter we seal the lower part of the petal
paso 2-1.jpg

paso 2-2.jpg


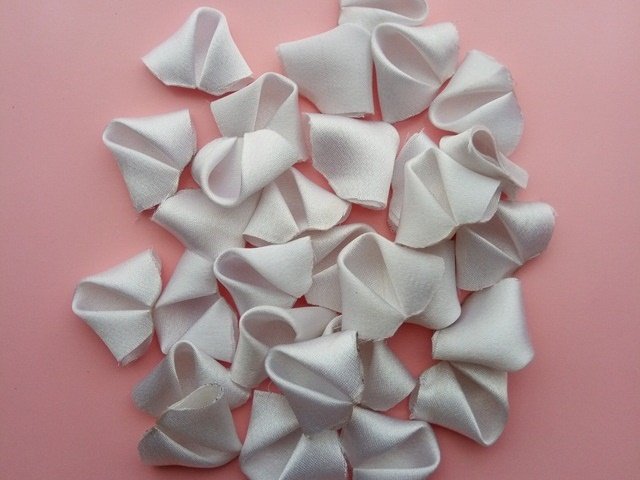
Este proceso lo debemos repetir con cada cuadrito de tela. Lo que yo hago para terminar más rápido es trabajar por serie, es decir, primero formo todos los triángulos y luego recorto y sello con un encendedor cada pétalo. Aquí están listos todos:
We must repeat this process with each square of fabric. What I do to finish faster is to work by series, that is, first I form all the triangles and then I cut out and stamp each petal with a lighter. Here they are all ready:

paso 2-3.jpg


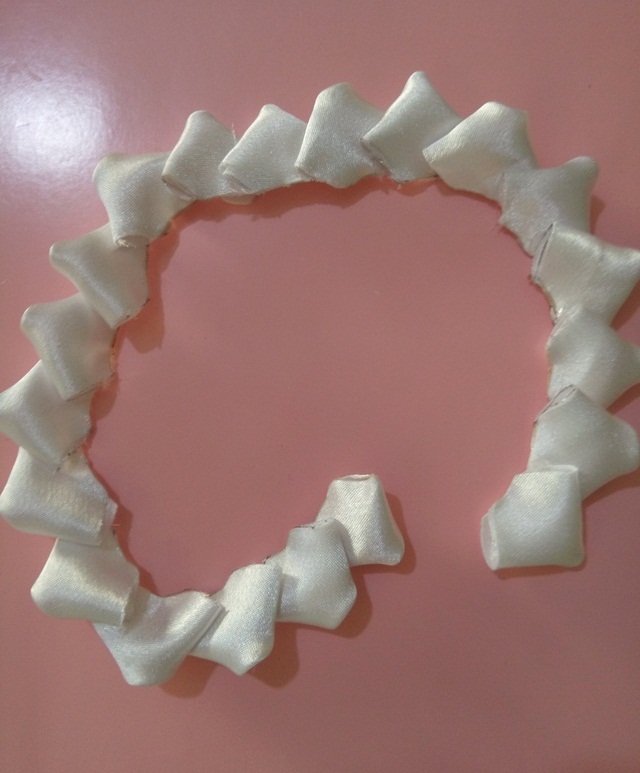
Paso 3. Ahora vamos a unir todos los pétalos y realmente existen varias técnicas, en este caso solo debemos pegar cada pieza al lado de otra formando una especie arco
Step 3. Now we are going to join all the petals and there are really several techniques, in this case we just have to glue each piece next to another forming a kind of arch

paso 3.jpg


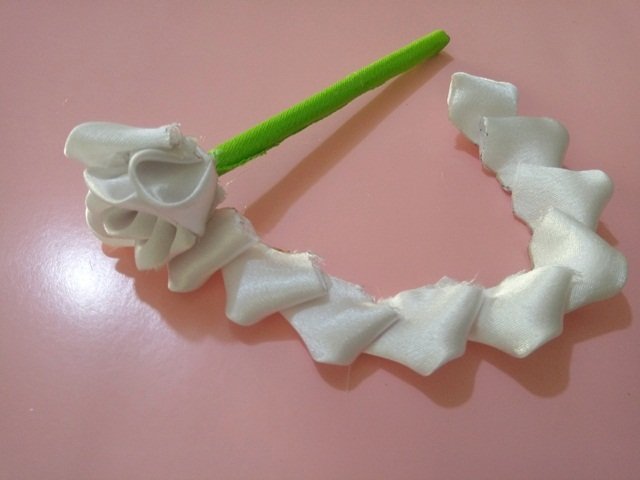
Paso 4. Para elaborar el tallo forramos el pitillo con silicon líquido y tela verde o cualquier color de su preferencia, incluso puede utilizar pedrería. Luego vamos a ir envolviendo y pegando la tira de pétalos en el tallo para que nuestra rosa empieza a tomar forma
Step 4. To make the stem, we line the straw with liquid silicone and green fabric or any color of your choice, you can even use rhinestones. Then we are going to wrap and stick the strip of petals on the stem so that our rose begins to take shape

paso 4.jpg


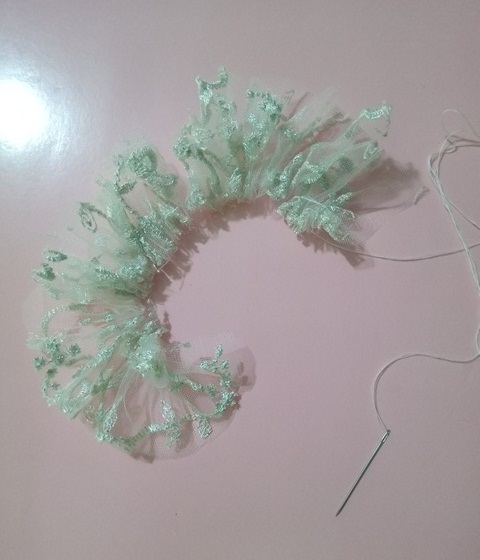
Paso 5. Finalmente cortamos una tira larga de encaje o tela bordada, la cosemos por todo el borde y fruncimos el hilo, esta será la decoración de nuestra rosa
Step 5. Finally we cut a long strip of lace or embroidered fabric, we sew it around the edge and gather the thread, this will be the decoration of our rose

paso 5.jpg

Este es el resultado final - This is the final result


final11.jpg


final3.jpg


Muchas gracias por visitar mi publicación amigos🤗, espero que les haya gustado esta manualidad y sobre todo que le sea de mucha utilidad, las rosas de tela son muy versátiles porque entre otras cosas podemos utilizarlas para decorar vestidos, para elaborar accesorios de cabello, tiaras de bautizo e incluso como centros de mesa!
Thank you very much for visiting my publication friends🤗, I hope you liked this craft and above all that it is very useful to you, fabric roses are very versatile because among other things we can use them to decorate dresses, to make hair accessories, tiaras baptism and even as centerpieces!

Las imágenes fueron tomadas por mi persona @beidacarolina para ser publicadas exclusivamente en hive. Para editar las fotos utilice PhotoScape y para traducir el texto utilice Traductor de Google
The images were taken by my person @beidacarolina to be published exclusively on hive. To edit the photos use PhotoScape and to translate the text use Google Translate
Sort:  

Que hermosa te quedó👍🤗

Graciaas amiga🤗

WARNING - The message you received from @animal-shelter is a CONFIRMED SCAM!

DO NOT FOLLOW any instruction and DO NOT CLICK on any link in the comment!

Nice post keep it up.
if you haven't receive 100 HIVE and 200 LEO than vote LeoFinance for witness
LeoFinance is a well known and great project so i am vouching for it
Vote Here for LeoFinance and get 100 HIVE and 200 LEO now

Thank you friend!😊

Congratulations @beidacarolina! You have completed the following achievement on the Hive blockchain and have been rewarded with new badge(s):

You got more than 100 replies.
Your next target is to reach 200 replies.

You can view your badges on your board and compare yourself to others in the Ranking
If you no longer want to receive notifications, reply to this comment with the word STOP

Check out the last post from @hivebuzz:

Hive Power Up Month - Feedback from February day 14
Valentine's day challenge - Give a badge to your beloved!
Support the HiveBuzz project. Vote for our proposal!