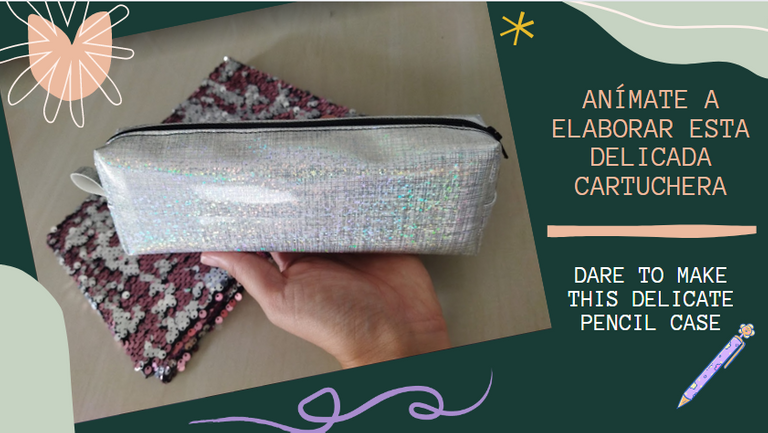
Mi pasión por las manualidades inicia con la necesidad de tener objetos lindos y funcionales elaborados por mi misma.
¡Reciban un saludo muy afectuoso toda la maravillosa familia de Hive! hoy especialmente a la comunidad DIY, con quienes quiero compartir esta delicada manualidad que además de hermosa es bastante útil.
Esta cartuchera te funcionará tanto para colocar tus lápices y otros útiles escolares como para guardar, por ejemplo tu maquillaje. Según los colores utilizados puede servir para que los más pequeños lo lleven al cole y también como un bello obsequio súper personalizado para alguien especial.
My passion for crafts began with the need to have cute and functional objects made by myself.
I send my warmest greetings to all the wonderful Hive family! Today, especially to the DIY community, with whom I want to share this delicate craft that is not only beautiful but also very useful.
This pencil case will work both for your pencils and other school supplies as well as for storing, for example, your makeup. Según los colores utilizados puede servir para que los más pequeños lo lleven al cole y también como un bello obsequio súper personalizado para alguien especial.
MATERIALES // MATERIALS

| MATERIALES | MATERIALS |
|---|---|
| TIJERA | SCISOR |
| HILO | THREAD |
| TELA DE 27CM X 22CM | FABRIC OF 27CM X 22CM |
| MÁQUINA DE COSER | SEWING MACHINE |
| REGLA | RULE |
| CIERRE O CREMALLERA DE 30CM | ZIPPER OF 30CM |
| TELA POP | POP FABRIC |
La tela POP es una tela delgada que funciona para tapar las costuras.
La tela para crear tu cartuchera será la de tu preferencia, se recomienda utilizar telas un poco gruesas para lograr que la misma tenga cuerpo y mantenga la forma.
En relación al hilo, normalmente utilizo uno que haga contraste sobre la tela,sin embargo esto lo harás según tu gusto.
The POP fabric is a thin fabric that works to cover the seams.
The fabric to create your pencil case will be the one of your preference, it is recommended to use fabrics a little thick to achieve that it has body and keeps the shape.
In relation to the thread, I normally use one that makes contrast on the fabric, however you will do this according to your creativity.
COMENCEMOS // LET´S GO

Lo primero que haremos es colocar nuestra cremallera sobre el lado que mide 27 cms, en este caso es importante colocar el frente de la tela y el cierre volteado, es decir quedará frente de la tela con el frente de la cremallera y procedemos a coser.
The first thing we will do is to place our zipper on the side that measures 27 cm, in this case it is important to place the front of the fabric and the zipper turned over, that is to say, the front of the fabric will remain with the front of the zipper and proceed to sew.

- Lo primero que hago es seleccionar la pata de la máquina de coser, utilizo la que se muestra en la foto, ya que,con esa queda la medida de la cremallera.
- Luego corresponde entonces coser el cierre con el borde de la tela.
- The first thing I do is to select the leg of the sewing machine, I use the one shown in the photo, since that is the size of the zipper.
- Then I sew the zipper to the edge of the fabric.

- Una vez se haya pasado la costura, procedemos como indica la imagen en voltear la cremallera doblar la tela y pasar costura.
- Debe quedar como se indica en la última foto.
- Once the seam has been passed, we proceed as indicated in the image to turn the zipper over, fold the fabric and pass the seam.
- It should be as shown in the last picture.

- Cortamos el tope inferior de la cremallera.
- Llevamos el borde del cierre al otro extremo de la tela y cosemos.
- Cut the end of the zipper.
- Bring the edge of the zipper to the other end of the fabric and sew.

- Cosemos para cerrar el otro extremo.

- Ahora vamos a abrir la cremallera y cómo habíamos cortado el final podemos entonces sacar el jalador y quedará abierto como se muestra en la imagen.
- Now we are going to open the zipper and as we had cut the end we can then remove the puller and it will be open as shown in the image.

- Igual que el lado anterior procedemos a voltear la cremallera.
- As on the previous side, we proceed to turn the zipper over.

- Procedemos a realizar la costura.
- Ahora colocamos nuevamente el jalador y cerramos.
- We proceed to sew the seam.
- Now we place again the puller and close.

- Una vez cerrada la cremallera,la vamos a doblar por la mitad como se muestra en la imagen.
- Con un lápiz haremos una marca por ambos lados.
- Once the zipper is closed, fold it in half as shown in the image.
- With a pencil we will make a mark on both sides.

*Procedemos a voltear la cartuchera y nos quedará tal como se muestra en la imagen.
*Proceed to flip the cartridge case over and it will look as shown in the image.

- Tomaremos la marca que realizamos y la alinearemos con el medio de la cremallera.
- Ambos lados deben quedar alineados.
- We will take the mark we have made and align it with the middle of the zipper.
- Both sides must be aligned.

- Vamos recortar una tira de la misma tela de la cartuchera de 1cm x 3,5cm.
- Esta tira se colocará en el extremo final de la cremallera.
- La tira va a servir para sostener la cartuchera y cerrarla con más facilidad.
- We are going to cut a strip of the same fabric of the pencil case of 1cm x 3,5cm.
- This strip will be placed at the end of the zipper.
- This will be used to hold it and close more easily our pencil case.

- Se introduce la tira justo en el medio de la cremallera dejando los extremos hacia afuera.
- Se procede a realizar la costura.
- Cortamos el excedente.
- The strip is inserted right in the middle of the zipper, leaving the ends facing out.
- We proceed to sew the seam.
- Cut the excess.

*Procedemos a coser el otro extremo.
*We proceed to sew the other end.

- Una vez se hayan cosido los dos extremos vamos a marcar un margen de 3 cm en cada borde.
- Al marcar los 4 bordes quedará como se muestra en la imagen.
- Once the two ends have been sewn together, we will mark a 3 cm margin on each edge.
- When the 4 edges are marked, it will look as shown in the image.

- Una vez marcados se procede a cortar los 4 bordes marcados.
- Once marked, proceed to cut the 4 marked edges.

- Vamos a doblar las esquinas como se muestra en la imagen.
- A cada esquina se le pasará una costura.
- We are going to join the corners as shown in the image.
- Each corner will have a seam.

- En la fotografía se muestra cómo debe ser el resultado al coser las 4 esquinas.
- The picture shows how the result should be when sewing the 4 corners.

- Acá utilizaremos 4 tiras de tela POP de 1cm x 7cm, el cual funcionará para cubrir la costura.
- Here we will use 4 strips of POP fabric of 1cm x 7cm, which will function to cover the seam.

- Finalmente procedemos a voltear la cartuchera y darle forma.
- Finally we proceed to turn the cartridge case over and shape it.

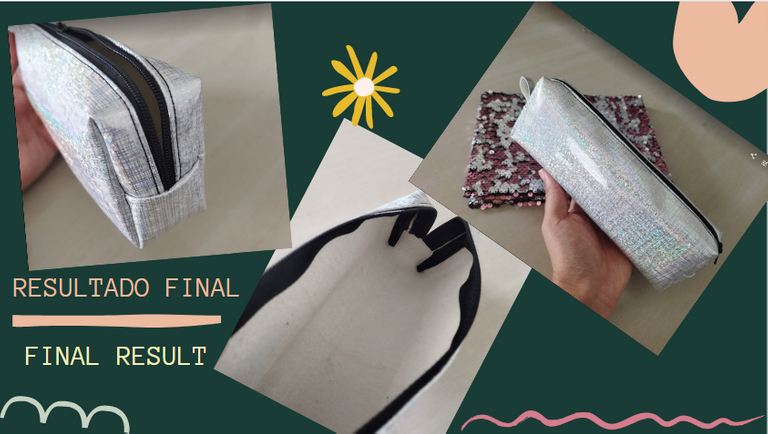
Podrás utilizarla para tus lápices u otros objetos que desees guardar, yo a veces hago varias y así poder tener en orden todos mis artículos en mi cartera.
Now our beautiful pencil case is ready! .
You can use it for your pencils or other items you want to keep, I sometimes make several and so I can have in order all my items in my purse.
¡GRACIAS POR LEER!
THANK YOU FOR READING!
Fotografía por:| Photografy by: @baptistaeashell, Redmi 9T.
Edición:| Edition by: @baptistaeashell, Canva.
Traducido con:| Translate with: www.Deepl.com/translator (free version)


