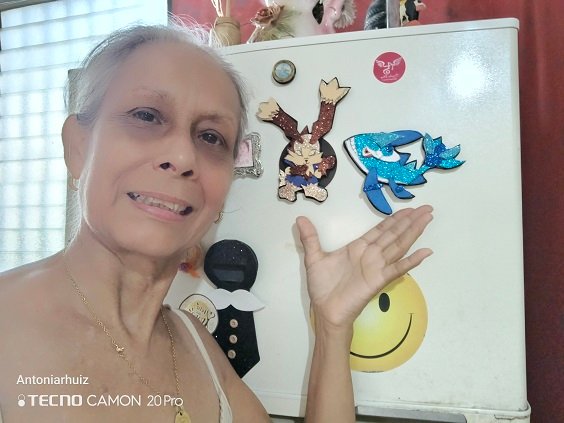
Greetings dear friends active in the Holozing community. Yesterday I came across the evolution of the alpha creatures and went crazy, literally. For days now I had in mind to make some fridge magnets to decorate but I had been putting it off until I saw [post] and said to myself that I must have them.
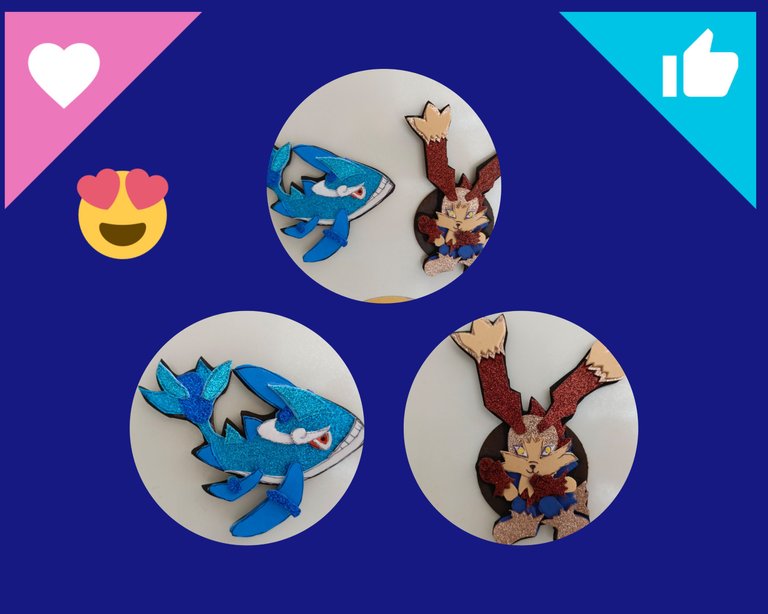
Waller
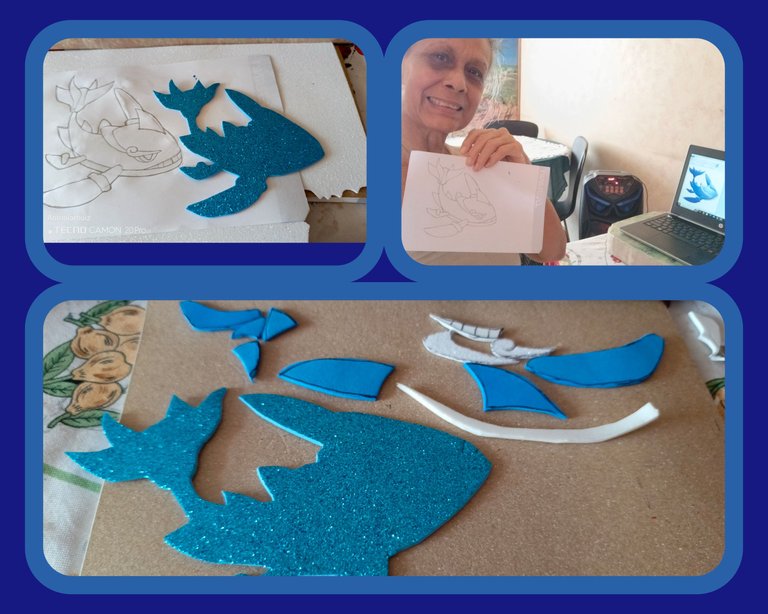
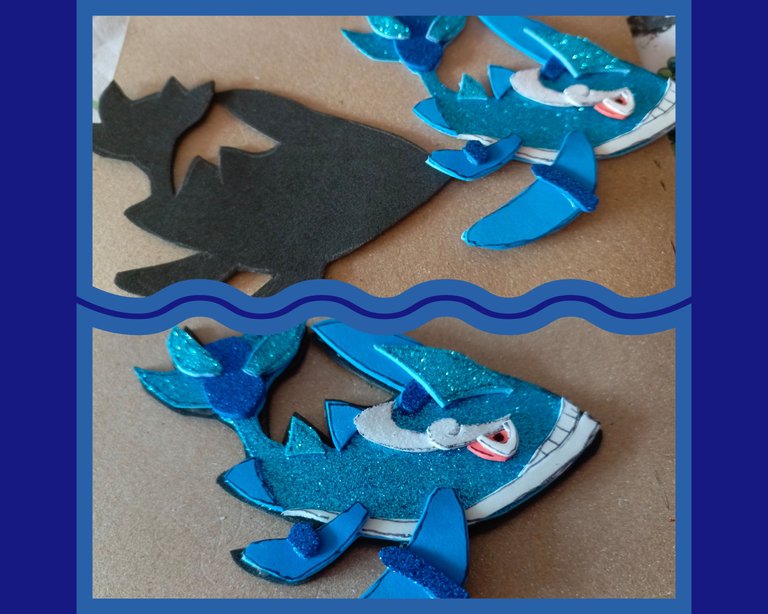
To make the cute whale we used: matte foami in black, orange, white and blue; also foami with white, dark blue and light blue frosting; liquid silicone and scissors.
- I traced the design on the back of the light blue brilliant foami. I drew the fins on the blue matte foami and others on dark blue frosted foami. The white parts; some in matte white and others in frosted white.
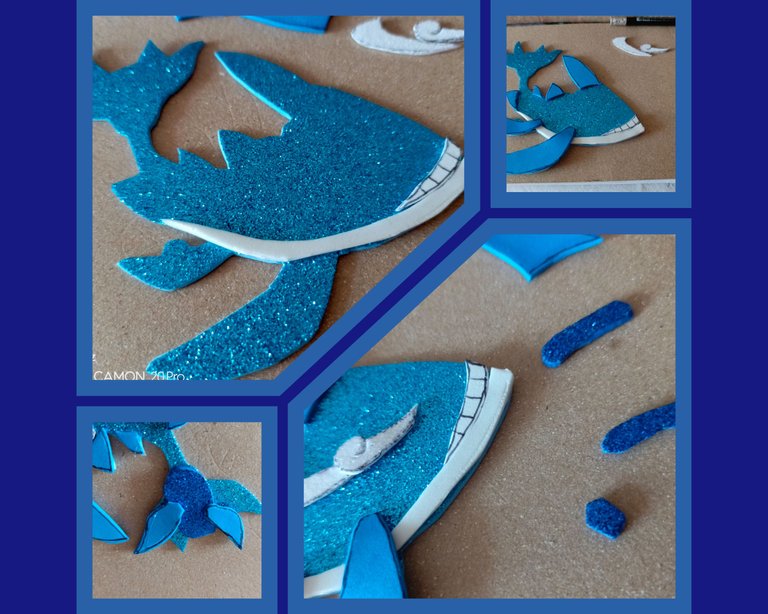
- I glued a small white strip that simulates the belly of the whale and with a small piece of the same color I made the mouth by drawing the teeth with a marker. At this point I glued all the small structures of the fins.
- For the eye, I had thought about painting it and decided to cut it out in foami, white and orange. Finished the project but then I saw that it lacked shine and so I made some parts in frosted foami and others in matte foami. I liked this better.
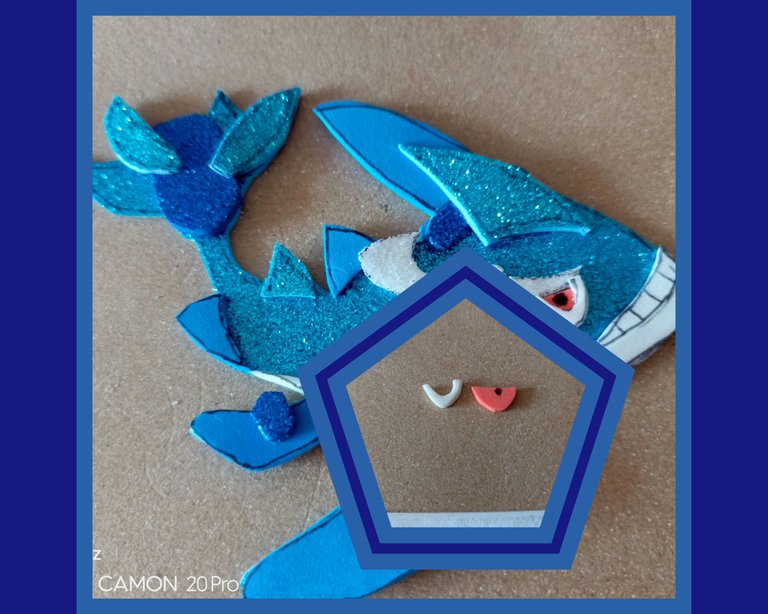
- Finally to give it consistency and shape, I mounted it on the black foami.

Zappity
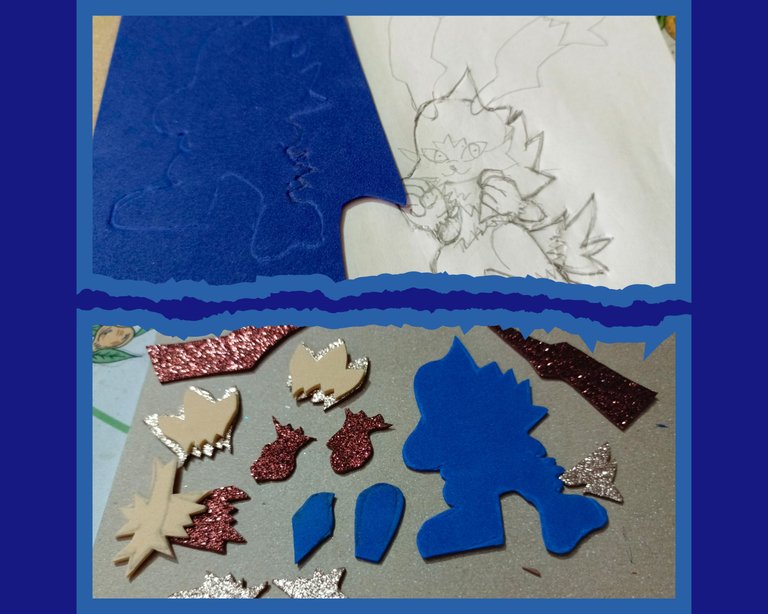
The material used for the bunny was: copper and brown frosted foami, blue and beige matte foami, yellow paint, magnets for the two figures, scissors, liquid silicone.
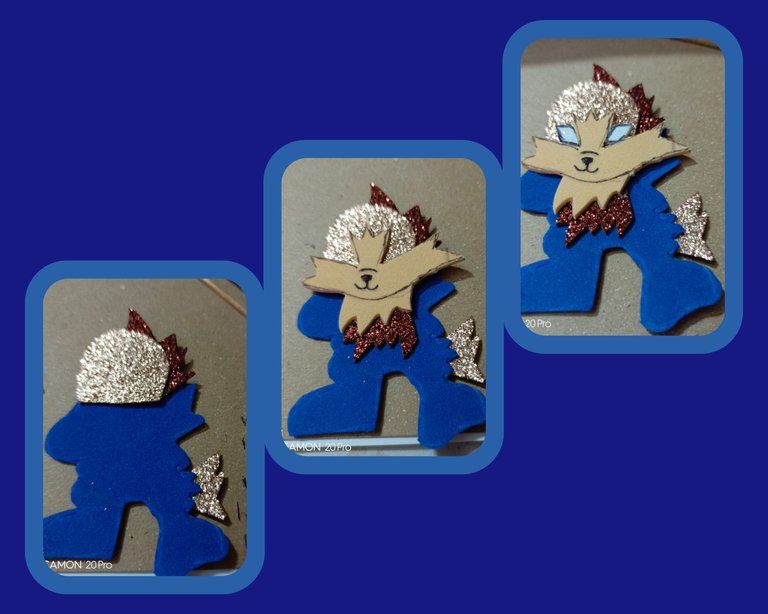
- Make the drawing of the bunny figure by taking the base in blue matte foami and the rest of the parts: ears, cuffs and fur in frosted brown; the tips of the ears, snout and fur in beige matte foami; the legs, face, ears and tail in copper colored frosted foami; the legs in matte blue color. The shape of the face does not appear in the photo because I forgot to place it, excuse me.
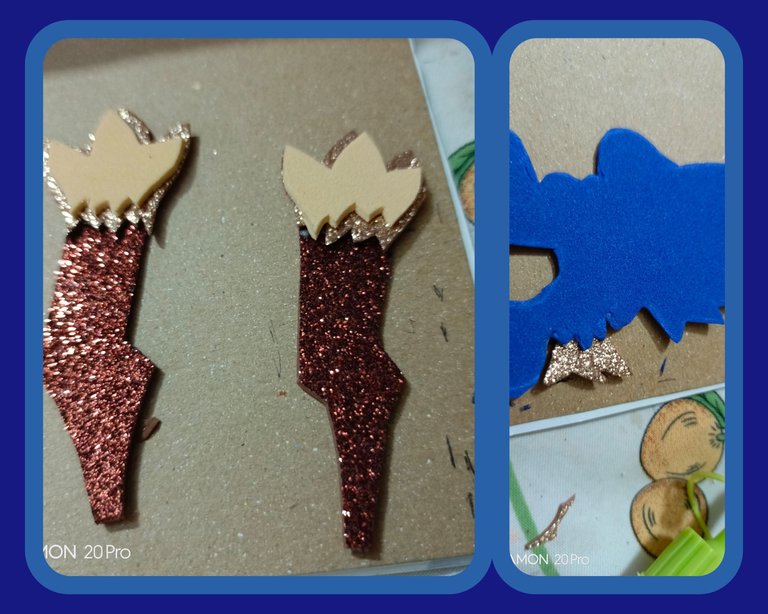
- I considered that the easiest thing is the ears, so it was the first thing I put together and I took advantage of it for a small tail.
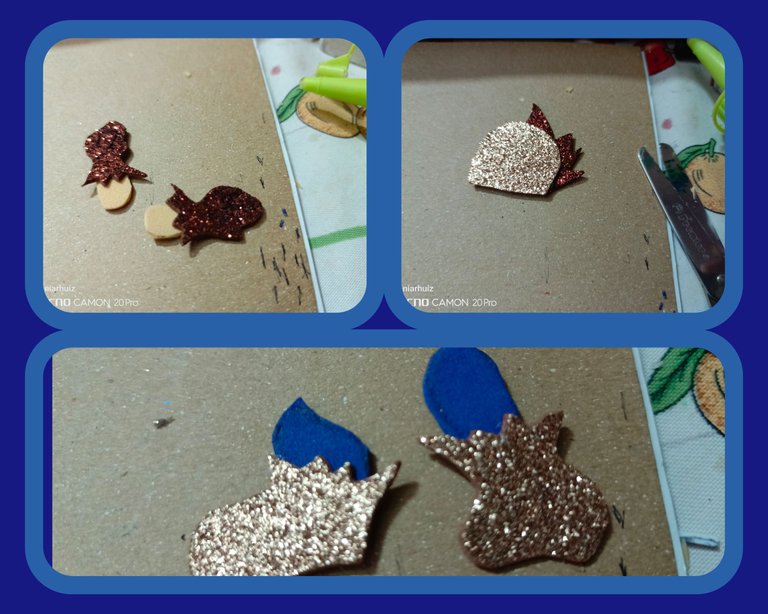
- Then I proceeded with the fists, legs and feets, face and hair, and at once I cut out the eyes.
- Define the face by gluing the face, muzzle and eyes.
- Glue the legs and fists.
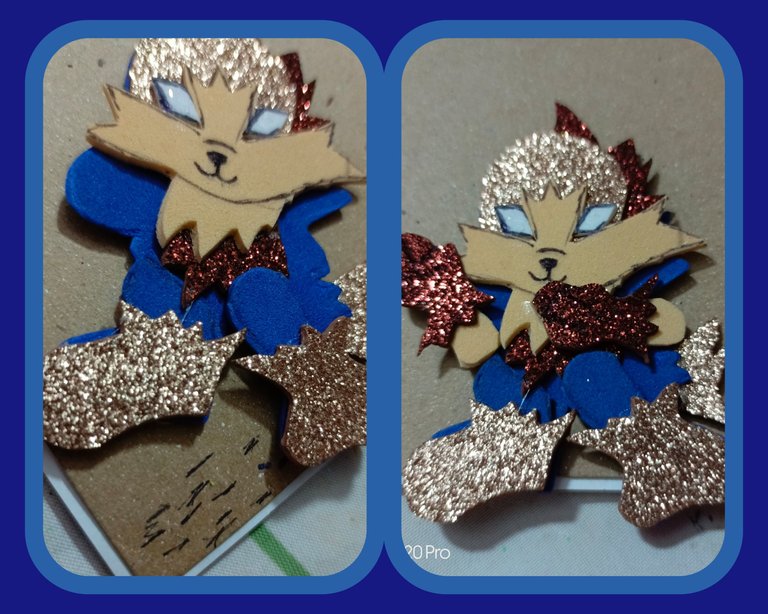
- Glue the ears and paint the eyes.
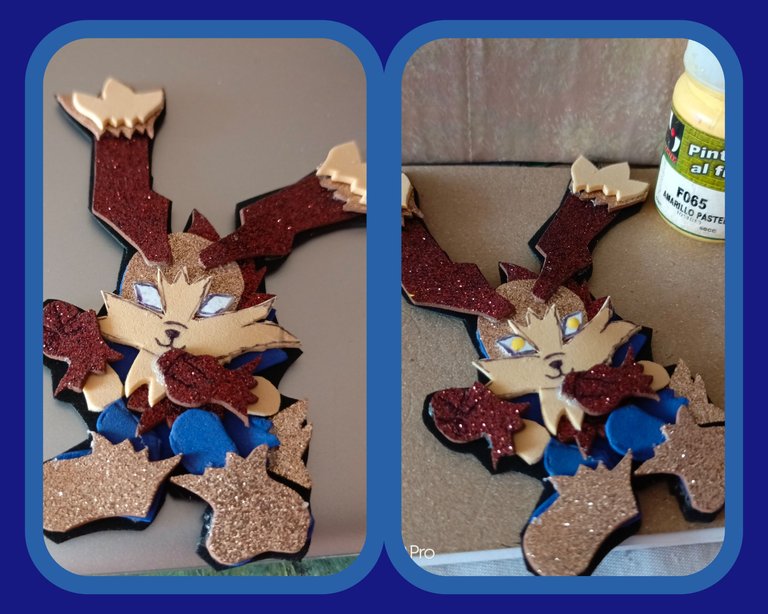
Finally, assemble in black foami and cut out the outline of the figure. Glue a magnet on each creature and that's it.
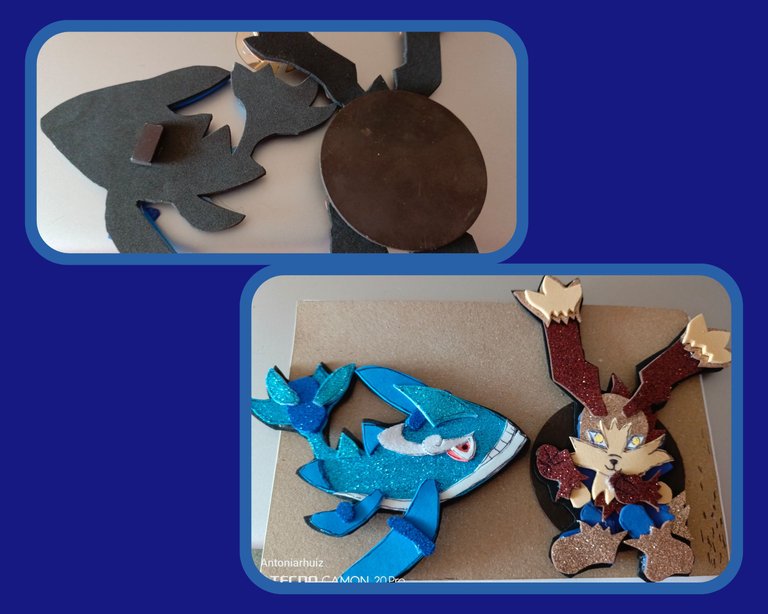
The process of making Waller was a little easier. Zappity gave me more work because I couldn't find how to make the fur; however I worked as I went along, in the end the final result was positive, at least that's what I think. It is possible that I will materialize the other creatures to have the collection but it will be in another publication. See you next time!
! [SPANISH]
Saludos apreciados amigos activos en la comunidad Holozing. Ayer me encontré con la evolución de las criaturas alfa y enloquecí, literalmente. Desde hace días tenía en mente hacer unos imanes de nevera para decorar pero lo venía posponiendo hasta que vi el [post] y me dije que debía tenerlos.
Todos me gustan pero me decidí por Waller que es la evolución de Walle, y por Zappity que es la evolución de Zappit. Al momento de comenzar con la manualidad lo vi sumamente fácil pero al desarrollar la idea me fui complicando, no me resultó tan fácil como lo pensé; sin embargo fui desarrollando la creación tipo ensayo y error. Comencé con Waller, la ballenita azul y mientras trabajaba eché mano de los audífonos de mi nieto y me puse full música. Lo primero que hice fue el dibujo de las dos criaturas.Waller
Para la elaboración de la linda ballena utilizamos: foami mate de color negro, naranja, blanco y azul; también foami con escarcha de color blanco, azul oscuro y azul claro; silicón líquido y tijera.
Calqué el diseño sobre el reverso del foami escarchado azul claro. Saqué las aletas en el foami mate azul y otras en foami escarchado azul oscuro. Las partes blancas; unas en color blanco mate y otras en blanco escarchado.
Pegué una pequeña tira de color blanco que simula la barriga de la ballena y con un pedacito del mismo color hice la boca dibujando la dentadura con un marcador. En este punto pegué todas las pequeñas estructuras de las aletas.
Para el ojo, había pensado en pintarlo y me decidí por recortarlo en foami, blanco y naranja. Terminado el proyecto pero luego vi que le faltaba brillo y entonces hice unas partes en foami escarchado y otras en foami mate. Esto me gustó más.
Por último para darle consistencia y forma, lo monté sobre el foami negro.
Zappity
El material usado en el conejo fue: foami escarchado cobre y marrón, foami mate azul y beige, pintura de color amarillo, imanes para las dos figuras, tijera, silicón líquido.
Realizar el dibujo de la figura del conejo tomado la base en foami mate azul y del resto de las partes: orejas, puños y pelo en color marrón escarchado; las puntas de las orejas, hocico y pelo en foami mate color beige; las patas, cara, orejas y cola en foami escarchado color cobre; las piernas en color azul mate. La forma de la cara no aparece en la foto porque olvidé colocarla, me disculpan.
Consideré que lo más fácil son las orejas, por lo tanto fue lo primero que armé y aproveché para pequeño rabo.
Luego procedí con los puños, patas y piernas, cara y pelo, y de una vez recorté los ojos.
Definir el rostro pegando la cara, el hocico y los ojos.
Pegar las patas y los puños.
Pegar las orejas y pintar los ojos.
Finalmente, se monta en foami negro y se recorta el contorno de la figura. Pegar un imán en cada criatura y listo.
El proceso de elaboración de Waller fue un poco más fácil. Zappity me dio más trabajo porque no encontraba como realizar el pelaje; no obstante fui trabajando sobre la marcha, al final el resultado final fue positivo, al menos es lo que yo creo. Es posible que elabore materialice las otras criaturas para tener la colección pero será en otra publicación. Hasta la próxima!!
Información Information Todas las fotos son propias All potos are my own Imagen editada en GridArt del teléfono Tecno Camon 20 Pro Imagen editada en GridArt del teléfono Tecno Camon 2 Pro Traducción en traductor Deepl versión gratuita Deepl translator free versión 
