Receive warm Venezuelan greetings from the beloved lands of the First Born of the American continent.
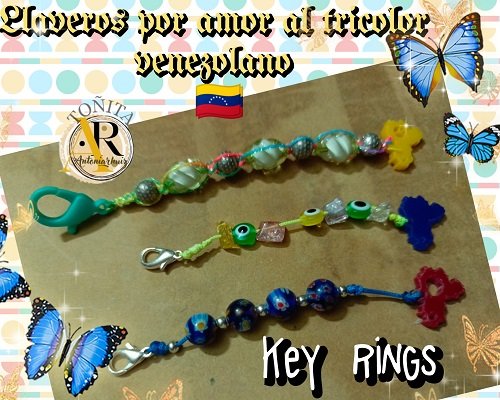
We are all born in a country and are forever marked with a sense of nationalistic identity. Each and every one of us loves our homeland from the corner where we are. This is the reason for these key chains that I share with you today.
I try as much as possible to work with recycled material with the intention of minimizing expenses but sometimes that is not possible. In the city where I live there is a store called Mercería y Manualidades La Colonial, it belongs to some friends who are like my family and it is where I buy the materials for my crafts. I found some map of Venezuela charms and I didn't hesitate to buy some to make a tricolor bracelet but at home I decided to buy some key chains to give as gifts to my beautiful coaches of the Bailoterapia.
! [SPANISH]
Reciban un cálido saludo venezolano desde las amadas tierras de la Primogénita del continente americano.
Todos nacemos en un país y quedamos marcados para siempre con el sentido de identidad nacionalista. Todos y cada uno de nosotros amamos nuestra patria desde el rincón donde nos encontramos. Este es el motivo de estos llaveros que les comparto hoy.
Trato en lo posible de trabajar con material de reciclaje con la intención de minimizar gastos pero a veces eso no es posible. En la ciudad donde vivo hay una tienda que se llama Mercería y Manualidades La Colonial, es de unos amigos que son como mi familia y es donde compro los materiales para mis manualidades. Encontré unos dijes de mapa de Venezuela y no dudé en comprar algunos para hacer una pulsera tricolor pero en casa me decidí por unos llaveros para regalar a mis lindas entrenadoras de la Bailoterapia.

Keychains with map of Venezuela
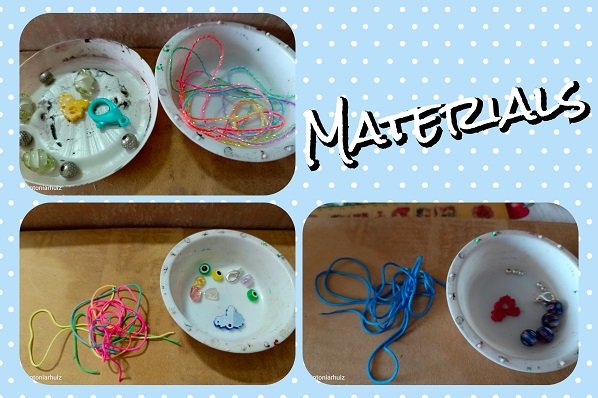
Materials
-3 Venezuela map charms
-Assorted beads
-Small and large metal separators
-2 Small metal strips of metal -Small metal strips
-1 Large plastic string
-1mm threads of various colors
-Scissors
-Lighter
-Board
! [SPANISH]
Llaveros con mapa de Venezuela
Materiales
-3 Dijes de mapa de Venezuela
-Cuentas variadas
-Separadores metálicos pequeños y grandes
-2 Trancas de pequeñas de metal
-1 Tranca grande de plástico
-Hilos de 1mm de varios colores
-Tijera
-Encendedor
-Tabla

Elaboration of the yellow map keychain
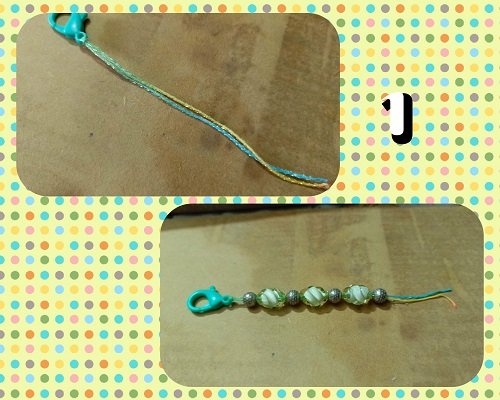
1-Cut 25 cms base and tie it to the stringer to fit the beads and spacers.
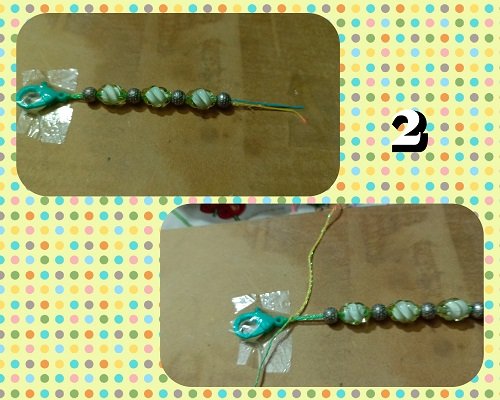
2-Fasten to the board with adhesive tape. Cut 40 cms of thread and pass it under the base cord.
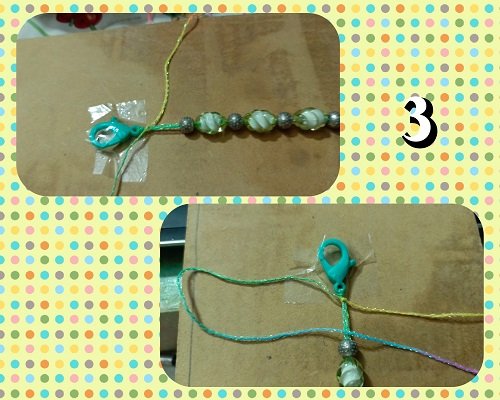
3-Start by tying a knot. Then with the thread on the left side, pass the tip to the right side over the base thread forming a "q".
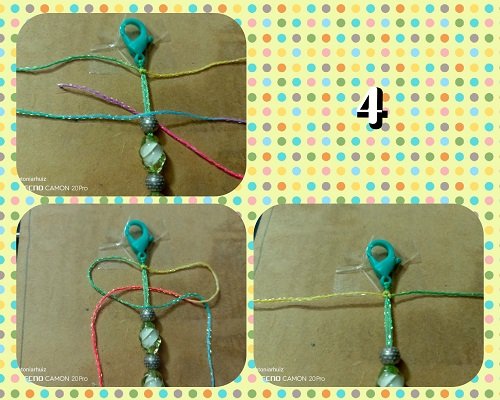
4-Take the end of the thread on the right side, pass it over the end of the thread of the "q" that was left on the right side and under the base thread to introduce it through the "q" and tighten.
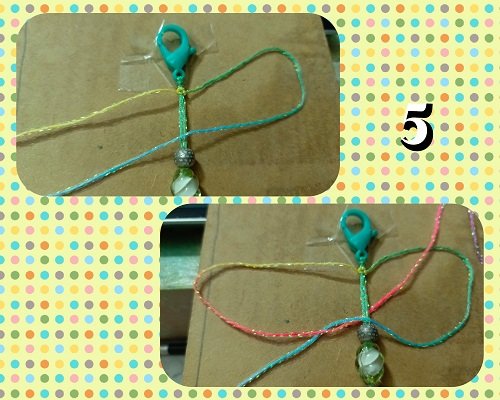
5-With the thread on the right side we form a "p". We pass the left yarn over the end of the "p" that was left on the left side and under the base yarn to pass it between the "p"; tighten. Repeat step 4 and 5 as many times as you wish, but in this case I repeated 3 times to make the knot flat.
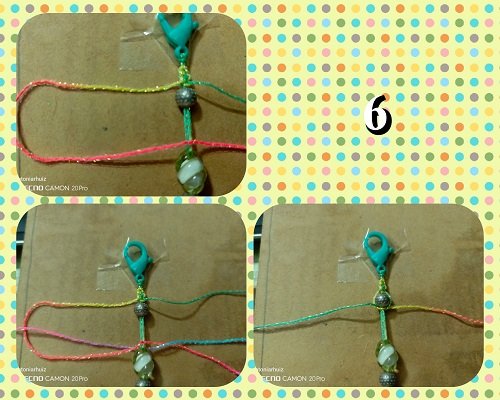
6-In this step we start weaving each bead in the same way as before but hugging each bead.
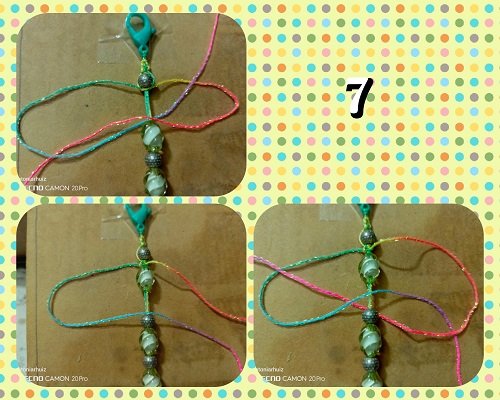
7-Repeat the process with each of the beads.
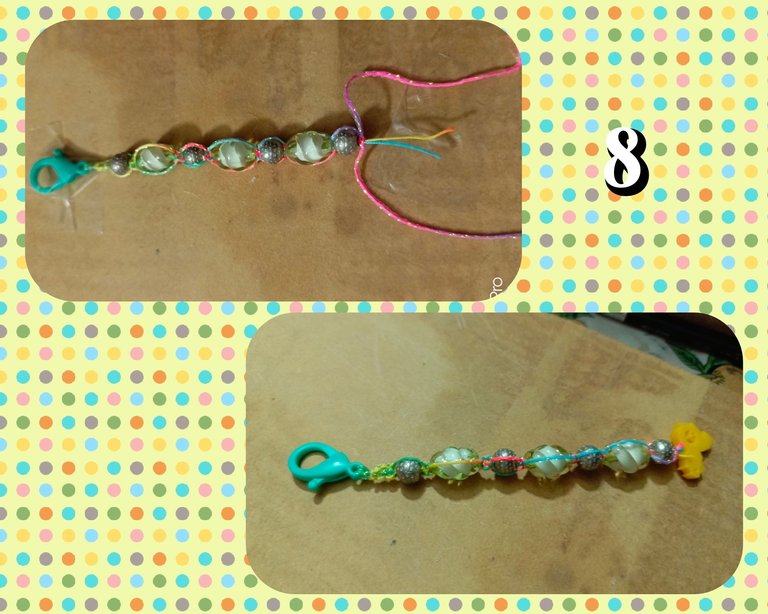
8-At the end, tie the pendant, cut and burn the ends to solder the excess threads.
! [SPANISH]
Elaboración del llavero de mapa amarillo
1-Cortar 25 cms base y atarlo a la tranca para encajar las cuentas y los separadores.
2-Fijar en la tabla con cinta adhesiva. Cortar 40 cms de hilo y pasarlo por debajo del cordón base.
3-Comenzar haciendo un nudo. Luego con el hilo del lado izquierdo, pasamos la punta al lado derecho por encima del hilo base formando una “q”.
4-Tomamos la punta del hilo del lado derecho, la pasamos por encima del extremo del hilo de la “q” que quedó en el lado derecho y por debajo del hilo base para introducir por la “q” y apretar.
5-Con el hilo del lado derecho formamos una “p”. Pasamos el hilo izquierdo por encima del extremo de la “p” que quedó del lado izquierdo y por debajo del hilo base para pasarlo entre la “p”; apretar. Repetir el paso 4 y 5 las veces que desee pero en este caso repetí 3 veces para hacer el nudo plano.
6-En este paso comenzamos a tejer cada cuenta de la forma anterior pero abrazando cada abalorio.
7-Repetir el proceso con cada una de las cuentas.
8-Al final, amarrar el dije, cortar y quemar las puntas para soldar los hilos sobrantes.

Making a blue map keychain
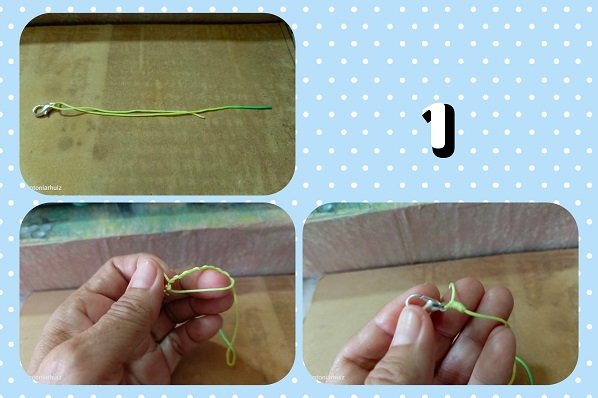
1-Cut 25 cms of thread and tie it to the string leaving 5 cms free. With the 5 cm cord make a knot of several turns tightening it to form a Franciscan knot.
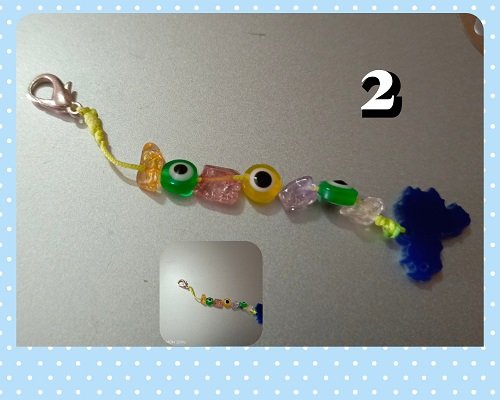
2-Insert the stones and the Turkish eye beads and finally anchor the blue map with another knot in the same style.
! [SPANISH]
Elaboración del llavero de mapa azul
1-Cortar 25 cms de hilo y atarlo a la tranca dejando 5 cms libre. Con el cordón de 5 cms hacer un nudo de varias vueltas apretando para formar un nudo franciscano.
2-Introducir las piedras y las cuentas de ojo turco y finalmente anclar el mapa azul con otro nudo del mismo estilo.

Making the red map keychain
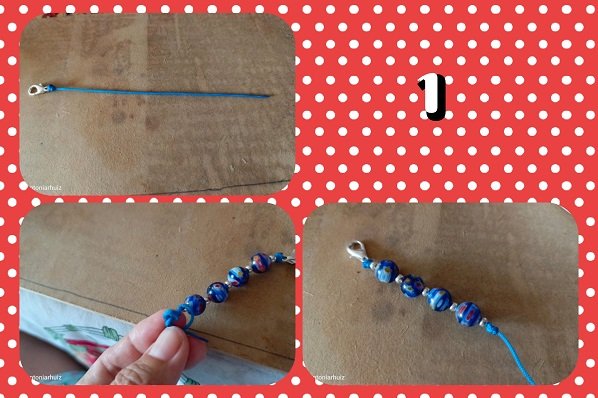
1-Cut 20 cms of thread and tie the string making a knot. Insert the beads and separators, closing with a Franciscan knot with a few turns.
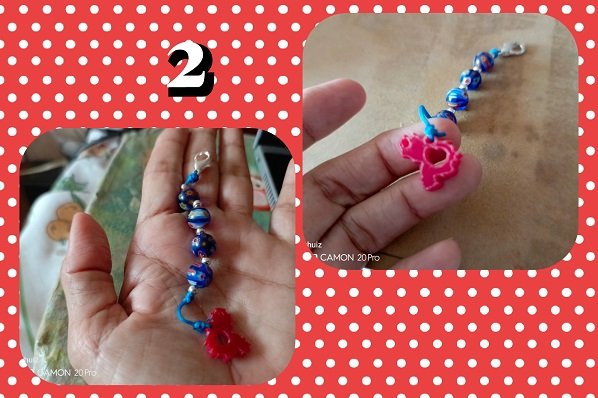
2-At the end, place the red map pendant making a Franciscan knot. Burn to secure the weave.
! [SPANISH]
Elaboración del llavero de mapa rojo
1-Cortar 20 cms de hilo y atar la tranca haciendo un nudo. Introducir las cuentas y separadores cerrando con un nudo franciscano de pocas vueltas.
2-Al final, colocar el dije de mapa rojo haciendo un nudo franciscano. Quemar para asegurar el tejido.

These are simple key chains that are easy to make but I still paid for the hazing by leaving the thread short on the yellow map key chain. I hope you liked it and I encourage you to make your own key chains.
! [SPANISH]
Estos son unos sencillos llaveros de fácil elaboración pero aun así pagué la novatada dejando el hilo corto en el llavero de mapa amarillo. Espero que les haya gustado y se animen a elaborar sus llaveros.
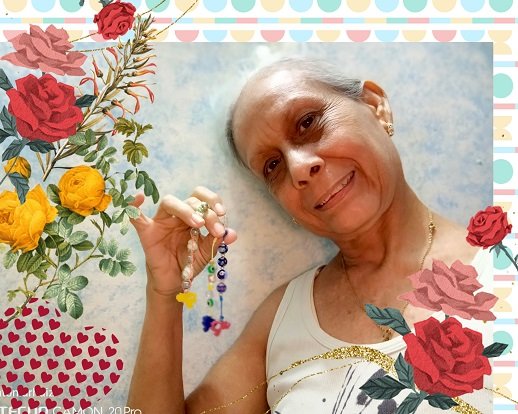
|Información| Information|
|Todas las fotos son propias| All photos are my own|
|Imagen editada en GridArt del teléfono Tecno Camon 20 Pro| Imagen editada en GridArt del teléfono Tecno Camon 2 Pro|
|Traducción en traductor Deepl versión gratuita| Deepl translator free versión|

