¡Hola, hola! Amigos bonitos de este Mundo Digital💕
Hello, hello! Beautiful friends of this Digital World💕
Español
¡BONITO DÍA TENGAN TODOS!.
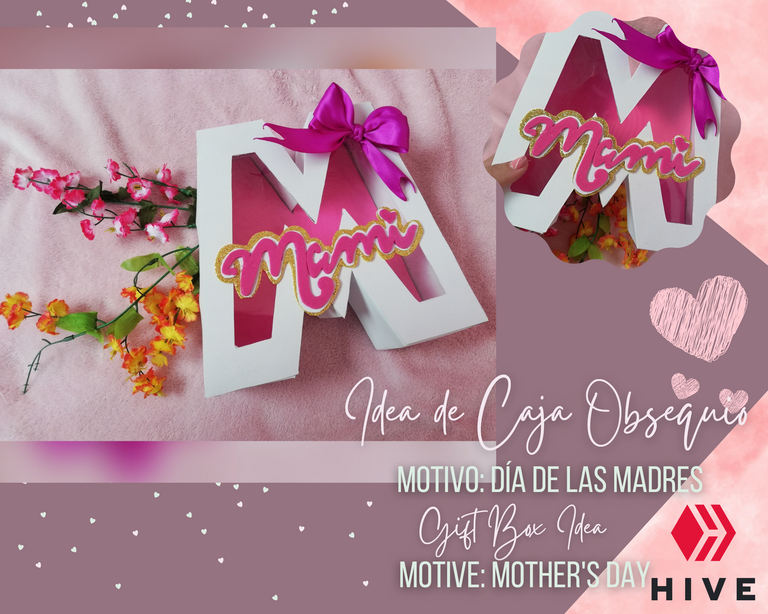
Para mí, mi madre es motivo de vida, mi orgullo y mi admiración más bonita, estamos a pocos días ya de celebrar el día de las madres y por si fuera poco también es su cumpleaños, todo casi que en la primera semana del mes.
Asi que desde ya, me encuentro haciendo detalles para hacerle saber y sentir lo especial que es para mi.
English
HAVE A NICE DAY, EVERYBODY! For me, my mother is my reason for living, my pride and my most beautiful admiration, we are just a few days away from celebrating Mother's Day and if that wasn't enough, it is also her birthday, all almost in the first week of the month.
So from now on, I am making details to let her know and feel how special she is to me.

Materiales | Materials
🌷Retazo de Cartón
🌷Cartulina escolar blanca
🌷Hoja de color fucsia
🌷Foami Fucsia y dorado
🌷Retazo de acetato
🌷½ metro de cinta
🌷Corta exacto
🌷Tijeras y Regla
🌷Cardboard scrap
🌷White school card stock
🌷Fuchsia color sheet
🌷Foami Fuchsia and Gold
🌷Acetate scrap
🌷½ meter of ribbon
🌷Exact cut
🌷Scissors and Ruler

Paso a Paso | Step by Step
Paso N°1 | Step N°1
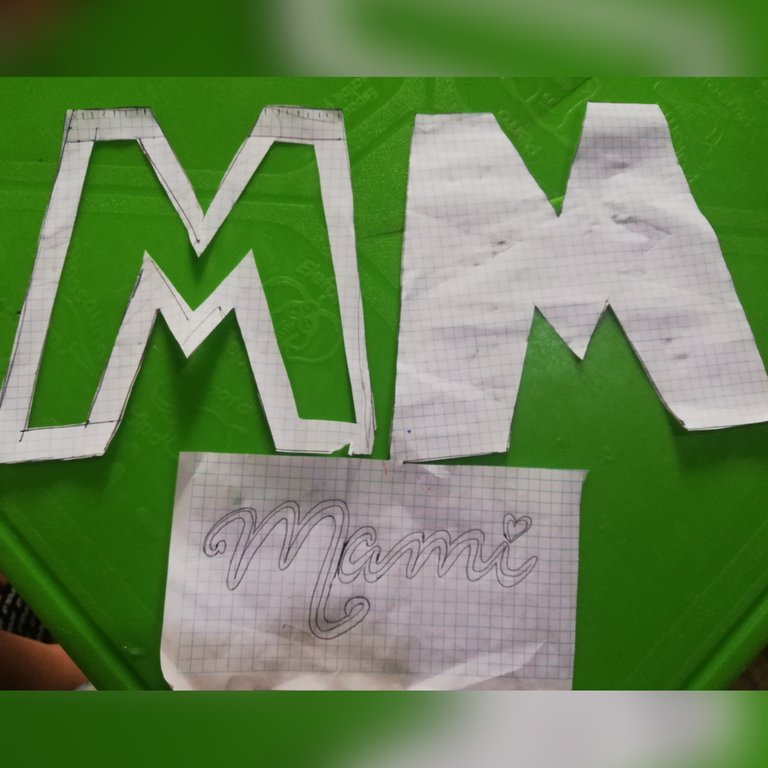
➟Lo primero que hice fue realizar en una hoja de reciclaje el molde de la letra a utilizar, en este caso la M utilizando dos de estas a la cual una de ellas le retire el centro. También realice en letra cursiva la palabra mami.
➟The first thing I did was to make in a recycled sheet the mold of the letter to be used, in this case the M using two of these to which one of them I removed the center. I also made in cursive the word mami.
Paso N°2 | Step N°2
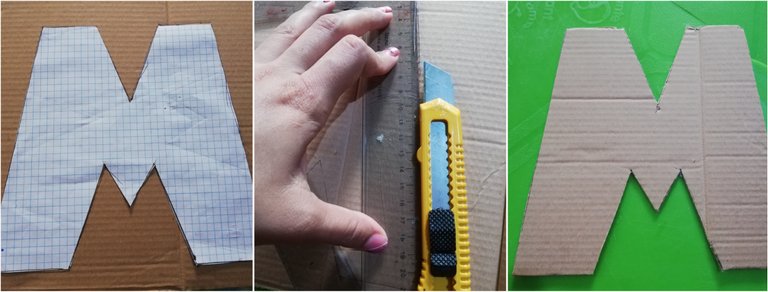
➟En el retazo de cartón marque la letra M completa y con ayuda del corta exacto la recorté.
➟On the cardboard scrap I marked the entire letter M and with the help of the exacto cutter I cut it out.
Paso N°3 | Step N°3
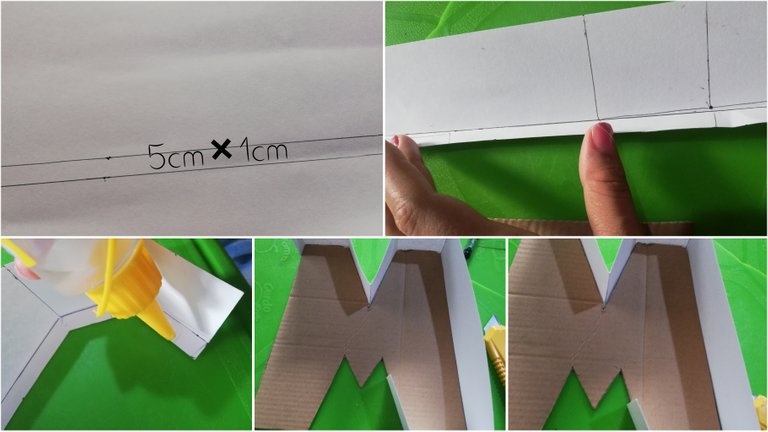
➟En la cartulina blanca marqué tiras largas de 5cm + 1cm el cual seria utilizado como pestañas para pegar al borde de la letra. Fui marcando y haciendo los dobles correspondientes para luego ir pegando.. (tal como lo muestra la fotografía)
➟On the white cardboard I marked long strips of 5cm + 1cm which would be used as tabs to glue to the edge of the letter. I was marking and making the corresponding doubles to then go gluing. (as shown in the picture)
Paso N°4 | Step N°4
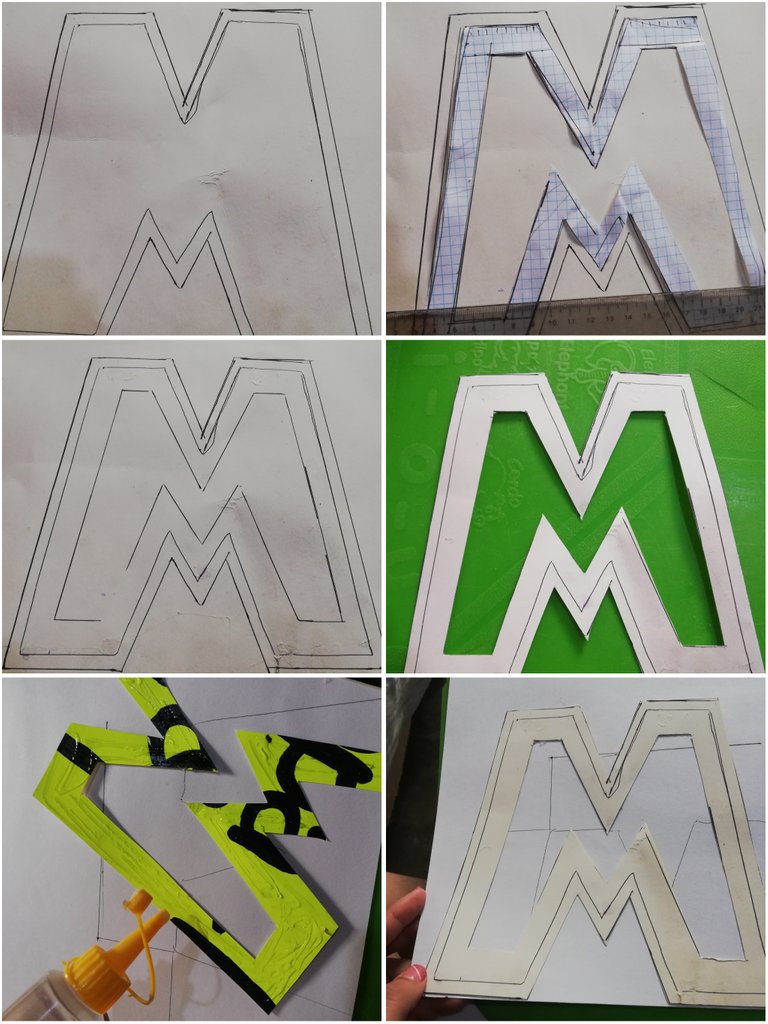
➟En cartulina reciclada marque la M, a la cual se le retirará el centro, con el exacto recorté y pegué sobre la cartulina blanca para luego recortar (esto lo hice con la finalidad que quedara mas gruesa y que no se viera la cartulina que estaba reciclando)
➟On recycled cardboard mark the M, from which the center will be removed, with the exact one I cut out and glued on the white cardboard and then cut out (I did this so that it would be thicker and the recycled cardboard would not show).
Paso N°5 | Step N°5
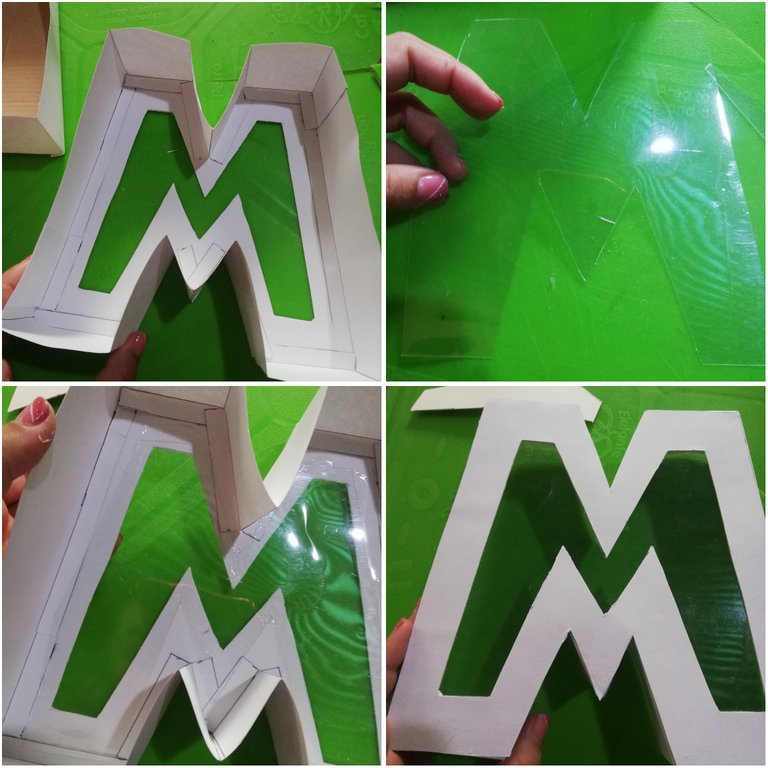
➟Repetí el proceso que en la pieza anterior, con tiras de cartulina de 5cm + 1cm realice el borde (esta será la tapa de la caja). En el acetato marque la M central y pegue en el interior.
➟Repeat the process as in the previous piece, with cardboard strips of 5cm + 1cm make the border (this will be the lid of the box). On the acetate mark the central M and glue inside.
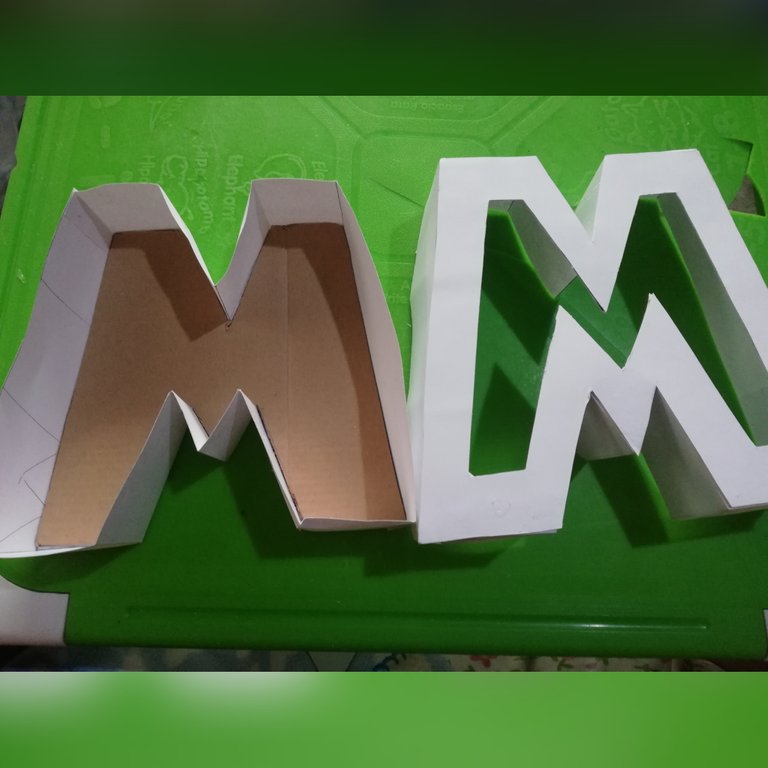
➟Esta es la vista de las caras de la caja ya armada, posterior a esto realice el proceso de decorado.
➟This is the view of the faces of the box already assembled, after this I made the decorating process.
Paso N°6 | Step N°6
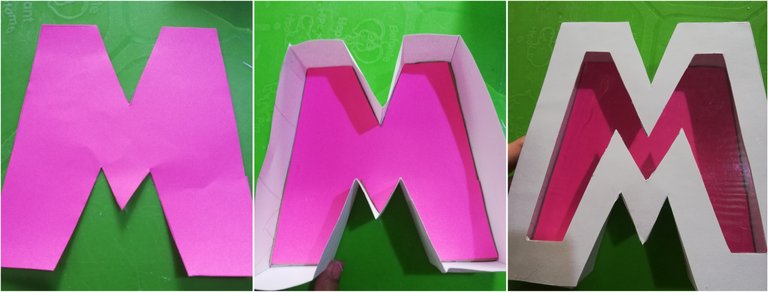
➟En una hoja de color fucsia, realice nuevamente la letra M, esta vez la pegue en el interior de la caja base. Al momento de enfrentar las dos caras se verá como lo muestra la fotografía.
➟On a fuchsia colored sheet, make the letter M again, this time glue it on the inside of the base box. When facing the two sides it will look as shown in the picture.
Paso N°7 | Step N°7
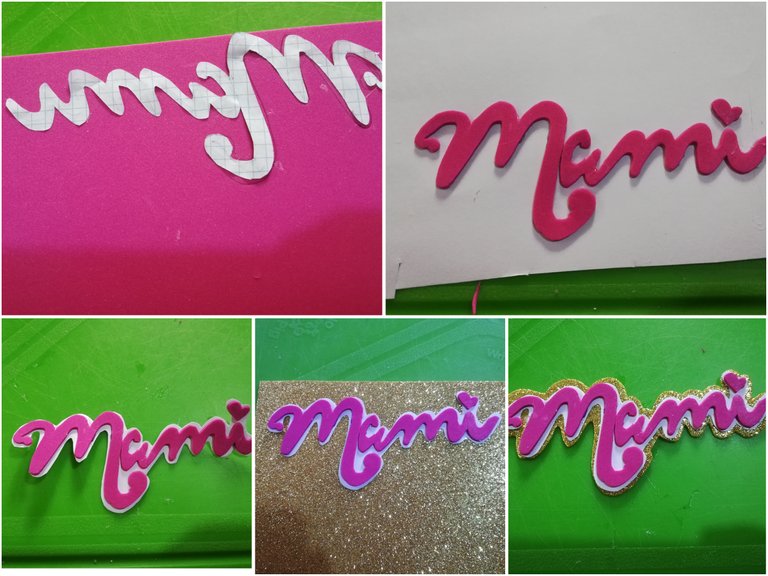
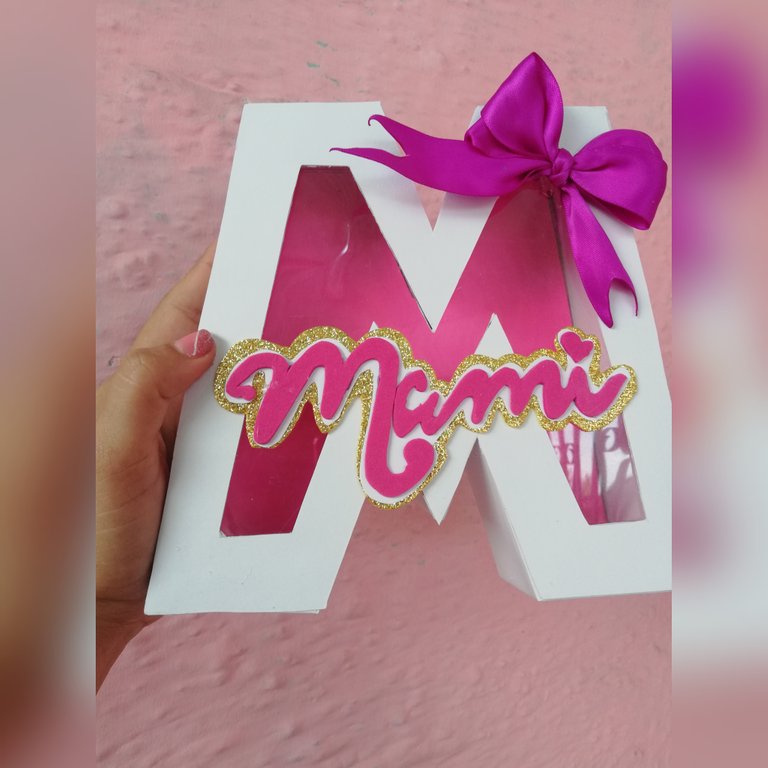
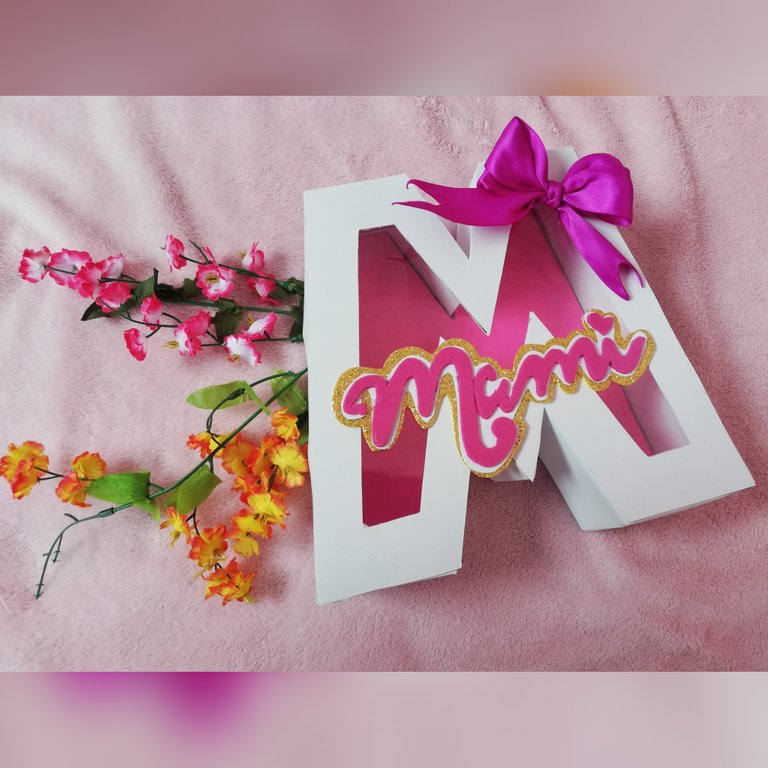
➟En el foami fucsia procedi a marcar la palabra mami (así le digo a mi madre), recorté y pegue sobre cartulina blanca la cual luego recorte dejando un borde muy mínimo y pegue esto al foami dorado donde repetí el proceso de corte.
➟On the fuchsia foami I proceeded to mark the word mommy (that's what I call my mother), cut out and glued on white cardboard which I then cut out leaving a very minimal border and glued this to the gold foami where I repeated the cutting process.
Paso N°8 | Step N°8
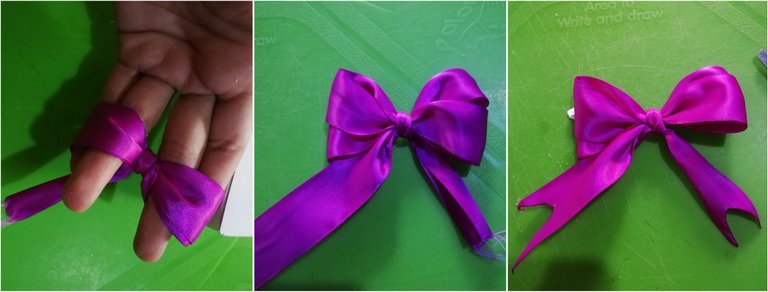
➟Con ayuda de mis dedos realice un lazo, corte las puntas y con un encendedor las selle.
➟With the help of my fingers I made a loop, cut the ends and with a lighter I sealed them.
Paso N°9 | Step N°9
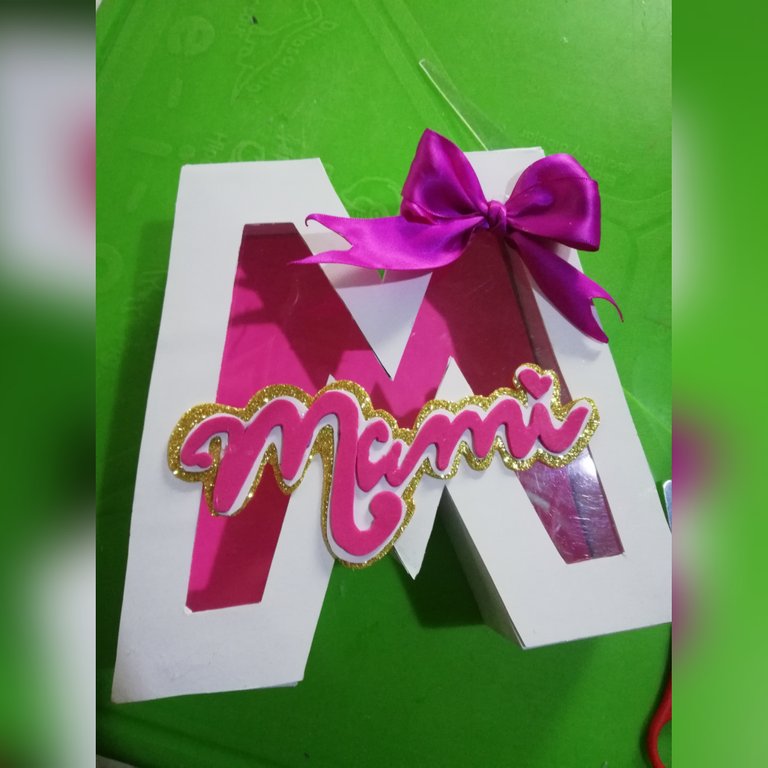
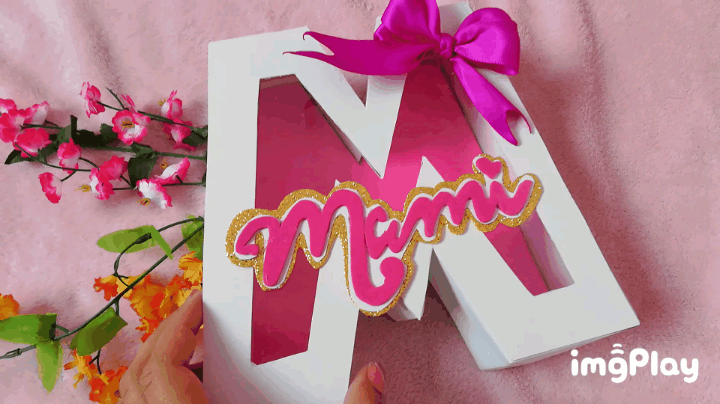
➟Pegué los detalles anteriormente realizados a la caja, culminando asi este hermoso trabajo.. ¡LISTO PARA LLENAR CON BOMBONES, O CUALQUIER OTRO DETALLE A OBSEQUIAR!
➟I glued the details previously made to the box, culminating this beautiful work... READY TO FILL WITH BONBONS, OR ANY OTHER DETAIL TO OBSEQUIRE!
Resultado Final | Final Result

Espero les guste esta publicación🌷
I hope you like this publication 🌷
Ediciones en Canva y Picstar
Traducciones en Deepl.com
Editing in Canva and Picstar
Translations in Deepl.com
