It's time to make the girls fall in love, bracelet made with wire and stones.
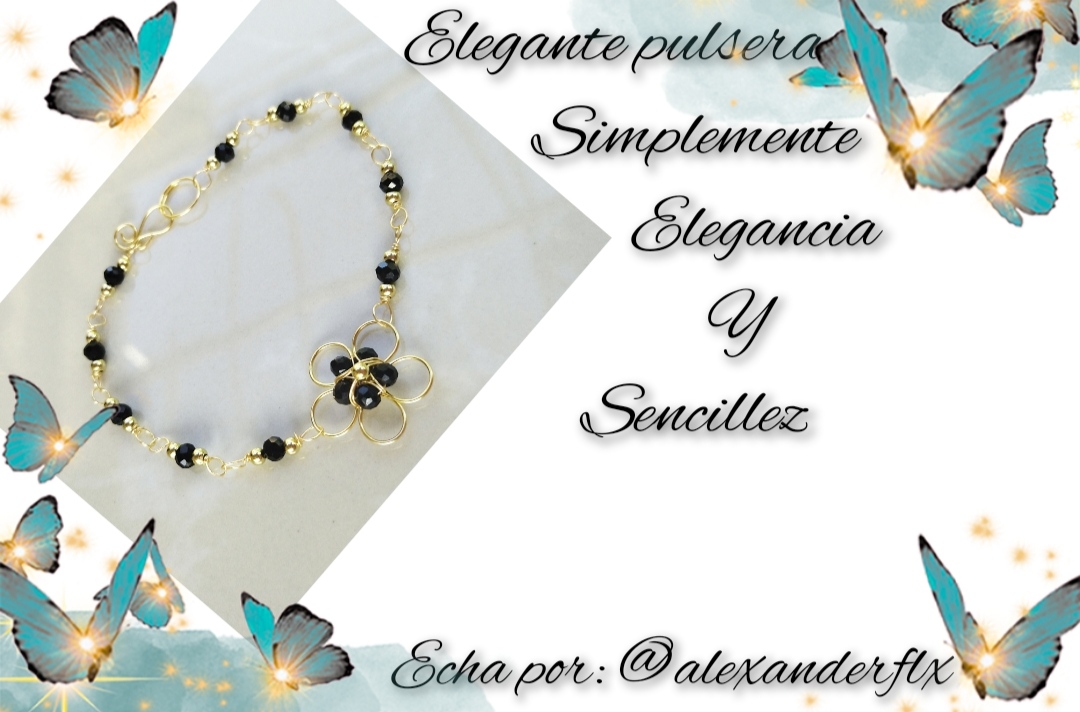
Holaaa feliz noche espero estén bien la noche de hoy quiero compartir con ustedes un hermoso logro les cuento que me a ido muy bien en mi emprendimiento destro de muy poco les mostraré la portada de mi emprendimiento quiero darle las gracias a esta hermosa comunidad #jewelry por su apoyo y a todas esas personas que me an inspirado a seguir adelante, la noche de hoy quiero compartir con ustedes una hermosa pulsera echa con alambre, piedras y tiene como dije una hermosa flor espero a las chicas les guste bueno sin más que decir pasaremos al paso a paso🌹🌸💖🏵️🌺🌻
Hello, happy night, I hope you are well tonight, I want to share with you a beautiful achievement, I will tell you that my venture has gone very well, after a very short time I will show you the cover of my venture, I want to thank this beautiful community #jewelry for your support and to all those people who have inspired me to keep going, tonight I want to share with you a beautiful bracelet made with wire, stones and has a beautiful flower as I said, I hope the girls like it well, just say we will go step by step🌹🌸💖🏵️🌺🌻
What do we need.
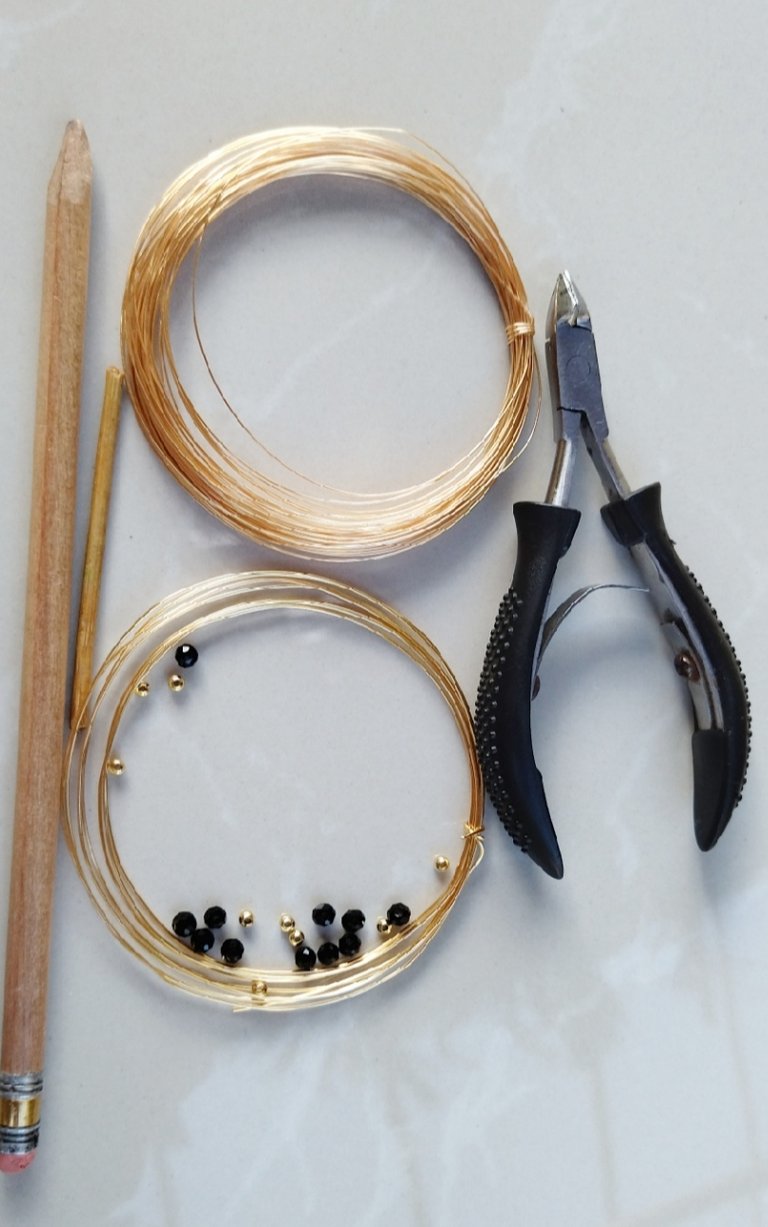
- piedras de bisutería
- alambre para bisutería calibre 22 y calibre y 26
- pinzas
- lápiz
- Palillo
jewelry stones
22-gauge and 26-gauge jewelry
tweezers
pencil
Toothpick
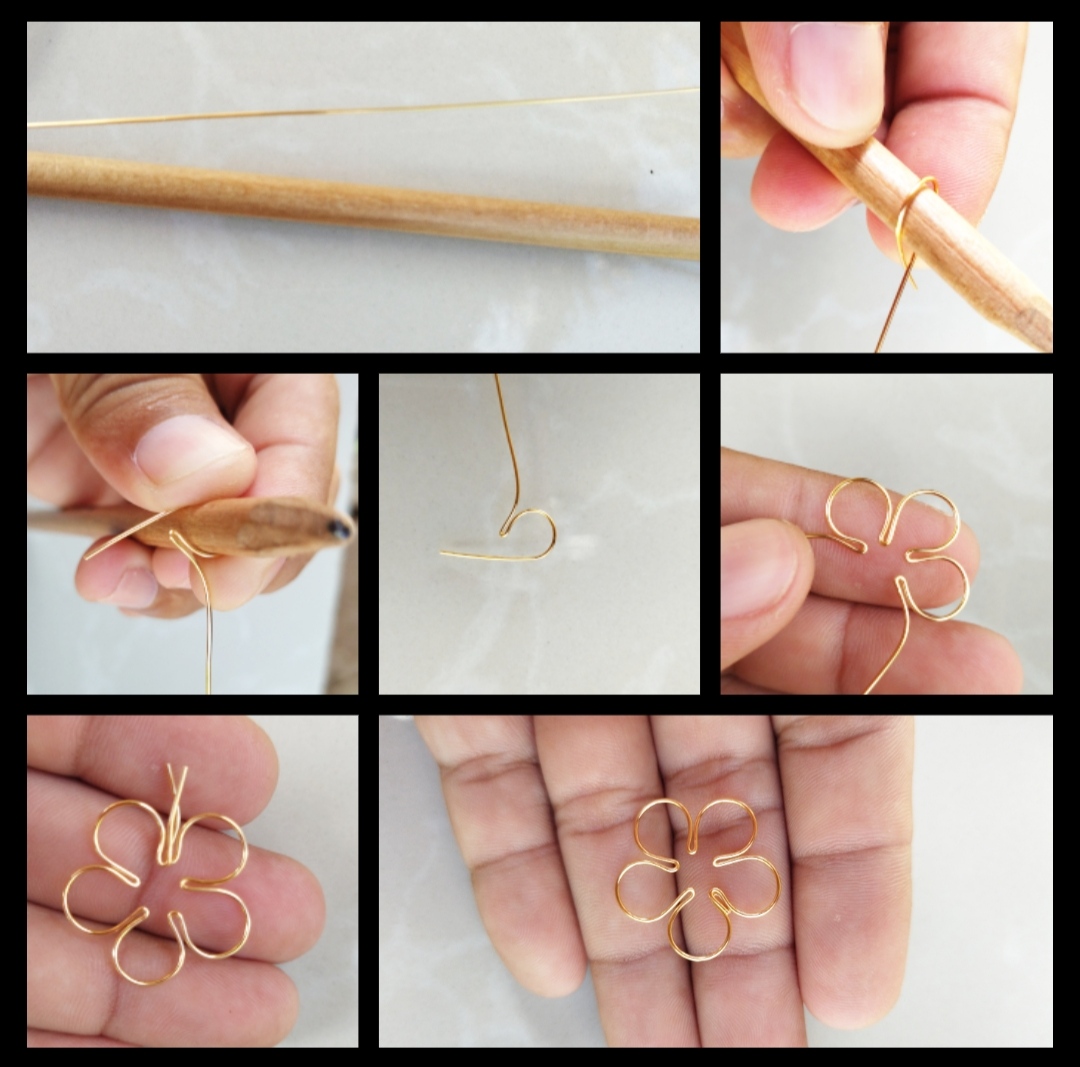
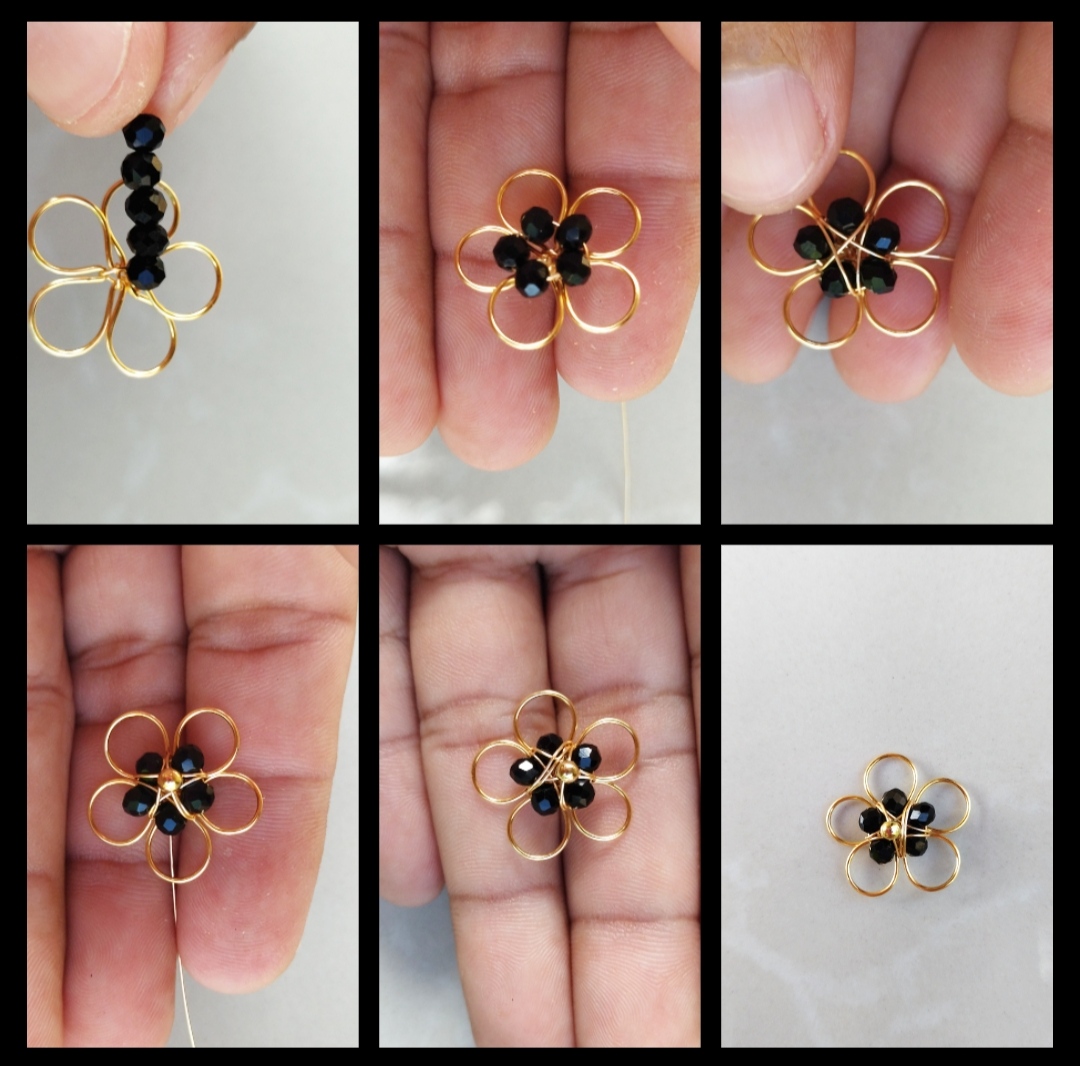
Paso 1: En este primer paso les mostraré como hacer la flor para este paso tomaremos el lápiz y un trozo de alambre calibre veintidós, luego de tener nuestro material listo tomaremos nuestro alambre y aremos un redondo con la ayuda de nuestro lápiz luego de aver echo un redondo doblaremos el alambre más largo hacia arriba y con ese mismo alambre aremos otro redondo y así seguiremos haciendo asta tener sinco redondo o pétalos como lo quieran llamar cortamos el exceso de alambre y acomodamos un poco con nuestras manos que nos quede lo mejor posible 😉.
.
Step 1: In this first step I will show you how to make the flower for this step we will take the pencil and a piece of twenty-two gauge wire, after having our material ready we will take our wire and we will make a round shape with the help of our pencil then Once we have made a round, we will bend the longest wire upwards and with that same wire we will make another round and in this way we will continue making until we have five round stems or petals, as they want to call them, we cut the excess wire and accommodate a little with our hands so that it fits us best possible 😉.
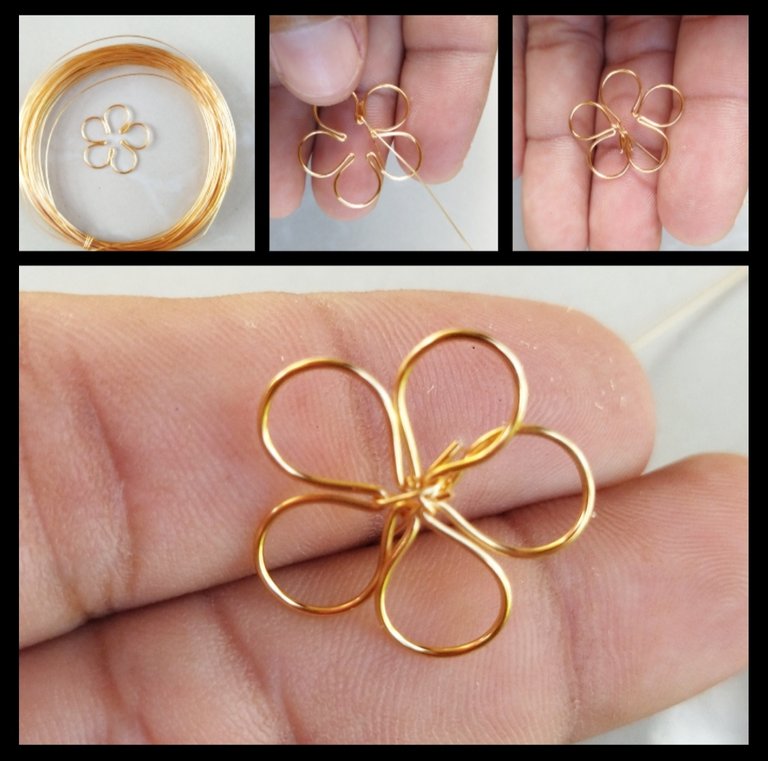
Paso 2: Para nuestro segundo paso tomaremos un trozo de alambre calibre veintiséis y la flor que hicimos en nuestro y no olvidemos nuestras piedras olvide colocarla en la foto le pido una disculpa luego de tener todo empezaremos, pondremos en medio de los pétalos y apretaremos con mucho cuidado asta que las puntas o los doble que tenemos en medio de cada pétalo este en el medio de la flor no olviden apretar con mucho cuidado luego seguiremos trabajando con el mismo alambre sin cortarlo meteremos sinco piedras negras luego aremos un redondo tratemos de que nos quede justo en medio de la flor luego para asegurar la flor pasaremos el alambre nuevamente lo por el medio de los pétalos tomando también la pequeña flor de piedra y por último meteremos una piedra dorada y la pondremos en medio de la flor damos otra vuelta para asegurar la piedra y listo ya tenemos la flor adornada.
Step 2: For our second step we will take a piece of twenty-six gauge wire and the flower we made in our and let's not forget our stones forget to put it in the photo I apologize after we have everything we will start, we will put in the middle of the petals and we will press very carefully until the tips or the doubles that we have in the middle of each petal are in the middle of the flower, do not forget to press very carefully then we will continue working with the same wire without cutting it we will put five black stones then we will make a round one let's try so that it is right in the middle of the flower, then to secure the flower we will pass the wire again through the middle of the petals, also taking the small stone flower and finally we will insert a golden stone and put it in the middle of the flower, give another turn to secure the stone and ready we have the decorated flower.
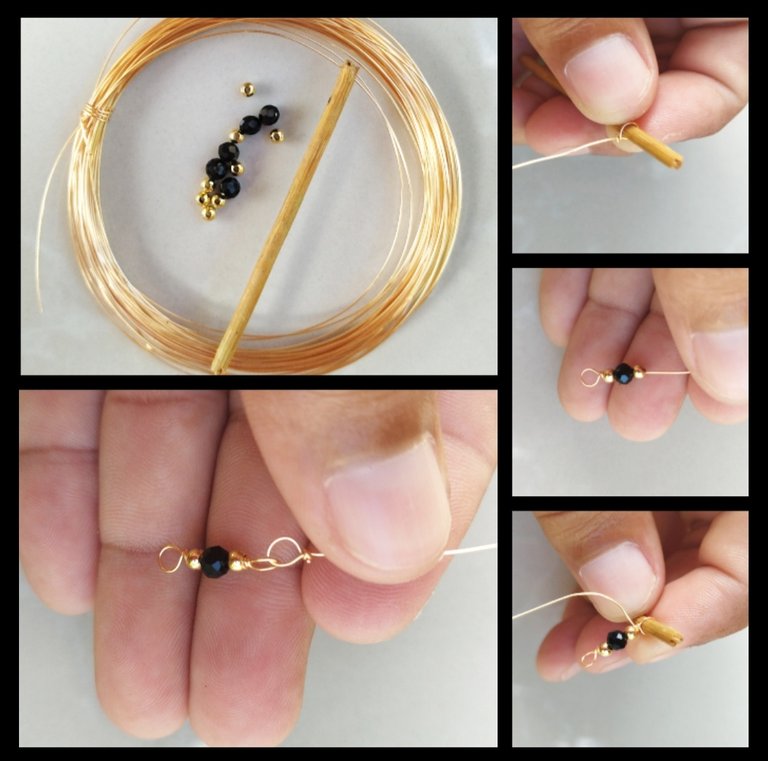
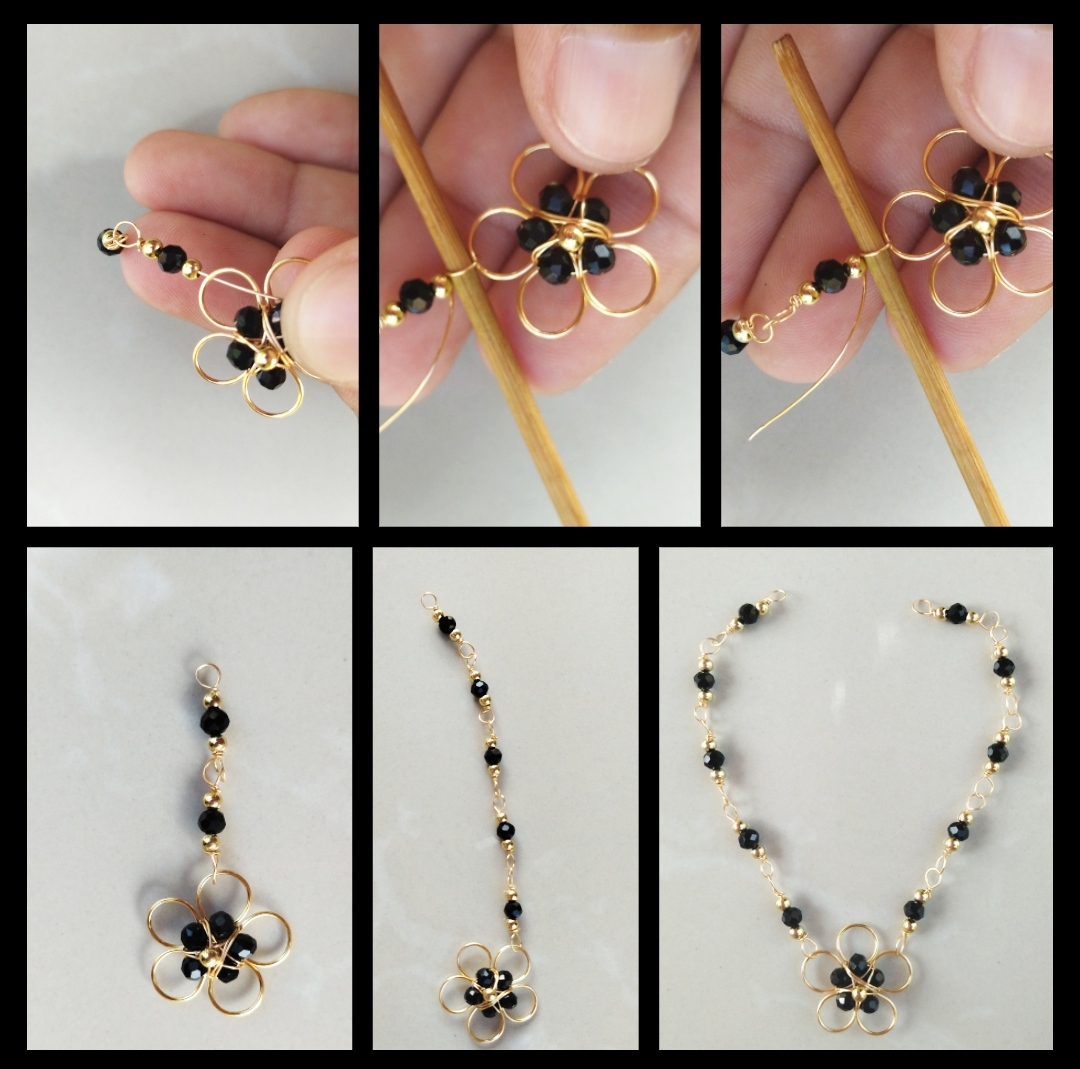
Paso 3: Para este tercer paso utilizaremos piedras un palillo y alambre calibre veintiséis ya este paso lo emos echo en otra oportunidad, tomaremos un trozo de alambre y aremos un redondo con la ayuda de nuestro palillo luego meteremos una piedra dorada una negra y otra dorada cerramos haciendo otro redondo ya tenido dos piezas pegada le pondremos la flor de la misma forma hacemos un redondo y antes de cerrar le ponemos la flor y hay si podemos cerrar si quieren hacemos la cadena primero y luego le ponemos la flor o hacemos la cadena ya con la flor pegada el otro lado lo aremos de la misma manera .
Step 3: For this third step we will use stones, a toothpick and twenty-six gauge wire and we will do this step another time, we will take a piece of wire and make a round shape with the help of our toothpick, then we will insert a golden stone and a black one and another gold we close making another round already had two pieces glued we will put the flower in the same way we make a round and before closing we put the flower and if we can close if you want we make the chain first and then we put the flower or we We will plow the chain with the flower attached to the other side in the same way.
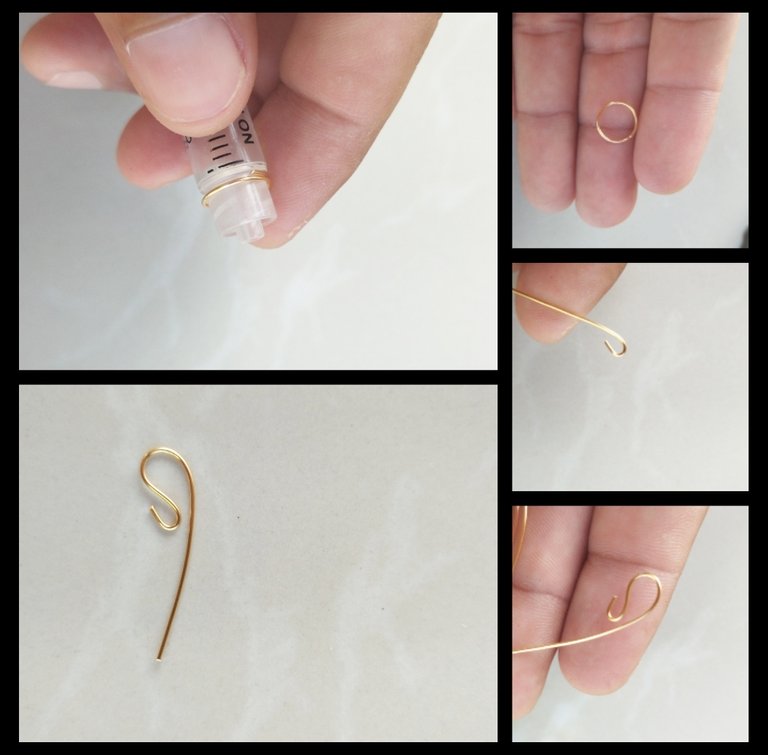
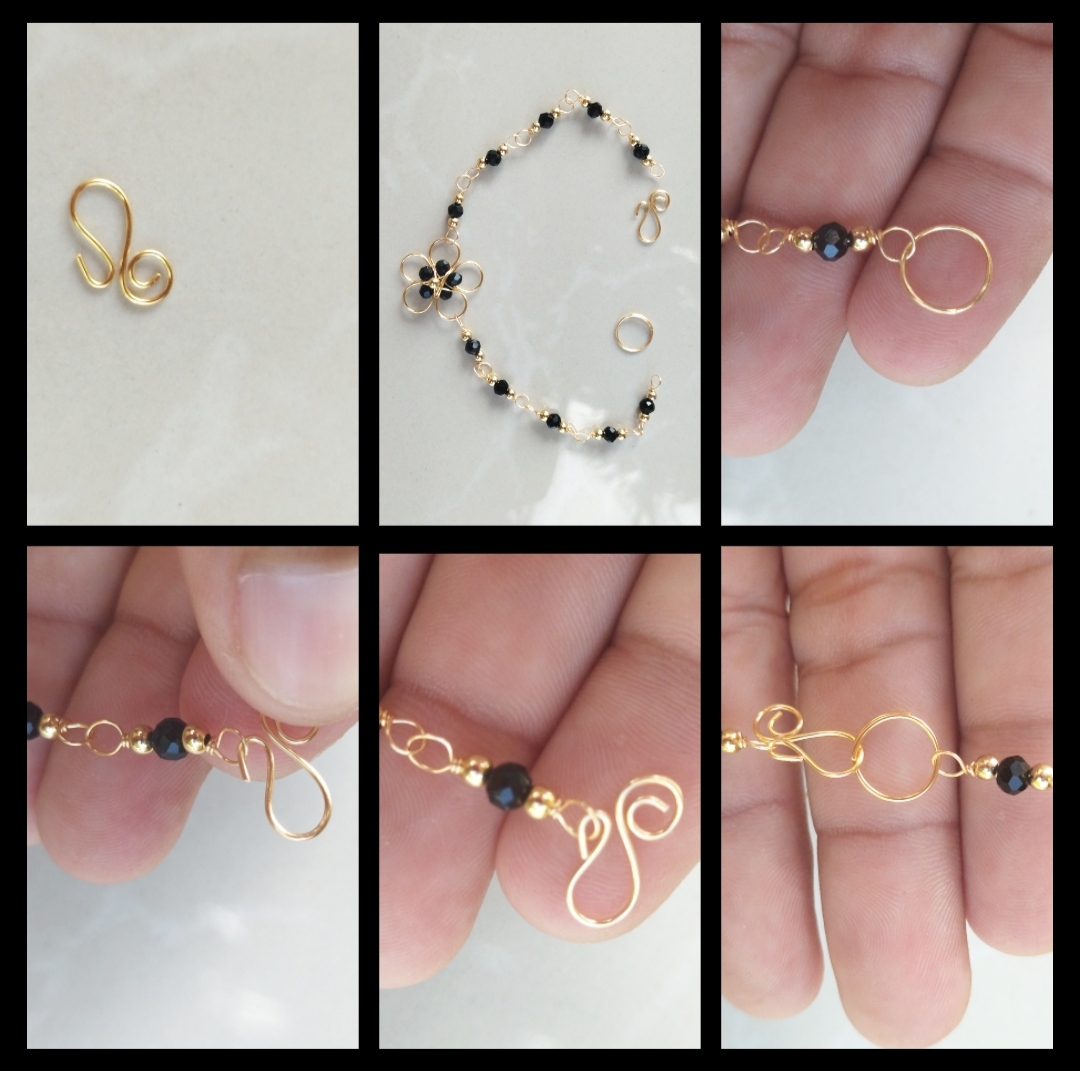
Paso 4: Bueno ya estamos terminando para este paso solo le pondremos los ganchos a nuestra pulsera para empezar cortaremos un trozo de alambre calibre veintidós primero aremos un redondo podemos utilizar el lápiz con el que realizamos la flor o una injectadora como queramos luego de hacer el redondo aremos para hacer el gancho primero doblaremos un poco la punta del alambre aremos un dobles más grande hacia el otro lado luego aremos un aspiral con el alambre que nos quedó ya teniendo alas dos pieza solo nos falta colocarlas en nuestra pulsers colocaremos una en cada punta de la pulsera y listo espero les allá gusta será asta la próxima que tengan una feliz noche 😉💖🌹🏵️🌺.
Step 4: Well we are finishing for this step we will only put the hooks on our bracelet to begin we will cut a piece of twenty-two gauge wire first we will make a round we can use the pencil with which we make the flower or an injector as we want later to make the round we will make the hook first we will bend the tip of the wire a little we will make a larger double to the other side then we will make a spiral with the wire that we have left and having two wings we just need to place them in our bracelets we will place one at each end of the bracelet and that's it I hope you like it there until next time have a happy night 😉💖🌹🏵️🌺.
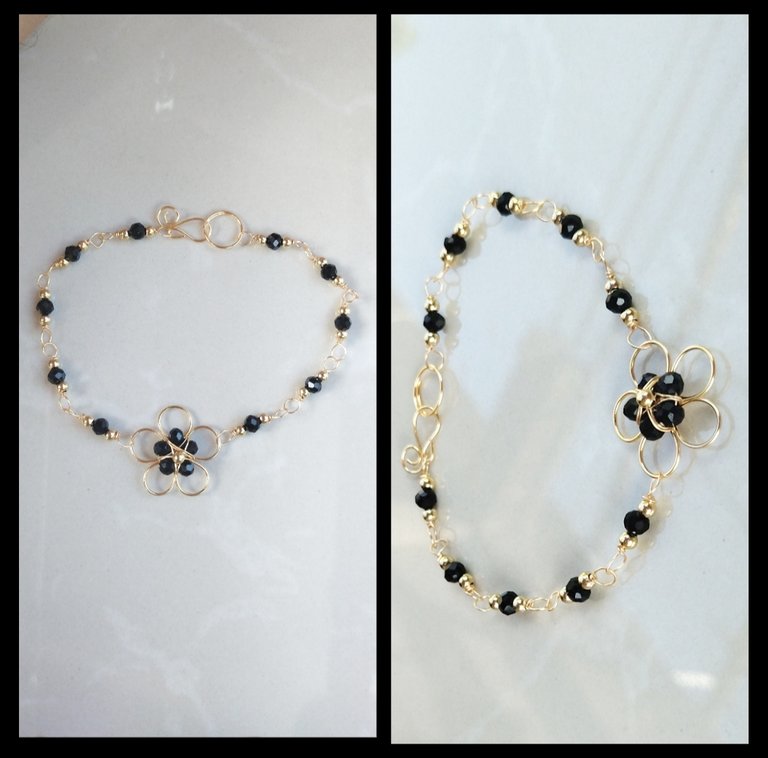
listo nuestros hermosa pulsera , espero que a las damas les guste, fue un gusto compartir con ustedes .
ready our beautiful bracelet , I hope the ladies like it, it was a pleasure to share with you.
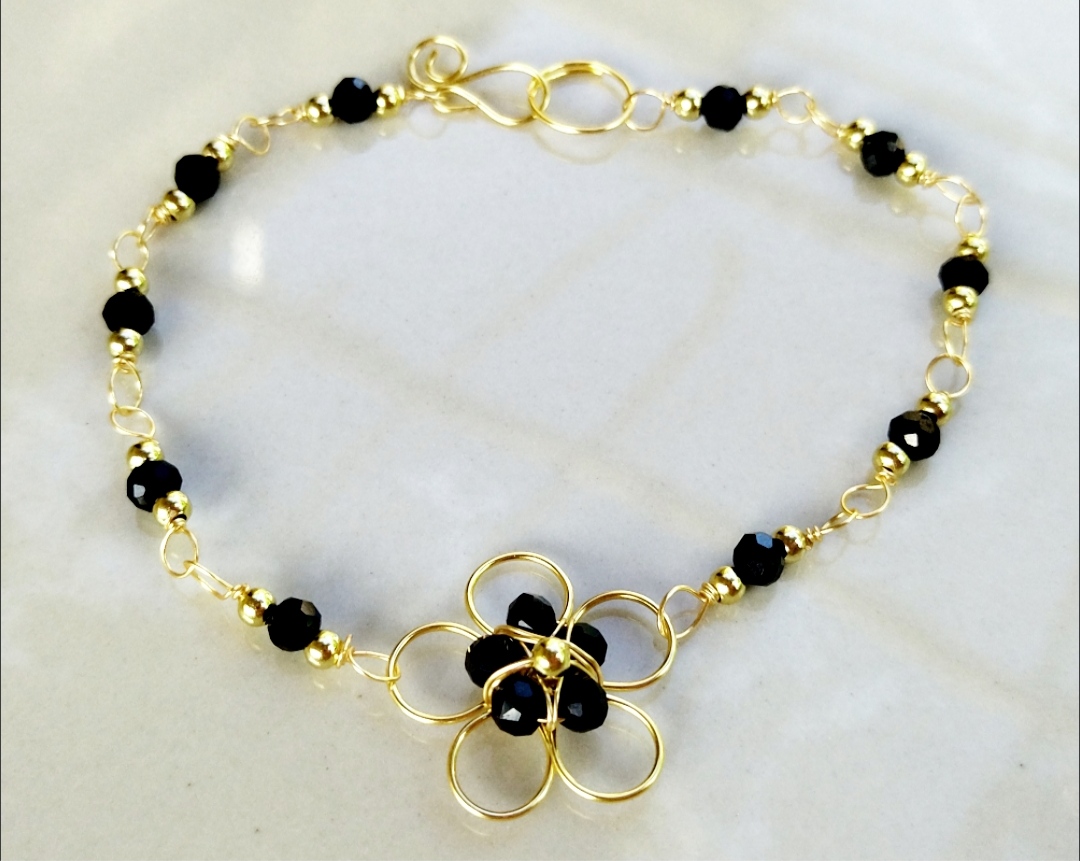
Todas las Fotos son de mi autoría y fueron tomadas con mi Celular Redmi 9T
All Photos are my authorship and were taken with my Redmi 9T Cellphone


