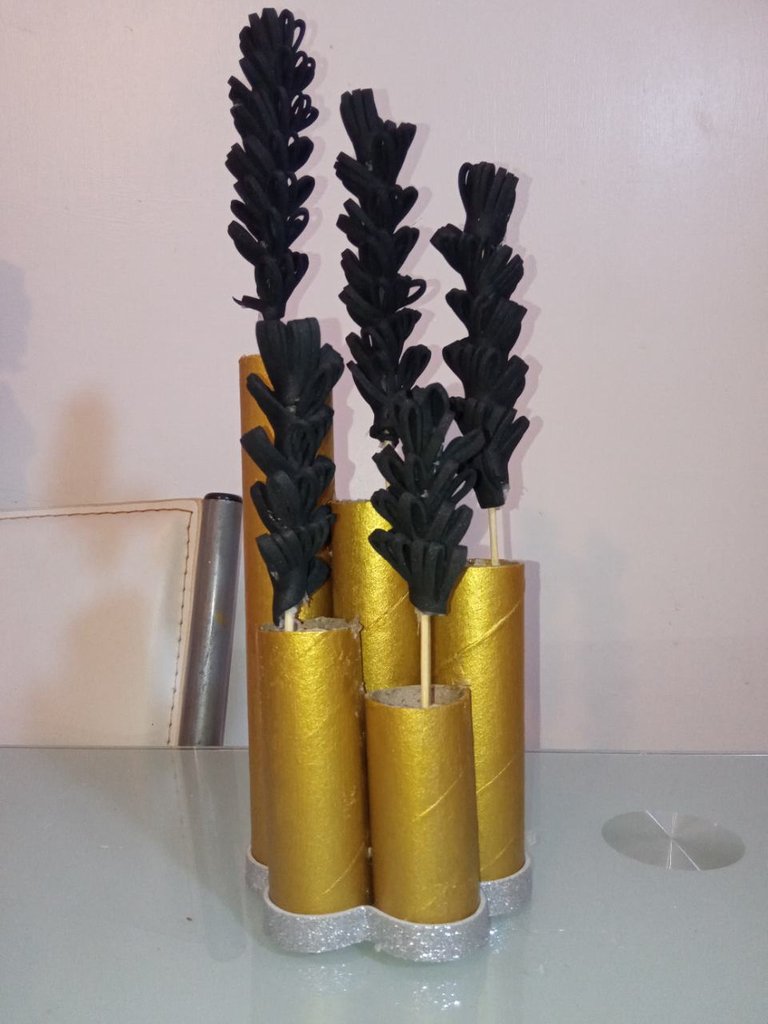
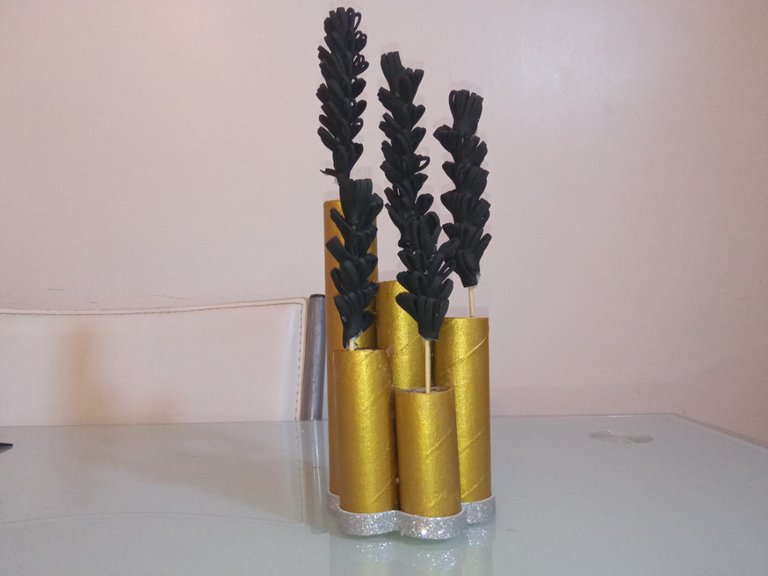
Very good evening, I hope everyone at #HIVE is healthy and happy on this new day. Today I am here to share with all of you and especially to share with all my artisan friends and DIY lovers of the hive who daily leave me their comments of love and appreciation for my projects, a new creative craft, this time It is a centerpiece that I have made from aluminum foil cylinders since these cylinders are thinner and taller, which makes them more versatile when working and adapting to the size you want. The style of my centerpiece is quite vintage, sober, with elegant colors that reflect a golden age like the 80's where opulence and sophistication were trends.
Muy buenas noches, espero que todos en #HIVE se encuentren sanos y felices en este nuevo día. El día de hoy paso por acá para compartir con todos ustedes y muy especialmente para compartir con todos mis amigos artesanos y amantes bricolajeros de la colmena quienes diariamente me dejan sus comentarios de cariño y valoración hacía mis proyectos, una nueva manualidad creativa, está vez se trata de un centro mesa que he elaborado a partir de cilindros de papel aluminio ya que estos cilindros son más delgados y altos lo que los hacen ser más versátiles al momento de trabajar y adaptar a la medida que desees. El estilo de mi centro de mesa es bastante vintage, sobrio, con colores elegantes que reflejan una época dorada como los fueron los años 80 dónde la opulencia y lo sotistificado eran tendencias.
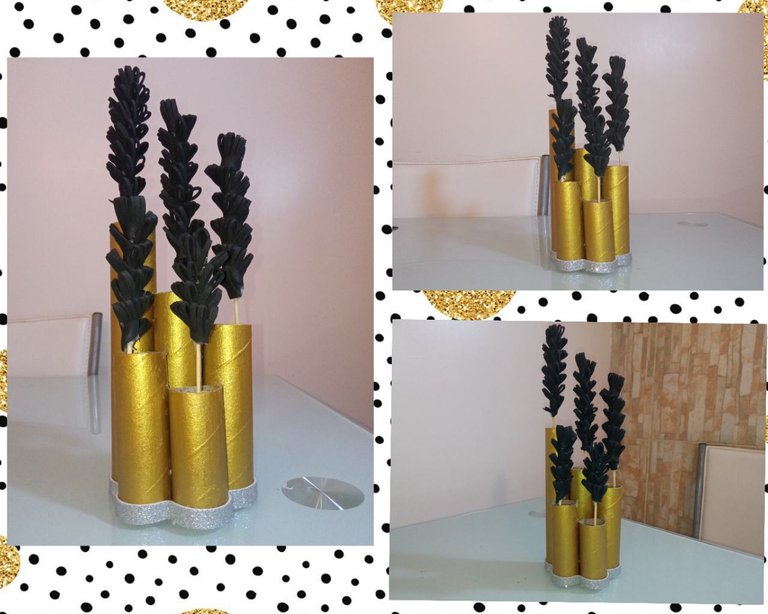
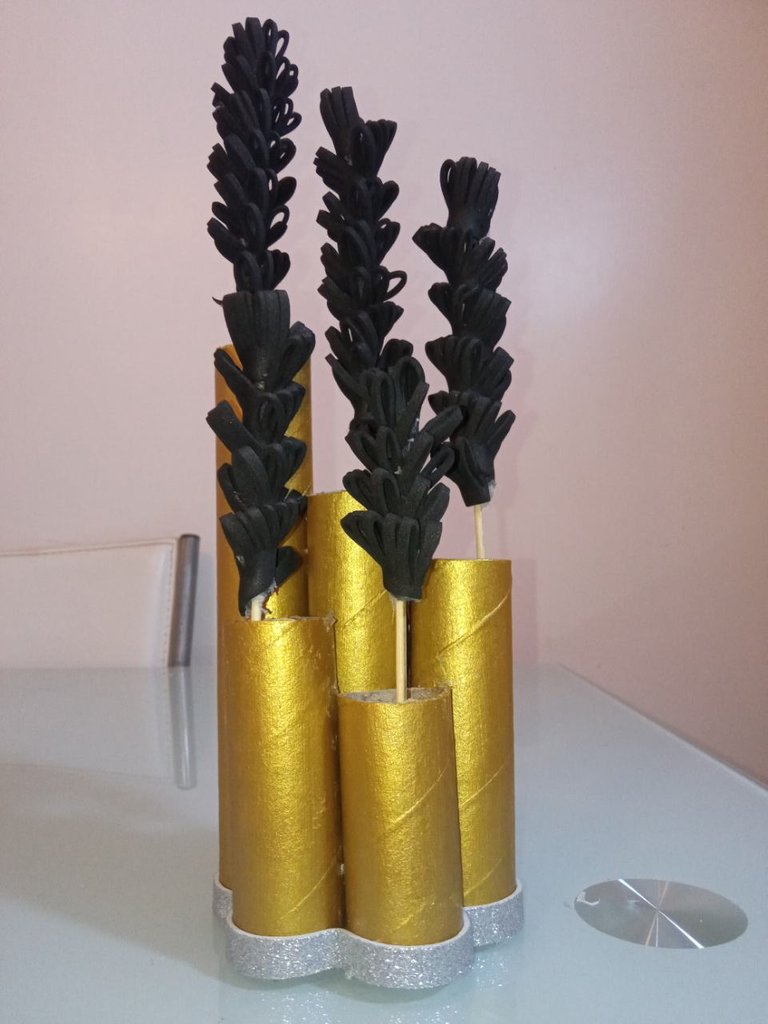
This centerpiece is quite simple and easy to make, you decide at the height you want to cut your cylinders as long as you reduce two or three centimeters to the following ones and then paint and glue between them in order in a decreasing way to give it greater visual impact. . The floral decorations are some lavender flowers that I have made in black Eva rubber to place inside my cylinders. Do you want to know more details about my craft of the day? Then I share with you in the following tutorial how to make a vintage-style centerpiece.
Este centro de mesa es bastante sencillo y fácil de elaborar, tu decides a la altura que quieras cortar tus cilindros siempre y cuando vayas reduciendo dos o tres centímetros a los siguientes y luego pintar y pega entre entres ordenamente de forma decreciente para darle mayor impacto visual. Los adornos de florales son unas flores de lavanda que he elaborado en goma Eva color negro para colocar dentro de mis cilindros. ¿Quieres conocer más detalles de mi manualidad del día? A continuación te comparto en el siguiente tutorial como elaborar un centro de mesa de estilo vintage.
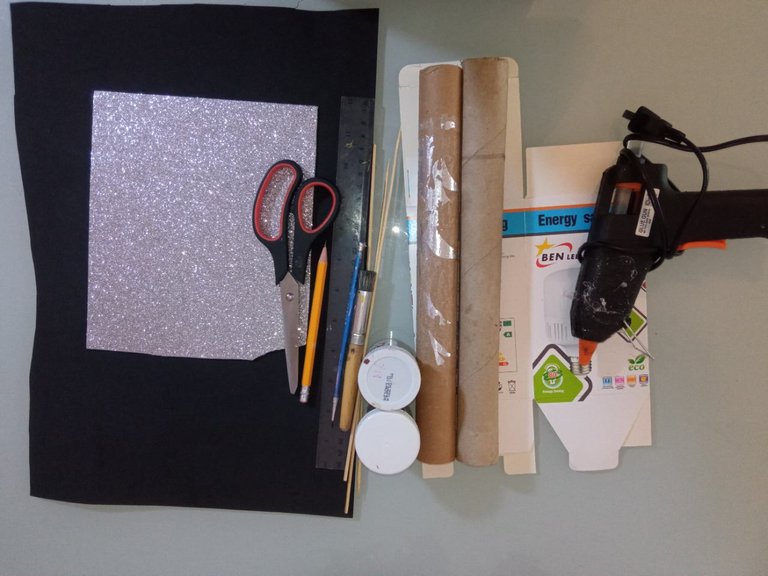
Used materials:
✓ Aluminum foil paper cylinders.
✓ Black and frosty gray Eva foam.
✓ Gold cold paint.
✓ Bar silicone with his gun.
✓ Exact or scalpel.
✓ Height sticks.
✓ Paperboard.
✓ Ruler.
✓ Brushes.
✓ Pair of scissors.
✓ Pencil.
Materiales utilizados:
✓ Cilindros de papel de hojas de aluminio.
✓ Goma Eva negra y gris escarchada.
✓ Pintura al frío color oro.
✓ Silicón de barra con su pistola.
✓ Exacto o bisturí.
✓ Palillos de altura.
✓ Cartón.
✓ Regla.
✓ Pinceles.
✓ Tijeras.
✓ Lápiz.
We start with our craft:
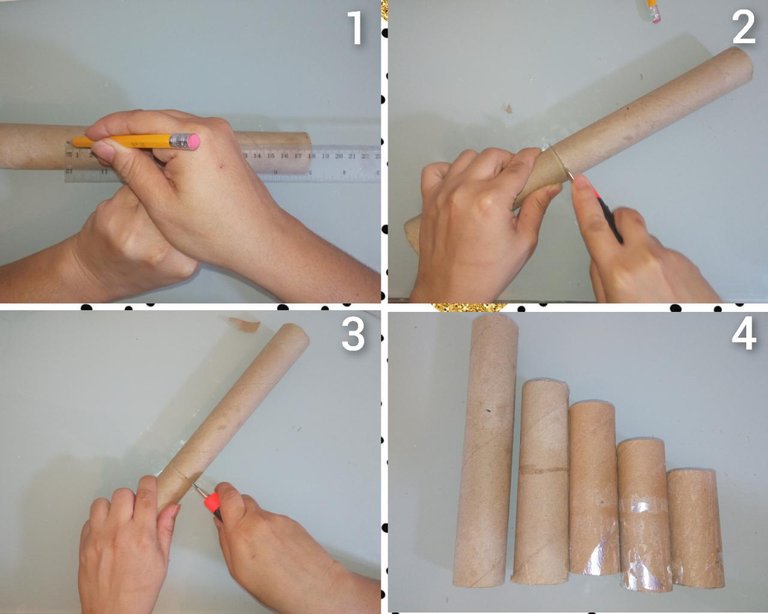
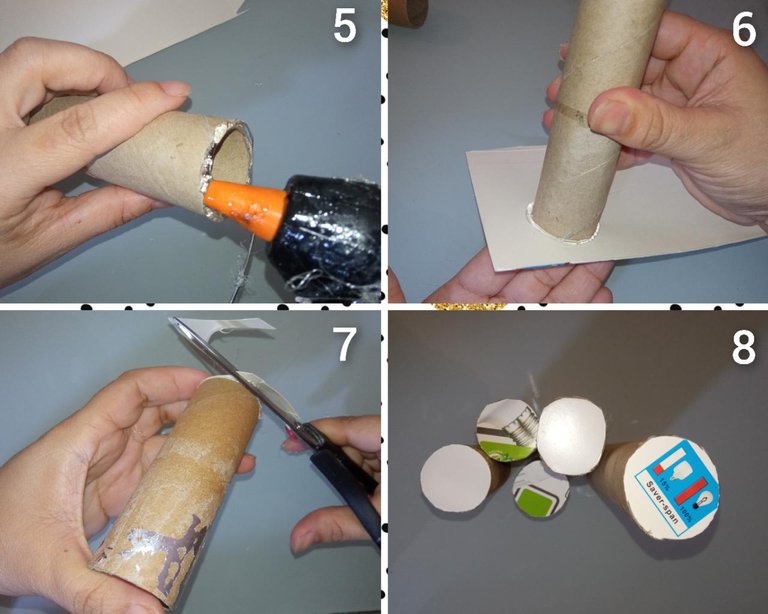
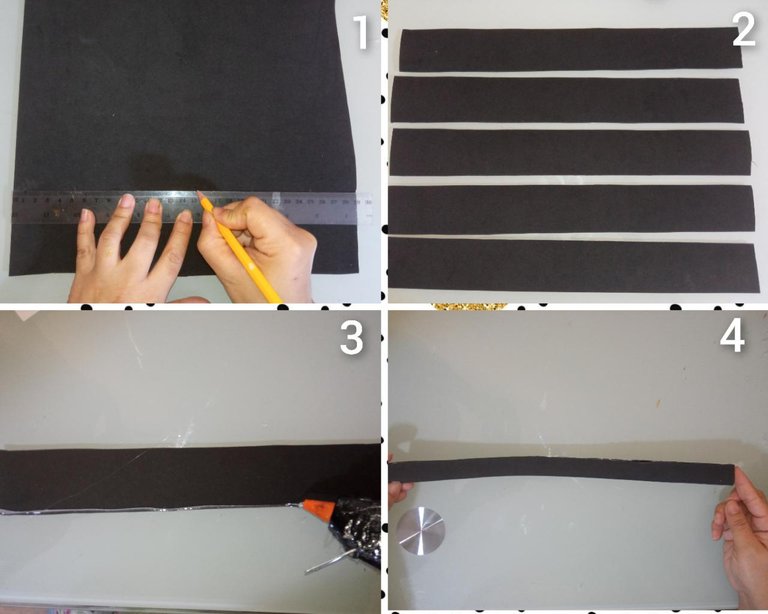
Take the ruler and mark the size of the cylinders, you choose the number of cylinders you want to place in the piece, I marked five cylinders with the following centimeters (18, 15, 13, 11 and 9) and mark the circumference with the pencil Where are you going to cut the cylinder? Now, cut your cylinders with the exact or scalpel and proceed to glue the cardboard of what will be the base with the hot silicone and cut the excess cardboard with the scissors.
Iniciamos con nuestra manualidad:
Toma la regla y marca la medida de los cilindros, tu escoges la cantidad de cilindros que desees colocar en la pieza, yo marqué cinco cilindros con los siguientes centímetros (18, 15, 13, 11 y 9) y marca con el lápiz la circunferencia por dónde vas a cortar el cilindro. Ahora, corta con el exacto o bisturí tus cilindros y procede a pegar con el silicón caliente el cartón de lo que será la base y recorta los excesos de cartón con las tijeras.
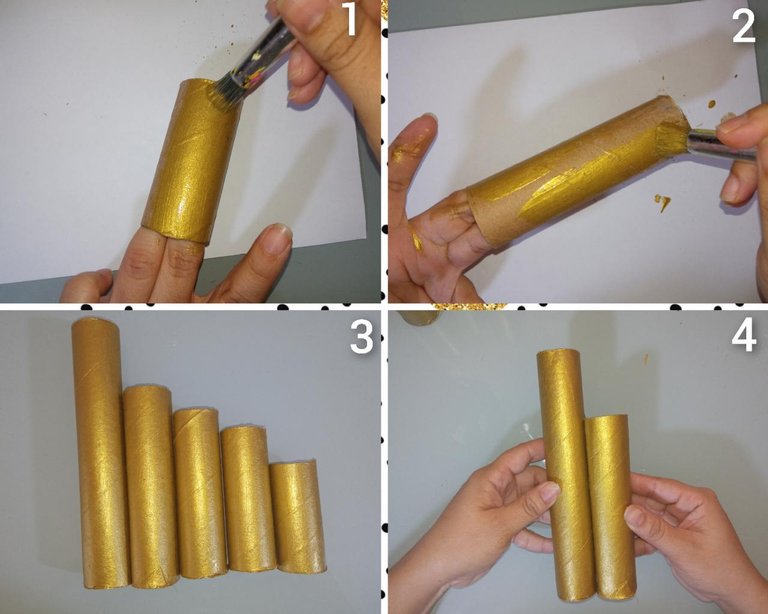
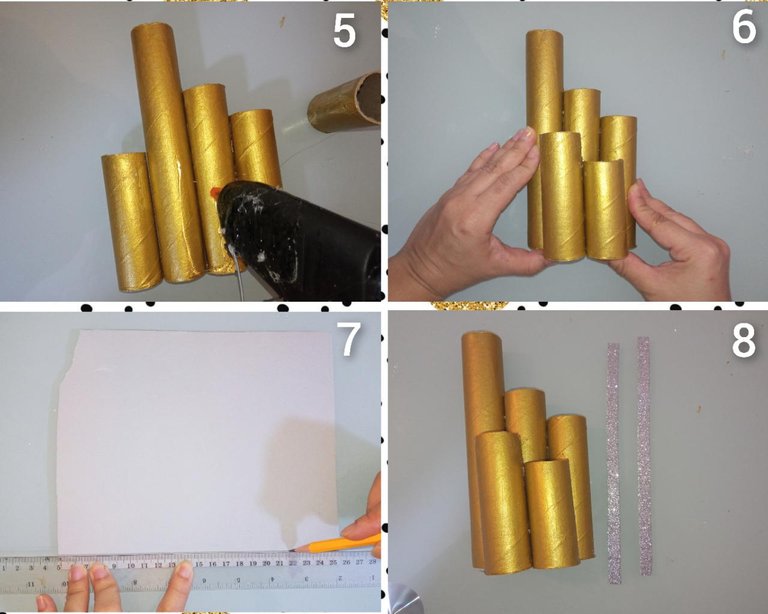
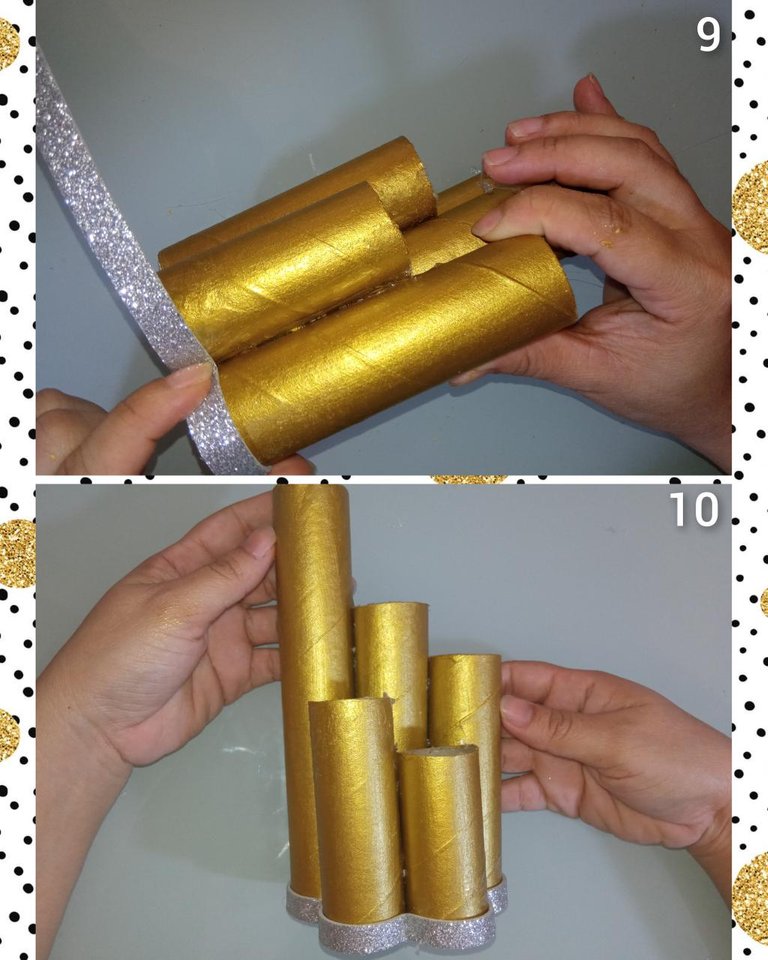
With the brush and gold paint, paint all your cylinders and let dry. Then, with the hot silicone, stick together maintaining an order with respect to the height of each cylinder. On the other hand, mark with the ruler on the gray frosted Eva rubber one centimeter strips, cut the Eva rubber strips and paste from the base of your colndros and we have almost ready our table centro.
Con el pincel y la pintura color oro, pinta todos tus cilindros y deja secar. Luego, con el silicón caliente pega entre sí manteniendo un orden con respecto a la altura de cada cilindro. Por otro lado, marca con la regla en la goma Eva escarchada color gris tiras de un centímetro, recorta las tira de goma Eva y pega de la base de tus colndros y ya tenemos casi listo nuestro centro de mesa.
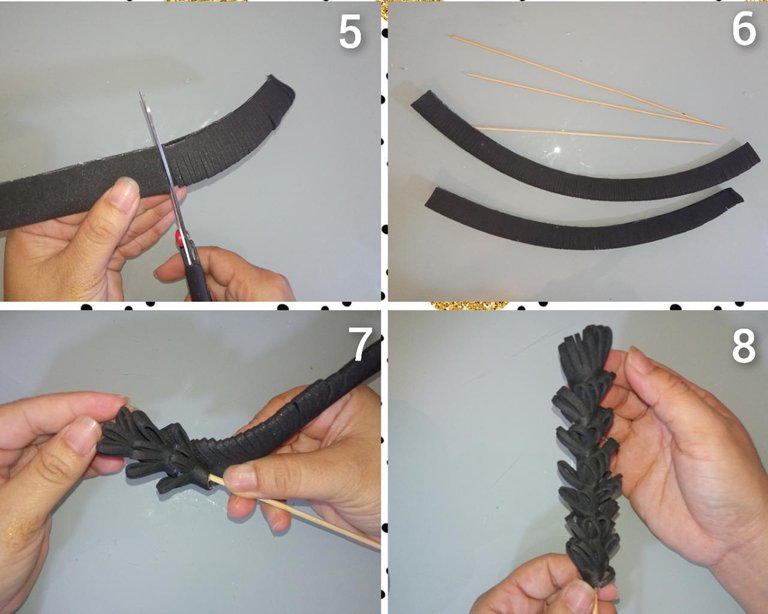
Take the black Eva rubber and mark with the ruler and the pencil strips of about 5 centimeters, cut these strips with the scissors and glue both edges of the strips with the hot silicone, with the scissors make straight cuts on the side of the strip that you have left without gluing, and now with the hot silicone glue the strips in the form of a snail-like spiral from the sticks to form the flowers.
Toma la goma Eva color negro y marca con la regla y el lápiz tiras de unos 5 centímetros, corta con las tijeras estás tiras y pega con el silicón caliente ambos bordes de las tiras, con las tijeras realiza cortes rectos del lado de la tira que has dejado sin pegar, y ahora con el silicón caliente pega las tiras en forma de espiral tipo caracol de los palillos para formar las flores.
Finally, when you have all your flowers, stick the height stick with the hot silicone from the base of the cylinders.
Para finalizar, cuando tengas todas tus flores, pega el palillo de altura con el silicón caliente de la base de los cilindros.
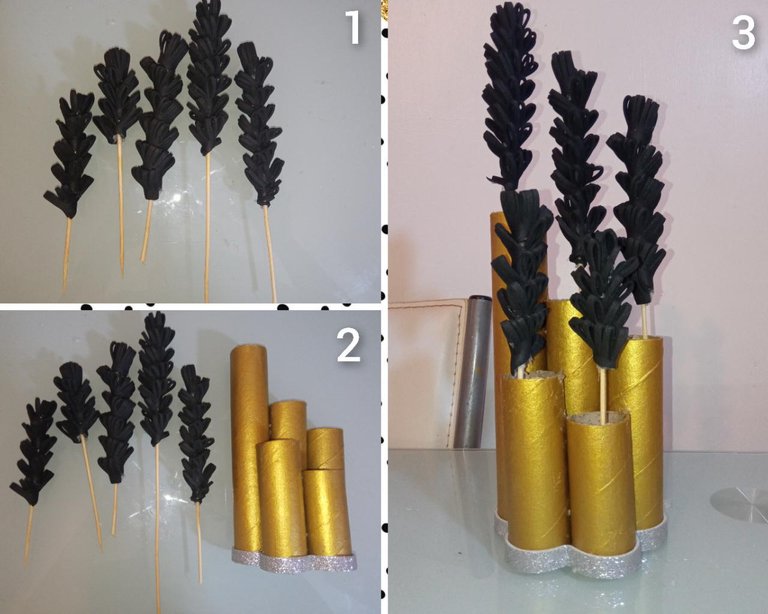
This is how the craft has been, I hope you like it and until a next post. God bless you 😇🙏 and in life we always have to persist, resist and not stop giving up if we don't want to cease to exist.
Así ha quedado manualidad, espero que les gustes y hasta un próximo post. Dios les bendiga 😇🙏 y en la vida siempre tenemos que persistir, resistir y no dejar de desistir si no queremos dejar de existir.
THANKS FOR READING ME // GRACIAS POR LEERME.
Translated by: google translator // Traducido por: google traductor.
Camera 13 MP Xiaomi Redmi 9. // Camara 13 MP Xiaomi Redmi 9.
All photos are my property // Todas las fotos son de mi propiedad.
The collage were made with the collage maker android app // Los collage fueron realizado con la app para android collage maker.
