Last year I built real BB8 from Star Wars and you can do it too! Here is how! With the cheap 3d printers at home, you are not limited to building small objects. You can also make droid which is almost 1m tall. Just need more plastic and lots of patience. The best of, you don't need to be a 3D designer, all the files are generously shared by the amazing group of builders, who did the hard work, designing and testing it. You can sign in to the facebook group here: https://www.facebook.com/groups/BB8BuildersClub/ to download files for your own private build and enjoy the ride. This is quite a demanding project, I must warn you. Your printer will be locked for hundreds of hours and you will need to spend another tens or hundreds of hours sanding and finishing this model. It is not for people who need instant gratification, it requires lots of dedication and a bit of money. You can build a static version or even fully rolling model. I settled on static with an animated head, for now, need to save another 1000 euro for parts for driving mechanism and dedicate another few months for constructing it. I hope this series of post will help me repair my budget and make this possible
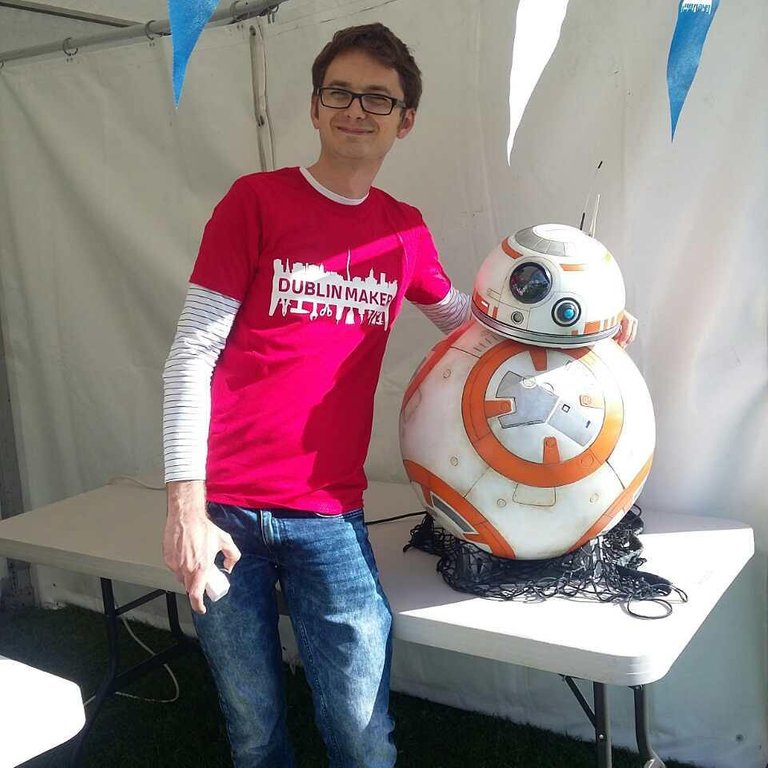
Photo Credit me
Why?
I asked this questions in the moment of doubts maybe hundred of times :) I make small figurines most of the time, this is dictated by size of my workshop/bedroom and commissions which come my way. I wanted to challenge myself and build something more amazing for my own collection. I originally wanted the Wall-E but after seeing the first trailer featuring BB-8 I knew this will be huge and very popular new character. I had the plan to show him at different conventions and charity events, but the main one, I take part every year is Dublinmaker. I choose this to be my deadline and stuck to it. It is a great family event in Merrion Square Park, free to attend and full of cool inventions and inspirations for young makers. We always have 3d printers and show kids that they can print their own toys or they can download them from the internet. For the last few years, I wanted to show the use of this machine in bigger projects. I spent 2 years developing few versions of my animatronic dragon what was a great success in the event, but too big project for my limited free time.

Photo credit: Me
I decided this time to stand on shoulders of a community of builders from BB-8 builders club and use their files. They are very well prepared and tested. If your printer is accurate, the parts come like from the model kit. They are engineered to be strong and fit in right place, there is a wiki page with instruction and forum where you can ask questions when you stuck. There are official files and few versions of mechanics and frames to download. Just need to read before you start your build to choose the one which suits your needs the best.
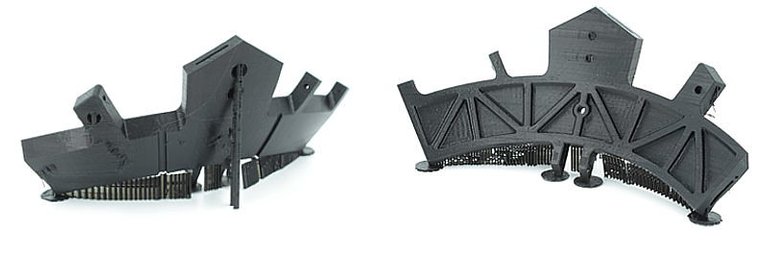
Photo credit: Me
Frame
I went with the frame designed by a brilliant maker, Cary Christie. This construction is made of 24 identical pieces joined together with screws and coins or washers and create very rigid and strong base for external panels. Every part will take around 9 hours to print so it is in total 216 hours of your machine time plus whatever is lost on failed prints. There are also 6 pairs of ribs which need to be printed to give support 6 unique panels. It looked so time-consuming, I needed to find a better way, so I made a mold and cast all 24 parts in resin.
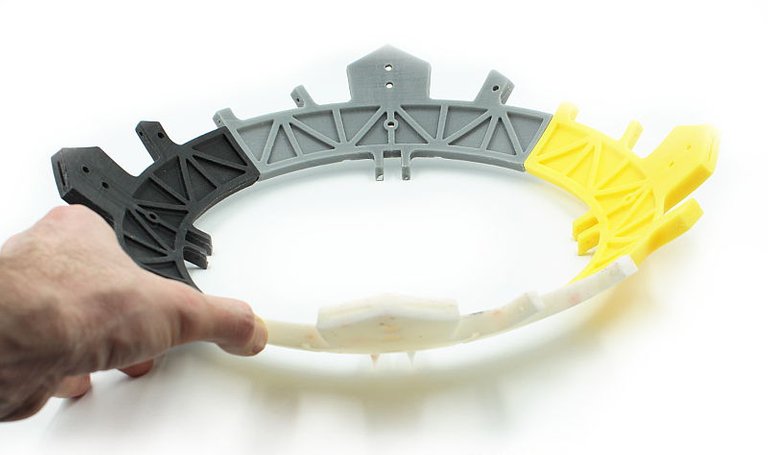
Photo by me

Photo credit: https://www.caryeng.com
It looked like great ideat at that time. After I finished this part of the job Cary released his injection molded frame kit he sells for 350usd. It is totally worth the price. It is stronger and lighter frame and all parts are much more precise what later helps with fitting the panels. I am going to buy it for my final version if I will ever decide to make the rolling droid. If I knew he will be selling it, I would save myself a month of my time. The price of his product minus price of plastic you would need for 3d printed frame plus the cost of electricity and your time cleaning the pieces and fitting them together it makes it very attractive product. You can find it on his website here https://www.caryeng.com/
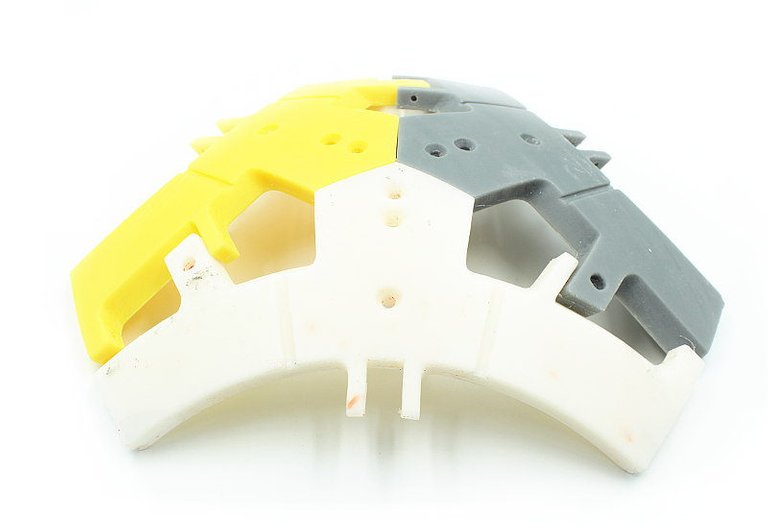
Photo credit: Me
When you have your frame figured, you will need 6 rings, 6 unique center panels and 8 triangle panels to complete the sphere.
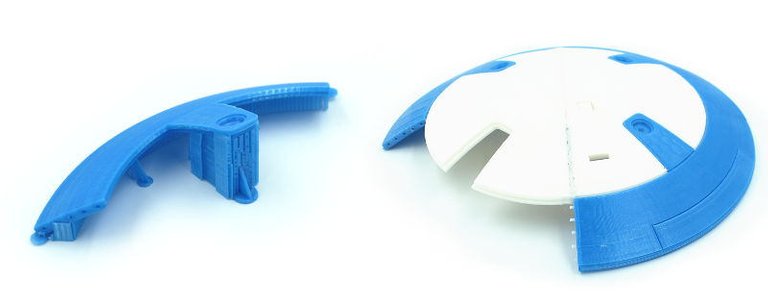
Photo credit: Me
Rings
The club files are prepared in different versions, for big printers you can print each panel in one piece, or if your print bed is small like mine, they are cut into pieces. Each ring was made of 4 parts, joined with glue and aligned with pieces of plastic sliding in the holes. This is amazing they spent this time figuring it out before they released the files which work. Huge thank you to the members of the club.
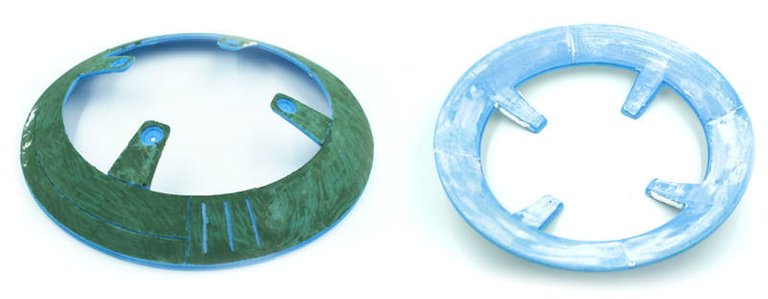
Photo credit: Me
After your printer spent more than 30 hours of printing all 4 pieces of the ring, you need to assemble them sand it smooth. It is the most labor-intensive process and quite boring. I used the electric sander for the first pass to smooth the plastic as good as possible. Than covered almost the whole thing with putty and sand again. Then, prime it with grey paint to see places where you need to add more putty, sand it, prime putty, sand, prime and repeat until it is smooth to your satisfaction. I needed more than 6 passes to get the part which I was happy about. I did not want to go through the whole process 6 times, so I made a mold and cast 6 copies, almost ready to paint. The mold making process took a lot of time and materials, silicone is expensive and I used a lot of it. I am now glad I went this route because I was able to make 6 more rings in one day for my next droid, you will see soon ;) There are basically 2 types of the ring in BB-8 and I noticed that I can get the second version by cutting few extra lines and filling another. That is why it made sense to make a single mold and save time on printing and sanding. I also knew that resin cast panel will be stronger than a 3d printed piece which is made of layers even if most of the droids out there are fully printed and they last.
Triangles
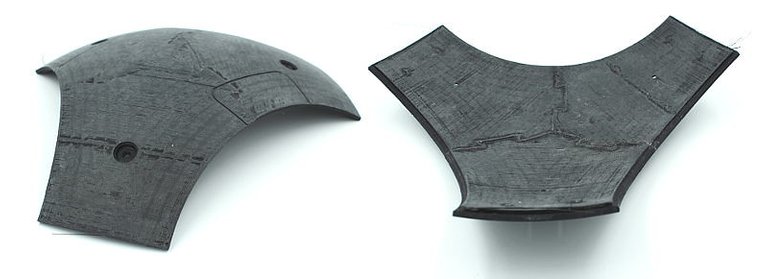
Photo credit: Me
You will need 8 of those. They are made of 3 pieces and glued together. They are almost identical, except 3 of them require few lines cut to look like an air intake or something. It was easy decision to make just one and make a mold. I tried to save on silicone and made a stupid mistake which cost me some extra sanding, but I can write about it if you are interested. How many of you still read this? :) If you want to know how the molds were made, please leave the comment so I will write an in-depth article about this part of the process. If you only plan to build it once, just follow the instructions from the club and print all the pieces.
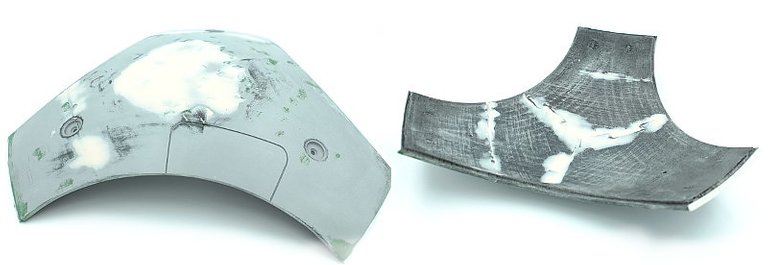
Photo credit: Me
Centre panels
There are 6 unique panels, so I could not speed the process on this one. Each needs to print in 2 pieces (or single on a bigger machine) and be glued and sanded. There are many little details, groves and some recessed sections which require some detailed work with sandpaper all by hand. The biggest issue for me was to hide the seam. The 2 parts fit together in the into3d program, but they printed with edges lifting slightly from the print bed due to shrinkage of the plastic during the printing process. I filled the gap with 3d printing pen and made it good with automotive putty. It stinks like a dangerous chemical but sands very well. It is very fine dust so wear a respirator.
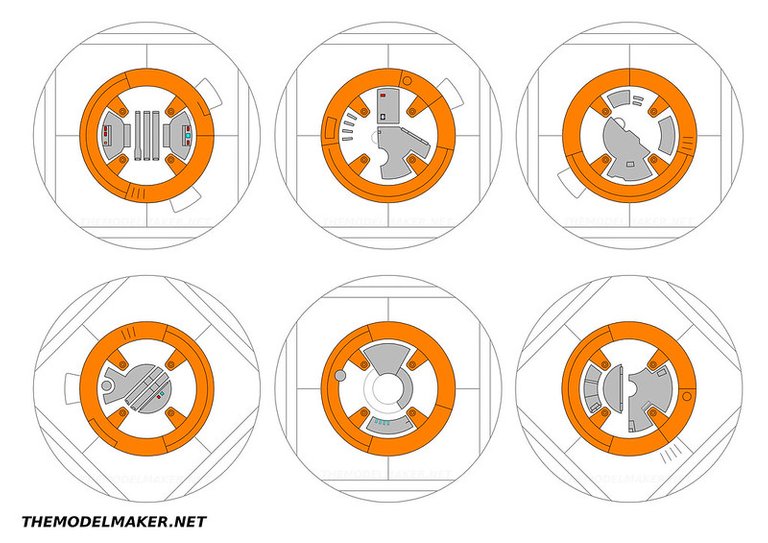
Photo credit: Me
When all the panels are ready, you need to screw them into the frame and try to line it properly. It is a long process because any imperfections produce bigger joins. You need to unscrew the panel, sand it more or readjust the elements. Sometimes you will need to heat the part with a heat gun or hot water so it softens and easier follow the curvature of the sphere.

Photo credit: Me
If you are at this stage of the build, the rest should be easier. Most of the people start with making head and giving up with rest of the body when they realize how demanding this project is. I started with the ball, so there was no going back :) The most costly part was done, I had to continue. I must say there were moments when I wanted to give up, but I pushed it because I promised to bring it to Maker Faire. I am very happy I did, it was a huge success, seeing all the happy faces was priceless. I will be bringing it this year too along with his dark side version BB-9e which I started printing last weekend. I will be able to use the same molds for most of this build and speed the process. BB-8 took me half a year from decision to completion but most of the time invested in this will help me complete the second droid in 1 month (that's the plan).
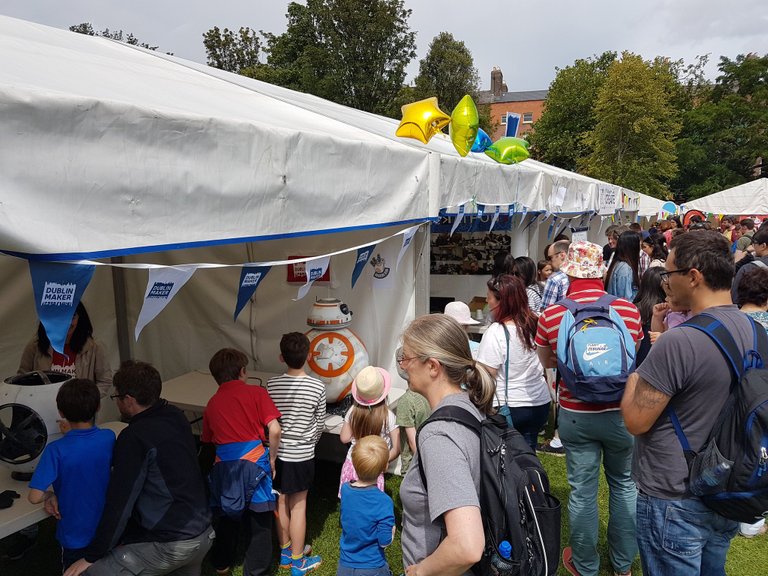
Photo by my friend Mike Hibbett : https://twitter.com/MikeHibbett
I hope you enjoyed this post, there are lots of things to explain about this build and planning to write more about it if you are interested. I did not show you yet what is inside, what electronics I used and how it was painted. I can also show you what materials I used for molds and to cast panels. It will be always work in progress figure, I installed thumb-up panel already before my latest charity event appearance. I printed the drawer panel which was going to distribute candies but did not have time to finish it. I will modify it to give away chocolate coins inspired but most recent movie, where he shot with coins. I need to figure out the mechanism for that and the way I will fill the storage container with candies. I will share this upgrade with you if you want to repeat it. At this moment, he is moving head, speaks, lights are working and thumb up appeared from one of the side panels. I will upload the dtube video with that, so watch this blog and give me your support so I can build more. See you next time here on the internet or 21 July in Dublin, if you want to see him live! Also check my other post where I show my new adventure, building his evil brother.
You can read about this full scale BB-8 here:
https://themodelmaker.net/bb-8-droid-remote-controlled-toy/