I have to tell you about an interesting experience I had recently. It's about my return to woodcarving, a hobby I had given up a year ago.
It all started when I bought a cheap woodcarving kit, inspired by a few YouTube videos. Unfortunately, the initial enthusiasm didn’t last long. There are several reasons why I abandoned it:
Firstly, the kit was not of good quality. The knives were a real pain to use. I had to constantly sharpen them, and even then, the blade remained mediocre.
Secondly, I couldn't find the right type of wood to work with.
Finally, I embarked on projects that were way too complex for my beginner level.
Fortunately, my girlfriend @altheana had the good idea of slipping my woodcarving kit into my travel bag before we left for our land. The kit had stayed at my parents' house for a year, like many impulsive projects.
(By the way, @xsasj, how’s your ukulele going? Mine is in a closet at my parents' house, but I often think about it.)
Last night, we ate earlier than usual. These past few days, instead of watching videos on our phones as we usually do, we have started reading in the evening.
But last night, instead of reading, I felt the urge to get back into woodcarving. While browsing Pinterest, I came across a photo of a carved mushroom. It made me want to try this project.
While doing some research online, I learned that it’s better to use fresh wood. From the beginning, I had only worked with dead and dry wood. The problem with dry wood is that the knife can’t penetrate it properly.
On our land, we are lucky to have many trees, including hazel trees (at least 10, but I have never really counted them). The previous owner had maintained them to limit the number of branches. I spotted a new branch growing and thought it would be a good idea to cut it to promote the development of the others.
So, I took out my Swiss army knife, used the saw blade to cut this small piece of branch:
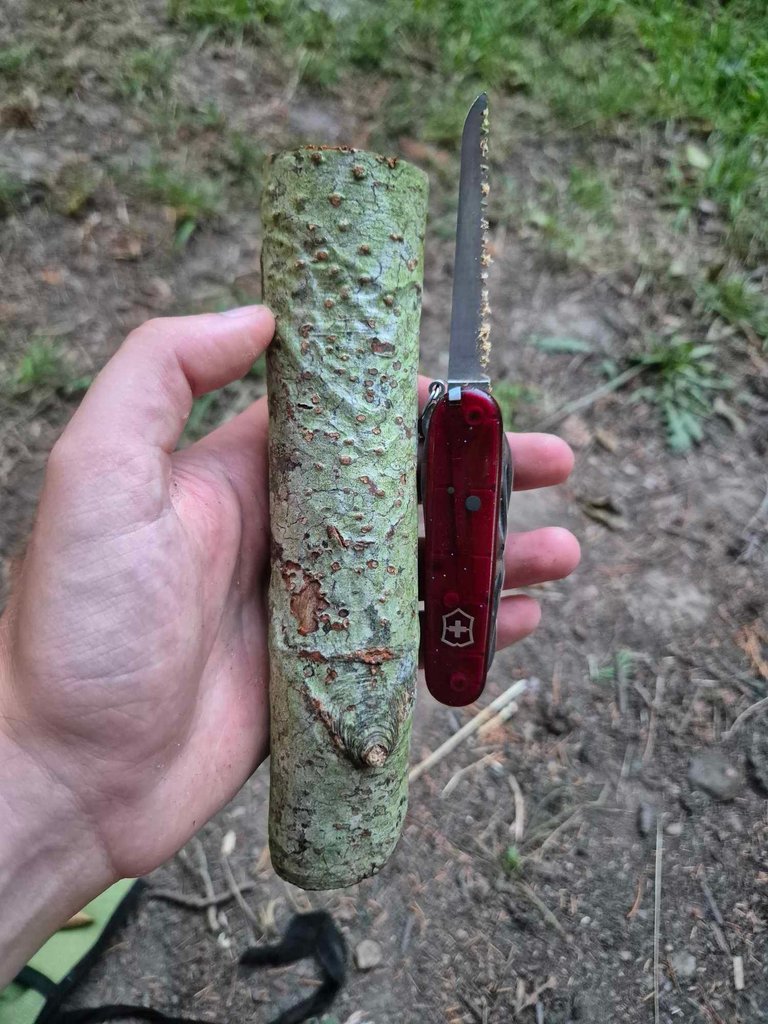
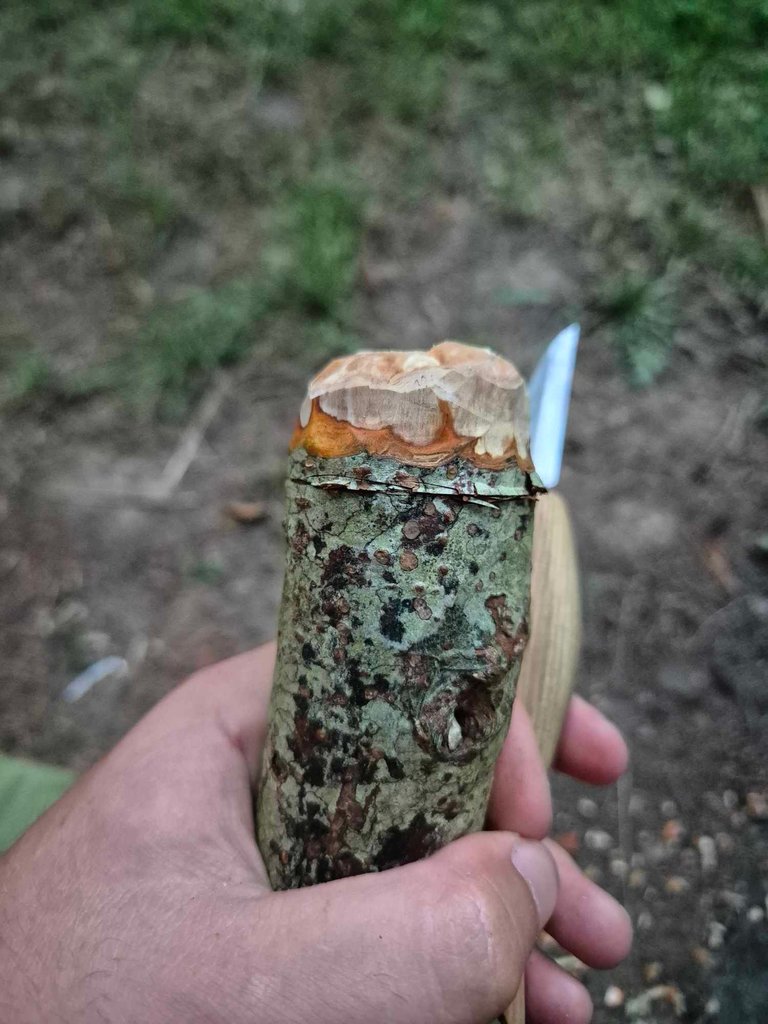
Then, I started carving. First, I rounded the top with my carving knife to form the mushroom cap:
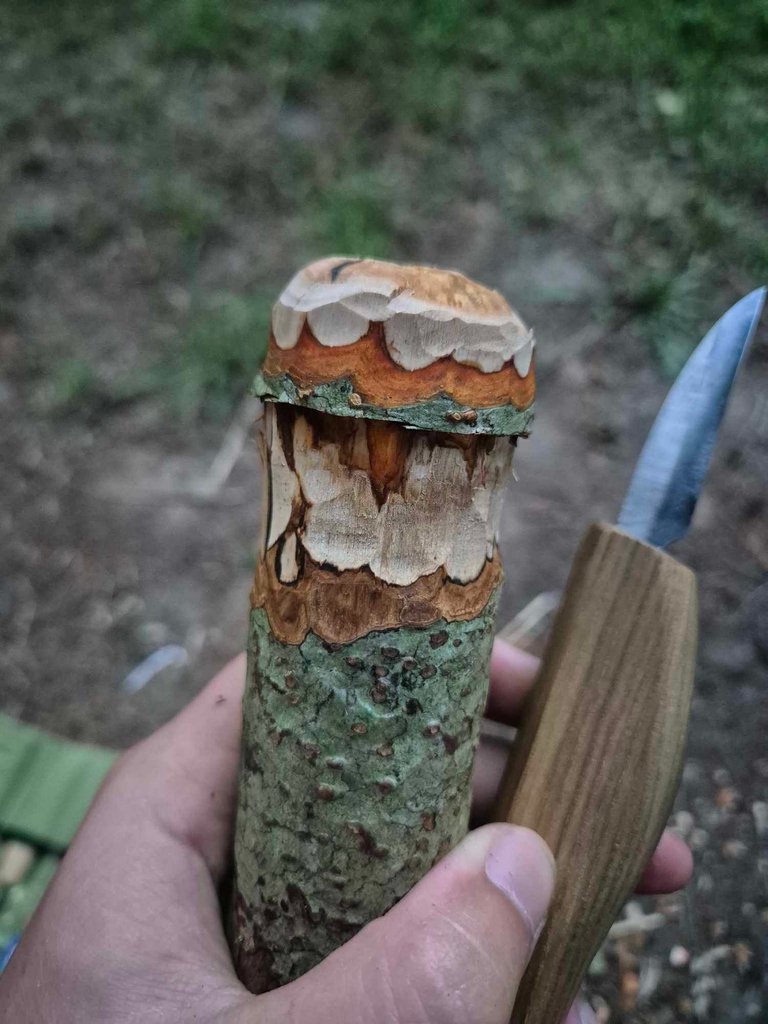
About 1 cm below the rounded part, I drew a line with my knife to delimit the cap. Then, I began removing a lot of material below this limit to form the stem of the mushroom, or rather the “stipe” as I learned it is called:
Night fell quickly, and the mosquitoes started attacking me. Not being able to see much, I decided to go to bed.
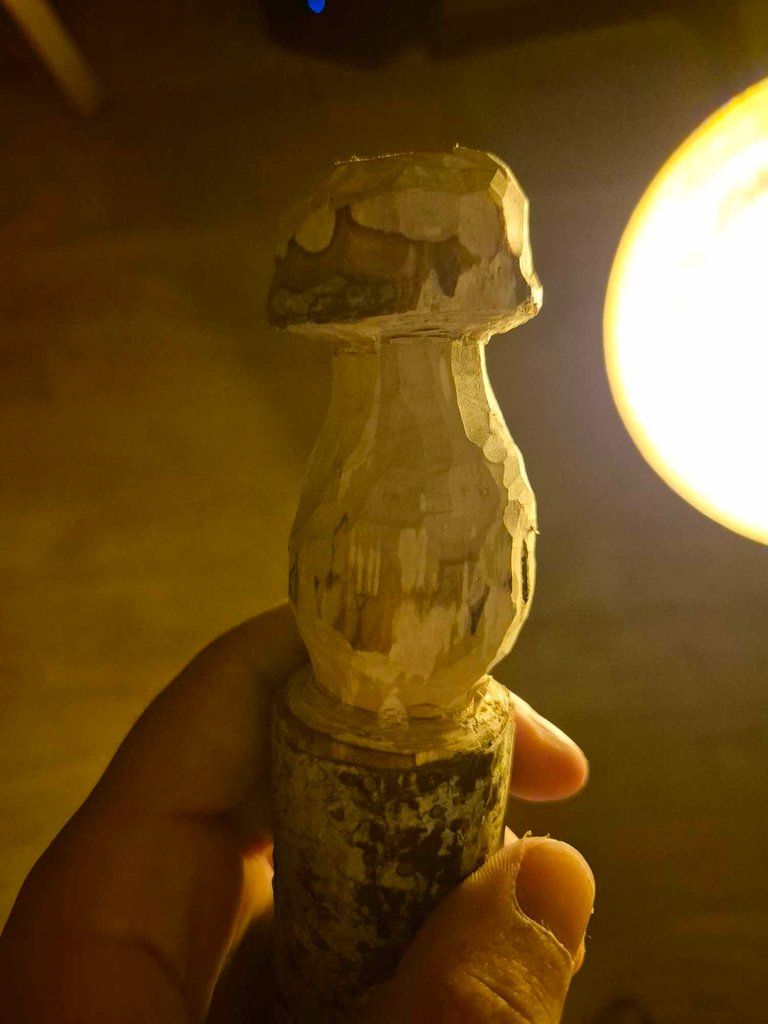
This morning, I resumed my work:
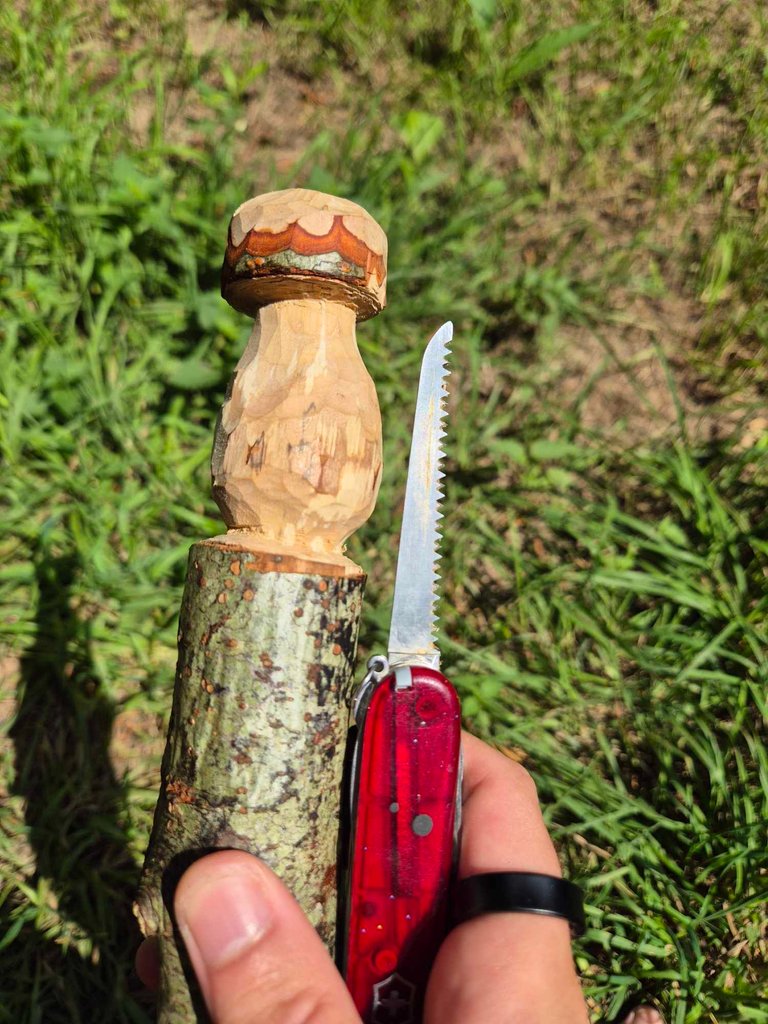
I sawed off the base with my Swiss army knife, and there it was! I held a beautiful little wooden mushroom in my hands:
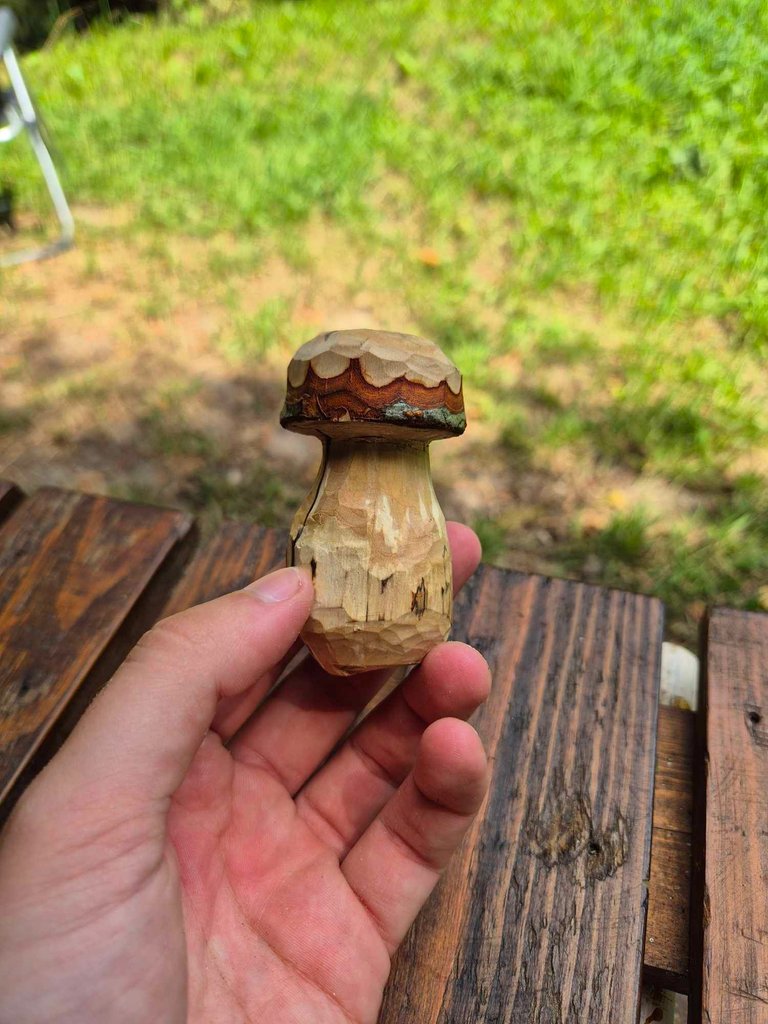
My very first successful woodcarving project. And I'm sure it won't be the last!
Version Française
Il faut que je vous raconte une expérience intéressante que j'ai vécu récemment. Ça concerne mon retour à la sculpture sur bois, une hobby que j'avais abandonnée il y a un an.
Tout a commencé lorsque j'ai acheté un kit de woodcarving pas cher, inspiré par quelques vidéos YouTube. Malheureusement, l'enthousiasme initial n'a pas duré longtemps. Plusieurs raisons expliquent cet abandon :
Premièrement, le kit n'était vraiment pas de bonne qualité. Les couteaux étaient un vrai calvaire à utiliser. Je devais constamment les aiguiser et même ainsi, la lame restait médiocre.
Deuxièmement, je n'arrivais pas à trouver le bon type de bois pour travailler.
Enfin, je me suis lancé dans des projets de figurines beaucoup trop complexes pour mon niveau de débutant.
Heureusement, ma copine @altheana a eu la bonne idée de glisser mon kit de woodcarving dans mon sac de voyage avant notre départ pour notre terrain. Le kit était resté chez mes parents depuis un an, comme beaucoup de projets impulsifs.
(d'ailleurs @xsasj, tu en es où avec ton Ukulélé ? Le miens est dans un placard chez mes parents. Mais j'y pense souvent.)
Hier soir, nous avons mangé plus tôt que d'habitude. Ces derniers jours, au lieu de regarder des vidéos sur nos téléphones comme à notre habitude, nous nous sommes mis à lire le soir.
Mais hier soir, au lieu de la lecture, c'est l'envie de me remettre au woodcarving qui m'a pris. En parcourant Pinterest, je suis tombé sur la photo d'un champignon sculpté. Ça m'a donné envie d'essayer ce projet.
En faisant quelques recherches sur internet, j'ai appris qu'il était préférable d'utiliser du bois encore frais. Depuis le début, je n'avais travaillé qu'avec du bois mort et sec. Le problème du bois sec, c'est que le couteau ne peut pas s'y enfoncer correctement.
Sur notre terrain, nous avons la chance d'avoir de nombreux arbres, dont des noisetiers (au moins 10, mais je n'ai jamais vraiment compté). L'ancien propriétaire les avait entretenus pour limiter le nombre de branches. J'ai repéré une nouvelle branche en train de pousser et j'ai pensé que ce serait une bonne idée de la couper pour favoriser le développement des autres.
J'ai donc sorti mon couteau suisse, utilisé la lame de scie pour couper ce petit bout de branche :

Ensuite, j'ai commencé à sculpter. J'ai d'abord arrondi le dessus avec mon couteau de woodcarving pour former le chapeau du champignon :

Environ 1 cm sous l'arrondi, j'ai tracé une ligne avec mon couteau pour délimiter le chapeau. Puis, j'ai commencé à enlever beaucoup de matière en dessous de cette limite pour former le tronc du champignon, ou plutôt le "stipe" comme j'ai appris que ça s'appelait :

La nuit est tombée rapidement et les moustiques ont commencé à m'attaquer. Ne voyant plus grand-chose, j'ai décidé d'aller me coucher.

Ce matin, j'ai repris mon travail :

J'ai scié la base avec mon couteau suisse et voilà ! J'avais entre les mains un superbe petit champignon en bois :

Mon tout premier projet de woodcarving réussi. Et je suis certain que ce ne sera pas le dernier !
All photos were taken with my smartphone. The English translation is done with DeepL.


