Hello my beautiful spiders, I had them somewhat abandoned but I'm here, that although Christmas has passed, I still want to show you my new tree at least for me, because the one I had before after almost 30 years was already a little ugly, but we must make changes and that we do not win so much feelings.
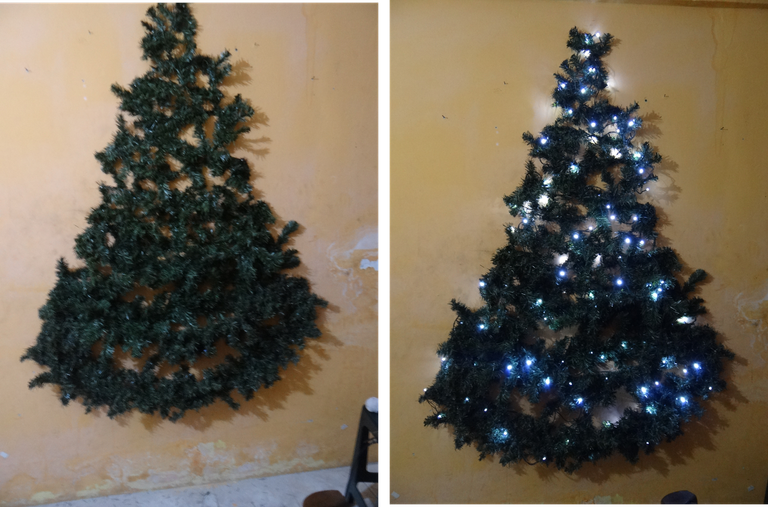
I went to stores, searched the social networks and found a new trend in trees, the wall trees, I liked it a lot and there were hundreds of models to choose from, I chose one that retained something to my previous tree, and on the wall I found it more comfortable, because of the water leaks through the roof and is a danger water with electricity, it takes up less space too, I show you first how it was, then the step by step.

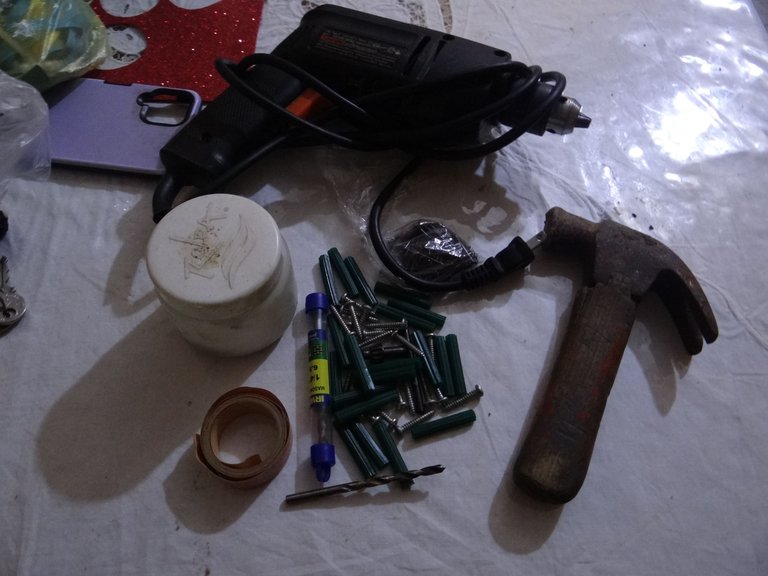
Materials:
-Garlands I used about 5.
-Blue Ramplung and screws.
-Pabilo thread, steel nails.
-Measuring tape.
-Drill, hammer, large steel nail.
1.- Choose which wall has an electrical outlet nearby to connect the fixtures.
2.- Remove everything from the wall, sweep, dust and spider web.
3.- Take the measurement from the top to the bottom in a straight line to trace what would be the middle of the tree.
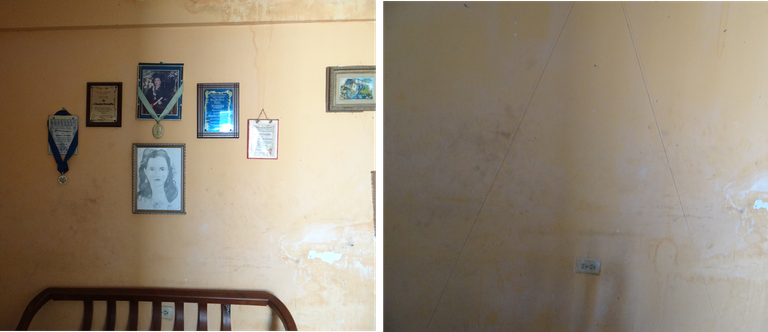
4.- From the top I extended the wick thread to the bottom but at a distance of about one meter from the middle of the tree, there I stuck the thread with plastic tape and I did the same on the other side.
5.- Again from top to bottom on both sides I measured from 10 to 10 cms.
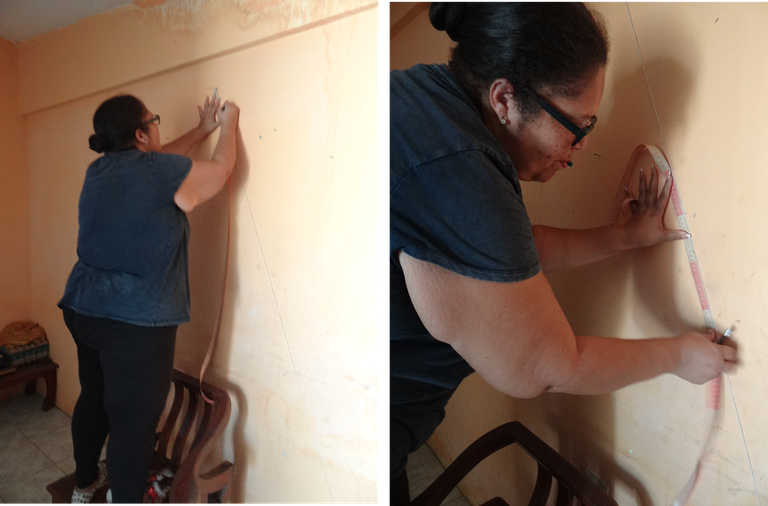
6 .- Above at the first point I started with the drill to make the holes, as far as I could, hard walls by the way, I helped me with the big steel nail, not to force the drill, which incidentally was not mine, I had to take care of it more.
7 .- Then from one side from the first hole I made in the next one that measured 10 cms I did the same as with the middle one above, the next point I did not make a hole, I followed the next, ie a point if and the other not, until you get down, then I went to the other side to do the same, but this time I did the same holes but not in the same direction of the other side, where I did not make a hole on the other right side, I did them on the left side, which would be like a zic zac.
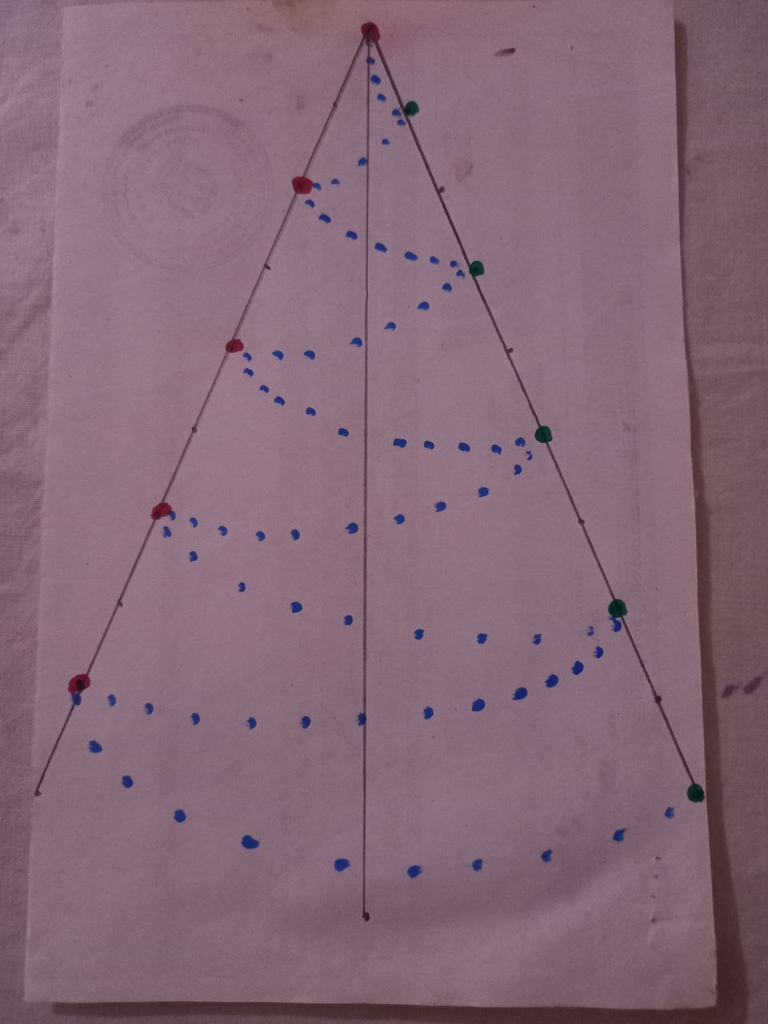
8 .- This previous step took me a few days because of the hardness of the wall, the old ones were good material ha ha ha, but it was not impossible, with patience everything is achieved.
9 .- Now ready, look for the garlands and place them well securing the screws as it is a thick wire, with nails would not have held, use 4 garlands because the idea is that it is shaped like a tree with some fall and not straight.
10 .- Then the light installations, I only used two, while in the tree I put almost 10, as enough.
11 .- And the decorations that were not all but I chose from all a little: the tails, necklaces, which I have done, the stuffed animals and my foami star that also comes out change for this year.
12.- In the evening, the "¡Encendido", not that I say so, but those who saw it said it was very nice.

In Venezuela there is a belief or religious tradition that Christmas is removed after the day of the Virgin of Candelaria, which is February 2nd, so I will remove it on February 3rd.
I couldn't wait until December of this year to show you the tree, because I need to delete the pictures from my camera and cell phone.
All pictures taken with my Samsung A12 cell phone and Sony camera.

Hola mis lindas arañas, los tenia algo abandonados pero ya estoy aqui, que aunque ya paso navidad, igual quiero mostrarles mi arbolito nuevo al menos para mi, porque el que tenia antes despues de casi 30 años ya estaba algo feo, pero debemos hacer cambios y que no nos ganen tanto los sentimientos.
Fui a tiendas, busque en las redes sociales y encontre una tendencia nueva en arbolitos, los de pared, me gusto mucho y habian cientos de modelos como para escoger, escogi uno que conservara algo a mi anterior arbolito, y en la pared me resultaba mas comodo, por lo de las filtraciones de agua por el techo y es un peligro agua con electricidad, ocupa menos espacio tambien, les enseño primero como quedo, luego el paso a paso.

Materiales:
-Guirnaldas use como 5.
-Ramplung azul y tornillos.
-Hilo pabilo, clavitos de acero.
-Cinta de medir.
-Taladro, martillo, clavo de acero grande.
1.- Escoger cual pared que esta tenga una toma de corriente cerca para conectar las instalaciones.
2.- Quite todo lo de la pared, la barri, quitar polvo y telaraña.

3.- Tome la medida desde arriba hasta abajo en linea recta para trazar lo que seria el medio del arbolito.
4.- Desde arriba extendi el hilo pabilo hasta abajo pero a una distancia del medio como un metro ahi pegue el hilo con cinta plastica y asi mismo hice del otro lado.

5.- De nuevo desde arriba hacia abajo en ambos lados iba midiendo de 10 en 10 cms.
6.- Arriba en el primer punto empece con el taladro a hacer los huecos, hasta donde pudiera, paredes duras de paso, me ayudaba con el clavo grande acero, para no forzar el taladro, que de paso no era mio, debia cuidarlo mas.
7.- Luego de un lado desde el primer hueco que hice en el siguiente que medi los 10 cms hice lo mismo que con el del medio arriba, el siguiente punto no hice hueco, segui al siguiente, es decir un punto si y el otro no, hasta llegar abajo, luego me fui al otro lado a hacer lo mismo, pero esta vez hice los huecos igual pero no en la misma dirección del otro lado, que donde no hice hueco en el otro lado derecho, los hice en el lado izquierdo, que quedaria como un zic zac.

8.- Este paso anterior me llevo unos dias por lo duro de la pared, las de antes eran buen material ja ja ja, pero no era imposible, con paciencia todo se logra.
9.- Ya listo, busque las guirnaldas y las coloque asegurando bien en los tornillos ya que es un alambre grueso, con clavitos no hubiese aguantado, use 4 guirnaldas porque la idea es que quede con forma de arbolito con algo de caida y no recta.
10.- Luego las instalaciones de luces, solo use dos, mientras que en el arbolito le ponia casi 10, como bastante.

11.- Y los adornos que tampoco fueron todos pero escogi de todos un poco: las colas, collares, los que yo he hecho, los peluchitos y mi estrella de foami que tambien le sale cambio para este año.
12.- Ya en la noche el ¡Encendido!, no es que lo diga yo, pero los que lo vieron dijeron que quedo muy bonito.

En Venezuela hay una creencia o tradición religiosa que la navidad se quita después del día de la Virgen de la Candelaria, que es el 02 de febrero, así que lo quitare el 03 de febrero.
No podia esperar a diciembre de este año para enseñarles el arbolito, porque necesito borrar las fotos de la camara y celular.
Todas las fotos tomadas con mi celular Samsung A12 y camara Sony.

