
Que tal amigos de Hive. Ya se acerca diciembre y es natural que todos estemos muy creativos y emocionados por las fechas más lindas del año. En esta oportunidad tengo la dicha de presentarles un hermoso tutorial dedicado a la navidad. Para ello he utilizado una simple hoja de maquina para realizar el copo de nieve. Así es! el material para realizar este bonito arreglo es una sencilla hoja blanca.
Necesitaremos estos materiales complementarios.
- Lápiz
- Regla
- Tijera
- y por supuesto la hoja blanca de papel.
Empecemos...
Paso a Paso
1
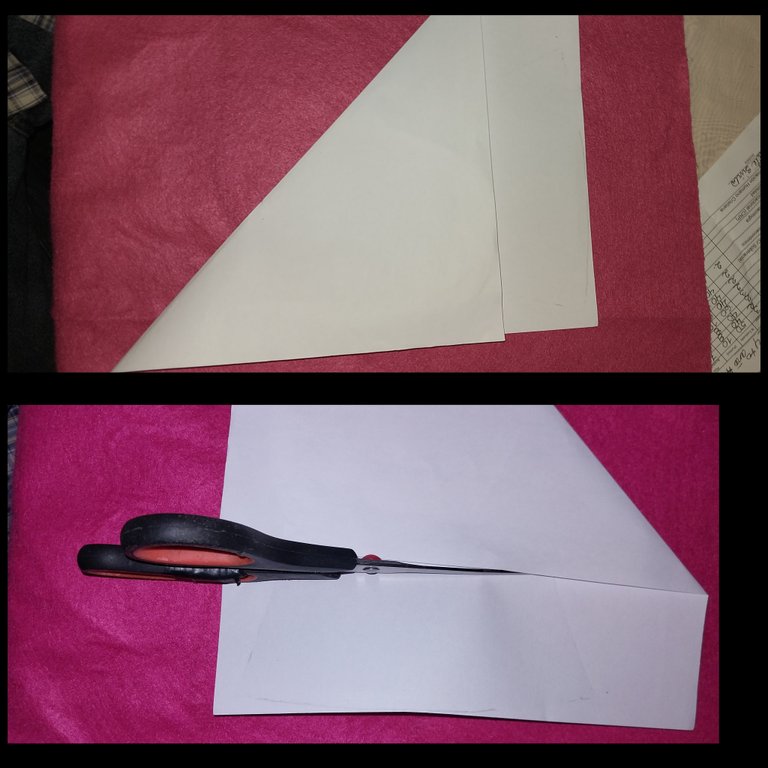
Iniciaremos doblando la hoja a la mitad y de forma diagonal para formar un triangulo recto. Luego el extremo saliente lo vamos a recortar con la tijera.
2
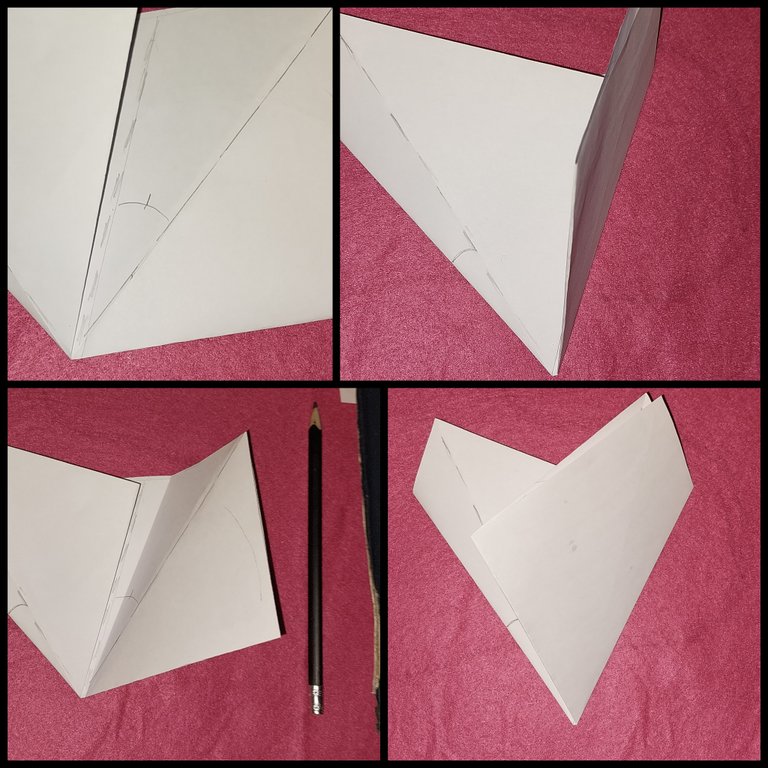
Desde la punta del triangulo vamos a doblar este en dos partes iguales y luego doblados hacia el centro.
3
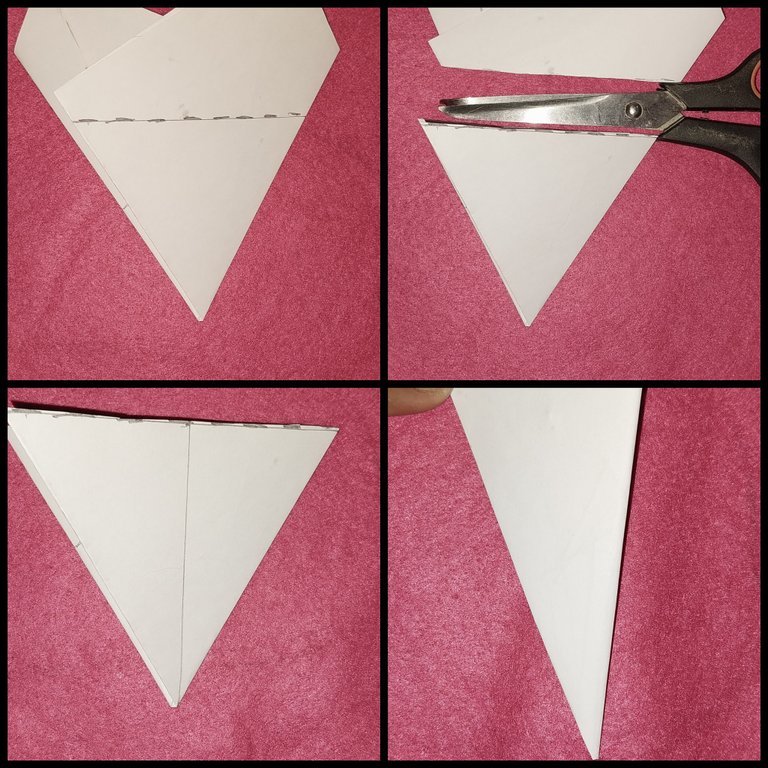
Con la ayuda de la regla trazamps6 una línea que una los extremos y a la vez elime el exceden lineal.cortamos con la tijera la línea.
4
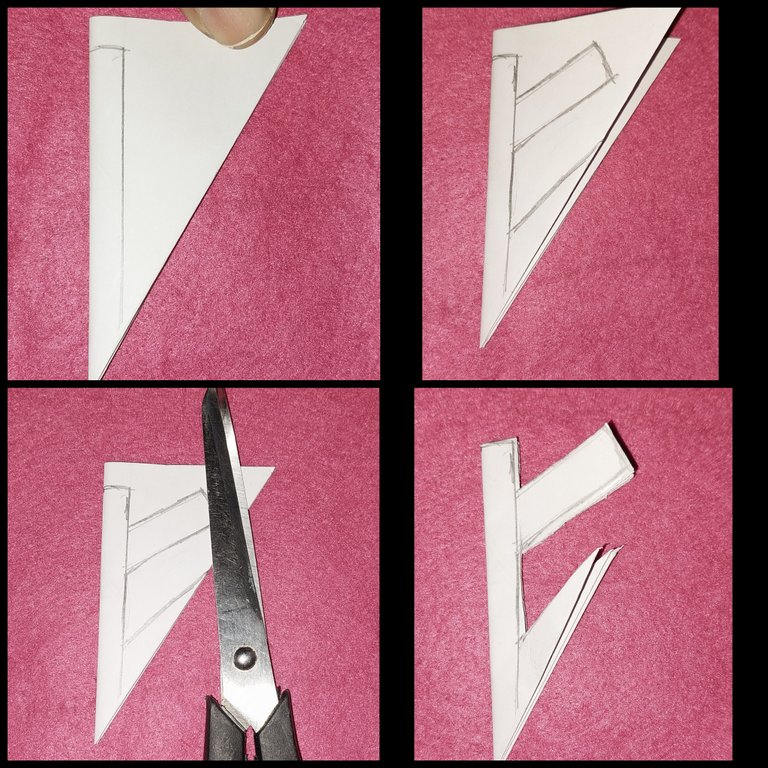
Luego con el lápiz dibujamos un pilar de 2 centímetros y luego trazamos dos líneas diagonales desde el pilar.
Recortamos el espacio con la tijera exceptuando la zona interna de las líneas que se trazaron.
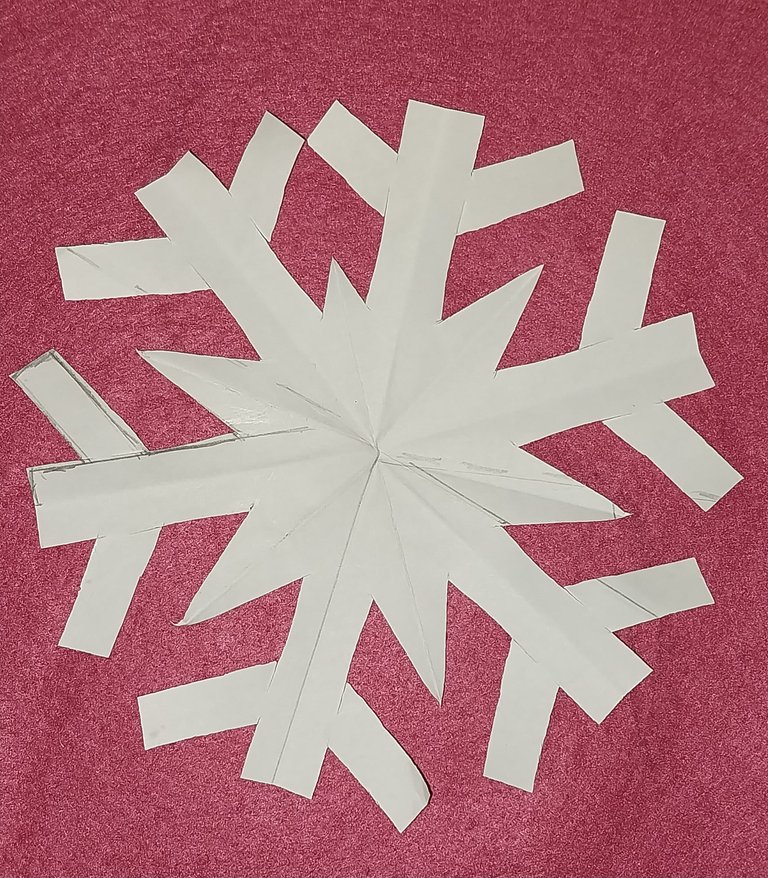
Este sería el resultado final amigos!
Wue les parece?
- Las imágenes me pertenecen
- Traductor: Deepl traslator
- Edicion: Canva

Howdy Hive friends. December is coming and it is natural that we are all very creative and excited for the most beautiful dates of the year. This time I have the pleasure to present you a beautiful tutorial dedicated to Christmas. For this I have used a simple machine blade to make the snowflake. That's right! the material to make this beautiful arrangement is a simple white sheet.
We will need these complementary materials.
- Pencil
- Ruler
- Scissors
- and of course the white sheet of paper.
Let's start...
Step by Step.
1

Start by folding the sheet in half diagonally to form a straight triangle. Then we will cut the protruding end with the scissors.
2

From the tip of the triangle we are going to fold this in two equal parts and then folded towards the center.
3

With the help of the ruler trazamps6 a line that joins the ends and at the same time elimit the linear excess.we cut with the scissors the line.
4

Then with the pencil we draw a 2 centimeters pillar and then we draw two diagonal lines from the pillar.
We cut the space with the scissors except for the inner area of the lines that were drawn.

This would be the final result folks!
What do you think?
- Images belong to me
- Translator: Deepl traslator
- Editing: Canva


