English
Hello friends.
I have been learning to knit for about a while now and it seemed like a good idea to share with you my progress.
My teacher says that I learn very fast, in just 3 days I learned the basic stitches to knit anything, I still have a lot to learn but I have already started to create some little things like the amigurumis that I love and for these holiday dates I wanted to make some ornaments for my room, since I don't have a Christmas tree 🎄(which sounds a little sad but what am I going to do😅).
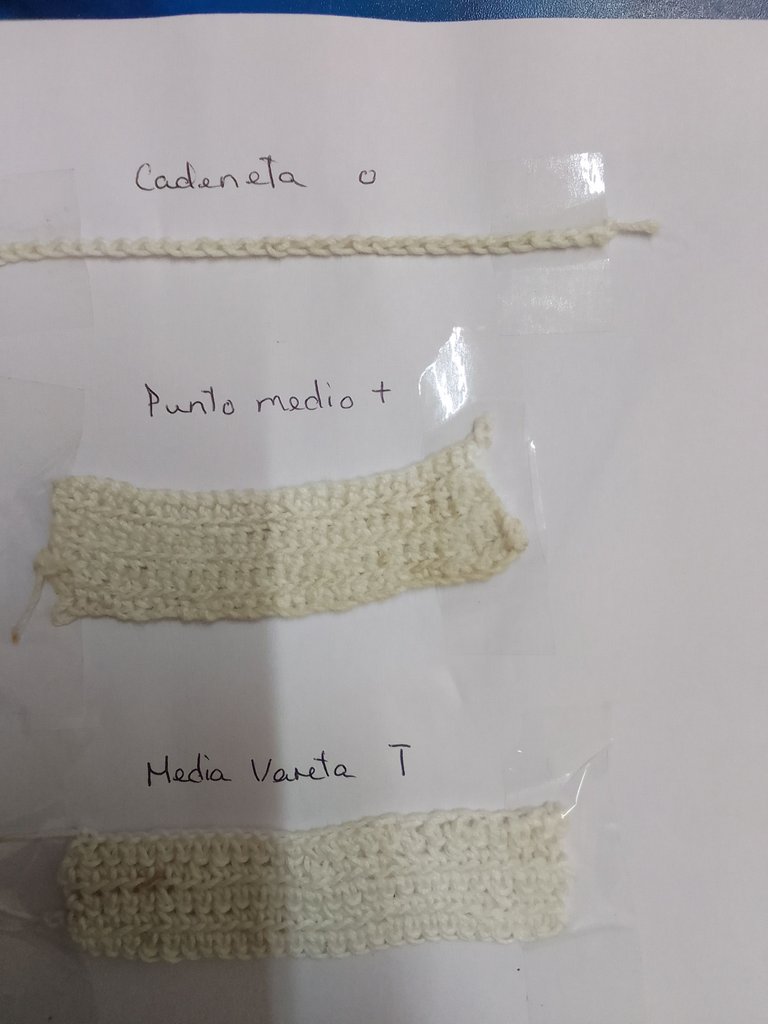
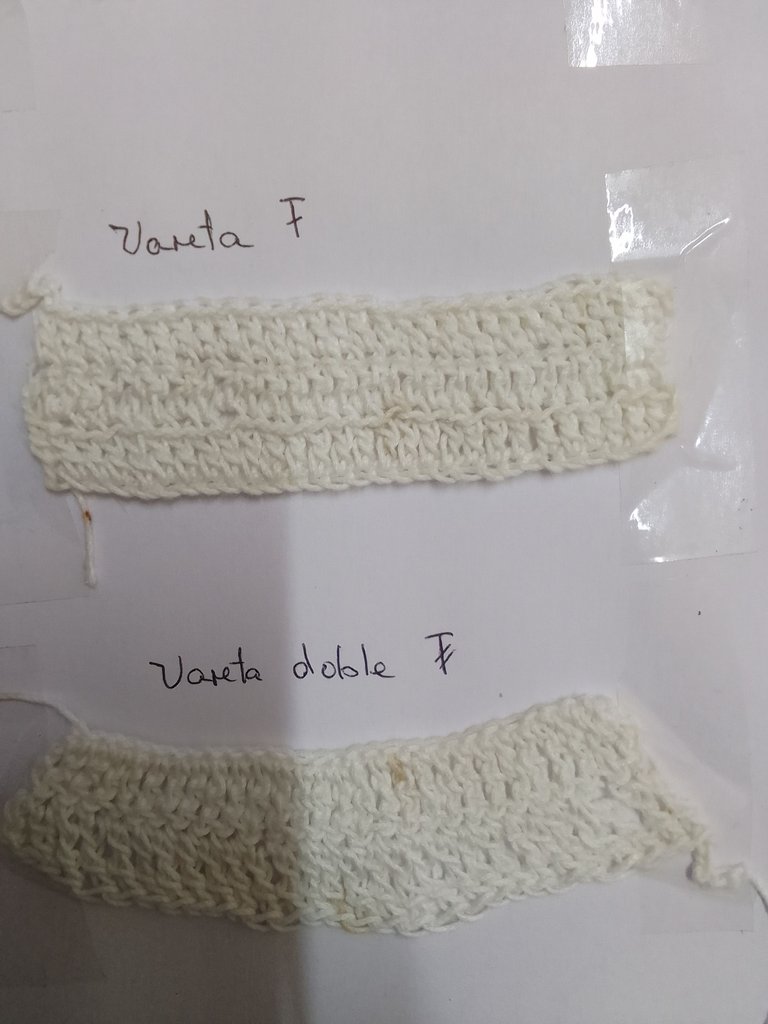
First of all I want to show you the points that I have learned. Start with the basic stitches which are chain stitch, middle stitch, half crochet, crochet, double crochet and triple crochet (I don't know what you will call them but I learned them that way). I learned the ring stitch online but the truth is that it is very easy to do.
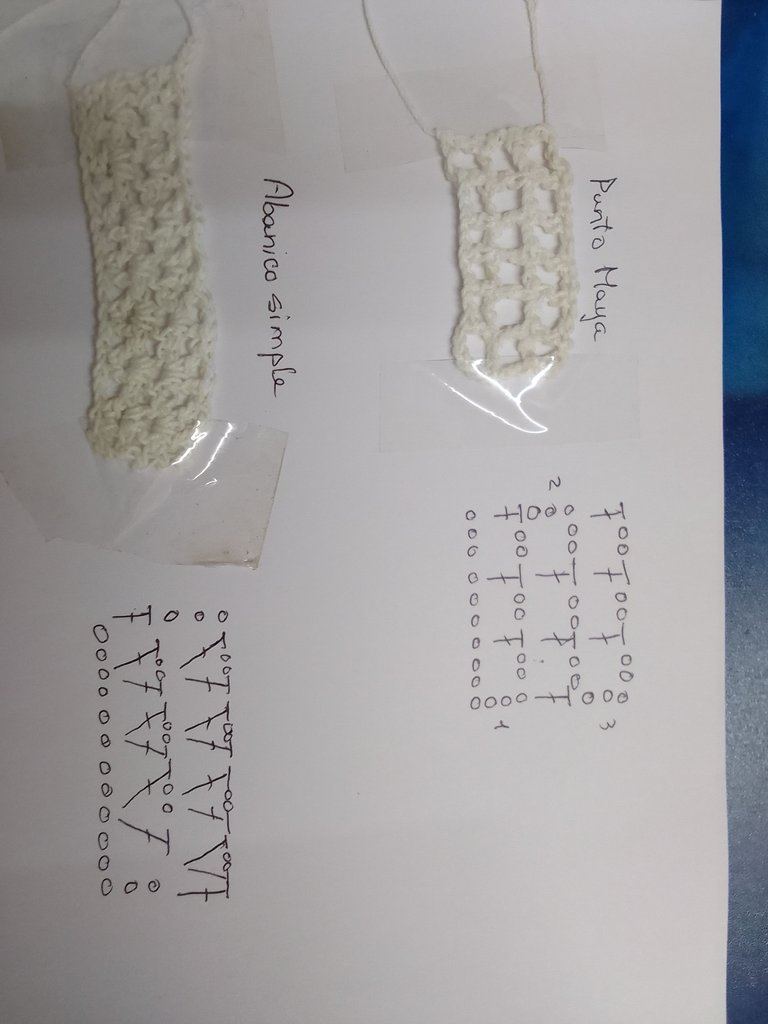
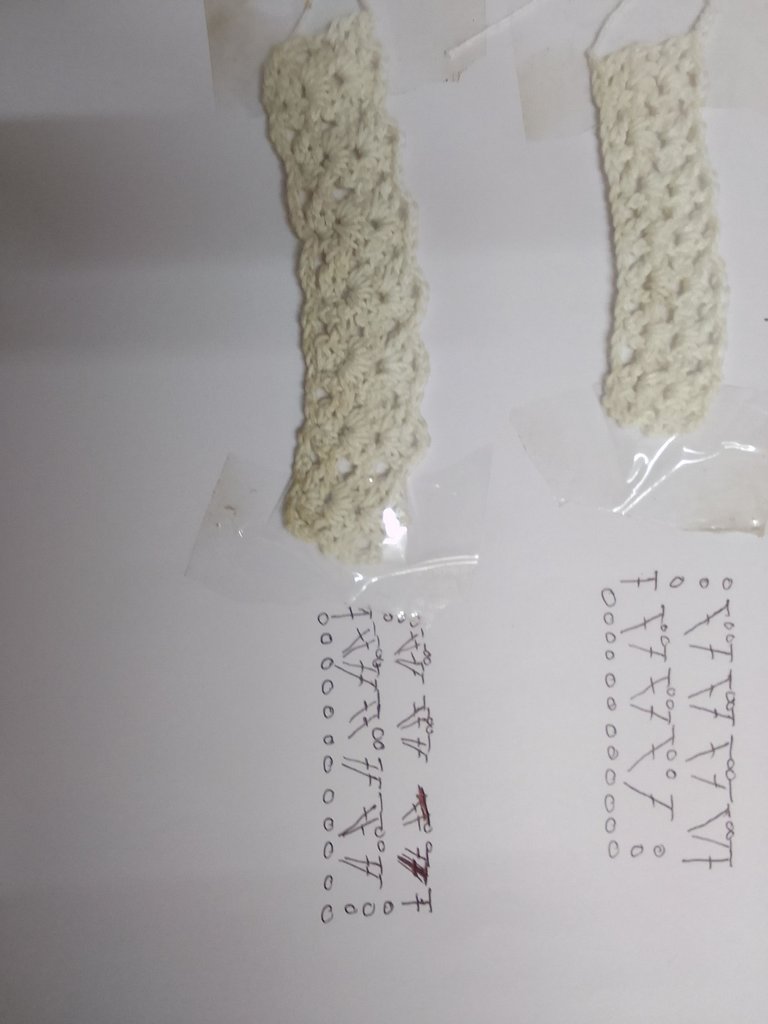
As I was taking classes I also learned to read patterns, because when you know how to read a pattern things become easier (at least that's what I think, and it happens to me both in knitting and sewing). This pattern is quite easy in my opinion, it can be done in a few minutes and it looks beautiful.
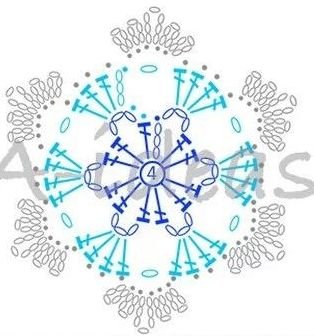
Pattern taken from Pinterest
But if you don't understand the patterns there's no need to worry, I'm going to explain how to make this snowflake step by step.
🧶 First we make the ring stitch to start with our Christmas ornament.

🧶 Then we are going to do 5 chain stitches. For those who do not know how this stitch is made I leave you an image with the steps to make the stitch.

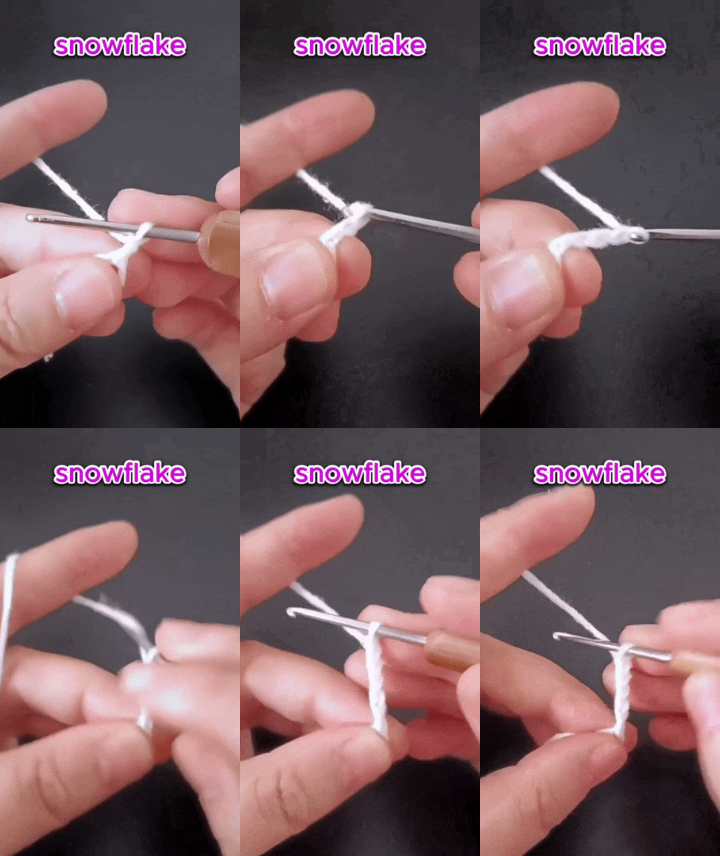
🧶 Now we make a varette by passing the needle through the ring of the beginning. Here I also leave the image of the steps for the vareta stitch.

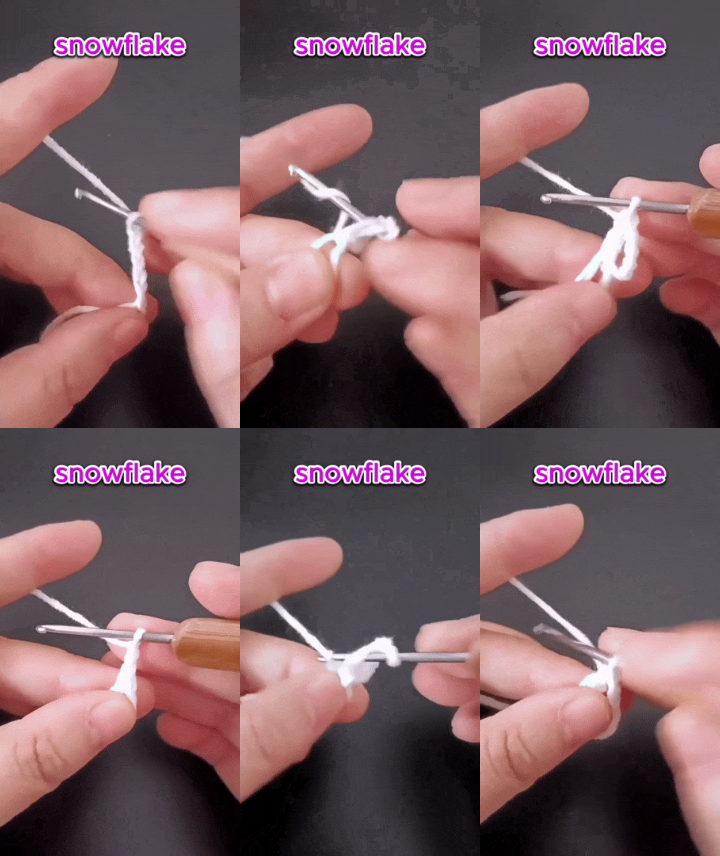
🧶 To continue the shape of our snowflake after making the string, we are going to make 2 chains, like this until we get to count 6 strings.
🧶 When we have already our 6 braids to close we are going to make 2 chains and pass the needle through the third chain from the beginning, we take the thread and pass it to the other end.
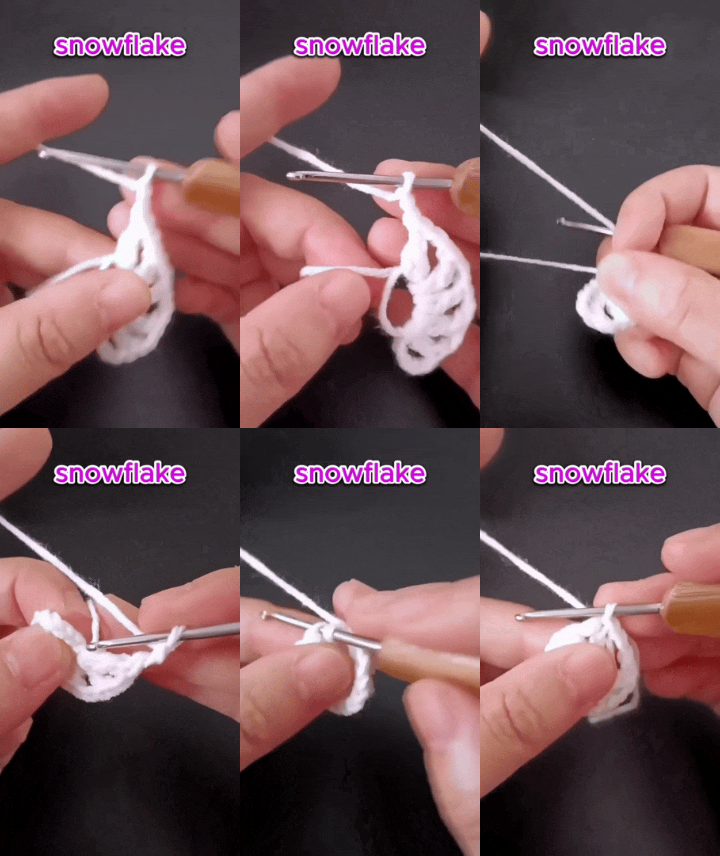
🧶 The stitch that was used to join both ends is called a satin stitch.
🧶 The next step will be to make 3 chains, followed by this one we will make 4 chains (except in the first section we will make 3 chains). It would be 4 strings and 2 chains, like this 👇.

🧶 At the end we close in the same way as before.

🧶 Finally we are going to make chains in this order: 3, 5, 7, 5, 3 and we are going to join them each with single crochet.
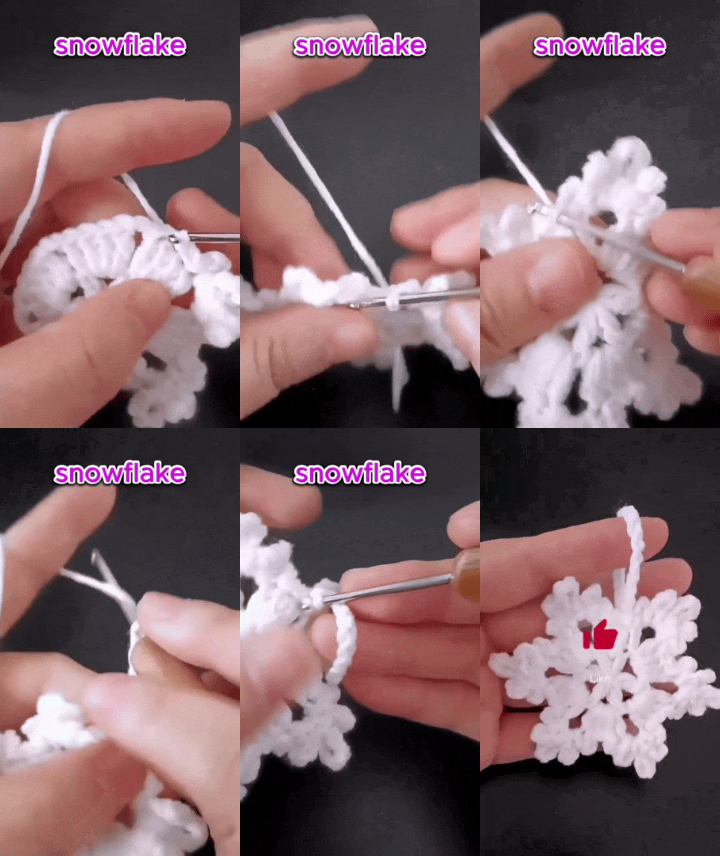
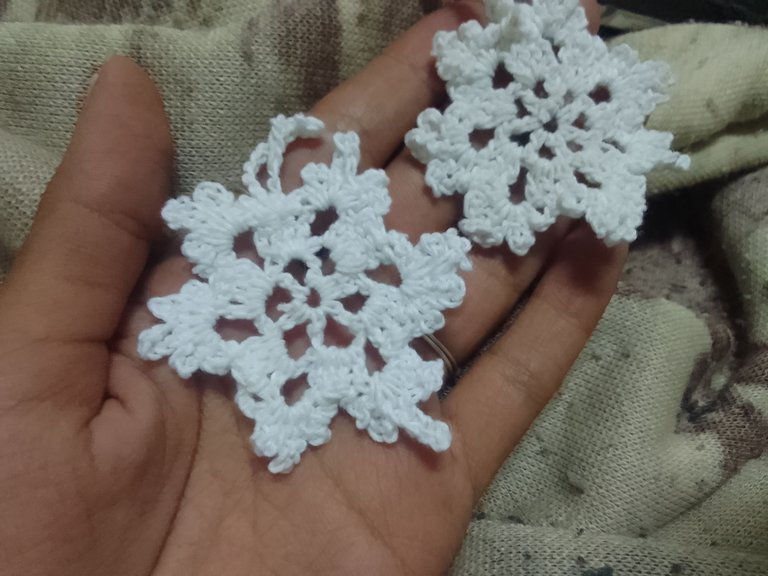
And so we have a beautiful snowflake to decorate our Christmas tree 🎄 or whatever we want.
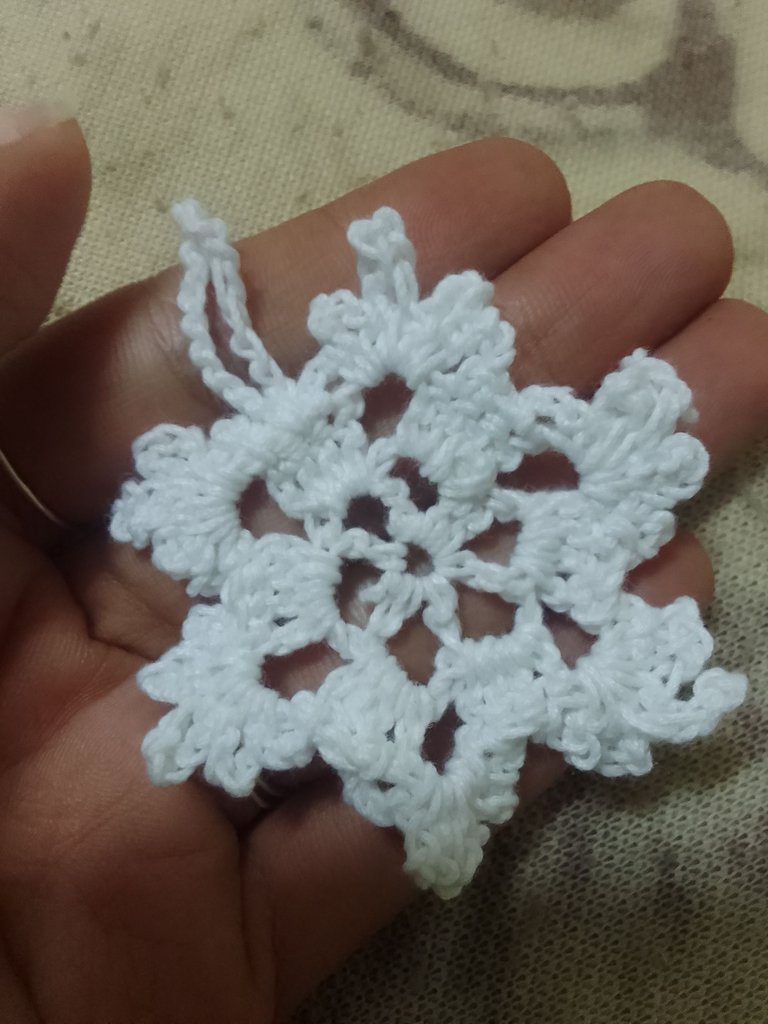
This is what it finally looks like ❄️. If you made it this far thank you so much ❤️✨. See you in the next post ❤️.
Hola amigos.
Hace aproximadamente he estado aprendiendo a tejer y me pareció buena idea compartir con ustedes mi avance.
Mi profesora dice que aprendo muy rápido, en tan solo 3 días me aprendí los puntos básicos para tejer cualquier cosa, aún me falta mucho por aprender pero ya he empezado a crear algunas cosillas como los amigurumis que me encantan y para estas fechas decembrinas quise hacer algunos adornos para mi cuarto, ya que no tengo árbol de Navidad 🎄(lo cual suena un poco triste pero que le voy a hacer😅).

Primero que nada quiero mostrarles los puntos que he aprendido. Empezar por los puntos básicos que son cadeneta, punto medio, media vareta, vareta, vareta doble y vareta triple (no se como les llamaran ustedes pero yo los aprendí así). El punto anillo lo aprendí por internet pero la verdad es que es bien fácil de hacer.


A medida que iba tomando clases también aprendía a leer los patrones, ya que cuando sabes leer un patrón las cosas se vuelven más fáciles (al menos eso pienso yo, y me sucede tanto en tejido como en la costura). Este patrón es bastante fácil a mi manera de ver, se puede hacer en uno pocos minutos y queda hermoso.

Patrón sacado de Pinterest
Pero si no entienden los patrones no hay que preocuparse, les voy a explicar como hacer este copo de nieve paso a paso.
🧶 Primero hacemos el punto anilla para empezar con nuestro adorno navideño.

🧶 Luego vamos a hacer 5 puntos cadeneta. Para los que no saben como se hace este punto les dejo una imagen con los pasos para realizar el punto.


🧶 Ahora hacemos una vareta pasando la aguja por la anilla del principio. Aquí también les dejo la imagen de los pasos para el punto vareta.


🧶 Para continuar la forma de nuestro copo de nieve luego de hacer la vareta, vamos a hacer 2 cadenetas, así hasta llegar a contar 6 varetas.
🧶 Cuando tengamos ya nuestras 6 varetas para cerrar vamos a hacer 2 cadenetas y a pasar la aguja por la tercera cadeneta del principio, tomamos el hilo y lo pasamos al otro extremo.

🧶 El punto que se usó para unir ambos extremos se llama punto raso.
🧶 El siguiente paso será hacer 3 cadenetas, seguidas a esta haremos 4 varetas (excepto en la primera sección que haremos 3 varetas). Serían 4 varetas y 2 cadenetas, así 👇.

🧶 Al finalizar cerramos de la misma forma que antes.

🧶 Por último vamos a hacer cadenetas en este orden: 3, 5, 7, 5, 3 y vamos a unirlos cada uno con puntos rasos.

Y así tenemos un hermoso copo de nieve para adornar nuestro árbol de Navidad 🎄 o lo que queramos.

Así es como se ve finalmente ❄️. Si llegaste hasta aquí muchas gracias ❤️✨. Nos vemos en el próximo post ❤️.
Disclaimer: los gifs los hice recortando este video.

