Virtual greetings to you all the members of the #diyhub community. How are you all doing today? I hope you all are doing better. I am here today to share with you all about my upholstery work. Today I upholst an old black car seat to a new one and the process is very simple.
It is always a thing of Joy to me any time I share my skill here with you all they learn from me while I also learn from other people's posts. I enjoy learning some skills here in this community.
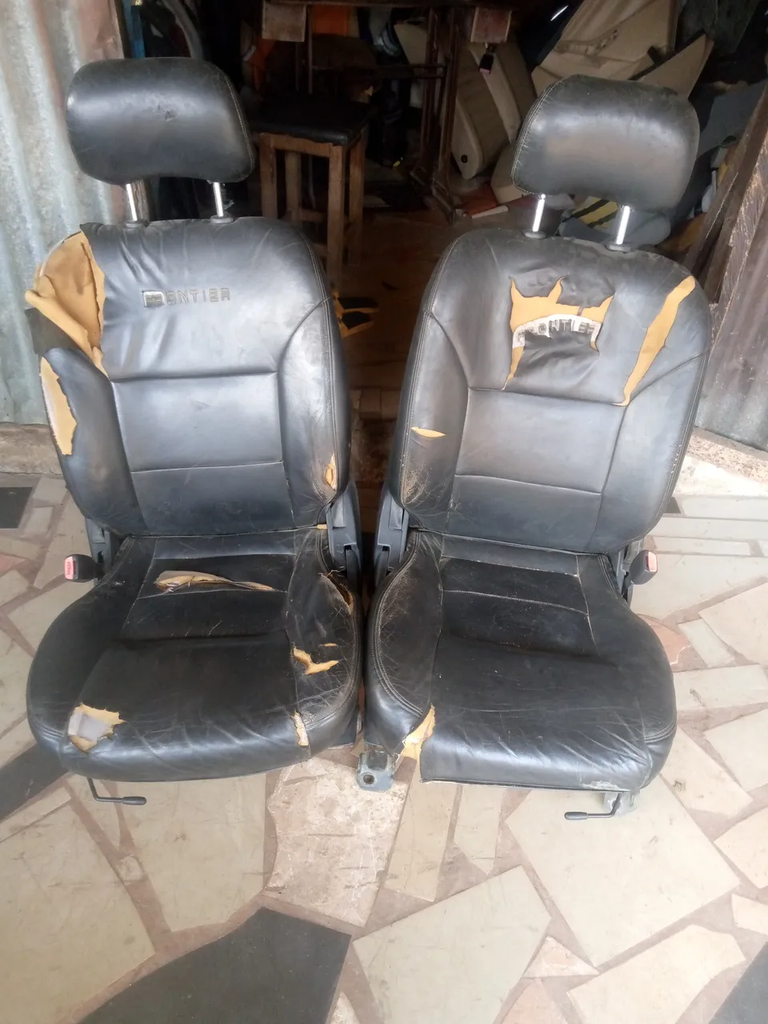
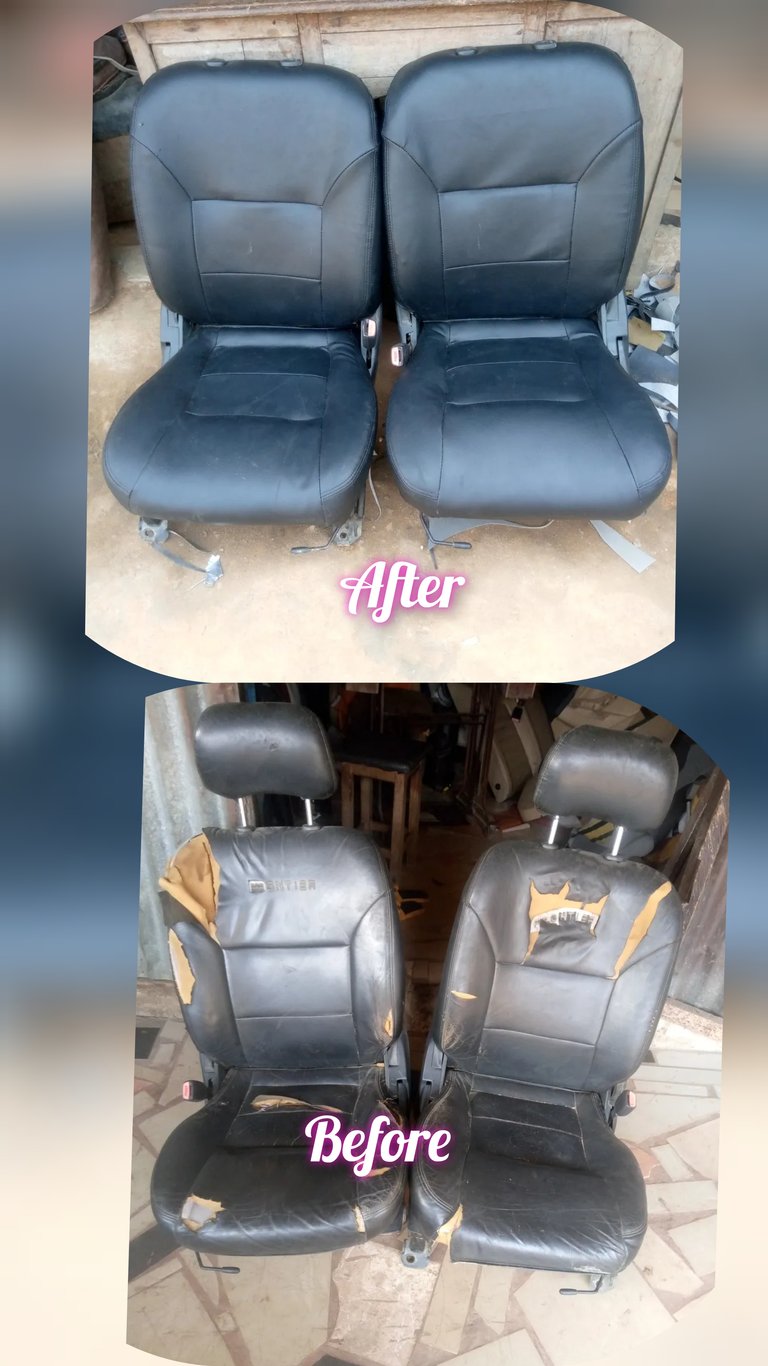
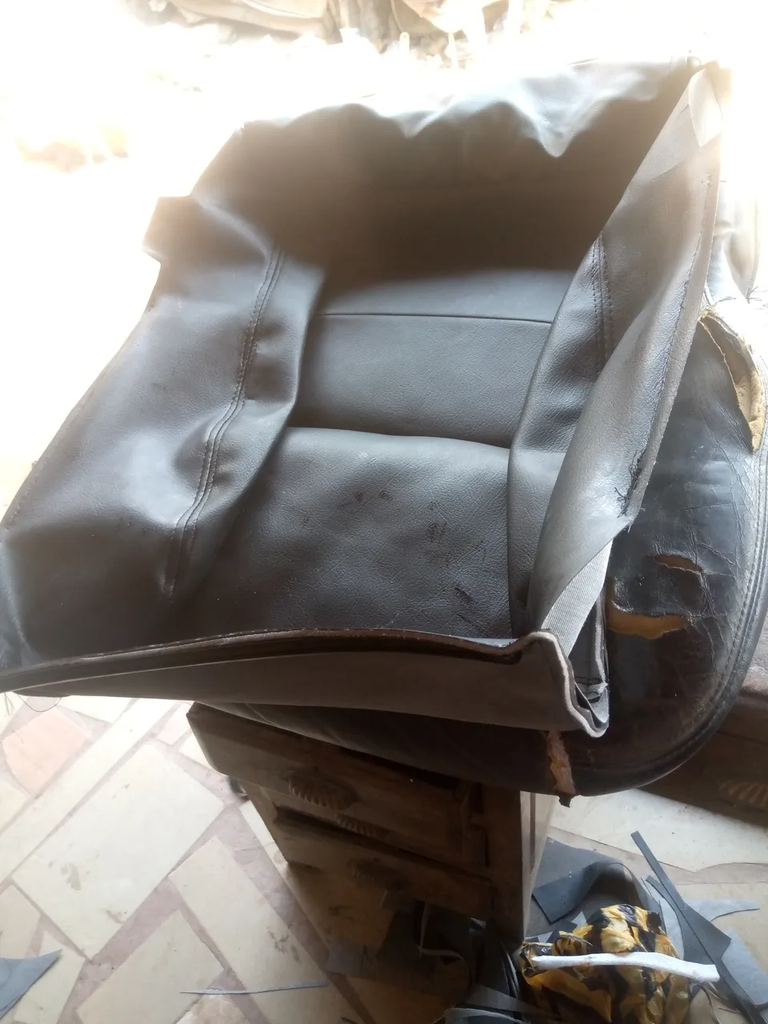
The picture above shows how the seat was before I started work. It was bad I mean very bad. All the old leather has cut off and it makes the car interior look dirty.
I asked him why he chose to make this seat look bad like this before bringing it up, but he told me he never knew they could resolve it until one of his friends introduced me to him.
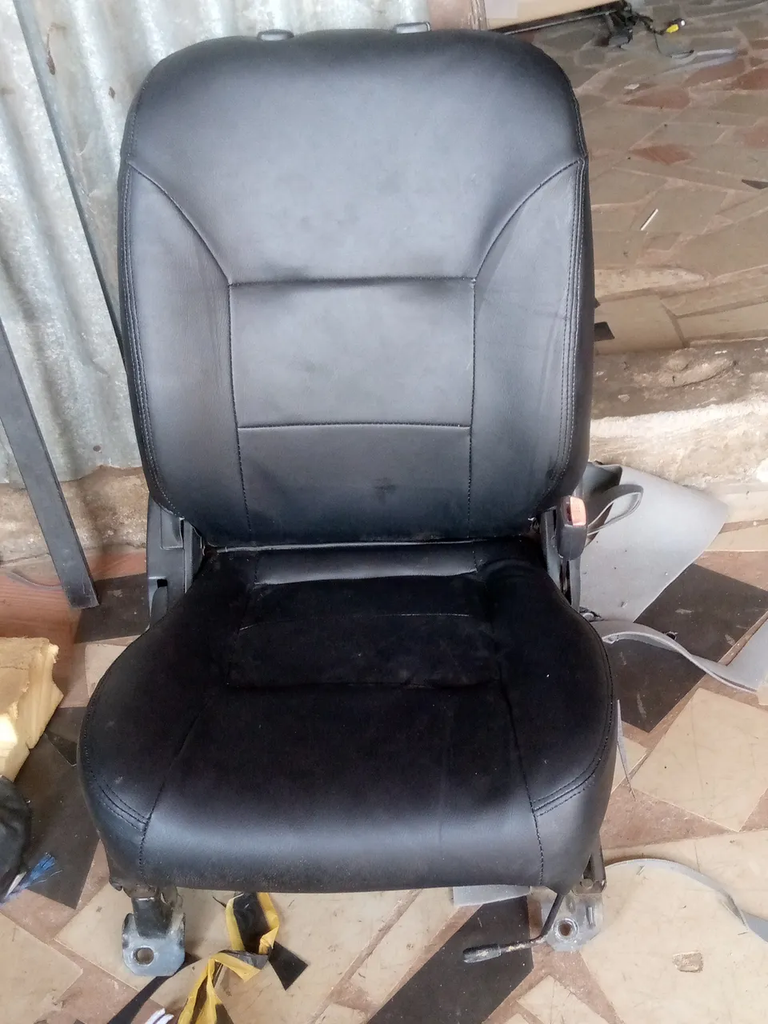
Here is the finished work

If you check the finished work you will see this looks very neat and new.
Since this is a diy post I will share with you guys some simple steps I took to make the work come real.
Material/tools used
- sewing machine
- thread
- new leather
- set of spanners
- screwdriver
- Sewing tape
- scissors
- chalk
- clips etc
To proceed, firstly I have to get all the materials needed at the market. I bought black leather, gum, roof material, and other important things needed to get the work done.
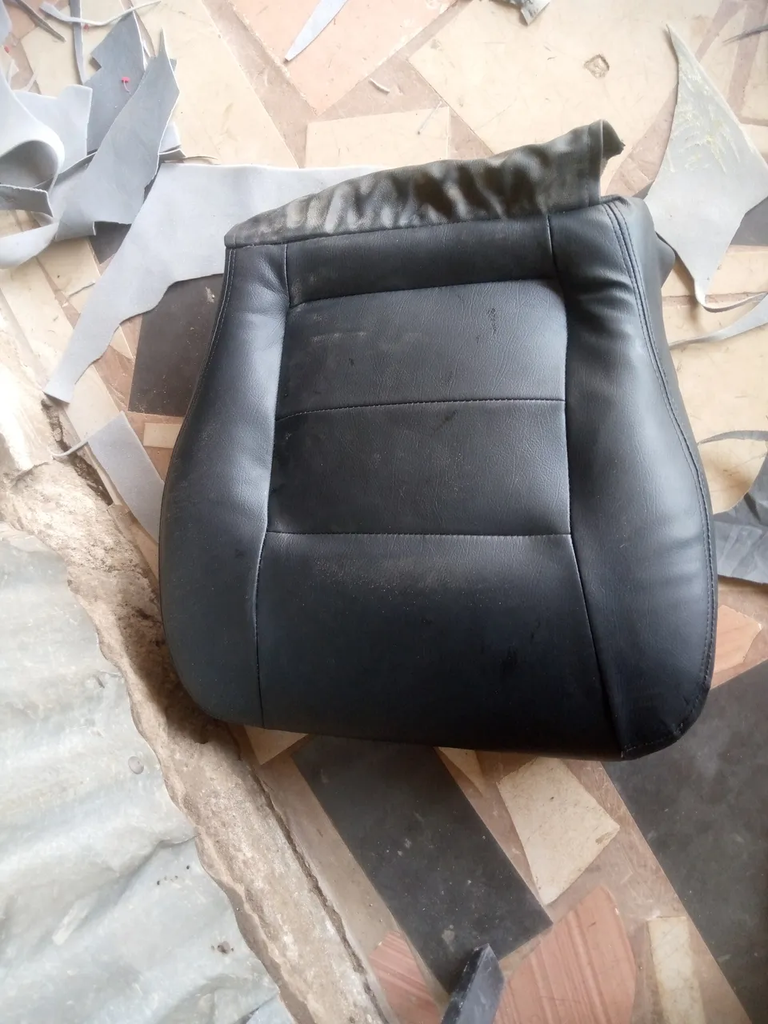
To make it easy and simple for me to get access to a hidden part of the seat, I have to lose the seat separately. See the photo below.

Since both seats look the same, I will use one of them for my illustration.
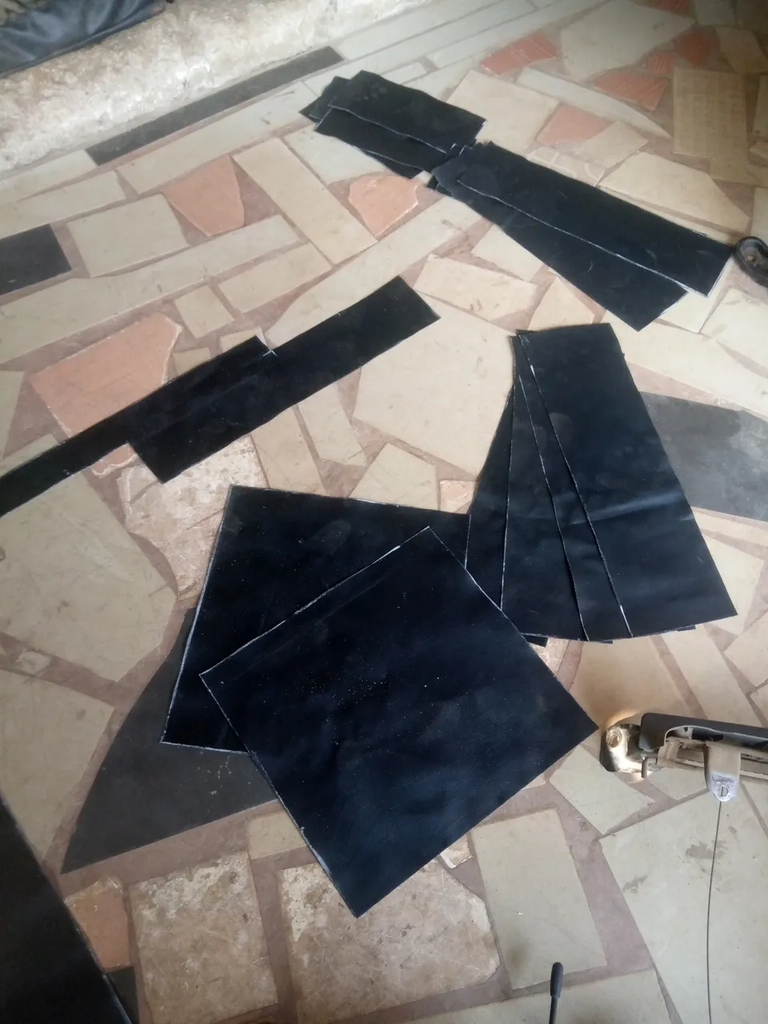
After losing the seat, I used my measurement tape to measure out the vertical and the horizon length of each pattern of the seat and then write it on the seat.

I then transfer the measurements to the new leather and then mark it by drawing a line to meet with the Mark point.

I used scissors to cut them out Following the draw line on the new seat.
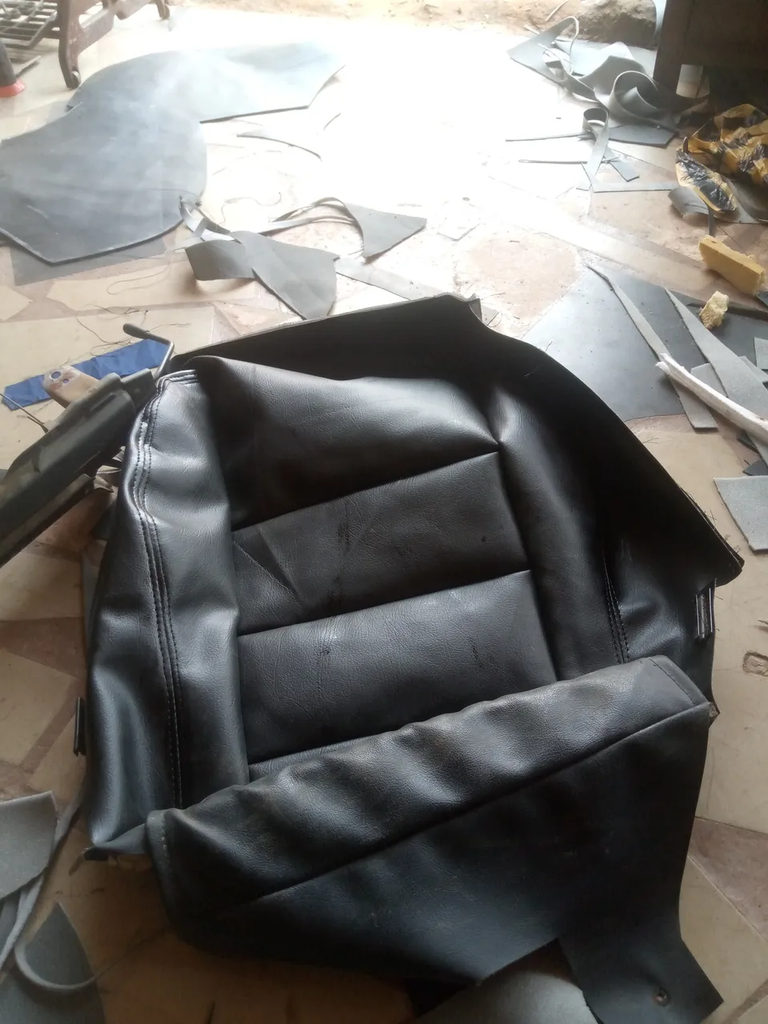
After cutting them out, the next thing to do is to form the pattern I will be working with. I place the cut material on its position, trace out the shape, place it on a roofing material, and then gum them together just to make it thick and smooth.

I then cut it out for the Sewing process to begin.

I then use my sewing machine to sew those patterns together carefully and I try my best to make sure the sewing is neat.

Here is the new sew seat cover.
I then clip it to the seat foam with the help clips and this is very simple to do.
Here is how it looks after clipping it.
I then do the same to the back seat too and here is the outcome of it.

I then tight back the seat and here is the finished work.
I do the same thing to the other one and here is the finished work for the two seats.
Work well done. How is the outcome of the work? Hope is nice. I would love to hear from you.
Thanks, guys for going through. Your support is needed
Posted Using InLeo Alpha
