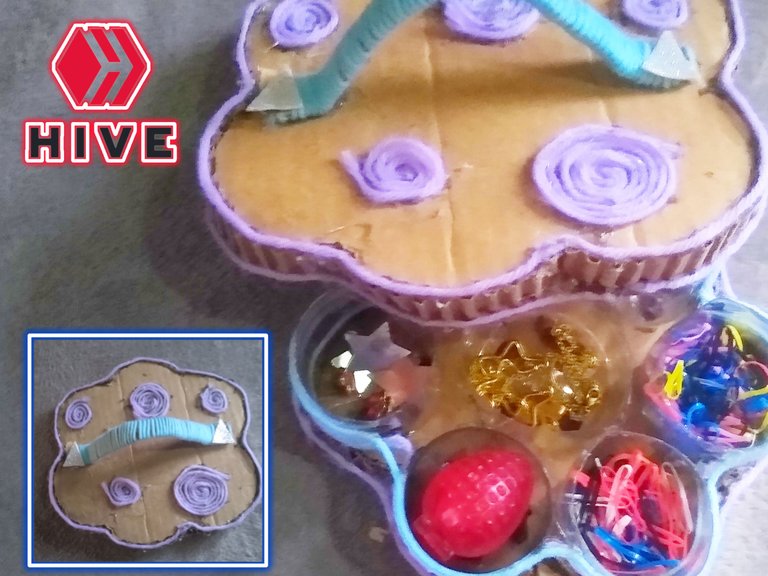
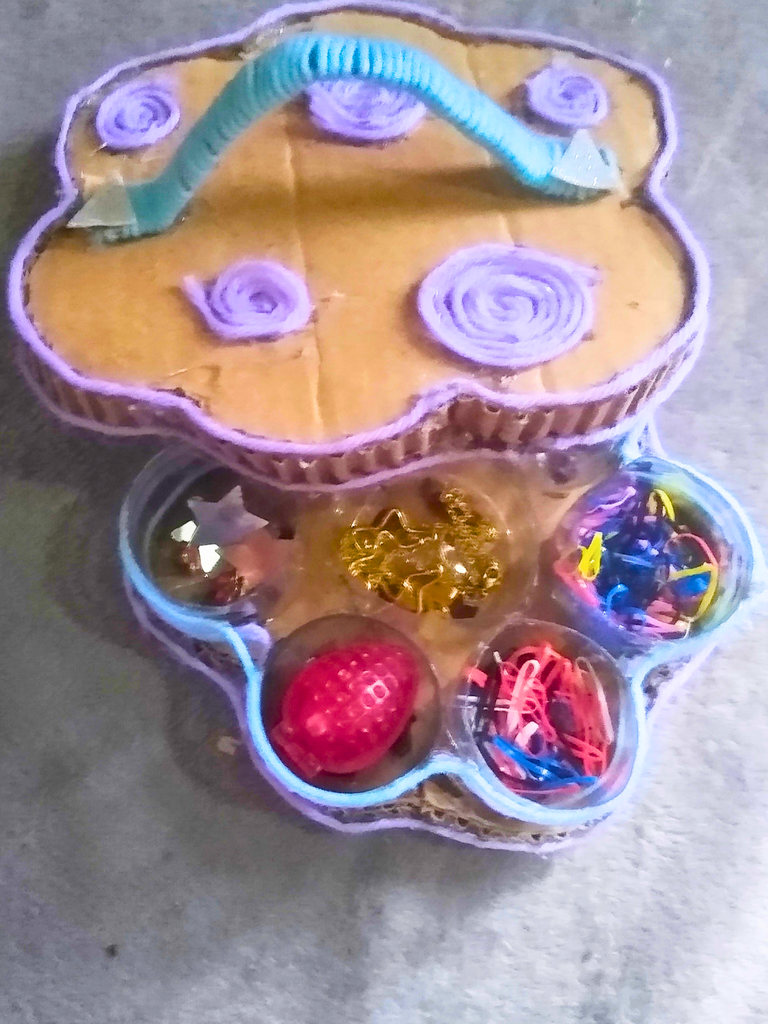
Hola hivers bienvenidos nuevamente para hoy te queremos compartir este útil y precioso cofre algunos de sus materiales son reciclados además que te servirá para guardar en cada uno de sus compartimentos diferentes cositas como por ejemplo: ligas para el cabello aretes etc.
Hello hivers welcome back for today we want to share with you this useful and beautiful chest, some of its materials are recycled and it will serve you to store in each of its compartments different things such as: hair bands, earrings, etc.
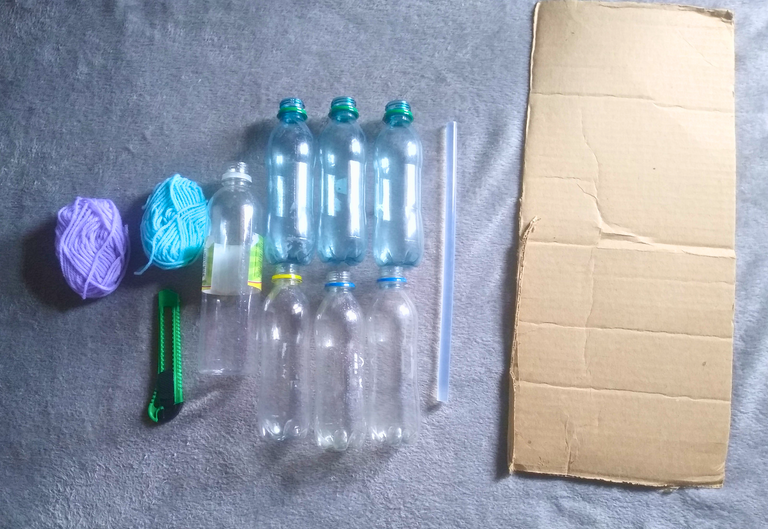
MATERIALES
- 7 botellas plásticas de cualquier color
- 1 barra de silicona
- 1 bisturí(o tijeras)
- cartón
- lana del color que prefieras
MATERIALS
- 7 plastic bottles of any color
- 1 silicone stick
- 1 scalpel (or scissors)
- cardboard
- wool in the color of your choice
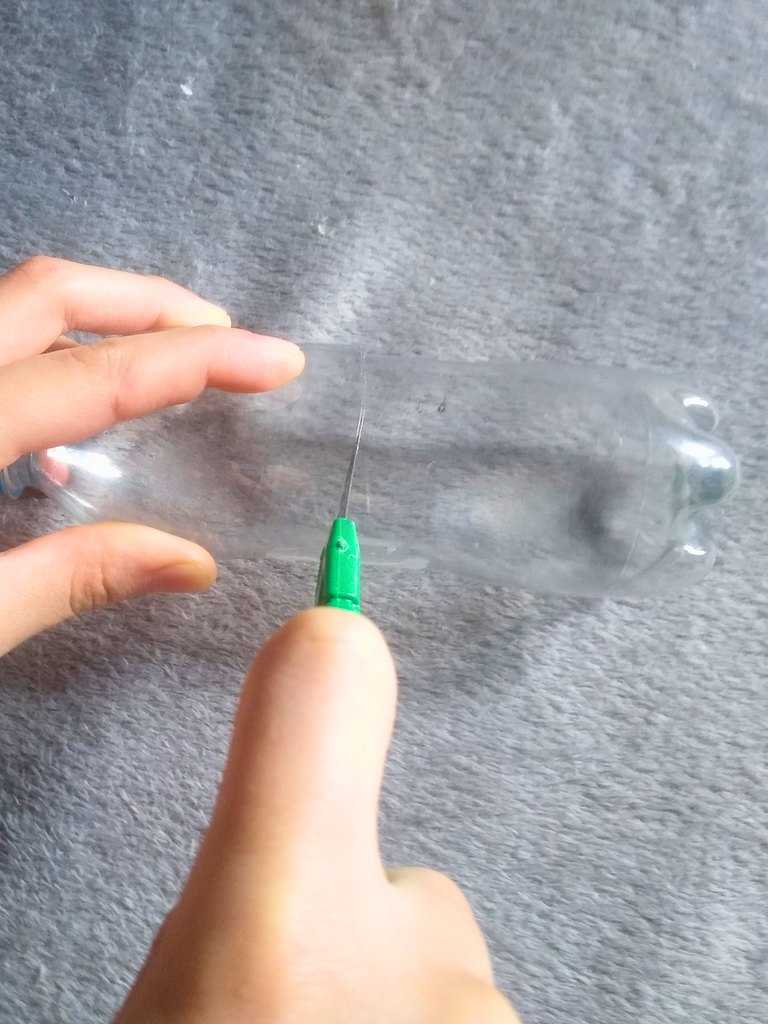
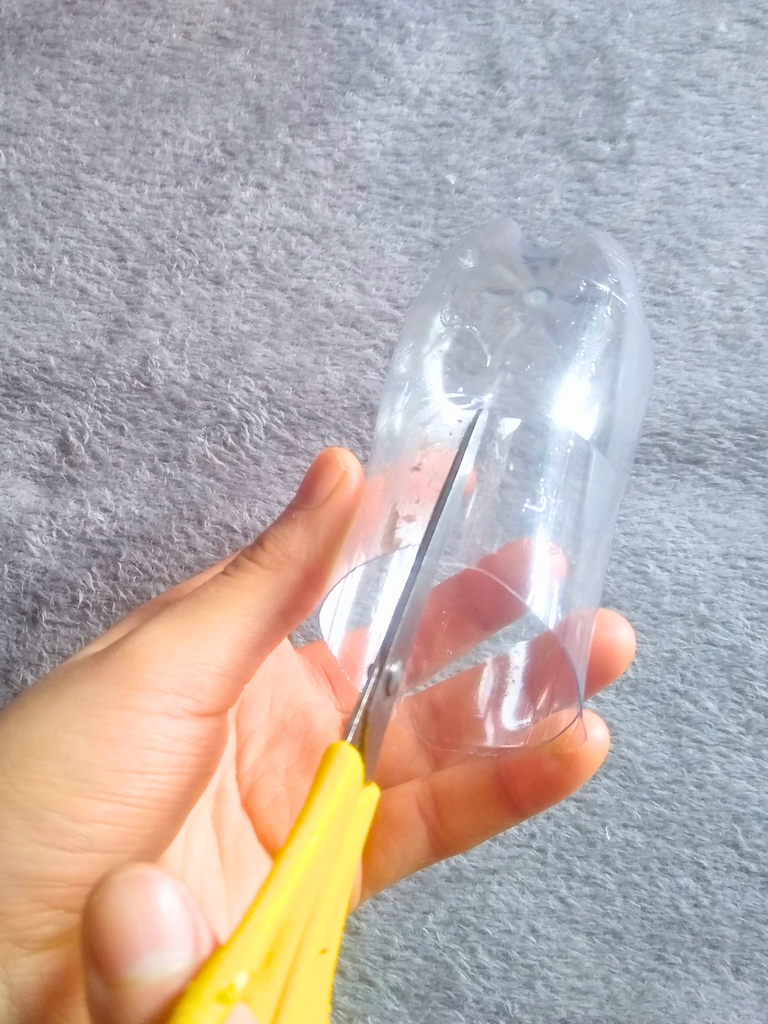
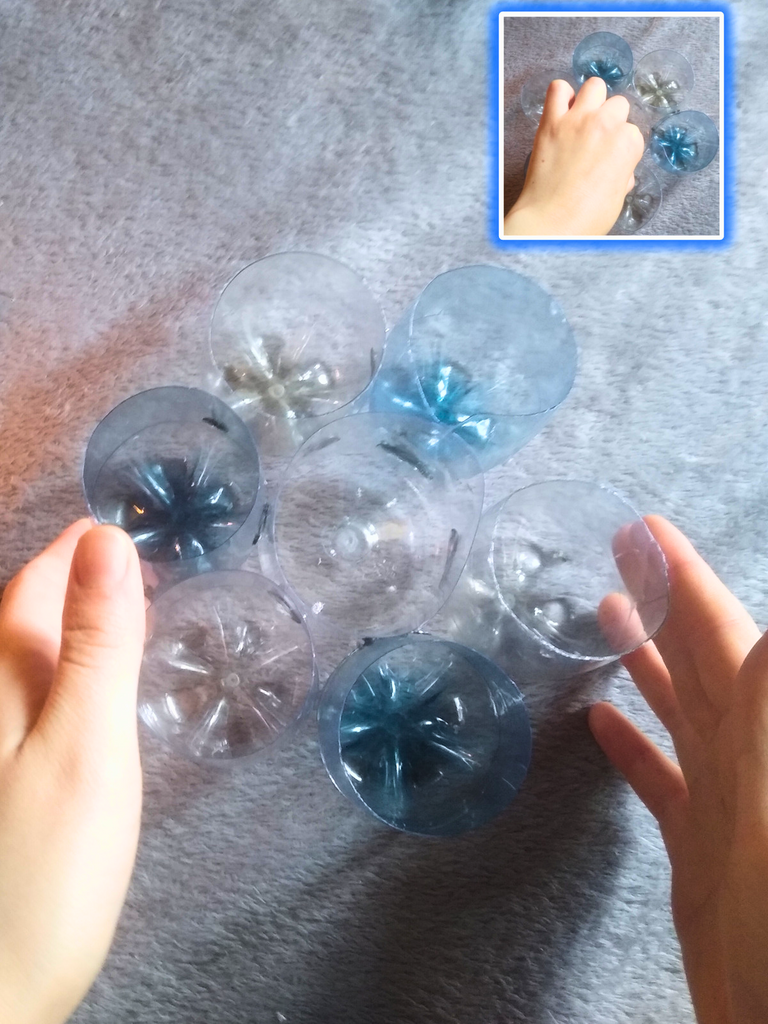
Paso 1
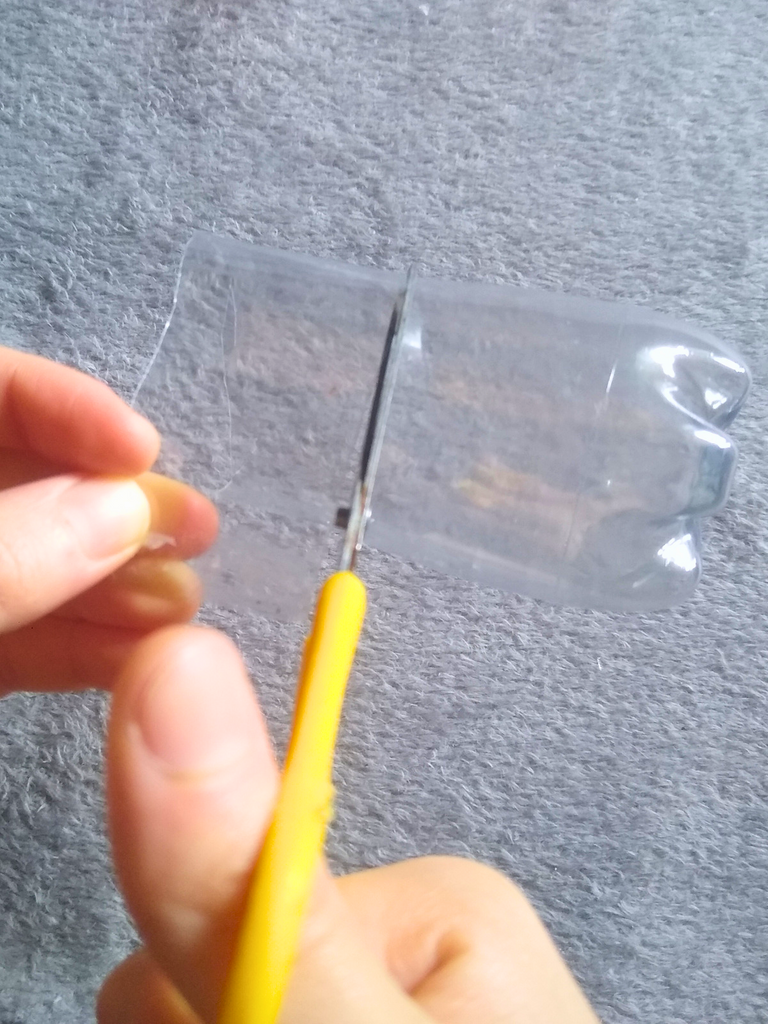
Acá vamos a cortar con un bisturí o lo que tengas a la mano todos nuestros tarritos reciclados por la mitad así de esta forma como puedes observar en las fotos aquí no esta por demás decirte que tengas especial cuidado al manipular la herramienta con que vas a cortar las botellas, luego de que están cortadas con unas tijeras vamos a emparejar el corte para que todas las botellas nos queden del mismo tamaño en esta ocasión se me dificulto conseguir todas las botellas del mismo color además como puedes observar la botella que va en el medio tiene un mayor tamaño que las de los laterales.
Step 1
Here we are going to cut with a scalpel or whatever you have at hand all our recycled jars in half in this way as you can see in the photos here is not superfluous to tell you to be especially careful when handling the tool with which you will cut the bottles, after they are cut with scissors we will even out the cut so that all the bottles are the same size on this occasion I had difficulty getting all the bottles of the same color also as you can see the bottle that goes in the middle has a larger size than those on the sides.
 |  |  |  |
|---|
Paso 2
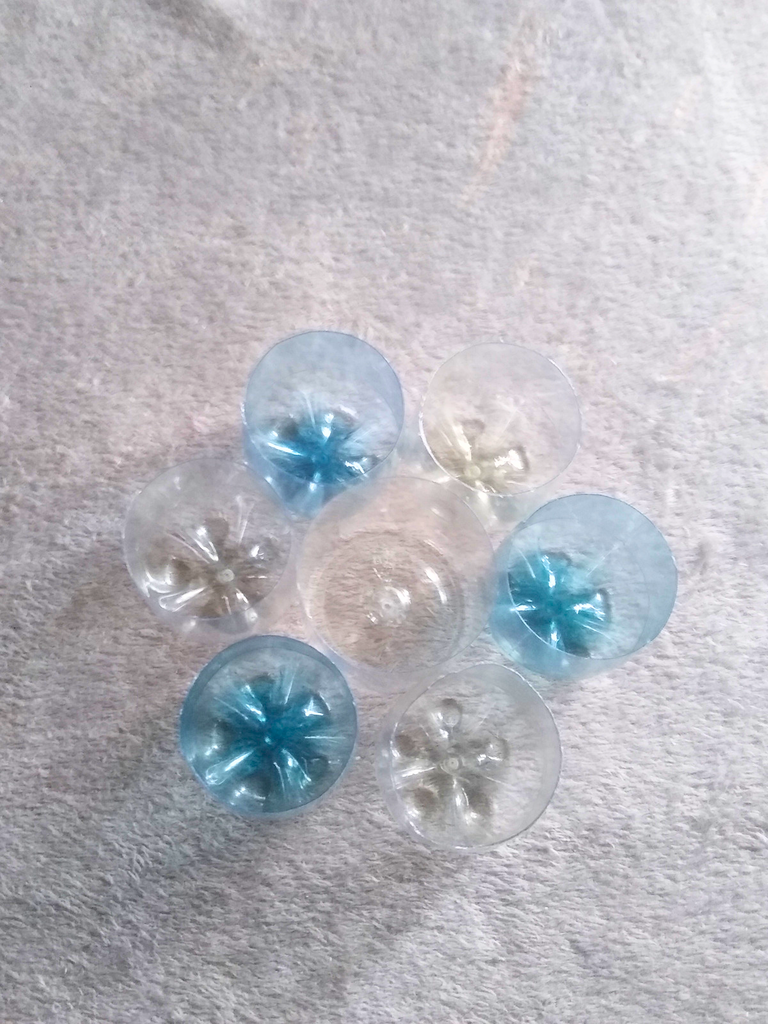
Pues en este paso lo que haremos será pegar cada parte una con la otra para que compongan una sola pieza y queden bien sujetas entre si como te muestro en las fotos ya pegadas las 7 partes quedan como observas quisiera decirte que al principio pensé que no quedaría bonito con las botellas de diferentes colores pero a medida que se fue haciendo el trabajo nos dimos cuenta que nos gusto mucho como estaba quedando.
Step 2
Well in this step what we will do is to glue each part one with the other so that they compose a single piece and are well attached to each other as I show you in the photos and glued the 7 parts are as you see I would like to tell you that at first I thought it would not be nice with the bottles of different colors but as we were doing the work we realized that we really liked how it was getting.
 |  |  |
|---|
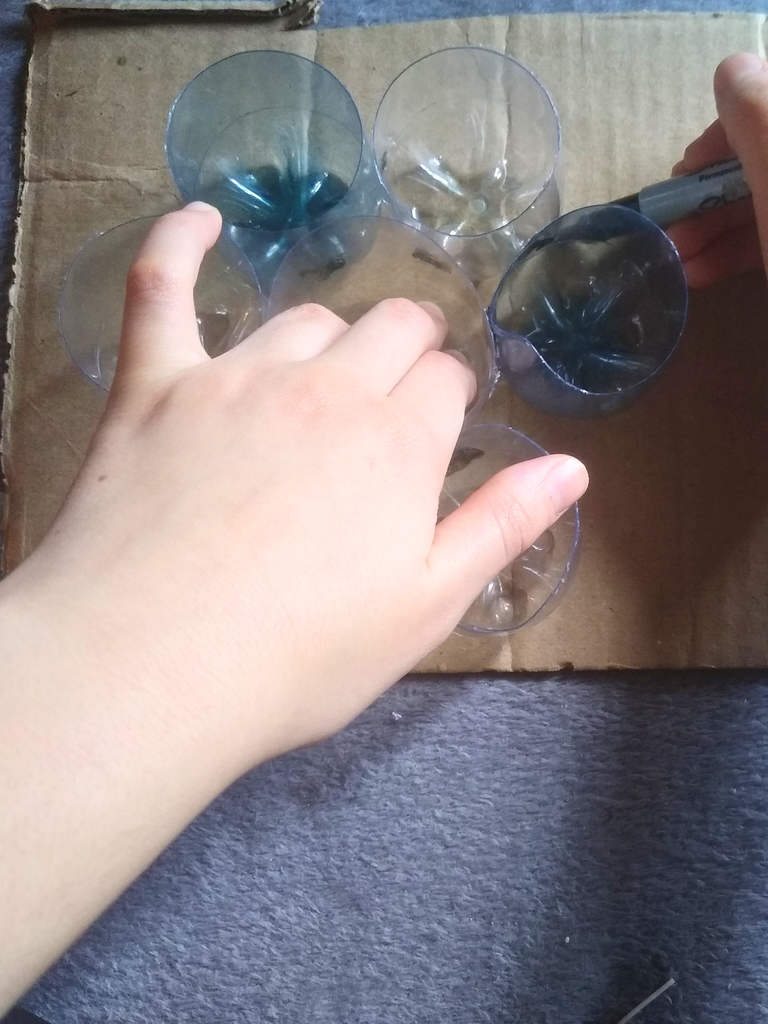
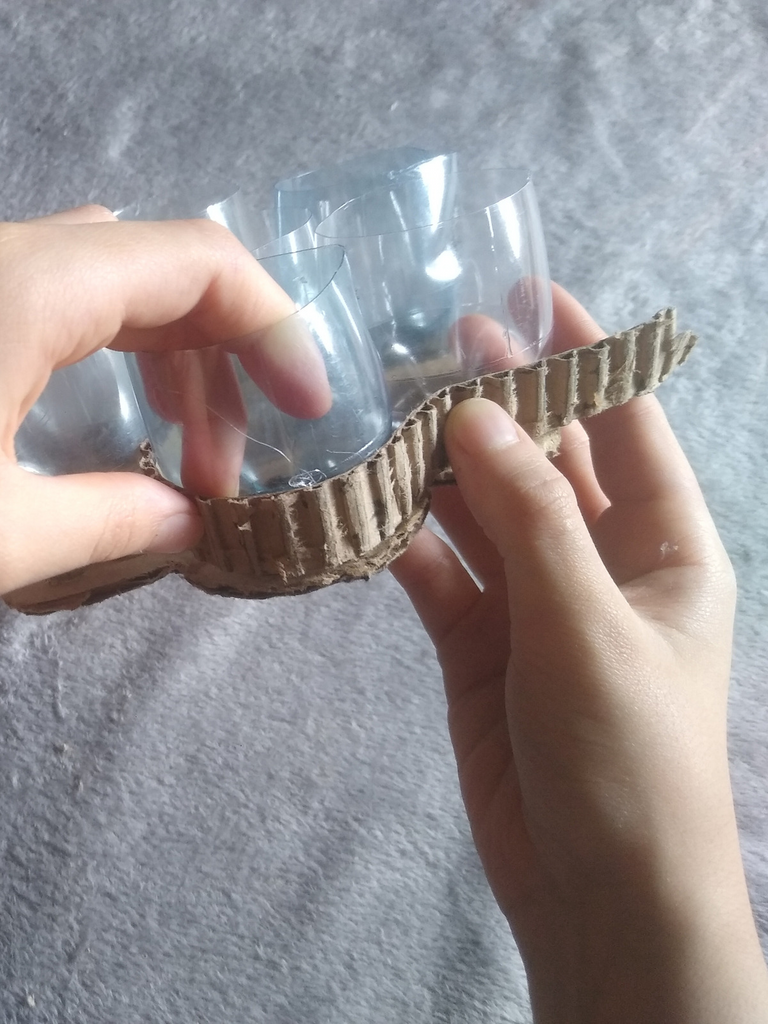
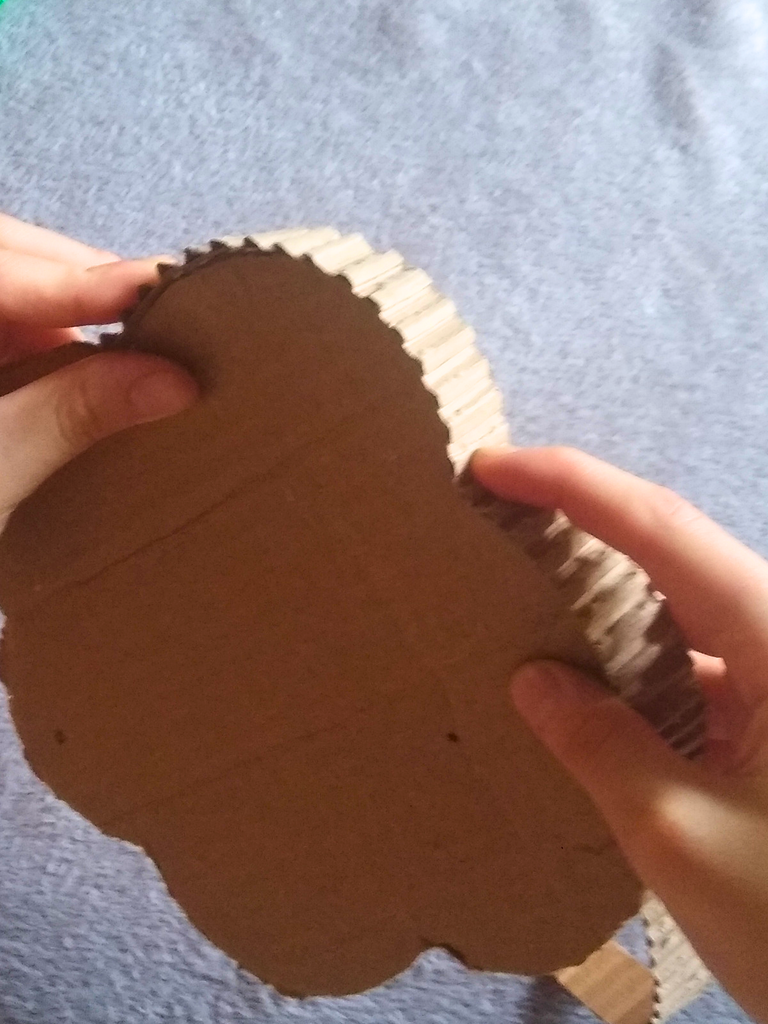
Paso 3
Acá encima del cartón ponemos las botellas ya pegadas entre si y con un marcador o lápiz delineamos la forma que nos entrega las mismas botellas al estar pegada creando la silueta que será la base del cofre por eso no te especifique medidas para el cartón en los materiales ya que eso dependerá mucho del tamaño de las botellas que elijas utilizar , además cuando ya este cortada nuestra silueta esa misma la pondremos sobre el cartón sobrante y dejaremos una margen de un centímetro para elaborar la tapa del cofre, una vez listas las dos partes de silueta que necesitamos, pegamos la base que sacamos para la parte inferior del cofre alas botellas y queda como esta en la foto
Step 3
Here on top of the cardboard we put the bottles already glued together and with a marker or pencil outline the shape that gives us the same bottles to be glued together creating the silhouette that will be the base of the chest so do not specify measures for the cardboard in the materials as that will depend on the size of the bottles you choose to use, also when our silhouette is already cut, we will put it on the remaining cardboard and leave a margin of one centimeter to make the lid of the chest, once ready the two parts of silhouette we need, we glue the base that we took out for the bottom of the bottles chest and it looks like this in the photo.
 |  |  |
|---|
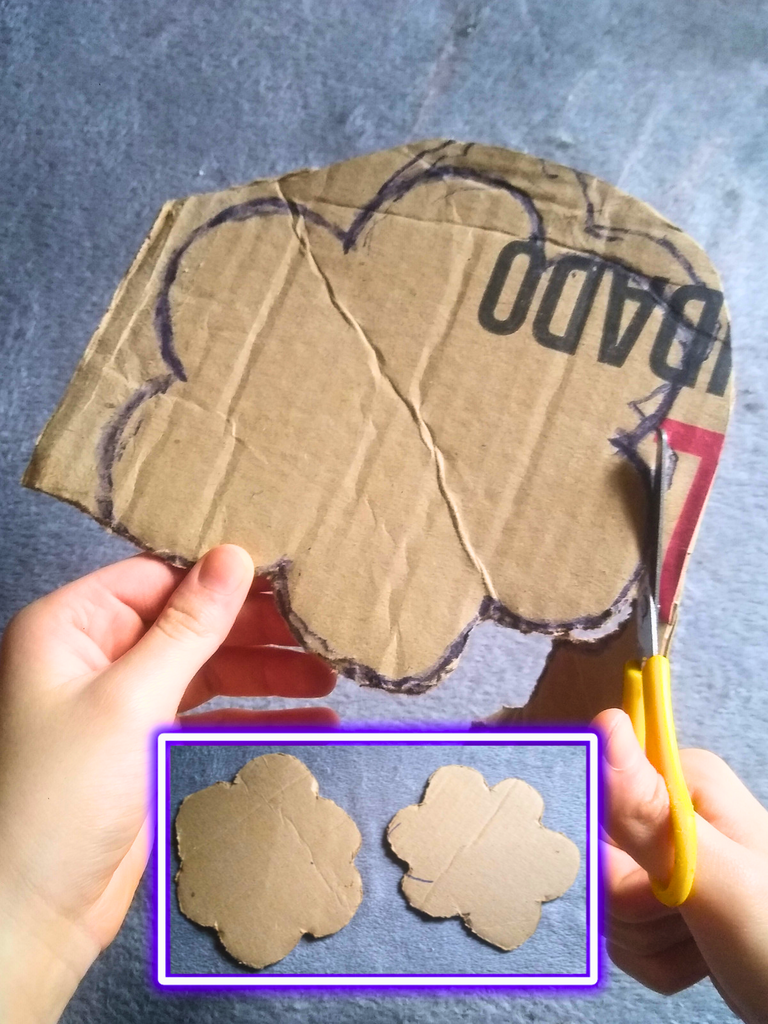
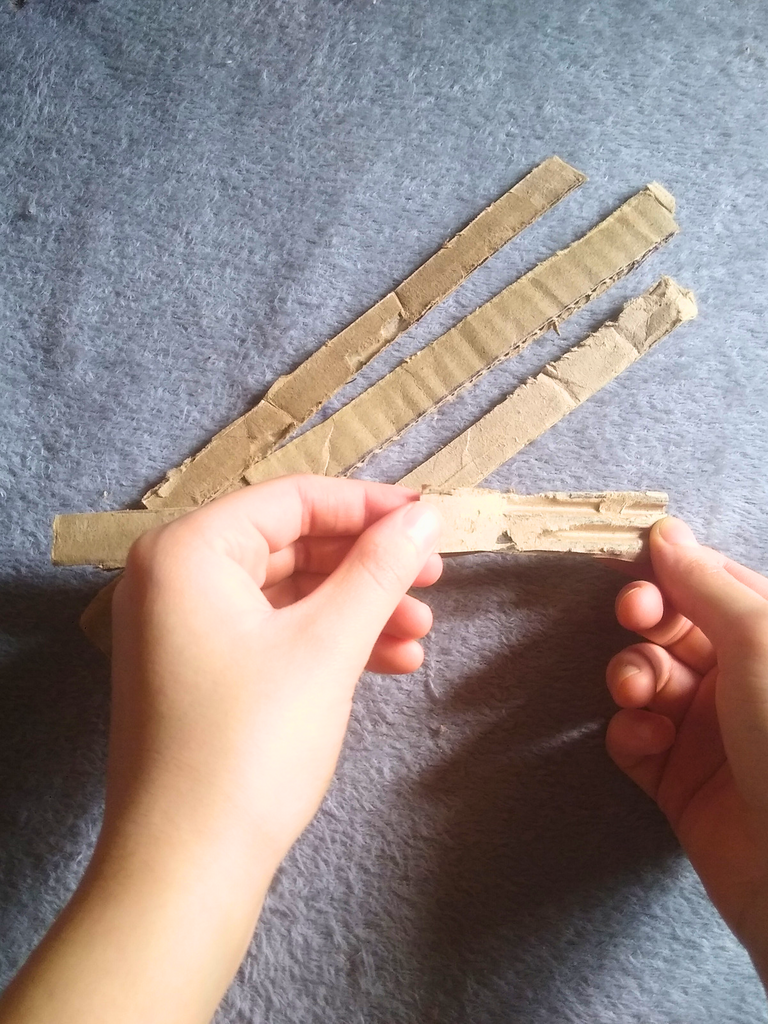
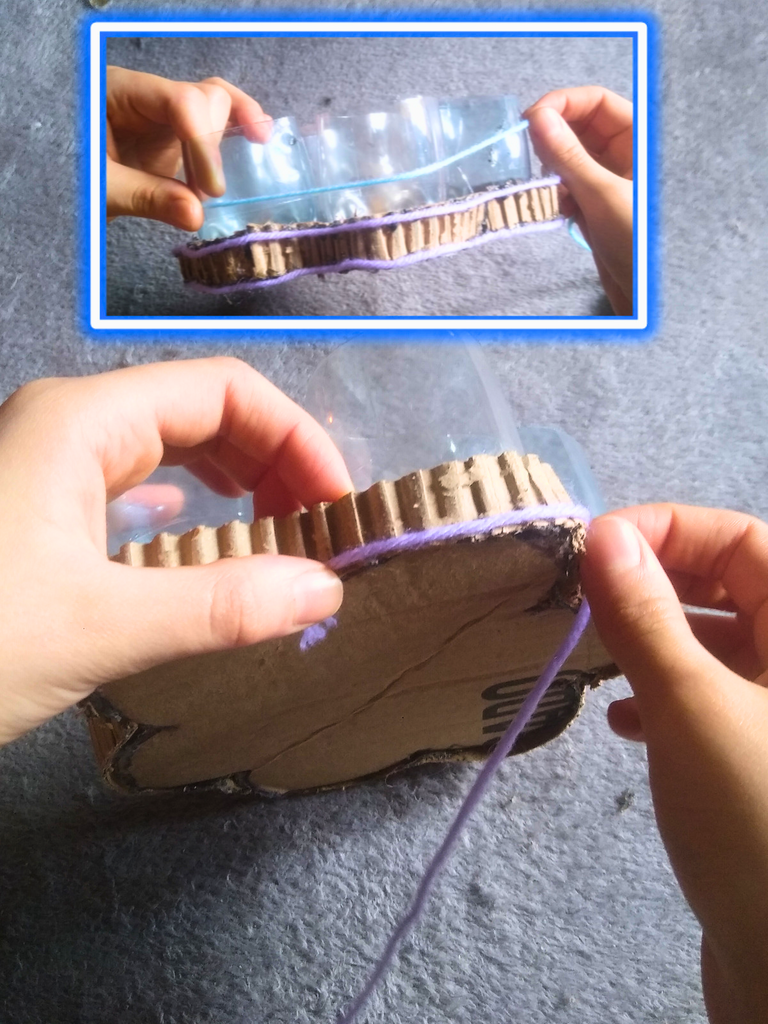
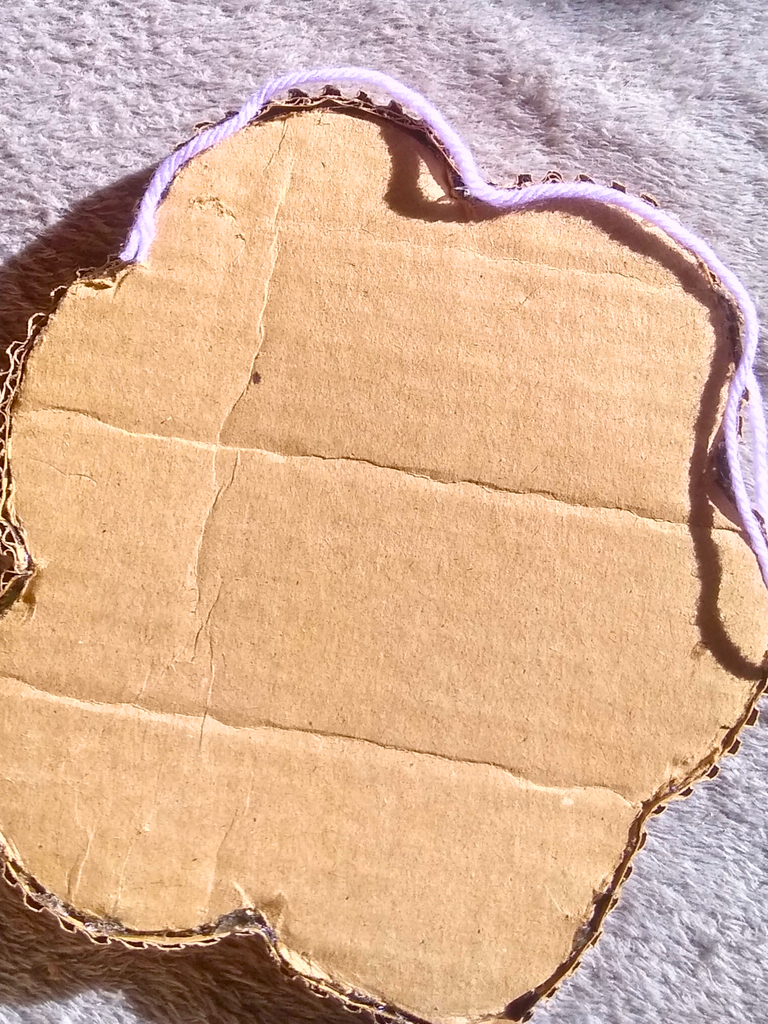
Paso 4
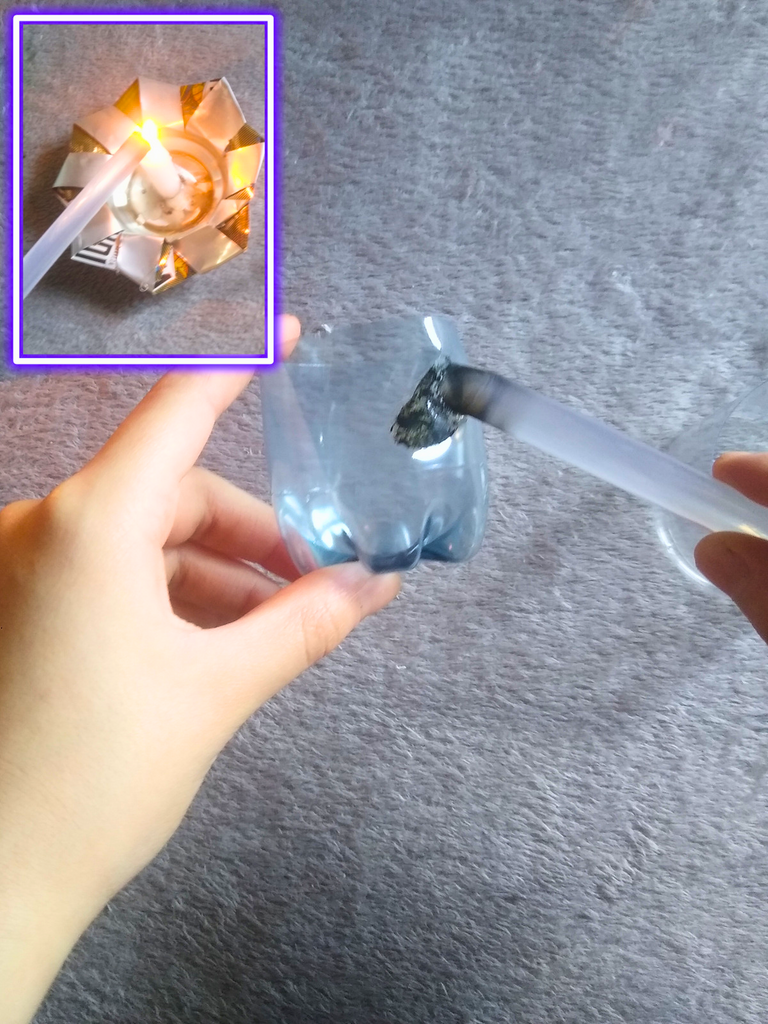
Aquí vamos a elaborar la tapa de nuestro cofre esta lleva un poco mas de precisión debemos cortar tiras de un centímetro pero para que te quede el corrugado del cartón expuesto una vez le hallamos quitado la capa superior del mismo deberás cortar las tiras de manera horizontal, pegamos en la parte inferior del cofre el cartón ya corrugado cuando terminemos de pegarlo le empezaremos a pegar lana del color que tu prefieras en los bordes del cartón que acabamos de pegar y también alrededor de las botellas, la silueta que teníamos reservada para la tapa le hacemos el mismo proceso le pegamos tiras de nuestro cartón corrugado así como ves en la foto ,luego por todo el borde pegamos lana.
Step 4
Here we are going to elaborate the lid of our chest this takes a little more precision we must cut strips of one centimeter but so that you have the corrugated cardboard exposed once we have removed the top layer of the same you must cut the strips horizontally, we glue on the bottom of the chest the corrugated cardboard and when we finish gluing it we will start gluing wool of the color you prefer on the edges of the cardboard that we just glued and also around the bottles, the silhouette that we had reserved for the lid we do the same process we glue strips of our corrugated cardboard as you see in the picture, then all around the edge we glue wool.
 |  |  |  |  |
|---|
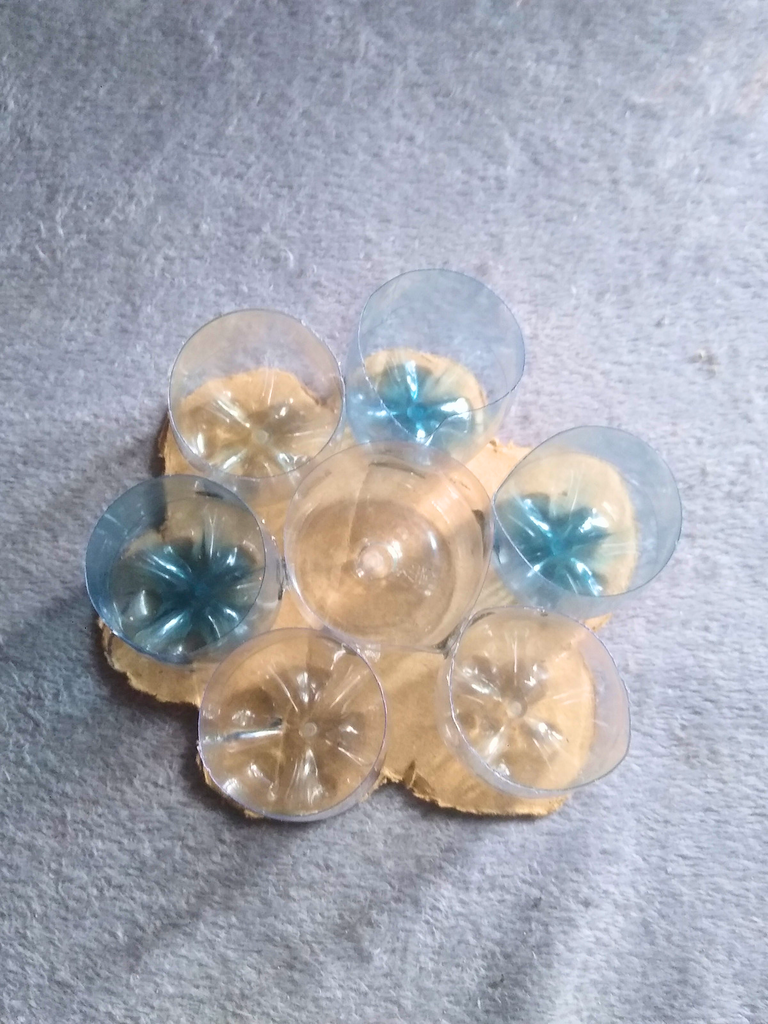
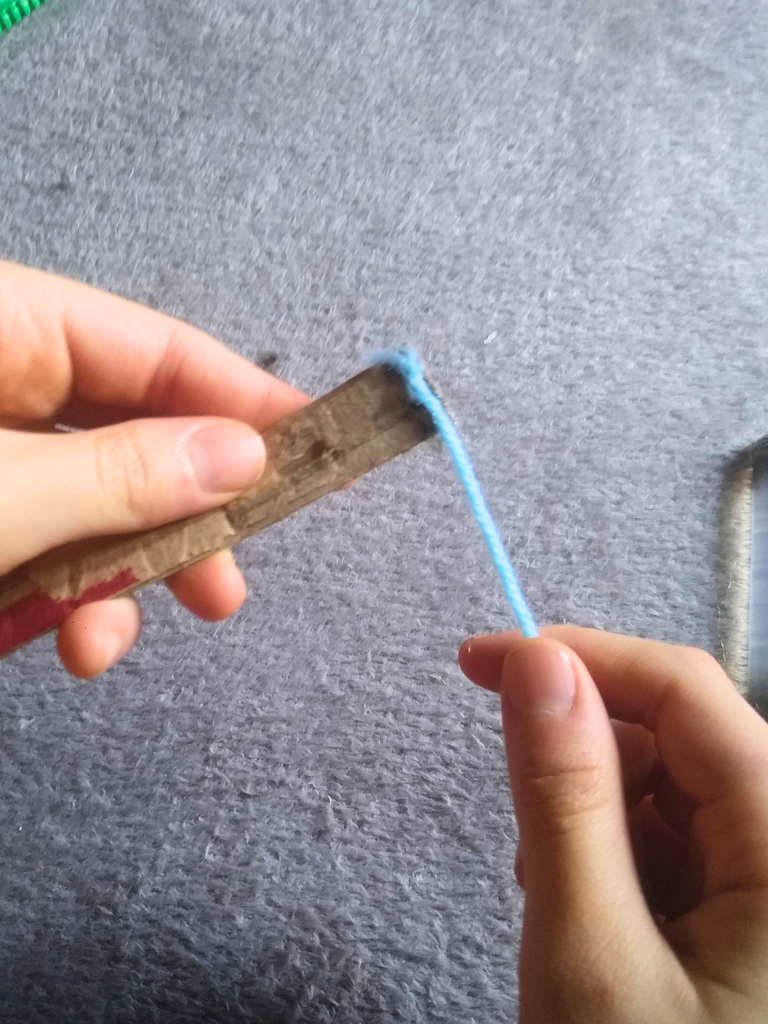
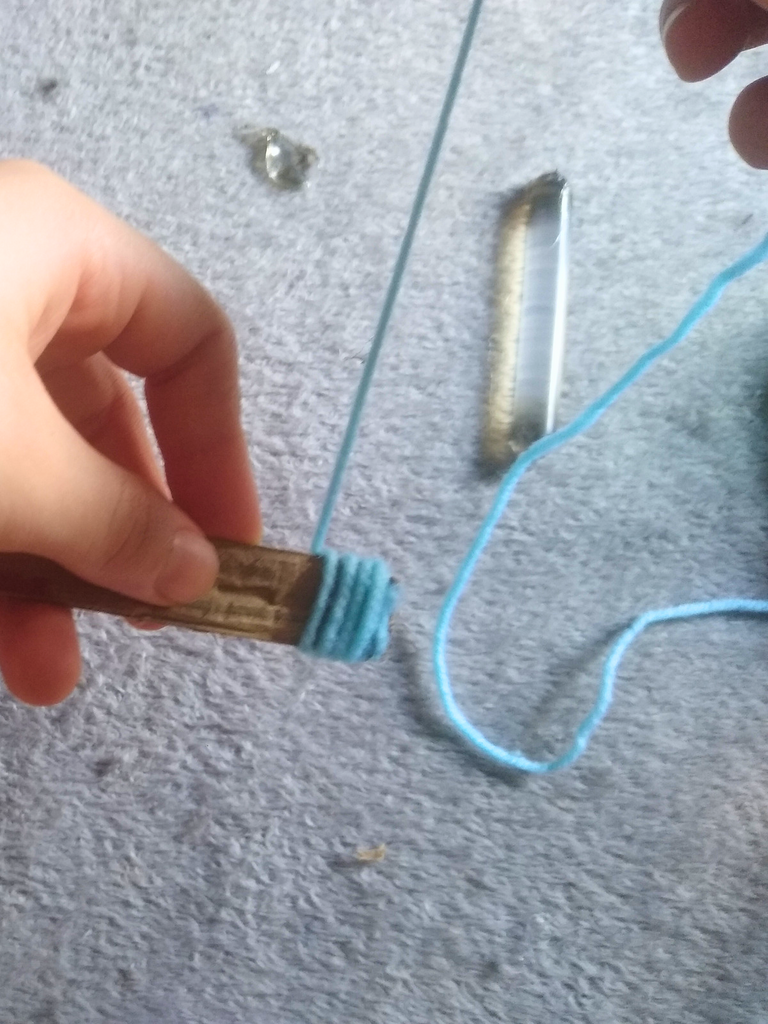
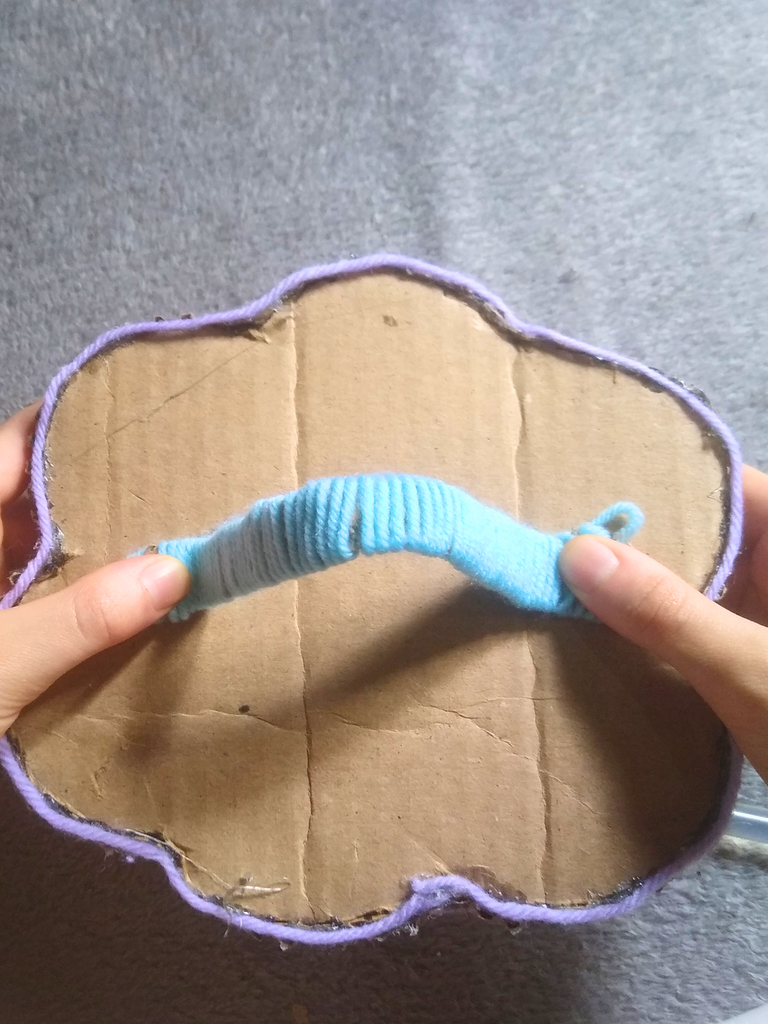
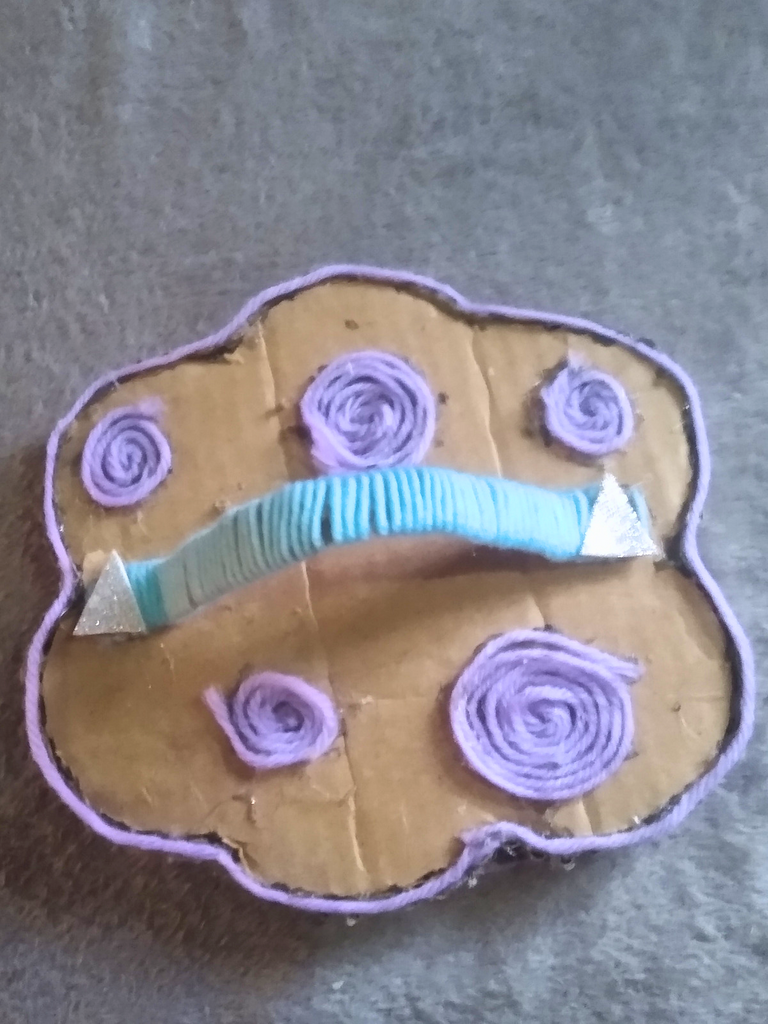
Paso 5
Vamos a elaborar el soporte que va encima de la tapa para poder abrirlo también se utilizo una tira de un centímetro y el largo será a tu gusto lo forramos con lana de cualquier color yo utiliza azul cuando ya lo tenemos bien forrado con lana procedemos apegarla de un extremo a o otro en todo el centro de la tapa y como toque personal le puse a cada extremo una figura geométrica en fomi y unas circulas hechos con lana como decoración final de la tapa.
Step 5
We are going to elaborate the support that goes on top of the lid to be able to open it also used a strip of a centimeter and the length will be to your taste we cover it with wool of any color I used blue when we already have it well lined with wool we proceed to attach it from one end to the other throughout the center of the lid and as a personal touch I put at each end a geometric figure in fomi and some circles made with wool as final decoration of the lid.
 |  |  |
|---|
 |  |
|---|
Gracias por llegar hasta aquí por leer y si te gusto el post no olvides regalarme tu beneficioso like suscribirte y dejarme en comentarios que te pareció lo que traje parar ti el día de hoy además es hecho con el mayor de los gustos.
Thank you for reading this post and if you liked it don't forget to give me your beneficial like, subscribe and leave me in comments what you thought about what I brought for you today and it is made with the greatest of tastes.

- Fotos tomados por mi
- Fotos editadas en Canva
- Traducido en DeepL
- Photos taken by me
- Photos edited in Canva
- Translated at DeepL


