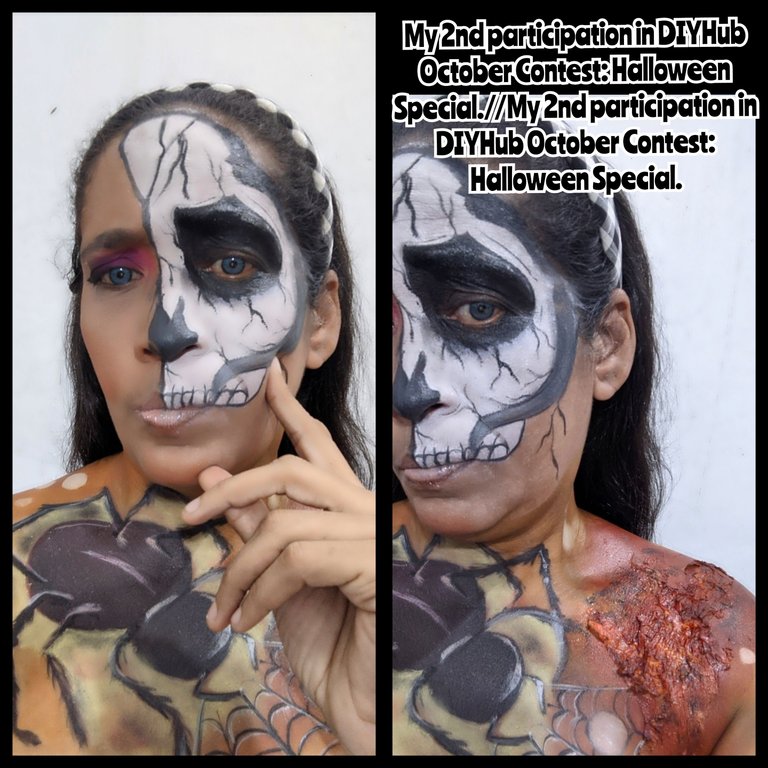
Saludos mis amores, se está acercando Halloween y ya poco a poco se deja ver qué aspecto de esa terrible criatura que está emergiendo de lo más profundo de mi ser y que poco a poco ha iniciado una cuenta regresiva para llegar a salir por completo.
Para realizar este maquillaje me tomó unas 4 horas y 10 minutos únicamente y acá se los muestro, como parte de mi participación en este maravilloso concurso, como una segunda entrada, y les muestro como fue el proceso de creación.
MATERIALES
🕷️ Maquillaje corporal.
🕷️ Base líquida.
🕷️ Polvo suelto translúcido.
🕷️ Corrector de ojeras.
🕷️ Prebase.
🕷️ Sombras.
🕷️ Lápiz de ojos.Marrón y negro.
🕷️ Máscara de pestañas.
🕷️ Papel higiénico.
🕷️ Silicón líquido.
🕷️ Brochas y pinceles.
🕷️PROCESO CREATIVO 🕷️
🕷️ PASO 1:
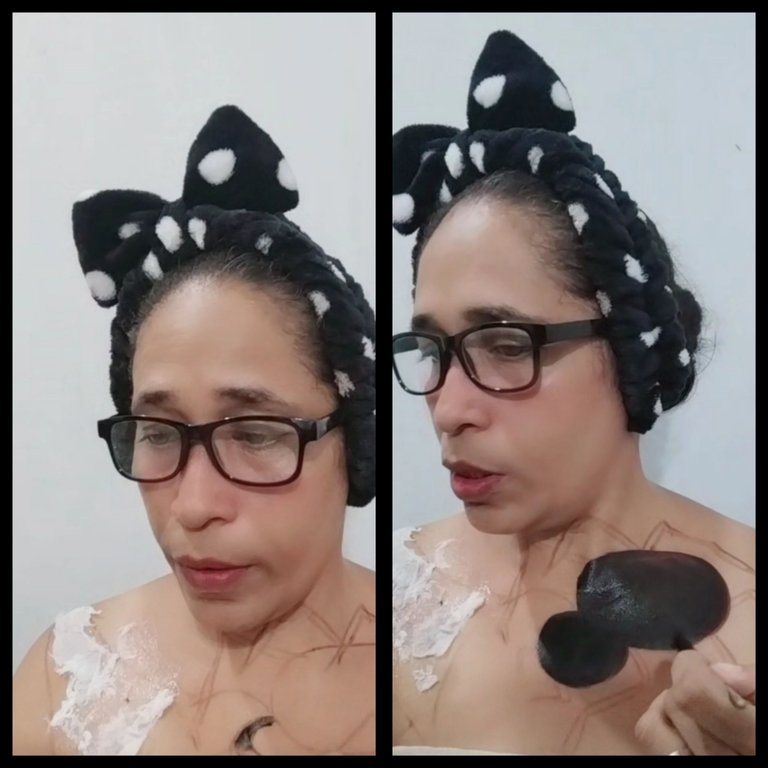
Primero que nada preparamos la piel, hidratando muy bien, luego tomé el lápiz marrón y dibuje en mi pecho una araña gigante, luego tome el silicón líquido y aplique en la piel, luego fui colocando papel higiénico encima, colocándolo de manera que quedé arrugado, y al final le doy otra capa de silicón, cuando ya está casi seco, pasó los dedos por encima para lograr que se vea un efecto de piel quemada y dejo secar.
Luego tomó la paleta de maquillaje artístico y con un pincel plano, pintó la araña rellenando primero con el color negro y encima con un poco de rojo y sellamos con el polvo suelto translúcido.
🕷️PASO 2:
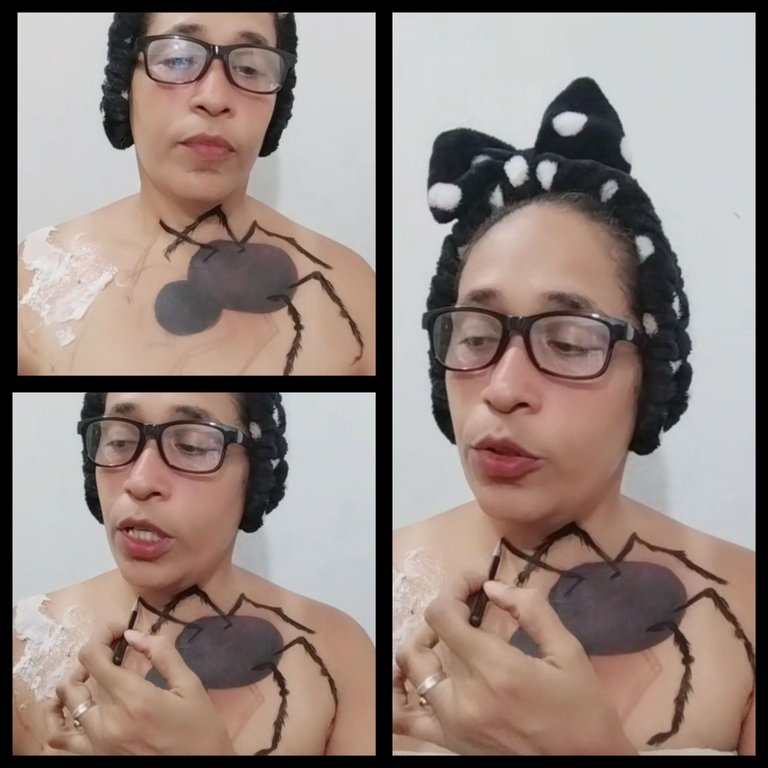
Ahora que ya está sellado el dibujo de la araña procedo a pintarle las patas, asegurándose de dibujar pelitos en sus patitas y sellamos con polvo suelto translúcido.
🕷️PASO 3:
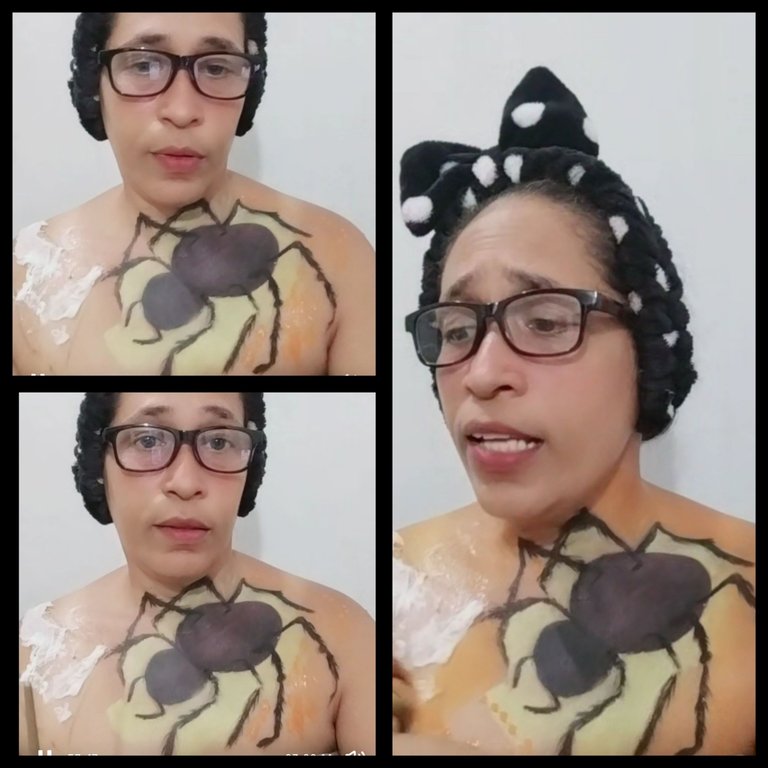
Cuando ya estuvo pintada la araña procedí a tomar pintura amarilla y la aplicó al rededor de la araña, luego aplicó pintura color naranja, seguido del marrón y el negro.
Fui aplicando color por color y fui difuminando con la esponja húmeda, ¿que logré con unir todos estos colores casi juntos? Pues fui degradando al tiempo que difuminando, lo que le dió una aspecto maravilloso al dibujo, además de darle profundidad y sello con polvo suelto translúcido.
🕷️PASO 4:
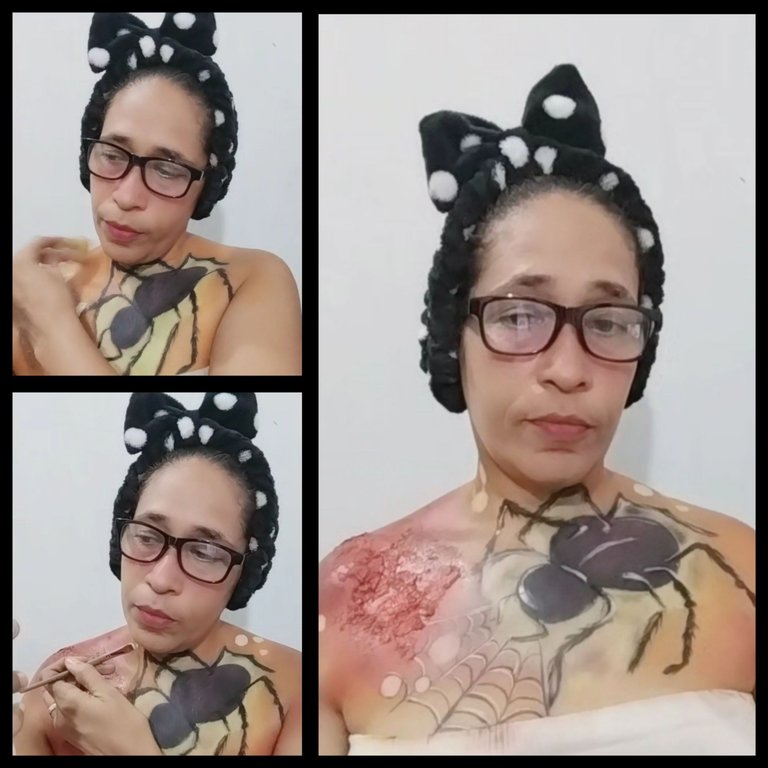
Ahora tome pintura de color rojo y con una esponja fui difuminando encima de la herida que me forme con el silicón y papel higiénico, cuando ya está cubierta por completo aplique el color negro en algunos lugares de la herida para lograr darle más realismo a la herida, también dibuje una tela de araña y en ella, así como a sus alrededores dibuje unos círculos blancos que simulan ser los huevos de la araña, y listo luego de varias horas termine la parte de el pecho.
🕷️PASO 5:
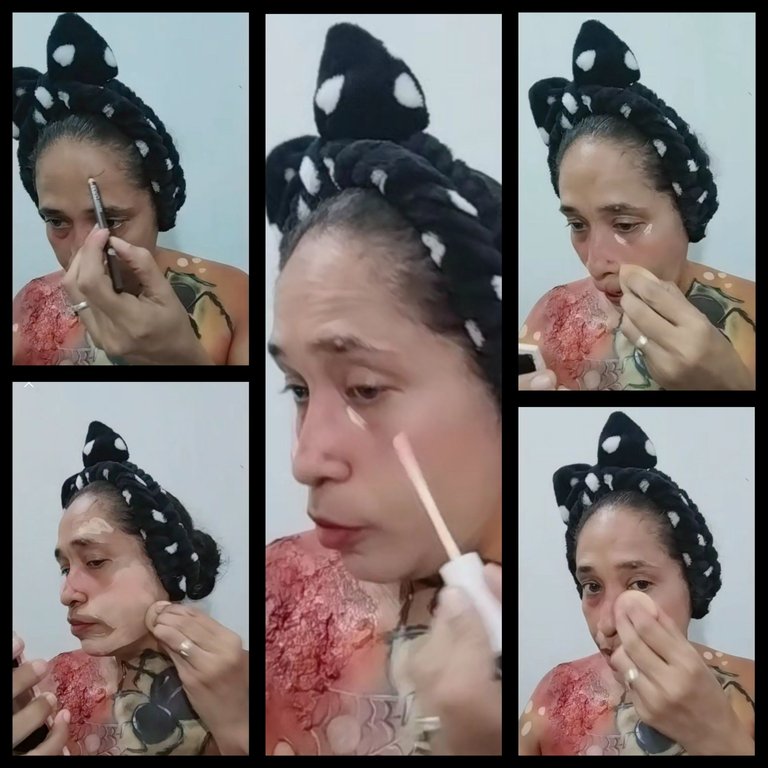
Con el lápiz marrón dibujo en mi rostro el medio cráneo , en la otra mitad del rostro aplicó corrector de ojeras, pre base en el párpado, así como también una base líquida, y difumina con esponja húmeda, cuando todo ya está aplicado sello con polvo suelto translúcido.
🕷️PASO 6:
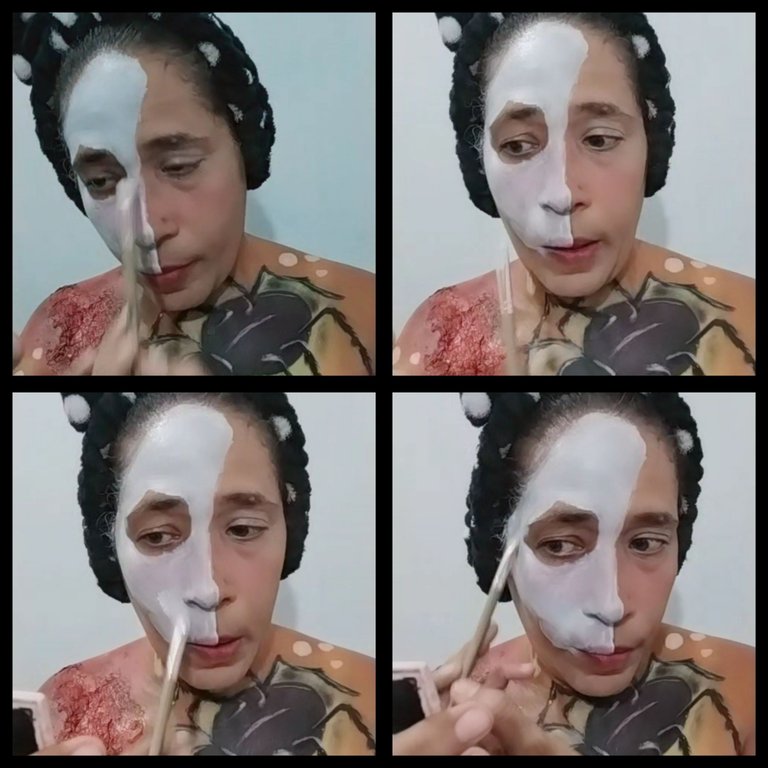
Ahora bien en el otro medio rostro, tome la pintura blanca y dibuje el medió cráneo, y sello con polvo suelto translúcido.
🕷️PASO 7:
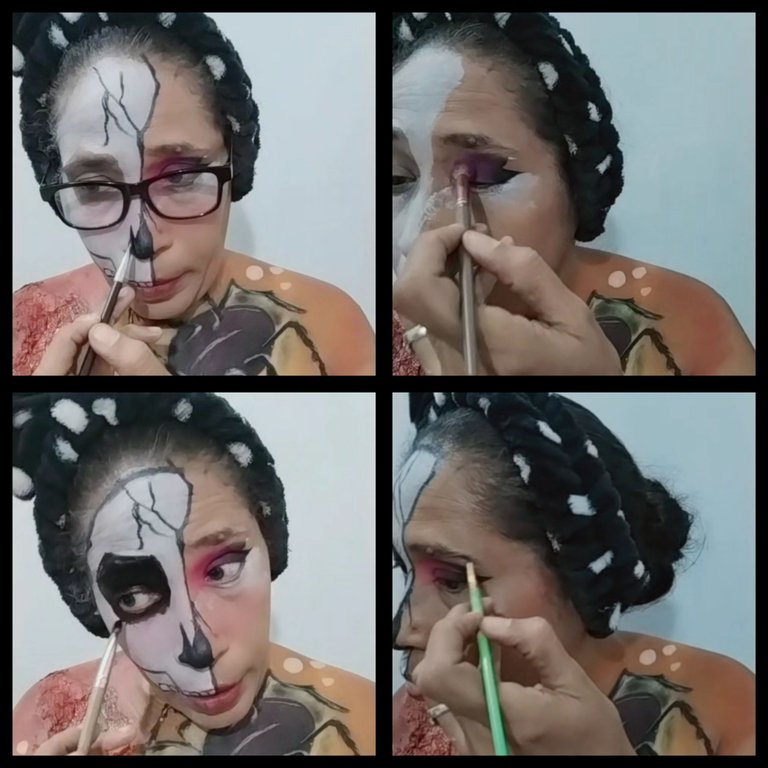
Ahora para finalizar le di los toques finales, aplicó sombras, rubor, máscara de pestañas, iluminador y brillo labial, mientras que en el lado del cráneo con un pincel fino y la pintura negra hicimos los diferentes delineador y rasgos que lleva el cráneo, tales como el ojo, los dientes, y líneas expresivas y listo terminamos.
🕷️ RESULTADO FINAL 🕷️
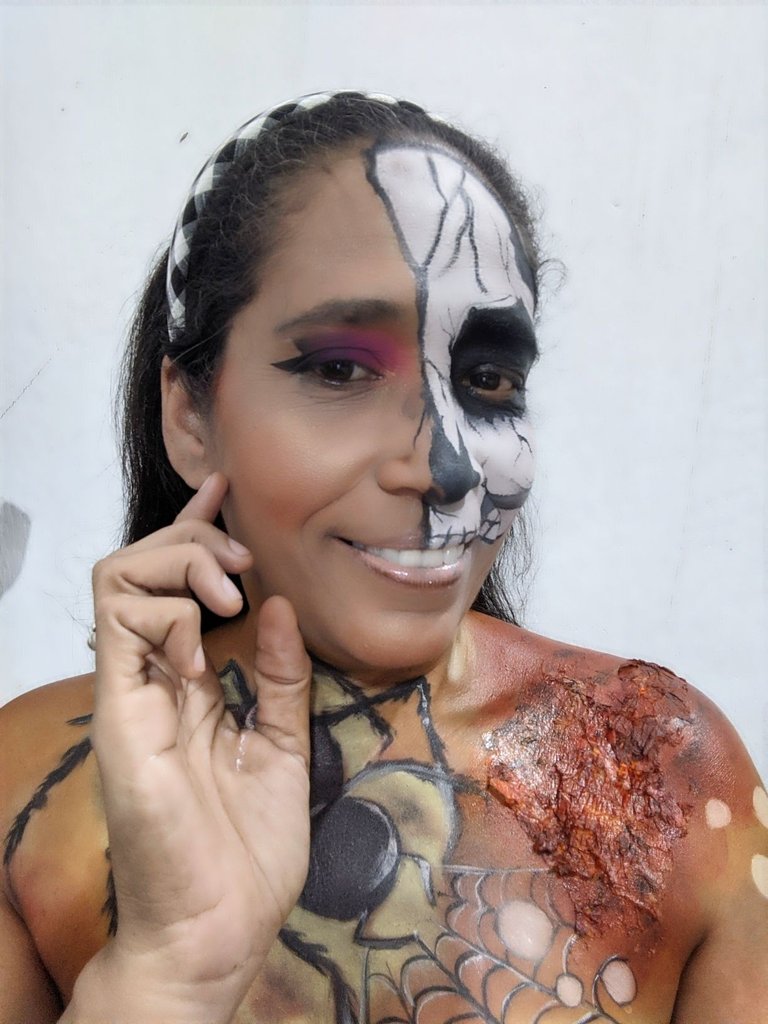
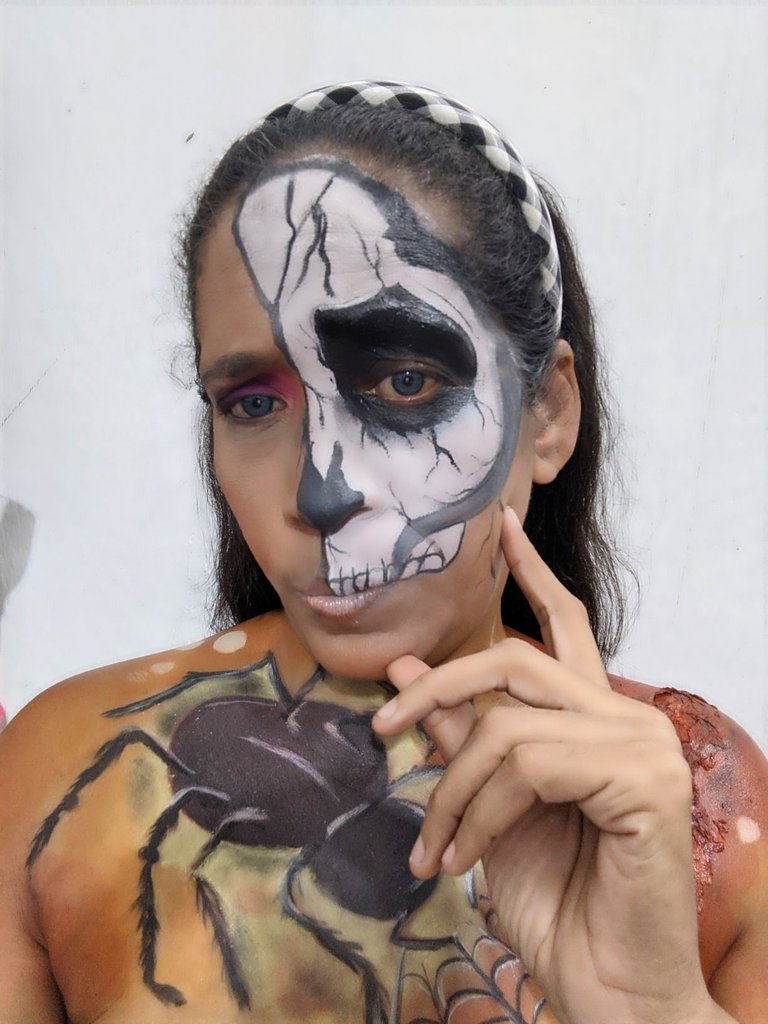
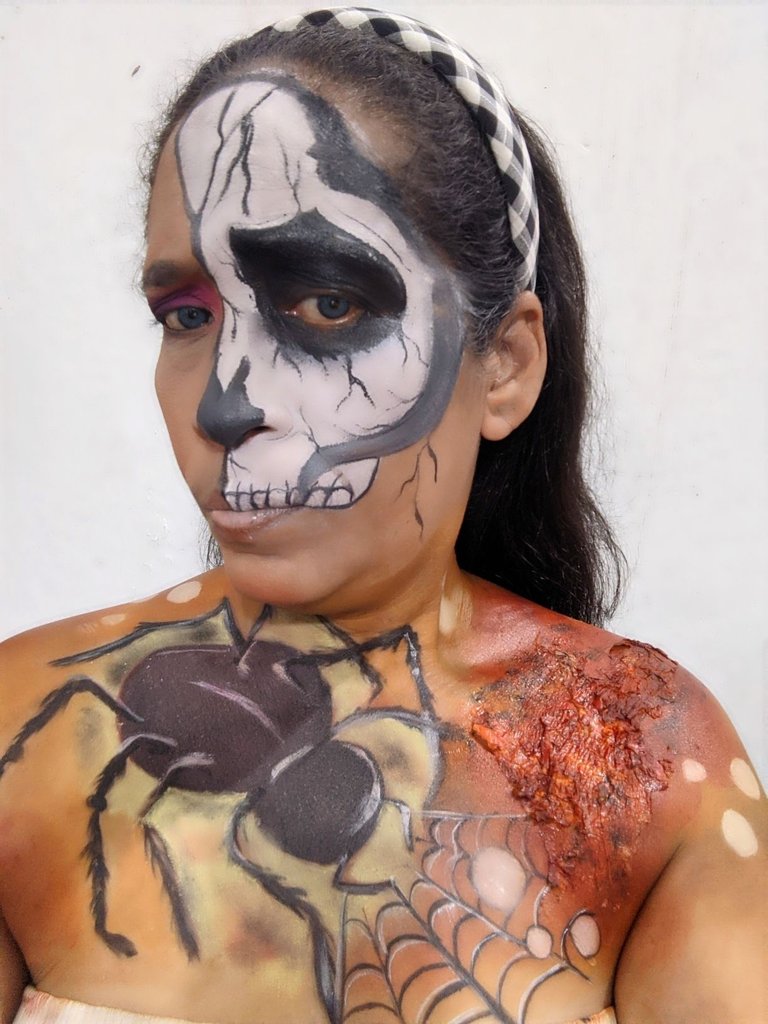
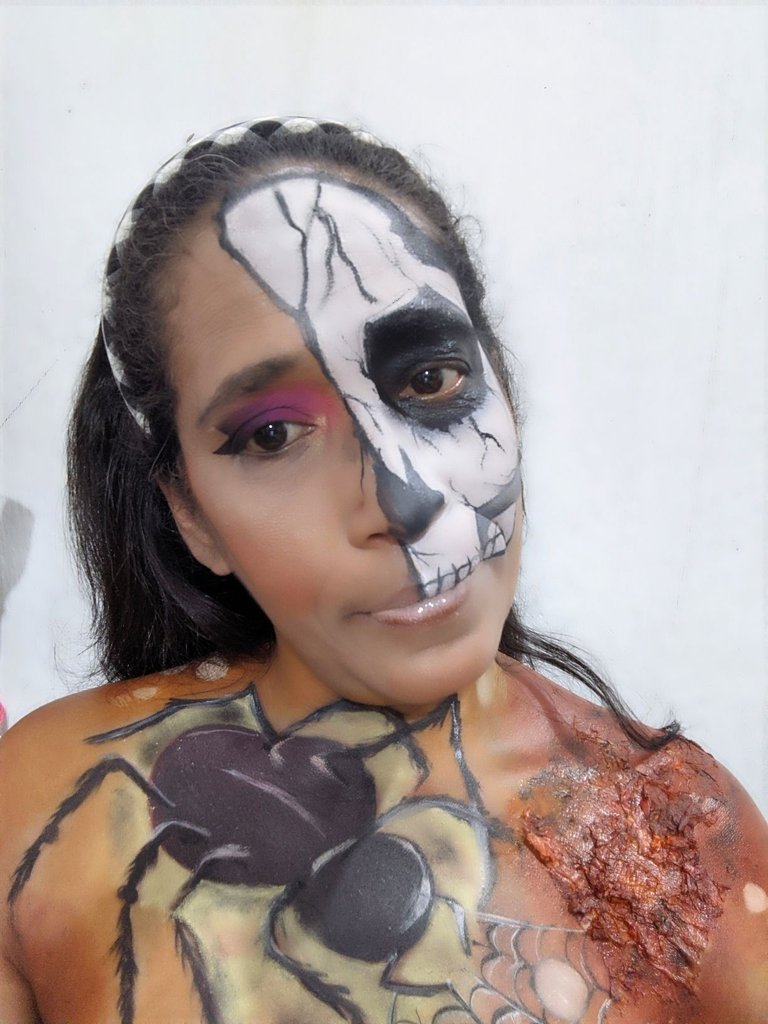
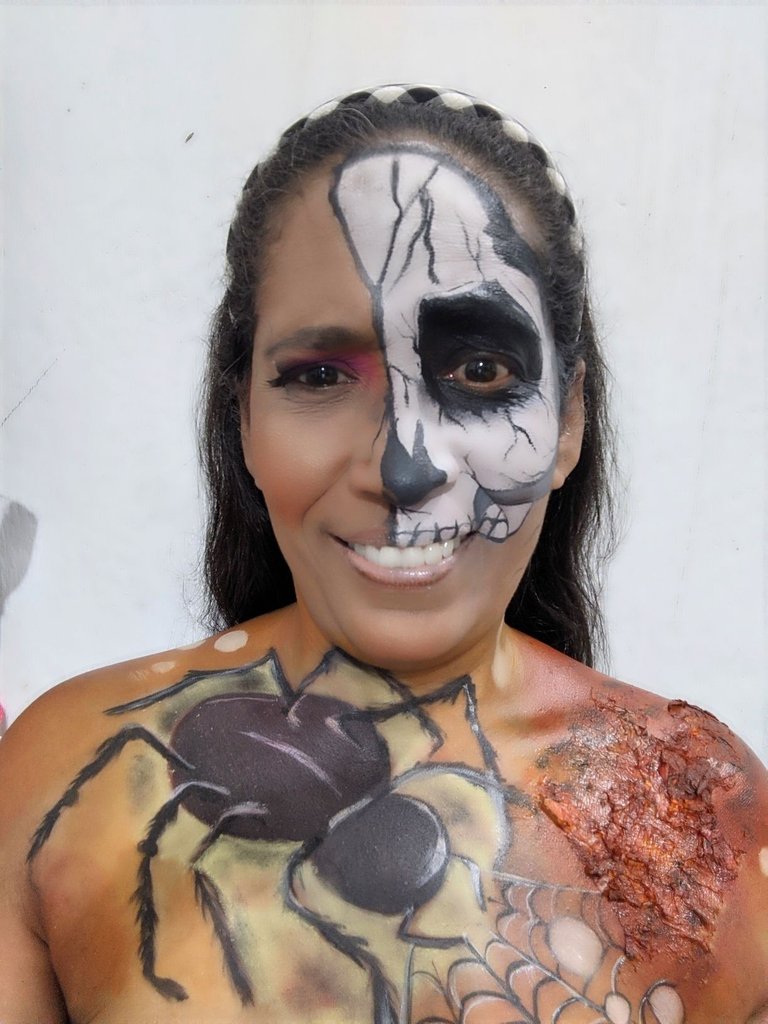
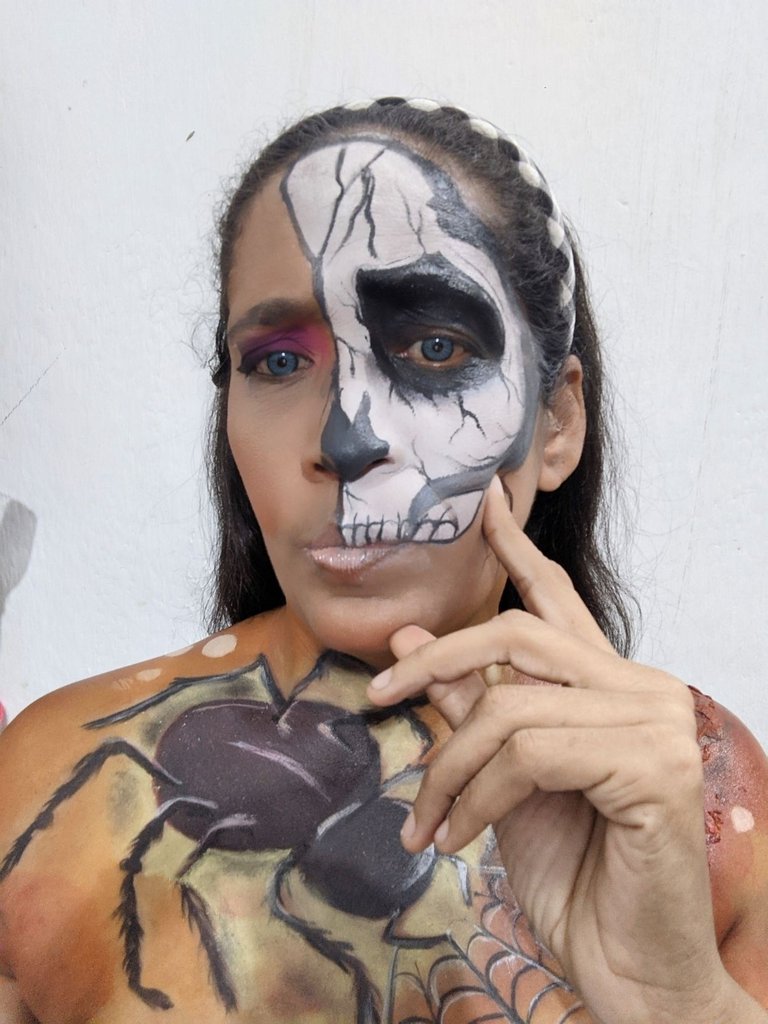
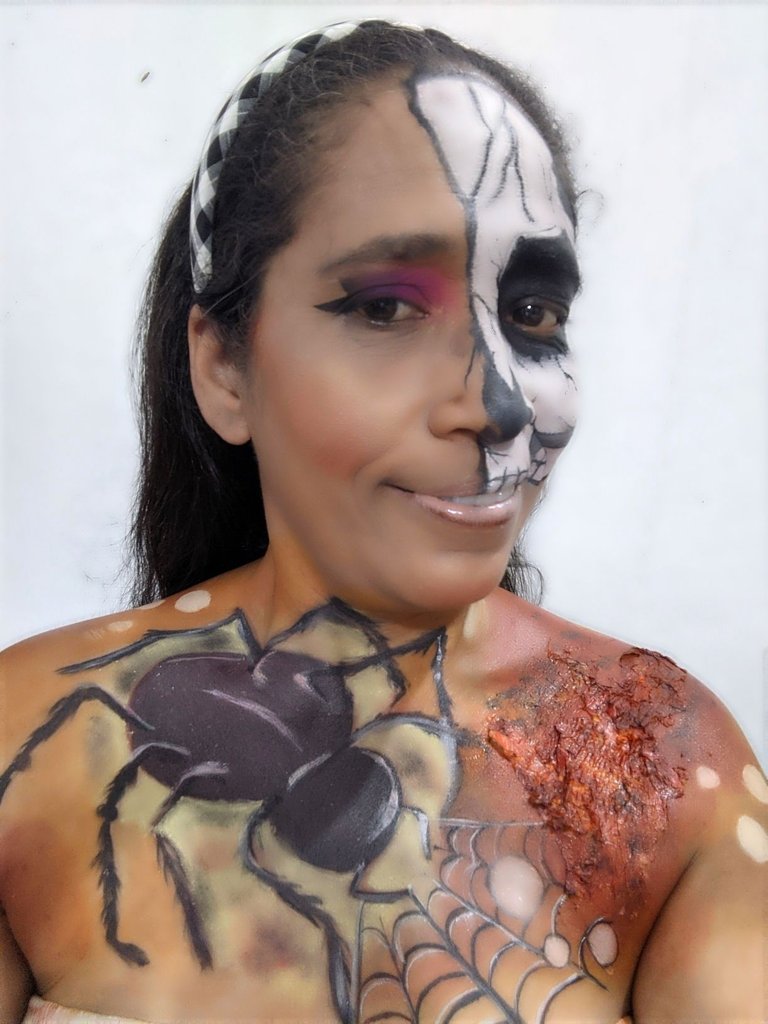
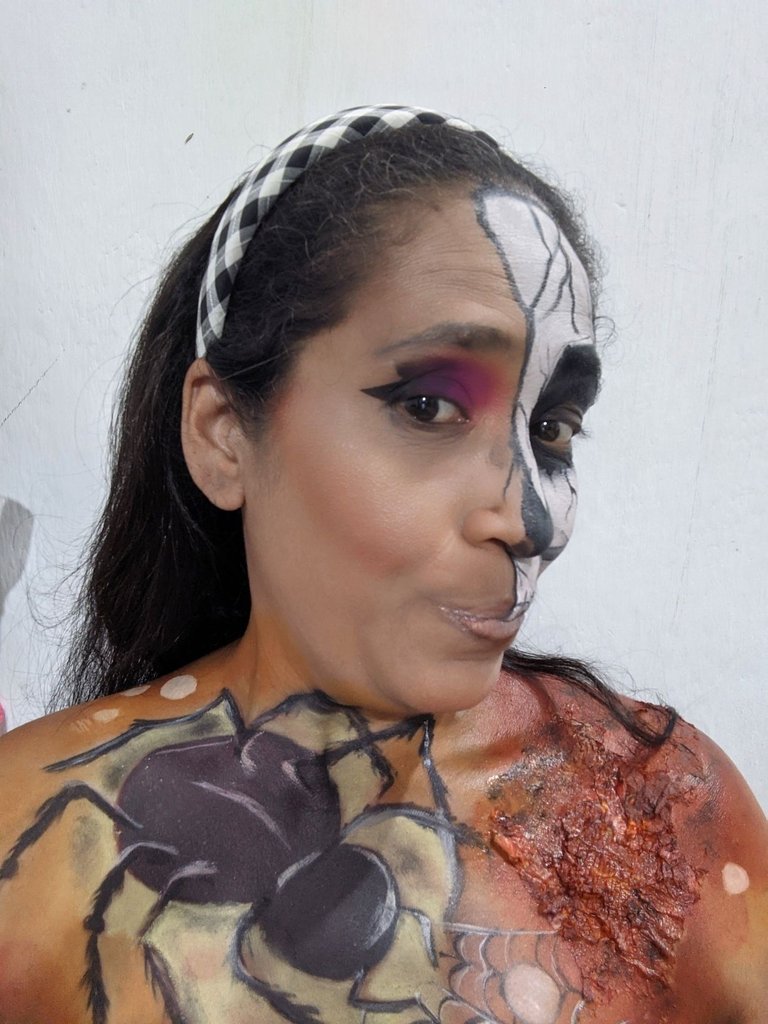
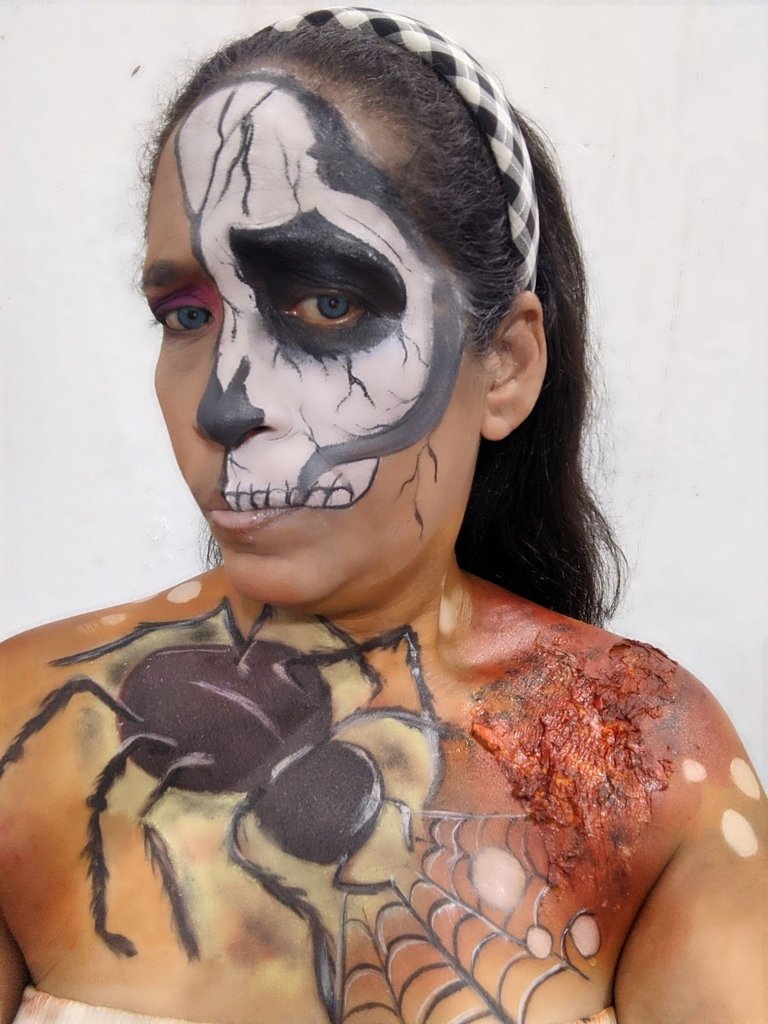
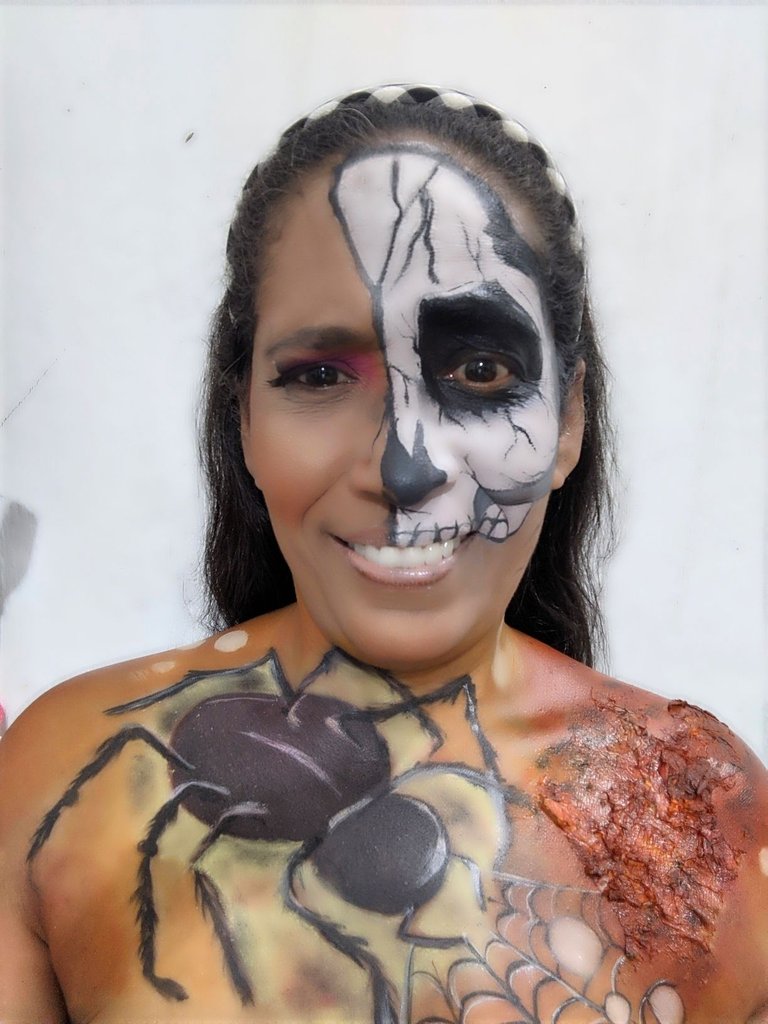
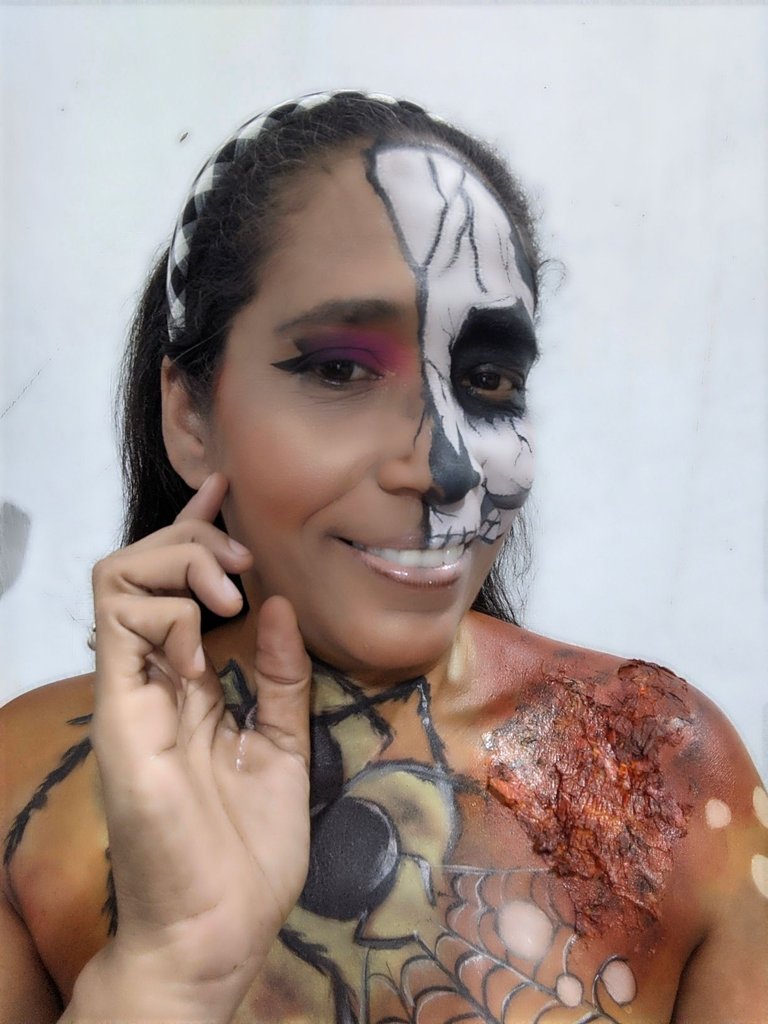
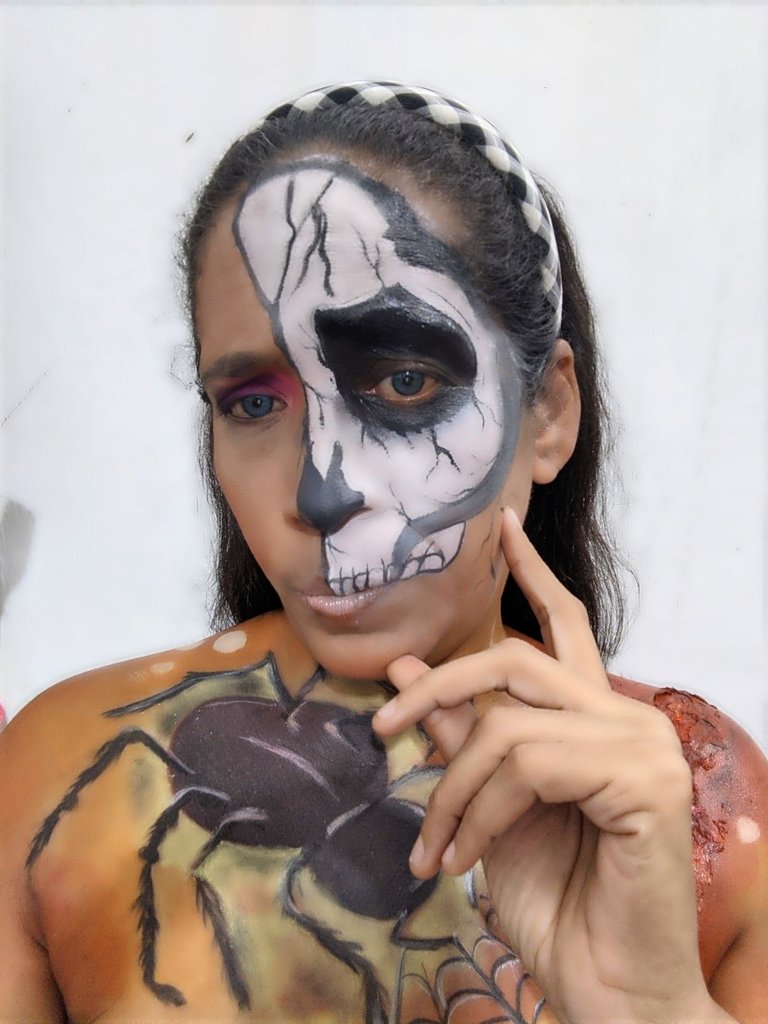
Espero de corazón que está segunda participación haya sido de su agrado, sepan ustedes mis laboriosas abejitas que cada trabajo que elaboró, lo hago con la mejor de las disposiciones, en esta trate de dar lo mejor de mi trabajo, traté de ser lo más prolija y pulcra para darle un acabado impresionante a mi trabajo, espero haberlo logrado, por ahora me despido hasta una nueva propuesta, de antemano mil gracias por el apoyo.
🕷️ CRÉDITOS 🕷️
Todas las fotografías fueron tomadas con mi teléfono Xiaomi redmi 9T y son de mi propiedad así como el vídeo, y utilice el programa polish, cap cut para editar el video y el traductor Deepl.


Greetings my loves, Halloween is approaching and little by little we can see what aspect of that terrible creature that is emerging from the deepest part of my being and that little by little has started a countdown to come out completely.
It took me about 4 hours and 10 minutes to do this makeup and here I show you, as part of my participation in this wonderful contest, as a second entry, and I show you how was the process of creation.
MATERIALS
🕷️ Body make-up.
🕷️ Liquid foundation.
🕷️ Translucent loose powder.
🕷️ Dark circles concealer.
🕷️ Prebase.
🕷️ Eye shadows.
🕷️ Brown and black eye pencil.
🕷️ Mascara.
🕷️ Toilet paper.
🕷️ Liquid silicone.
🕷️ Brushes and brushes.
🕷️PROCESO CREATIVE 🕷️
🕷️ STEP 1:

First of all we prepare the skin, moisturizing very well, then I took the brown pencil and drew on my chest a giant spider, then I took the liquid silicone and applied on the skin, then I was placing toilet paper on top, placing it so that it was wrinkled, and at the end I give another layer of silicone, when it is almost dry, I passed my fingers over it to get a burned skin effect and let it dry.
Then he took the artistic makeup palette and with a flat brush, he painted the spider filling first with the black color and on top with a bit of red and sealed with the translucent loose powder.
🕷️STEP 2:

Now that the drawing of the spider is sealed, I proceed to paint the legs, making sure to draw little hairs on its legs and seal with translucent loose powder.
🕷️STEP 3:

Once the chandelier was painted I proceeded to take yellow paint and applied it around the chandelier, then applied orange paint, followed by brown and black.
I applied color by color and blended with the wet sponge, what did I achieve by joining all these colors almost together? Well, I was degrading while blending, which gave a wonderful aspect to the drawing, besides giving it depth and seal with translucent loose powder.
🕷️STEP 4:

Now I took red paint and with a sponge I was blurring over the wound that I formed with the silicone and toilet paper, when it is completely covered I applied the black color in some places of the wound to give more realism to the wound, I also drew a spider web and in it, as well as in its surroundings I drew some white circles that simulate the spider eggs, and ready after several hours I finished the part of the chest.
🕷️STEP 5:

With the brown pencil I draw on my face the half skull, on the other half of the face I apply concealer for dark circles, pre base on the eyelid, as well as a liquid foundation, and blend with a wet sponge, when everything is already applied I seal with translucent loose powder.
🕷️STEP 6:

Now on the other half face, take the white paint and draw the half skull, and seal with translucent loose powder.
🕷️STEP 7:

Now to finish I gave the final touches, applied shadows, blush, mascara, highlighter and lip gloss, while on the side of the skull with a fine brush and black paint we made the different eyeliner and features that carries the skull, such as the eye, teeth, and expressive lines and ready we finished.
🕷️ FINAL RESULT🕷️


Espero de corazón que está segunda participación haya sido de su agrado, sepan ustedes mis laboriosas abejitas que cada trabajo que elaboró, lo hago con la mejor de las disposiciones, en esta trate de dar lo mejor de mi trabajo, traté de ser lo más prolija y pulcra para darle un acabado impresionante a mi trabajo, espero haberlo logrado, por ahora me despido hasta una nueva propuesta, de antemano mil gracias por el apoyo.
🕷️ CRÉDITS 🕷️
All pictures were taken with my Xiaomi redmi 9T phone and are my property as well as the video, and I used polish, cap cut to edit the video and Deepl translator.


