Español
Saludos comunidad de creadores🙋. Comenzar deseándoles días cargados de buenas vibras, llenos de risas, y de ambiente sano, cómo en los días de carnavales, donde en compañía de familia y amigos, optamos por sonreirle a la vida.
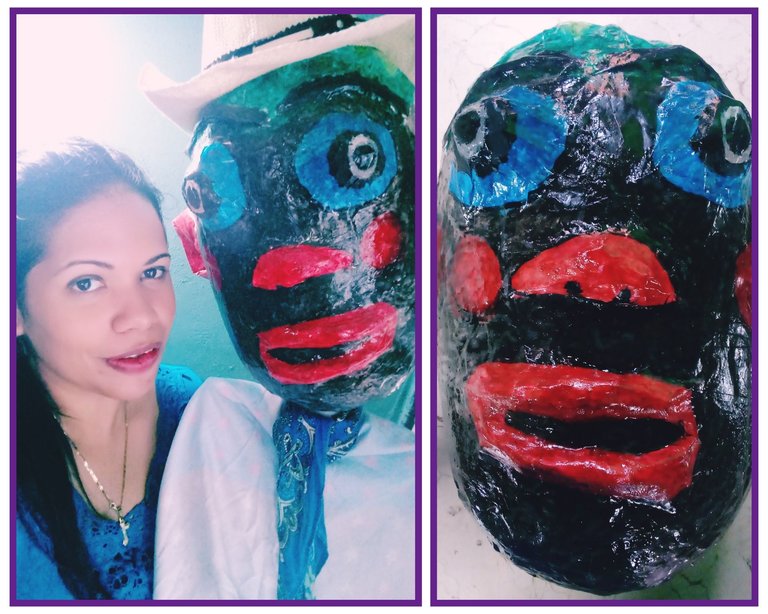
La confección que les traigo: muñecones carnavaleros, nace a raíz de recordar lo que me generaron estos maravillosos días, así como el querer superar el miedo tenido desde pequeña a estos grandes muñecos.
Este método sencillo amigos, que compartiré en forma de tutorial, también lo podemos emplear para confeccionar piñatas, donde queramos asemejarlas a las apariencias humanas. Y otro uso que lo descubrí después de terminada por la opinión de mis sobrinos pequeños, los traviesos, es la de espantapájaros, pues fue lo que exclamaron al instante de verla.
Materiales
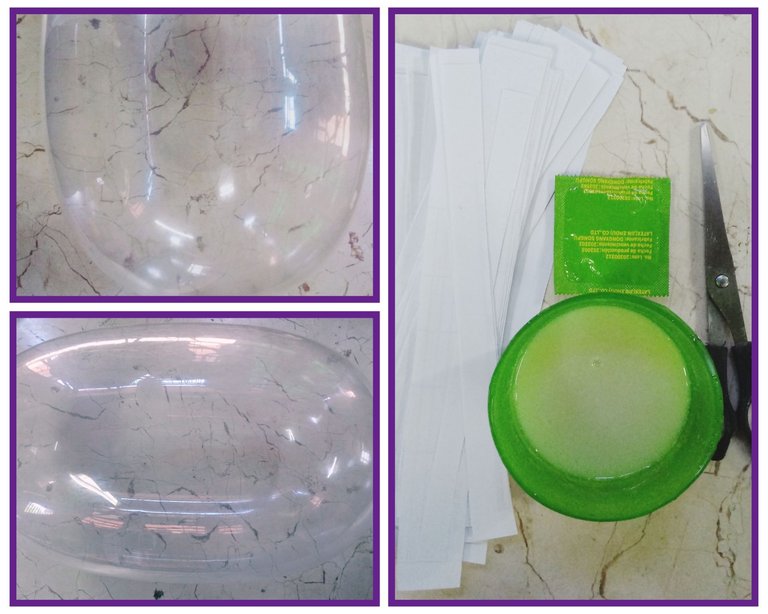
.Tiras de papel blanco
.Pega elaborada de harina
.Pegamento
.Tijera
.Temperas
.Pincel
.Barniz
.Globo grande ó preservativo.
.Tablitas finas de madera
.Clavo
.Hilo
Modo de confección
1-Tomar un globo grande o preservativo.Yo tomé la segunda opción, pués los globos que poseía eran pequeñitos y mi objetivo era que tuviera un gran tamaño.
2-Inflarlo hasta tener el tamaño deseado y realizarle un nudo para mantener su volúmen.
3-Utilizando las tiras blancas y la pega elaborada de harina, realizamos la técnica de papel maché y lo cubrimos cuidadosamente dándole tres capas .
4-Después de doce horas de secado, cortamos con la tijera por donde se encuentra el nudo ó amarre, permitiéndonos sacar el globo o preservativo , dejando una estructura redonda .

5-Ya teniendo la estructura redonda con una consistencia dura, nos destinamos a realizarles rasgos faciales.
Para confeccionar los ojos, nariz: Estrujé papel, y lo fui amoldando hasta de darle forma de bola.
Para confeccionar cejas, boca, pelo: Estrujé papel y lo amolde formando tabaquitos largos.
Para confeccionar orejas: Cortar dos cartulinas de igual diámetro, enrollar y realizar dobleces según como queramos amoldar las orejas.
6-Ya teniendo nuestros rasgos listos, con el pegamento lo adherimos al sitio destinado, y utilizando la técnica de papel maché con tiras blancas y pega elaborada de harina, dándole tres capas de empapelado, le otorgamos firmeza.
7-Amigos, hasta aquí tenemos nuestro muñeco listo para decorar a nuestro gusto pintándolo con temperas y acuarelas.
8-Para darle un acabado brilloso, utilizamos barníz.
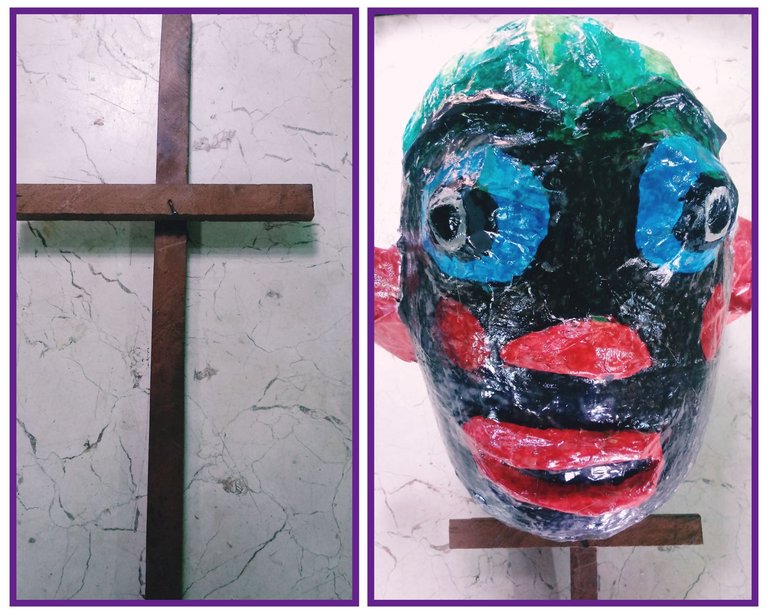
Si lo vamos a usar de muñecón, le agregamos la base por su orificio, que podemos obtener de forma muy fácil, sólo uniendo dos tablitas con un clavo en forma de cruz, una con un diámetro largo, que sería el cuerpo, y la otra más corta, para sus brazos. Luego, le ponemos el vestuario y accesorios que nos gusten.
Si lo queremos destinar para una piñata, en la parte del orificio con ayuda de la tijera, recortados un pequeño cuadrado. Rellenamos con confituras y tapamos el orificio con cartulina suave , la que poseerá los hilos adheridos, por los que tiraremos de ellas.
Espero que les haya gustado esta forma sencilla para realizar muñecones carnavaleros ó piñata cumpleañera, que constituyen atractivos en las fiestas populares, así como en los cumpleaños de los pequeños de la casa. Los exhorto a su confección y les deseo excelentes días🙋✨.
Confecciones y fotografías propias.
English
Greetings community of creators🙋. To begin by wishing you days full of good vibes, full of laughter, and a healthy atmosphere, as in the days of carnivals, where in the company of family and friends, we choose to smile at life.
The confection that I bring you: carnival dolls, was born as a result of remembering what these wonderful days generated for me, as well as wanting to overcome the fear I had since childhood to these great dolls.
This simple method friends, which I will share in the form of a tutorial, we can also use to make piñatas, where we want to resemble human appearances. And another use that I discovered after it was finished by the opinion of my little nephews, the naughty ones, is that of scarecrow, because that was what they exclaimed the instant they saw it.
Materials
.White paper strips
.Paste made of flour
.Glue
.Scissor
.Temperas
.Brush
.Varnish
.Large balloon or condom.
.Thin wooden planks
.Clove
.Thread
Mode of preparation
1-Take a large balloon or condom.I took the second option, because the balloons I had were tiny and my goal was to have a large size.
2-Inflate it to the desired size and make a knot to maintain its volume.
3-Using the white strips and the glue made of flour, we perform the papier mache technique and cover it carefully giving it three layers.
4-After twelve hours of drying, we cut with the scissors where the knot or tie is located, allowing us to take out the balloon or condom, leaving a round structure.
5-Already having the round structure with a hard consistency, we are destined to make facial features.
To make the eyes, nose: I squeezed paper, and I was molding it until I gave it a ball shape.
To make eyebrows, mouth, hair: I squeezed paper and molded it into long cigarettes.
To make ears: Cut two pieces of cardboard of the same diameter, roll and make folds according to how we want to shape the ears.
6-Already having our features ready, with the glue we adhere it to the intended place, and using the papier-mâché technique with white strips and elaborate flour glue, giving it three layers of wallpaper, we give it firmness.
7-Friends, so far we have our doll ready to decorate to our liking by painting it with tempera and watercolors.
8-To give it a shiny finish, we use varnish.
If we are going to use it as a dummy, we add the base through its hole, which we can obtain very easily, just by joining two little boards with a cross-shaped nail, one with a long diameter, which would be the body, and the other shorter, for its arms. Then, we put the costumes and accessories that we like.
If we want to use it for a piñata, in the part of the hole with the help of scissors, cut out a small square. We fill with jams and cover the hole with soft cardboard, which will have the attached threads, by which we will pull them.
I hope you liked this simple way to make carnival dolls or birthday piñata, which are attractive at popular parties, as well as on the birthdays of the little ones in the house. I urge you to make them and wish you excellent days🙋✨.
Own clothing and photographs.

