Español
Saludos amigos creadores 🙋☀.
Quizás muchos de ustedes, hayan elevado sus niveles de miedo al presenciar alguna película aterradora. En mi, este efecto lo causó el filme Babadook, dónde la criatura perturbadora de los sueños de un pequeño se alimenta y se fortalece con el miedo que genera en sus víctimas. Hoy continuando el espíritu creador de Halloween e inspirada en este personaje Babadook les traigo un tutorial sencillo, donde confeccionaremos una pequeña lamparita de monstruo asimilándola a su figura.
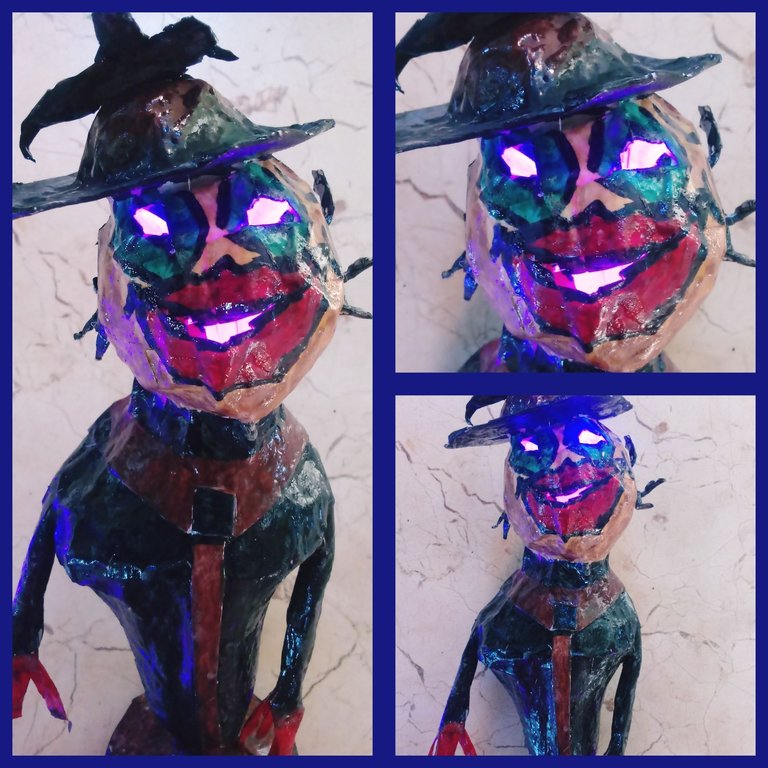
Materiales
.Moldes:
-Copa,
-Objeto mediano rodondo
.Aceite
.Papel
.Tiras de papel blanco
.Pega elaborada de harina
.Pegamento
.Cartulina
.Tijera
.Bisturí
.Temperas
.Acuarelas.
.Pincel
.Barniz
.Bombillitos de colores
Modo de confección:
Cabeza
1-Tomar el molde redondo y cubrirlo en su totalidad con un algodonsito impregnado de aceite.
2-Tomar tiras blancas y la pega elaborada de harina y realizarle tres capas de empapelado con la técnica de papel maché. Dejar secar doce horas.
3-Con ayuda de la tijera, ir cortando cuidadosamente por el centro de la estructura, dividiéndola al desmontarla en dos mitades de igual diámetro.
4-Pegar las dos mitades con el pegamento, y realizarle una capa de empapelado a la estructura completa, dejando un pequeño orificio redondo sin cerrar. Dejar secar por ocho horas.
5-Con un bisturí, realizar los cortes en ojos y boca, según el modelo deseado.
Cuerpo
1-Tomar la copa y con un algodonsito humedecido en aceite, impregnar toda su superficie.
2-Empapelar completamente dándole tres capas, con tiras de papel blanco y la pega elaborada de harina. Dejar secar por doce horas.
3-Realizar una grieta cuidadosamente con el bisturí por todo su centro, y desmontar del molde.
4-Realizar una cuarta capa de empapelado con la técnica de papel maché, permitiendo obtener una copa de papel totalmente conformada. Dejar secar por ocho horas.
Brazos
1-Cortar dos rectángulos de cartulina de igual diámetro.
2-Enrrollarlos conformando dos tabaquitos largos.
3-Mantener la estructura con pegamento.
Garras
1-Marcar con el lápiz la forma deseada para las garras.
2-Utilizando la tijera cortar por la guía marcada.
3-Adherir con el pegamento a los brazos.
Accesorios
Sombrero de cuervo
1-Recortar un cuadrado mediano de cartulina.
2-Estrujar papel y adherirlo con pegamento al cuadrado.
3-Realizarle una capa de empapelado con tiras de papel blanco y pega elaborada de harina. Dejar secar por 6 horas.
4-Marcar en una cartulina con un lápiz la forma de un cuervo.
5-Recortar por la guía trazada y adherir la figura del cuervo con
pegamento a la base del sombrero.
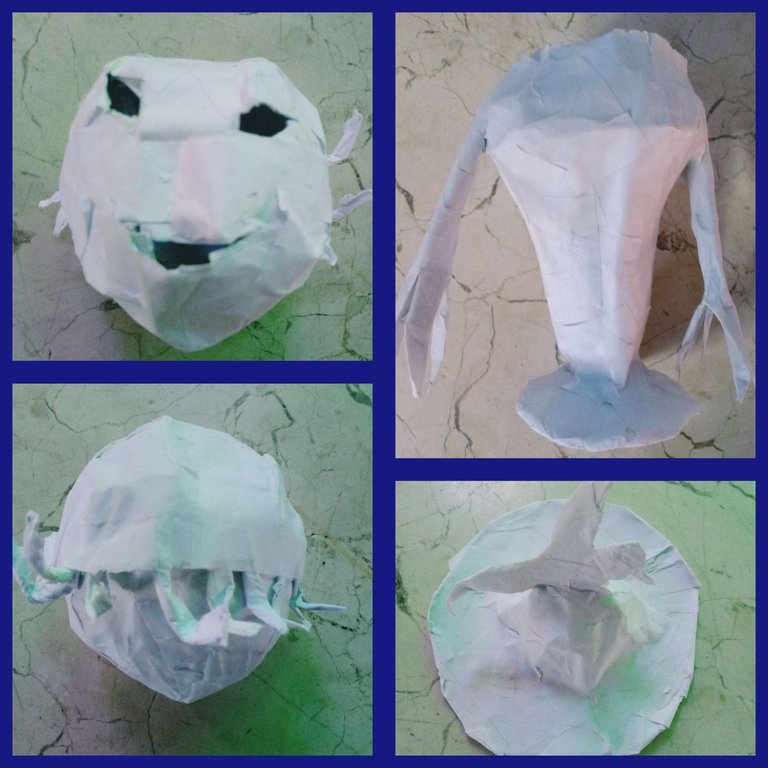
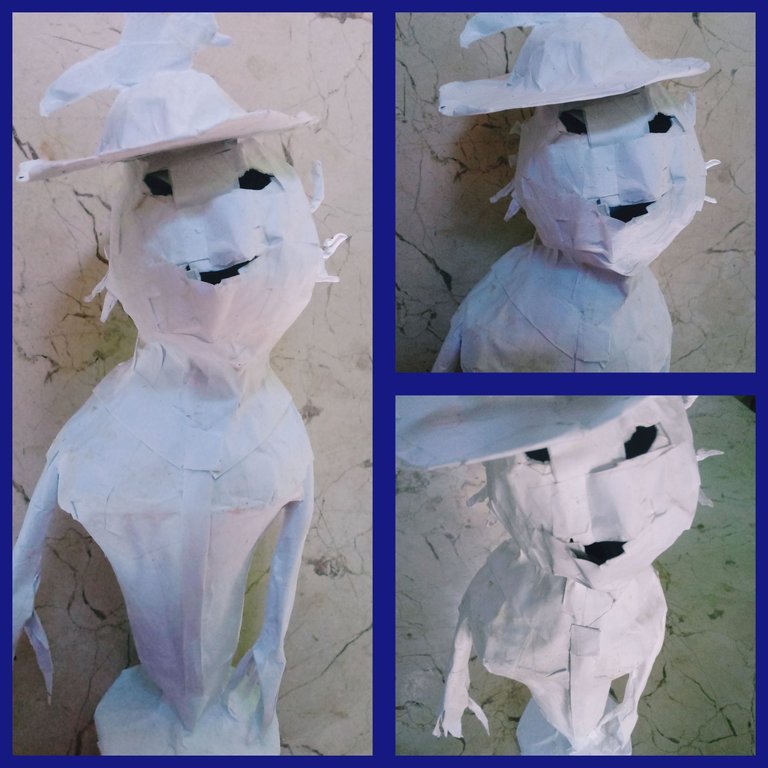
Ya teniendo todas la estructuras de nuestra lamparita de monstruo confeccionadas, pasamos a unificarlas, utilizando el pegamento.Y luego, para generarle firmeza, realizamos la técnica de papel maché dándole una capa de empapelado, dejándola lista para ser pintada y decorada.
El Babadook al que quise asemejar mi lamparita, siempre portaba un traje negro, así qué este color y otros de tonalidad oscura como el marrón, los empleé para decorarlo. Para darle su acabado brilloso utilicé barníz.
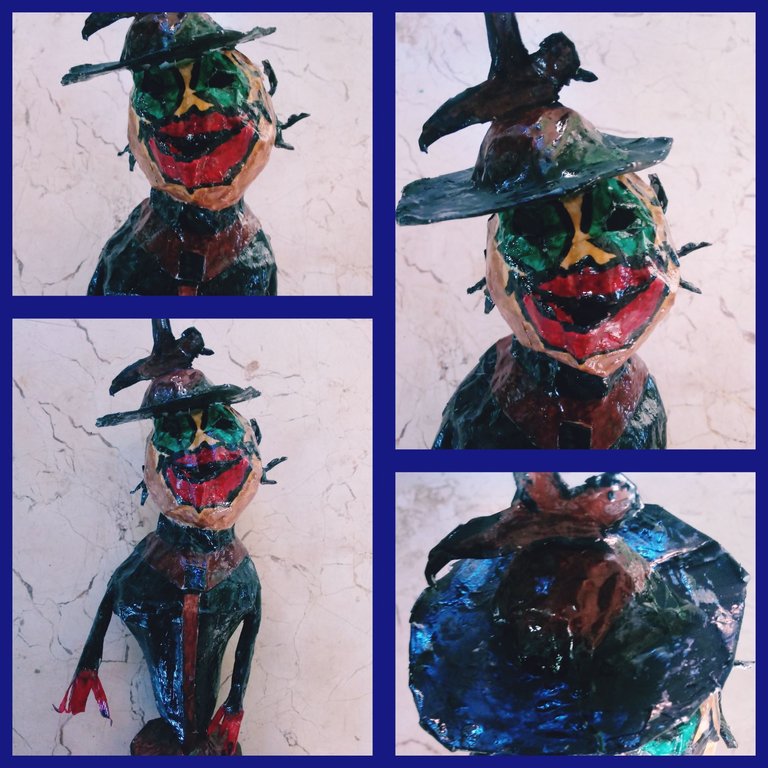
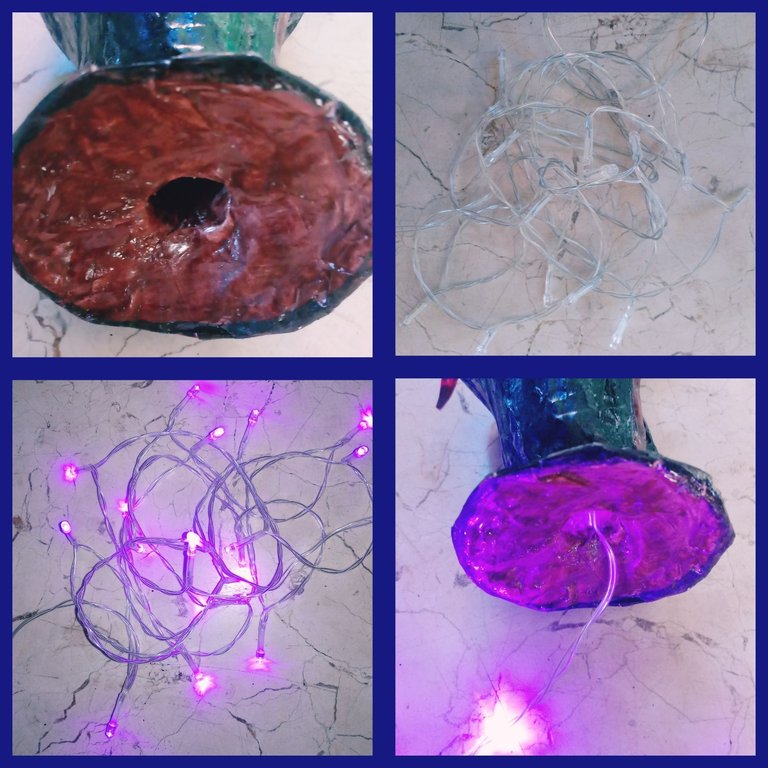
Hasta aquí amigos, tenemos nuestra estructura de la lámpara monstruo confeccionada, ahora pasamos a la iluminación y esto lo lograremos con esos pequeños bombillitos luminosos que usamos para decorar en navidad o fechas festivas.
Introducimos cuidadosamente los bombillitos por el orificio que se encuentra en la parte de abajo del cuerpo. Y los guiamos hasta su cabeza.Dejando a nuestra vista al ser encendidos, unos ojos y boca aterradores iluminados.
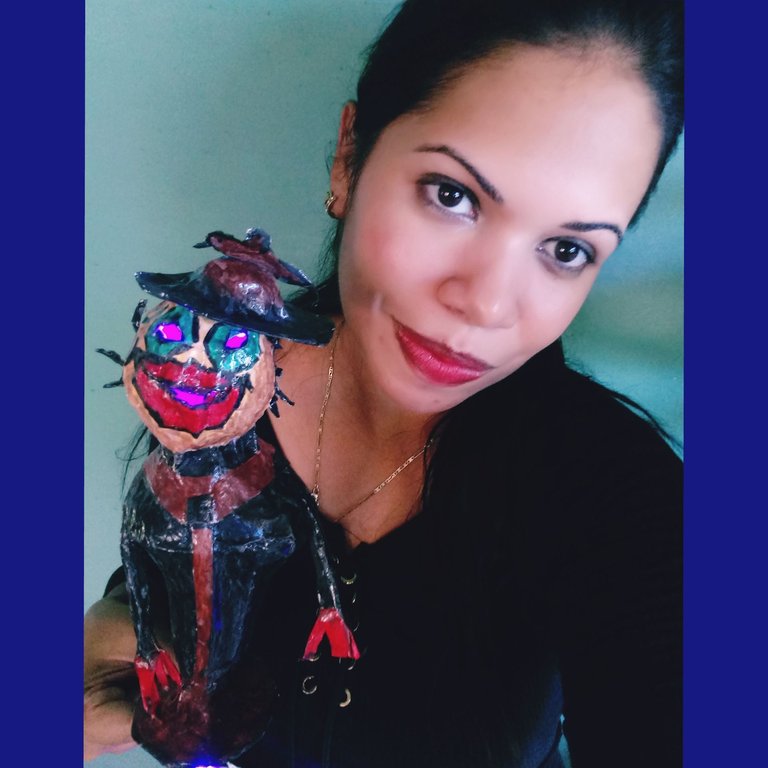
Espero que les haya gustado la confección de esta lamparita monstruo. Los exhorto a su creación y que la estrenen en esta noche de brujas cercana, donde historias escalofriantes y aterradoras tendrán lugar. Pero les advierto amigos, que si las confeccionan, venzan sus temores, pues recuerden que el Babadook se alimenta de los profundos miedos.
Bendecidos y excelentes días a todos. Gracias por sus publicaciones compartidas, capaces de instruir e inspirar.🙋🌈
English
Greetings fellow creators 🙋☀.
Perhaps many of you have raised your fear levels by watching a scary movie. In me, this effect was caused by the film Babadook, where the disturbing creature of a child's dreams feeds and strengthens itself with the fear it generates in its victims. Today continuing the creative spirit of Halloween and inspired by this Babadook character I bring you a simple tutorial, where we will make a small monster lamp assimilating it to his figure.

Materials
.Moulds:
-Cup,
-Medium object round
.Oil
.Paper
.White paper strips
.Paste made of flour
.Glue
.Cardboard
.Scissor
.Scalpel
.Temperas
.Watercolors.
.Brush
.Varnish
.Colorful light bulbs
Mode of preparation:
Head
1-Take the round mold and cover it completely with a cotton ball impregnated with oil.
2-Take white strips and glue it made of flour and make three layers of wallpaper with the papier mache technique. Leave to dry for twelve hours.
3-With the help of the scissors, carefully cut through the center of the structure, dividing it when disassembling it into two halves of equal diameter.
4-Glue the two halves with the glue, and make a layer of wallpaper to the complete structure, leaving a small round hole unclosed. Leave to dry for eight hours.
5-With a scalpel, make the cuts in the eyes and mouth, according to the desired model.
Body
1-Take the cup and with a cotton ball moistened in oil, impregnate its entire surface.
2-Completely wallpaper giving it three layers, with strips of white paper and the glue made of flour. Leave to dry for twelve hours.
3-Make a crack carefully with the scalpel all over its center, and disassemble from the mold.
4-Make a fourth layer of wallpaper with the papier mache technique, allowing to obtain a fully shaped paper cup. Leave to dry for eight hours.
Arms
1-Cut two cardboard rectangles of equal diameter.
2-Roll them into two long cigarettes.
3-Maintain the structure with glue.
Claws
1-Mark with the pencil the desired shape for the claws.
2-Using the scissors cut through the marked guide.
3-Adhere with the glue to the arms.
Accessories
Raven hat
1-Cut out a medium square of cardstock.
2-Squeeze paper and adhere it with glue to the square.
3-Make a layer of wallpaper with strips of white paper and paste made of flour. Let it dry for 6 hours.
4-Mark on a cardboard with a pencil the shape of a crow.
5-Cut out by the traced guide and adhere the figure of the raven with
glue to the base of the hat.

Having all the structures of our monster lamp already made, we move on to unify them, using the glue.And then, to generate firmness, we perform the papier-mâché technique by giving it a layer of wallpaper, leaving it ready to be painted and decorated.

The Babadook that I wanted to resemble my lamparita, always wore a black suit, so this color and others of dark hue such as brown, I used to decorate it. To give it its shiny finish I used varnish.

So far friends, we have our monster lamp structure ready, now we move on to lighting and we will achieve this with those little luminous bulbs that we use to decorate for Christmas or festive dates.
Carefully insert the bulbs through the hole that is located at the bottom of the body. And we guided them to his head.Leaving in our sight to be lit, a terrifying illuminated eyes and mouth.

I hope you liked the making of this monster lamp. I urge you to your creation and to release it on this upcoming Halloween, where chilling and terrifying stories will take place. But I warn you, friends, that if you make them, overcome your fears, because remember that the Babadook feeds on deep fears.

Blessed and excellent days to all. Thank you for your shared posts, able to instruct and inspire.🙋🌈