Español
Saludos amigos creadores🙋☀🎃🍬.
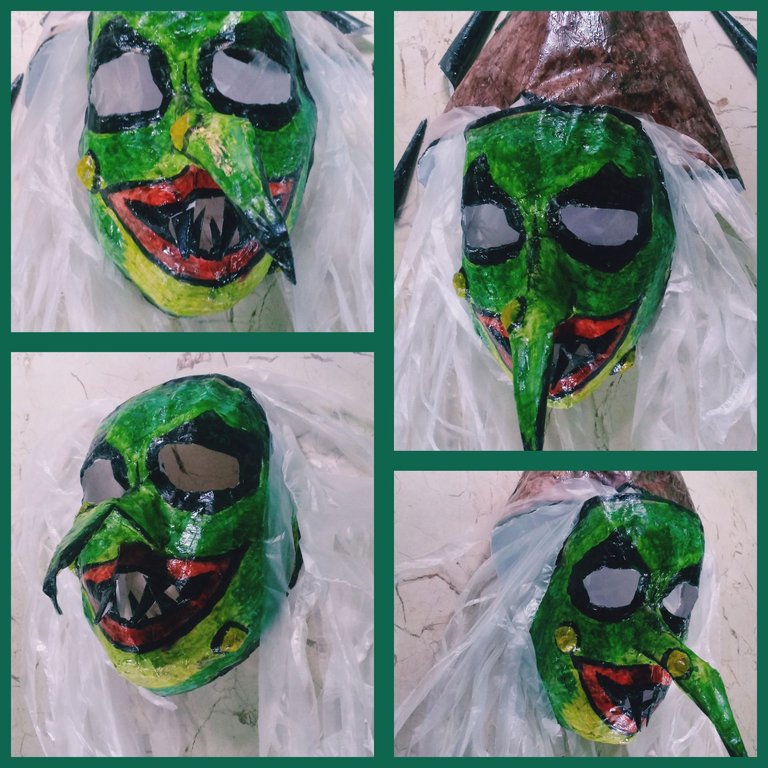
Cada confección que realizó inspirada en algúna fecha festiva como la de Halloween y la navidad, la disfruto al máximo, pues les doy riendas sueltas a mi imaginación. Hoy les traigo en forma de tutorial al paso a paso de como realicé mi disfraz de bruja personalizado, el que estuvo compuesto por una máscara siniestra, garras, y sombrero.
Materiales
.Molde: Mi rostro
.Espejo
.Tiras de papel blanco
.Papel
.Cartulina
.Agua
.Pega elaborada de harina
.Pegamento
.Tijera
.Temperas
.Acuarelas
.Pincel
.Nailon
.Hilos
.Barníz
Modo de confección:
Comenzar amigos deciéndoles, que la pega de harina la realicé casera como medida de protección, pues la iba utilizar cerca de mi rostro y quise evitar alguna alergia hacia algún conservante. Los componentes que utilicé fueron agua y harina únicamente, mezclando media taza de harina por una de agua y poniéndolo a fuego lento por cinco minutos hasta espesarla. Espero que este método de hacer pega lo puedan aplicar para sus futuras creaciones. Comencemos.
Máscara
Base de máscara
1-Recoger bien el pelo y quitar accesorios del rostro.
2-Humedecer bien el rostro y frente de un espejo comenzar a cubrirlo totalmente con tiras de papel blanco y agua. Presionando suavemente, marcando nuestros rasgos faciales.
3-Realizar encima de la primera capa de empapelado dos capas, utilizando tiras de papel blanco y pega elaborada de harina.
Mediante realizaba este proceso confesarles que sentí escalofríos frente al espejo, observando los pequeños papelitos pegados que me hacían lucir como una momia.
4-Esperar cinco minutos e inclinando el rostro hacia delante, desmontar la máscara.
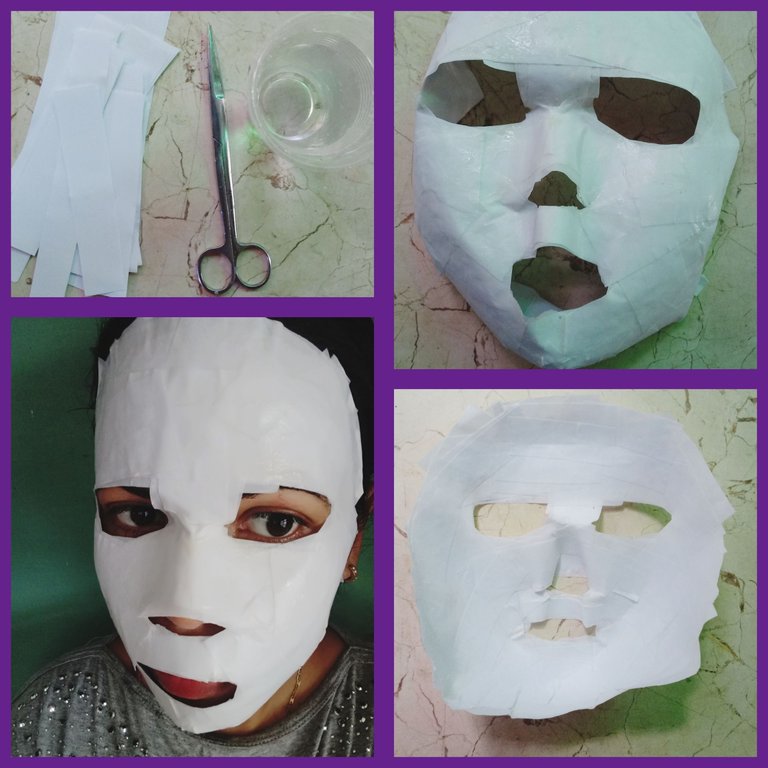
5-Lavar bien nuestro rostro con abundante agua, quitando algún residuo quedado. Mientras dejamos secar por doce horas nuestra base para la máscara.
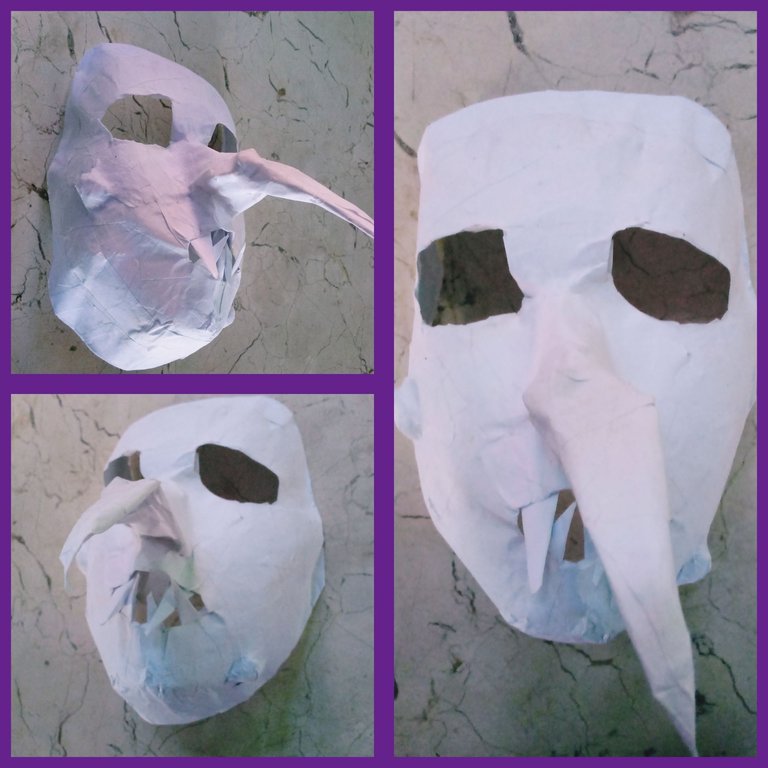
Nariz
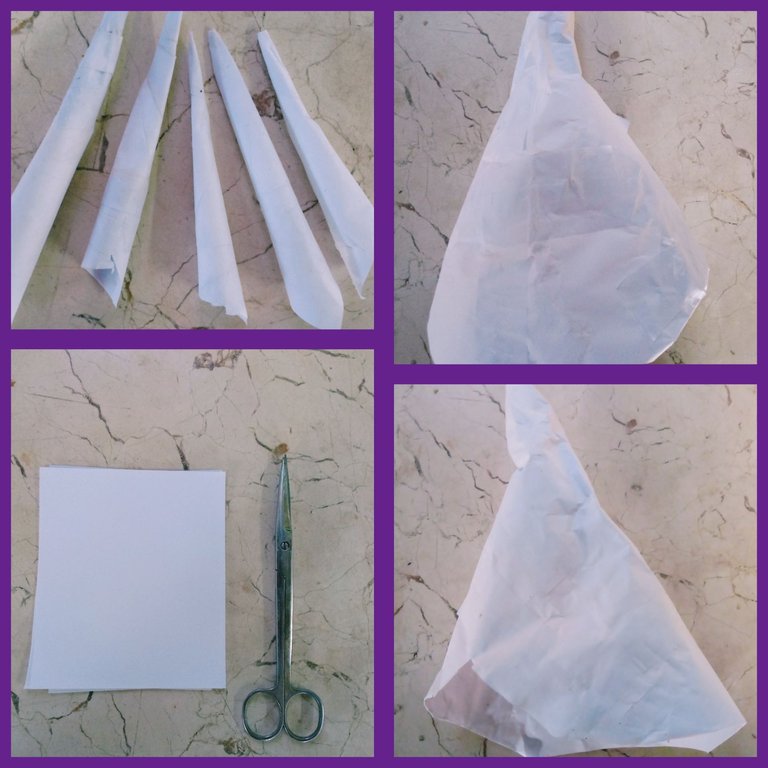
1-Cortar con la tijera un cuadrado mediano en la cartulina.
2-Tomar uno de sus vértices y enrollarlo conformando un pequeño cono.
3-Mantener la estructura con pegamento.
4-Realizar dobleces que le generen curvas.
Verrugas
1-Estrujar papel en forma de bolitas.
2-Darle una capa de empapelado con tiras blancas y pega elaborada de harina, proporcionándole una superficie lisa.
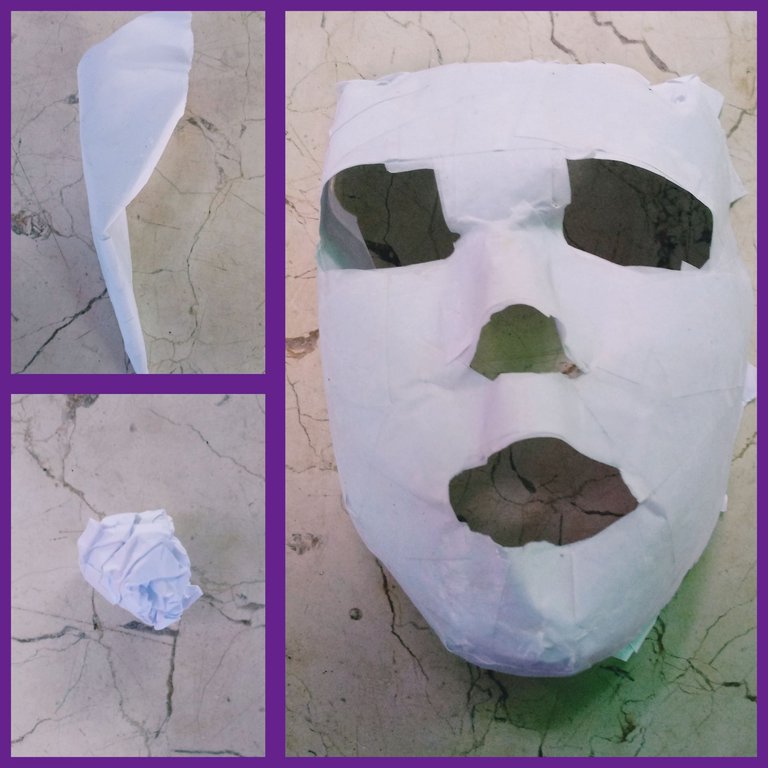
Unificar la base de la máscara con la nariz , y las verrugas utilizando el pegamento, y para generarle firmeza y dureza, le damos una capa de empapelado en su totalidad con tiras de papel blanco y pega elaborada de harina. Dejamos secar por ocho horas.
Garras
1-Cortar diez cuadrados medianos de cartulina.
2-En cada uno, tomar uno de sus vértices y enrrollar conformando diez conitos finos.
3-Mantener la estructura con pegamento.
Sombrero
1-Cortar un cuadrado grande de cartulina.(Varía según el tamaño deseado para el sombrero).
2-Tomar uno de sus vértices y enrollar conformando un cono.
3-Mantener la estructura utilizando pegamento.
Cabello
1-Utilizando la tijera cortar finas tiritas de nailon.
Ya teniendo nuestra máscara, garras, y sombrero listos, pasamos a darle vida utilizando las temperas y acuarelas. Quise que el verde predominara en la máscara pues a parte que es uno de mis colores preferidos, podría emplearla para representar en futuras historias narradas a mis pequeños sobrinos, al villano duende verde, de la película el Hombre Araña. Para las garras y el sombrero, utilicé tonalidades oscuras como el negro y el marrón, para aportarle un toque siniestro al traje. Su acabado brilloso lo logré, utilizando barníz.
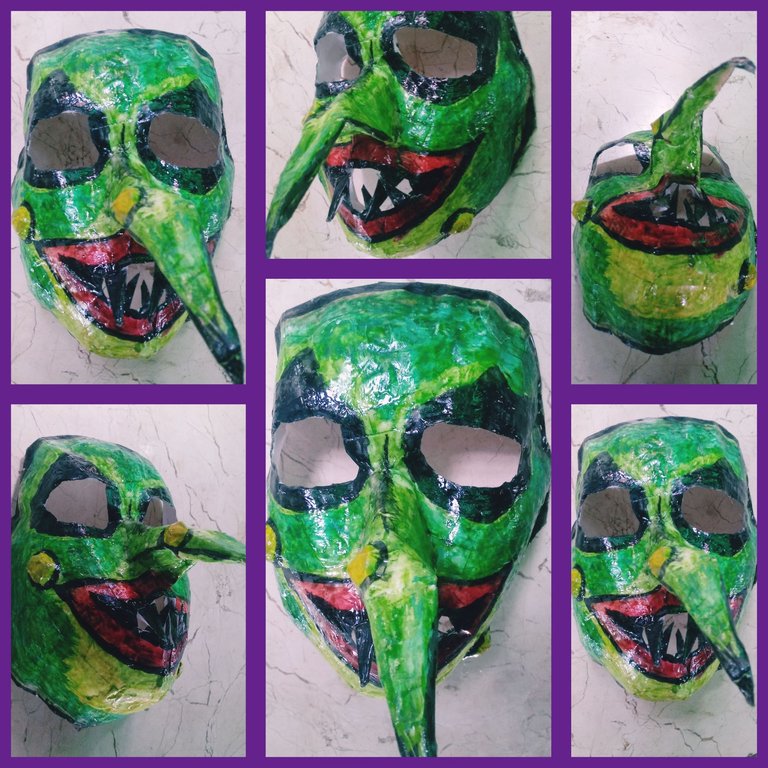
Después de pintada la máscara de bruja y los acccesorios, me dispuse a darles los toques finales para personalizarla, mediante la adherencia con pegamento del cabello de tiritas de nailon y los hilitos para su sostén.
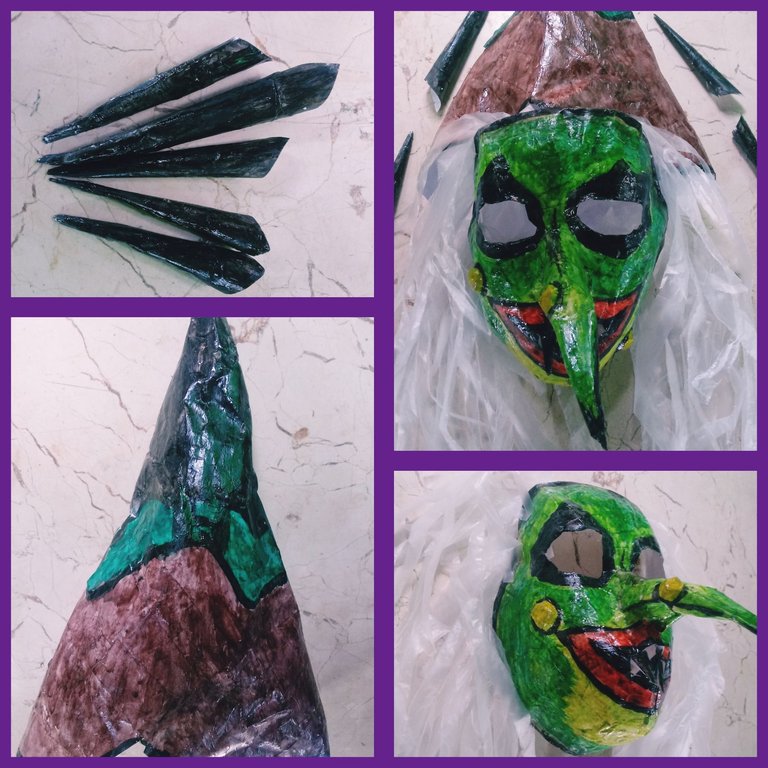
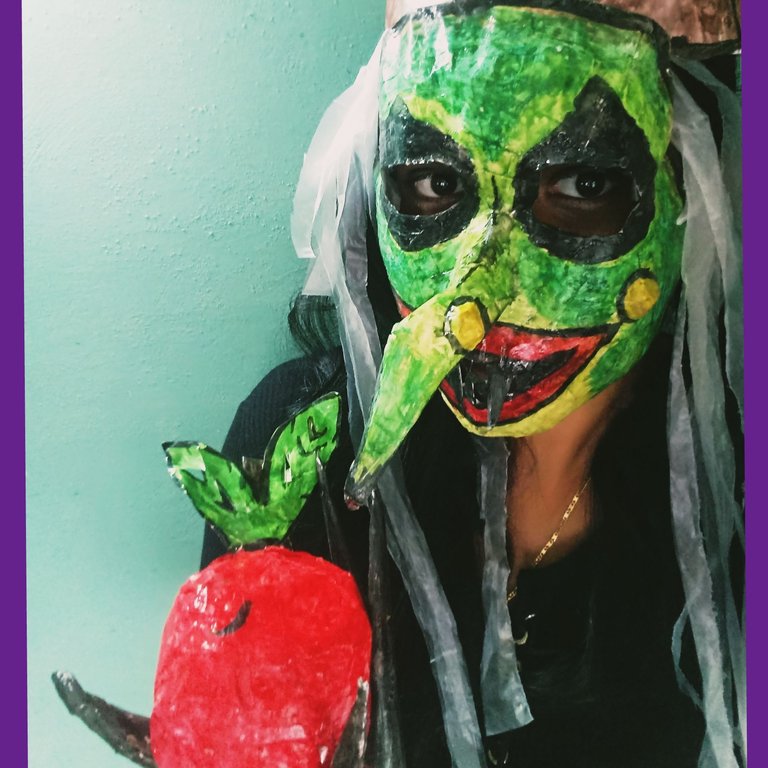
Mi disfraz de bruja, amigos, quedó listo para estrenarlo junto a las demás manualidades confeccionadas destinadas a esta noche de Halloween.
Darle las gracias a todos por sus bellas e inspiradoras creaciones compartidas.
Les deseo una bendecida y excelente semana.
¡Feliz Halloween!🙋🎃🍬🌈
English
Greetings fellow creators🙋☀🎃🍬.
Every confection she made inspired by some festive date like Halloween and Christmas, I enjoy it to the fullest, because I give free rein to my imagination. Today I bring you in the form of a tutorial to the step by step of how I made my personalized witch costume, which was composed of a sinister mask, claws, and hat.

Materials
.Mold: My face
.Mirror
.White paper strips
.Paper
.Cardboard
.Water
.Paste made of flour
.Glue
.Scissor
.Temperas
.Watercolors
.Brush
.Nylon
.Threads
.Varnish
Mode of preparation:
To start friends by telling them, that I made the flour paste homemade as a protective measure, because I was going to use it near my face and I wanted to avoid any allergies to any preservatives. The components I used were water and flour only, mixing half a cup of flour for one of water and putting it on low heat for five minutes until it thickens. I hope that this method of making glue can be applied for your future creations. Let's get started.
Mask
Mask base
1-Collect the hair well and remove accessories from the face.
2-Moisten the face well and in front of a mirror start to cover it completely with strips of white paper and water. Gently pressing, marking our facial features.
3-Make two layers on top of the first layer of wallpaper, using strips of white paper and glue made of flour.
Through this process, I confessed to them that I felt chills in front of the mirror, looking at the little papers stuck together that made me look like a mummy.
4-Wait five minutes and tilting the face forward, disassemble the mask.

5-Wash our face well with plenty of water, removing any remaining residue. While we let our base for the mask dry for twelve hours.
Nose
1-Cut a medium square on the cardboard with the scissors.
2-Take one of its vertices and roll it into a small cone.
3-Maintain the structure with glue.
4-Make bends that generate curves.
Warts
1-Squeeze paper into balls.
2-Give it a layer of wallpaper with white strips and paste made of flour, providing a smooth surface.

Unify the base of the mask with the nose, and the warts using the glue, and to generate firmness and hardness, we give a layer of wallpaper entirely with strips of white paper and glue made of flour. Let it dry for eight hours.

Claws
1-Cut ten medium squares of cardstock.
2-In each one, take one of its vertices and roll forming ten thin cones.
3-Maintain the structure with glue.
Hat
1-Cut a large square out of cardboard.(Varies depending on the desired size for the hat).
2-Take one of its vertices and roll forming a cone.
3-Maintain the structure using glue.

Hair
1-Using scissors cut thin nylon strips.
Already having our mask, claws, and hat ready, we moved on to bring it to life using tempera and watercolors. I wanted green to predominate in the mask because besides being one of my favorite colors, I could use it to represent in future stories told to my little nephews, the villain green goblin, from the movie the Spider-Man. For the claws and the hat, I used dark shades such as black and brown, to give a sinister touch to the outfit. I achieved its shiny finish, using varnish.

After the witch mask and accessories were painted, I set out to give them the finishing touches to customize it, by gluing the nylon band-aid hair and the strands for its bra.

My witch costume, friends, was ready to be released along with the other ready-made crafts destined for this Halloween night.

Thank you all for your beautiful and inspiring shared creations.
I wish you a blessed and excellent week.


