Felíz noche comunidad DiyHub, saludos y bendiciones para cada uno de ustedes espero se encuentren bien en este fin de semana, hoy me encuentro en casa descansando para comenzar una nueva jornada de trabajo, aprovecho el momento para compartir una linda manualidad en foami.
Happy night DiyHub community, greetings and blessings to each of you, I hope you are well this weekend, today I am at home resting to start a new work day, I take advantage of the moment to share a beautiful foami craft.
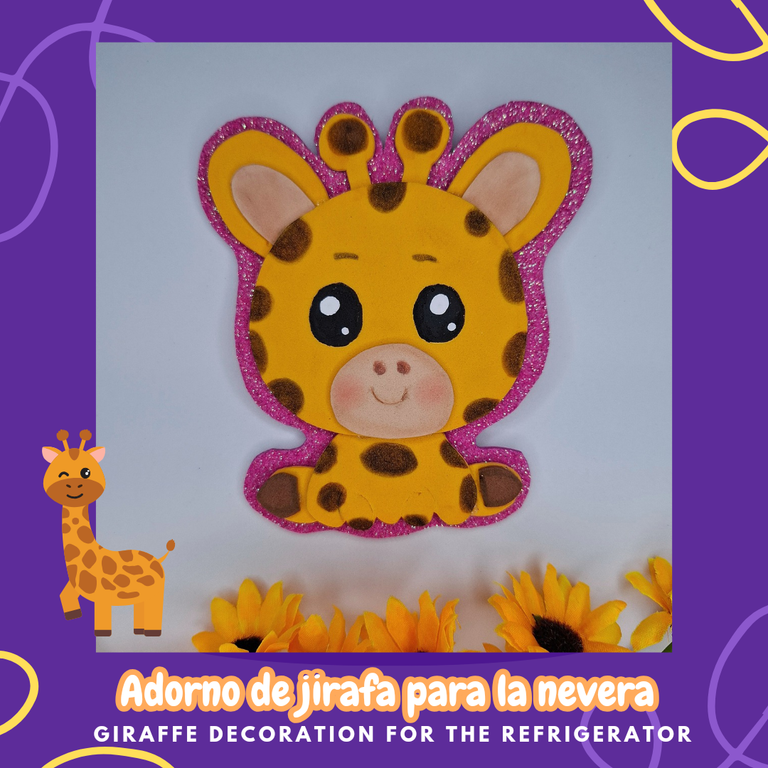
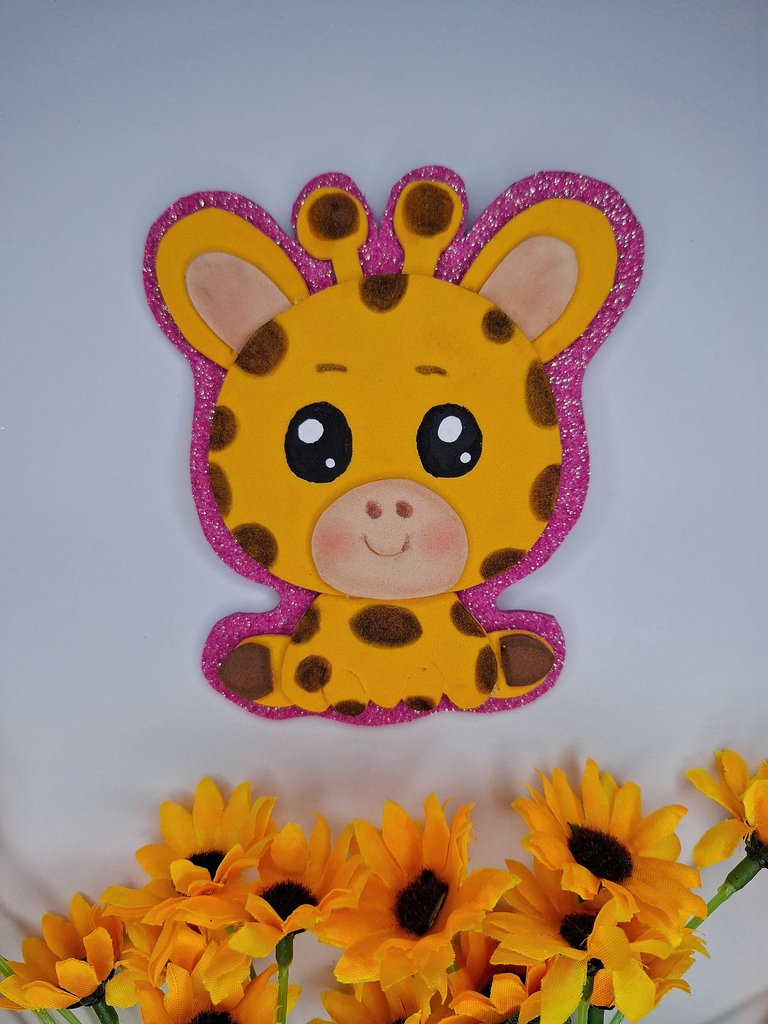
En esta ocasión seguimos con los adornos decorativos para la nevera, en este caso les comparto una tierna jirafa que pueden realizar de forma fácil y con pocos materiales, queda muy linda para dar estilo a nuestra nevera, espero les guste.
On this occasion we continue with the decorative ornaments for the refrigerator, in this case I share with you a cute giraffe that you can make easily and with few materials, it looks very cute to give style to our refrigerator, I hope you like it.
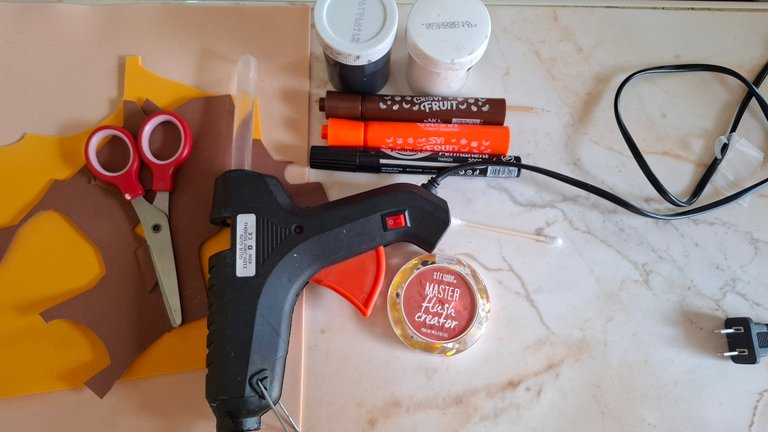
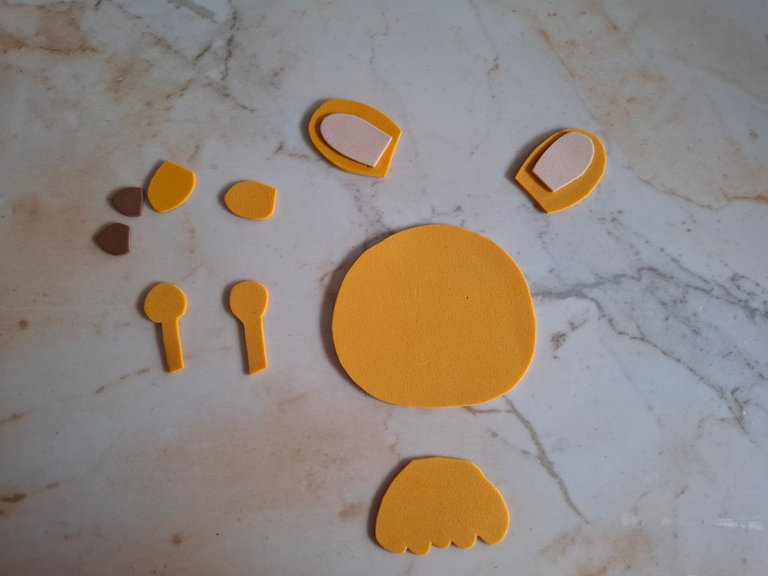
Materiales:
💛Foami amarillo.
💛Foami color piel.
💛Foami marrón.
💛Marcador negro.
💛Marcador amarillo.
💛Sombra de ojos.
💛Foami rosa escarchado.
💛Pintura blanca.
💛Palillo.
💛Tijera.
💛Silicón.
Materials:
Yellow foam.
Skin-colored foami.
Brown foam.
Black marker.
Yellow marker.
Eye shadow.
Frosty pink foami.
White paint.
Toothpick.
Scissors.
Silicone.
Paso a paso / Step by step
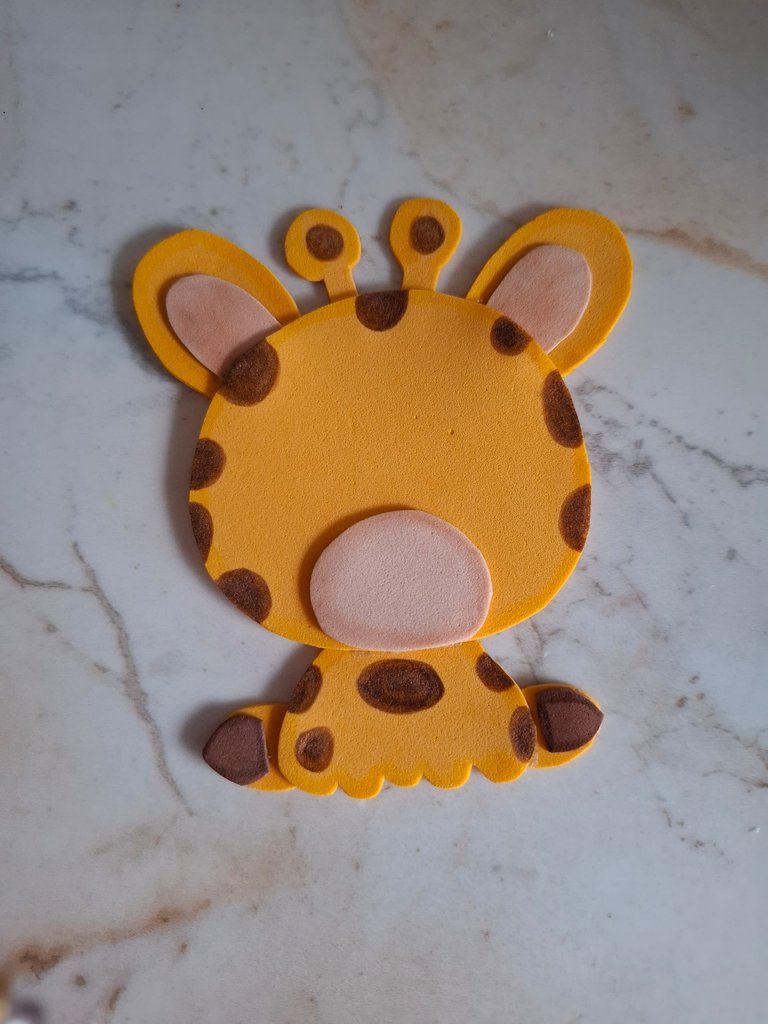
El primer paso se trata de dibujar el molde en hoja blanca para luego pasar al foami, comenzando con la cabeza, cuerpo, orejas, y los detalles de las patitas.
The first step is to draw the mold on a white sheet and then move on to the foam, starting with the head, body, ears, and the details of the legs.
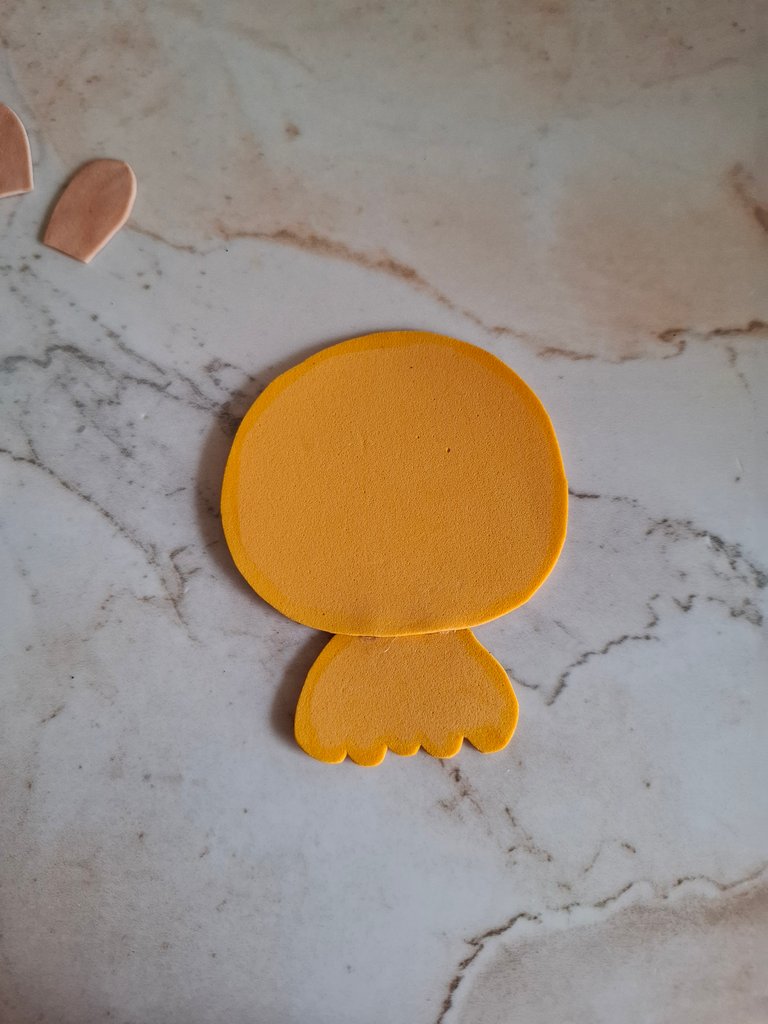
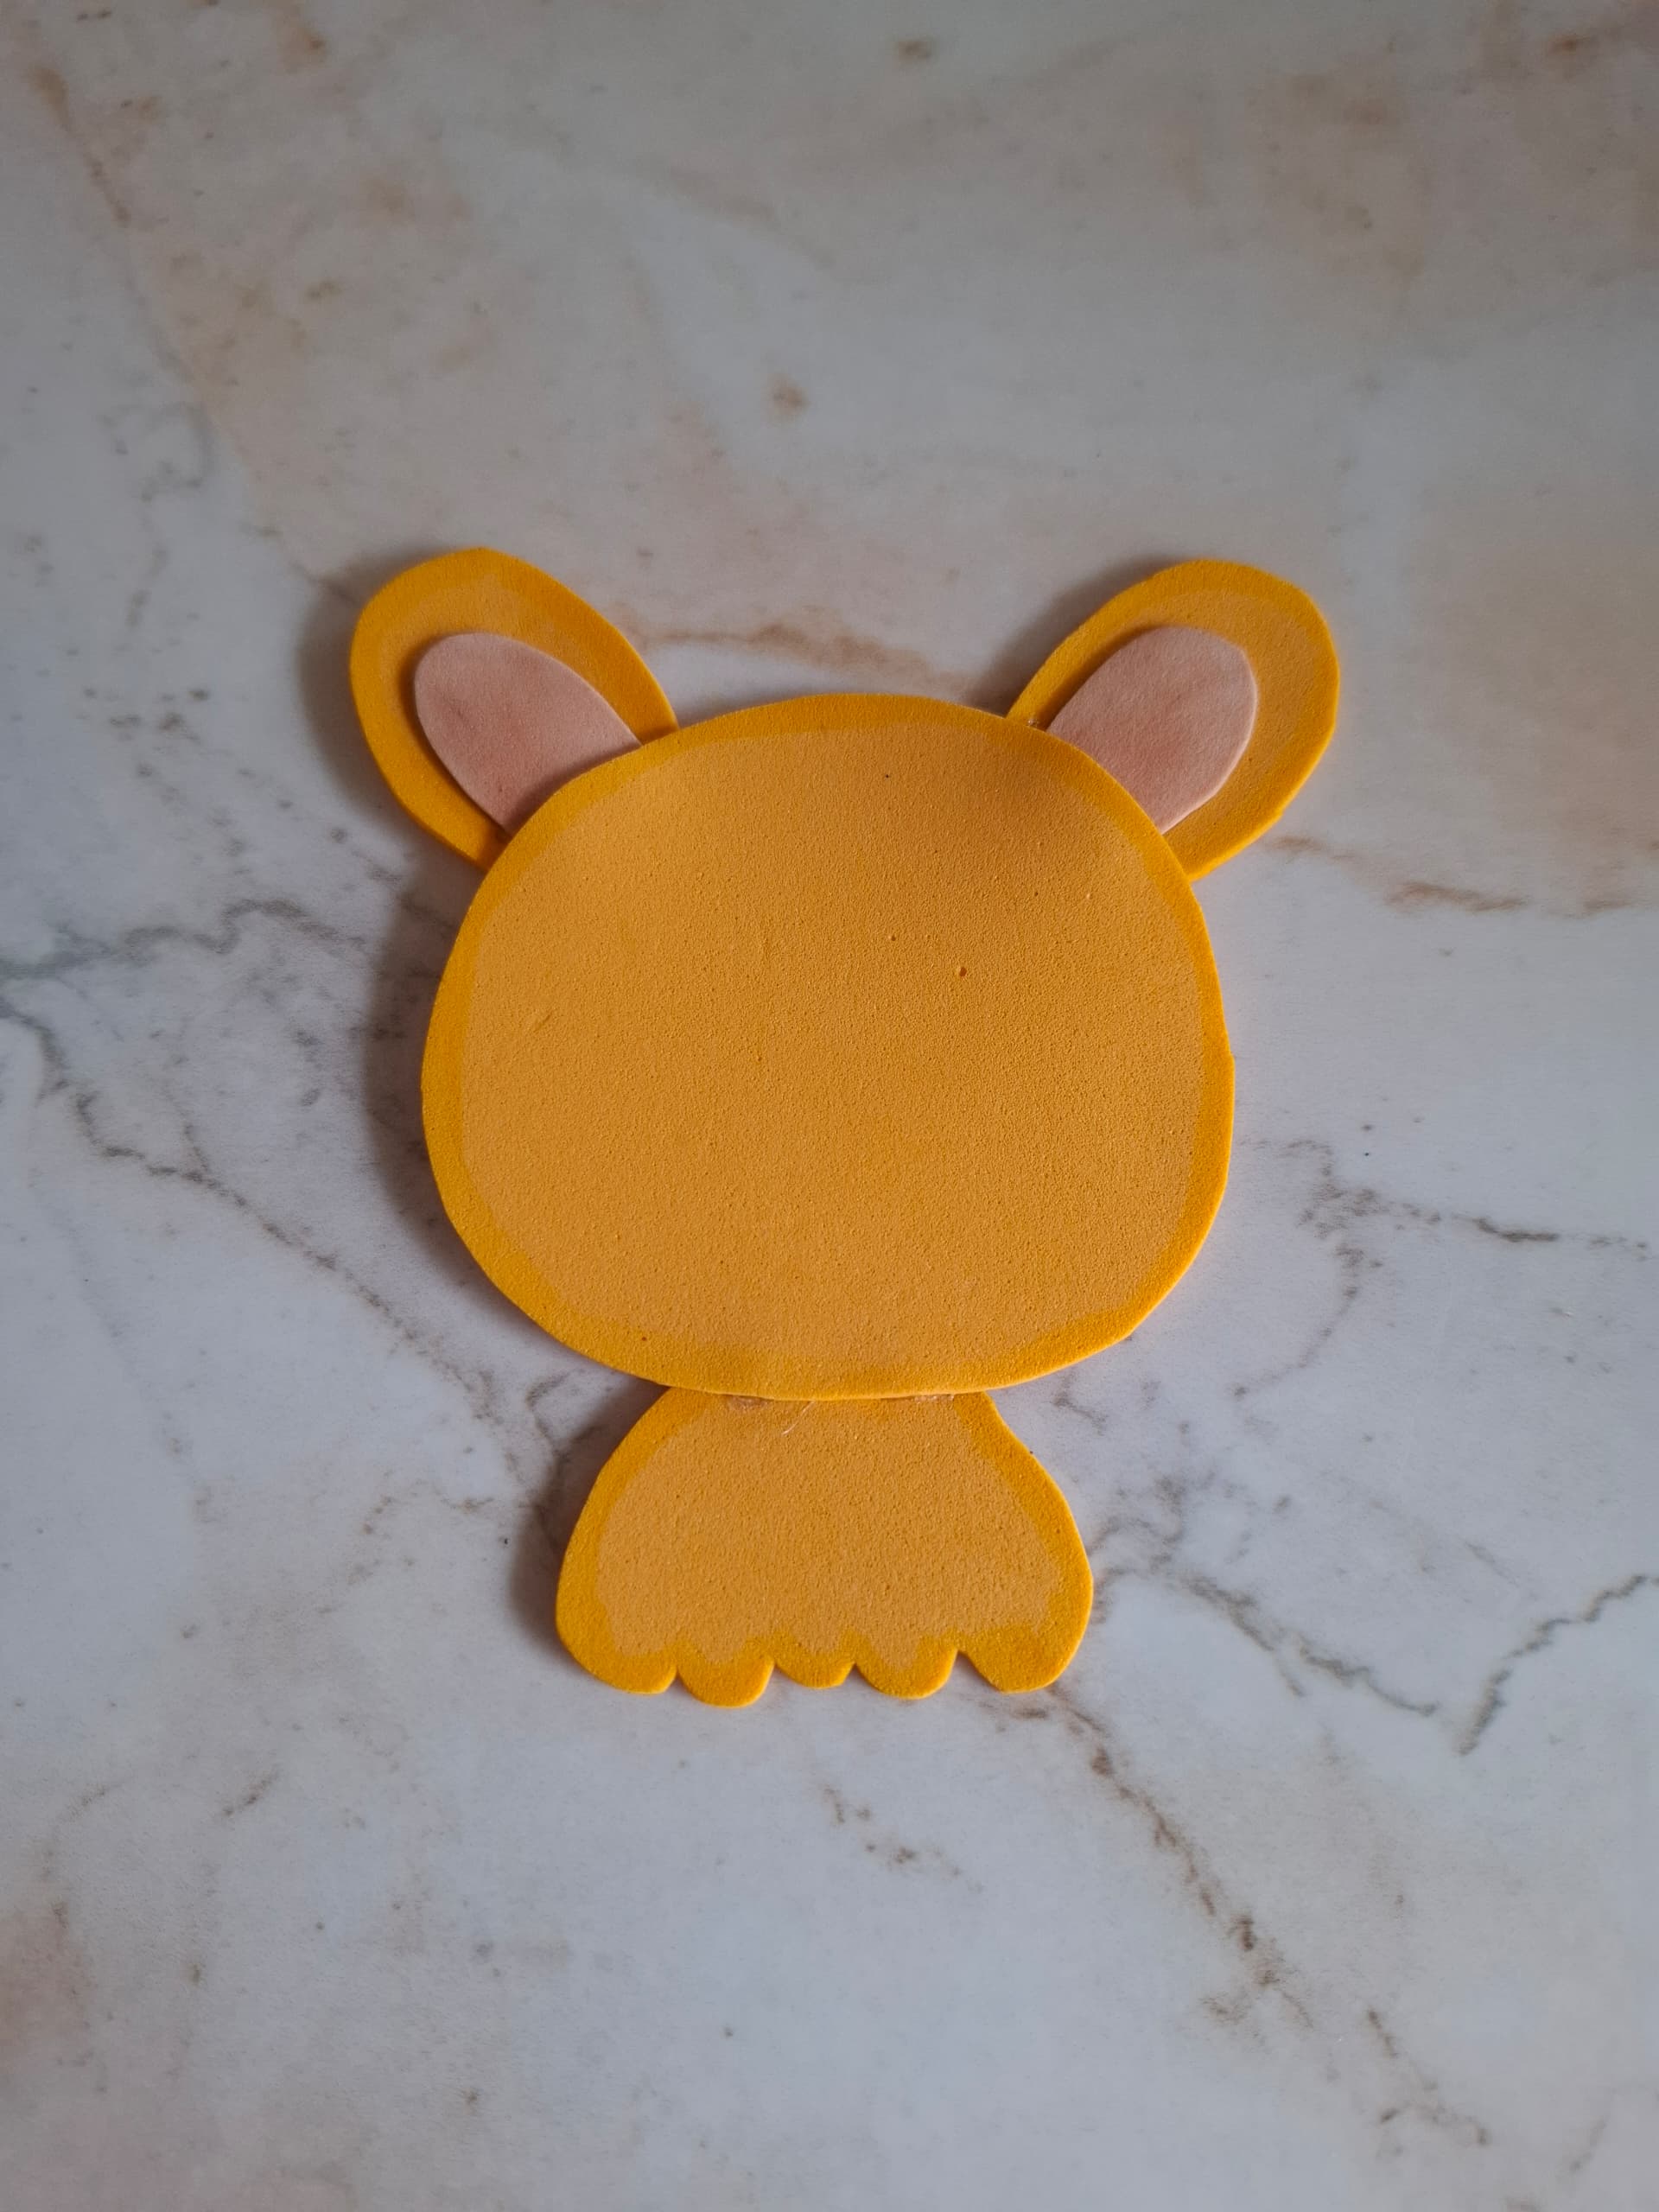
Al pasar al foami procedemos a cortar y a unir con silicón, voy a aplicar marcador amarillo al rededor de la silueta del foami amarillo, en las orejas voy a colocar el foami color piel en el centro y apliqué un poco de sombra en tono marrón claro.
When we move to the foam we proceed to cut and join with silicone, I am going to apply yellow marker around the silhouette of the yellow foam, on the ears I am going to place the skin-colored foam in the center and I applied a little shadow in a light brown tone.

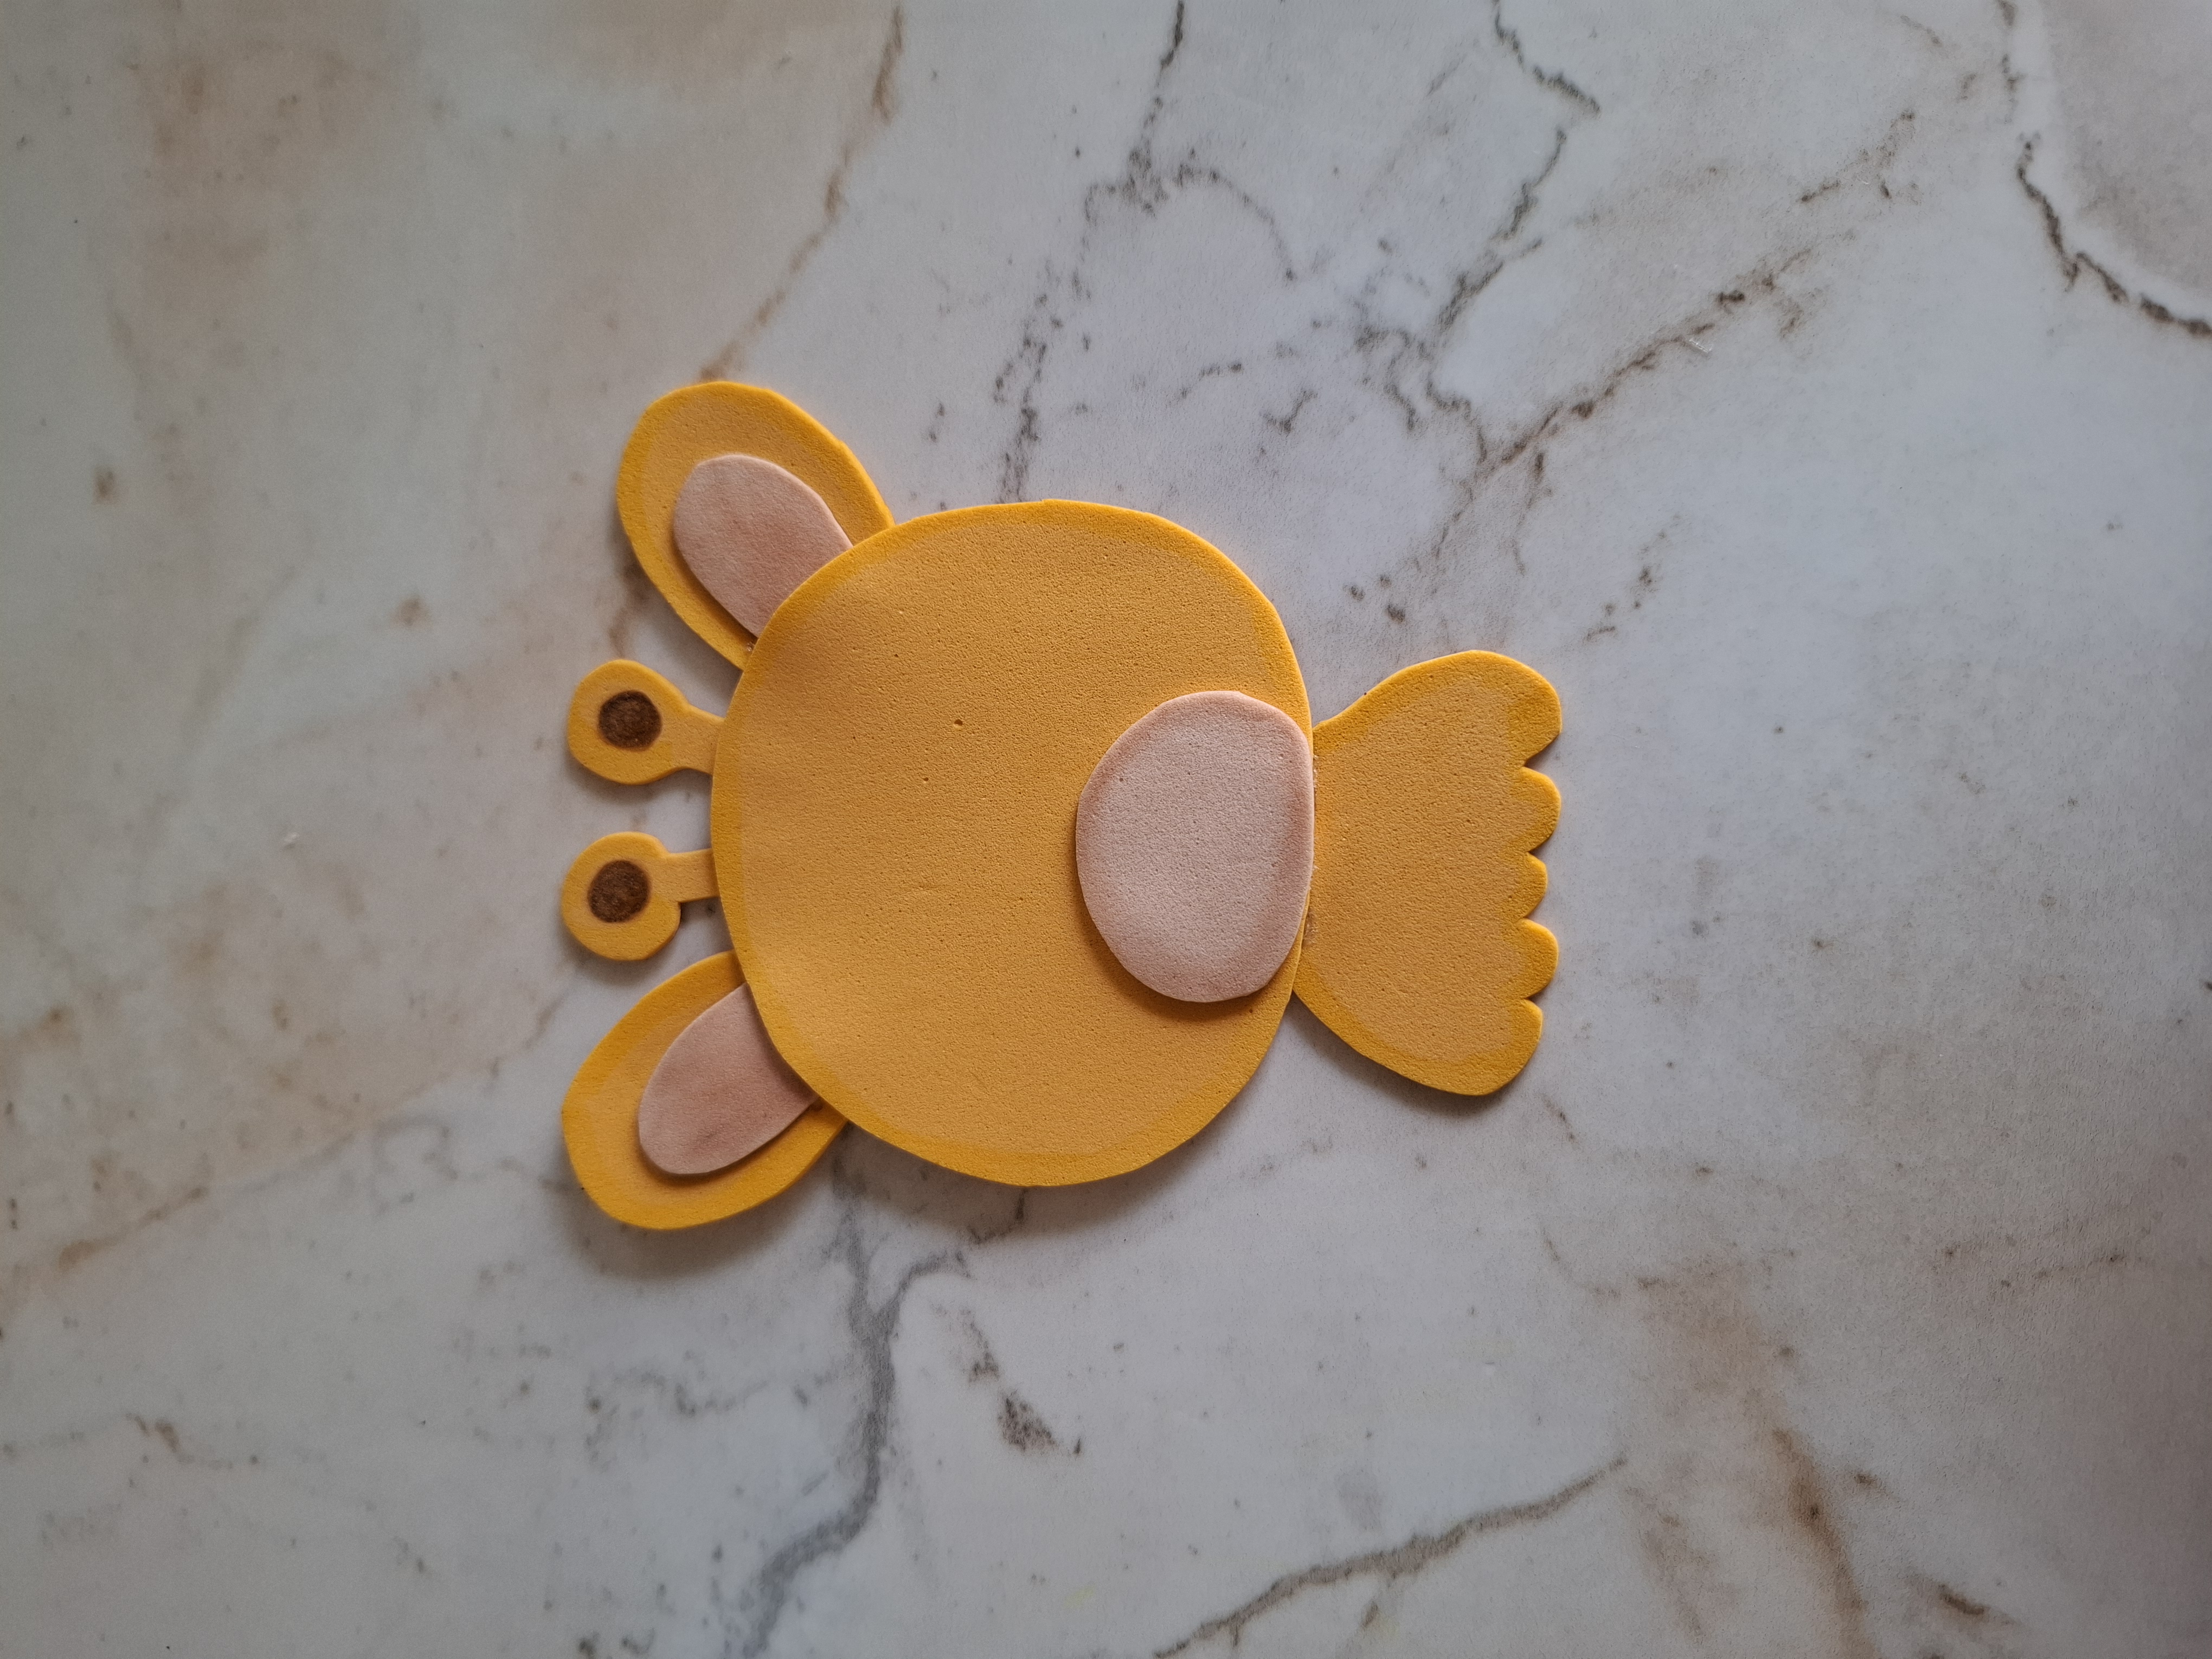
También apliqué la misma sombra en el foami piel de la boca, con marcador marrón realicé las manchas que caracterizan a la jirafa, también realicé sus ojos con pintura negra y con pintura blanco unos pequeños puntos en la parte superior e inferior.
I also applied the same shadow on the foam skin of the mouth, with brown marker I made the spots that characterize the giraffe, I also made its eyes with black paint and with white paint some small dots on the top and bottom.
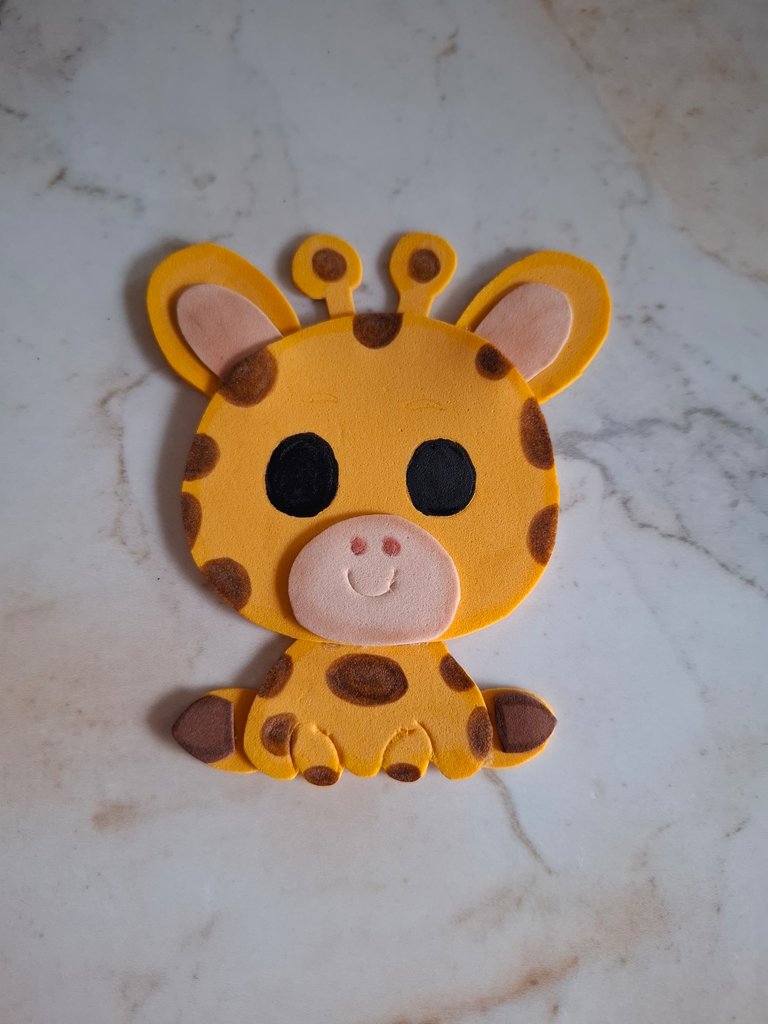
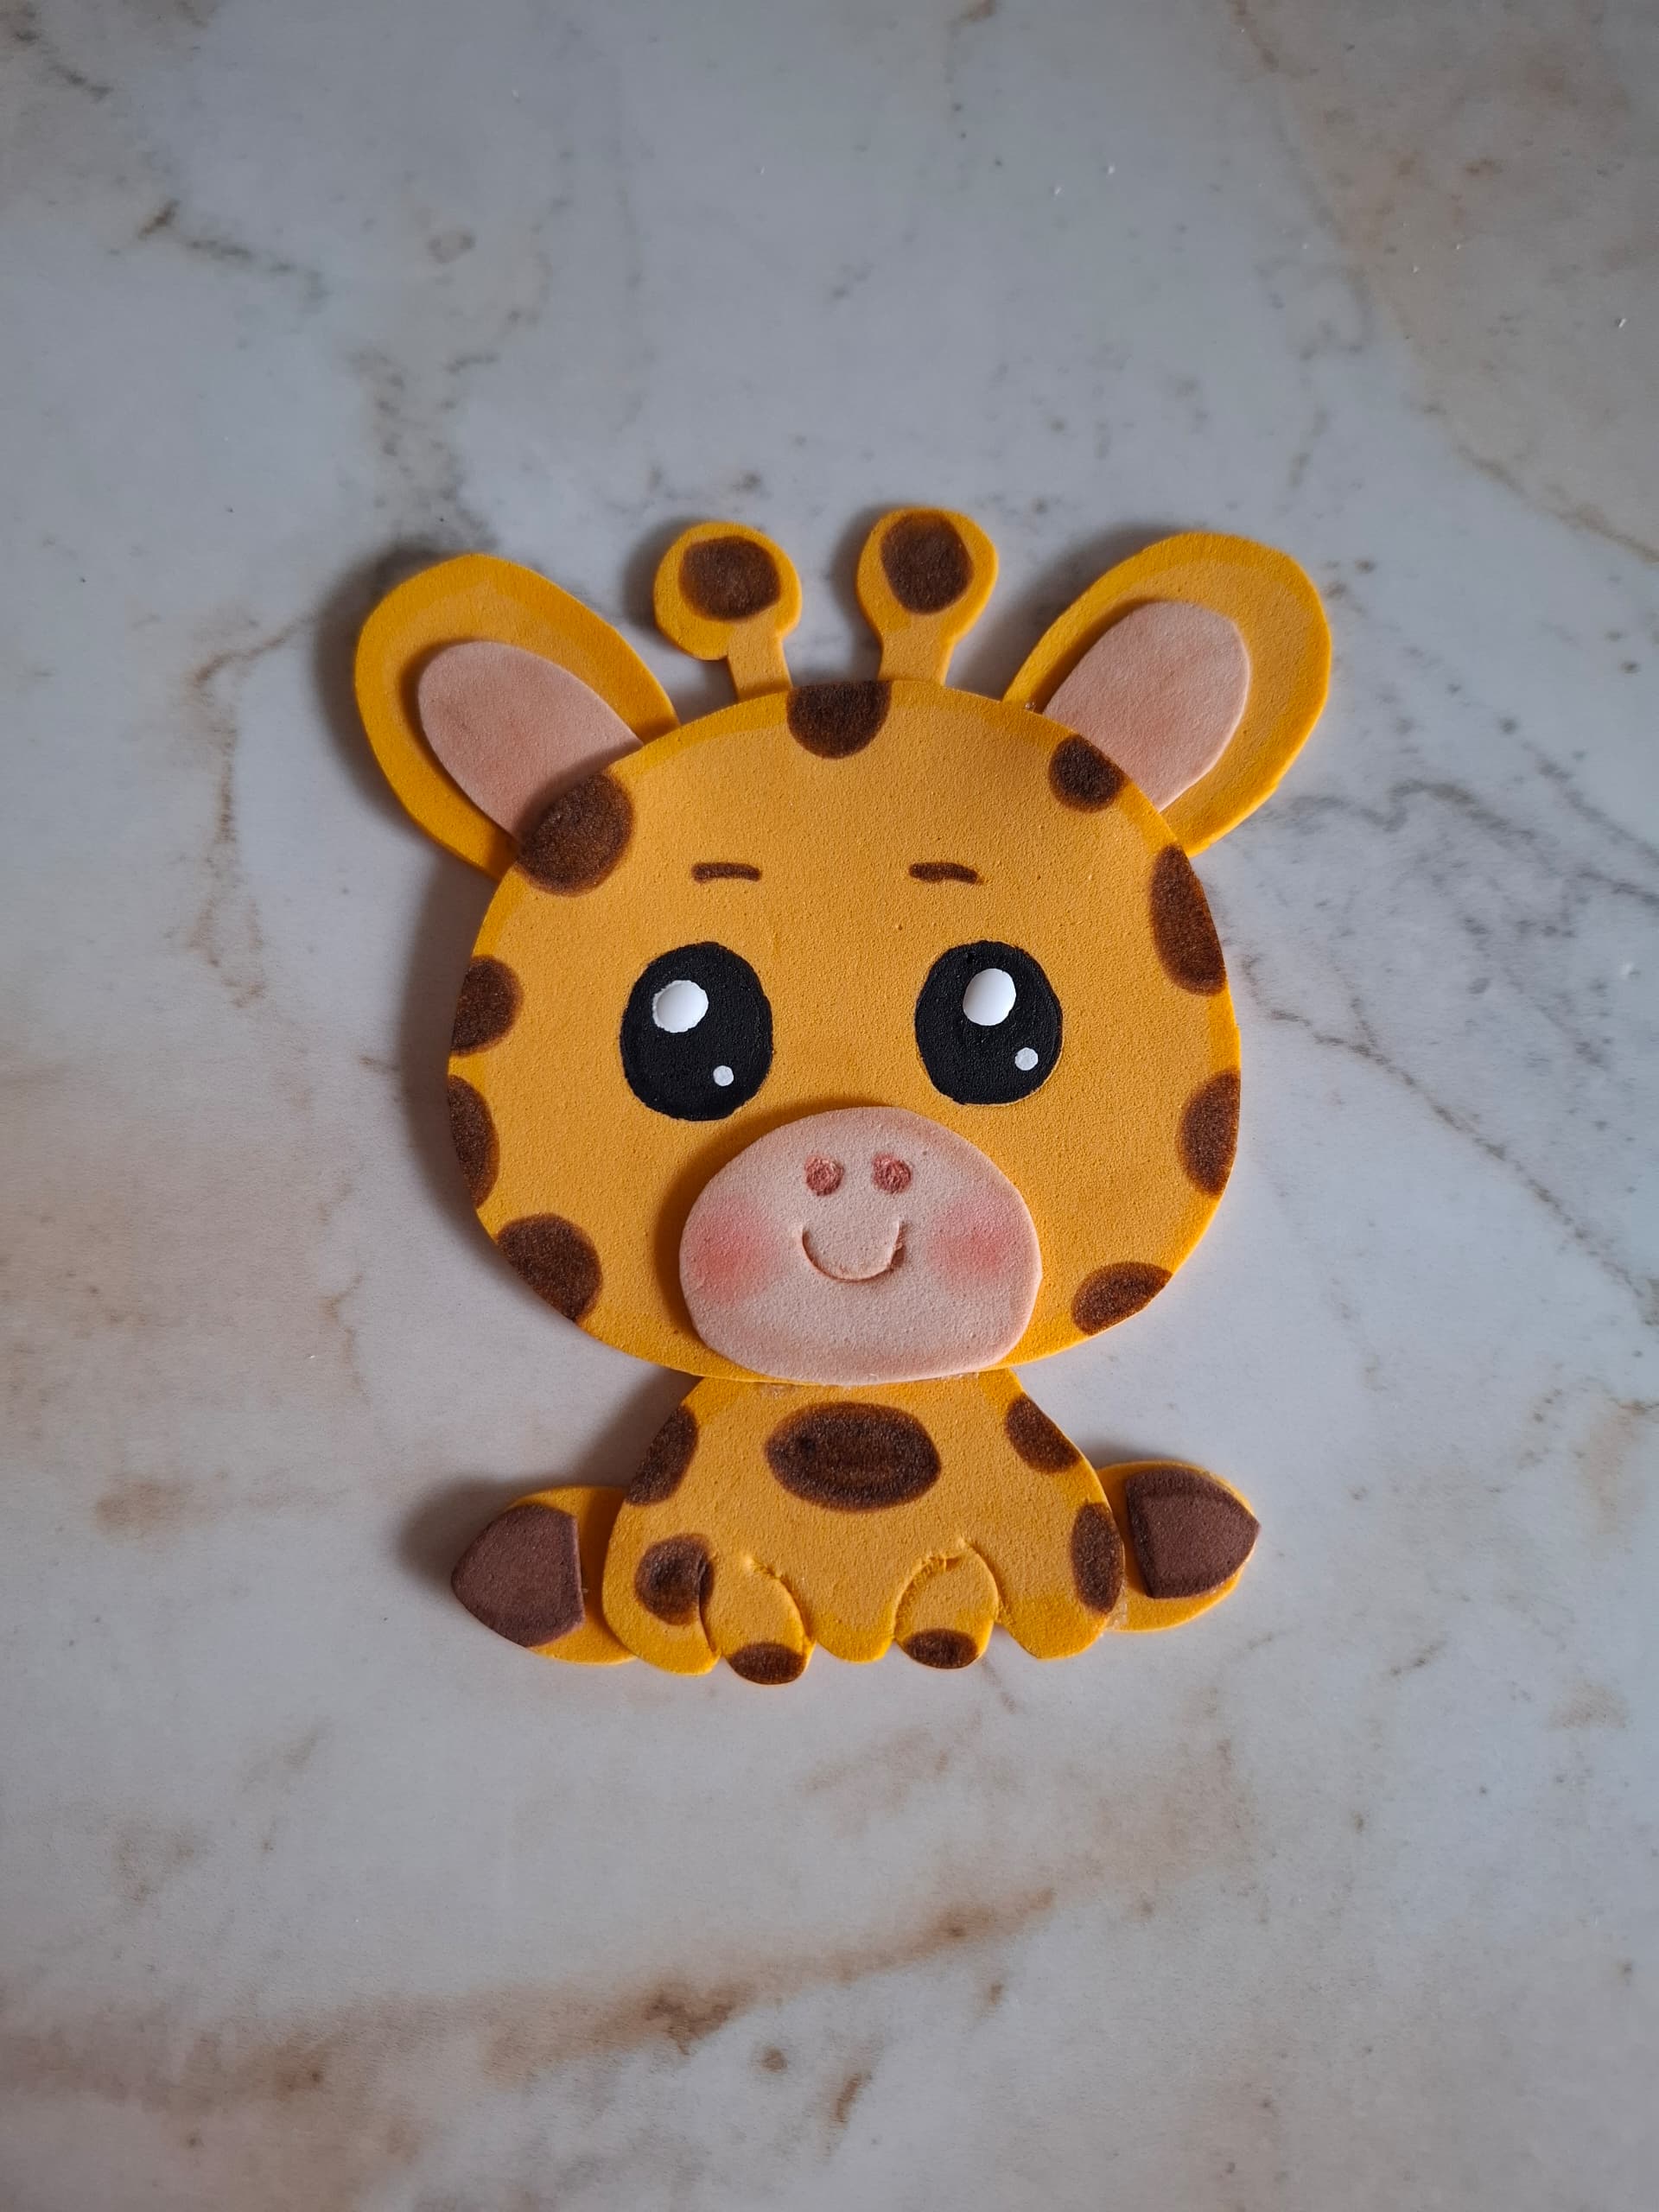
Marqué una sonrisa con un palillo, y realicé dos puntos que serán la nariz, apliqué rubor color rosa, por último voy a colocar la jirafa sobre el foami rosa escarchado dibujamos la silueta y cortamos, de esta forma terminé esta linda jirafa y ya lo podemos utilizar en nuestra nevera, en esta ocasión se la di como obsequio a mi mamá ya que ella queria uno de estos adornos.
I marked a smile with a toothpick, and made two points that will be the nose, I applied pink blush, lastly I am going to place the giraffe on the frosty pink foam, we draw the silhouette and cut, this way I finished this cute giraffe and now we can do it to use in our refrigerator, on this occasion I gave it as a gift to my mother since she wanted one of these ornaments.
Muchas gracias por visitar mi publicación nos vemos en una próxima oportunidad con más ideas creativas.
Thank you very much for visiting my publication, see you next time with more creative ideas.

Contenido original. - original content.
Los separadores y banner fueron realizados en Canva. - The dividers and banner were made in Canva.
Las fotografias son tomadas con mi teléfono Redmi Note 11s y editadas en PicsArt - The photographs are taken with my Redmi Note 11s phone and edited in PicsArt.
Traducción de: Google traductor - Translation of: Google translator.