Familia Colmena y comunidad @diyhub, es un placer saludarle y estar aquí para compartir con ustedes mi participación con la temática abejas de este mes. Las abejas son una parte vital de los ecosistemas viven en colonias o comunidades para trabajar en equipo algo muy parecido a nuestro desarrollo aquí en Hive.
Hive family and community @diyhub, it is a pleasure to greet you and be here to share with you my participation with this month's bees theme. Bees are a vital part of ecosystems live in colonies or communities to work as a team something very similar to our development here at Hive.
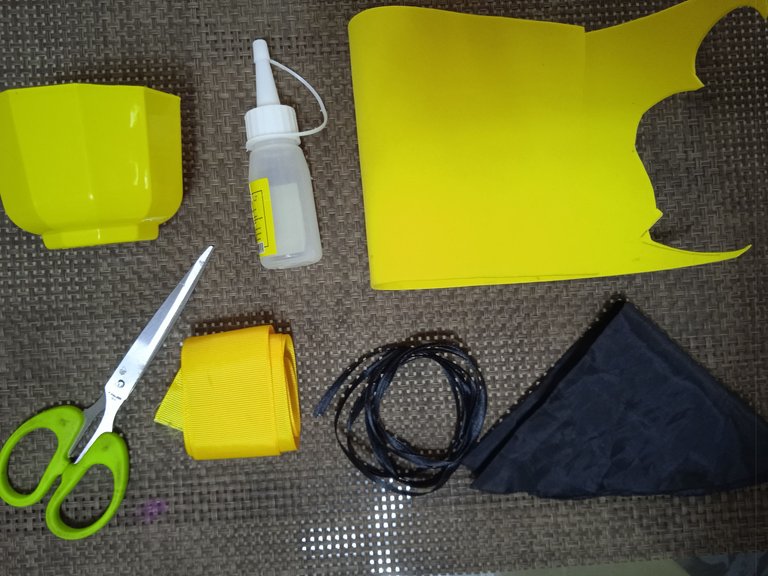
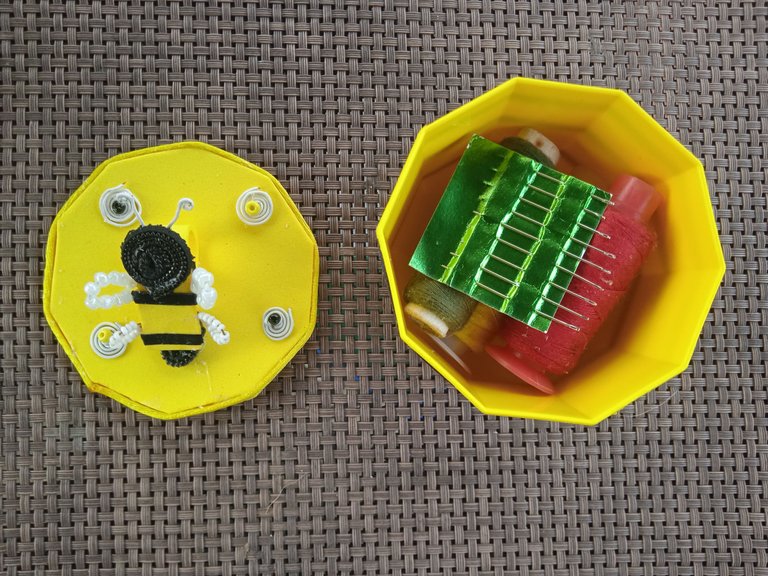
Estos son los materiales usados en la elaboración de esta propuesta:
✓Foami amarillo.
✓Alambre blanco.
✓Cinta negra.
✓Mostacillas blancas, negras y amarillas.
✓Silicón frío transparente.
✓Cola de rata amarillo.
✓Dispensador plástico amarillo.
✓Recorte de cremallera negra.
✓Tijeras.
✓Encendedor.
✓Pinza punta redonda.
✓Hilos.
✓Agujas.

These are the materials used in the elaboration of this proposal:.
✓Yellow foami.
✓Wire white.
✓Black ribbon.
✓White, black, and yellow loops.
✓Cold transparent silicon.
✓Yellow rat tail.
✓Yellow plastic dispenser.
✓Black zipper trim.
✓Scissors.
✓Lighter.
✓Round-nose tweezers.
✓Threads.
✓Needles.
Use estos sencillos pasos para su elaboración:
PRIMER PASO:
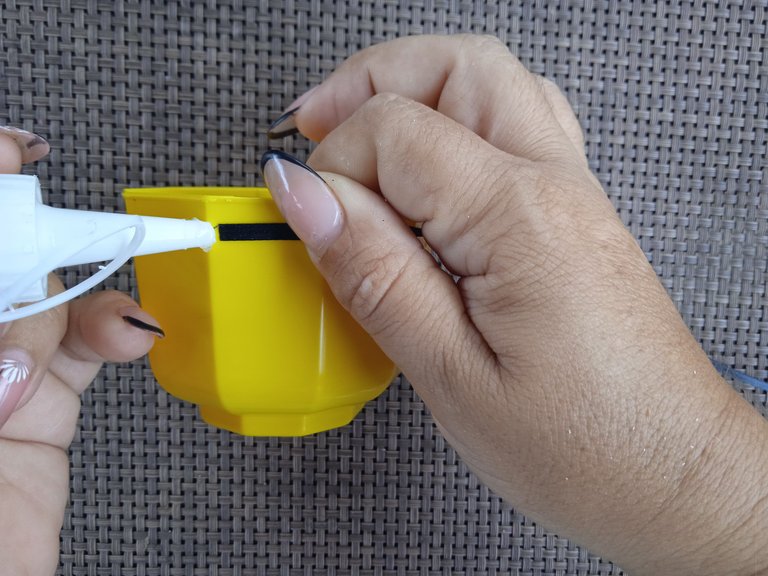
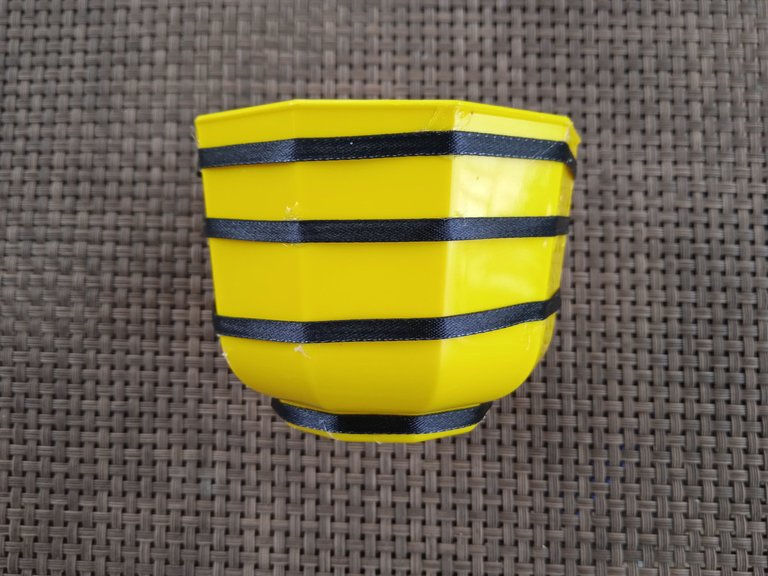
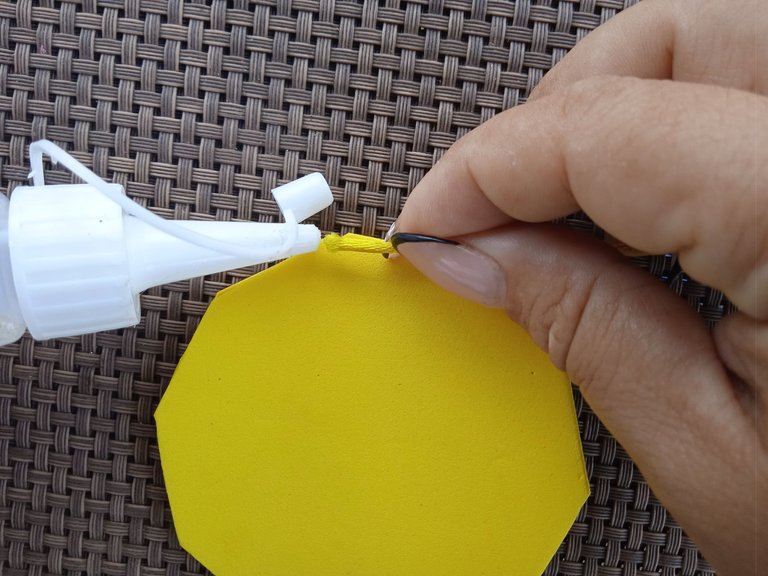
Empiezo tomando el pequeño dispensador plástico amarillo y con las tijeras ✂️ corto de la cinta negra cuatro trocitos de quince centímetros cada uno y rodeo el contorno del dispensador como muestra la imagen, fijando con silicón frío transparente.
Use these simple steps to make it:.
STEP ONE:
I start by taking the small yellow plastic dispenser and with the scissors ✂️ I cut from the black ribbon four pieces of fifteen centimeters each and go around the outline of the dispenser as shown in the picture, fixing with cold silicone
with cold silicone.

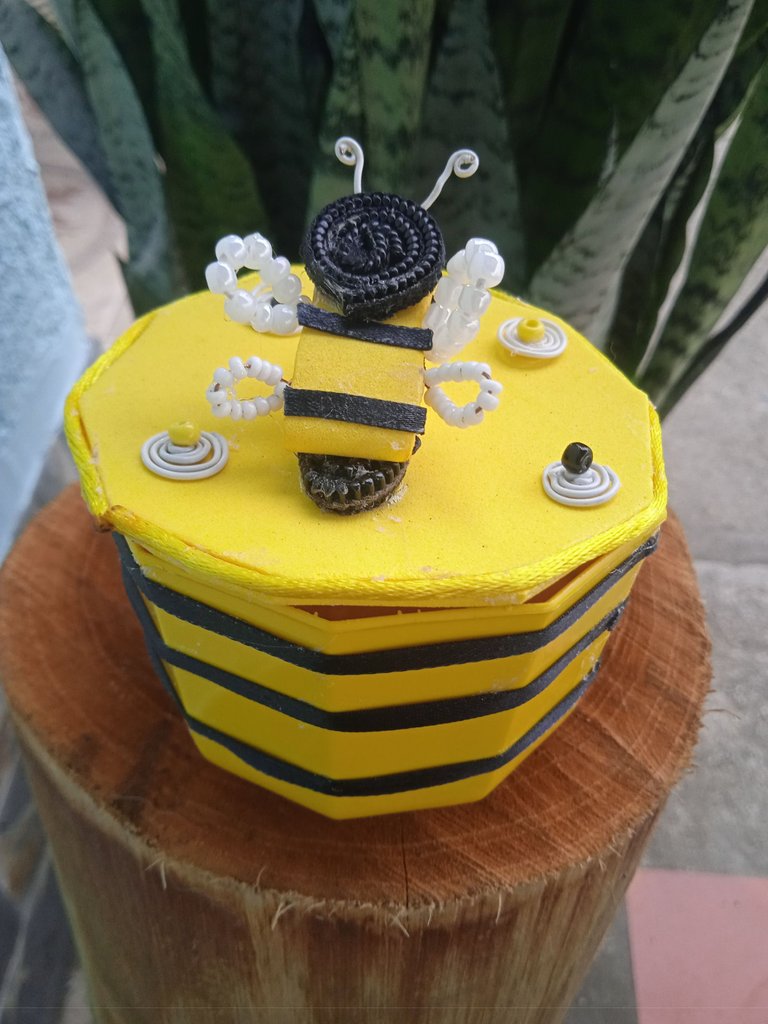
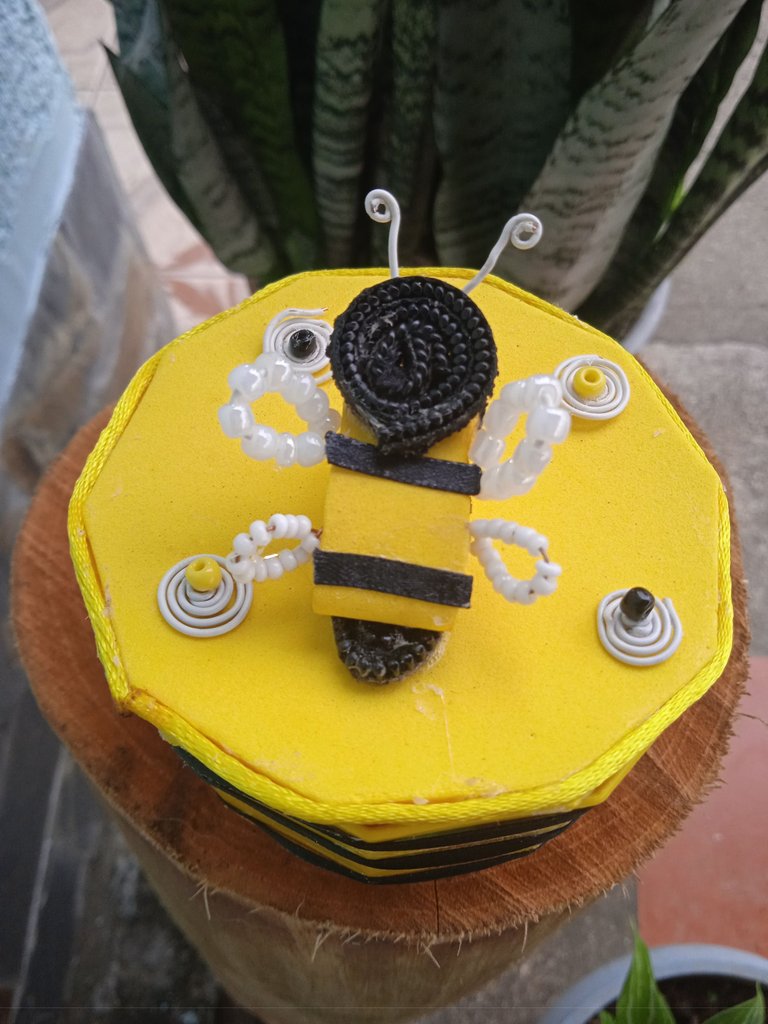
SEGUNDO PASO:
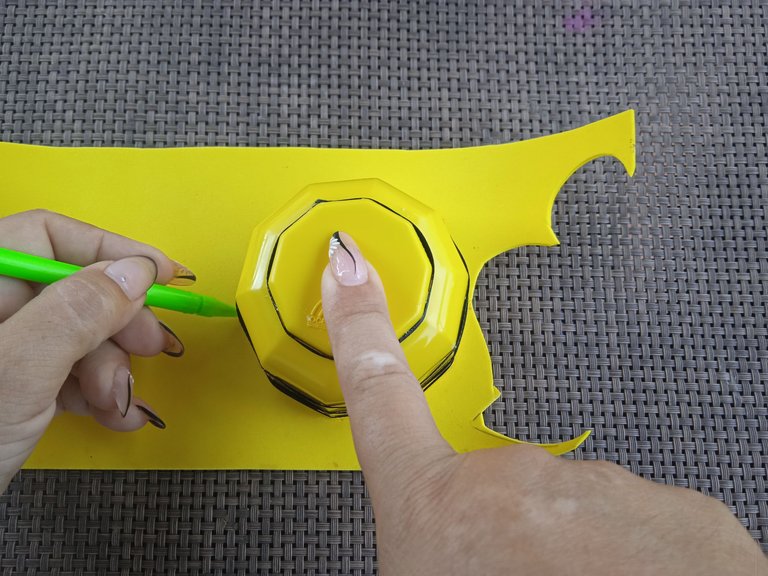
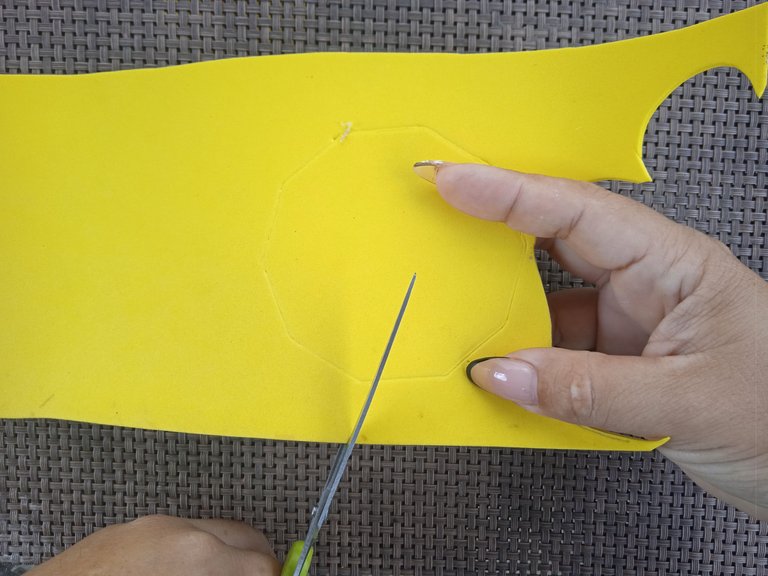
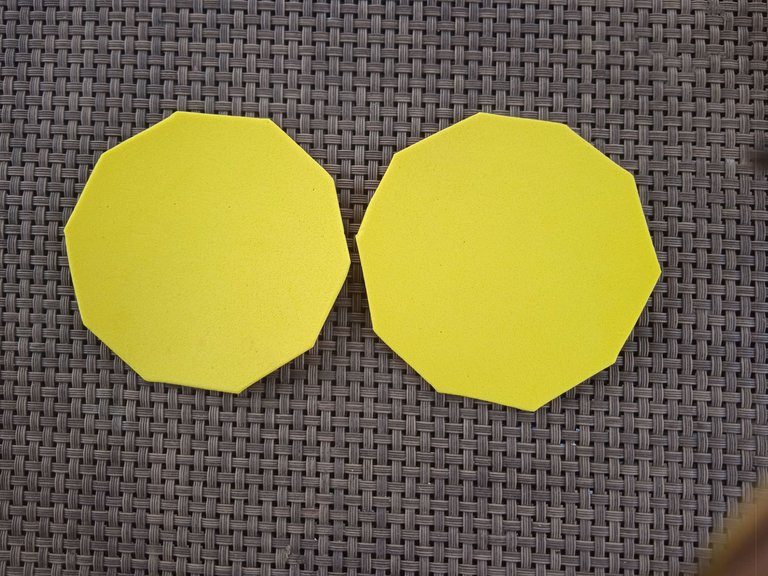
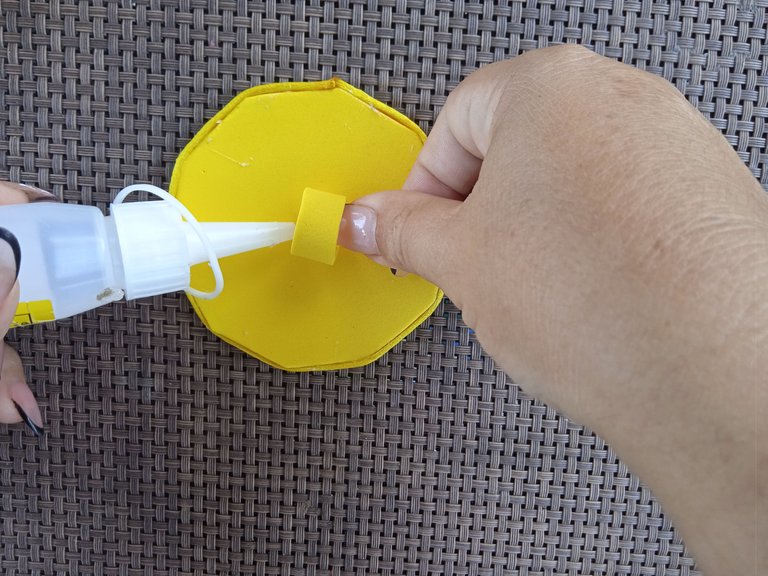
Ahora marco en el foami amarillo el contorno del dispensador usándolo como molde para formar la tapa, corto dos piezas; una vez que tengo las dos caras las uno y pego con silicón frío transparente, ahora uso cola de rata amarilla y la pongo alrededor de lo que será la tapa y así queda elaborada.
SECOND STEP:
Now I mark on the yellow foamis the outline of the dispenser using it as a mold to form the lid, I cut two pieces; once I have the two sides I join them together and glue them with cold transparent silicone, now I use yellow rat glue and put it around what will be the lid and so it is elaborated.
PASO TRES:
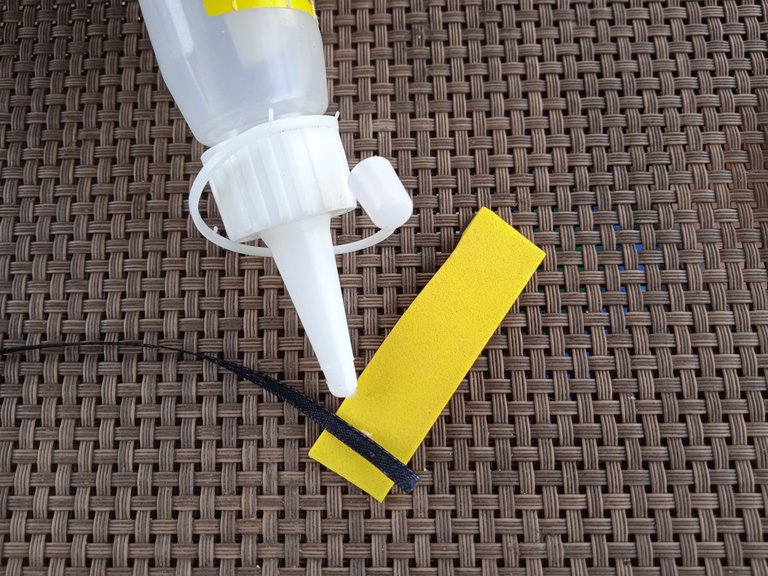
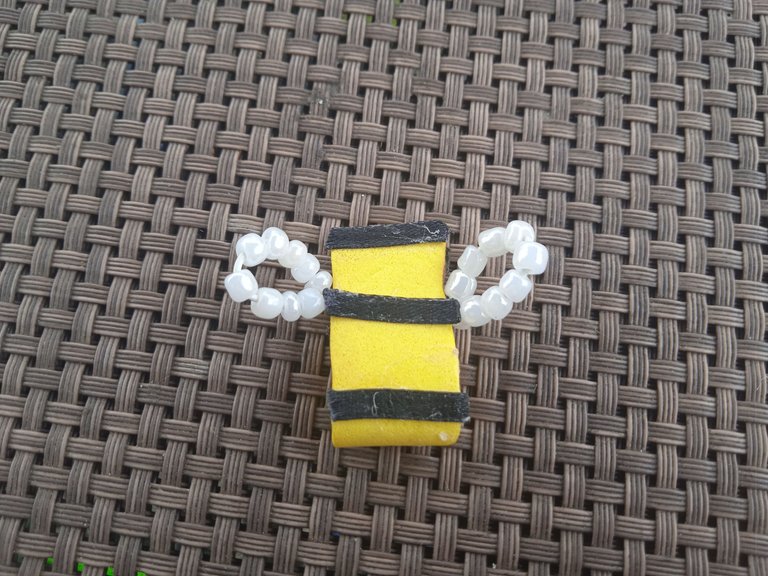
Aquí voy a formar el motivo de mi proyecto una Abeja: primero corto del foamis amarillo un pequeño rectángulo de cinco centímetros aproximadamente, también corto cuatro trocitos de cinta negra de un centímetro, y dejando un espacio de medio centímetro entre ellas las pongo con el silicón frío transparente en el rectángulo de foami amarillo, lo doblo de forma ovalada y fijo con el silicón frío.
STEP THREE:
Here I am going to form the motif of my project a Bee: first I cut from the yellow foamis a small rectangle of five centimeters approximately, I also cut four little pieces of black ribbon of one centimeter, and leaving a space of half a centimeter between them I put them with the transparent cold silicone on the rectangle of yellow foami, I fold it in an oval shape and fix with the cold silicone.
Paso Cuatro:
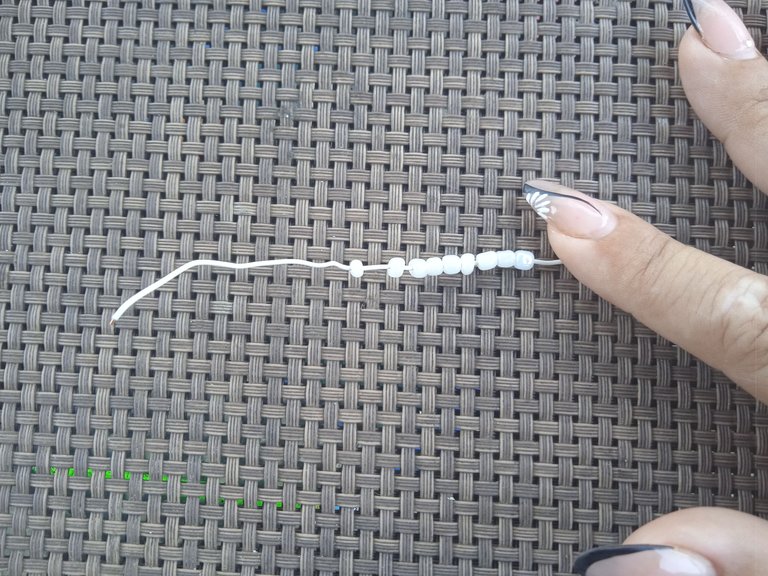
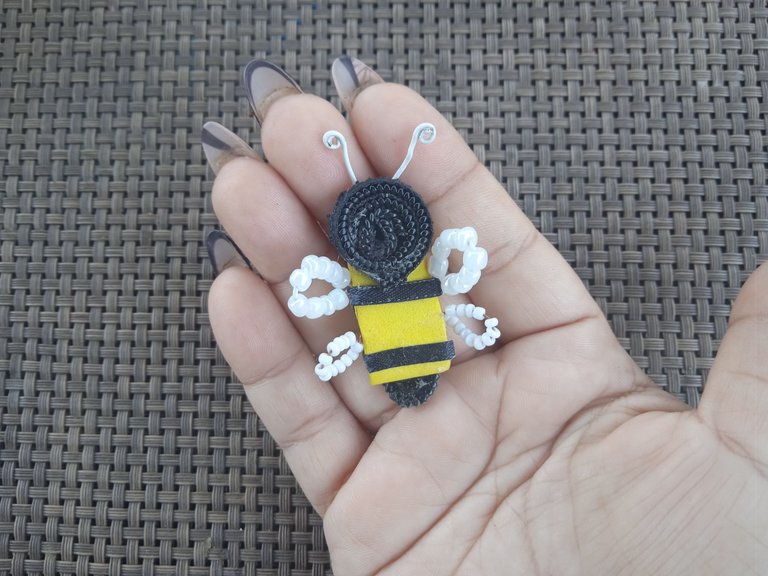
Voy a realizar las alas de la abeja: aquí en una medida de alambre blanco de siete centímetros inserto dieciocho mostacillones blancos perla, separo nueve mostacillones en tres centímetros del alambre, dejo un centímetro sin trabajar y realizo el mismo procedimiento anterior con los restantes nueve mostacillones, entorcho en la medida de tres centímetros y así tengo las dos alas, pongo silicón frío en el centro de las mismas, las paso de lado a lado del cuerpo y pego como muestra la imagen.
De igual forma realizo otro par de alas pero más pequeñas que las pongo debajo de las alas grandes.
Step Four:
I am going to make the wings of the bee: here in a measure of white wire of seven centimeters I insert eighteen pearl white beads, I separate nine beads in three centimeters of the wire, I leave one centimeter without working and perform the same procedure above with the remaining nine beads, I twist in the measure of three centimeters and thus I have the two wings, I put cold silicone in the center of them, I pass them from side to side of the body and glue as shown in the image.
In the same way I make another pair of wings but smaller and put them under the big wings.
Quinto Paso:
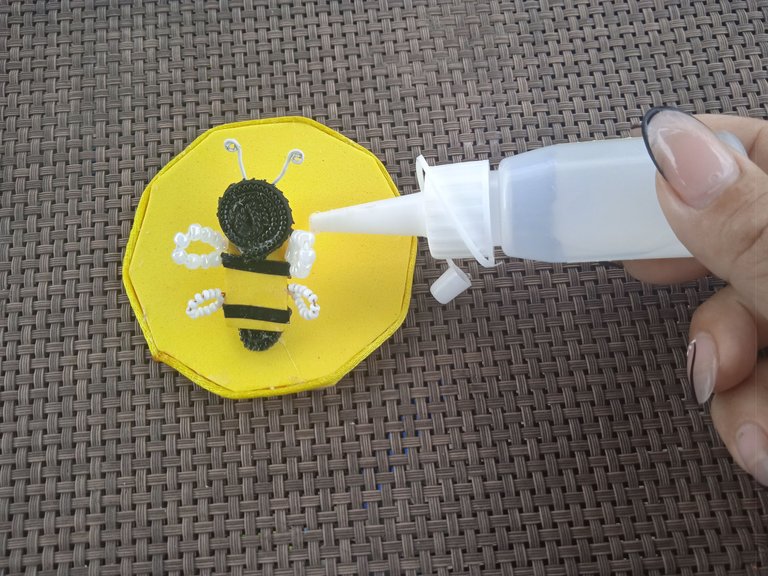
En este paso con un retacito de cremallera hago un círculo de tres vueltas y las pego con silicón frío en lo que será el cuerpo, luego con alambre blanco y usando la pinza punta redonda hago dos antenistas para colocarlas en la cabeza, de igual manera usando cremallera hago un pequeño óvalo y lo pongo al final del cuerpo como especie de aguijón, ahora hago con foamis amarillo un pequeño aro ⭕ que pongo en el centro de la tapa, dónde coloco la abeja como muestra mi imagen. Hago unos pequeños detalles para decoración de mi proyecto y así queda.
Fifth step:
In this step with a zipper patchwork I make a circle of three turns and glue them with cold silicone in what will be the body, then with white wire and using the round tip tweezers I make two antennae to place them on the head, in the same way using zipper I make a small oval and put it at the end of the body as a kind of sting, now I make with yellow foamis a small ring ⭕ that I put in the center of the lid, where I place the bee as shown in my image. I make some small details to decorate my project and this is how it looks like.
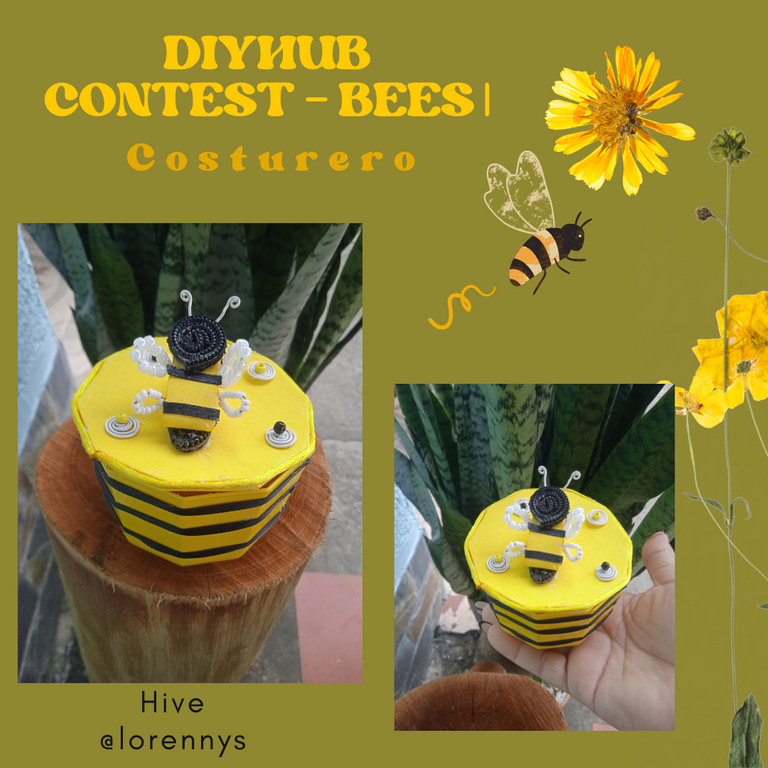
De esta manera he terminado la elaboración de mi costurero con temática de abeja 🐝 para participar en esta agradable iniciativa. Invito a mi amiga @josdelmi y @desileal a que participen, no puedo dejar pasar la oportunidad para agradecerle a la amiga @katiuskamata por invitarme a participar.
This way I have finished the elaboration of my bee-themed sewing box 🐝 to participate in this nice initiative. I invite my friend @josdelmi and @desileal to participate, I can't pass up the opportunity to thank my friend @katiuskamata for inviting me to participate.
Todas las fotografías son de mi propiedad ,capturadas con mi Redmi A9. Imagen principal, banner y separadores elaborados con Canva. Deelptraductor fue utilizado para esta publicación.
Éxitos y bendiciones para todos 🙏🏻 hasta las próxima publicación.
¡Tengan un feliz día!
¡Gracias por detenerte a leer!
All photos are my property, captured with my Redmi A9. Main image, banner and separators made with Canva. Deelptraductor was used for this publication.
Success and blessings to all 🙏🏻 until the next post.
Have a great day!
Thanks for stopping by to read!