Hello dear friends of Hive. Literally if you don't have your better half, create it. Yes! create it using this wonderful Filigram technique.
I show you below:
Materials:
- Orange cardboard ribbons.
- White cardboard ribbon.
- Hoops
- Glue or cold silicone
- Green mouse tail tape
- Stick
Step by step
Step 1
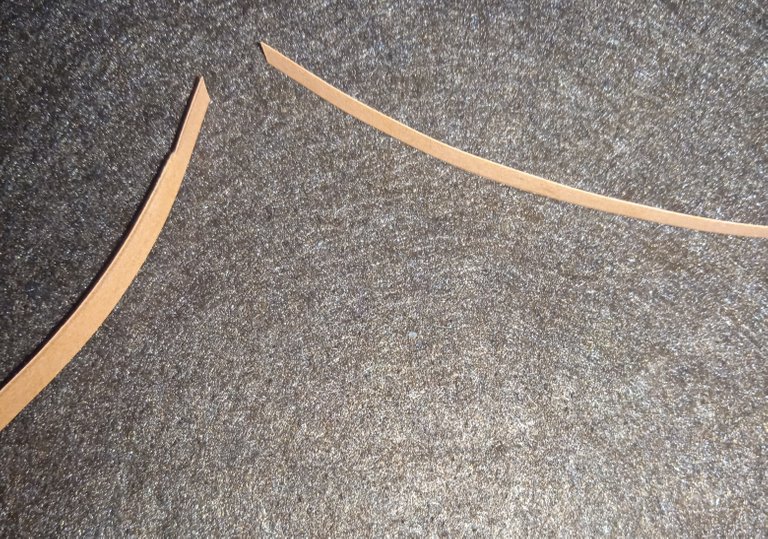
We proceed to join the ends of the orange ribbons, we need two 40 cm ribbons to form an 80 cm ribbon.

2
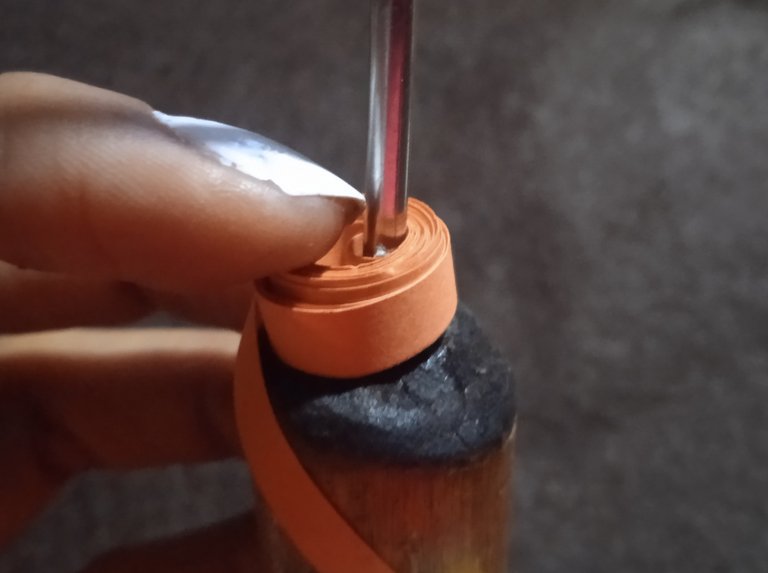
Take the cotton swab and proceed to roll the orange cardboard around it, making 14 turns on the cotton swab.
3

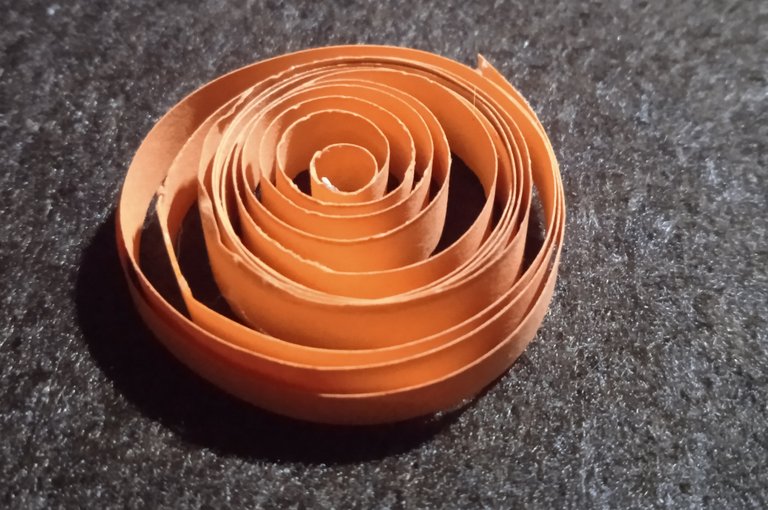
Then remove the cotton swab to form our first circle of filigree ribbons. Cut the excess material from the cardboard.
4
Glue the end to the circle with cold silicone.
5
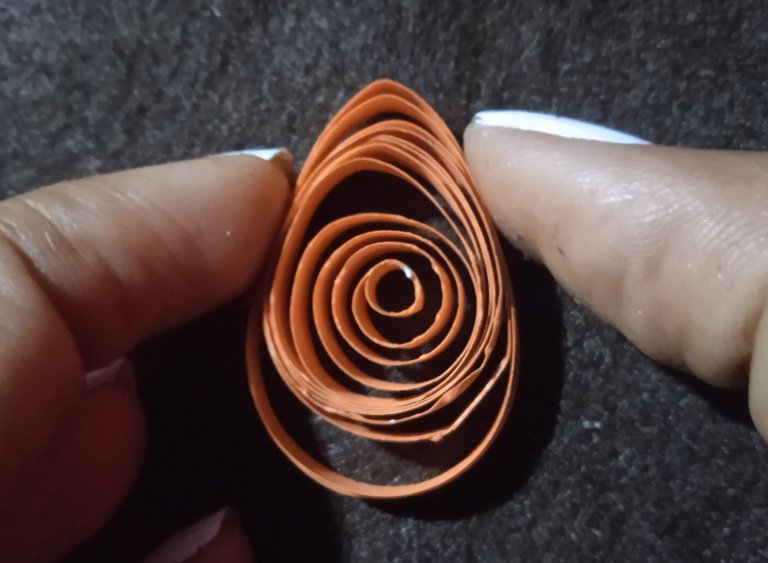
Then take the circle and press it to form a triangle using your fingers.
6

Also triangulate the ends of the upper part.
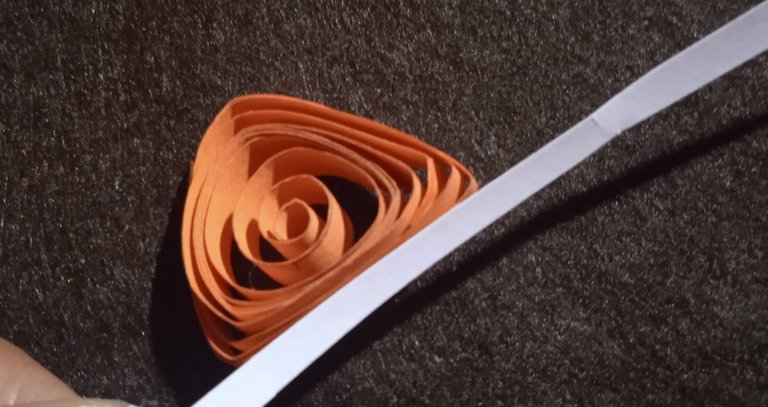
Then wrap a 30 cm long white cardboard ribbon around the orange piece.

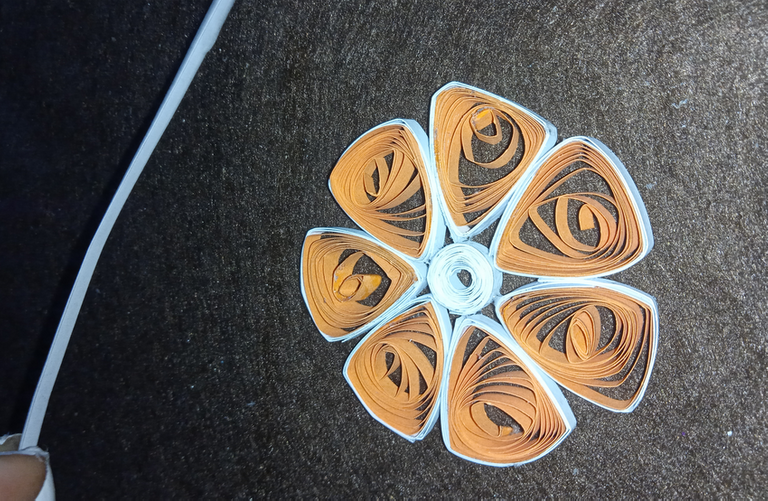
This is the result. You must make 7 equal pieces.
7

Then a smaller circle is made with cardboard.
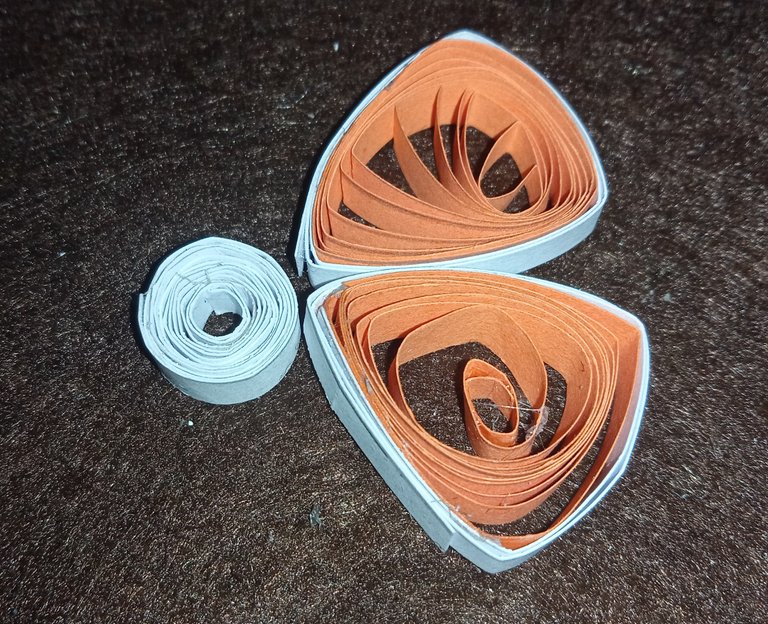
Then glue the seven orange pieces around the circle to form our orange piece.
8
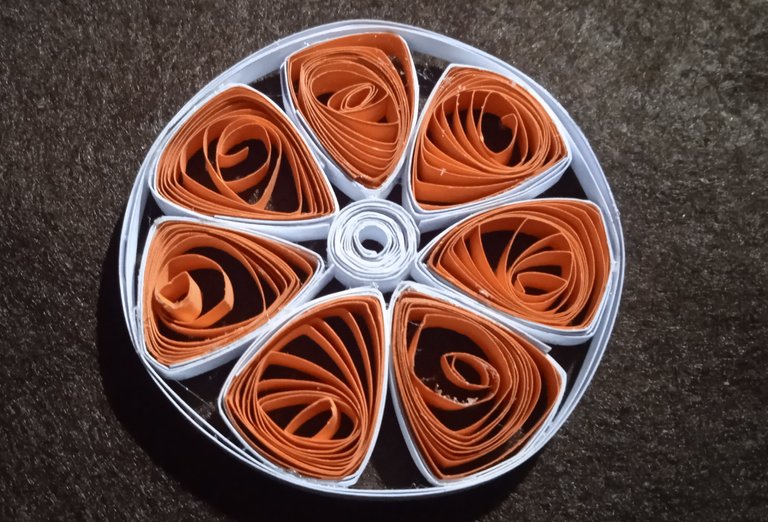
Finally, take the cardboard ribbon and wrap it around the piece. As it is placed, it is attached to our figure with the help of cold silicone.
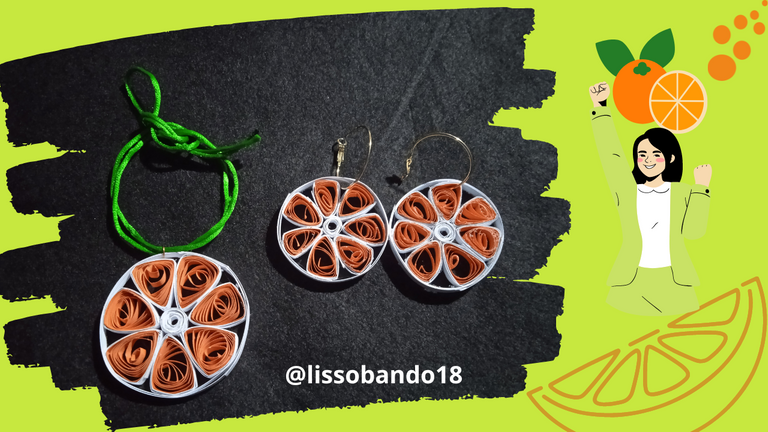
Asho, yes! we have created our better half!
It is rather a piece of an orange. It is a very easy to make diligram project, I hope you like it and above all that you can follow the tutorial.
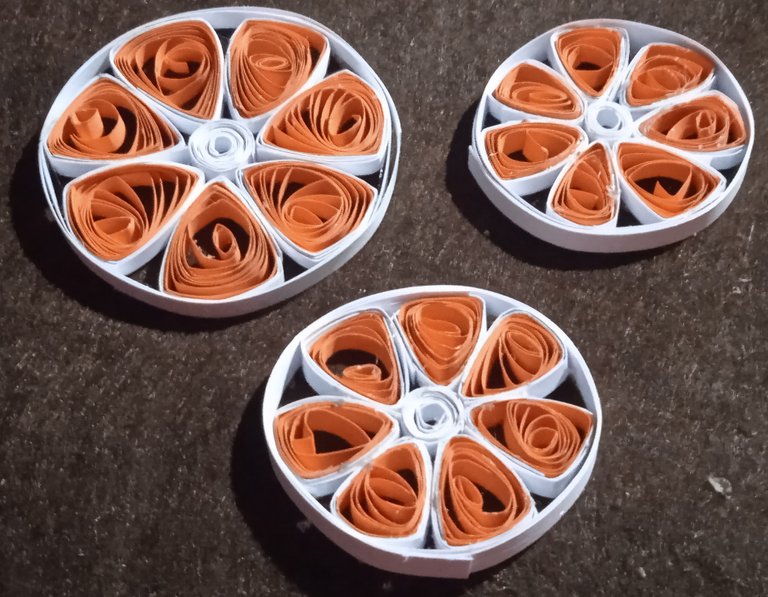
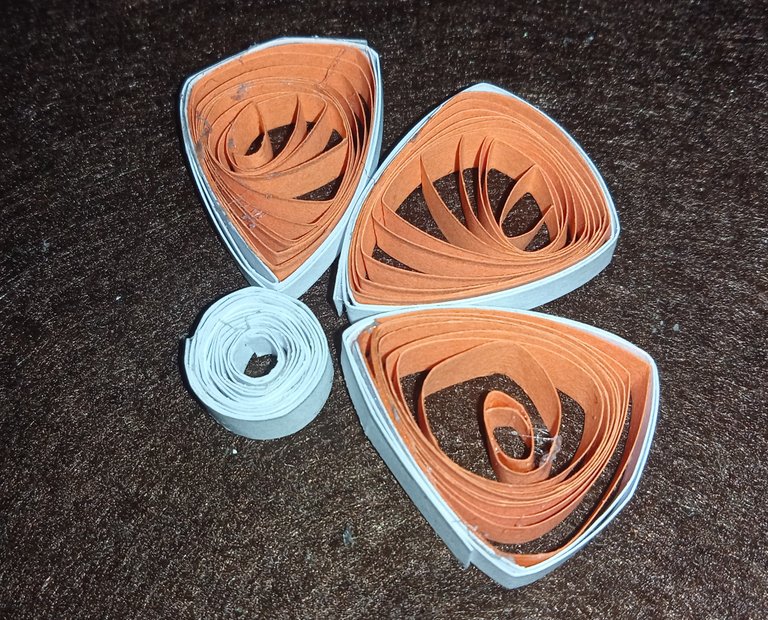
I developed another two pieces of orange, but this time smaller.

I inserted an aargolla between the final pieces of the piece.
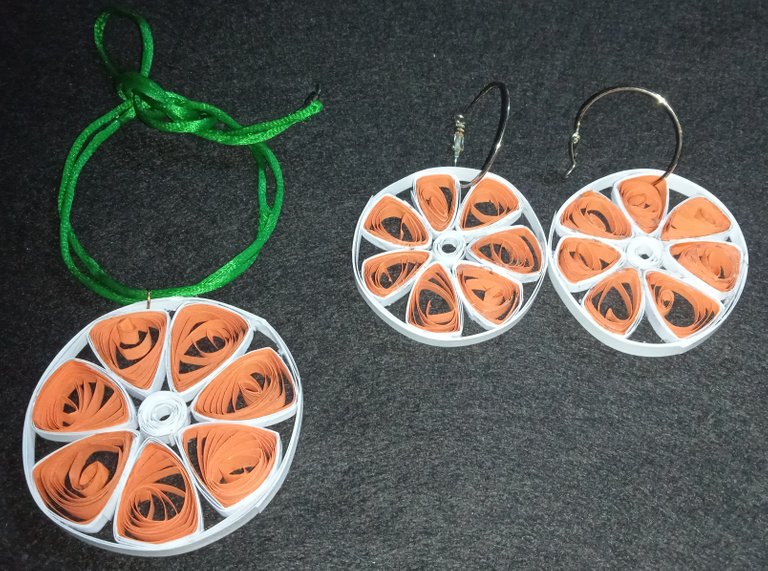
I also added a ribbon to the piece to create a set of necklace and earrings made of orange pieces! I sincerely hope you like it.
Greetings and see you next time friends!
The images are my own and were taken with a Redmi Note 9
Translator used: Deepl
I edited the pictures using canva.
Hola queridos amigos de Hive. Literlamente sino tienes tu media naranja creála. Si! creála utilizando esta maravillosa tecnica de Filigrama.
Les muestro a continuación:
Materiales:
- Cintas de Cartulina narajanja
- Cinta de cartulina blanco.
- Argollas
- Pega o silicon al frio
- Cinta de cola de ratón verde
- Bastoncillo
Paso a Paso
1
Se procede a unir los extremos de las cintas naranjas, necesiitamos dos cintas de 40 cm para formar una cinta de 80 cm
2
Se toma el bastoncillo y se procede a enrollar la cartulina naranja alrededor de este realizando 14 vueltas en el bastoncillo.
3
Luego se saca el bastoncillo para formar nuestro primer circulo de cintas de filigrama. Se corta el material sobrante de la cartulina.
4
Se pega el extremo al circulo con el silicón al frio.
5
Luego se toma el circulo y se hace presion para formar un triámgulo ayudandonos de nuestros dedos.
6
Tambien se debe triangular los extremos de la parte superior.
Luego con de deben enrollar a la pieza naranja una cinta blanca de cartulina de 30 cm de largo.
Se obtiene este resultado. Se deben hacer 7 piezas iguales.
7
Luego se hace un circulo más pequeño con cartulina.
Despues se deben pegar la siete piezas naranjas alrededor del circulo para formar nuestro pedazo de naranja.
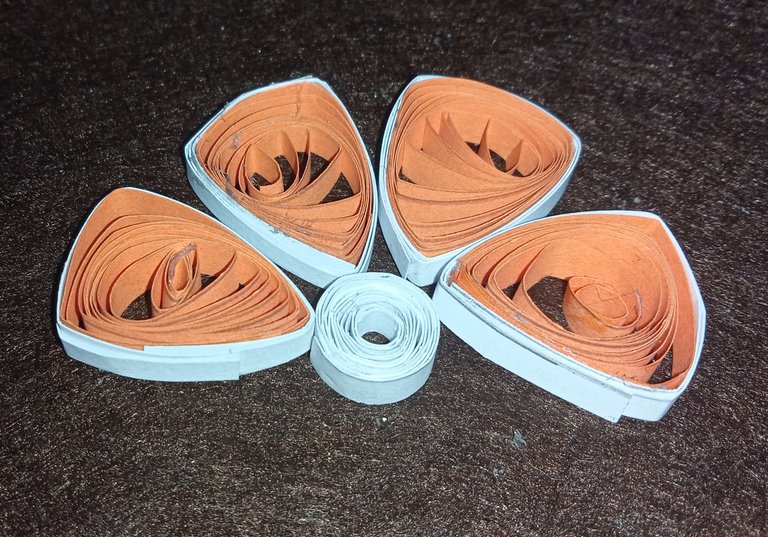
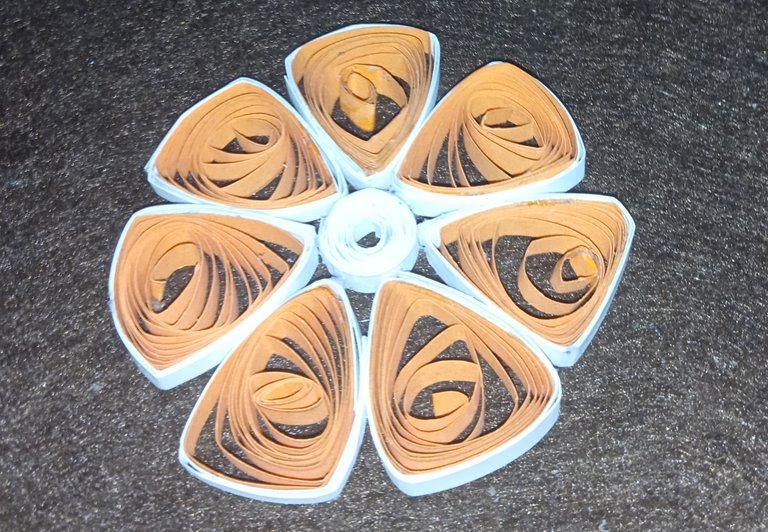
Este es el resultado al pegar las 7 piezas naranjas.
8
Finalmente se debe tomar la cinta de cartulina y se enrolla esta alrededor de la pieza. A medida que se va colocando se va uniendo esta a nuestra figura con la ayuda del silicón al frio.
Asho si! hemos creado nuestra media naranja!
Más bien es un trozo de una naranja, Es un proyecto de diligrama muy facil de hacer, espero les guste y sobre todo que puedan segui el tutorial.
desarrollé otros dos pedazos de naranja, pero esta vez más pequeños.
Introduje un aargolla entre los pesapcios finales de la pieza.
Tambien agregué una cinta a la pieza para crear un set de collar y aretes de trozos de naranj! de todo corazón espero les guste.
Saludos y hasta la proxima amigos!
Las imagenes son de mi autoria y fueron Tomadas a traves de un Telefono ZTE BLADE.
Traductor utilizado: Deepl
La edicion de las fotos la realicé mediante canva.
