WELCOME TO MY BLOG
Hellooooo, hellooooo! Greetings my dear creatives from DiyHub. Today we are going to make a photo frame with recycled material. Cardboard boxes are one of the most used waste materials for many uses, especially for crafts. It is the ideal material for this project because it is light and easy to handle.
Last month was my mother's birthday, and my sister who is in Chile sent me some photos of her family so I could frame two and take them as a gift, but on the date she told me I wouldn't have time to make them, since the trip was scheduled for the next day, so I decided to print them and take them with the intention of giving them to my mother and bringing them back to make her photo frame.
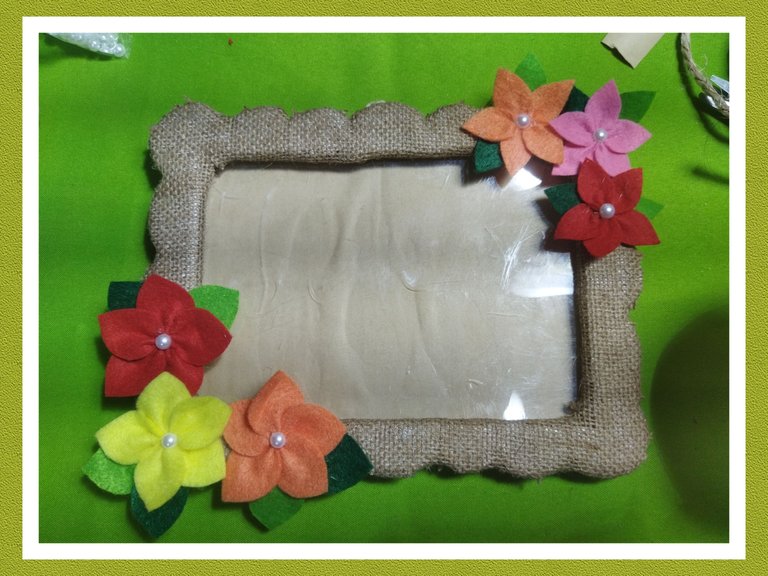
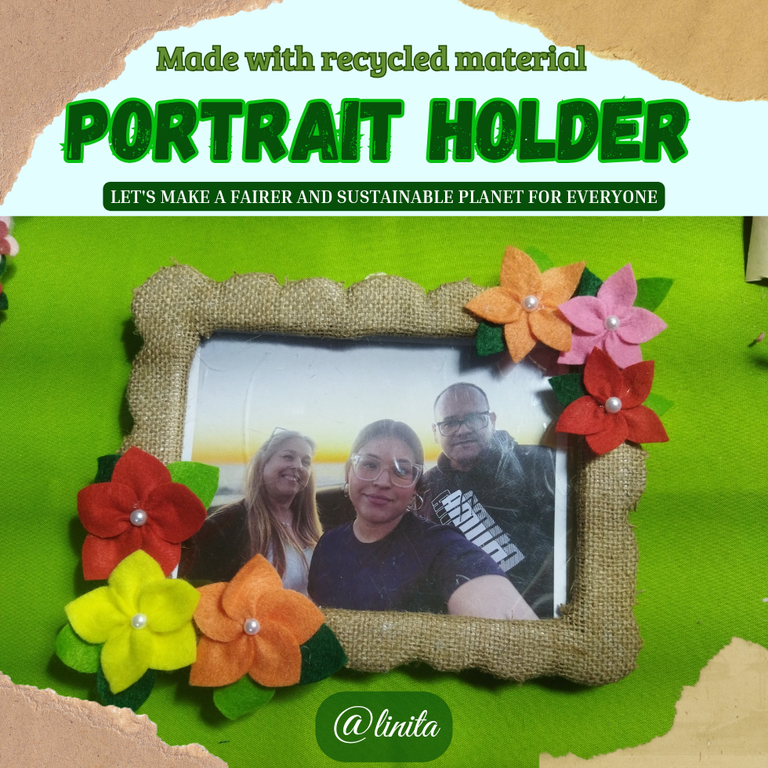
This is one of the models I chose, made with waste cardboard, scraps of felt and sackcloth. With the combination of these 3 materials I made this cute photo frame, I hope you like it.
BIENVENIDOS A MI BLOG
¡Holaaaa, holaaaaa! Saludos mis estimados creativos de DiyHub. Hoy vamos a realizar un portaretrato con material de reciclaje. Las cajas de cartón son unos de los materiales de desecho que más se utilizan para darle muchas utilidades sobre todo para las manualidades. Es el material ideal para este proyecto porque es liviano y fácil de manejar.
El mes pasado fue el cumpleaños de mi madre, y mi hermana que está en Chile me envió unas fotos de su familia para que enmarcara dos y se las llevara de obsequio, pero a la fecha que me dijo no me daría tiempo realizarlos, ya que el viaje estaba programado para el día siguiente, así que opté por imprimirlas y llevarlas con la intención de entregárselas a mi mamá y traerlas de regreso para hacerles su portaretratos.
Éste es uno de los modelos que escogí, realizado con cartón de desecho, retazos de fieltro y tela de saco. Con la combinación de estos 3 materiales realicé este lindo portaretratos, espero les guste.
MATERIALS
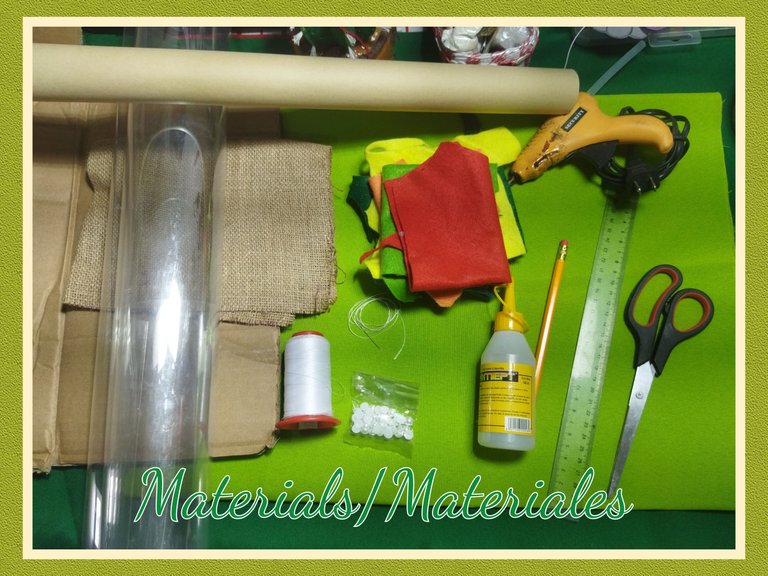
- Cardboard box
- Felt scraps
- Sackcloth
- Half pearls
- Acetate
- Kraft paper
- Silicone stick and liquid
- Quick-drying glue
- Sewing needle and thread
- Graphite pencil
- Ruler
- Scissors
- Rope or cabuya
- Photograph
- Cutter
MATERIALES
- Caja de cartón
- Retazos de fieltro
- Tela de saco
- Media perlas
- Acetato
- Papel kraft
- Silicón en barra y líquido
- Pega secado rápido
- Aguja e hilo de coser
- Lápiz de grafito
- Regla
- Tijera
- Mecatillo o cabuya
- Fotografía
- Cortador
STEP BY STEP // PASO A PASO
STEP 1
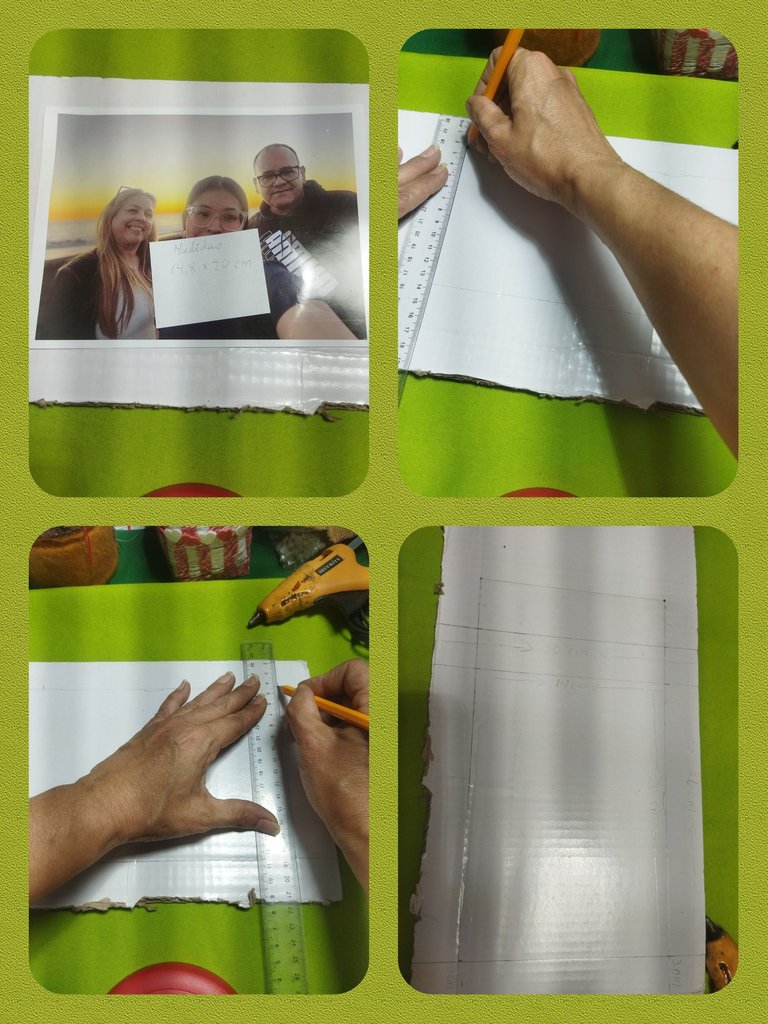
To make the frame for the photo, the first thing we will do is measure the photo. The one I will use for this frame measures 14.8 x 20 cm.
We will use a piece of cardboard measuring 26 x 20 cm, on which we will mark a rectangle measuring 14 x 20 cm, leaving 3 cm on each side for the frame design.
PASO 1
Para realizar el marco para la foto lo primero que haremos será medir la fotografía. La que usaré en este marco mide 14,8 x 20 cm.
Utilizaremos un trozo de cartón de 26 x 20 cm, en la que marcaremos un rectángulo de 14x20 cm, dejando 3 cm de cada lado para el diseño del marco.
STEP 2
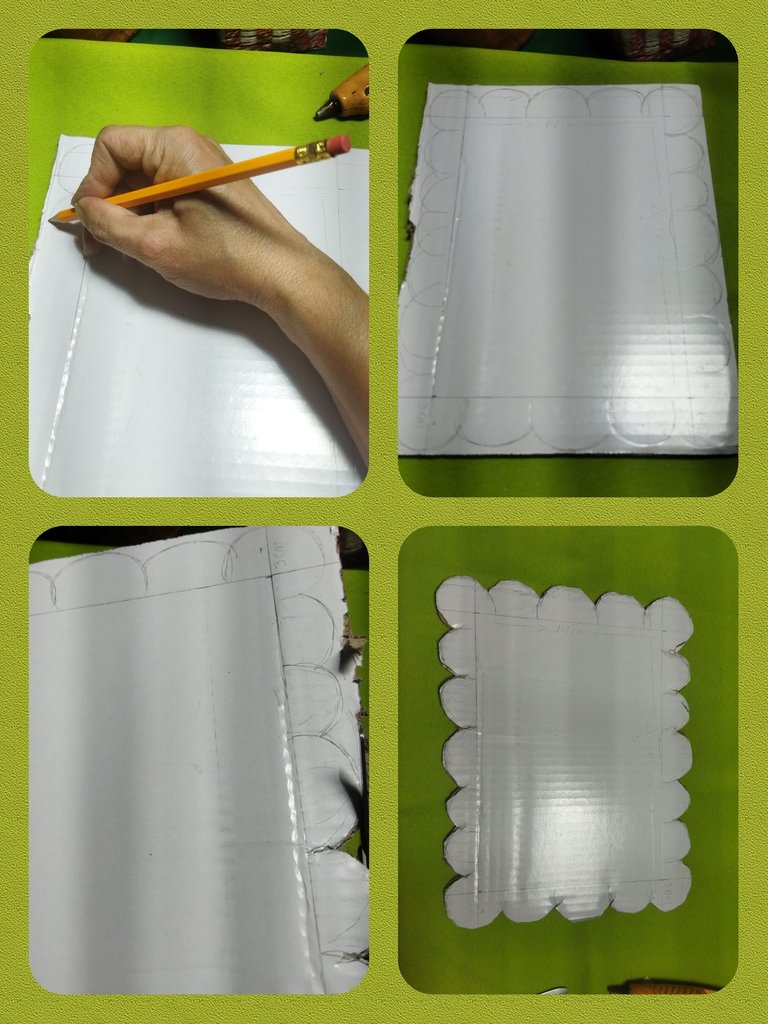
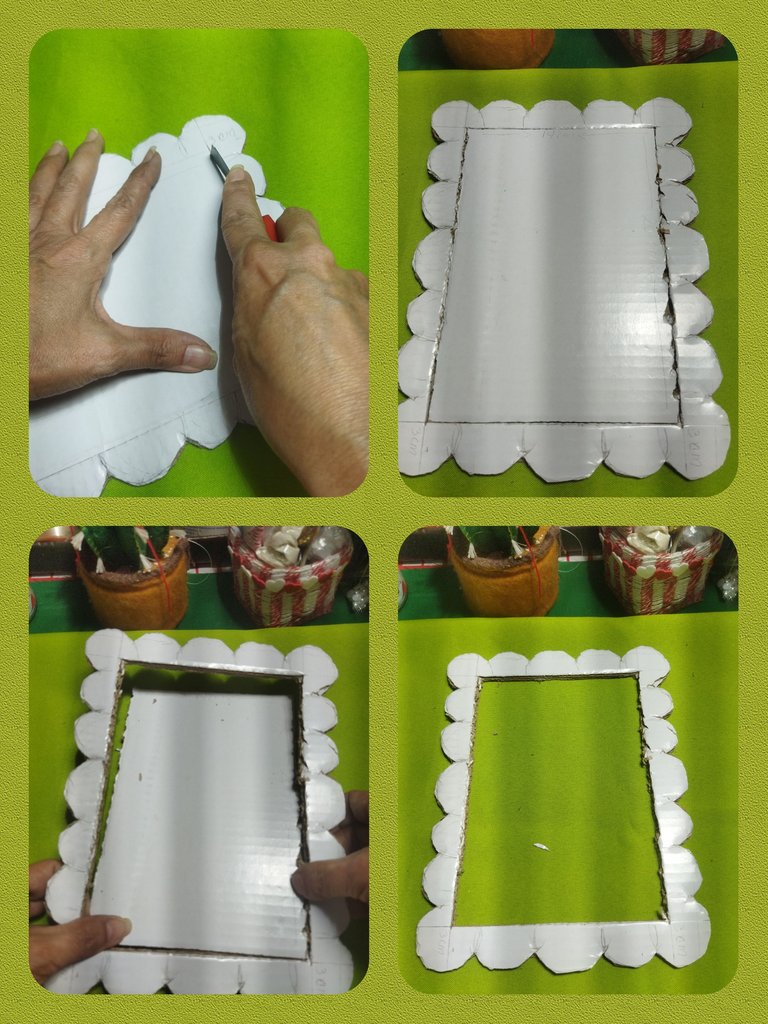
We make semicircles around the rectangle and cut them out with scissors and with the cutter we take out the internal rectangle to form the frame.
PASO 2
Realizamos semicirculos alrededor del rectángulo y recortamoscon tijera y con el cortador sacamos el rectángulo interno para así fprmar el marco.
STEP 3
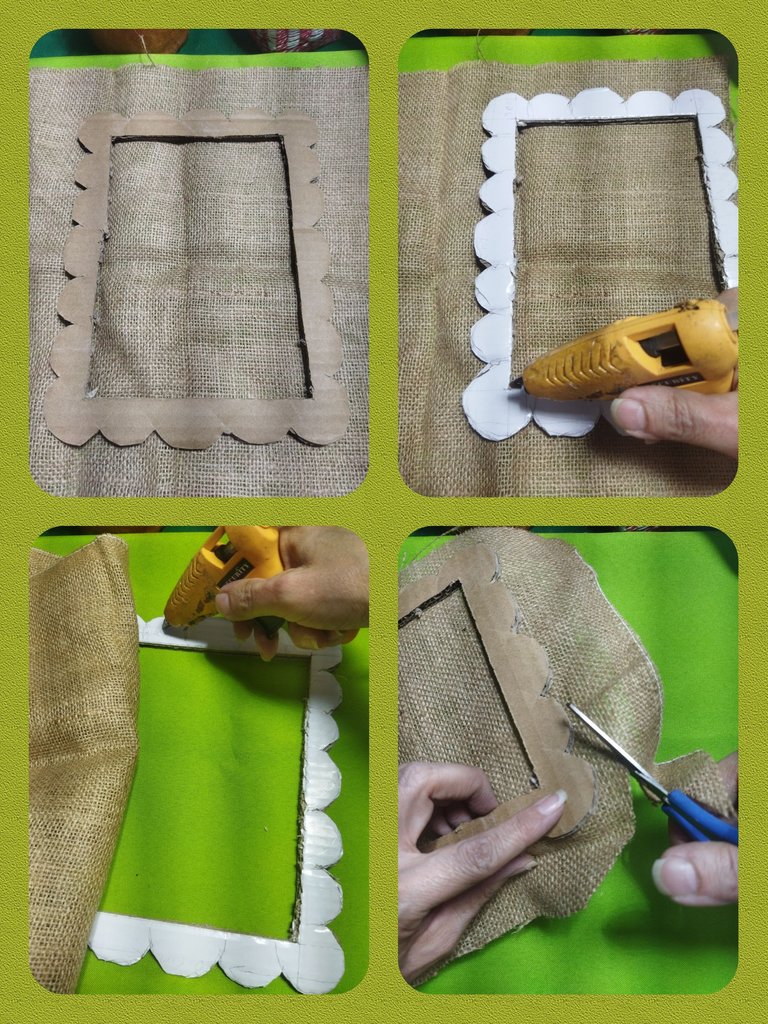
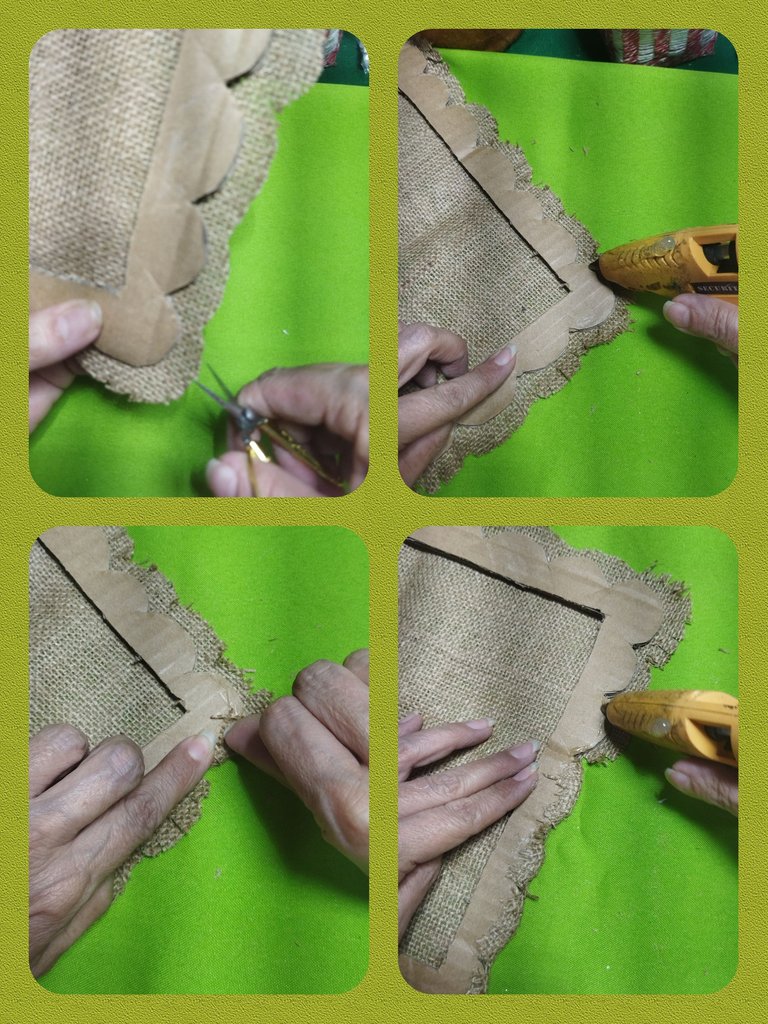
- Using a glue gun, glue the frame to the fabric.
- Take the sackcloth and cut it to the size of the frame, leaving approximately 2 cm.
- Using scissors, make 0.50 cm cuts around the frame and glue it all around.
PASO 3
- Con la pistola de silicón pegamos el marco a la tela.
- Tomamos la tela de saco y cortamos a la medida del marco dejando 2 cm aproximadamente.
- Con una tijera realizaremos cortes de 0,50 cm alrededor del marco e iremos pegando por todo el contorno.
STEP 4
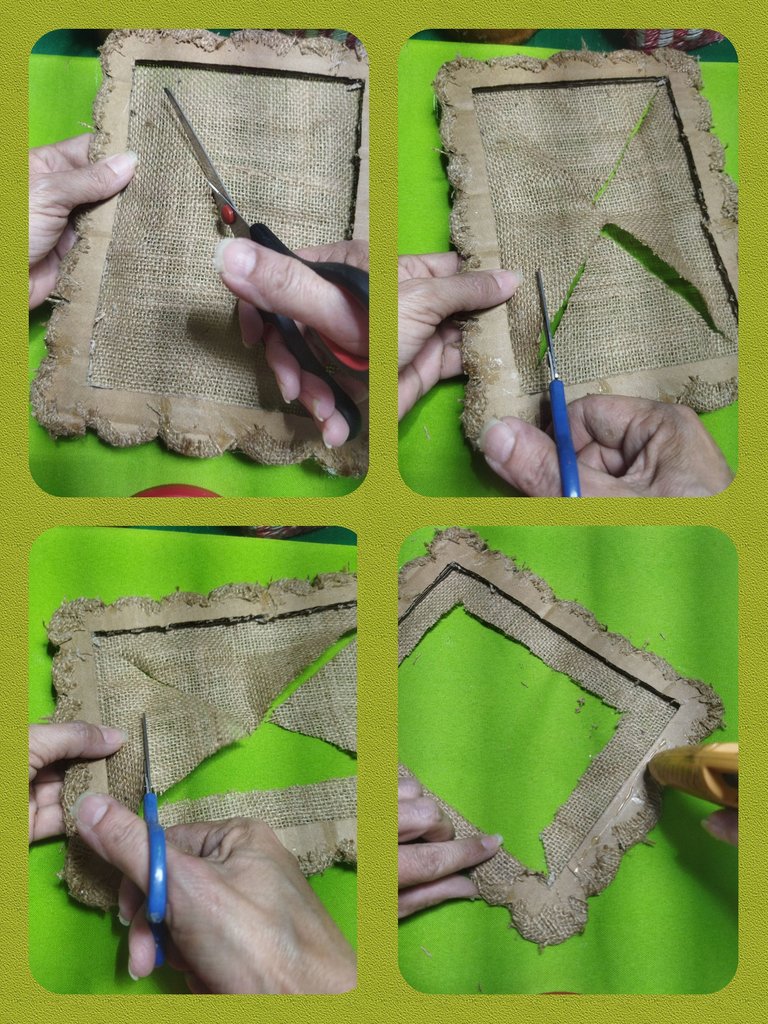
- Now we will make an X in the center of the frame and cut to the corner, then cut leaving 3 cm to make the fold.
- We glue the fabric to the frame trying to make it well stretched.
PASO 4
- Ahora realizaremos una X en el centro del marco y cortamos hasta la esquina, luego cortamos dejando 3 cm para realizar el doblez.
- Pegamos la tela al marco tratando que quede bien estirada.
STEP 5
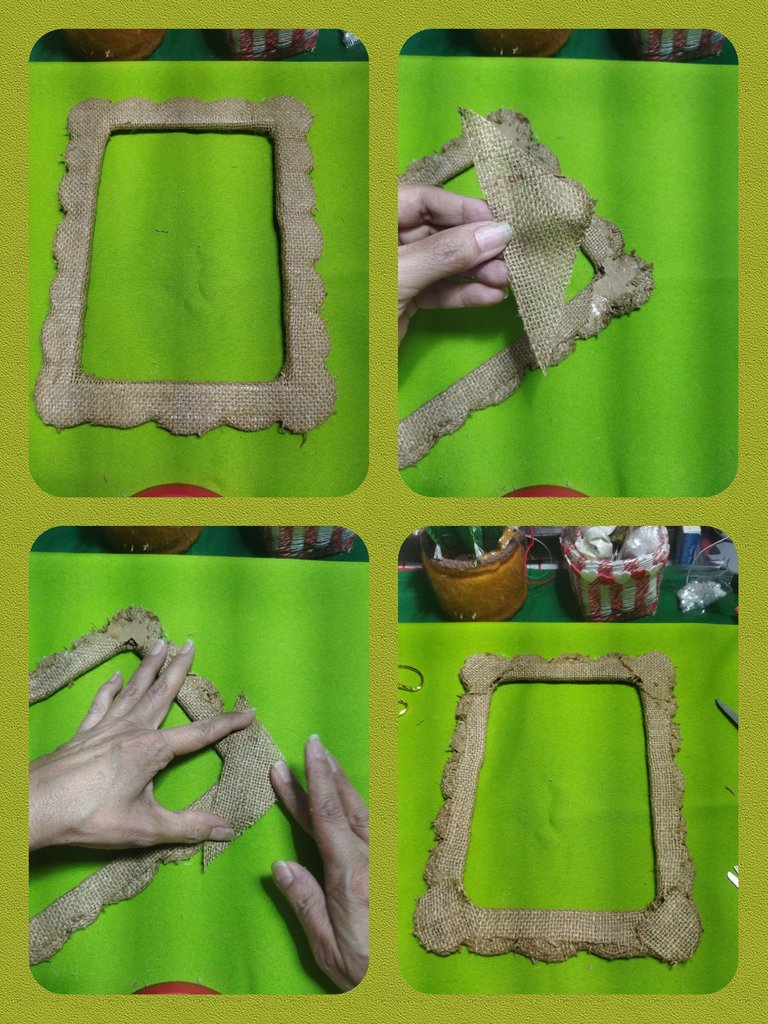
With the scraps that we cut from the center, we are going to glue one of the corners of the frame on the back and cut the rest of the fabric that sticks out.
PASO 5
Con los retazos que cortamos del centro, vamos a pegar en da una de las esquinas del marco por la parte de atrás y cortamos el resto de la tela que sobresale.
STEP 6
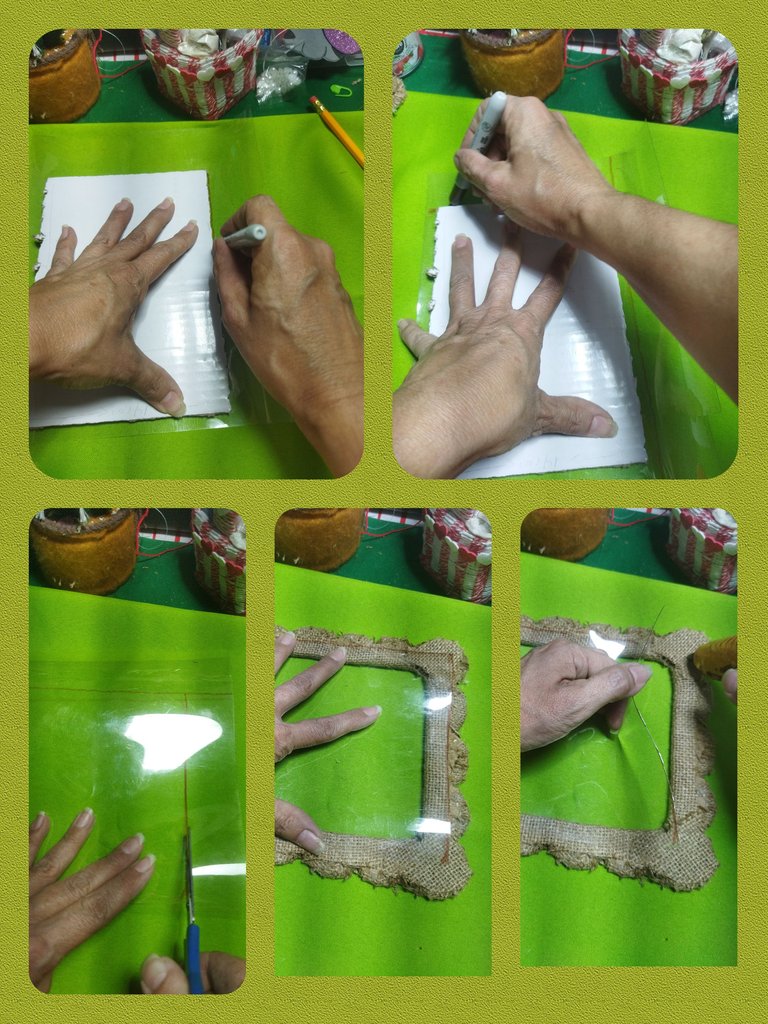
- Take the piece of cardboard that we cut from the center of the frame and measure the acetate, leaving an additional 1 cm on each side.
- Cut and glue with silicone.
PASO 6
- Tomamos el trozo de cartón que cortamos del centro del marco y tomamos la medida del acetato dejando 1 cm adicional de cada lado.
- Cortamos y pegamos con silicón.
STEP 7
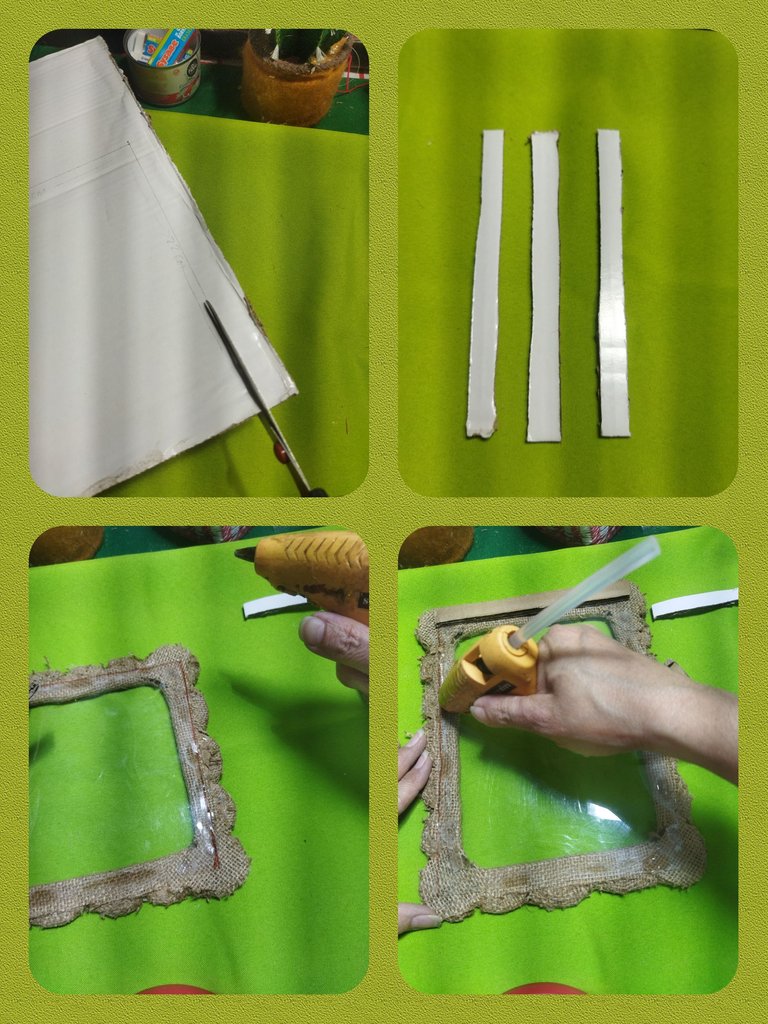
- Now we are going to cut 3 cardboard strips of 1x10 cm and 2 of 1x16 cm.
- We glue them 1 cm away from the internal frame and leave one side clear to insert the photo.
PASO 7
- Ahora vamos cortar 3 listones de cartón de 1x10 cm y 2 de 1x16 cm.
- Pegamos a 1 cm de distancia del marco interno y dejamos un lado despejado para introducir la foto.
STEP 8
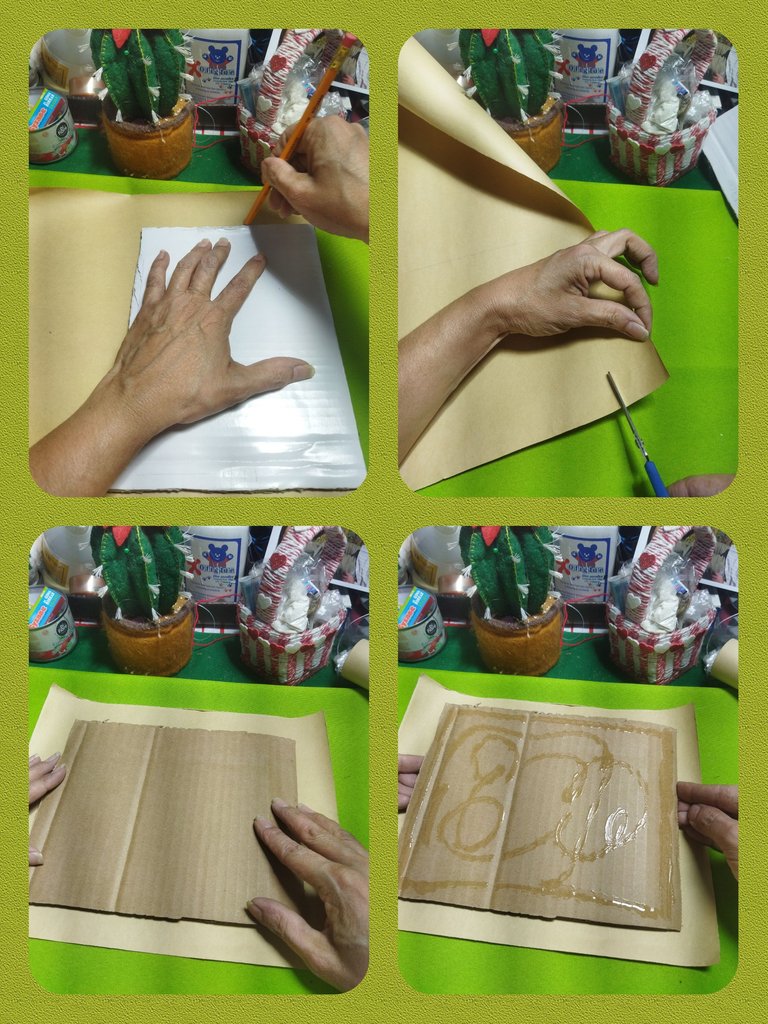
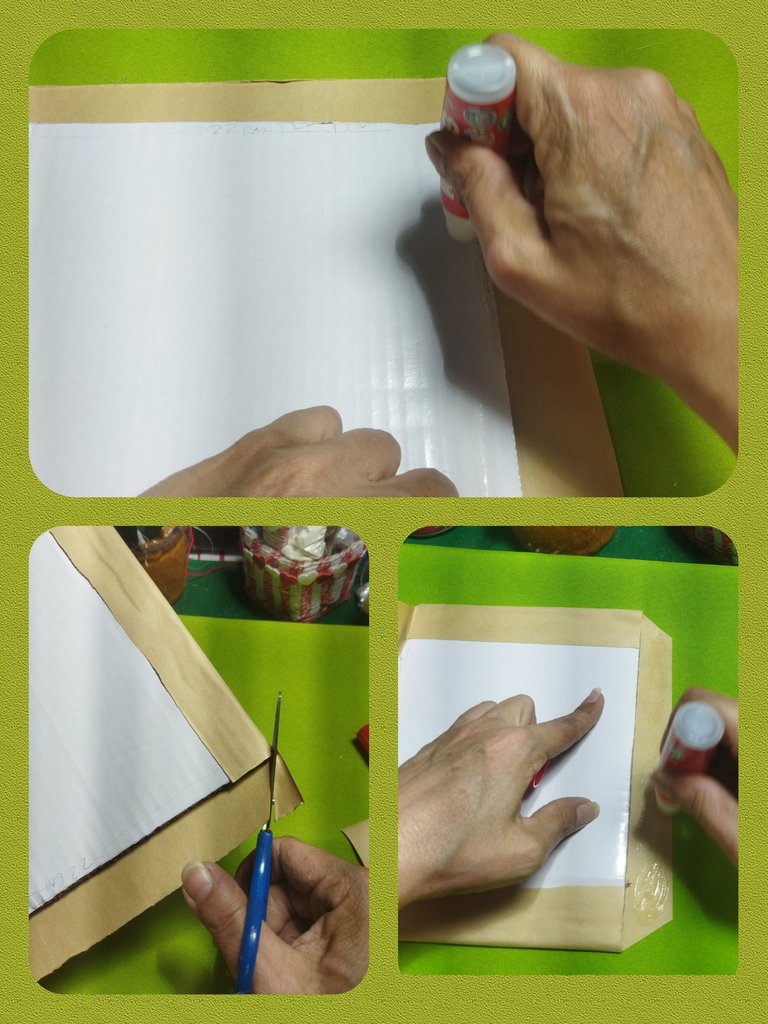
- For the back cover, cut the cardboard to 22x17.5 cm.
- Cover it with kraft paper using quick-drying glue.
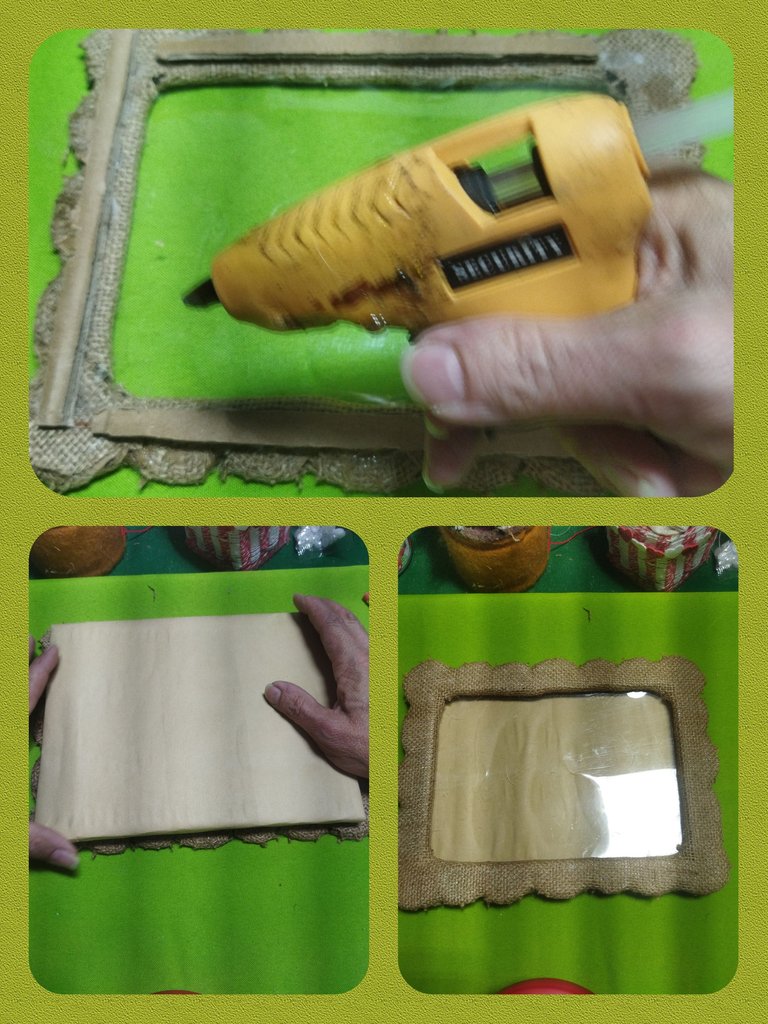
- We glue it to the frame with hot silicone.
PASO 8
- Para la tapa trasera cortamos el cartón 22x17,5 cm.
- Forramos con el papel kraft utilizando la pega de secado rápido.
- Pegamos al marco con silicón caliente.
STEP 9
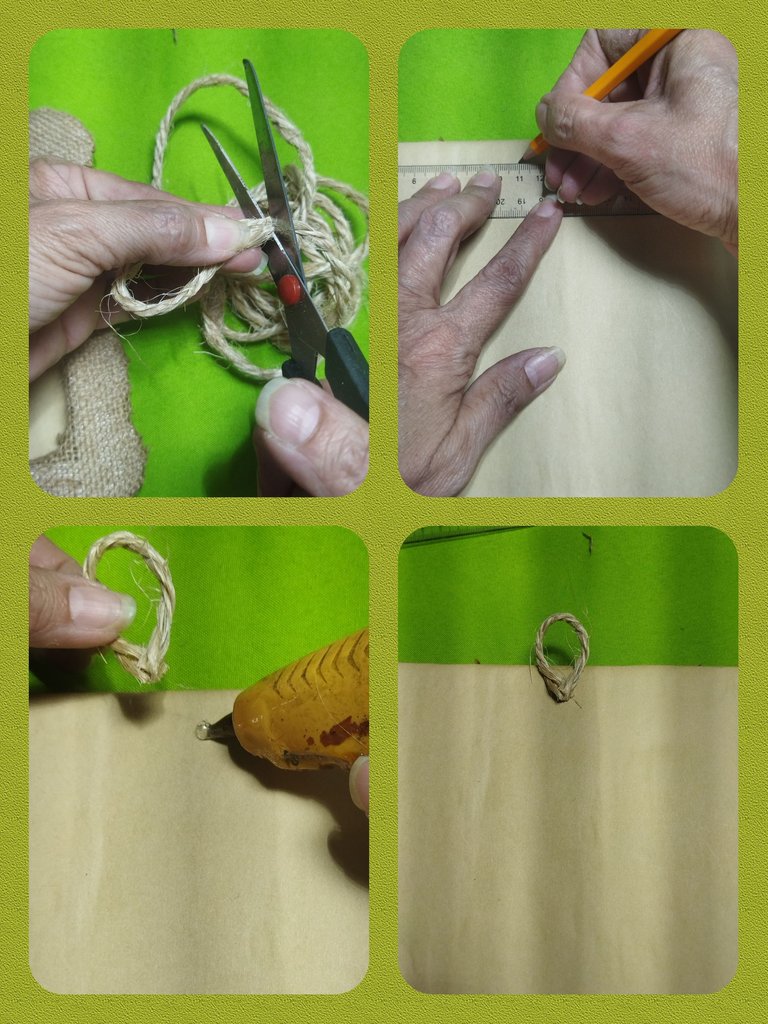
For the pendant we will use a piece of 8 cm rope or cord.
- We take the central measurement of the frame from the back, fold the cord in two and glue with silicone.
PASO 9
Para el colgante utilizaremos un trozo de mecatillo o cabuya de 8 cm.
- Tomamos la medida central del marco por la parte trasera, doblamos en dos la cabulla y pegamos con silicón.
STEP 10
To decorate the frame we are going to make flowers of various colors in felt.
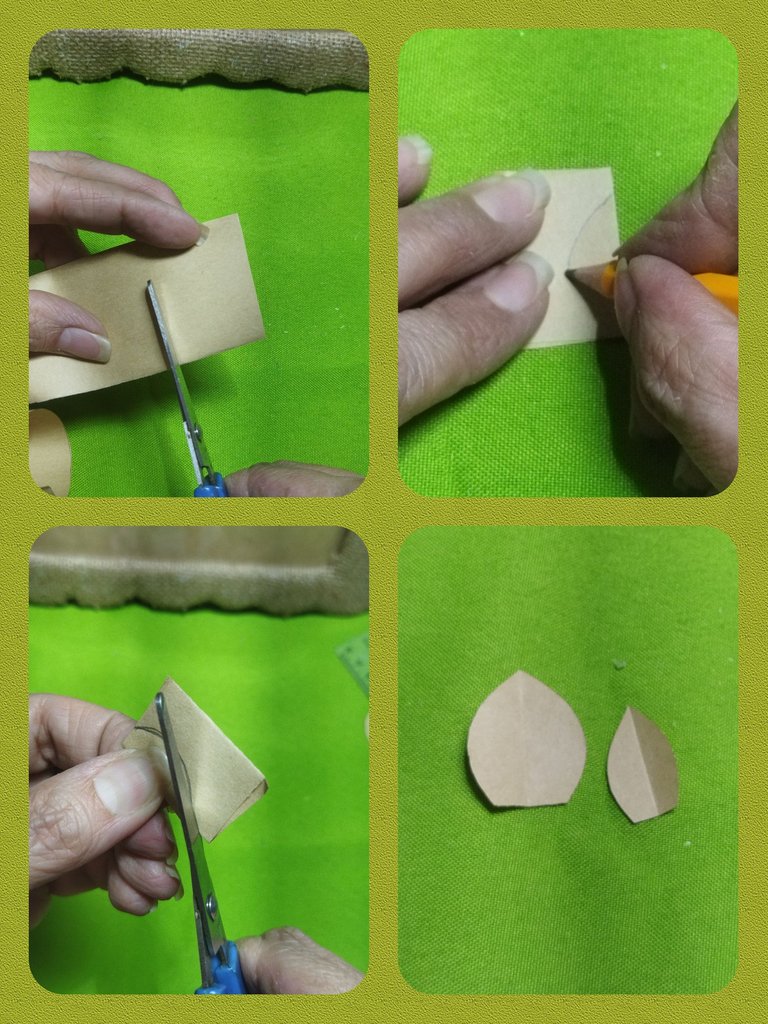
To make the mold we used two pieces of kraft paper, one of 4 cm and the other of 3 cm, we folded them in half and made half petal designs. With these patterns we will make the flowers and leaves.
PASO 10
Para adornar el marco vamos a realizar flores de variados colores en fieltro.
Para realizar el molde utilizamos dos trozo de papel kraft, uno de 4 cm y otro de 3 cm, doblamos a la mitad y dibujos medio pétalo. Con estos patrones haremos las flores y las hojas.
STEP 11
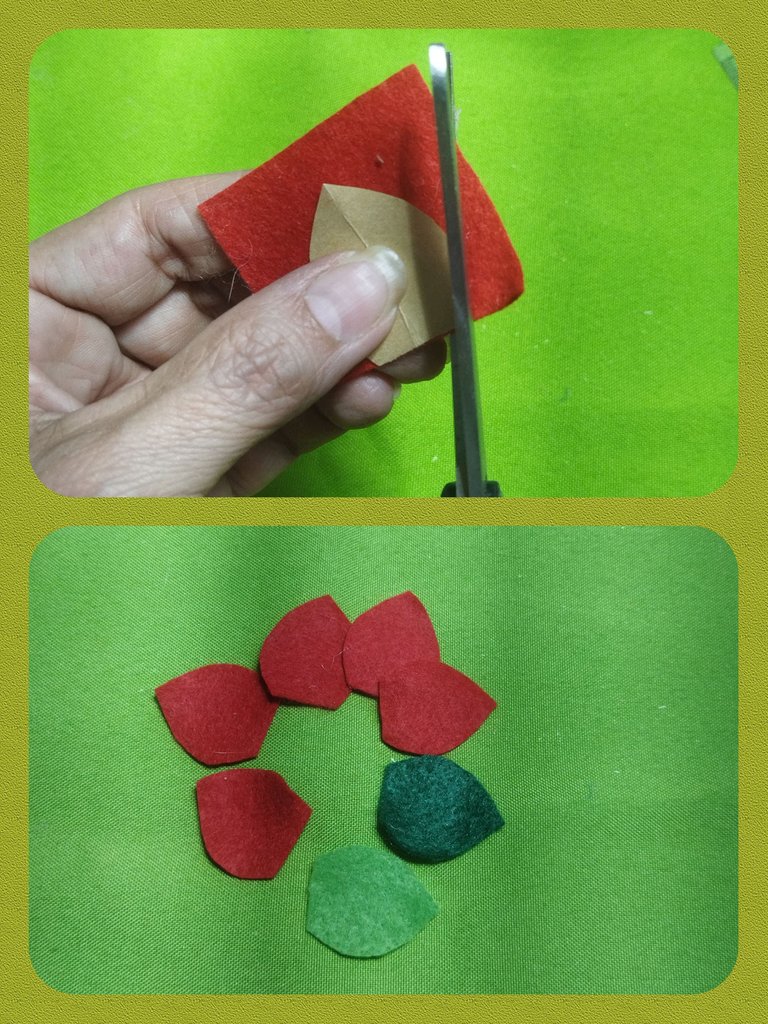
We took scraps of felt and using the patterns we made 5 pieces of each color for the flowers and two in green tones for the leaves, using the two patterns we made.
This frame has 3 large flowers and 3 small ones.
PASO 11
Tomamos retazos de fieltro y utilizando los patrones realizamos 5 piezas de cada color para las flores y dos en tonos verdes para las hojas, utilizando los dos patrones que realizamos.
Este marco lleva 3 flores grandes y 3 pequeñas.
STEP 12
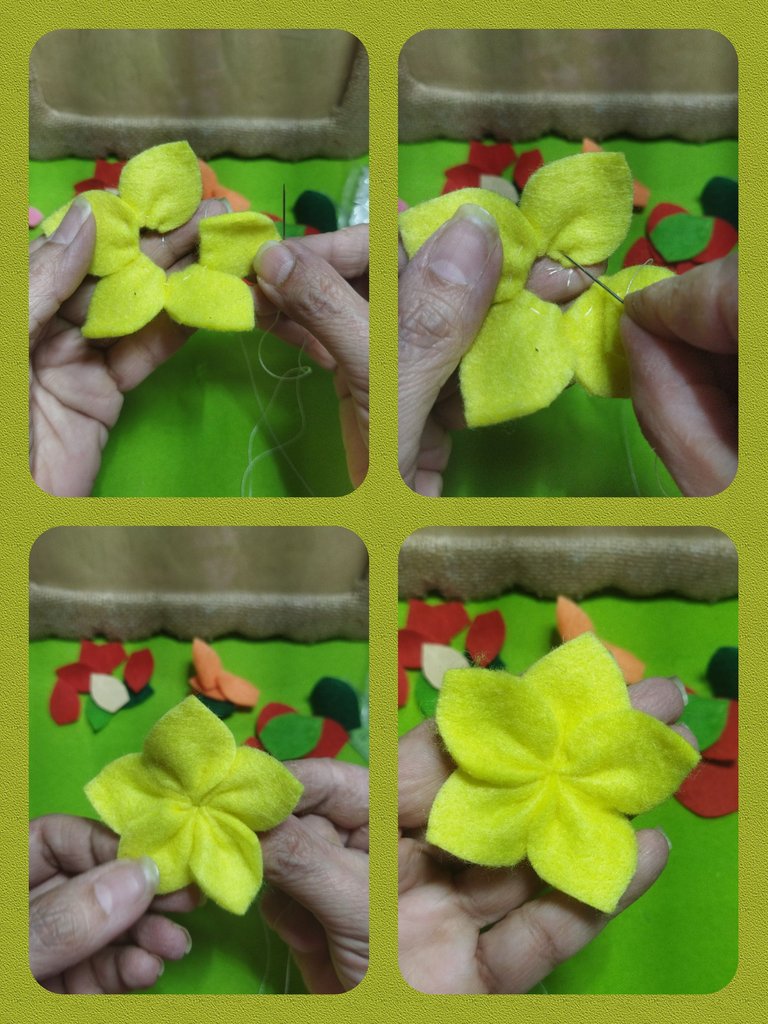
Now we are going to form the flowers by joining the petals with thread.
We take the first petal and make 4 basting stitches, then we take the remaining 4, making the same step on each one until we have 5 petals.
PASO 12
Ahora vamos a formar las flores uniendo los pétalos con hilo.
Tomamos el primer pétalo y realizamos 4 puntos de hilvana o bastillo, luego tomamos los 4 restantes realizando el mismo paso en cada uno hasta tener los 5 pétalos.
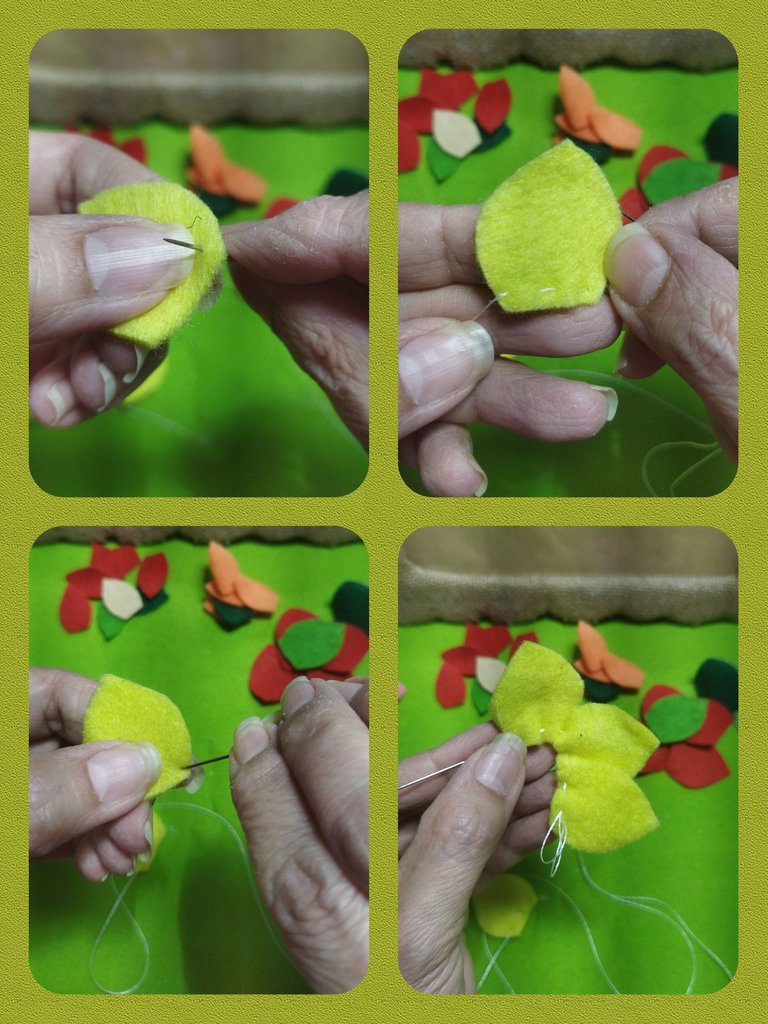
Then we take the needle and insert it through the first petal that we are joining and pass it through the center of the seam. We pull the thread until we join the 5 petals and we shape it until we form the flower.
Luego tomamos la aguja y la introducimos por el primer pétalos que enlazamos y la pasamos por el centro de la costura. Halamos el hilo hasta unir los 5 pétalos y vamos moldeando hasta formar la flor.
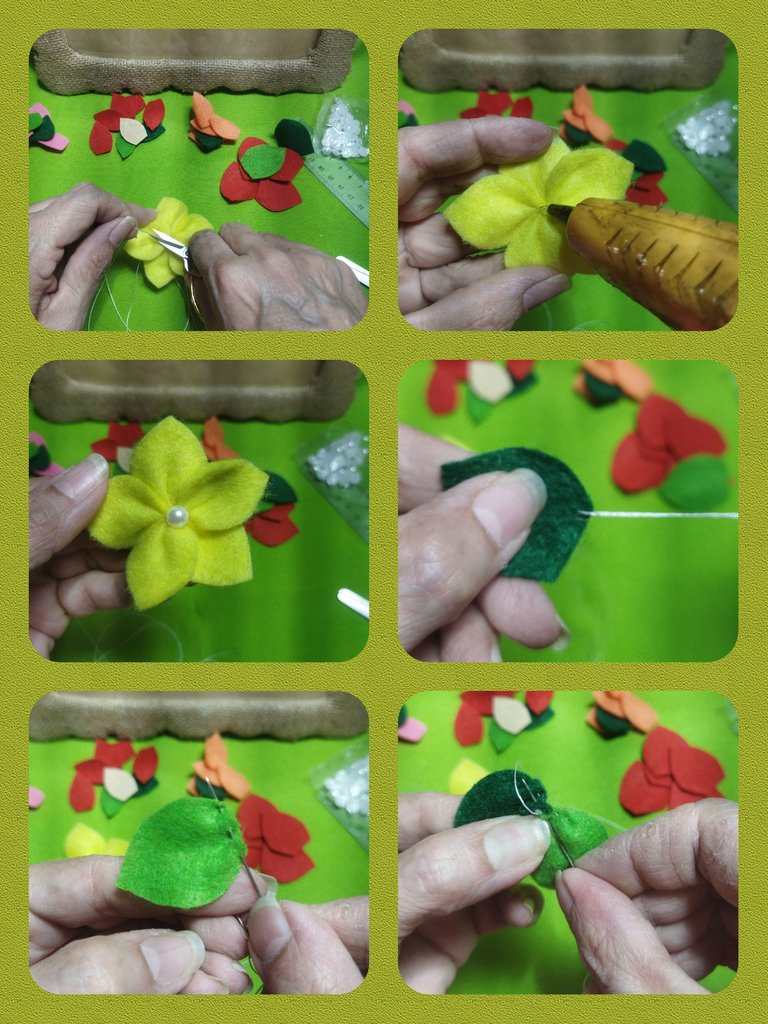
- We make a finish behind the flower and cut the thread.
- We glue a half pearl in the center with silicone.
- Then we join the leaves making a semi-curl with the hem stitch and glue it to the flower from behind.
- Realizamos un remate por detras de la flor y cortamos el hilo.
- Pegamos con silicón una media perla en el centro.
- Luego unimos las hojas realzando un semiarruchado con el punto de bastillo y pegamos a la flor por detrás.
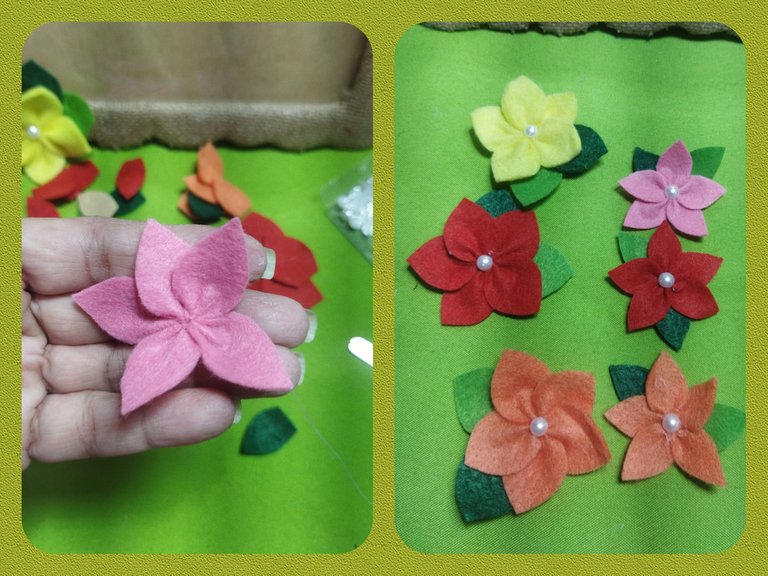
We made the rest of the flowers, in various colors.
Realizamos el resto de las flores, en colores variados.
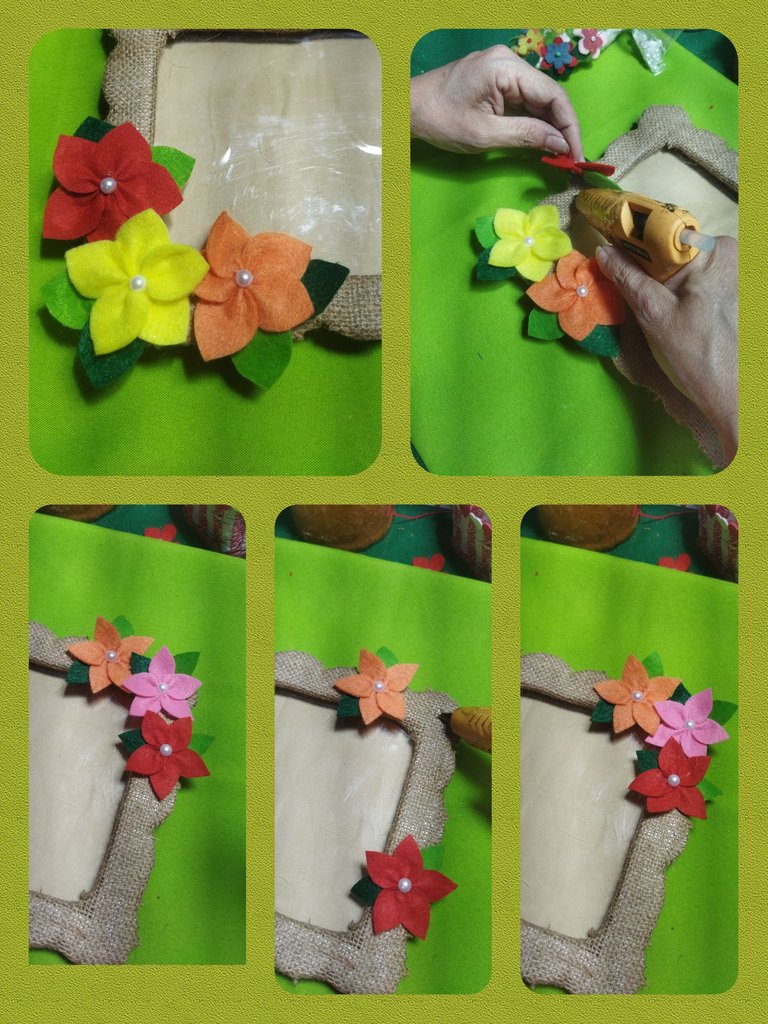
STEP 13
We place the flowers in the desired location and glue them with hot silicone.
PASO 13
Ubicamos las flores en el sitio que queremos y pegamos con silicón caliente.
PROJECT COMPLETED
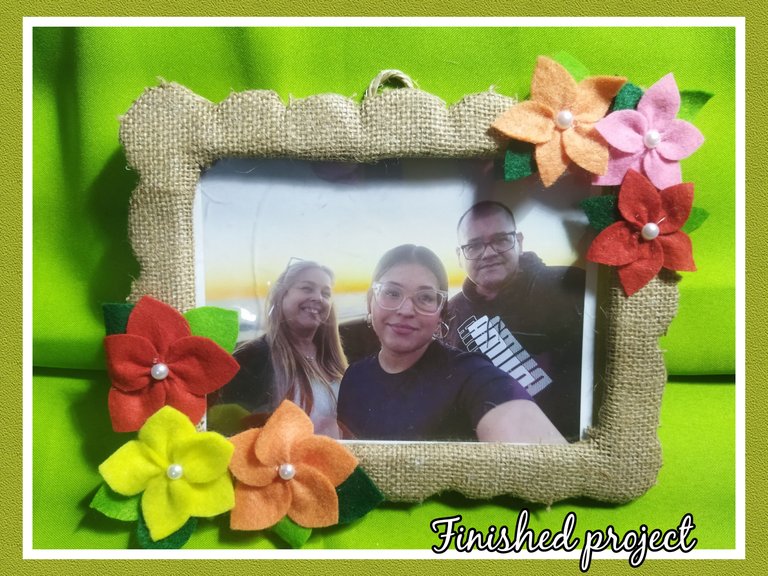
This is the final result. A cute picture frame made from simple pieces of cardboard and scraps of fabric. It's a nice way to reduce pollution and we also get beautiful decorations for our homes. I know my mother will love it because she loves having her house full of photos and decorations. That's all. See you next time.
PROYECTO FINALIZADO
Este es el resultado final. Un lindo portaretatos a partir de simples trozos de cartón y retazos de tela. Es una lindo forma de reducir la contaminación y además obtenemos bellos adornos para nustros hogares. Sé que a mi madre le encantará porque es amante de tener su casa llena de fotos y adornos. Es todo. Nos vemos en la próxima.
