WELCOME TO MY BLOG
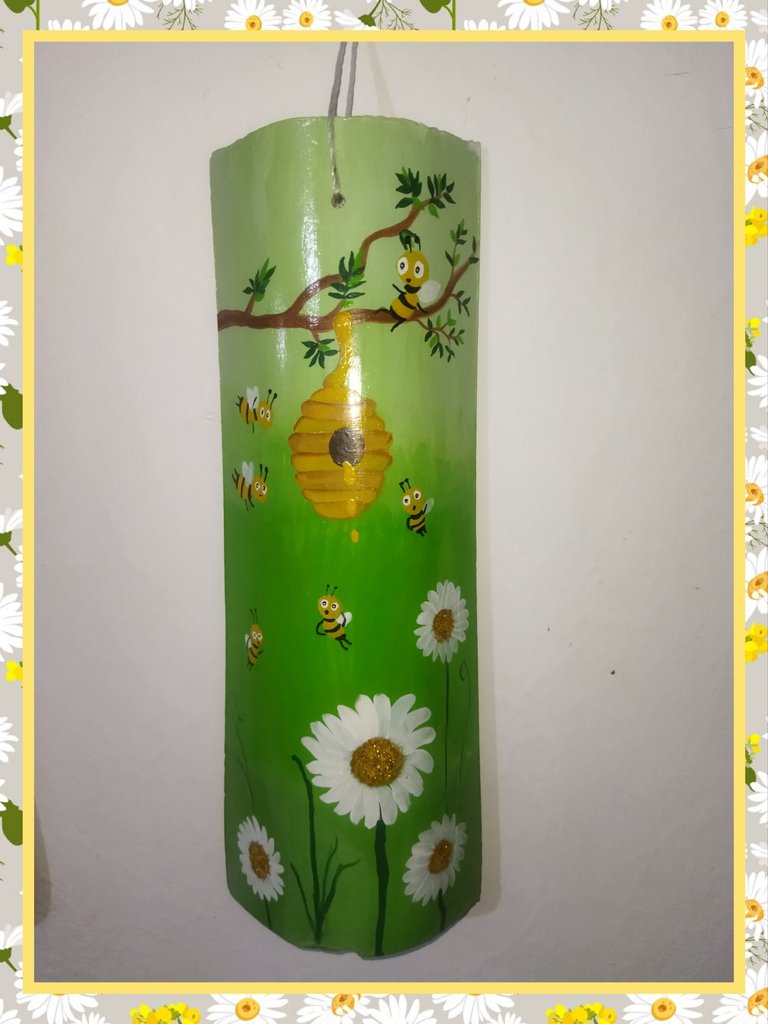
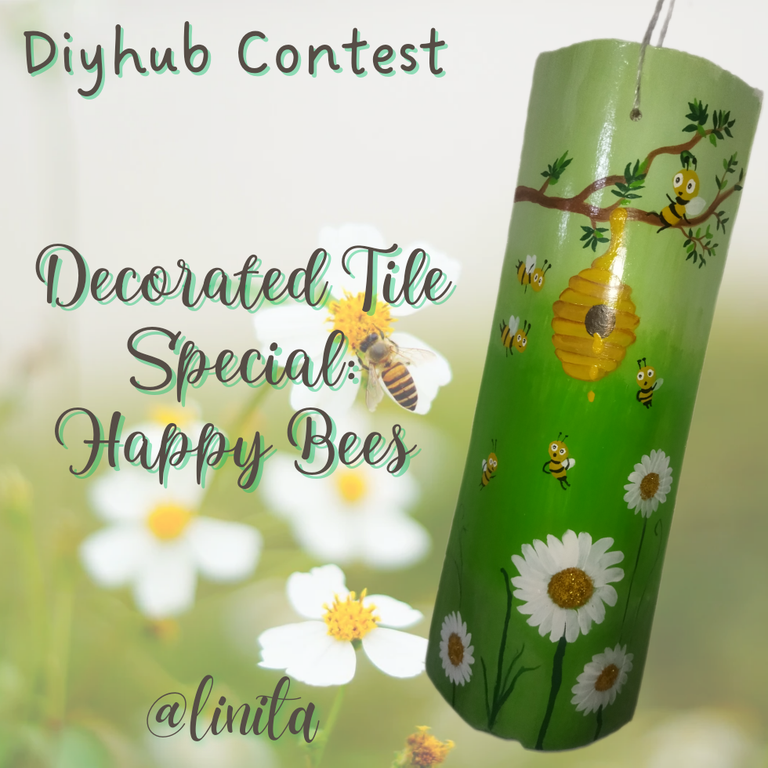
Hellooooo, hellooooo! Greetings my dear creatives from DiyHub. I couldn't let this contest pass without presenting my entry and celebrating this great special day of the bees, these little animals that so laboriously group together to create their wonderful honeycomb that is of so many benefits for us human beings, since we feed on it and it provides us with great benefits.
My entry is a tile decorated with a harmonious green landscape with flowers, which are a source of food for the bees while they work in harmony to form their honeycomb. As I have told you on previous occasions, one of my favorite hobbies is painting on tiles that I have rescued from landfills or that will be their destiny. Now without further ado, let's begin with the step by step, but not without inviting @vicmito74, @marytp20 and @aarolta to participate in the contest.
BIENVENIDOS A MI BLOG
¡Holaaaa, holaaaaa! Saludos mis estimados creativos de DiyHub. No podía dejar pasar este concurso sin presentar mi participación y celebrar este gran día especial de la abejas, estos pequeños animalitos que tan laboriosos se agrupan para crear su maravilloso panal que es de tantos beneficios para nosotros los seres humanos, ya que de éste nos alimentamos y nos provee grandiosos benefecios.
Mi participación se trata de una teja decorada con un paisaje verde armonioso con flores, que son fuente de alimento de las abejas mientras trabajan en armonía para formar su panal. Como ya les he contado en ocasiones anteriores, uno de mis hobbies favoritos es pintar sobre tejas que he rescatado de los vertederos o que ese será su destino. Ahora sin más, comencemos con el paso a paso, no sin anes invitar a @vicmito74, @marytp20 y a @aarolta a participar en el concurso.
MATERIALS
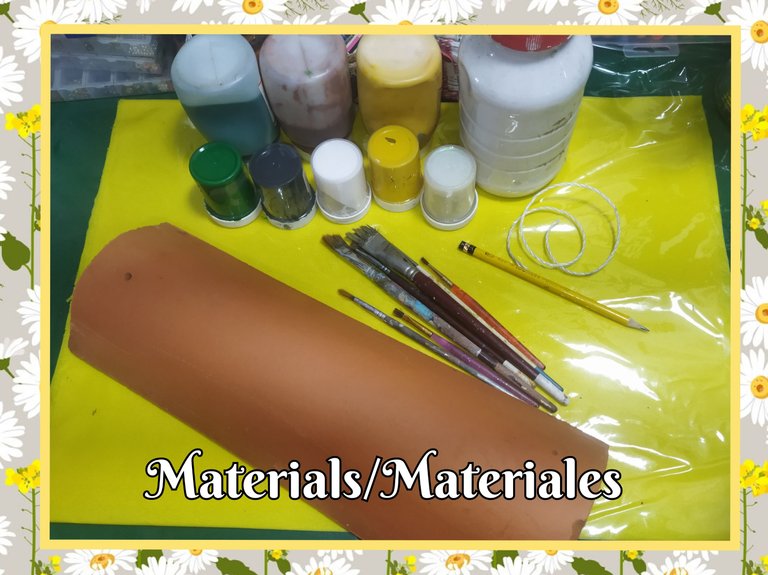
- Clean and dry tile
- Cold paints in various colors
- White rubber paint (water-based)
- Brushes
- String
- Acrylic wax
- Sandpaper #180
MATERIALES
- Teja limpia y seca
- Pinturas al frio colores variados
- Pintura blanca de caucho (a base de agua)
- Pinceles
- Mecatillo
- Cera acrílica
- Gel escarchado
- Lija #180
STEP BY STEP // PASO A PASO
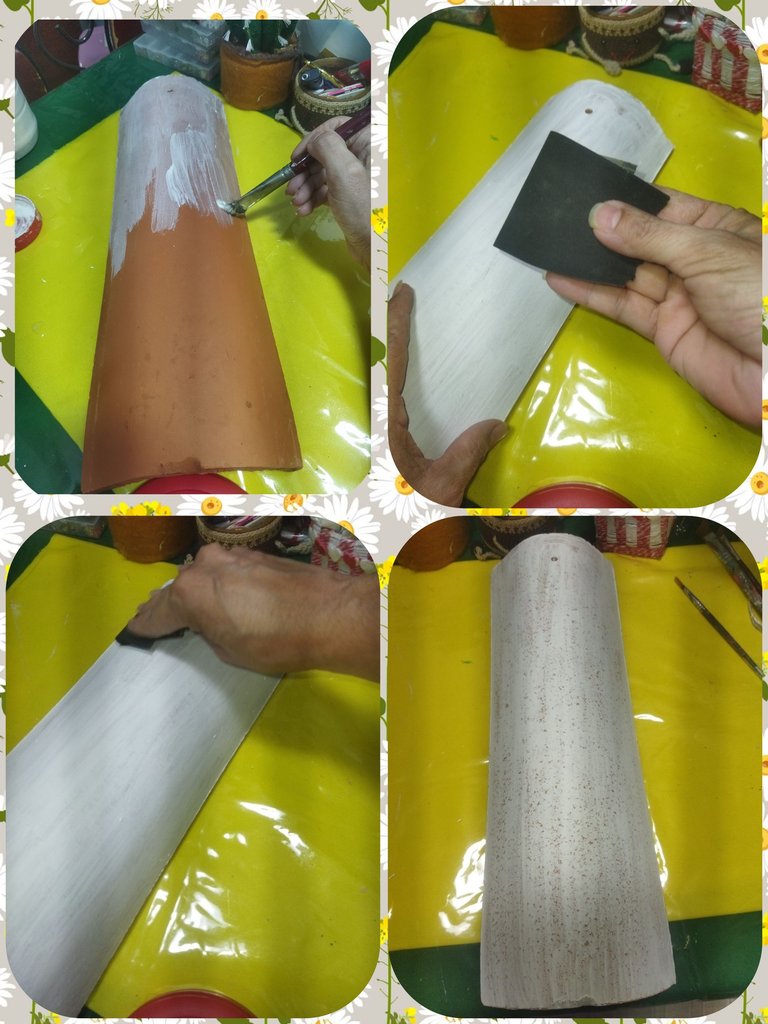
We start by applying a base coat of white rubber paint. This allows us to create a layer that will prevent the absorption of a large amount of acrylic paint and at the same time allows us to make the drawing and visualize it better, in case you are going to draw on the tile. Once the paint is dry, we apply another layer and let it dry thoroughly.
Then, with the sandpaper, we gently slide over the paint to remove the excess and smooth the surface.
Comezamos echando una base con la pintura blanca de caucho. Esto nos permte crear una capa que evitará la absorción de gran cantidad de pintura acrílica y a su vez nos permite realizar el dbujo y visualizarlo mejor, en caso que vayas a dibujar sobre la teja. Una vez seca, la pintura, aplicamos otra capa más y dejamos secar muy bien.
Luego con la lija, deslizamos suavemente sobre la pintura para retirar el exceso y alisar la superficie.
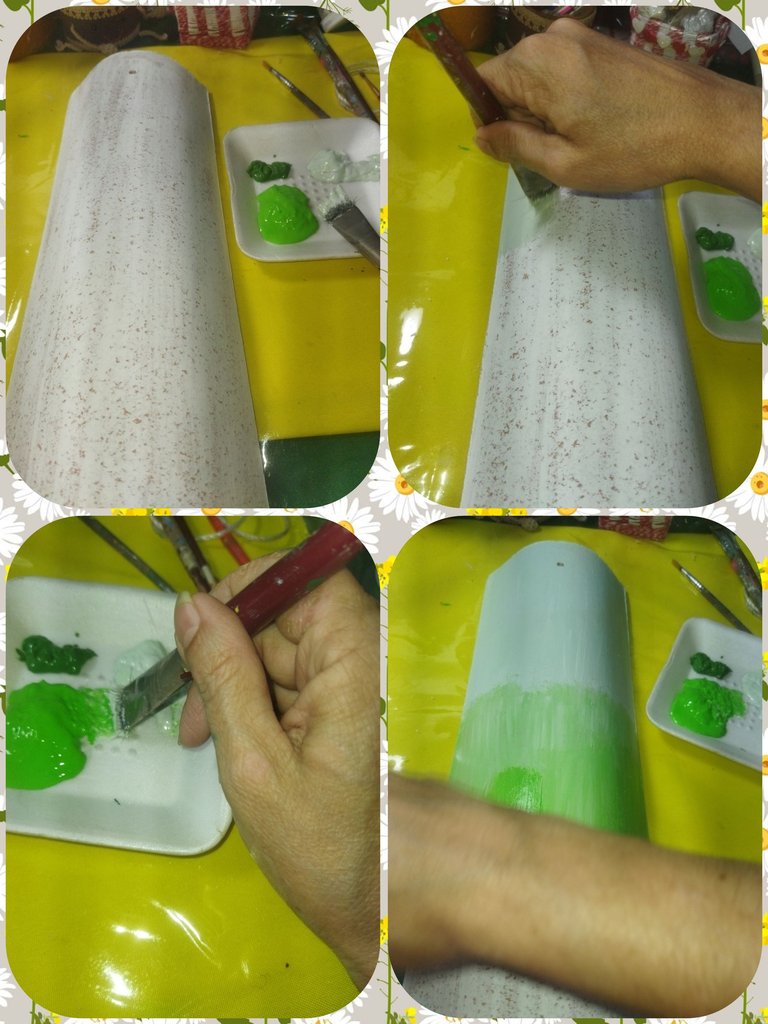
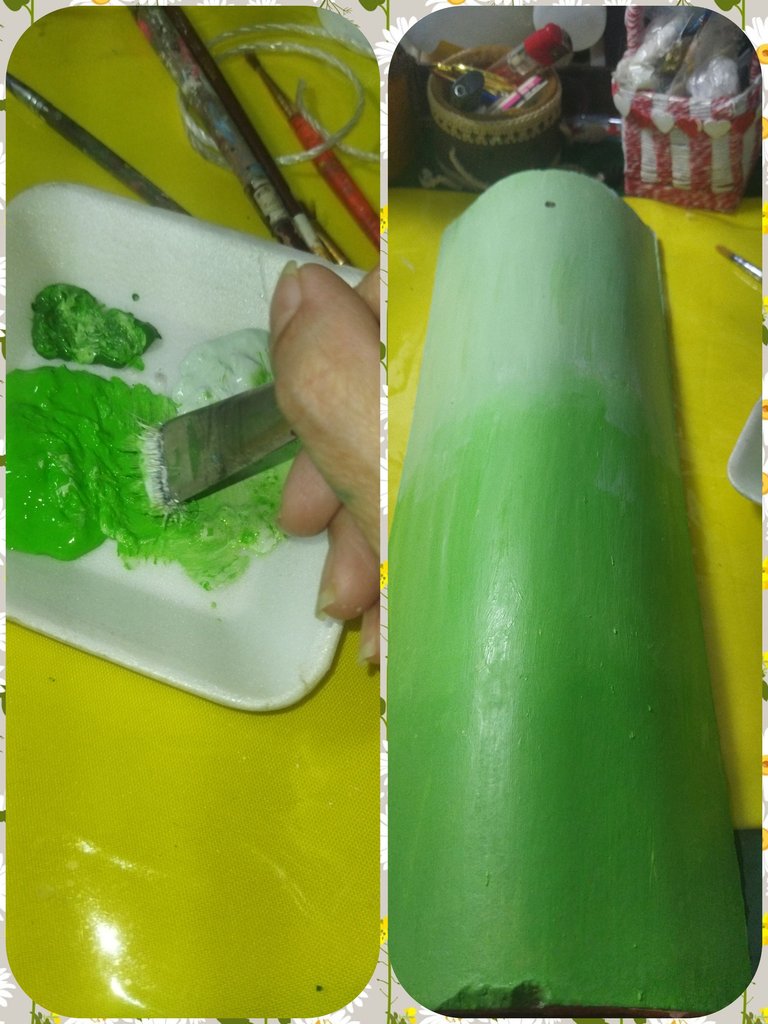
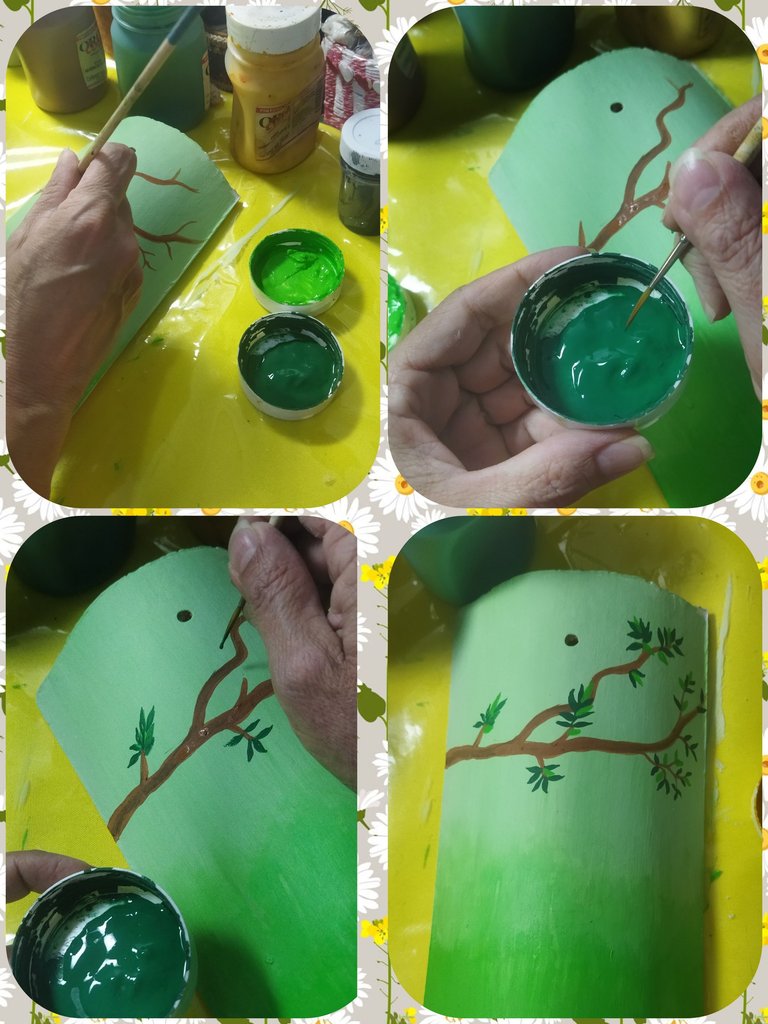
Now we will make a gradient of green tones on the tile to paint the background of the tread. For this step I used 3 shades of green, aqua green, apple green and forest green and an angled brush #18.
Ahora haremos un degradado de tonos verdes sobre la teja para pintar el fondo del pisaje. Para este paso utilicé 3 tonos de verde, verde agua, verde manzana y verde bosque y un pincel angular #18.
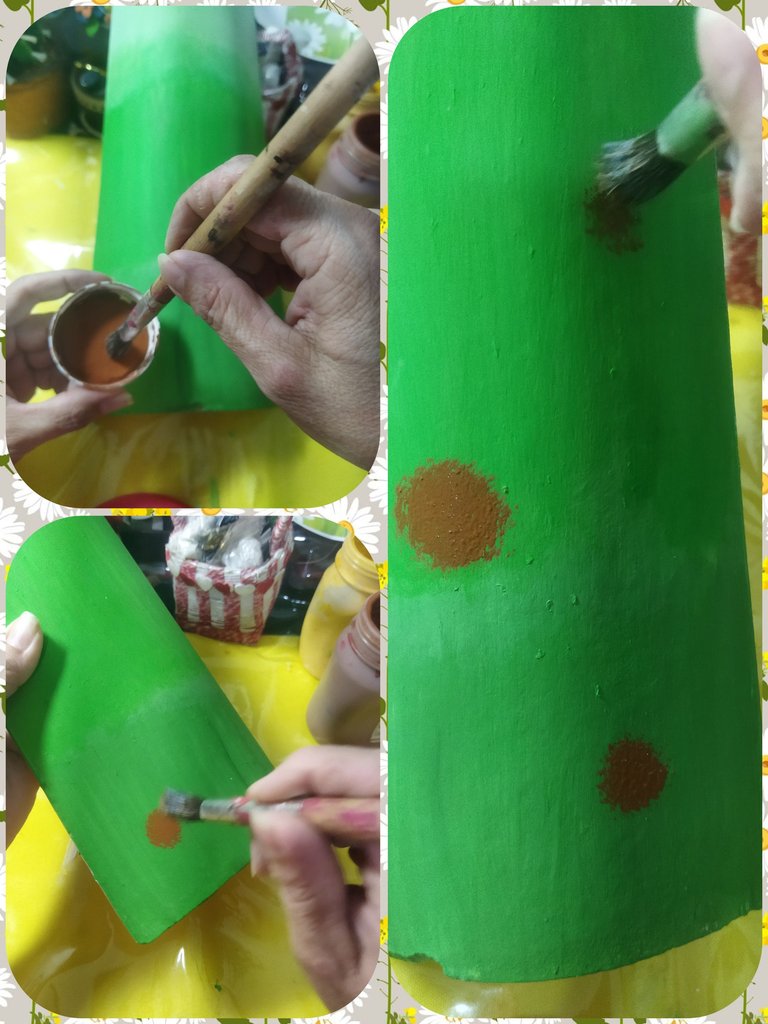
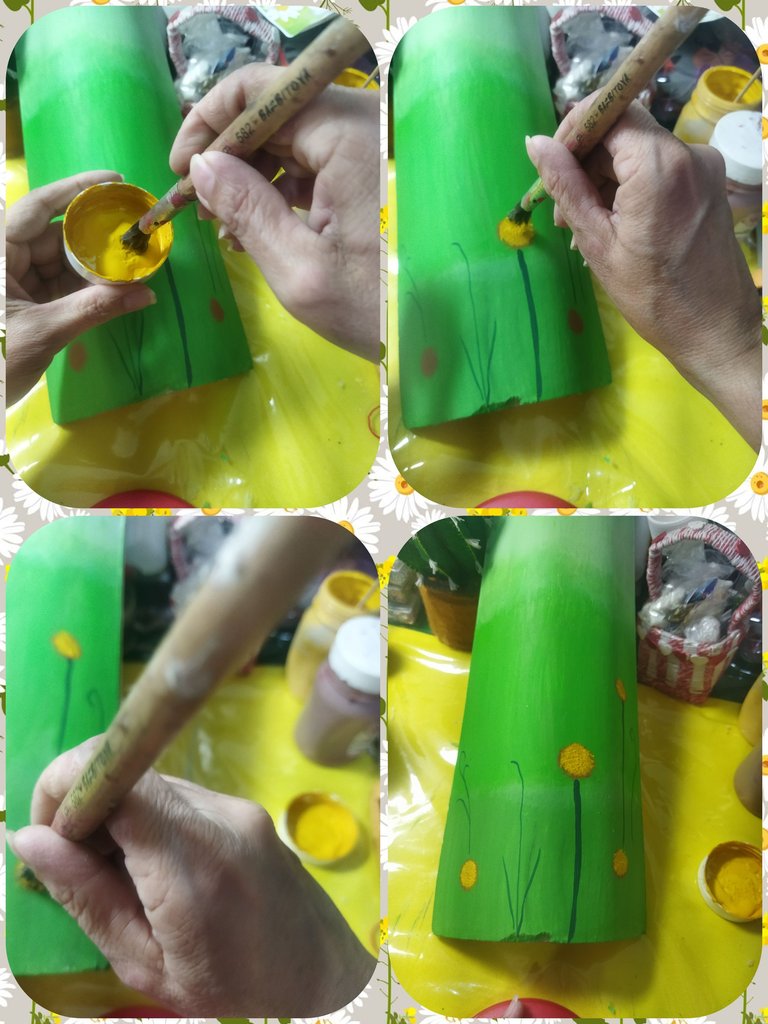
Once the green paint had dried, I began to paint the flowers. I used a round, stiff-bristled brush for the centre of the flower and a brown shade for the base, and I rubbed the brush in circles in dots on the tile.
Una vez seca la pintura verde, comencé a realizar las flores. Utilicé un pincel redondo de cerdas duras para el centro de la flor en un tono marrón para la base y fui haciendo círculos frotando el pincel en forma de puntos sobre la teja.
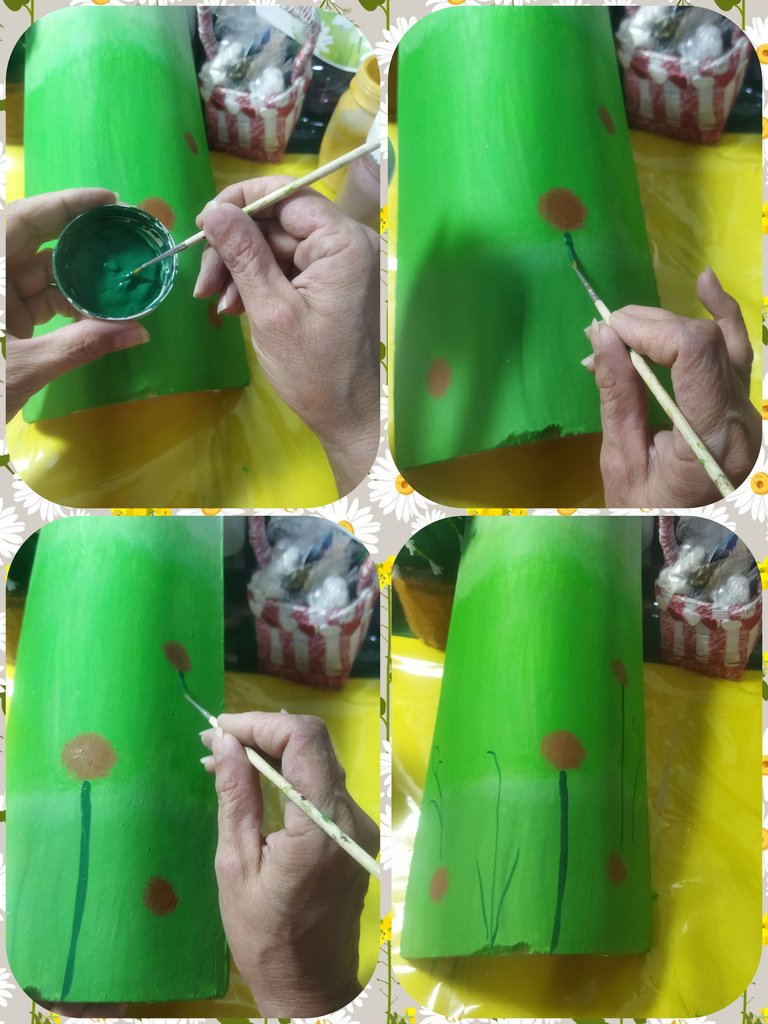
While the brown paint was drying, using Amazon green paint and the liner brush, I made the flower stems and some spikes.
Mientras secaba la pintura marrón, con pintura verde amazonas y el pincel liner, realicé los tallos de las flores y algunas espigas.
Now with the round brush and yellow paint we are going to rub over the brown base that we made previously leaving a border of the brown tone.
Ahora con el pincel redondo y pintura amarilla vamos a frotar sobre la base marrón que hicimos anteriormente dejando un borde del tono marrón.
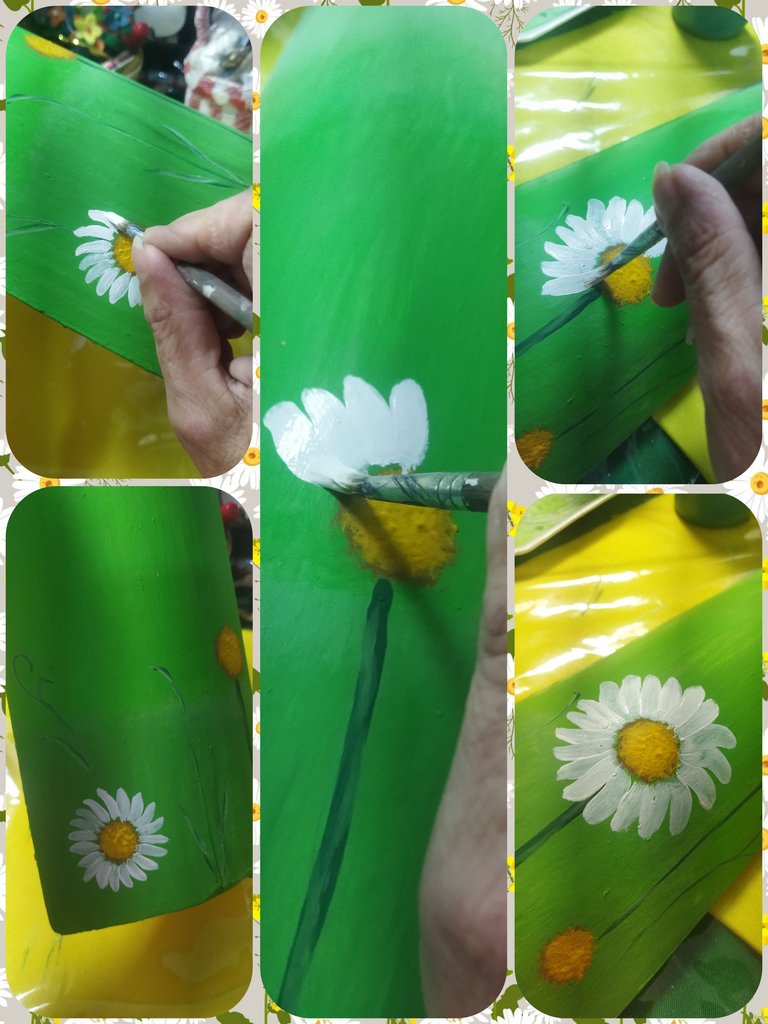
We make the flower petals with white paint and a soft-bristled round brush. Wet the brush in water and wet it with white paint and form the petals one by one until the flower is complete.
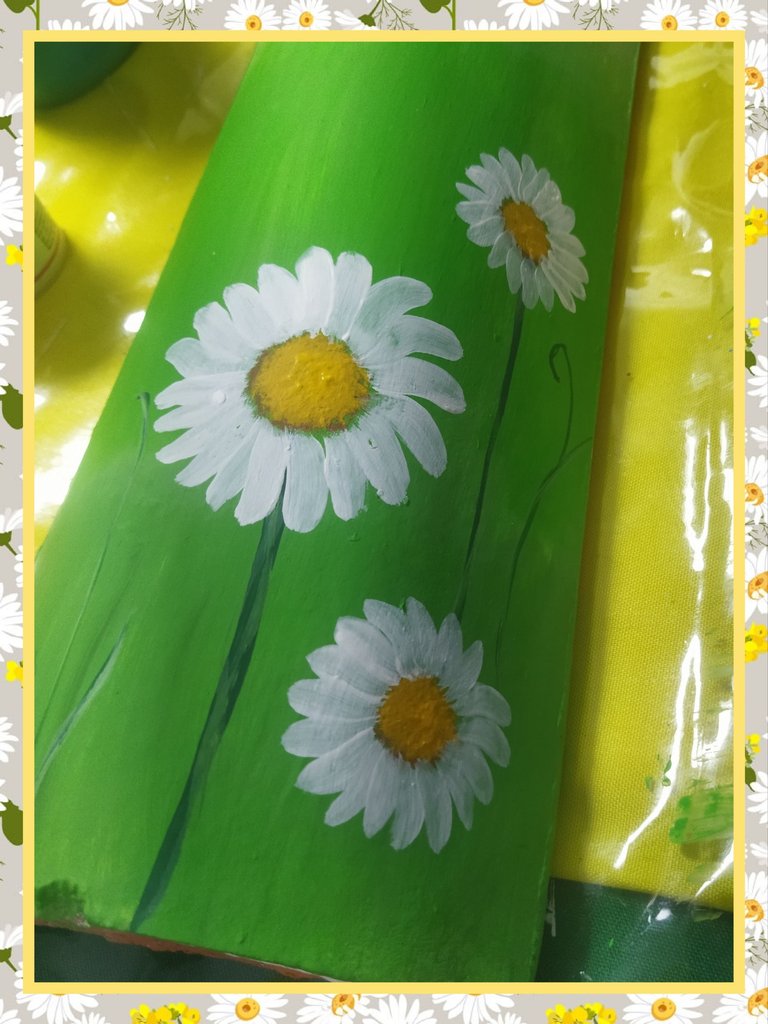
We do the same step on all the other buds.
Realizamos los pétalos de la flor con pintura blanca y pincel redondo de cerdas suaves. Humedeceos el pincel en agua y mojamos con pintura blanca y formamos uno a uno los pétalos hasta completar la flor.
Realizamos el mismo paso en todos los demás capullos.
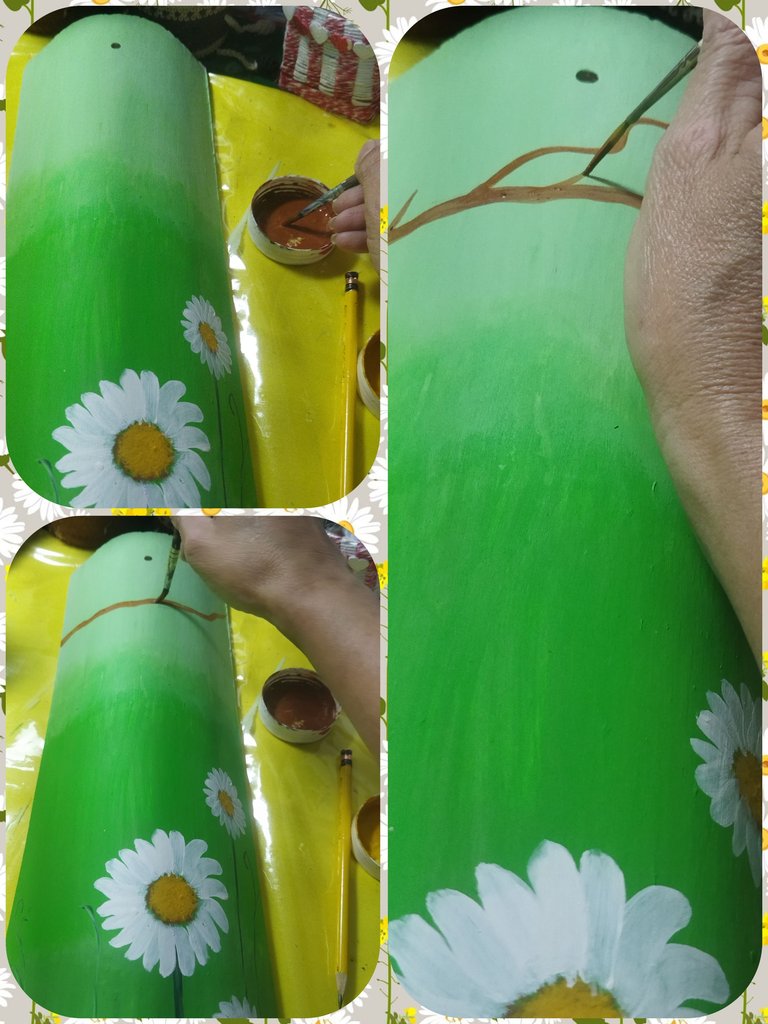
To paint the honeycomb, we will first make a branch that goes through the top of the tile with brown paint and the liner brush.
Para pintar el panal de las abejas, primeramente realizaremos una rama que atraviese la parte superior de la teja con pintura marrón y el pincel liner.
Next we painted the leaves with amazon green and apple green and the liner brush.
Seguidamente pintamos las hojas con verde amazonas y verde manzana y el pincel liner.
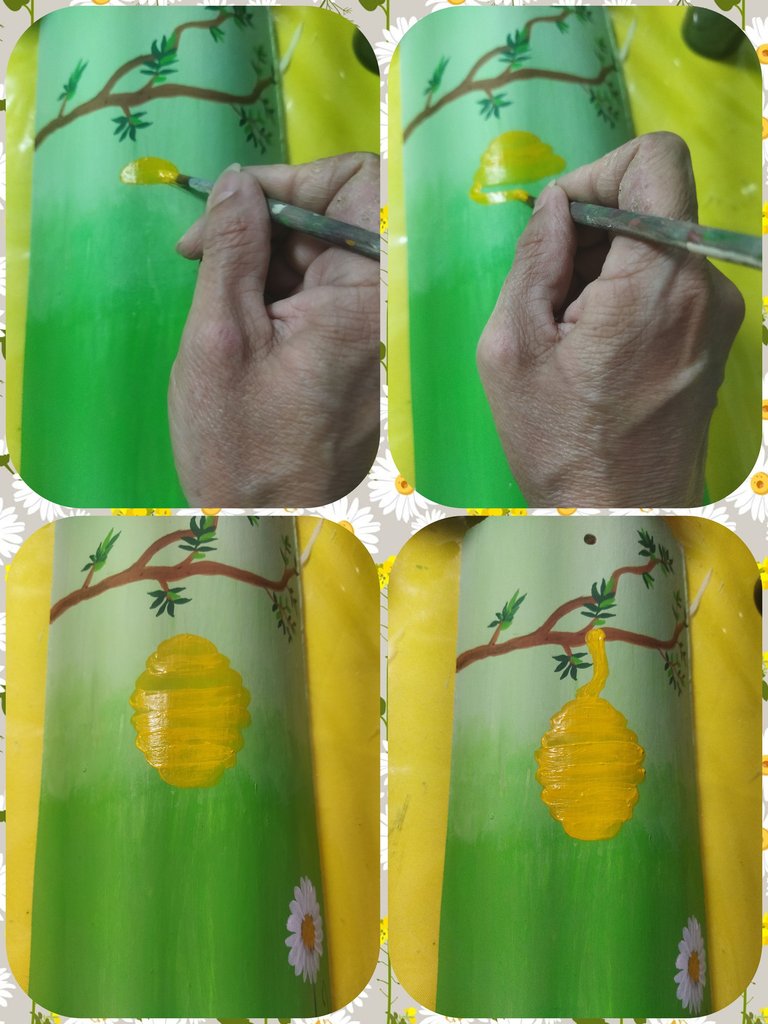
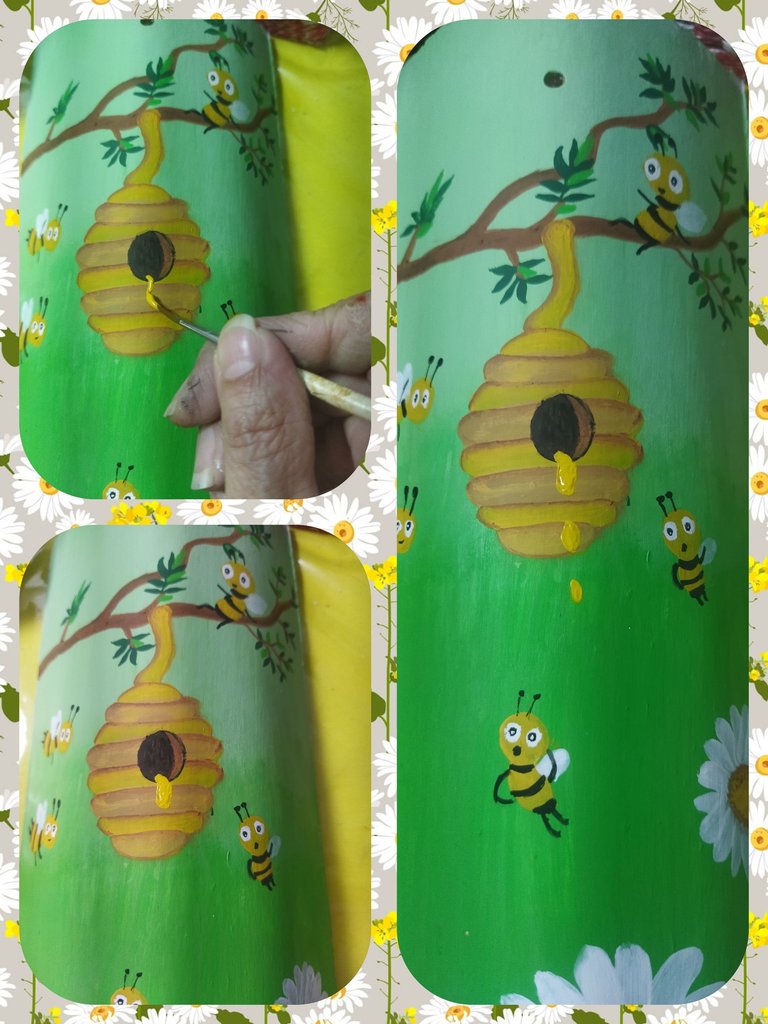
Using yellow, ochre and brown paint, we make the honeycomb, forming semicircles of different sizes, giving it the shape of a honeycomb with the yellow paint and letting it dry. And we repeat another layer.
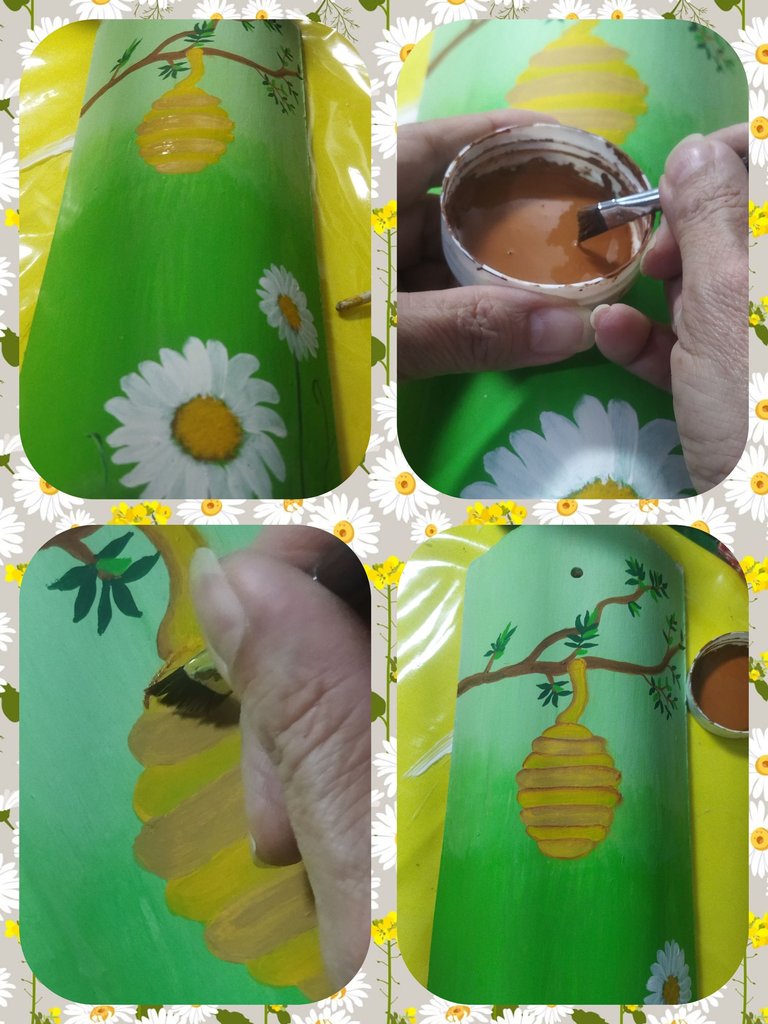
Then, with the ochre paint, we make a layer alternating between each of the divisions of the honeycomb.
Con pintura amarilla, ocre y marrón realizamos el panal de las abejas, formando semircírculos de diferentes tamaños dándole forma de panal con la pintura amarilla y dejamos secar. Y repetimos otra capa.
Luego con la pintura ocre realizamos una capa intercalando entre cada una de las divisiones del panal.
Using the angled brush and brown paint, we draw an outline around the honeycomb to define its contours.
Con el pincel angular y la pintura marrón realizamos un delineado por el panal para definir sus contornos.
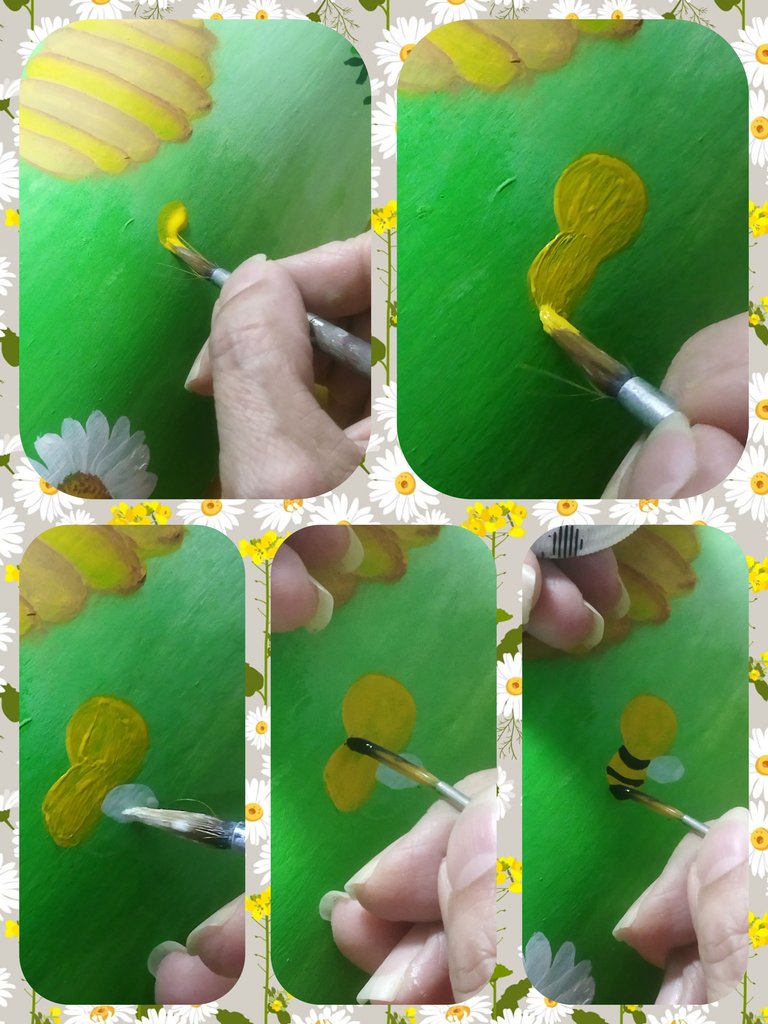
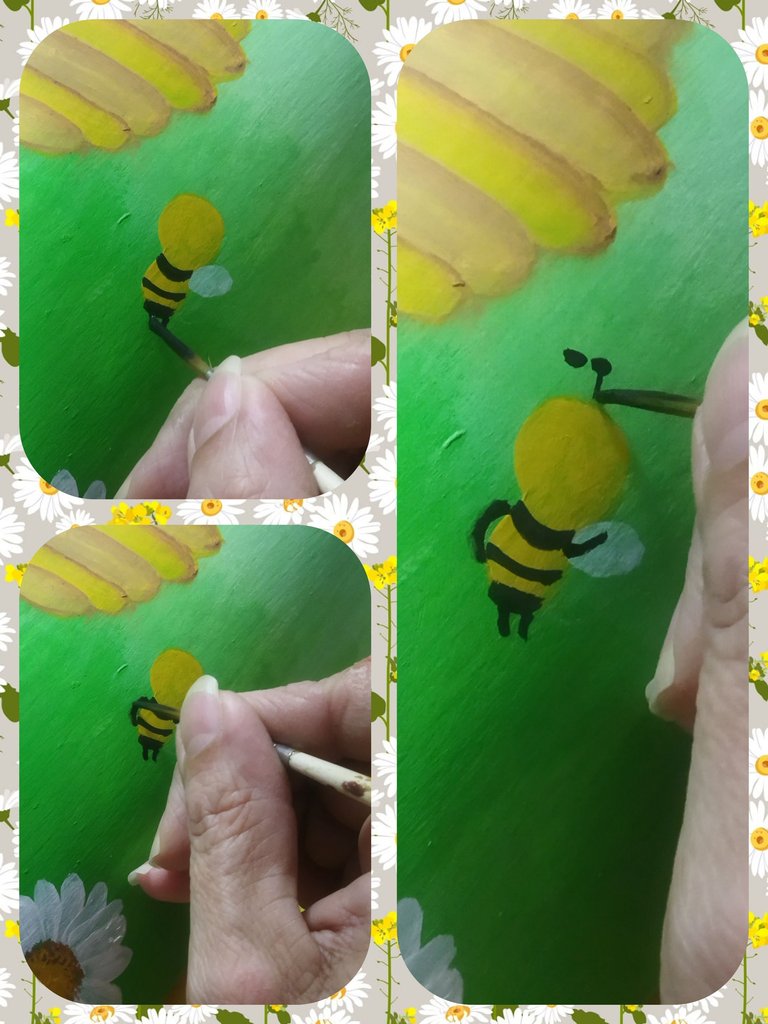
Now we have to paint the bees. We start by making the body of the bees, using the yellow paint and the round brush.
Then with white paint we make the wings and we make the black lines that define the body of the bee with the liner brush.
Ahora viene pintar las abejas. Comenzamos realizando el cuerpo de las abejitas, utilizando la pintura amarilla y el pincel redondo.
Luego con pintura blanca realizamos las alitas y realizamos las líneas negras que definen el cuerpo de la abeja con el pincel liner.
We make the front and back legs and the antennas.
Realizamos las patas delanteras y traseras y las antenas.
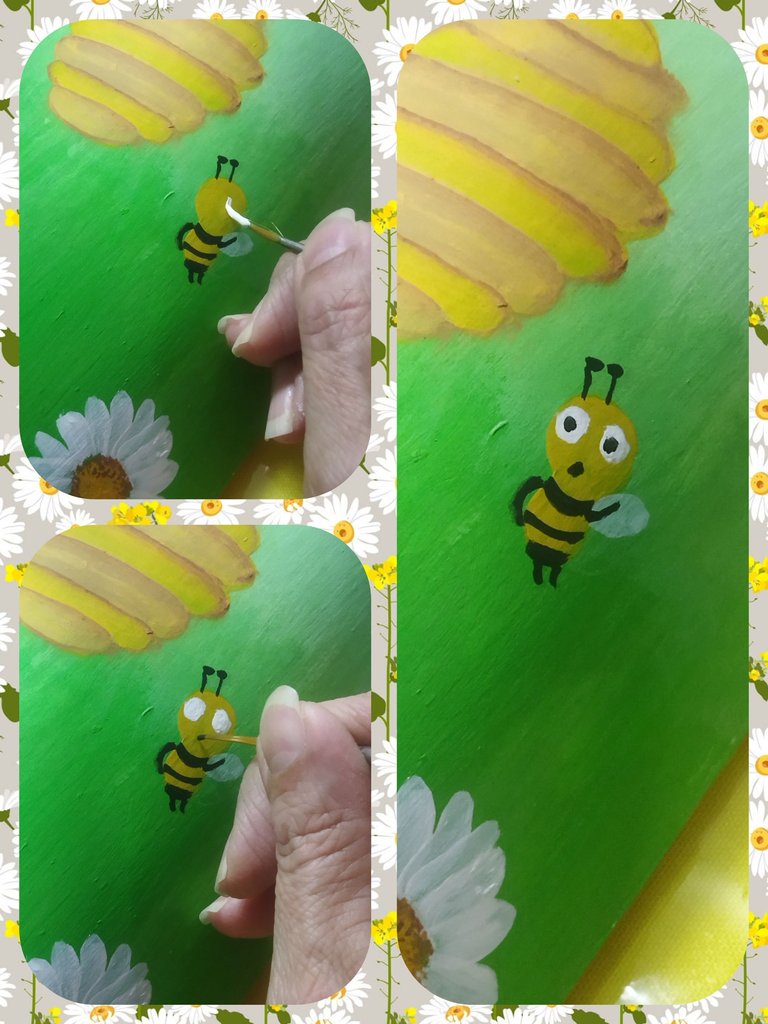
For the eyes, paint two white circles on the bee's head and a black dot on each of the circles. For the mouth, add a black dot or stick.
Para los ojos, pintamos dos circulos blancos en la cabeza de la abeja y un punto negro en cada uno de los círculos. Ypara la boca un punto o una barita negra.
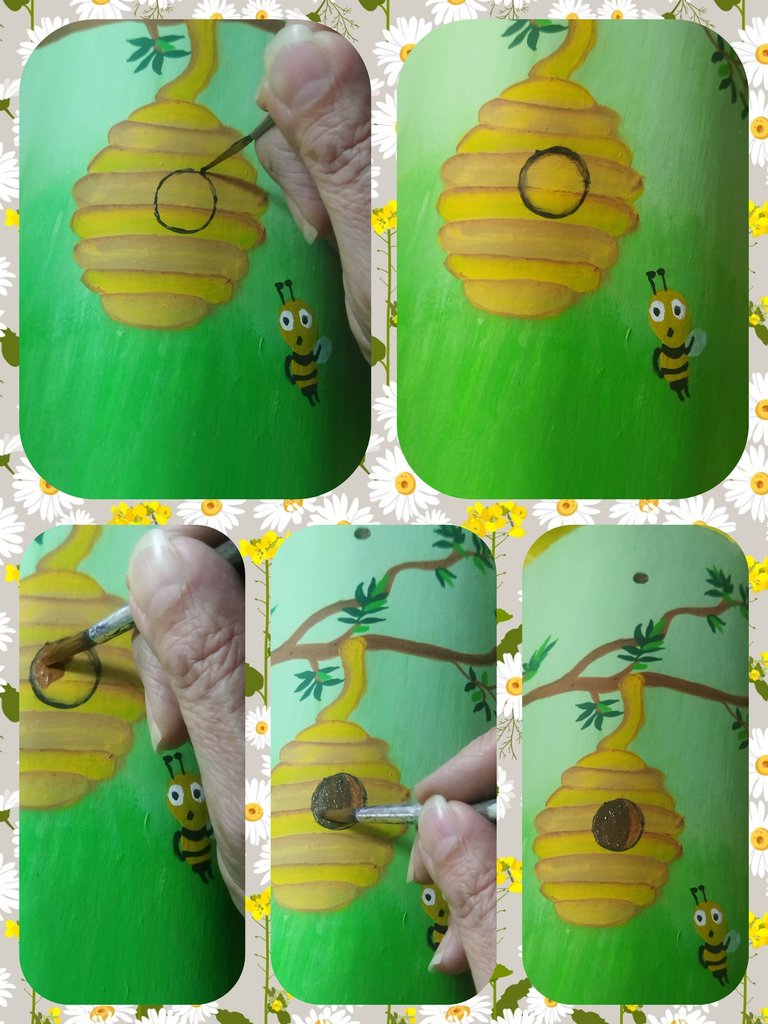
Using the liner brush and black paint, we draw a circle in the honeycomb to simulate the entrance, fill it in with brown paint, then shade it with black paint.
Con el pincel liner y pintura negra realizamos un círculo en el panal para simular la entrada, rellenamos con pintura marrón, luego sombreamos con pintura negra.
We complete the landscape by painting other bees around the honeycomb and the flowers.
Completamos el paisaje pintando otras abejas alrededor del panal y las flores.
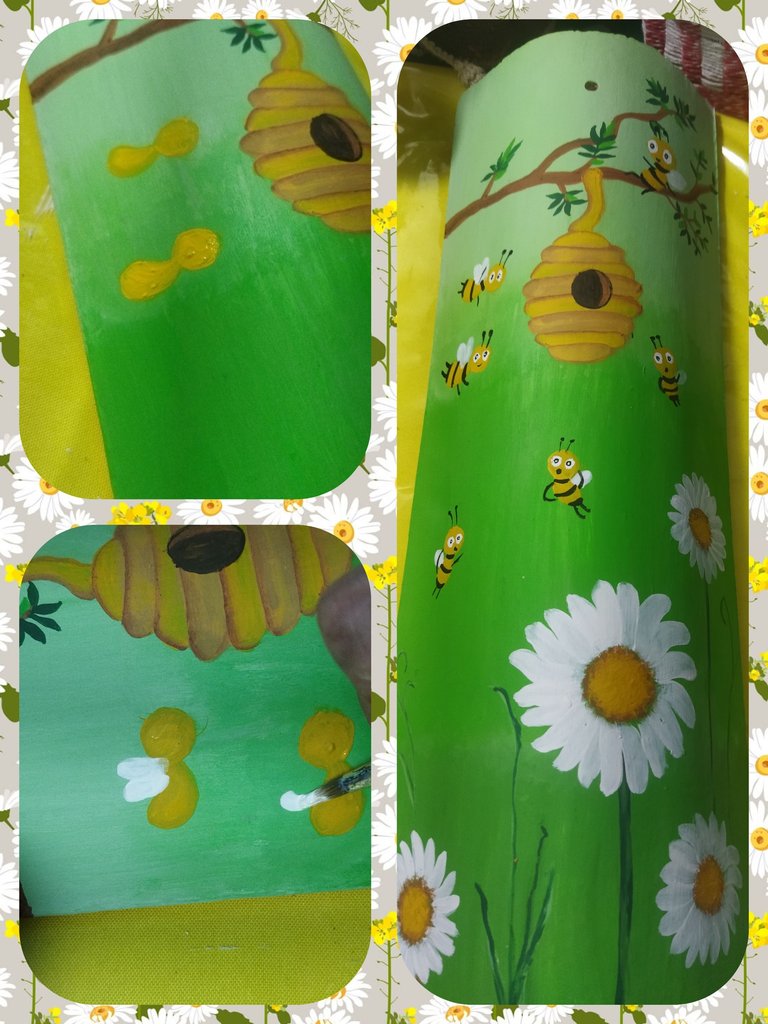
And finally, we cannot forget to paint the honey spilled on the honeycomb, making yellow drops.
Y por último, no puede faltar, pintamos la miel derramada sobre el panal, realizando gotas de color amarillo.
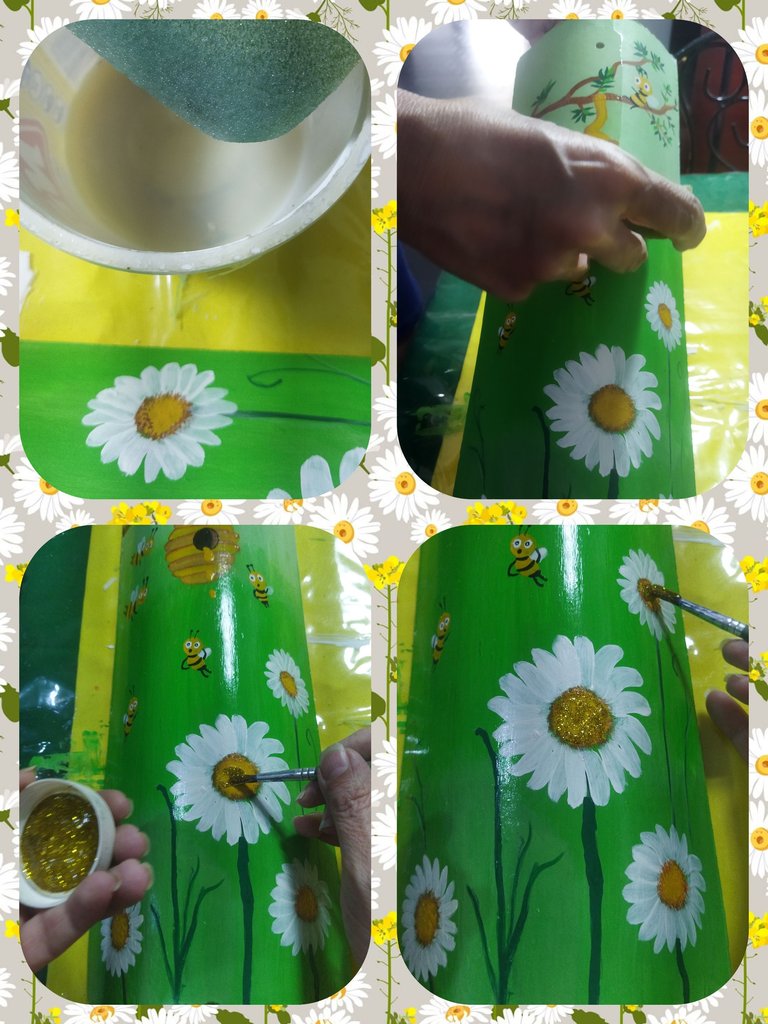
Now we are going to apply a layer of acrylic wax over the paint. This should be done once the paint is completely dry so that it does not run. With a sponge I quickly apply the layer without going over it again, until the entire tile is covered. It should be left to dry without handling it.
We add golden frosted gel over the center of the flowers and let it dry.
Ahora vamos a aplicar una capa de cera acrílica sobre la pintura, esto debe realizarse una vez que esta bien seca la pintura para que no se corra. Con una espoja aplico de forma rápida la capa sin pasar nuevamente por la misma, hasta cubrir toda la teja. Se debe dejar secar sin manipular.
Agregamos gel escarchado dorado sobre el centro de las flores y dejamos secar.
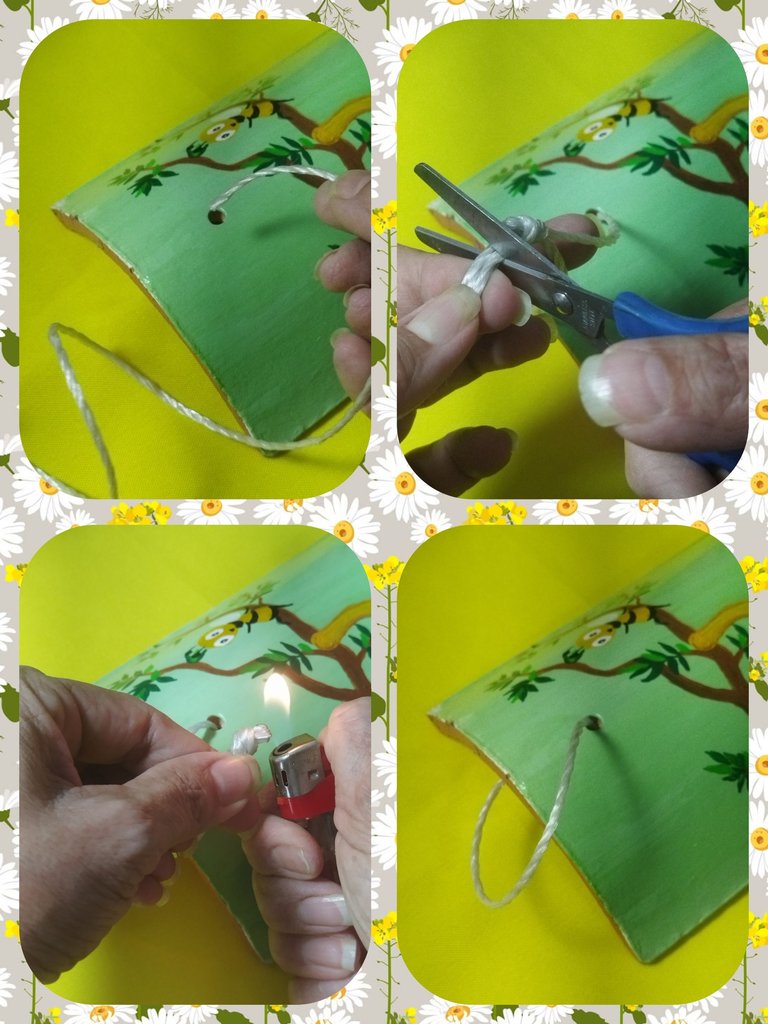
We place the string to hang the tile, tie a knot and seal with the lighter.
Colocamos el mecatillo para colgar la teja, realizamos un nudo y sellamos con el encendedor.
Many times when we are in the countryside, we protest or get scared when we hear a swarm of bees. Sometimes they migrate to other areas to form their nests, however, they feel threatened by man and often attack in defense. I can only recommend that if it ever happens to you, you should remain calm and let them pass without disturbing them. Every being that feels threatened tends to defend itself. This is my project, happy bees and bearers of well-being for all. I hope you like it. See you next time.
Muchas veces cuando estamos en el campo, protestamos o nos asustamos cuando escuchamos un enjambre de abejas, algunas veces ellas emigran a otras zonas para formar sus nidos, sin embargo, se sienten amenzadas por el hombre y muchas veces atacan en defensa. Sólo puedo recomendar que si alguna vez te llegase a suceder, debes conservar la calma y dejar que pasen sin molestarlas. Todo ser que se siente amenazado tiende a defenderse. Este es mi proyecto, abejas felices y portadoras de bienestar para todos. Espero les guste. Nos vemos en la próxima.
