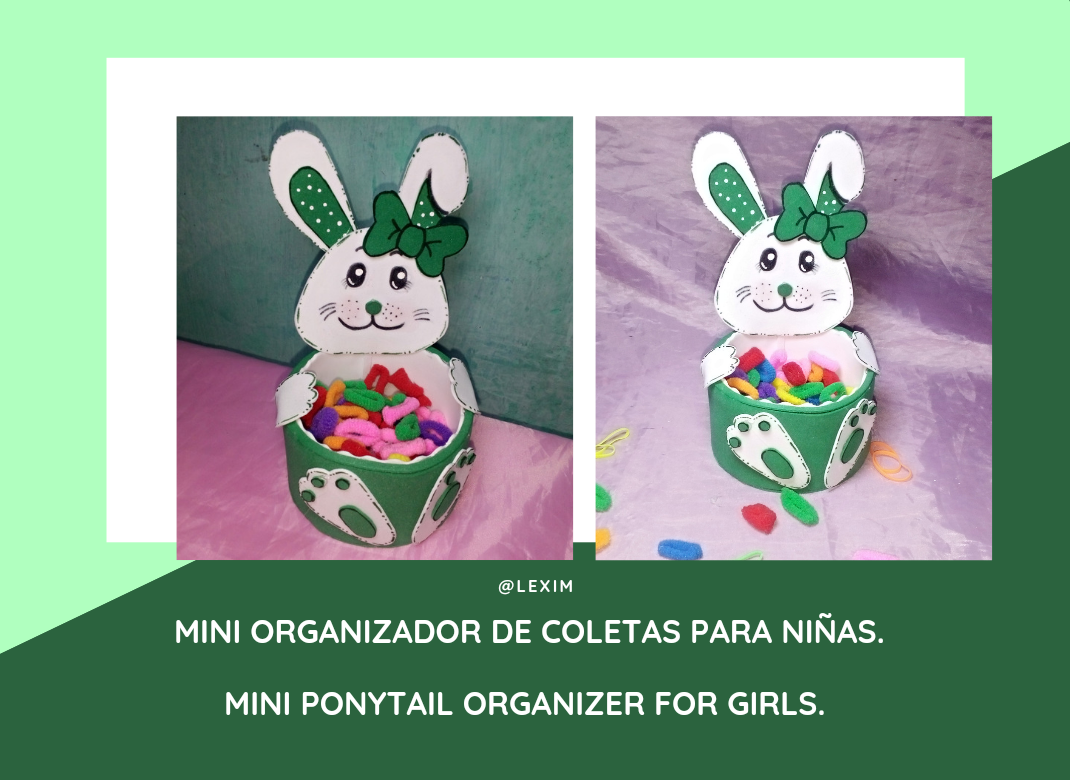
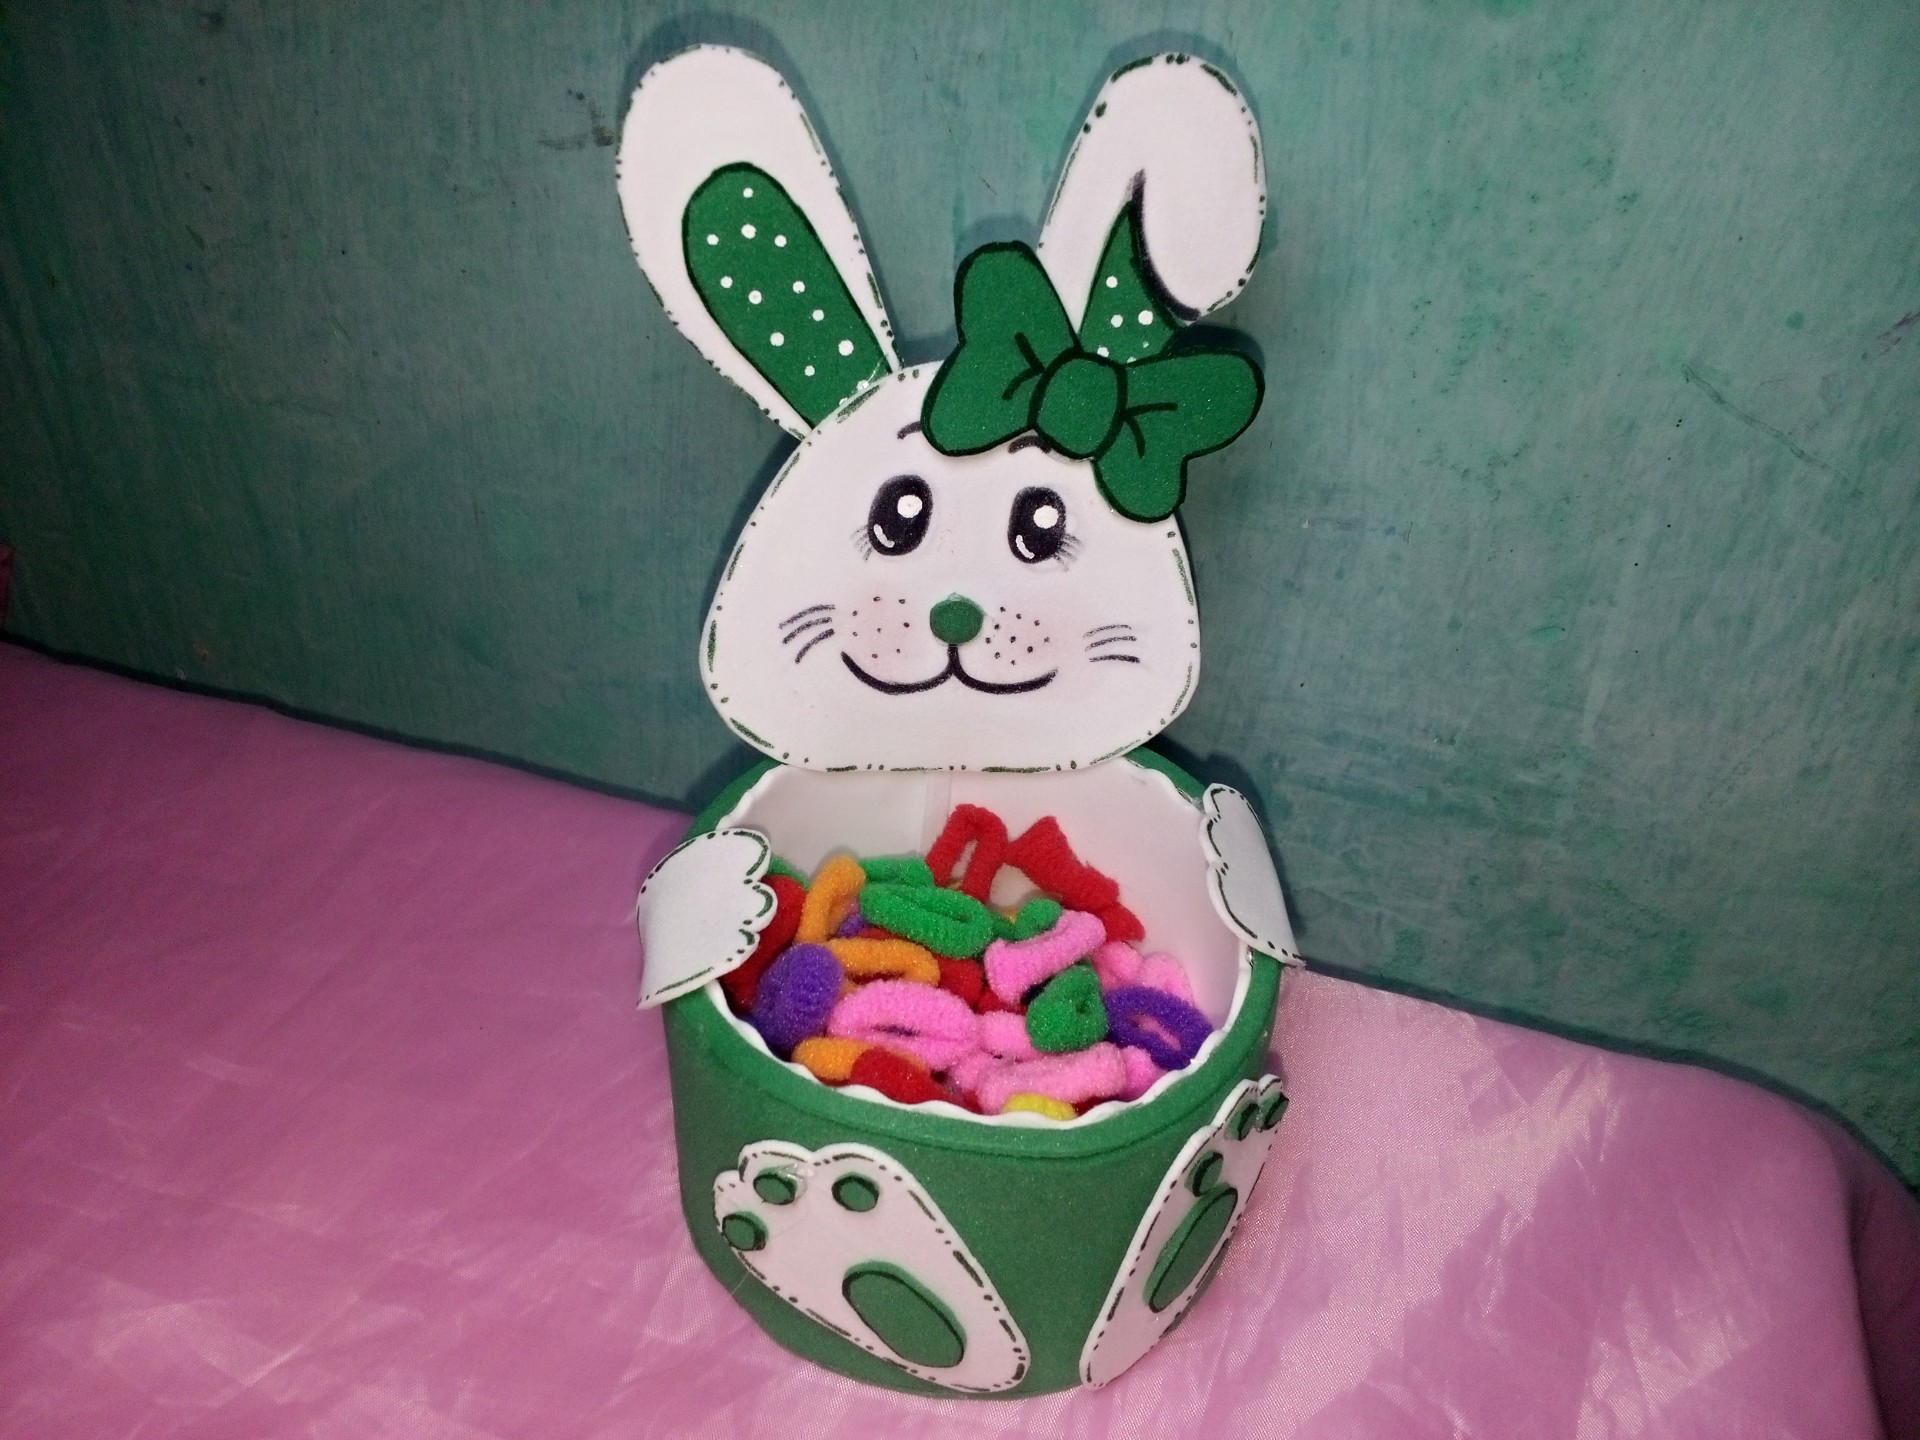
Hello to all dear colleagues who are part of this social network. Today I bring you one of my creative activities that I like to do with love for you a step by step this time I made a mini organizer of pigtails for girls with cardboard and super cheap Eva rubber and in turn we recycle the cardboard this idea helps girls to keep order in their hairstyle and makes it easier for daily use can be done in the color of the taste of each person read on for explanation.
Hola a todos queridos compañeros que hacen parte de esta red social. El día de hoy les traigo una de mis actividades creativas que me gusta hacer con mucho cariño para ustedes un paso a paso está vez hice un mini organizador de coletas para niñas con cartón y goma Eva súper barato y a su vez reciclamos el cartón esta idea ayuda a las niñas a mantener el orden en su peinadora y le hace más fácil su uso diario se puede hacer del color del gusto de cada quien sigan leyendo para su explicación.
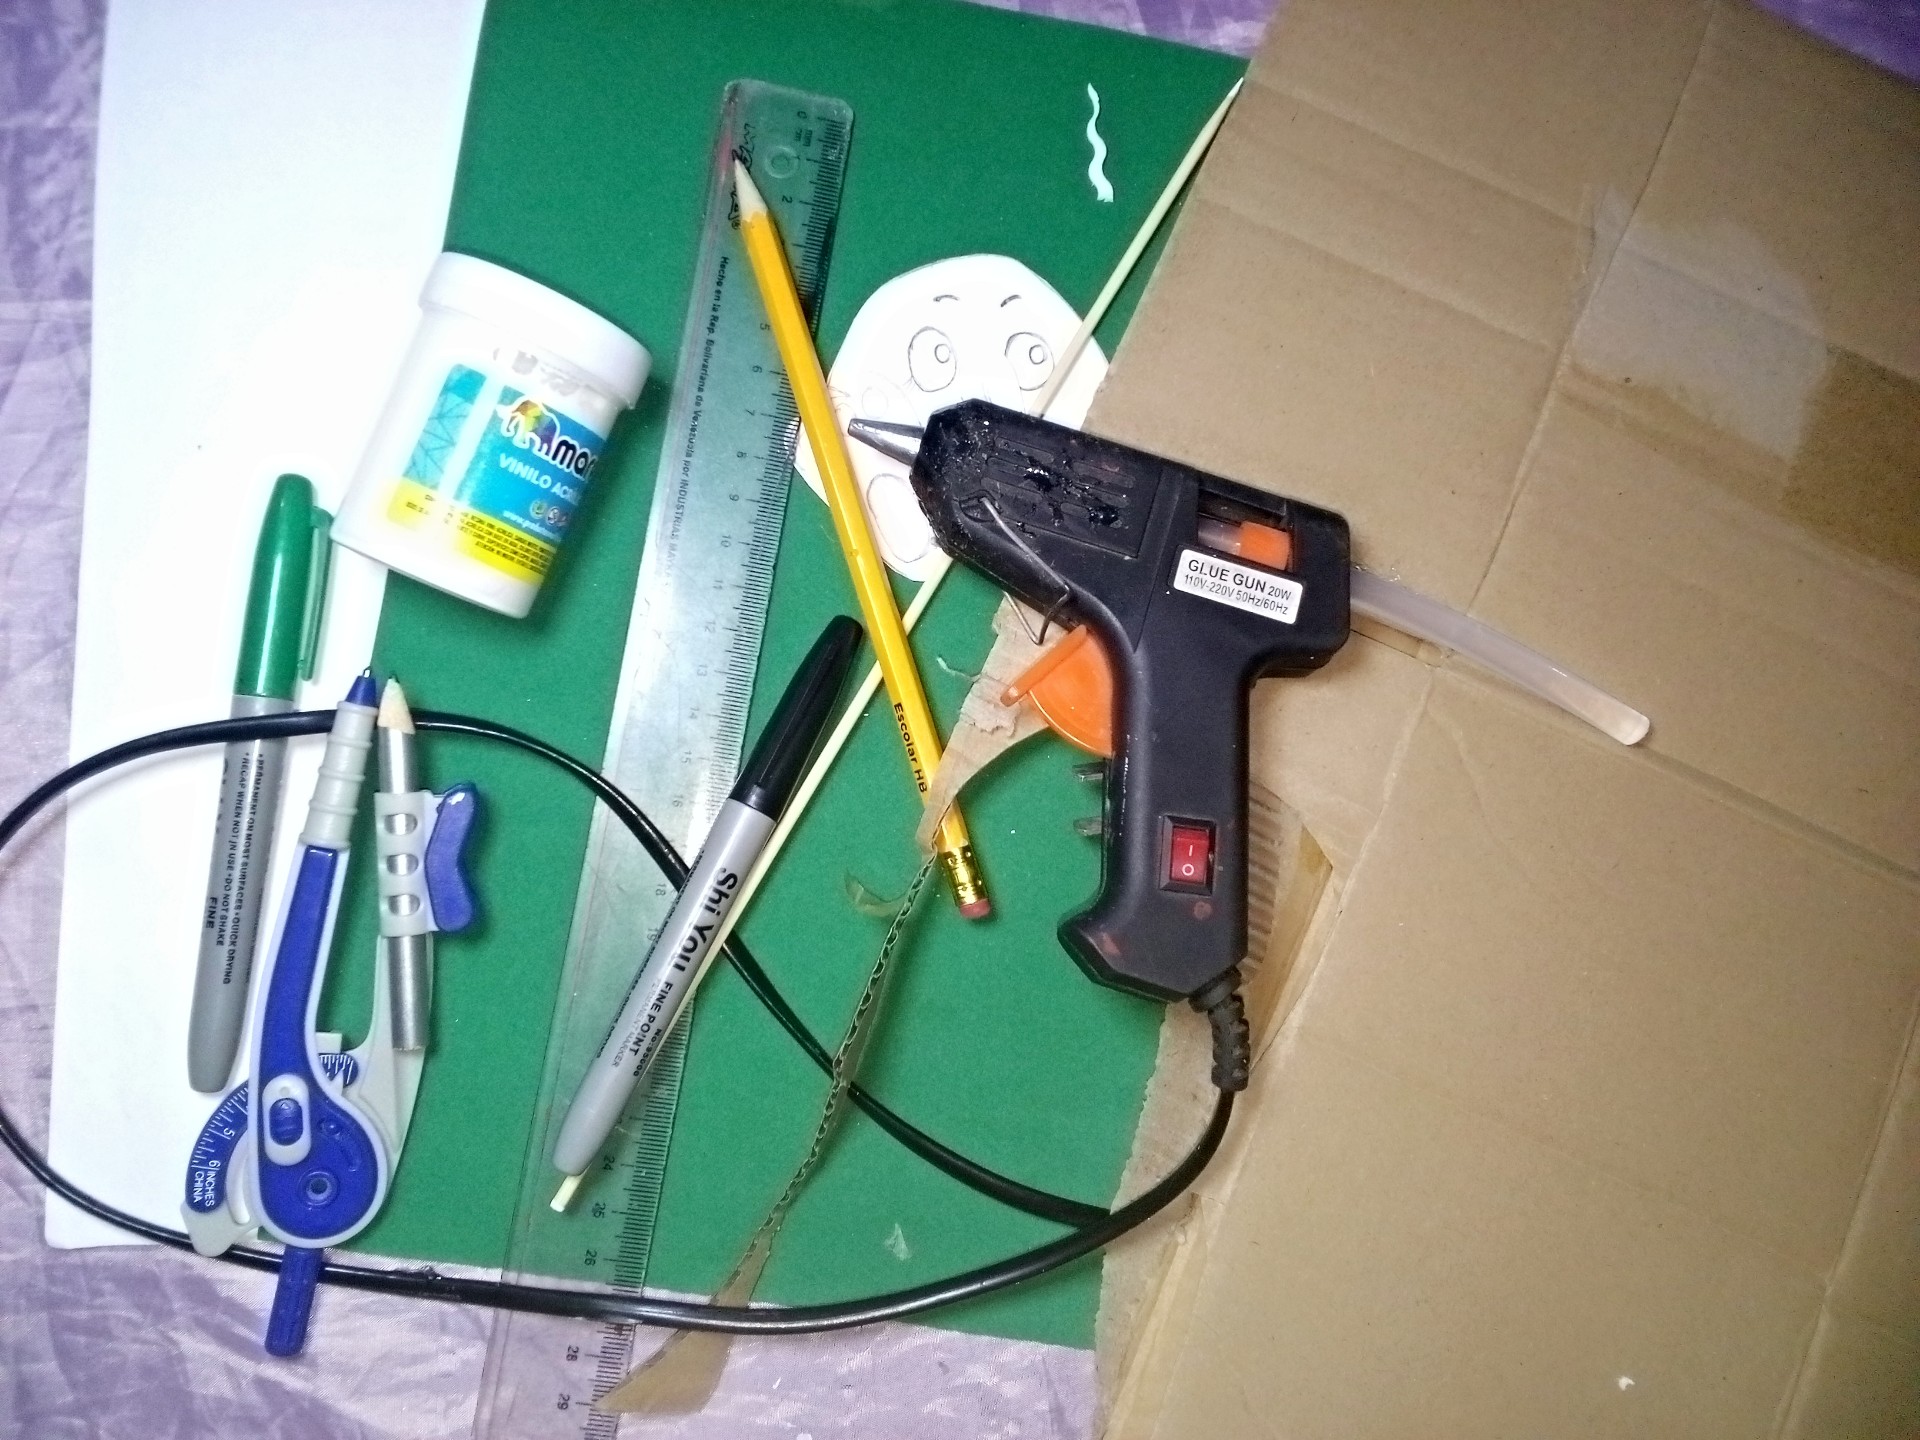
- Cardboard
- Green and white eva rubber
- Scissors
- Pencil
- Hot glue
- Ruler
- White acrylic paint
- Toothpick
- Green and black marker pen
- Mold head, hands, ears, paws and a bow.
- Compass.
Step by step.
Paso a paso.

Paso 1. // Step 1.
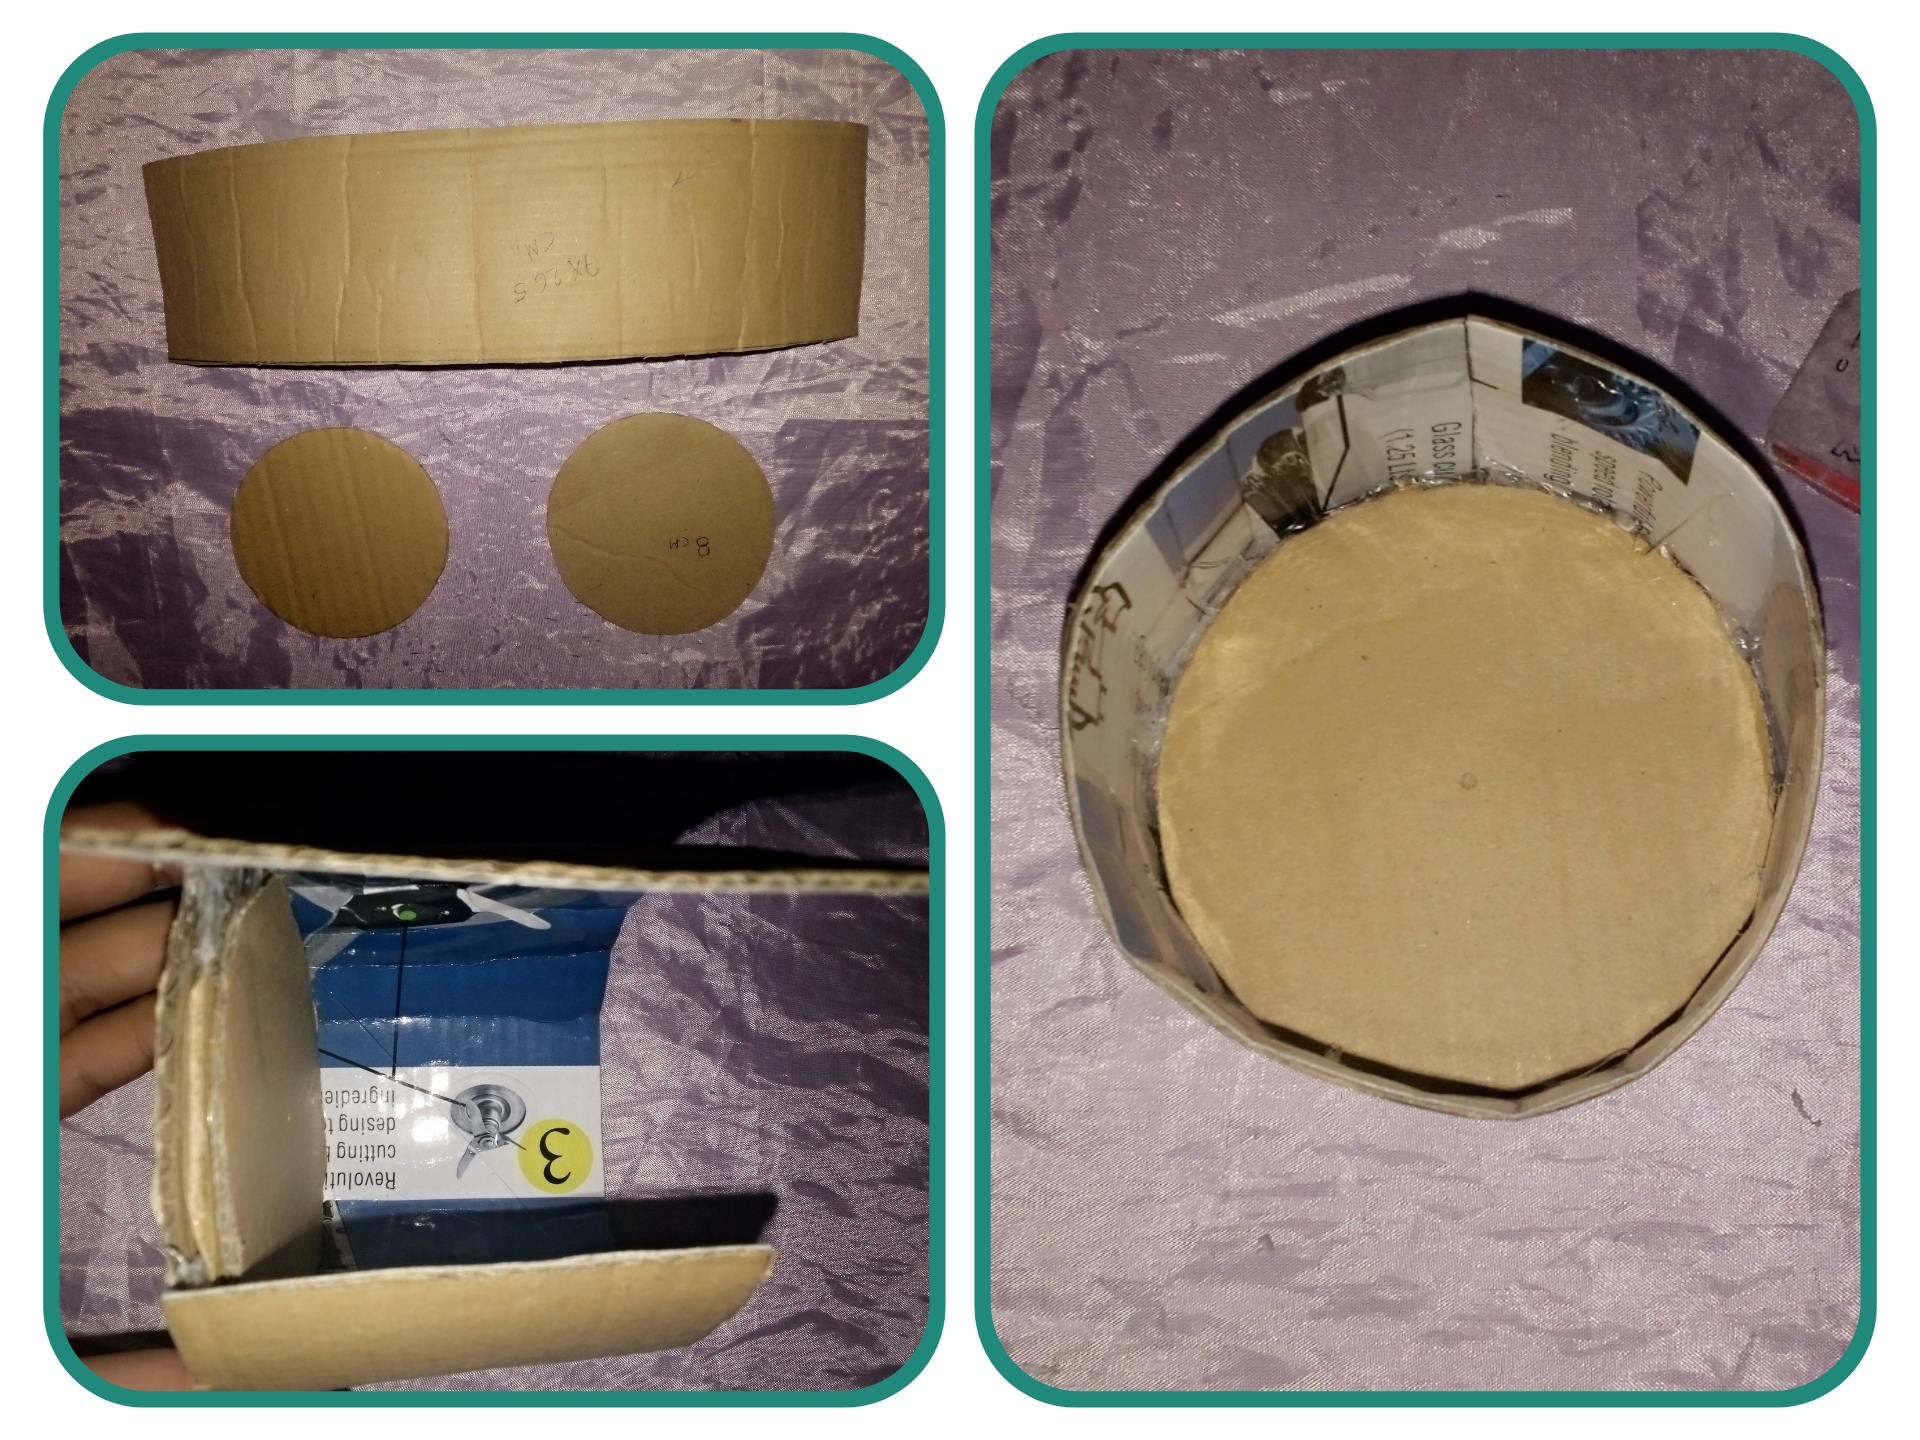
Take a piece of cardboard and cut a strip of 7x26.5 centimeters and with the help of the compass make a circle of 8 centimeters and glue the strip around the circle to form a circular box.
Toma un pedazo de cartón y corta una tira de 7x26.5 centímetros y con la ayuda del compás haz un círculo de 8 centímetros y pega la tira alrededor del círculo y se forma una caja circular.
Paso 2. // Step 2
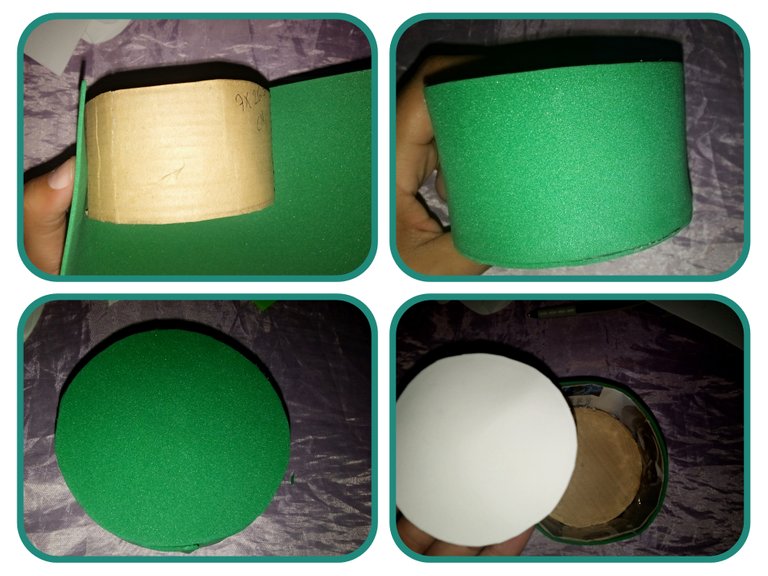
Take a sheet of green or any color eva rubber and cover the cardboard on the outside and underneath. And inside in white.
Toma un pliego de goma Eva de color verde o cualquier color y cubrimos tapando el cartón por fuera y por debajo. Y por dentro de color blanco.
Paso 3. // Step 3.
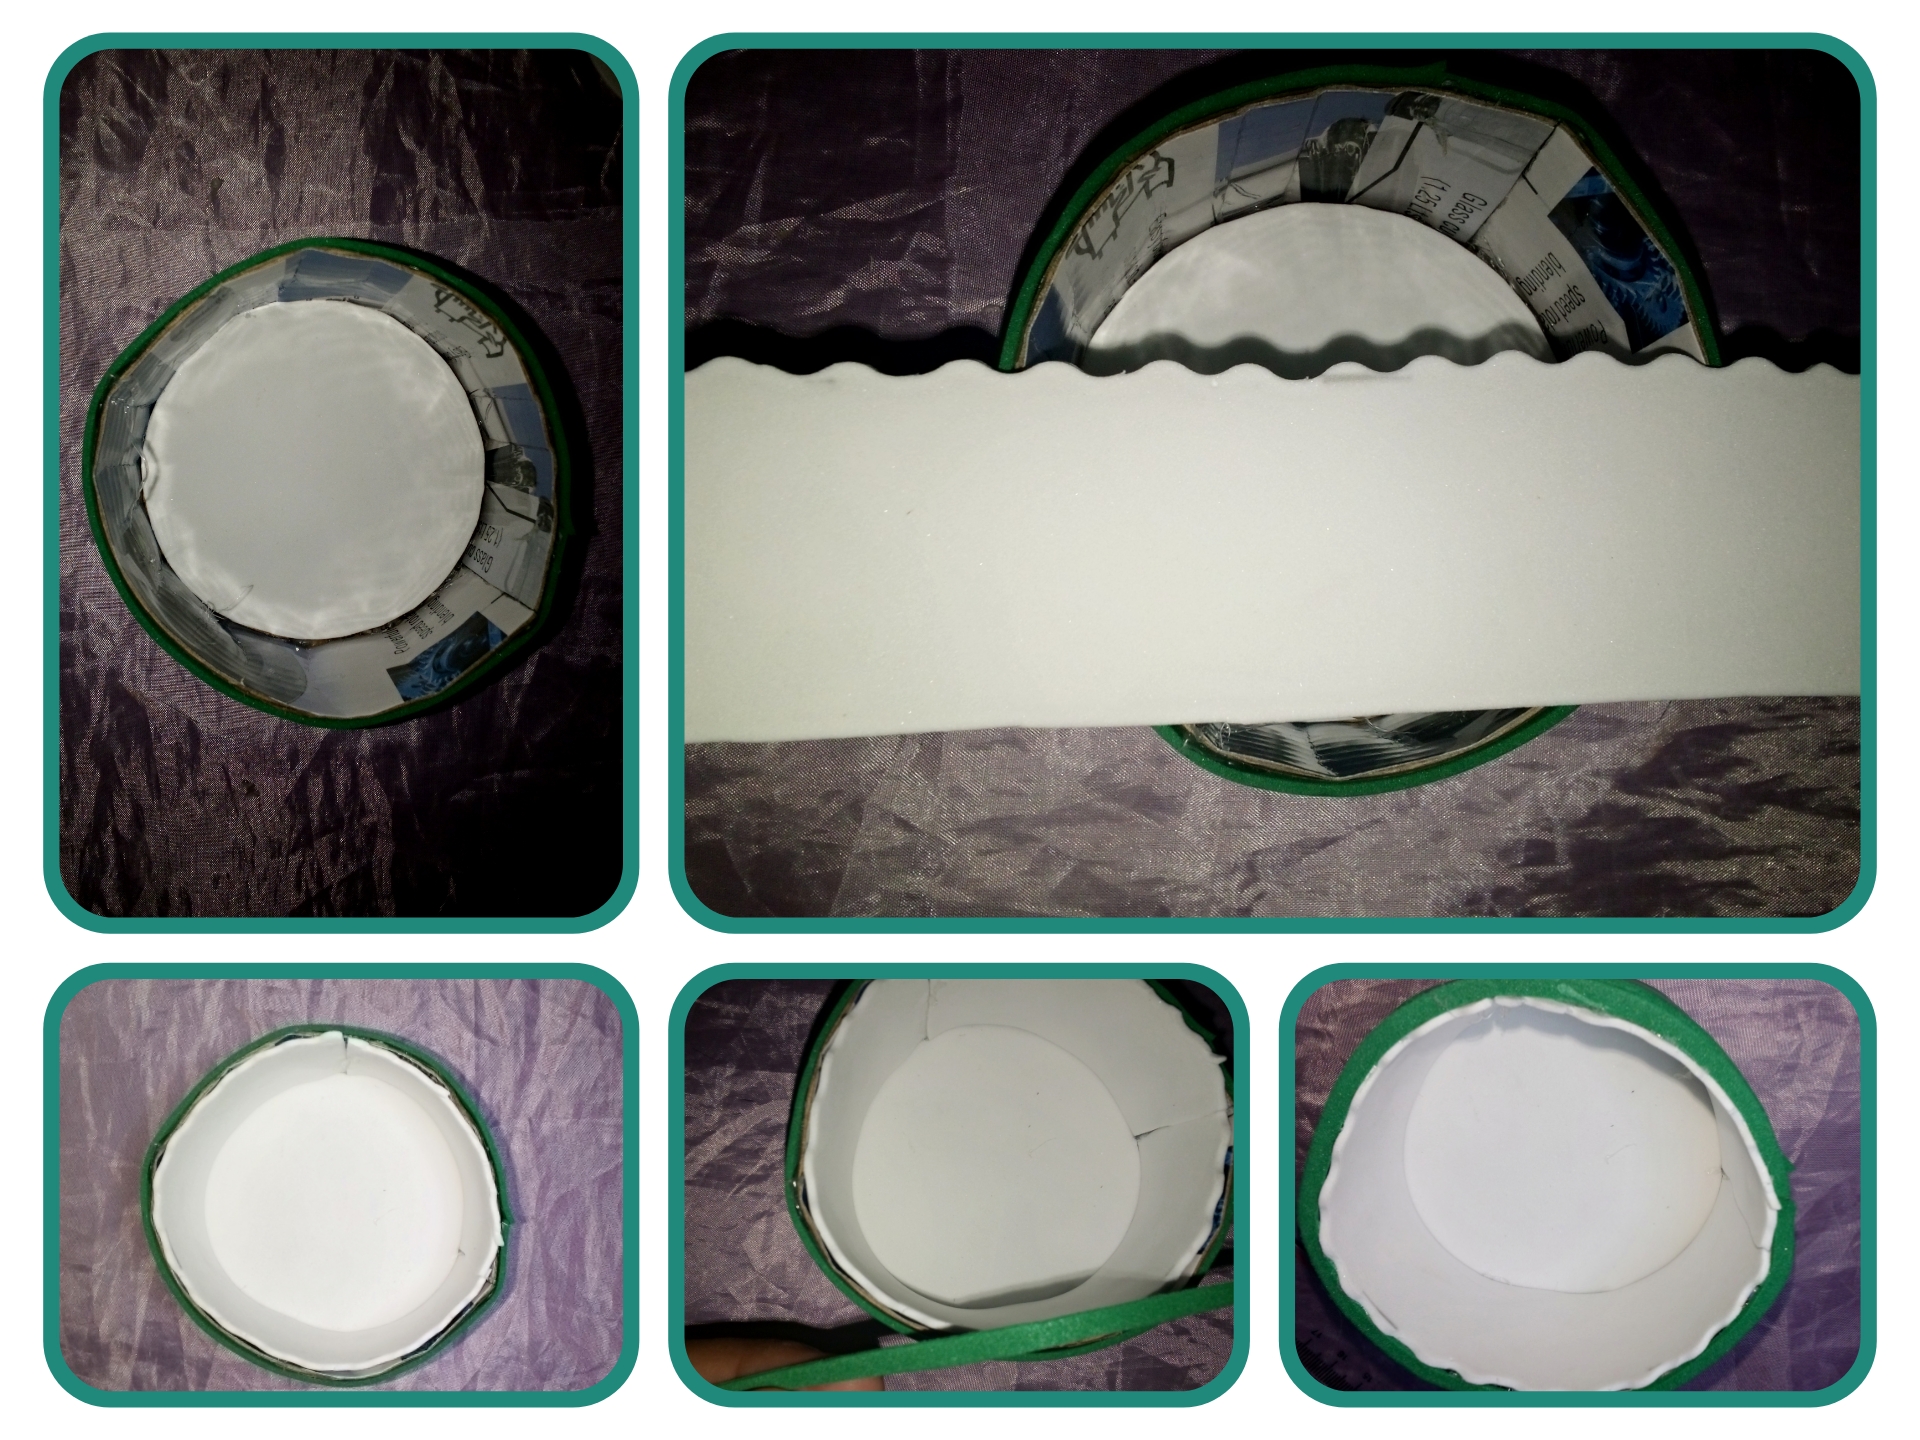
Cover the inside with the help of the figure scissors so that it takes a nice wavy shape. Cover around the circle with a thin strip of green eva gum in this way we finish the box.
Cubre el interior con la ayuda de las tijeras de figuras para que coja una bonita forma ondulada. Cubre alrededor del círculo con una tira fina de goma eva verde de esta forma terminamos la caja.
Paso 4. // Step 4.
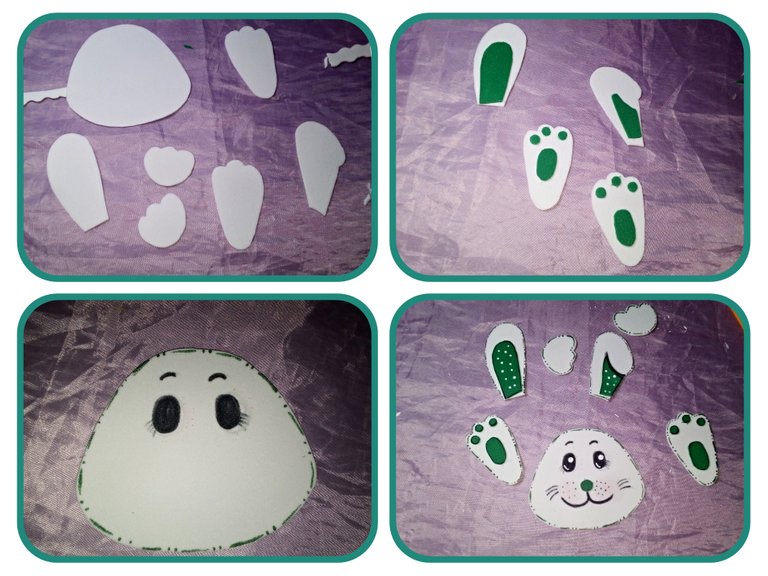
With the help of the molds we trace on the white Eva rubber to obtain a head, two paws, two hands, two ears and with the marker we shape his face, outline around each part of the pieces and with the white acrylic paint we place dots on his ears.
Con la ayuda de los moldes trazar en la goma Eva color blanco para obtener una la cabeza, dos patas, dos manos, dos orejas y con el rotulador darmos forma su rostro delineamos alrededor cada parte de las piezas y con la pintura acrílica blanca coloca puntos en sus orejas.
Paso 5. // Step 5.
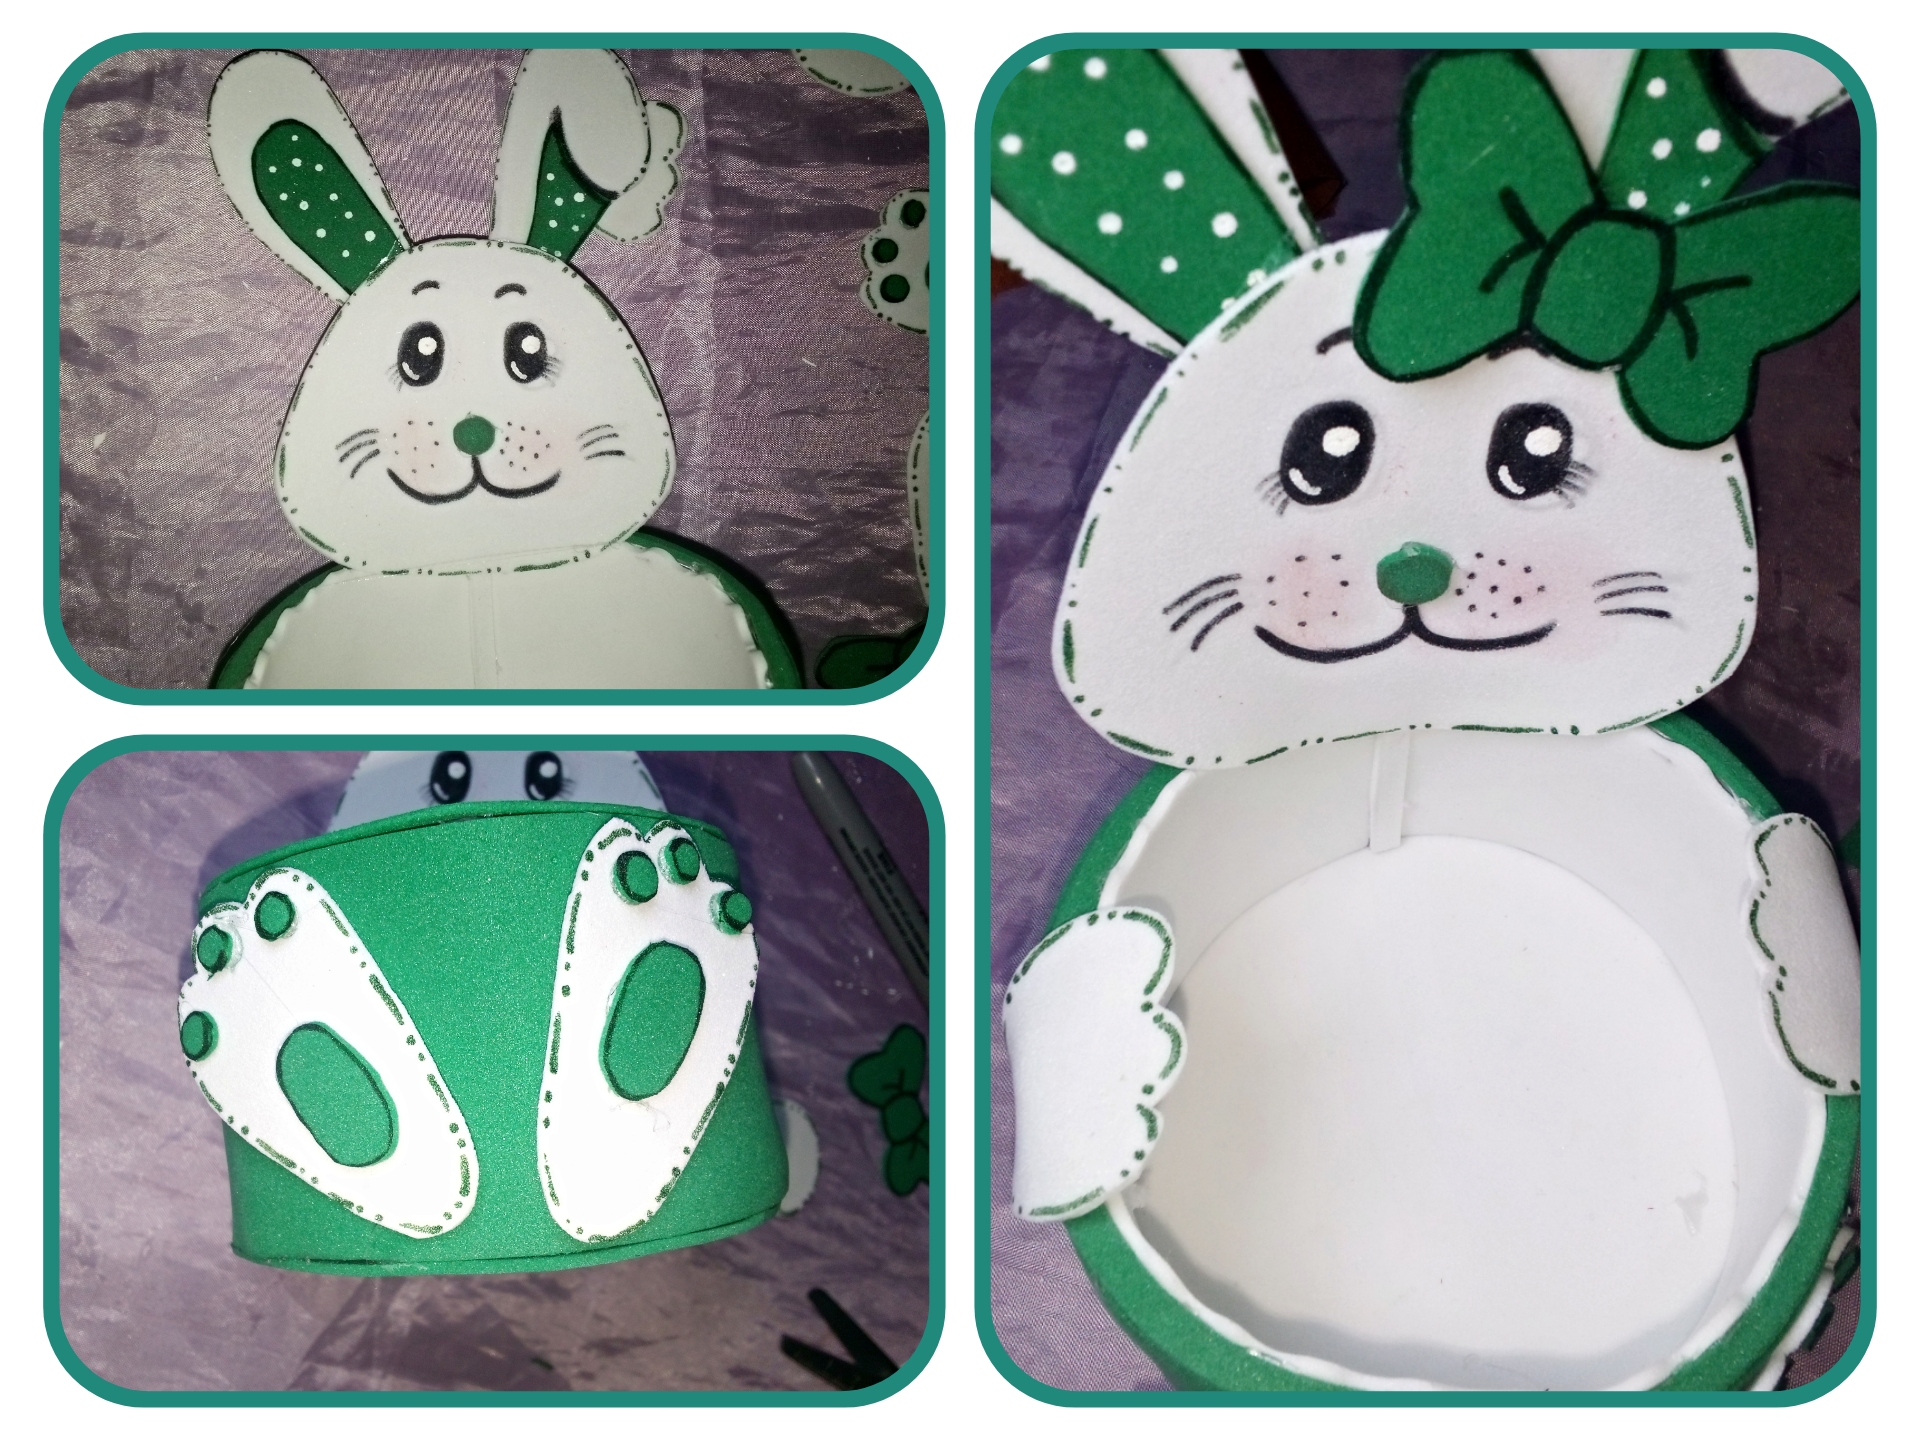

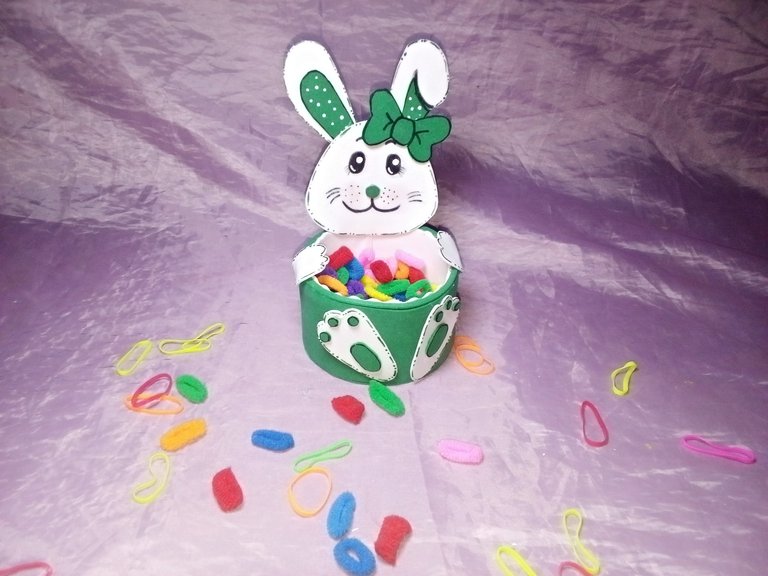
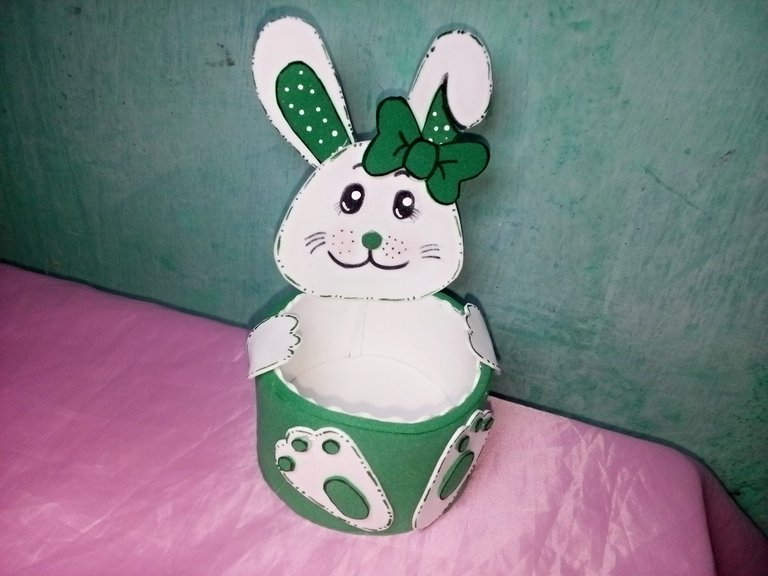
To finish, glue each part in its place: the head on top, the hands on the sides and the feet outside the circle and a bow, and in this way we have finished the mini organizer to keep the girls' pigtails.
Para terminar, pega cada parte en su sitio: la cabeza en la parte superior, las manos en los laterales y los pies fuera del círculo y un lazo, y de esta forma habremos terminado el mini organizador para guardar las coletas de las niñas.
Final result. // Resultado final.

Gracias por visitar.
Todas las fotos y el contenido son originales que hago diariamente para mi blog. Para La traducción uso deepl los marcos y separadores es usado de canva .📷🖼️🤗
Thank you for visiting.
All photos and content are originals that I make daily for my blog. For translation I use deepl the frames and separators are used from canva .📷🖼️🤗


