¡Hola, hola! Mi gente de Hive y linda comunidad de DIYHub 😊 💟, espero todos se encuentren súper bien, animados e inspirados.
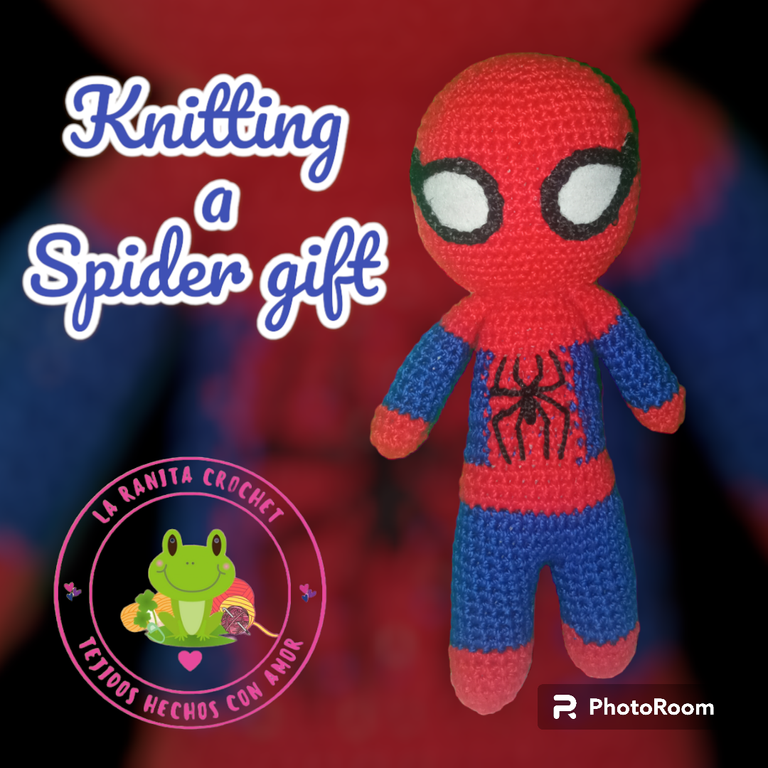
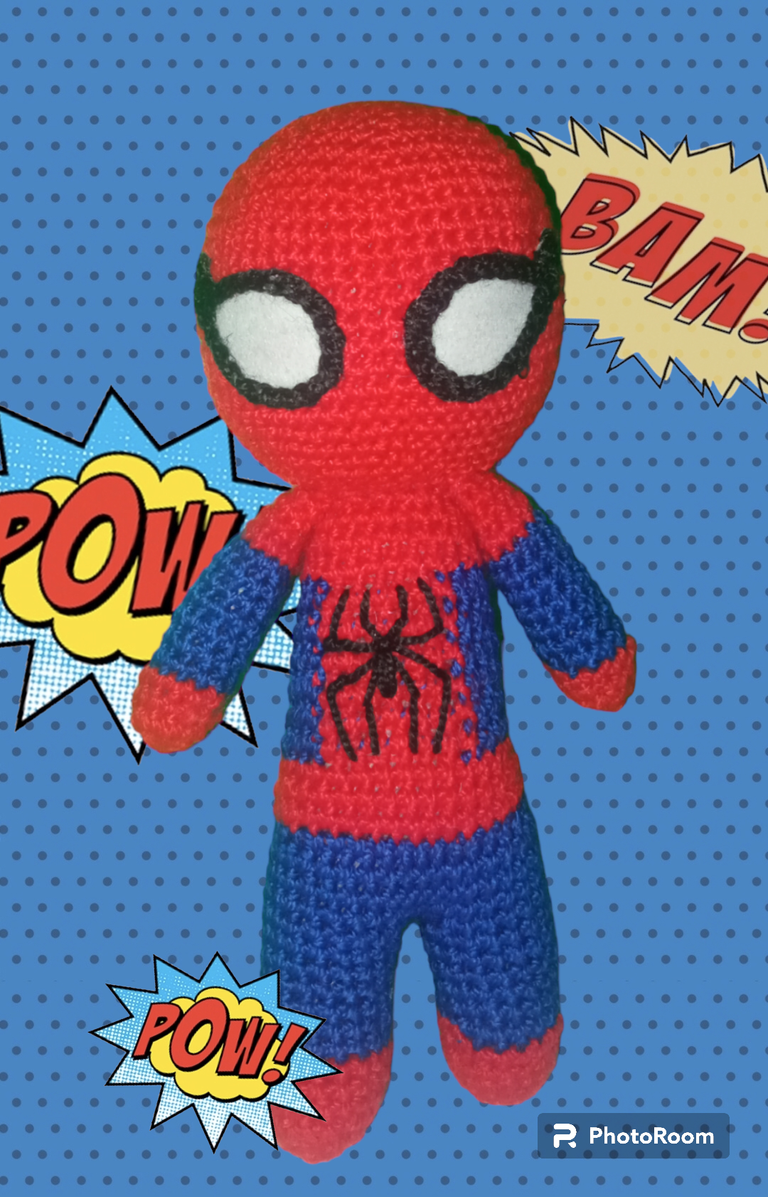
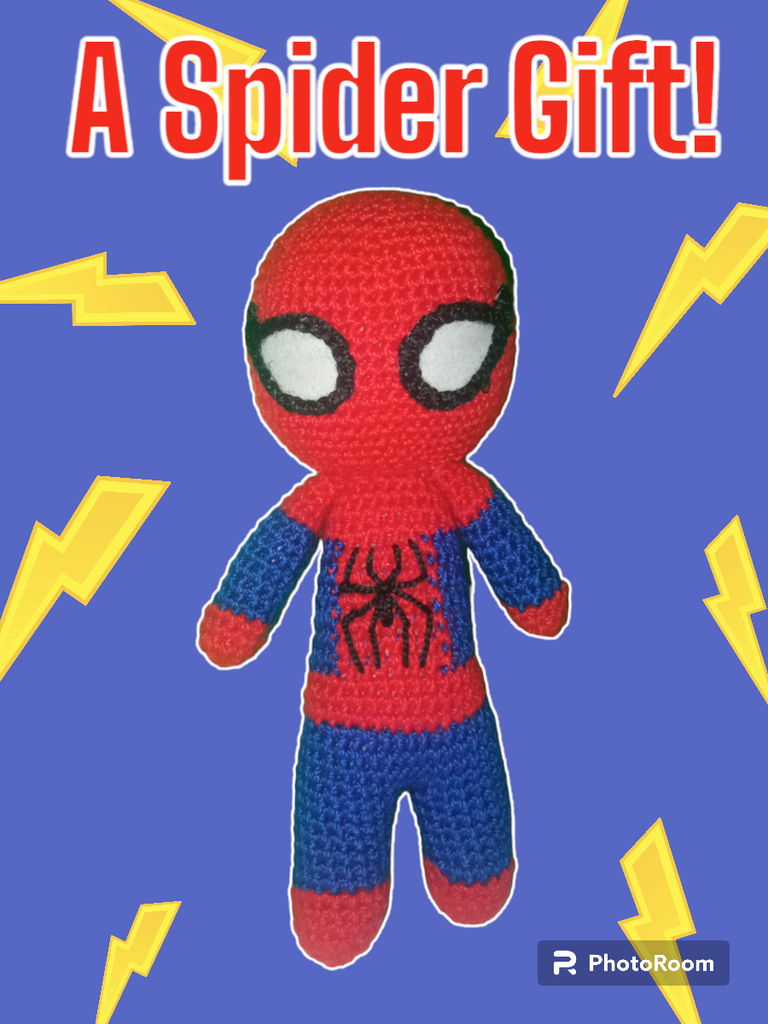
Hoy quiero mostrarles un lindo Spiderman que tejí para obsequiárselo a mi ahijado en su cumpleaños # 7, ya que en estos últimos meses se ha vuelto súper fan de Spiderman, y es que se volvió tan fan que el tema de su cumpleaños fue de Spiderman, así que pensé que este sería el regalo ideal, así que me puse manos al ganchillo y comencé mi labor.
Mi ahijado quedo enamorado de su regalo y ahora lo lleva a diario al colegio colgado de su morral 💖
Hello, hello! My Hive people and beautiful DIYHub community 😊 💟, I hope you are all feeling great, cheerful and inspired.
Today I want to show you a nice Spiderman that I knitted to give to my godson for his 7th birthday, because in the last few months he has become a Spiderman fan, and he became such a fan that the theme of his birthday was Spiderman, so I thought this would be the ideal gift, so I started crocheting and began my work.
My godson fell in love with his gift and now he wears it every day to school hanging from his backpack 💟
Por cierto el patrón lo saque de YouTube del canal de Knitoys & Crafts, tiene tutoriales muy bien explicados.
Materiales
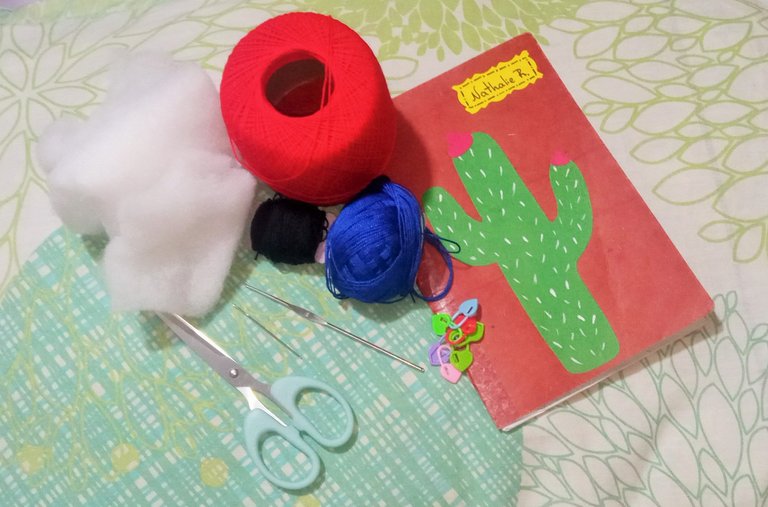
- Hilos de crochet acrílico en colores; rojo, azul rey y negro.
- Ganchillo o aguja de crochet # 4.
- Guata para rellenar.
- fieltro blanco para los ojos.
- pistola de silicón y una barra de silicón.
- Aguja lanera, marcadores de puntos y tijera.
By the way, I got the pattern from the Knitoys & Crafts YouTube channel, which has very well explained tutorials.
Materials
- Acrylic crochet threads in colors; red, royal blue and black.
- Crochet hook or crochet needle # 4.
- Wadding for stuffing.
- White felt for the eyes.
- Silicone gun and a silicone stick.
- Wool needle, stitch markers and scissors.
Para realizar este amigurumi emplearemos los siguientes puntos: Anillo mágico (Am), cadeneta (cad), punto bajo (Pb), aumento (Aum), disminuciones (dism), punto deslizado o punto raso (Pd).
Y las siguientes abreviaturas: Cambio de color (Cc), Vuelta (V).
Proceso de tejido:
1. Brazos (X 2 ):
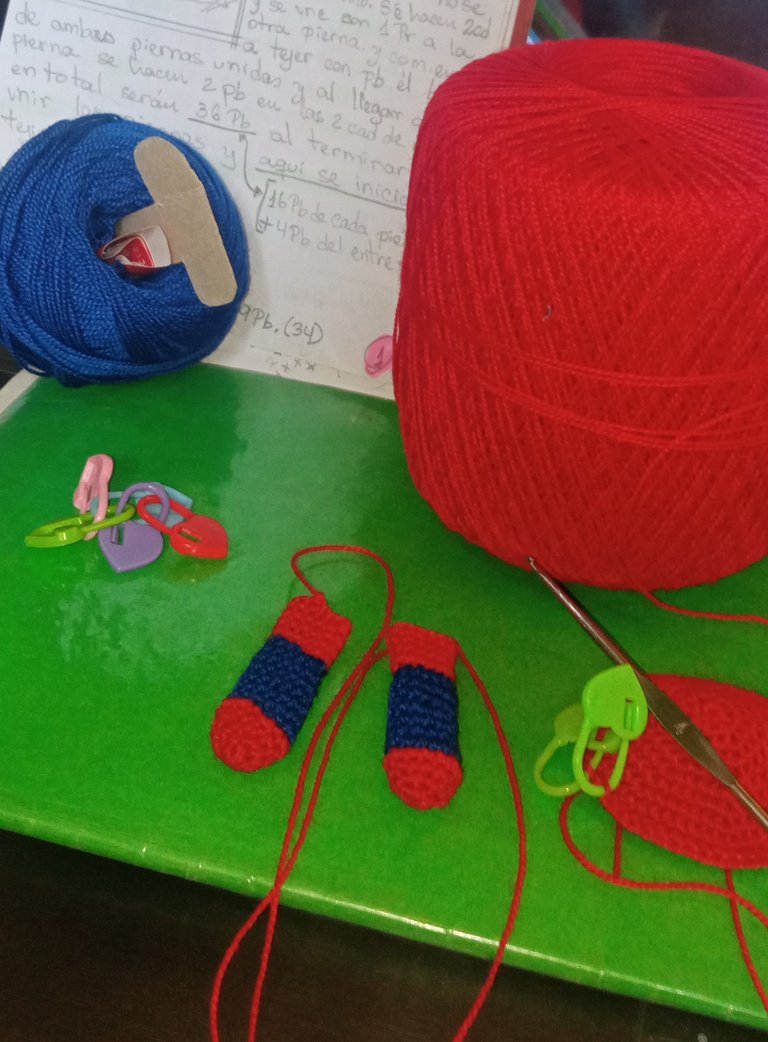
Con color rojo iniciamos haciendo un anillo mágico con 6 puntos bajos en la primera vuelta, V2: realizamos 6 aumentos, V3-4: tejemos punto sobre punto para un total de 12 puntos bajos en cada vuelta, V5-11: hacemos Cc a azul y tejeremos también 12 puntos bajos en cada vuelta, V12-15: cambiamos al color rojo y hacemos 12 puntos bajos en cada vuelta, cerramos esta última vuelta con un punto deslizado y cortando la hebra pero procurando dejar suficiente hilo para cerrar la pieza y también para luego coser la pieza al cuerpo.
Hacemos el segundo brazo de la misma manera y los rellenamos hasta la altura de la vuelta 11 para que no queden demasiado rellenos y tengan movilidad, los cerramos con ayuda de la aguja lanera y los reservamos mientras tejemos el resto de las piezas.
To make this amigurumi we will use the following stitches: Magic ring (MR), chain stitch (ch), single crochet (sc), increase (inc), decrease (dec), slip stitch (sl st).
And the following abbreviations: color change (Cc), Return (R).
Knitting process:
1. Arms (X 2 ):
With red color we start by making a magic ring with 6 single crochets in the first round, R2: we make 6 increases, R3-4: we knit stitch over stitch for a total of 12 single crochets in each round, R5-11: we make Cc to blue and we will also knit 12 single crochets in each round, R12-15: we change to red color and make 12 single crochets in each round, we close this last round with a slip stitch and cutting the yarn but trying to leave enough yarn to close the piece and also to then sew the piece to the body.
We make the second arm in the same way and fill them up to the height of the 11th row so that they are not too full and have mobility, we close them with the help of the wool needle and reserve them while we knit the rest of the pieces.
2. Cabeza:
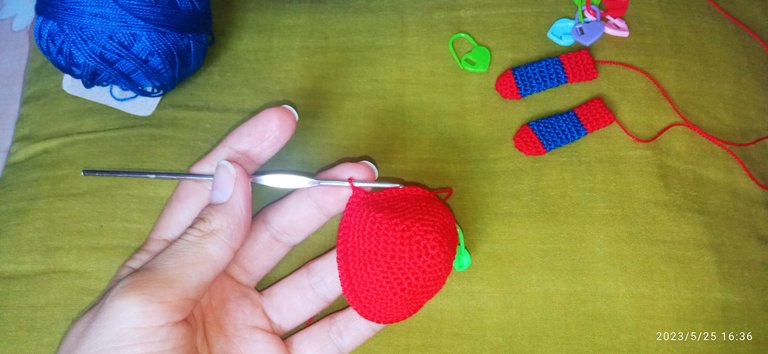
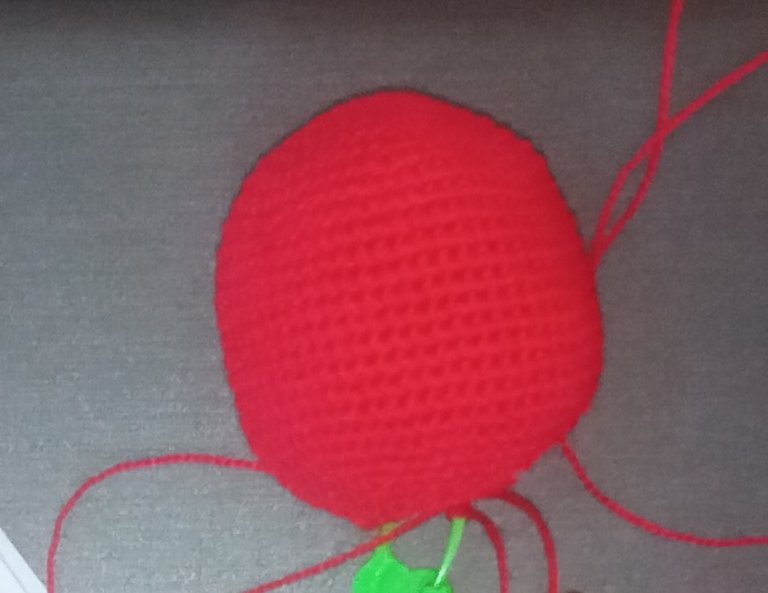
Para tejer la cabeza usaremos solo el hilo rojo e iniciaremos haciendo un anillo mágico con 7 puntos bajos, en la V2 haremos 7 aumentos. Y a partir de aquí haremos las siguientes secuencias;
V3: (1 Pb, 1 aum) x 7 (21)
V4: (2 Pb, 1 aum) x 7 (28)
V5: (3 Pb, 1 aum) x 7 (35)
V6: (4 Pb, 1 aum) x 7 (42)
V7: (5 Pb, 1 aum) x 7 (49)
V8: (6 Pb, 1 aum) x 7 (56)
V9-20: tejemos punto sobre punto, haciendo 56 Pb en cada vuelta.
V21: (6 Pb, 1 dism) x 7 (49)
V22: (5 Pb, 1 dism) x 7 (42)
V23: (4 Pb, 1 dism) x 7 (35)
V24: (3 Pb, 1 dism) x 7 (28)
V25: (2 Pb, 1 dism) x 7, así tendremos un total de 21 puntos. En esta vuelta cerramos con un punto deslizado y rellenamos. Recordemos siempre antes de cortar la hebra dejar al menos 20cm para luego unir las piezas.
2. Head:
To knit the head we will use only the red yarn and we will start by making a magic ring with 7 single crochet, in R2 we will make 7 increases. And from here we will make the following sequences;
R3: (1 sc, 1 inc) x 7 (21)
R4: (2 sc, 1 inc) x 7 (28)
R5: (3 sc, 1 inc) x 7 (35)
R6: (4 sc, 1 inc) x 7 (42)
R7: (5 sc, 1 inc) x 7 (49)
R8: (6 sc, 1 inc) x 7 (56)
R9-20: we knit stitch over stitch, making 56 sts in each row.
R21: (6 sc, 1 dec) x 7 (49)
R22: (5 sc, 1 dec) x 7 (42)
R23: (4 sc, 1 dec) x 7 (35)
R24: (3 sc, 1 dec) x 7 (28)
R25: (2 sc, 1 dec) x 7 , so we have a total of 21 stitches. In this round we close with a slip stitch and fill in. Always remember to leave at least 20cm before cutting the yarn to join the pieces together.
3. Piernas (X2):
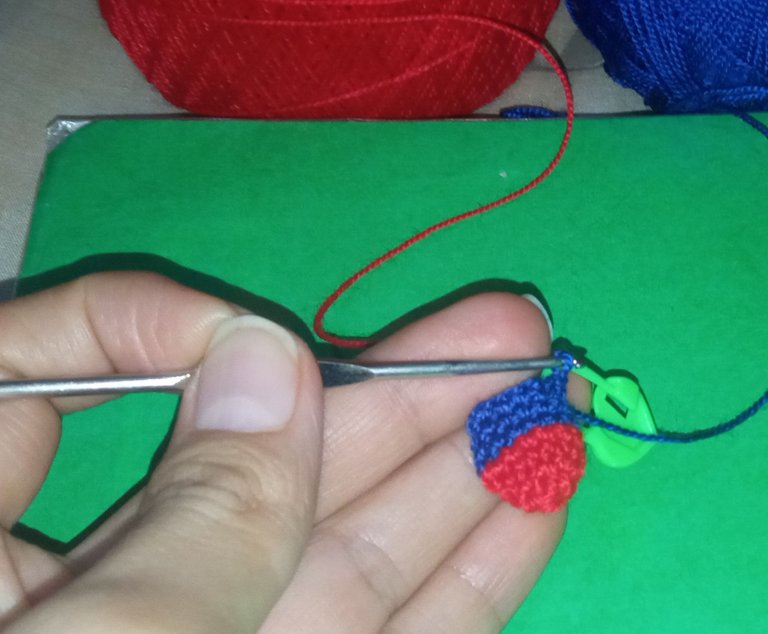
Iniciamos tejiendo con el hilo rojo, haciendo un anillo mágico con 6 puntos bajos, en la V2 hacemos 6 aumentos, V3: (2 Pb, 1aum) x4 para un total de 16 Pb en esta vuelta, de la V4 a la V6 tejeremos punto sobre punto y asi tendremos 16 Pb en cada una de estas vueltas, al finalizar la V6 hacemos el Cc a azul y desde la V7 hasta la V11 tejeremos punto sobre punto.
Ahora cortamos la hebra y hacemos la segunda pierna siguiendo las instrucciones anteriores. Al terminar de tejer la segunda pierna no cortaremos la hebra; lo que haremos será tejer 2 cadenetas y se une con un punto deslizado a la primera pierna, y se comienza a tejer con puntos bajos el borde de ambas piernas ya unidas y al llegar donde están las 2Cadenetas hacemos 1Pb sobre cada una, en total serán 36 Pb (16 Pb de cada pierna más los 4Pb del entrepierna que son las 2 cadenetas).
3. Legs (X2):
We start knitting with the red yarn, making a magic ring with 6 low stitches, in R2 we make 6 increases, R3: (2 sc, 1inc) x4 for a total of 16 sc in this round, from R4 to R6 we will knit stitch over stitch and so we will have 16 sc in each of these rounds, at the end of R6 we make the Cc to blue and from R7 to R11 we will knit stitch over stitch.
Now cut the yarn and knit the second leg following the previous instructions. When we finish knitting the second leg we will not cut the yarn; what we will do is knit 2 chains and join with a slipped stitch to the first leg, and start knitting with low stitches the edge of both legs already joined and when we get to where the 2 chains are we knit 1sc over each one, in total there will be 36 sc (16 sc of each leg plus the 4sc of the crotch that are the 2 chains).
4. Cuerpo:
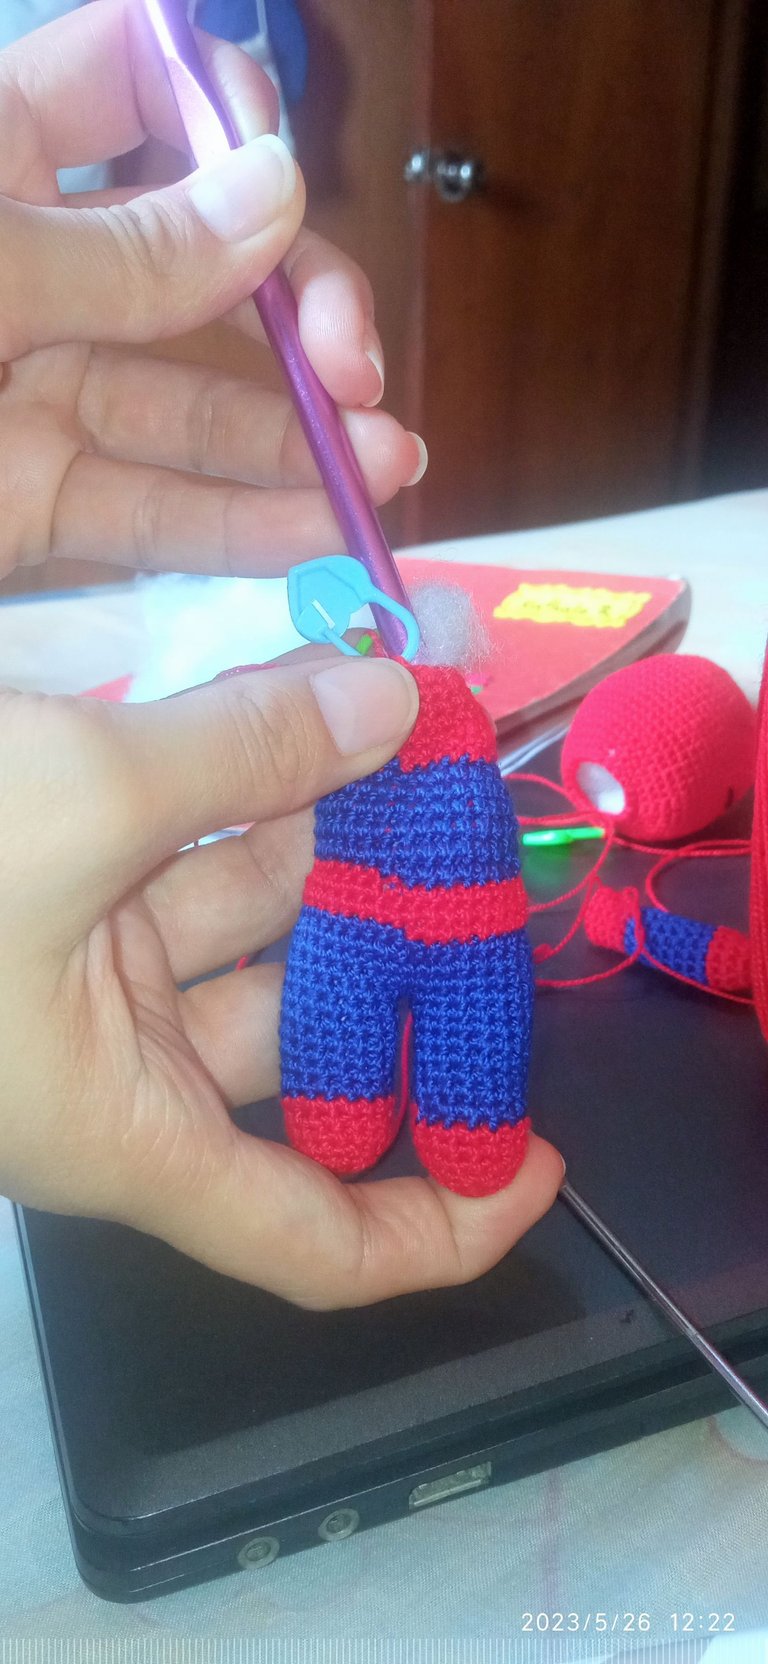
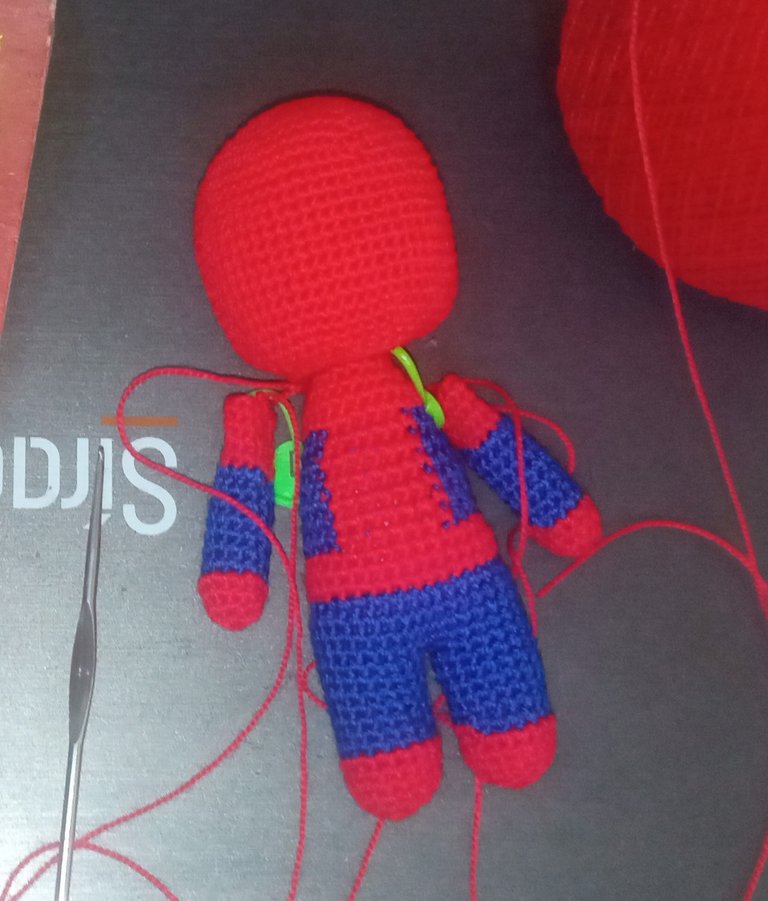
El tejido del cuerpo se hace continuando el tejido de unión de las piernas, por lo que continuaremos tejiendo en espiral; V12-15: 36 Pb, en la V16 haremos la siguiente secuencia: 7Pb, 1 dism, 16Pb, 1 dism, 9Pb para un total de 34 Pb en esta vuelta.
En las siguientes vueltas debemos prestar especial atención ya que haremos el cambio de color varias veces, para formar la parte del pecho donde luego bordaremos la araña.
V17: 34 Pb. (34) empezamos a rellenar.
V18: 7Pb, 1 dism, 15Pb, 1 dism, 8Pb. (32)
V19: 32 Pb (32)
V20: Cc azul (7Pb, dism, 3Pb), Cc rojo (7Pb), Cc azul (4Pb, dism, 7Pb). (30)
V21 y 22: inician con azul (11Pb), Cc rojo (7Pb), Cc azul (12Pb). (30)
V23: inicia con azul (7Pb, dism, 2Pb), Cc rojo (7Pb), Cc azul (3Pb, dism, 7Pb). (28)
V24: inicia con azul (6Pb, dism, 2Pb), Cc rojo (7Pb), Cc azul (3Pb, dism, 6Pb). (26)
V25: inicia con azul (5Pb, dism, 3Pb), Cc rojo (6Pb), Cc azul (3Pb, dism, 5Pb). (24) aca cortamos la hebra azul y la aseguramos ya que continuaremos tejiendo solo con el color rojo.
V26: 24 Pb. (24) Volvemos a rellenar con guata.
V27: 5Pb, dism, 11Pb, dism, 4Pb. (22)
V28: 5Pb, dism, 9Pb, dism, 4Pb. (20)
V29: (3Pb, dism) X 4. (16)
V30: (6Pb, dism) X 2. (14)
V31-33: 14Pb. (14)
V34: 7 dism. (7) Terminamos de rellenar nuestro amigurumi y cerramos con un anillo invertido.
4. Body:
The knitting of the body is done by continuing the joining knitting of the legs, so we will continue knitting in a spiral; R12-15: 36 sc, in R16 we will do the following sequence: 7sc, 1 dec, 16sc, 1 dec, 9sc for a total of 34sc in this round.
In the following rows we must pay special attention as we will make the color change several times, to form the part of the chest where we will later embroider the spider.
R17: 34 sc (34) we begin to fill in.
R18: 7sc, 1 dec, 15sc, 1 dec, 8sc. (32)
R19: 32 sc (32)
R20: Cc blue (7sc, dec, 3sc), Cc red (7sc), Cc blue (4sc, dec, 7sc). (30)
R21 and 22: initiate with blue (11sc), red Cc (7sc), blue Cc (12sc). (30)
R23: initiate with blue (7sc, dec, 2sc), red Cc (7sc), blue Cc (3sc, dec, 7sc). (28)
R24: start with blue (6sc, dec, 2sc), red Cc (7sc), blue Cc (3sc, dec, 6sc). (26)
R25: start with blue (5sc, dec, 3sc), red Cc (6sc), blue Cc (3sc, dec, 5sc). (24) here we cut the blue strand and secure it since we will continue knitting only with the red color.
R26: 24 sc. (24) We fill again with wadding.
R27: 5sc, dec, 11sc, dec, 4sc. (22)
R28: 5sc, dec, 9sc, dec, 4sc. (20)
R29: (3sc, dec) X 4. (16)
R30: (6sc, dec) X 2. (14)
R31-33: 14sc. (14)
R34: 7 dec. (7) We finish filling our amigurumi and close with an inverted ring.
5. Ojos:
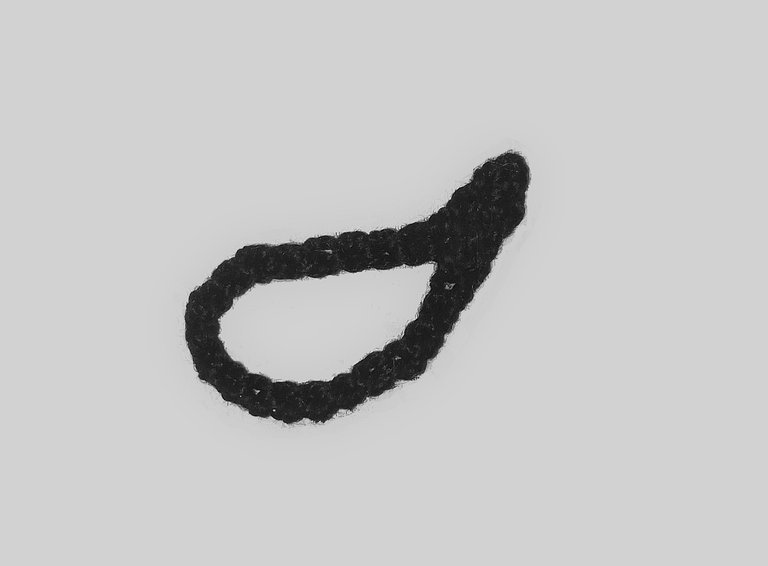
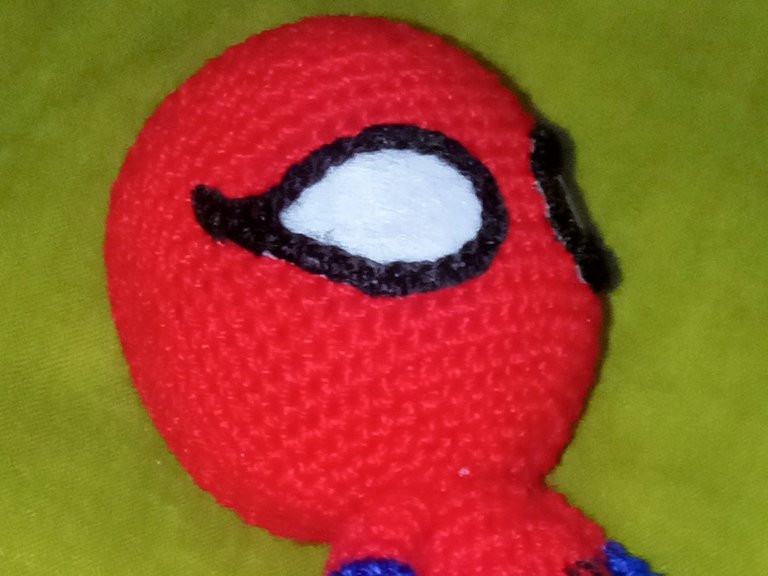
La chica del video uso para los ojos fieltro blanco y negro, pero a mí me fue imposible conseguir esos colores de fieltro, así que decidí utilizar una tela blanca y la recorte con la forma de los ojos y la bordee con una cadeneta, que realicé con hilo de crochet color negro, adaptándola al tamaño de los ojos y uniéndola al final con un punto deslizado; luego la cosí a la parte blanca del ojo para finalmente pegarlos a la carita del Spiderman.
5. Eyes:
The girl in the video used black and white felt for the eyes, but it was impossible for me to get those colors of felt, so I decided to use a white fabric and cut it out with the shape of the eyes and bordered it with a chain stitch, which I made with black crochet thread, adapting it to the size of the eyes and joining it at the end with a slipped stitch; then I sewed it to the white part of the eye to finally glue them to Spiderman's face.
6. Unión de las piezas:
- La cabeza se cose entre las vuelta 4 y 5 del cuello, contando de arriba hacia abajo.
- Al unir los brazos al cuerpo, coseremos procurando que el color azul del brazo y del cuerpo coincidan entre ellos.
- Los ojos los pegamos a la altura de la V14 con silicón frio o pegamento universal y les damos unas cuantas puntas con hilo de coser negro para asegurarlos mejor.
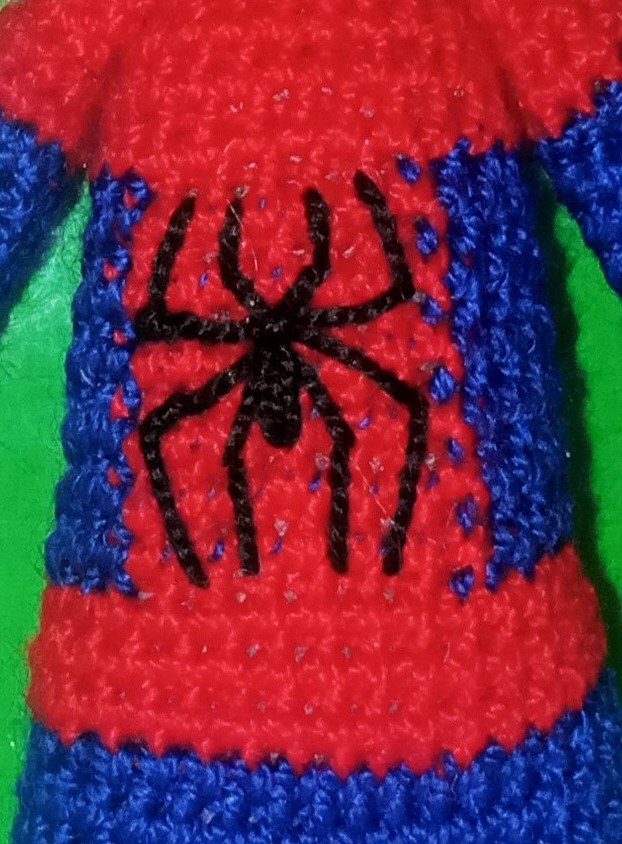
- Con hilo crochet negro y aguja lanera bordamos la araña del pecho.
6. Joining the pieces:
- The head is sewn between rounds 4 and 5 of the neck, counting from top to bottom.
- When joining the arms to the body, we will sew making sure that the blue color of the arm and the body match each other.
- The eyes we glue them at the height of the R14 with cold silicone or universal glue and we give them a few points with black sewing thread to secure them better.
- With black crochet thread and wool needle we embroider the spider on the chest.
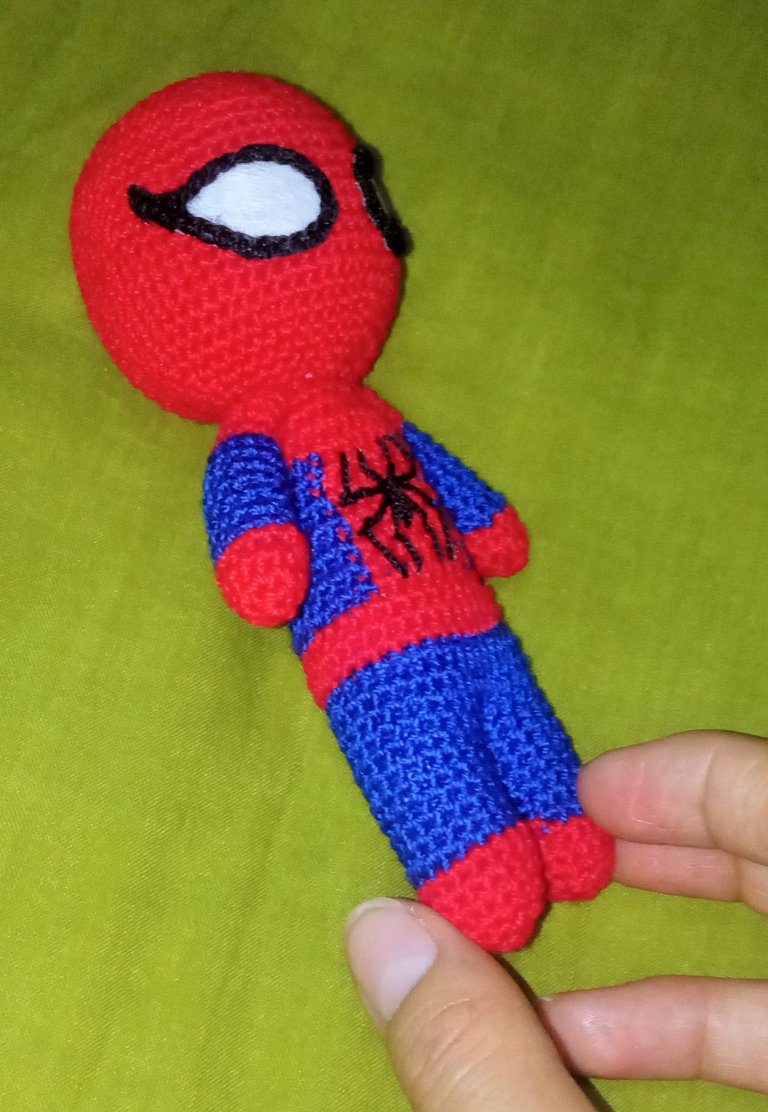
Y así culminamos la creación de este hermoso amigurumi de Spiderman. Como este es el regalo de cumpleaños de mi ahijado decidí personalizarlo aún más y le hice una bolsa de regalo con papel kraft y le pegue figuras que hice de cartulina simulando golpes de un comic y le escribí el nombre del niño. Pero como la hice casi saliendo para la fiesta no pude fotografiarla.
And so we finished the creation of this beautiful Spiderman amigurumi. As this is my godson's birthday gift I decided to personalize it even more and I made a gift bag with kraft paper and glued figures I made out of cardboard simulating comic book punches and wrote the child's name on it. But as I made it almost leaving for the party I could not photograph it.
Deseo les haya gustado tanto como a mi el resultado de este amigurumi de Spiderman, les aseguro que la carita de felicidad de mi ahijado valió cada minuto de las más 4 horas que pase tejiendo este lindo obsequio. ESPERO SUS BONITOS COMENTARIOS Y/O VOTOS, ASÍ ME MOTIVAN PARA SEGUIR COMPARTIENDO MIS CREACIONES CON USTEDES 🐸 💟
Se despide de ustedes con mucho cariño su amiga Nathalie @laranitacrochet
I hope you liked as much as I did the result of this Spiderman amigurumi, I assure you that the happy face of my godson was worth every minute of the more than 4 hours I spent knitting this nice gift. I HOPE YOUR NICE COMMENTS AND / OR VOTES, SO I AM MOTIVATED TO CONTINUE SHARING MY CREATIONS WITH YOU 🐸 💟
Your friend Nathalie @laranitacrochet bids you a fond farewell.
*Todas las fotografías utilizadas en la publicación son propiedad de la autora.
*Las fotografías fueron tomadas y editadas con mi REDMI 9 y con PhotoRoom.
*La traducción la hice en https://www.deepl.com/es/translator
*All photographs used in the publication are the property of the author.
*Photographs were taken and edited with my REDMI 9 and PhotoRoom.
*Translation was done at https://www.deepl.com/es/translator


