¡Hola, hola! Mi gente de Hive y linda comunidad de DIYHub 😊, espero todos se encuentren súper bien, animados e inspirados.
Quiero presentarles mí SEGUNDA ENTRADA en el CONCURSO PURR-FECT DIYHUB - En tributo a los GATOS, inspirado por la celebración del Día Internacional del Gato, el pasado 8 de agosto.
Hello, hello! My Hive people and beautiful DIYHub community 😊, I hope you are all super well, encouraged and inspired.
I want to present you my SECOND ENTRY in the PURR-FECT DIYHUB CONTEST - In tribute to CATS, inspired by the celebration of International Cat Day, last August 8.
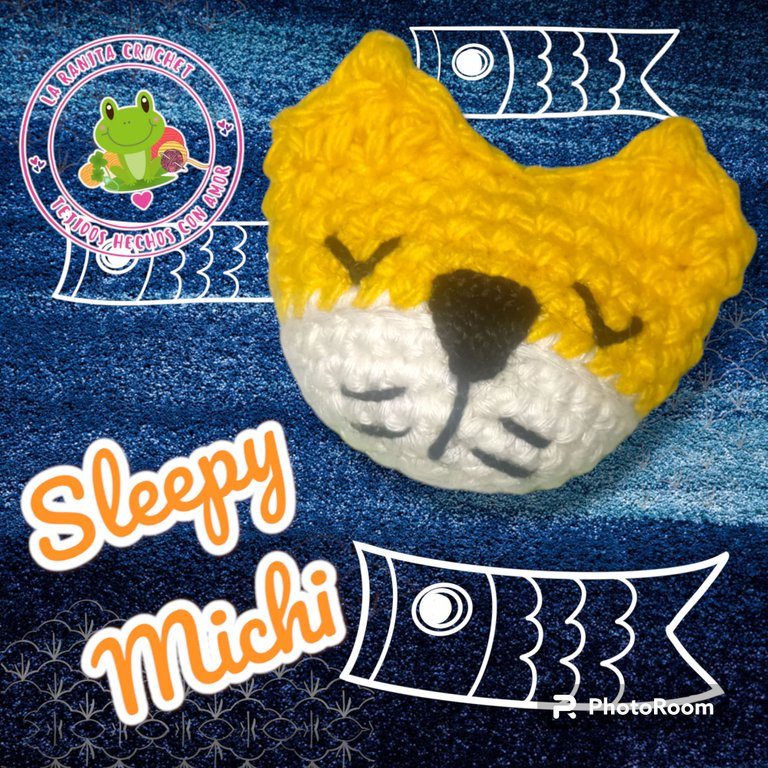
En el post anterior les presenté el paso a paso de como realice un porta chupete de Michi dormilón, como un obsequio para el nuevo bebe de un primo de mi esposo.
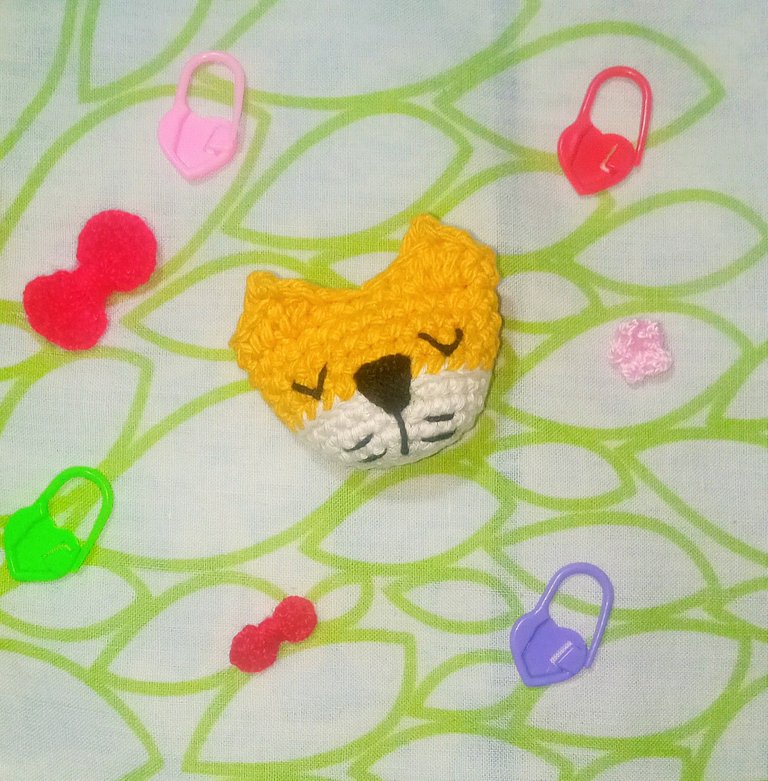
Bueno en esta ocasión les quiero mostrar cómo se realiza este lindo ¡Michi dormilón! recuerden que si desean hacerlo pueden utilizar cualquier hilo y color que deseen, y tengan en cuenta que el tamaño del Michi dependerá del grosor del hilo y aguja que utilicen.
Tejerlo no me toma más de 30 minutos, así que espero se animen a hacerlo, es un tejido ideal para los que están iniciando en el mundo de los amigurumis.
El patrón de este Michi lo vi en el canal de TikTok de @vivir_vintage y yo solo modifique un poquito las orejitas para que se vieran mas puntiagudas.
Materiales:
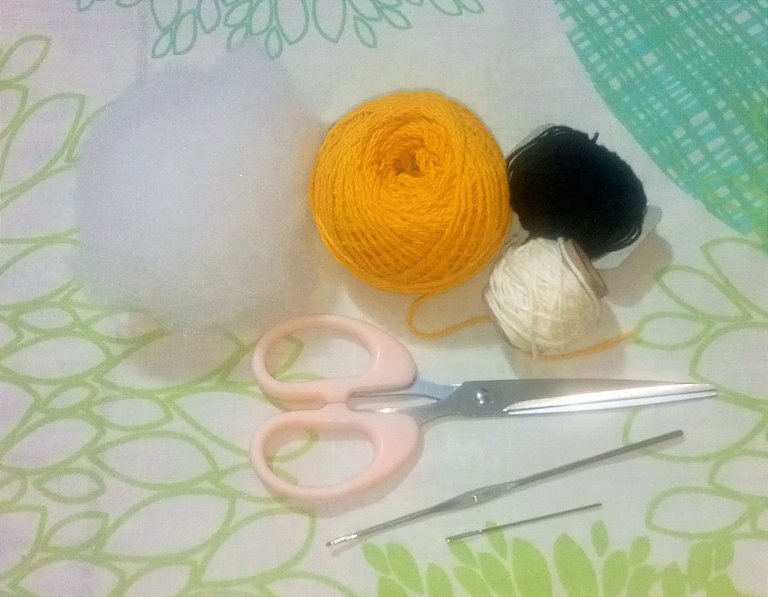
- Hilo de algodón color blanco y otro color que es a elección (tipo pabilo).
- Aguja de crochet #1.
- Guata para rellenar.
- Hilo crochet o de bordar color negro.
- Un marcador de puntos, Aguja lanera y tijera.
Well this time I want to show you how to make this cute sleepy Michi! remember that if you want to do it you can use any yarn and color you want, and keep in mind that the size of the Michi will depend on the thickness of the yarn and needle you use.
Knitting it takes me no more than 30 minutes, so I hope you are encouraged to do it, it is an ideal fabric for those who are starting in the world of amigurumis.
I saw the pattern of this Michi on the TikTok channel of @vivir_vintage and I only modified the ears a little bit to make them look more pointed.
Materials:
- Cotton thread white color and another color that is of your choice.
- Crochet needle #1.
- Wadding for stuffing.
- Crochet thread or black embroidery thread.
- A stitch marker, wool needle and scissors.
Para realizar este tejido solo emplearemos puntos sencillos: cadeneta (cad.), Anillo Mágico (AM), punto bajo (Pb), punto medio alto (Pma), punto alto extendido (Pae), punto deslizado o raso (Pr), y aumentos (Aum). Y las vueltas las identificaremos con una V acompañada de su número correspondiente.
Paso a Paso:
Este tejido lo haremos en redondo, es decir, tejeremos cerrando las vueltas con punto deslizado.
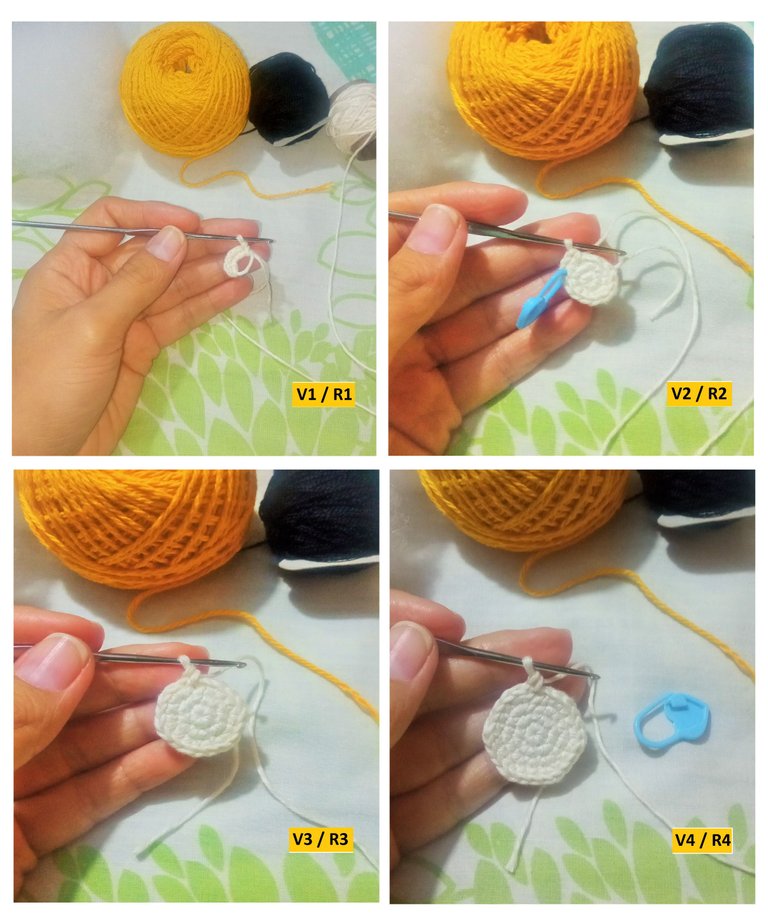
Iniciaremos tejiendo con el hilo blanco, en la V1 haremos un AM con 6 puntos bajos, en la V2 tejemos 6 aumentos, en la V3 hacemos la siguiente secuencia (1 Pb, Aum) x6, en la V4 haremos (2Pb,Aum) x6 para un total de 24 puntos bajos, y en la V5 y 6 tejemos punto sobre punto y tendremos 24 puntos bajos en cada una Ahora cerramos la vuelta con un punto deslizado, cortamos el hilo y hacemos el cambio de color, en mi caso elegí un lindo color mostaza.
To knit this fabric we will only use simple stitches: chain stitch (ch), Magic Ring (MR), single crochet (sc), half double crochet (hdc), extended double crochet (edc), slip stitch (sl st), and increases (inc). And the rows we will identify them with an R accompanied by their corresponding number.
Step by step:
This knitting will be done in the round, that is to say, we will knit closing the rows with slip stitch.
We will start knitting with the white yarn, in R1 we will knit a MR with 6 single crochet stitches, in R2 we will knit 6 increases, in V3 we will knit the following sequence (1 sc, inc) x6, in R4 we will knit (2 sc, inc) x6 for a total of 24 single crochets, and in R5 and 6 we will knit stitch over stitch and we will have 24 single crochets in each one. Now we close the row with a slip stitch, cut the yarn and make the color change, in my case I chose a nice mustard color.
A continuación, empezamos a tejer la V7, atentos que en esta vuelta y solo en esta tejeremos tomando solo la hebra de atrás del punto, es decir tejeremos en BLO y haremos 24 puntos bajos.
Next, we start knitting R7, note that in this row and only in this row we will knit taking only the back strand of the stitch, that is to say, we will knit in BLO and we will knit 24 single crochet stitches.
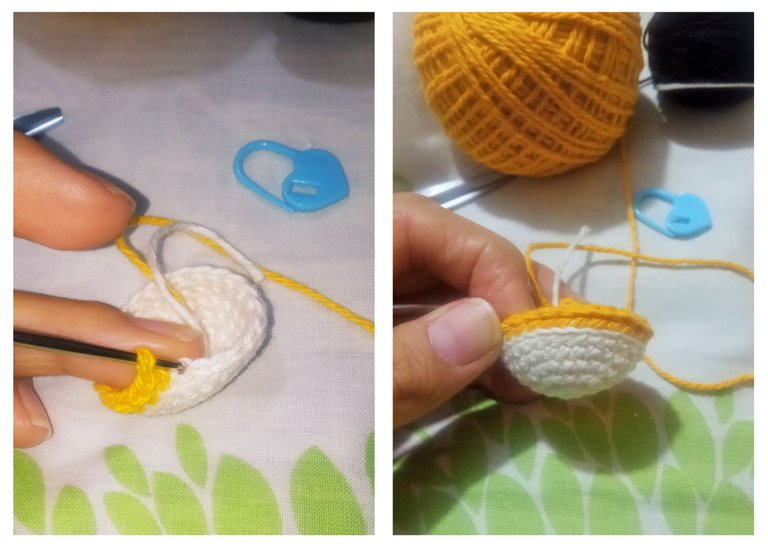
V7: Tomando solo hebra de atrás del punto (BLO) / R7: Taking only strand from back of stitch (BLO)
De la V8 a la V10 tejeremos también 24 puntos bajos en cada una, la última vuelta es la V11 y es donde haremos las orejitas así que presten mucha atención a la secuencia de puntos, tejeremos 7Pb, 1 Pma, 1Pae – 1 cad en picot – 1 Pae, 1 Pma, 4 Pb, 1 Pma, 1Pae – 1 cad en picot – 1 Pae, 1 Pma, 7 Pb.
From R8 to R10 we will also knit 24 single crochet stitches in each row, the last row is R11 and is where we will make the ears so pay close attention to the sequence of stitches, we will knit 7sc, 1 hdc, 1 edc - 1 ch in picot - 1 edc, 1 hdc, 4 sc, 1 hdc, 1 edc - 1 ch in picot - 1 edc, 1 hdc, 7 sc.
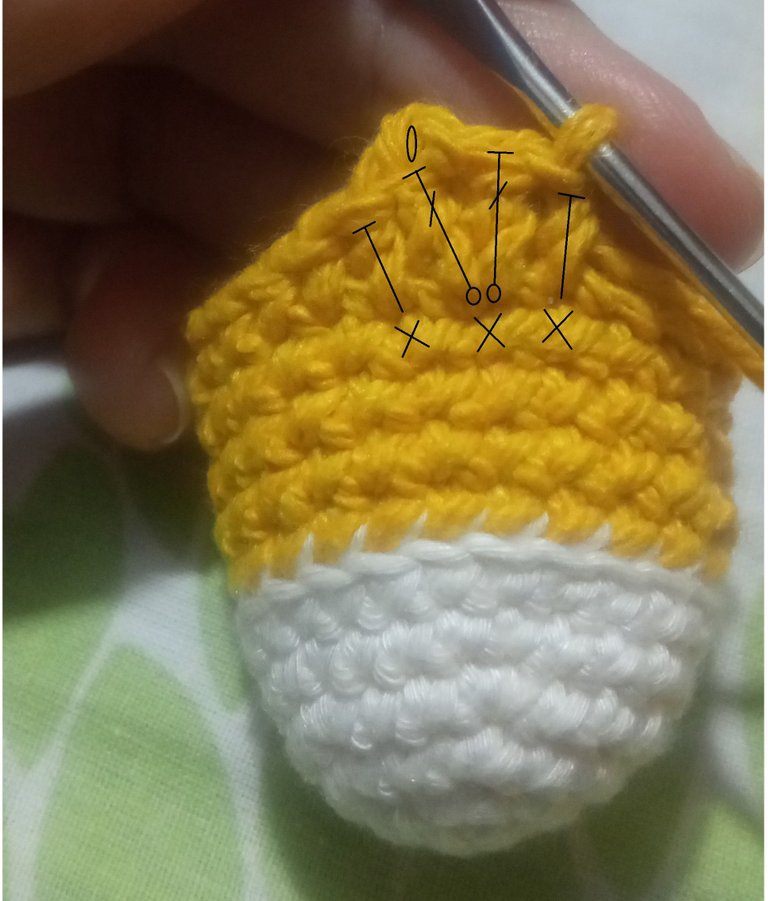
Detalle de los puntos de la oreja / Detail of the ear stitches
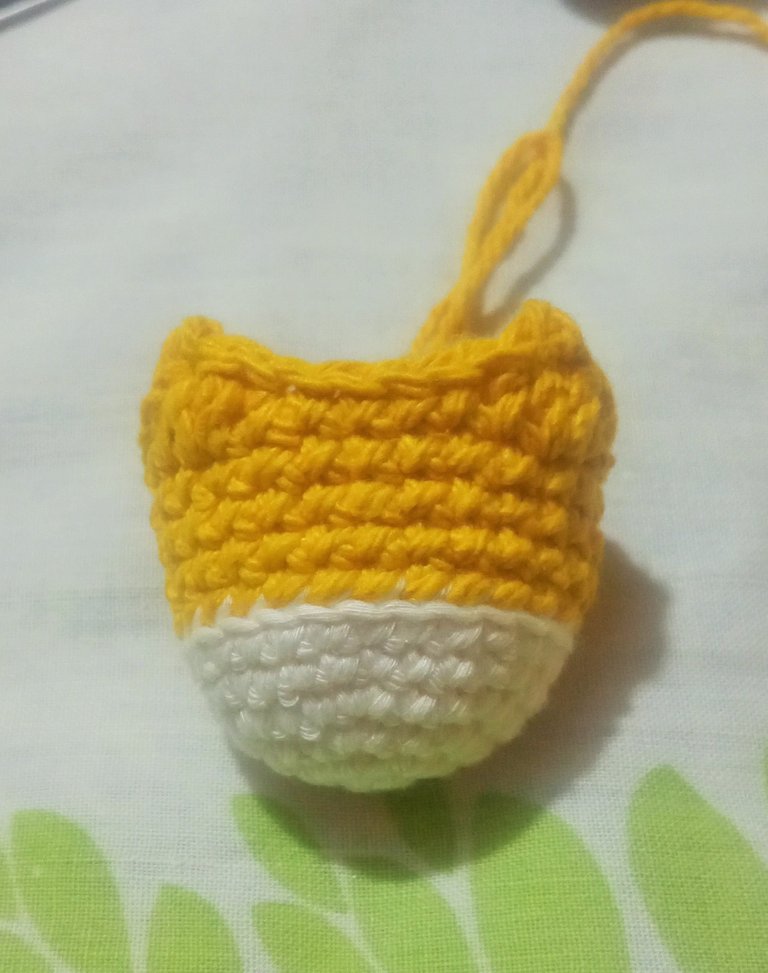
Vuelta 11 / Row 11
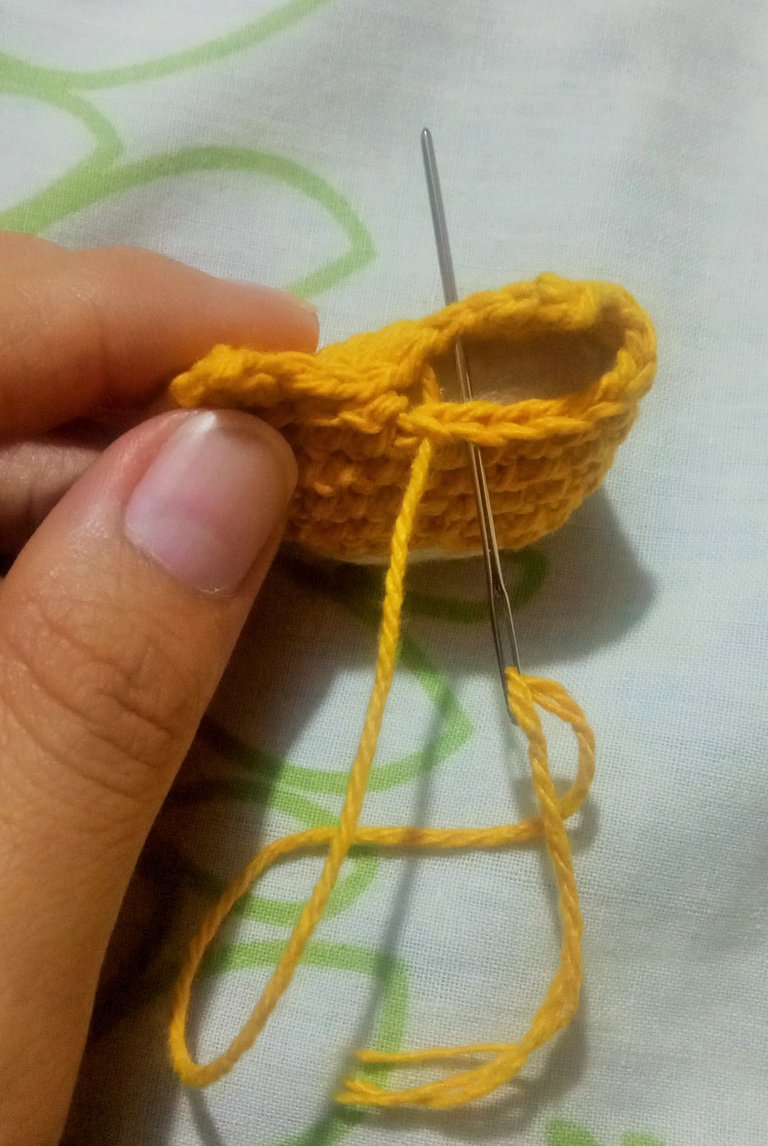
Y listo ahora hacemos un punto deslizado en el siguiente punto y cortamos la hebra dejando suficiente hilo para enhebrar la aguja lanera y cerrar el tejido.
A continuación rellenamos el amigurumi y lo cerramos con la aguja lanera.
And ready now we make a slip stitch in the next stitch and cut the yarn leaving enough yarn to thread the knitting needle and close the fabric.
Then we fill the amigurumi and close it with the wool needle.
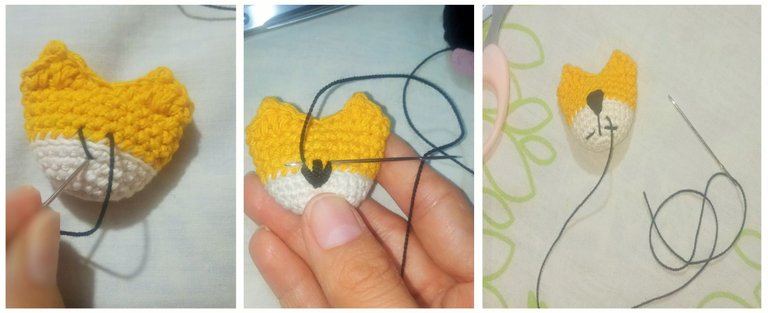
Ahora con hilo negro bordamos los detalles de la carita como se aprecia en la imagen; haciendo los ojitos con forma de triángulo invertido al igual que la nariz y agregamos sus lindos bigotes.
Now with black thread we embroider the details of the little face as shown in the picture; making the little eyes in the shape of an inverted triangle as well as the nose and add the cute whiskers.
Y asi finalizamos el tejido de este hermoso Michi dormilón 🐱 💟
And so we finish the weaving of this beautiful sleepy Michi 🐱 💟
Deseo les haya gustado este post de cómo hacer este lindo Michi Dormilón y que intenten hacerlo porque de verdad es muy rápido y fácil de tejer, espero sus bonitos comentarios y/o un me gusta, así me motivan para seguir haciendo más publicaciones de este tipo.
Se despide de ustedes con mucho cariño su amiga Nathalie @laranitacrochet
I hope you liked this post on how to make this cute sleepy Michi and that you try to do it because it is really quick and easy to knit, I hope your nice comments and / or a like, so I am motivated to continue making more publications of this type.
Your friend Nathalie @laranitacrochet bids you a fond farewell.
*Todas las fotografías utilizadas en la publicación son propiedad de la autora.
*Las fotografías fueron tomadas y editadas con mi REDMI 9 y con PhotoRoom.
*La traducción la hice en https://www.deepl.com/es/translator
*All photographs used in the publication are the property of the author.
*Photographs were taken and edited with my REDMI 9 and PhotoRoom.
*Translation was done at https://www.deepl.com/es/translator


