

🐠 💙 ESPAÑOL 💙 🐠
¡Hola, hola! Hivers y linda comunidad de DIYHub, espero todos se encuentren súper bien, animados e inspirados 💟
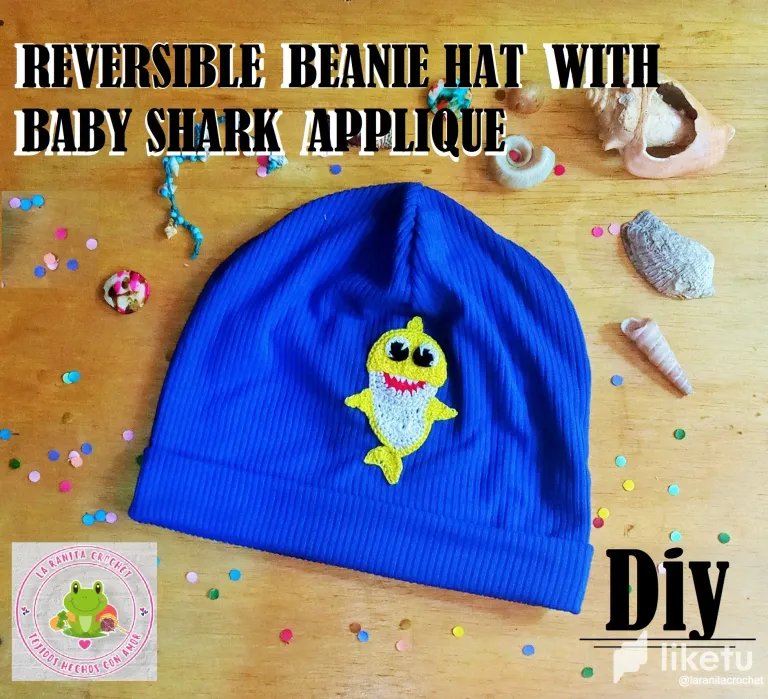
Hoy me gustaría mostrarles como realice este lindo Gorro Beanie Reversible que realice para regalarlo al hijo de una prima por su cumpleaños, y al cual le coloque el aplique de Baby Shark que hice hace unos días. En el link que les dejo pueden ver también como se realiza el aplique del que les hablo https://peakd.com/hive-189641/@laranitacrochet/esp-eng-aplique-de-baby-shark-tejido-a-crochet-baby-shark-crochet-applique
Este gorrito es bastante sencillo de hacer, tanto el patrón como la costura se hacen bastante rápido, yo realice la costura totalmente a mano, pero si te animas a realizar este tipo de gorro y tienes máquina de coser lo realizaras aún más rápido.
Este tipo de gorros no son solo para niños, ya que lo puedes realizar de la talla que desees y también puede ser para adultos. Y ya que es reversible también se puede hacer combinando dos telas con diferentes estampados y quedan súper lindos.
A continuación los dejo con los materiales que use y también con el paso a paso para tejer este divertido aplique de Baby Shark.
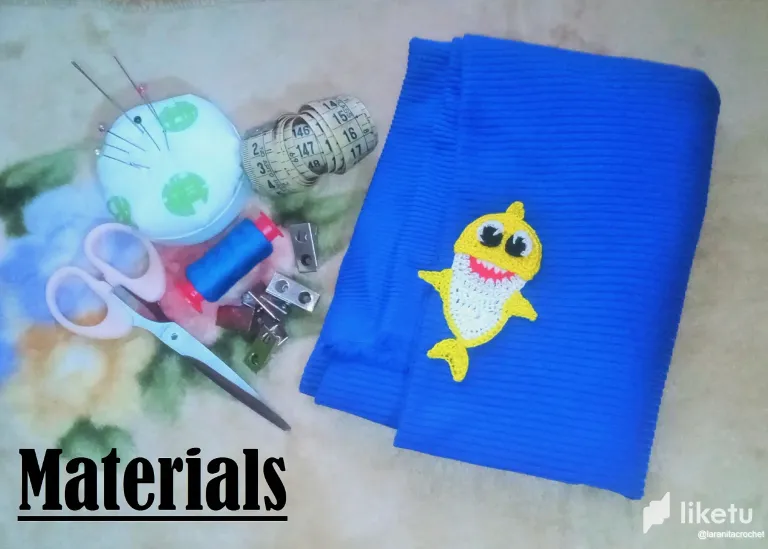
Materiales:
- Tela de algodón que sea elástica.
- Hilo del color de la tela.
- Aguja para coser a mano.
- Alfileres, cinta métrica y tijeras.
- Y claro un aplique para decorar el gorrito.
Paso a paso:
1) Para cortar la tela necesitamos la medida de la circunferencia de la cabeza, en mi caso serán 52 cm. Por lo tanto la tela la cortare de 52x52 cm, hay que tener en cuenta que la medida de la cabeza la marcaremos a lo ancho de la tela, es decir, del lado que sea más elástica.
2) Ahora doblamos la tela a la mitad del ancho, es decir la mitad de la medida de la cabeza, y cosemos con puntada de zig-zag todo el borde a lo largo de la tela.
3) Una vez cosido lo doblamos a la mitad de lo largo y marcamos la forma del patrón en ambos extremos de la tela, para luego cortarla.
4) Damos vuelta al gorro para ver el derecho de la tela y luego lo doblamos a la mitad juntando los extremos y dándole forma al gorro, luego hacemos un dobles de más o menos 2 dedos de ancho en la base del gorro para ubicar el aplique lo más centrado posible en el gorro y coserlo antes de realizar el siguiente paso.
5) Ahora para que nuestro gorro sea reversible lo que haremos será coser los extremos de la tela dejando la tela del lado revés, y de la manera como lo indico en las imágenes. Hay que recordar dejar en uno de los extremos un espacio de aproximadamente 5cm sin coser para dar vuelta al gorro.
6) Ya para terminar de hacer este lindo gorro con aplique de Baby Shark solo nos falta cerrar la parte por donde le dimos vuelta al gorro, y esto lo haremos realizando una costura invisible, y listo nuestro hermoso gorro.
También realice un bonito bolsa de regalo personalizada con el mismo tema de Baby Shark, y le aplique algo de perfume para bebes tanto al gorrito como a la bolsa para ser un poco más detallista con el obsequio ¡Que les puedo decir, así soy yo, súper detallista! Y cuando doy un obsequio me gusta que sea especial.
BUENO AMIGOS DESEO LES HAYA GUSTADO TANTO COMO A MÍ EL RESULTADO FINAL DE ESTE BONITO GORRO BEANIE REVERSIBLE CON APLIQUE DE BABY SHARK Y ESPERO SUS BONITOS COMENTARIOS Y/O VOTOS, ASÍ ME MOTIVAN PARA SEGUIR COMPARTIENDO MIS CREACIONES CON USTEDES, YO ESTARÉ FELIZ DE RESPONDER TODOS SUS COMENTARIOS 😊🐝💚 SEAN FELICES Y QUE LA MUSA DE LA CREATIVIDAD NUNCA LOS ABANDONE!
GRACIAS POR VISITAR MI BLOG!
Se despide de ustedes con mucho cariño su amiga Nathalie @laranitacrochet
*Todas las fotografías utilizadas en la publicación son propiedad de la autora.
*Las fotografías fueron tomadas y editadas con mi REDMI 9 y con la App FotoRoom.
*La traducción la hice en https://chrome.google.com/webstore/detail/google-translate/aapbdbdomjkkjkaonfhkkikfgjllcleb
🐠 💙 ENGLISH 💙 🐠
Hello hello! Hivers and beautiful DIYHub community, I hope everyone is feeling super well, encouraged and inspired 💟
Today I would like to show you how I made this cute Reversible Beanie Hat that I made to give to a cousin's son for his birthday, and to which I placed the Baby Shark appliqué that I made a few days ago. In the link that I leave you you can also see how the applique that I am talking about is made https://peakd.com/hive-189641/@laranitacrochet/esp-eng-aplique-de-baby-shark-tejido-a-crochet-baby-shark-crochet-applique
This hat is quite easy to make, both the pattern and the sewing are done quite quickly, I did the sewing completely by hand, but if you dare to make this type of hat and you have a sewing machine you will do it even faster.
These types of hats are not only for children, since you can make them in any size you want and they can also be for adults. And since it is reversible, it can also be made by combining two fabrics with different prints and they look super cute.
Below I leave you with the materials I used and also with the step by step to knit this fun Baby Shark applique.
Materials:
- Cotton fabric that is elastic.
- Thread the color of the fabric.
- Needle for hand sewing.
- Pins, measuring tape and scissors.
- And of course an appliqué to decorate the hat.
Step by Step:
1) To cut the fabric we need to measure the circumference of the head, in my case it will be 52 cm. Therefore, I will cut the fabric to 52x52 cm. It must be taken into account that we will mark the head measurement along the width of the fabric, that is, on the side that is most elastic.
2) Now we fold the fabric in half the width, that is, half the head measurement, and sew the entire edge along the fabric with a zig-zag stitch.
3) Once sewn, we fold it in half the length and mark the shape of the pattern on both ends of the fabric, and then cut it.
4) We turn the hat over to see the right side of the fabric and then we fold it in half, bringing the ends together and shaping the hat, then we make a double of about 2 fingers wide at the base of the hat to locate the appliqué as centered as possible on the hat and sew it before doing the next step.
5) Now to make our hat reversible, what we will do is sew the ends of the fabric, leaving the fabric on the wrong side, and in the way I indicate in the images. You must remember to leave a space of approximately 5cm at one end without sewing to turn the hat inside out.
6) To finish making this cute hat with Baby Shark appliqué, we only need to close the part where we turned the hat, and we will do this by making an invisible seam, and our beautiful hat is ready.
I also made a nice personalized gift bag with the same Baby Shark theme, and applied some baby perfume to both the hat and the bag to be a little more detailed with the gift What can I tell you, that's me, super detailed! And when I give a gift I like it to be special.
WELL FRIENDS I HOPE YOU LIKED THE FINAL RESULT OF THIS BEAUTIFUL REVERSIBLE BEANIE HAT WITH BABY SHARK APPLIQUE AS MUCH AS I DO AND I LOOK FORWARD TO YOUR NICE COMMENTS AND/OR VOTES, SO YOU MOTIVATE ME TO CONTINUE SHARING MY CREATIONS WITH YOU, I WILL BE HAPPY TO RESPOND ALL YOUR COMMENTS 😊🐝💚 BE HAPPY AND MAY THE MUSE OF CREATIVITY NEVER LEAVE YOU!
THANK YOU FOR VISITING MY BLOG!
Your friend Nathalie @laranitacrochet says goodbye to you with love.
*All photographs used in the publication are property of the author.
*The photographs were taken and edited with my REDMI 9 and with the FotoRoom App.
*I did the translation at https://chrome.google.com/webstore/detail/google-translate/aapbdbdomjkkjkaonfhkkikfgjllcleb
For the best experience view this post on Liketu


