English
Practical and Useful Sewing Box
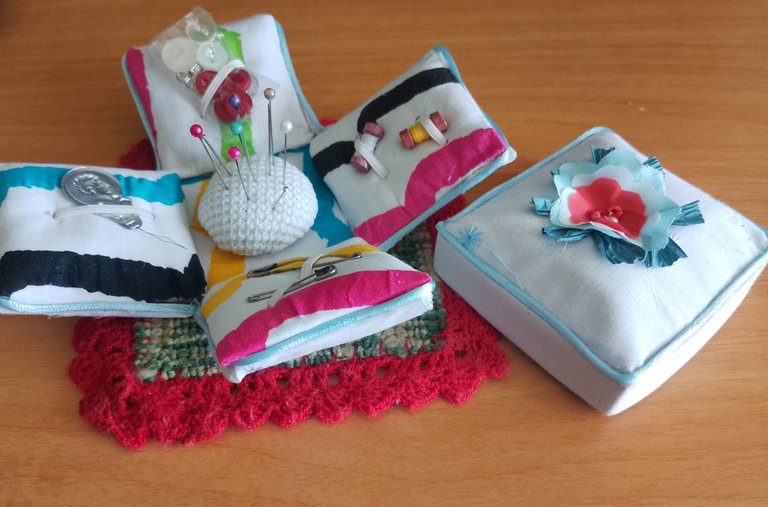
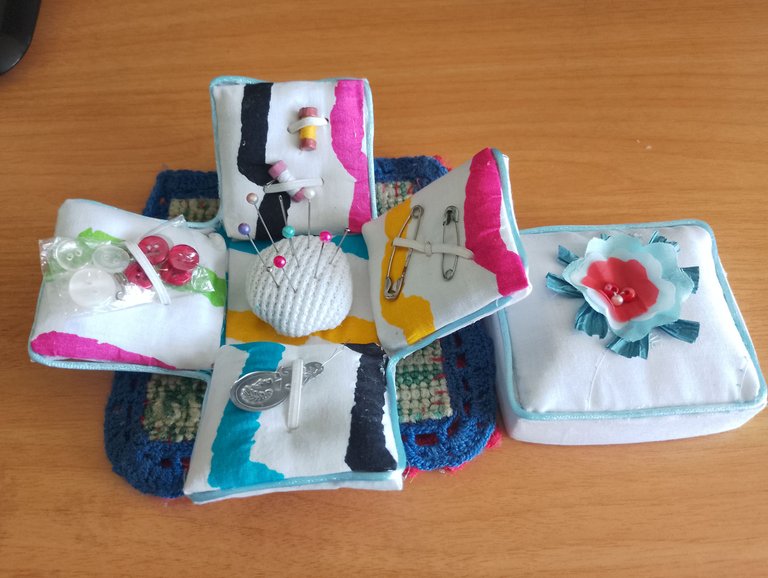
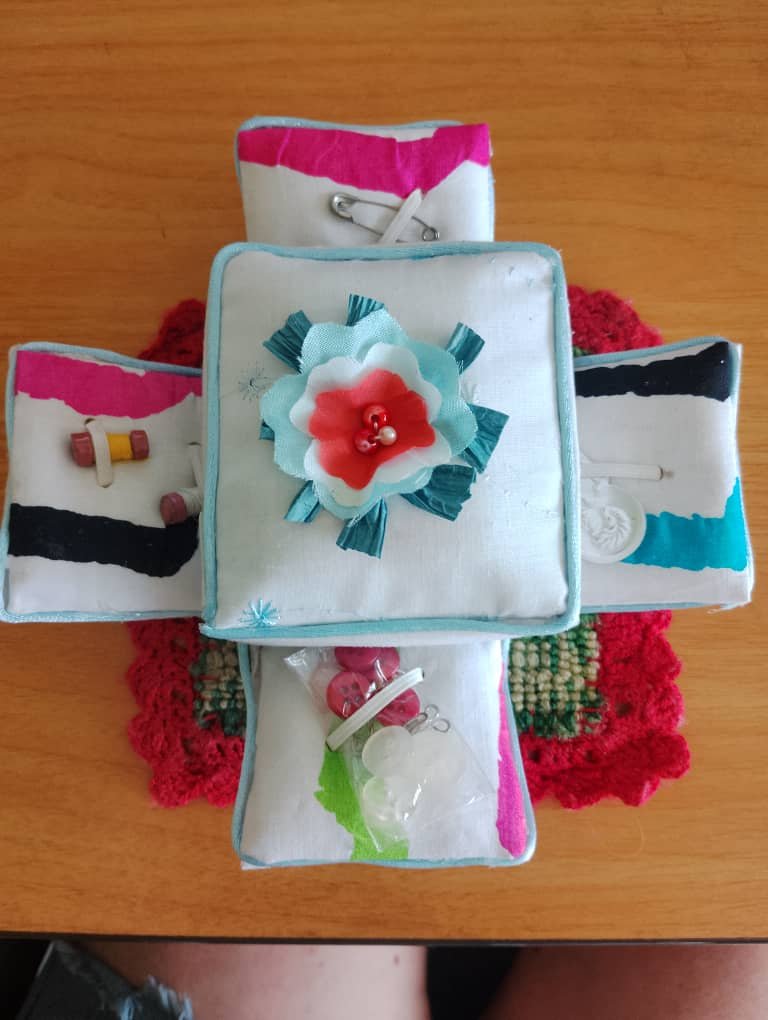
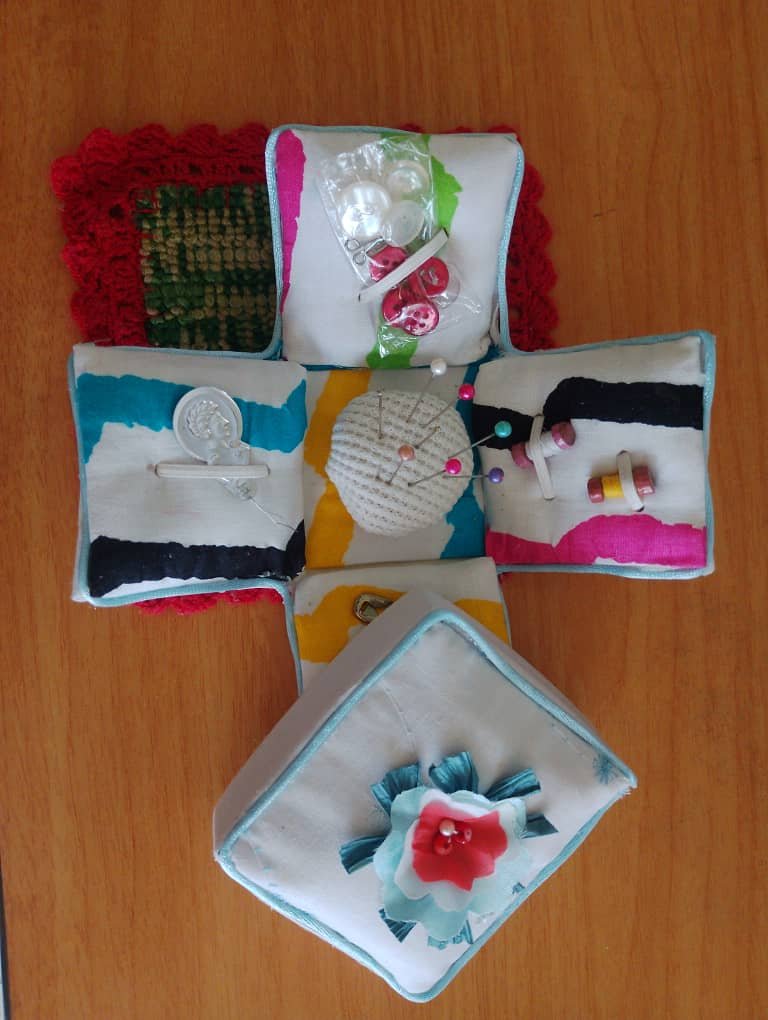
Hello dear friends of the DIYHub Community, my new project is a sewing box, I wanted to make it as a detail for my sister, who needs it to put in order some sewing implements and I thought it was a good opportunity to give it to her. It is complicated, but it looks very nice, I will try to explain the details, it was a long time since I replicated it, now I had to make it with recycled material; I was given some scraps of fabric and cardboard, the rest, I had it.
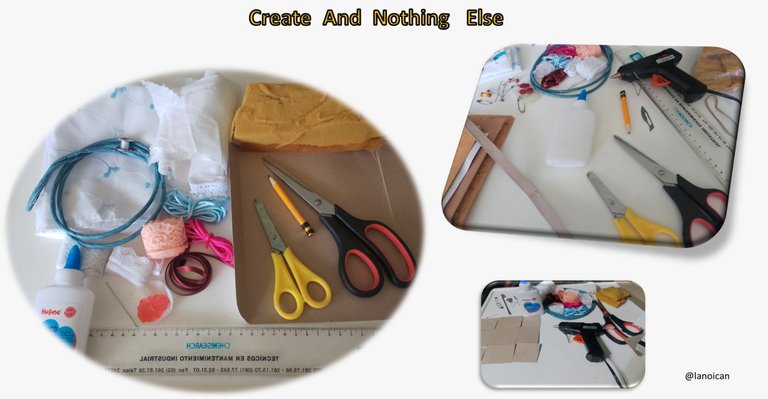
Materials:
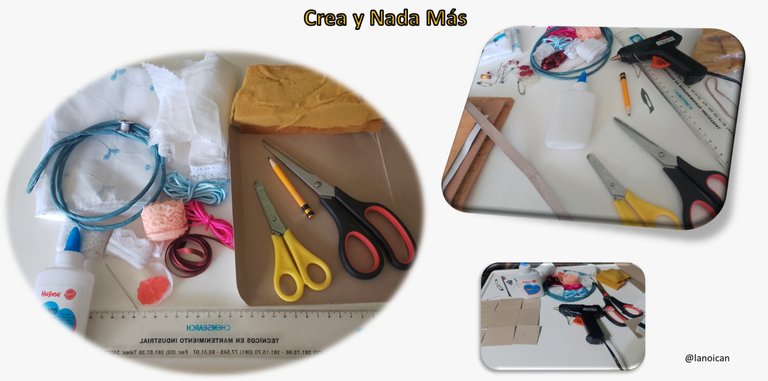
Now we will start with the direct materials: scissors, for cutting fabric and for cutting paper, scraps of fabric, glue: preferably silicone glue, otherwise white glue, pencil, ruler, box cutter or scalpel, strip of elastic, lace, mouse tail, foam rubber, it can be a small thin sheet, the one I used was given to me as a gift, I had to improvise. Large needle and thread.
Procedure:
Box
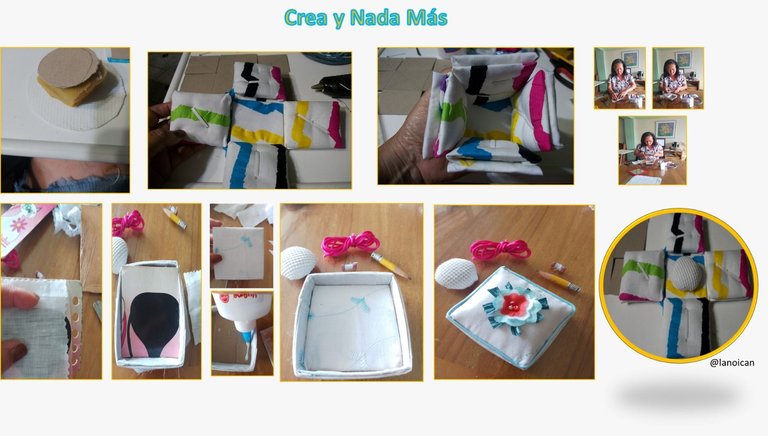
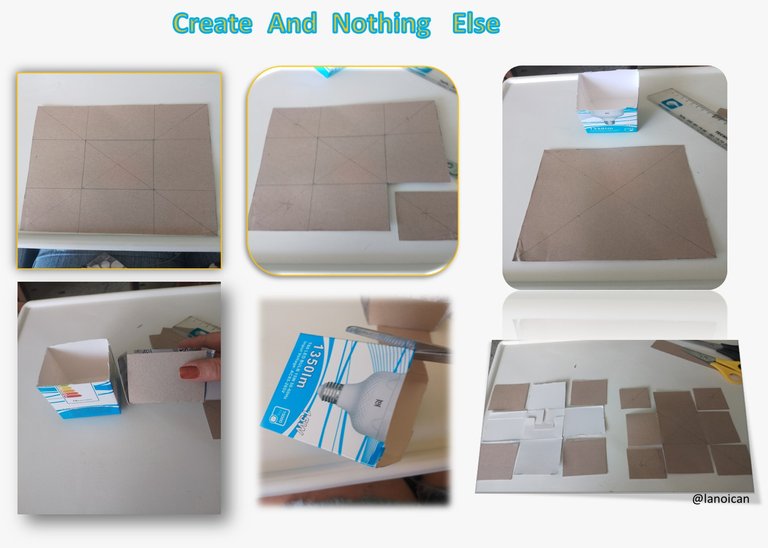
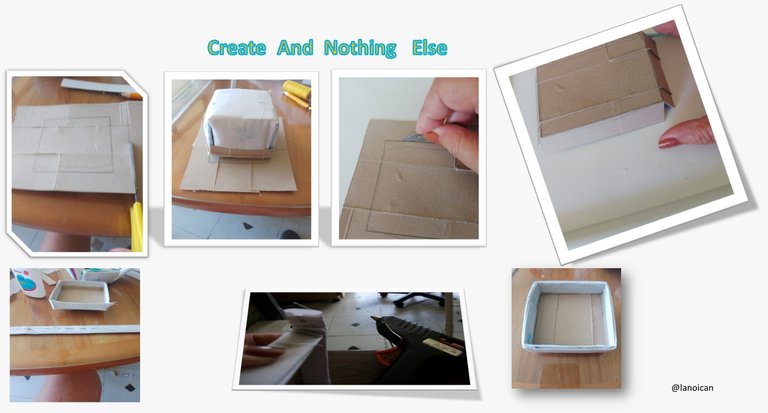
1st. Step: we cut the square cardboard, (you can use a letter size sheet and cut it, as a pattern). Then we divide it into nine sessions of equal size and with the scissors or cutter we cut the four corners, now we fold so that we have the shape of a box. In the photos you will see that in addition to the cardboard, a small box comes out that I used due to its small shape, I only had to polish the corners, and the rest was the same procedure, (see images).
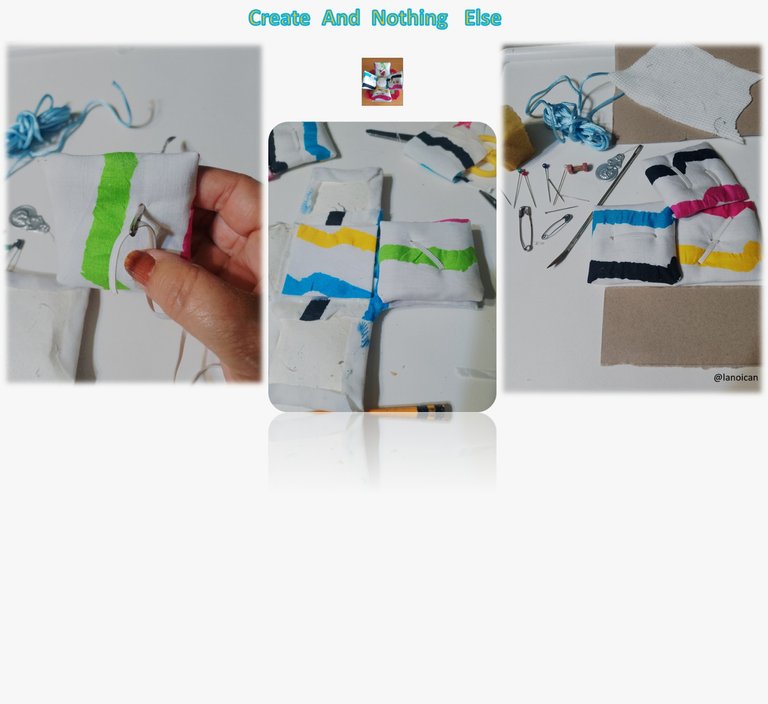
2nd. Step: we glue the four pieces of cardboard that we have left, a small square of foam rubber to each one. We also glue the piece that we have left from the painting, except in the center, then we cut the fabric to each square with a margin to fold it, we do the same with the large piece. And we proceed to cover each piece, we use glue or silicone to glue it, (see images).
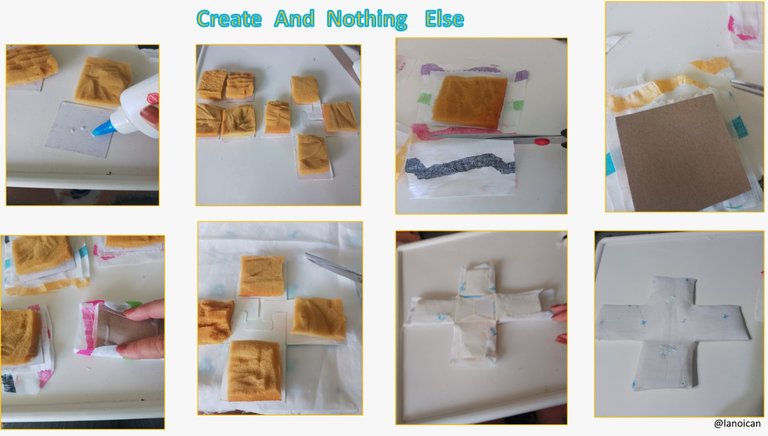
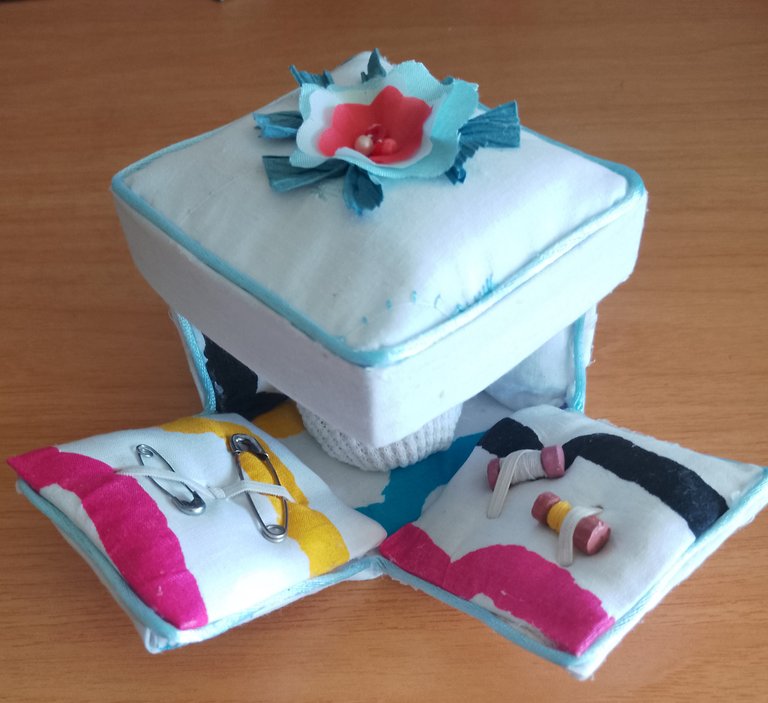
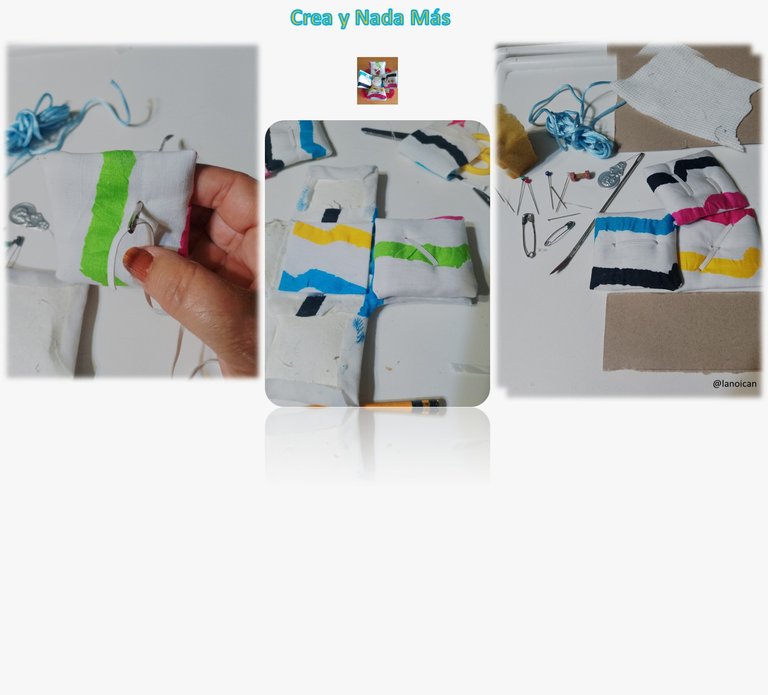
3rd. Step: with the needle we proceed to pass the elastic, depending on what we are going to place, it is the distance. Once the pieces are ready, we now glue it to the large piece (see images).
Top
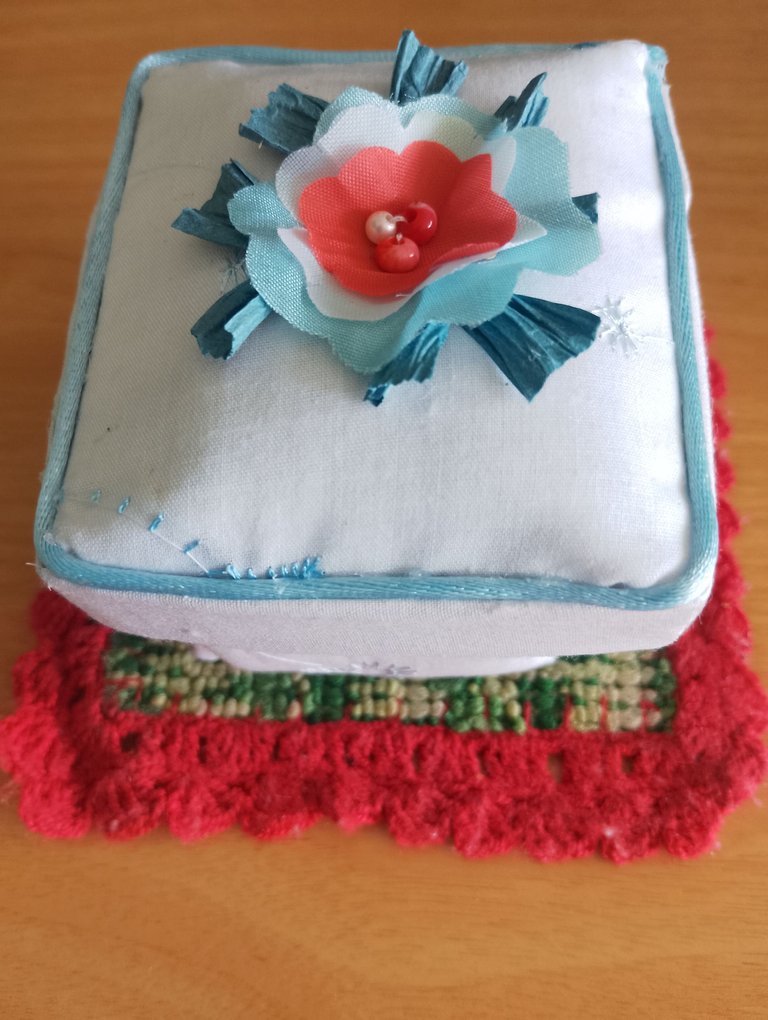
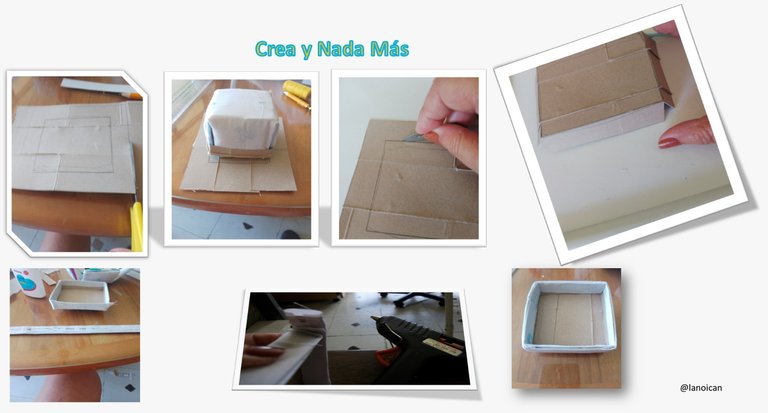
1st. Step: we take a small square cardboard, on top we place the little box, which we turned upside down and we try to draw a box (like saying the mouth of the box), once this is done, we draw outside this box around, another box with a separation more or less 1 and a half centimeters; We cut and fold, then we repeat the second and third steps, previous to the box, in this case we do it with the lid and then we line it. We cut a strip of cardboard to border the entire lid and a strip of fabric to cover it, then we glued it around the lid, to cover the finishing of the corners.
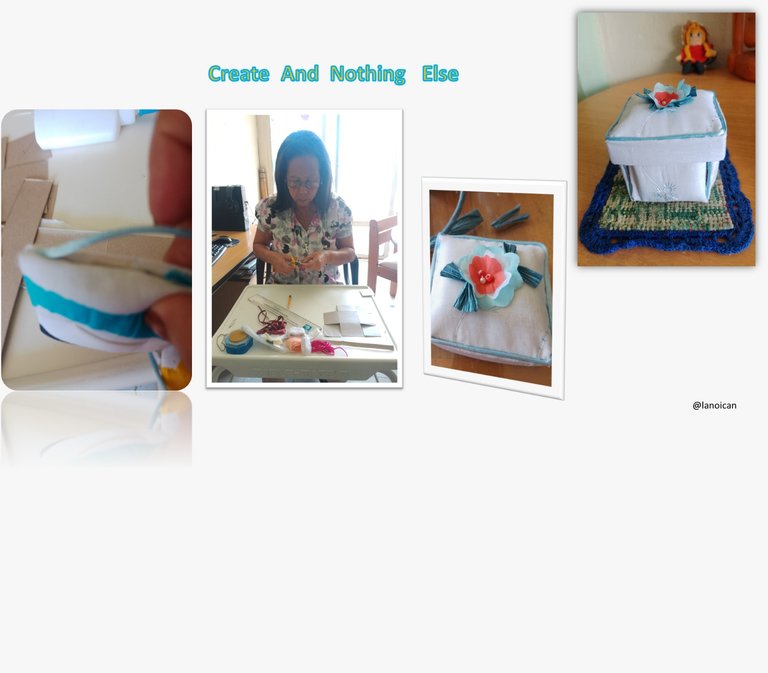
2nd. Step: we proceed to place the details, along the entire edge, and on top of the lid, if we wish.
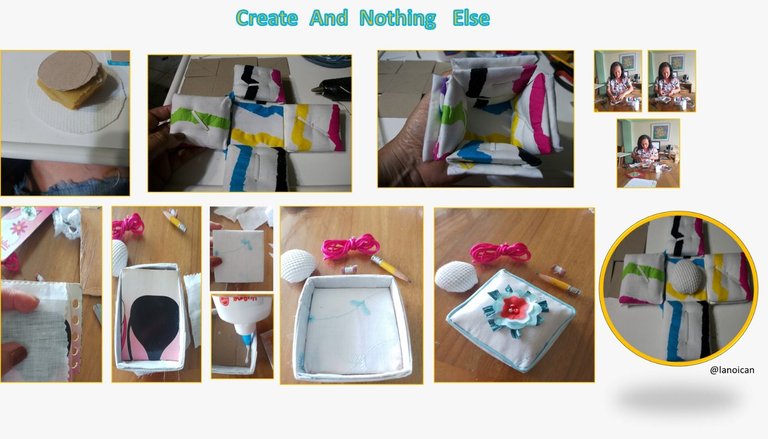
In the last step we make a small pad and glue it in the center of the sewing box and in the lid inside we place a lined lid to cover the finish, to make it look good we cut a small piece of fabric as a pattern. I want to tell you that I made the miniature spools of thread with the pencils when they are running out.

Español
Costurero Práctico y Util
Hola queridos amigos de la Comunidad de DIYHub, mi nuevo proyecto, es un costurero, lo quise realizar, como un detalle para mi hermana, que lo necesita para poner en orden algunos implementos de costura y me pareció una buena ocasión para regalárselo. Es complicado, pero queda muy bonito, voy a tratar de explicar bien los detalles, tenía mucho tiempo que no lo replicaba, ahora me tocó realizarlo con material reciclado; me regalaron unos retazos de tela y cartón, lo demás, lo tenía.


Materiales:
Ahora comenzaremos con los materiales directos: tijeras, para cortar tela y para cortar papel, retazos de tela, pega: preferiblemente de silicona, sino cola blanca, lápiz, regla, cúter o bisturí, tira de elástica, encaje, rabo ratón, goma espuma, puede ser una lámina pequeña delgada, la que yo utilicé me la regalaron, tuve que improvisar. Aguja grande e hilo.
Procedimiento:
Caja
1er. Paso: cortamos el cartón cuadrado, (puedes utilizar una hoja tamaño carta y la cortas, como patrón). Luego lo dividimos en nueve sesiones de igual tamaño y con la tijera o el cúter cortamos las cuatro esquinas, ahora doblamos para que nos quede la forma de una caja. En las fotos verán que sale además del cartón una cajita que utilice por su forma pequeña, solo tuve que abriles las esquinas, y lo demás fue el mismo procedimiento, (ver imágenes).
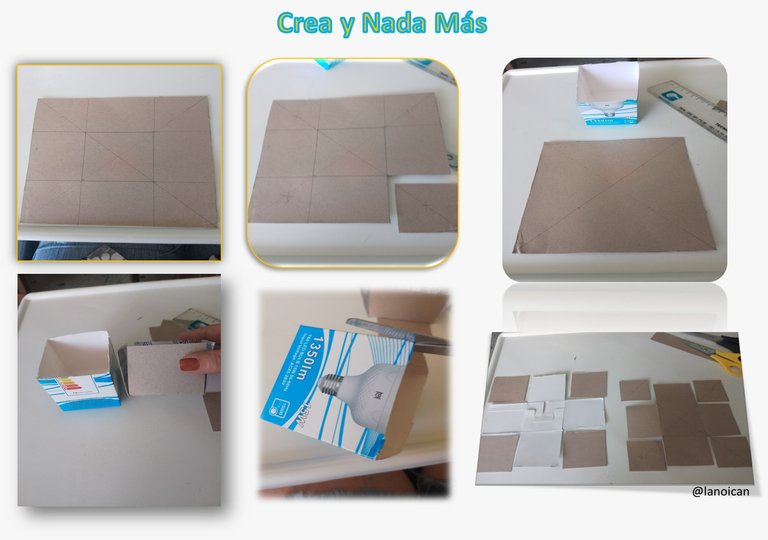
2do. Paso: los cuatro cartones que nos quedan le pegamos, un cuadrito de goma espuma a cada uno. Le pegamos también a la pieza que nos quedó del cuadro, menos en el centro, seguidamente cortamos la tela a cada cuadrito con margen para doblarla, lo mismo hacemos con la pieza grande. Y procedemos a forrar cada pieza, utilizamos la pega o silicona para pegarla, (ver imágenes).
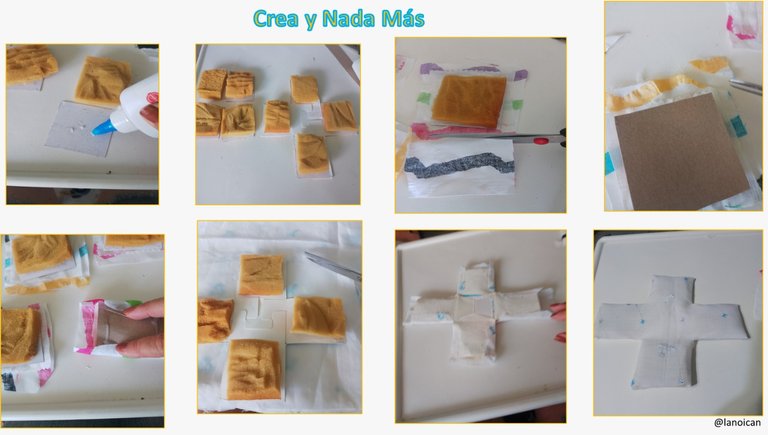
3er. Paso: con la aguja procedemos a pasar la elástica, de acuerdo a lo que vayamos a colocar, es la distancia. Una vez estén listas las piezas, ahora, la pegamos en la pieza grande, (ver imágenes).
Tapa
1er. Paso: tomamos un cartón pequeño y cuadrado, encima colocamos la cajita, que hicimos volteada y tratamos de dibujar un cuadro (como decir la boca de la caja), una vez realizado esto, dibujamos fuera de este cuadro alrededor, otro recuadro con una separación de más o menos con 1 ctm y medio; cortamos y doblamos, luego repetimos el segundo y tercer paso, anterior de la caja, en este caso lo hacemos con la tapa y luego la forramos. Picamos una tira de cartón para bordear toda la tapa y una tira de tela para forrarla, luego la pegamos alrededor de la tapa, para tapar el acabado de las esquinas.
2do. Paso: procedemos a colocarle los detalles, en toda la orilla, y encima de la tapa, si deseamos.
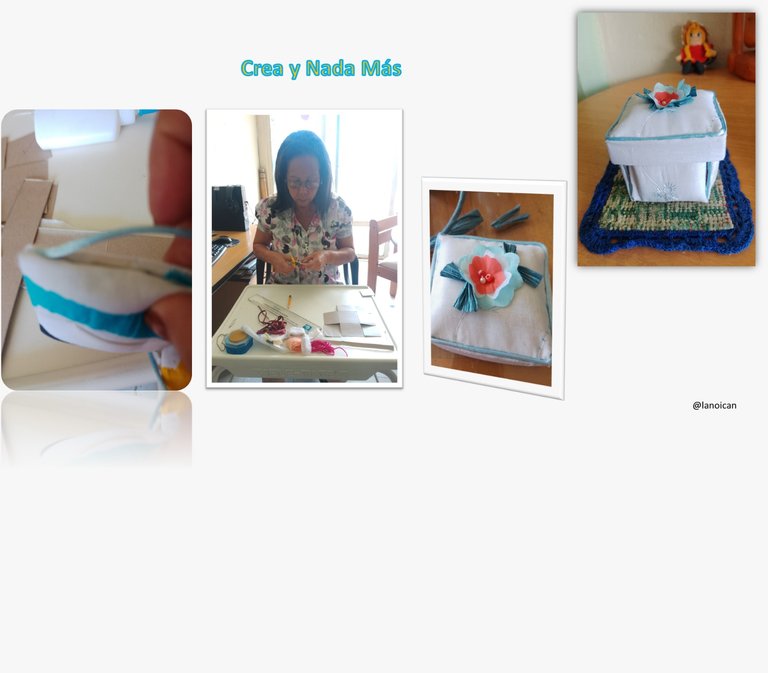
En el último paso hacemos una almohadilla pequeña y la pegamos en el centro del costurero y en la tapa adentro colocamos una tapita forrada para tapar el acabado, para que nos salga bien cortamos una telita como Patrón. Quiero decirles que los carretes de hilo en miniatura los hice con, los lápices cuando ya se están acabando.
