Hola hermosa comunidad
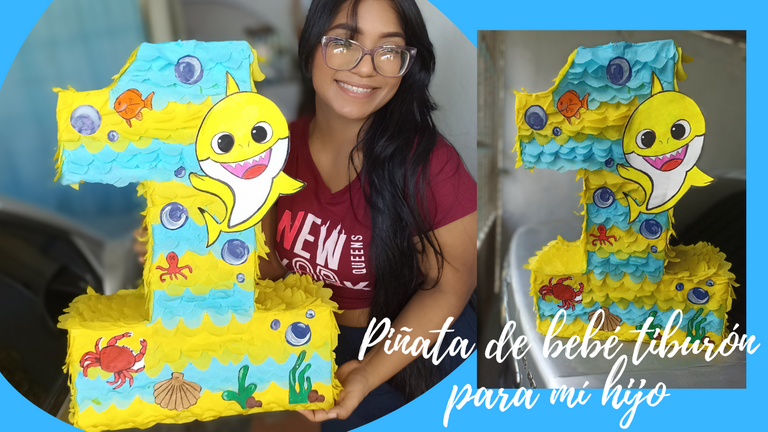
Espero que se encuentren súper bien esta noche queridos amigos, me emociona mucho compartirles con ustedes este post, hace unos días les comente que mis bebes están a punto de cumplir añito y primero va a cumplir Ethan él bebe su primer añito así que ando como loca planeando y haciendo y planificando todo para estas dos fechas que son importantísimas para mí, así que unas de las cosas que comencé hacer fue las piñatas y aquí quiero compartirles el paso a paso de esta hermosa piñata con temática de la fiesta de mi gordo el cual será de bebe tiburón, a pesar de no saber mucho sobre el tema me gusta aprender siempre pera yo hacerle todo a mis hijos con mucho esfuerzo y amor espero de todo corazón les guste tanto como a mi
Hello beautiful community
I hope you are doing great tonight dear friends, I am very excited to share with you this post, a few days ago I told you that my babies are about to turn one year old and first Ethan will be his first birthday so I am going crazy planning and making and planning everything for these two dates that are very important to me, so one of the things I started making was the piñatas and here I want to share with you the step by step of this beautiful piñata with the theme of my fat boy's party which will be a baby shark, even though I don't know much about the subject I always like to learn so I can make everything for my kids with a lot of effort and love, I hope you like it as much as I do.
Materiales
Cartón
Pega
Silicón
Tijeras
Papel crepe de color azul bebe y amarillo
Materials
Cardboard
Glue
Silicone
Scissors
Baby blue and yellow crepe paper
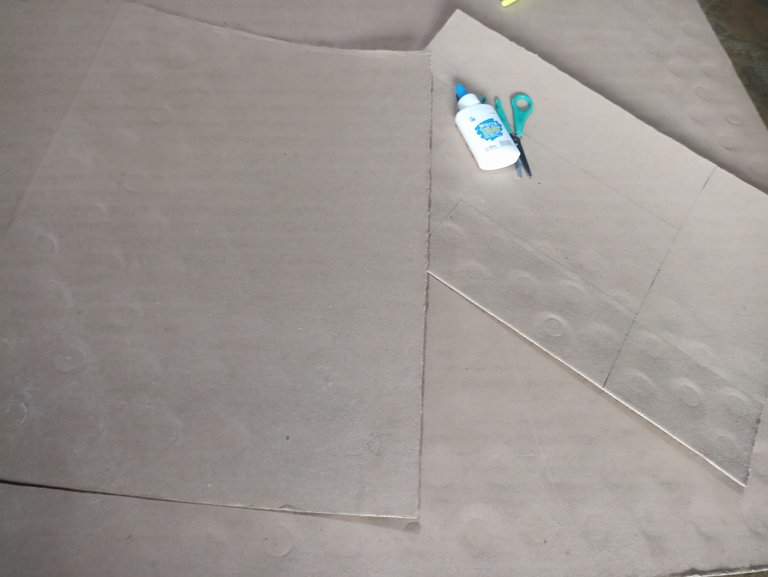
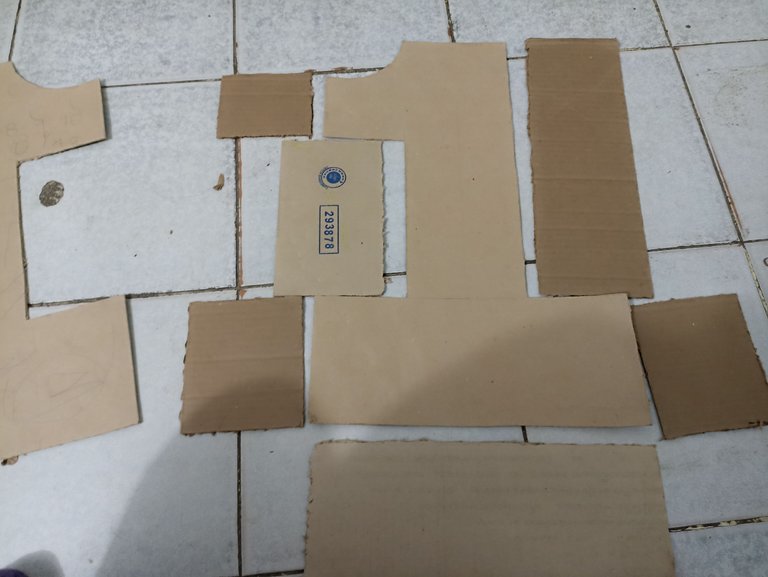
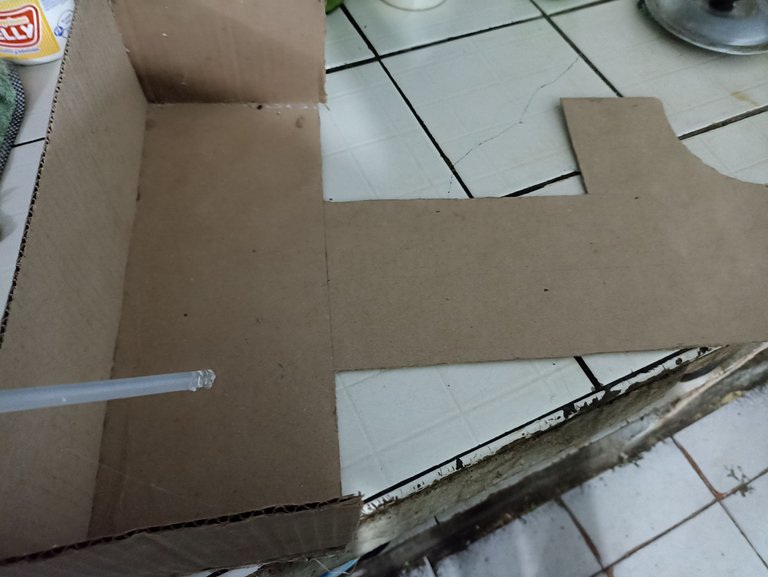
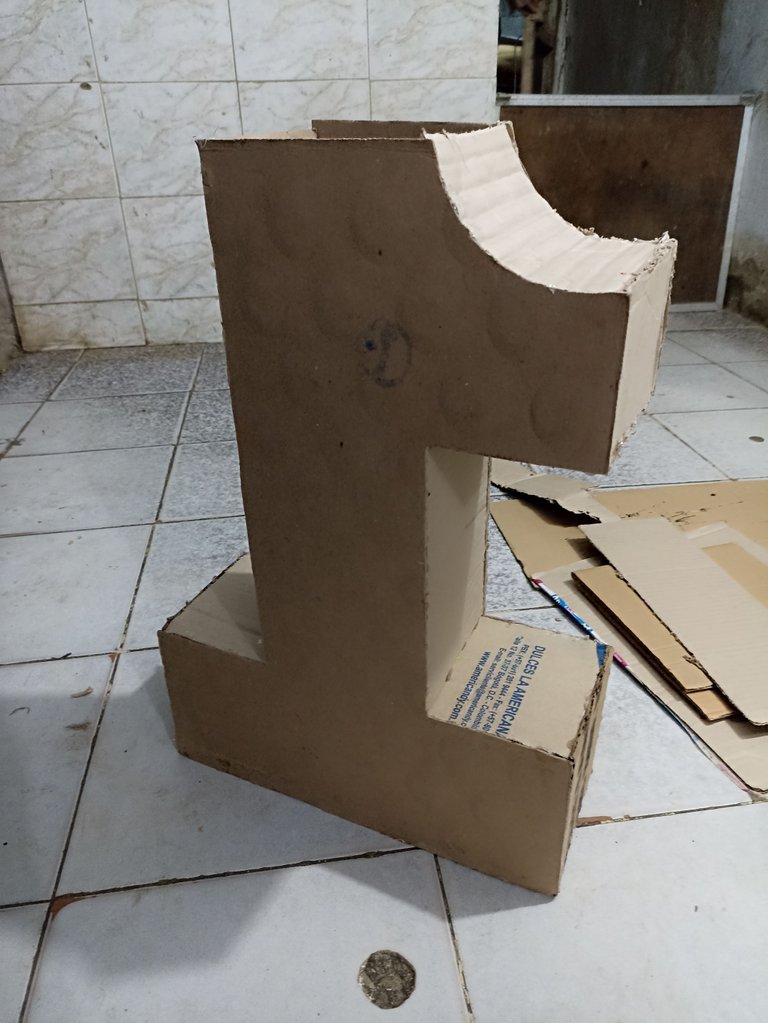
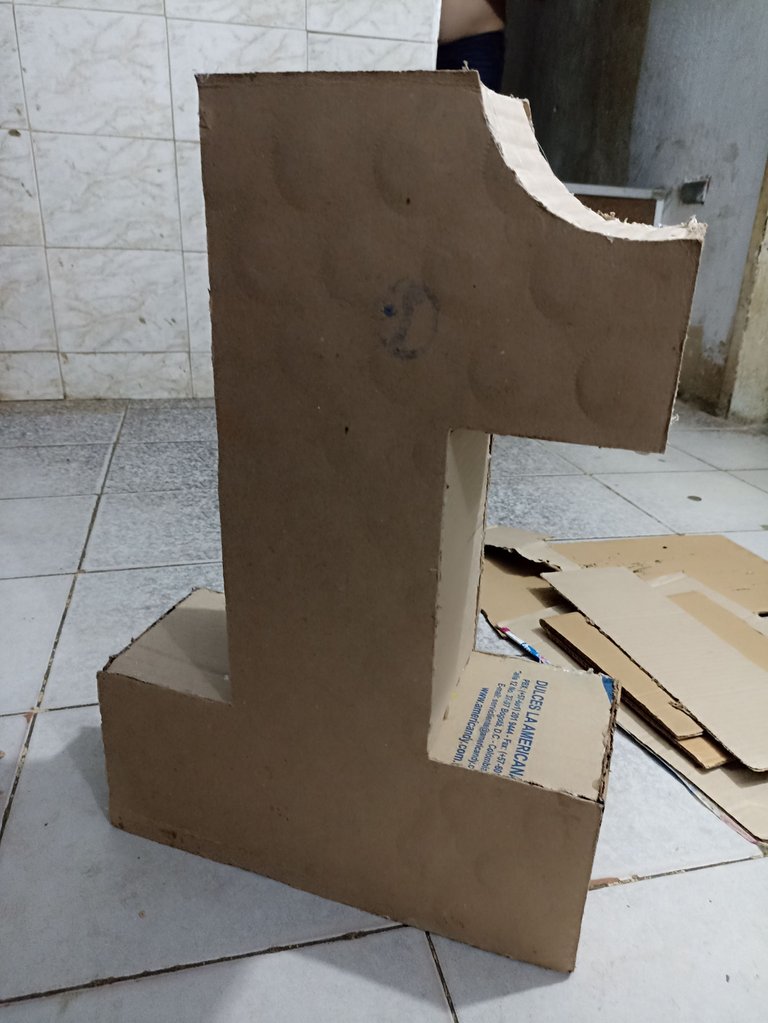
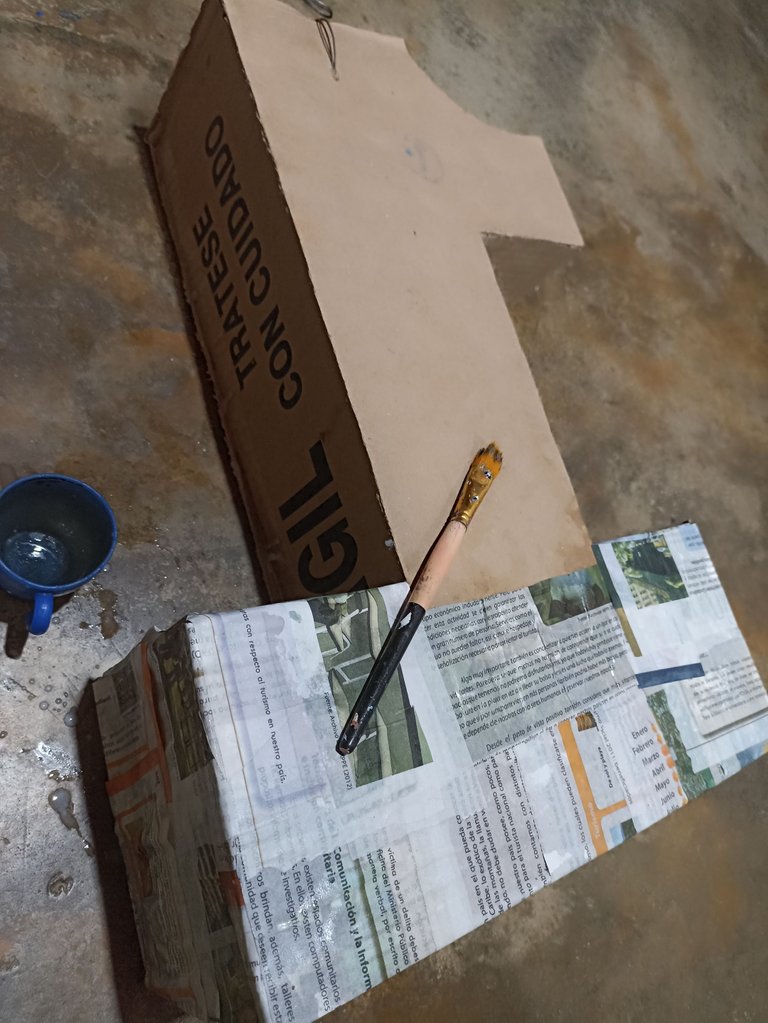
Primero tome un cartón grueso para dibujar el número uno y al recortarlo tome ese de muestra para realizar el otro del mismo tamaño y forma, luego con una regla recorte pedazos de cartón que iban por los bordes del numero usando cada parte del como guía y seguidamente comencé a pegarlo hasta colocar la otra cara del número 1 encima de otro dejando un poco de presión hasta que el silicón se seque
Step by step
First take a thick cardboard to draw the number one and cut it out and take that as a sample to make the other of the same size and shape, then with a ruler cut out pieces of cardboard that went around the edges of the number using each part as a guide and then began to paste it to place the other side of the number 1 on top of the other leaving a little pressure until the silicone dries.
 )
)

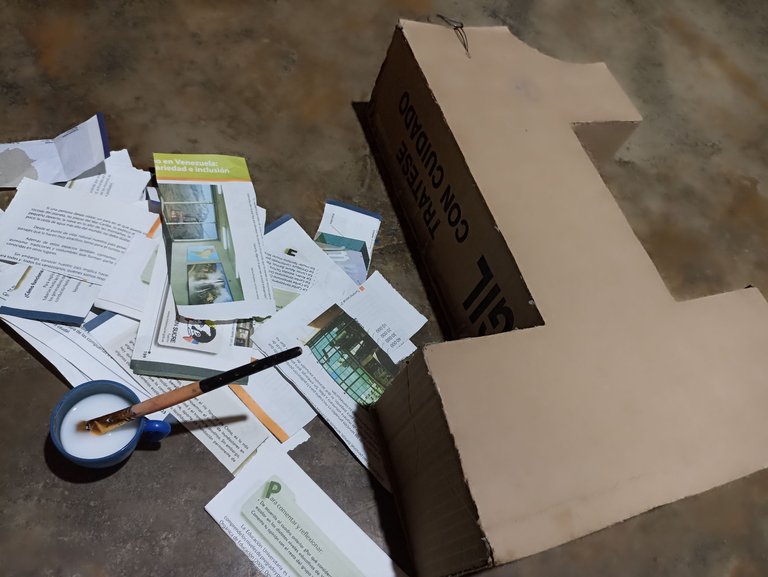
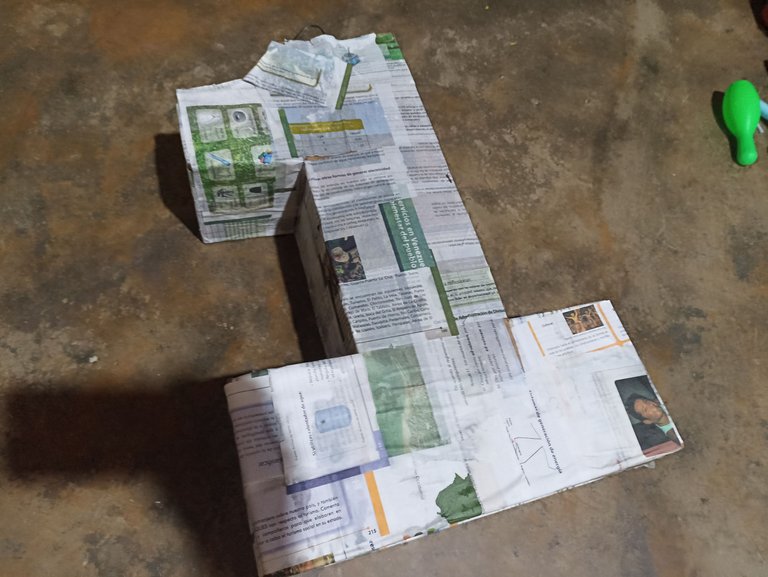
Seguidamente realice un embudo usando pega ligándola con un poco de agua y papel reciclado iba mojando este papel y cubriendo todo el número uno para completar de sellarlo para que este no se despegue y se endurezca para darle mayor fuerza y resistencia solo le hice una capa debido que el cartón ya era muy grueso y como solo serán niños pequeños me pareció bien así
Then I made a funnel using glue, binding it with a little water and recycled paper, wetting this paper and covering the whole number one to complete sealing it so that it does not peel off and hardens to give it greater strength and resistance I only did one layer because the cardboard was already very thick and as they will only be small children I thought it was good like that.
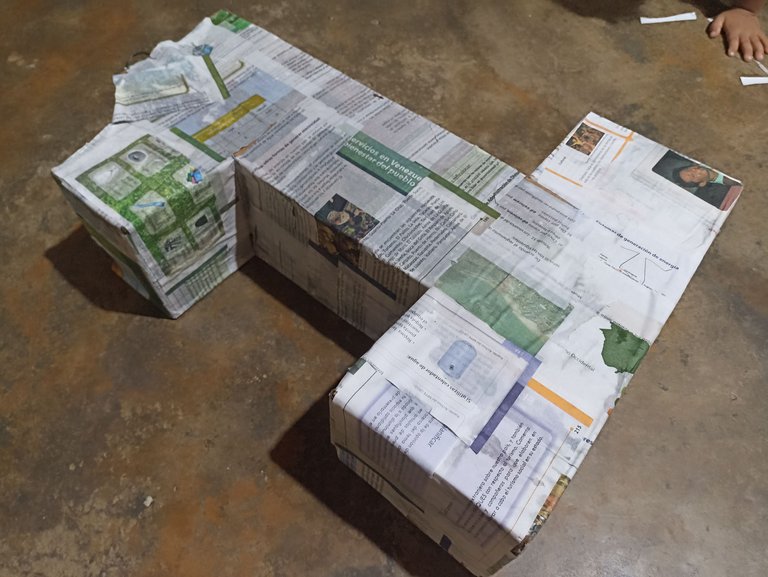
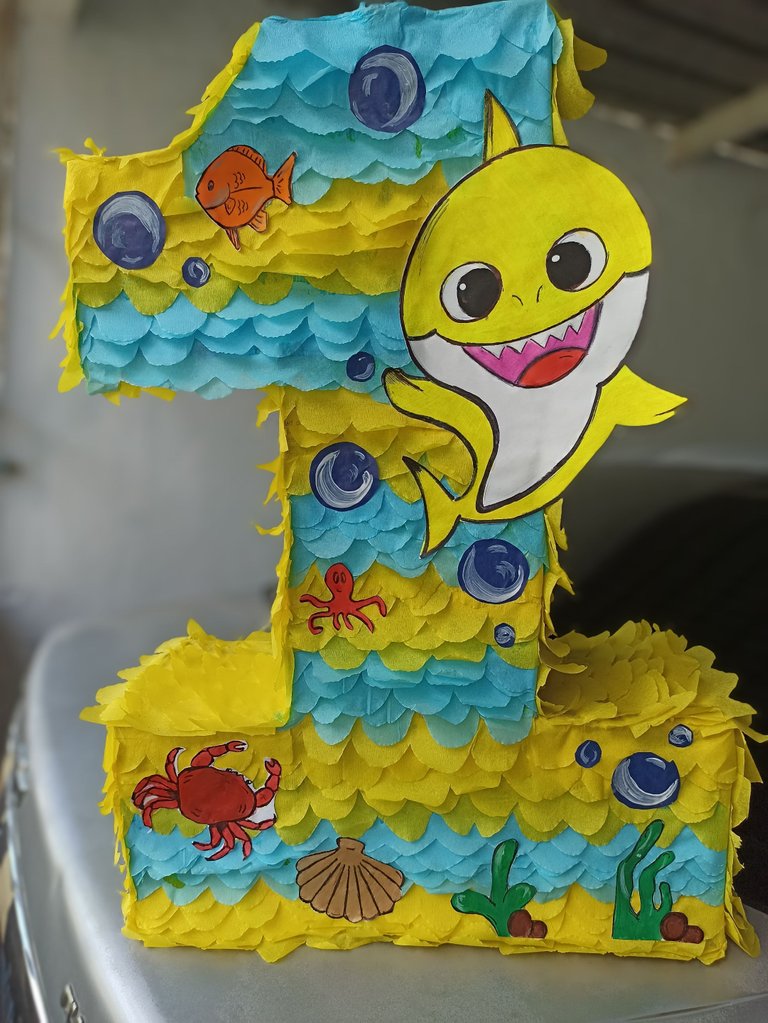
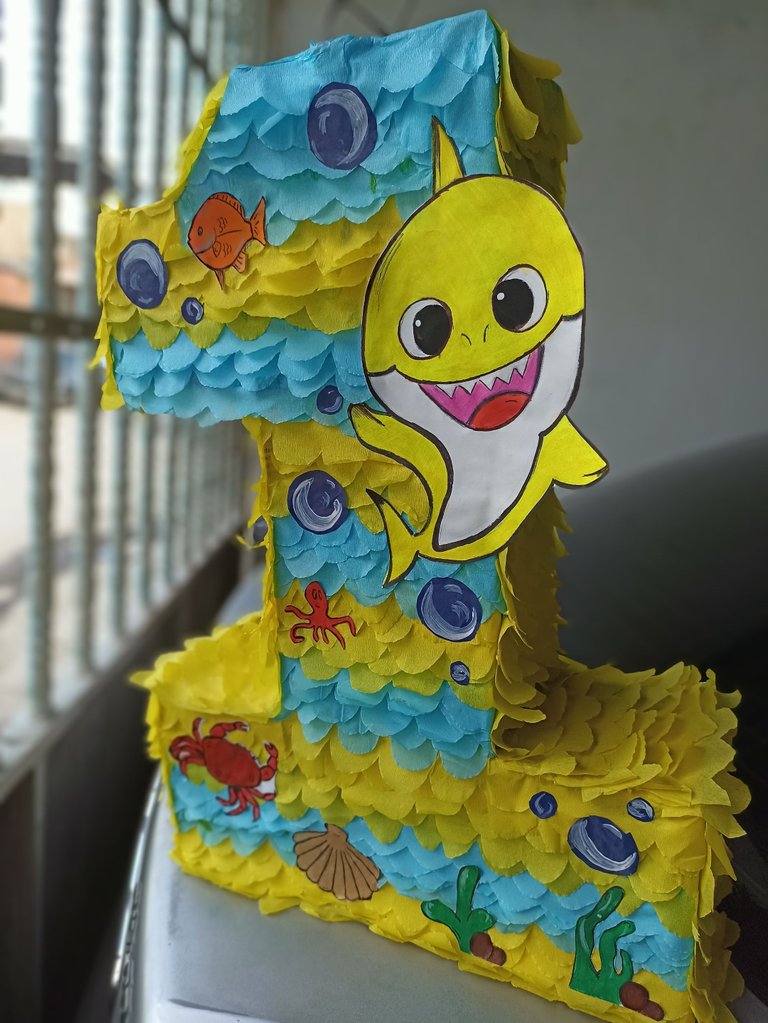
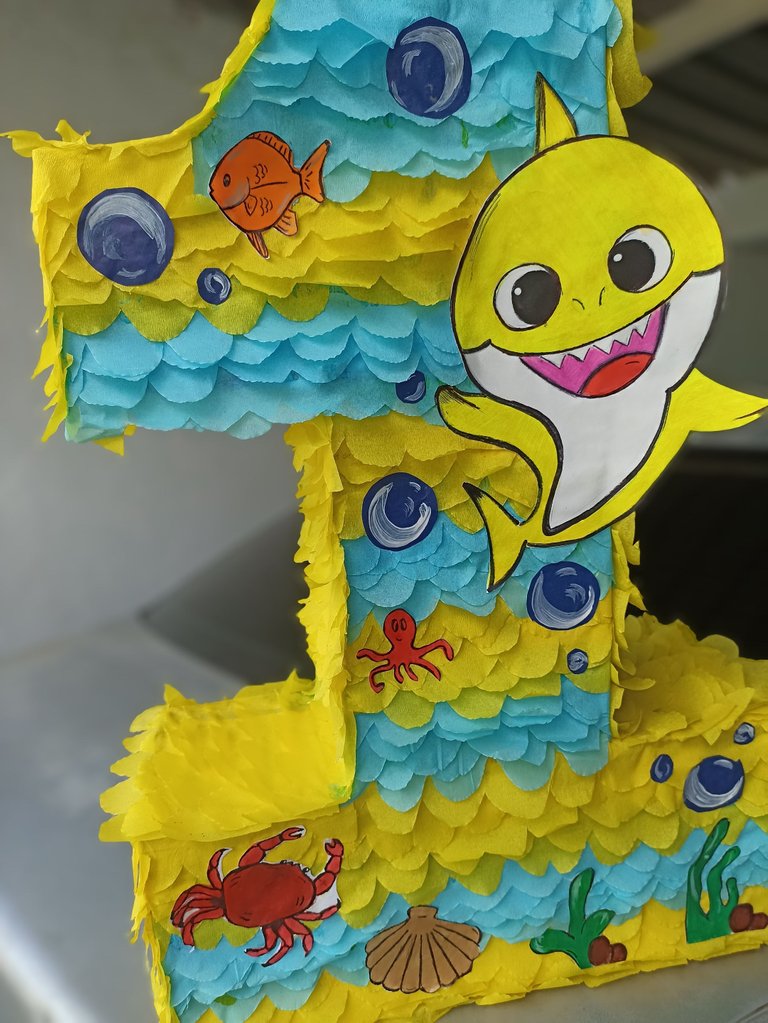
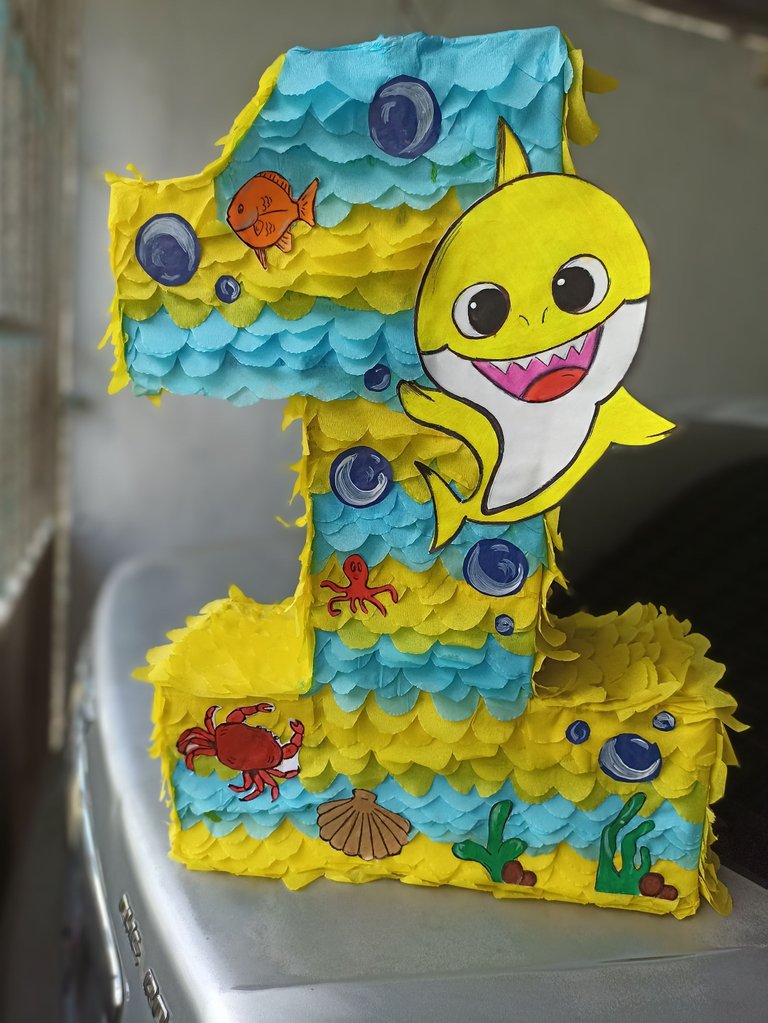
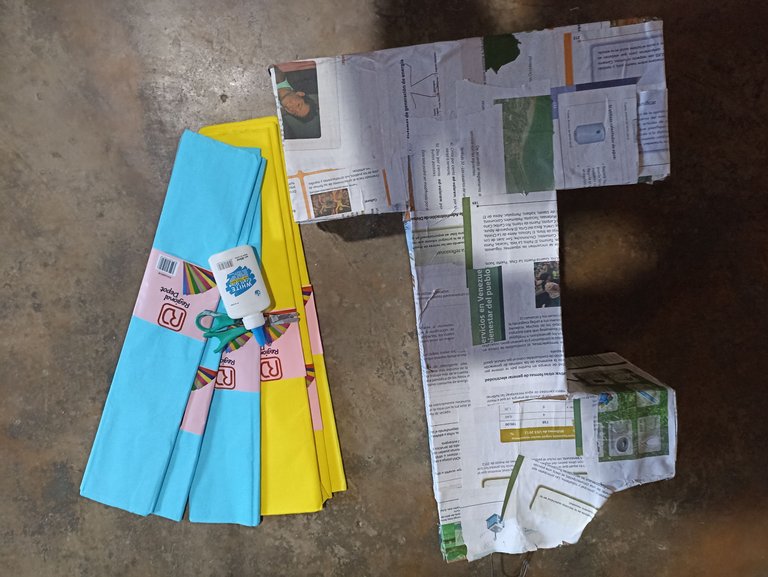
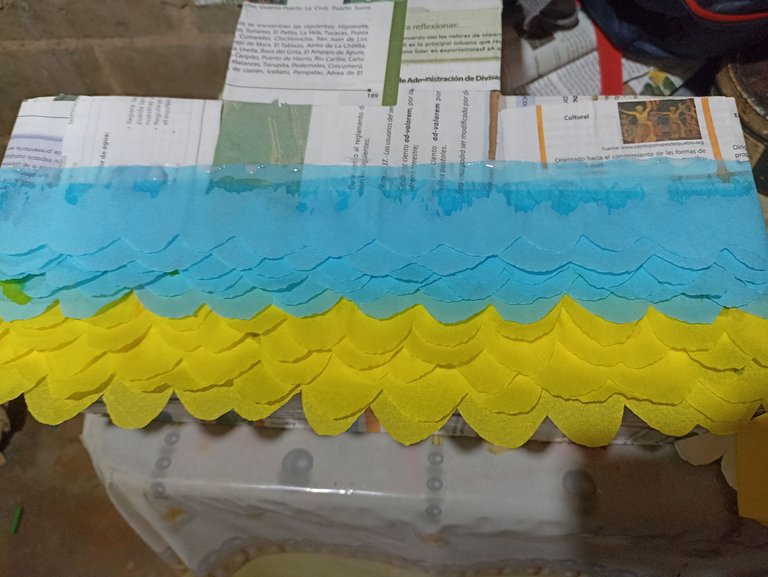
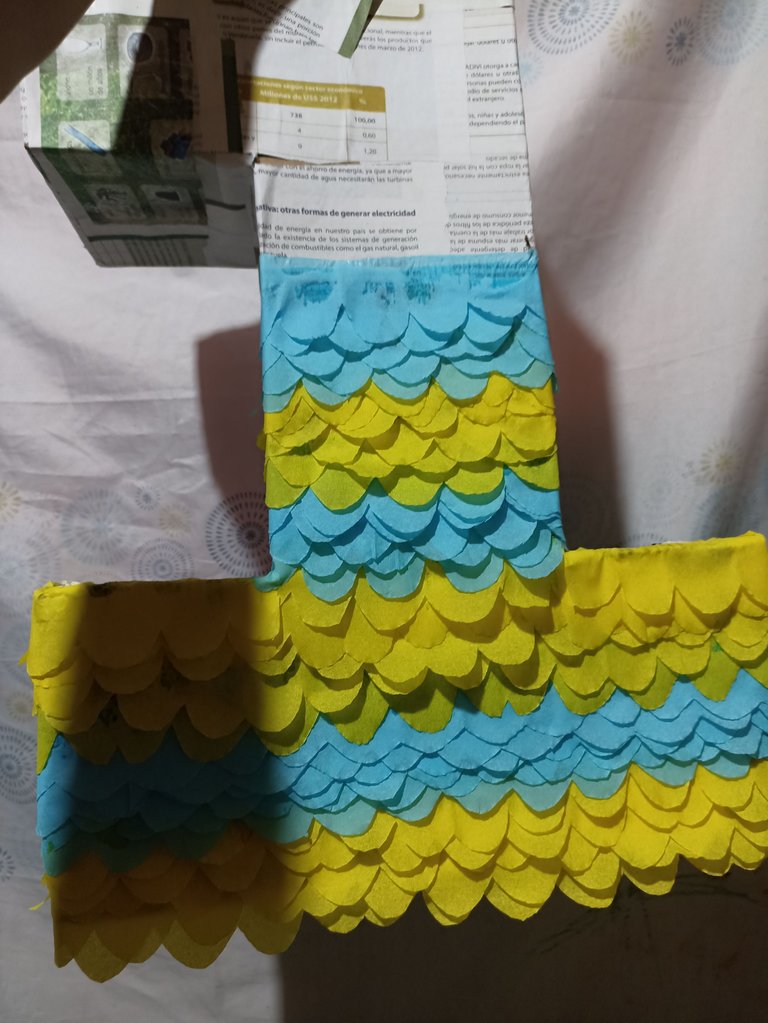
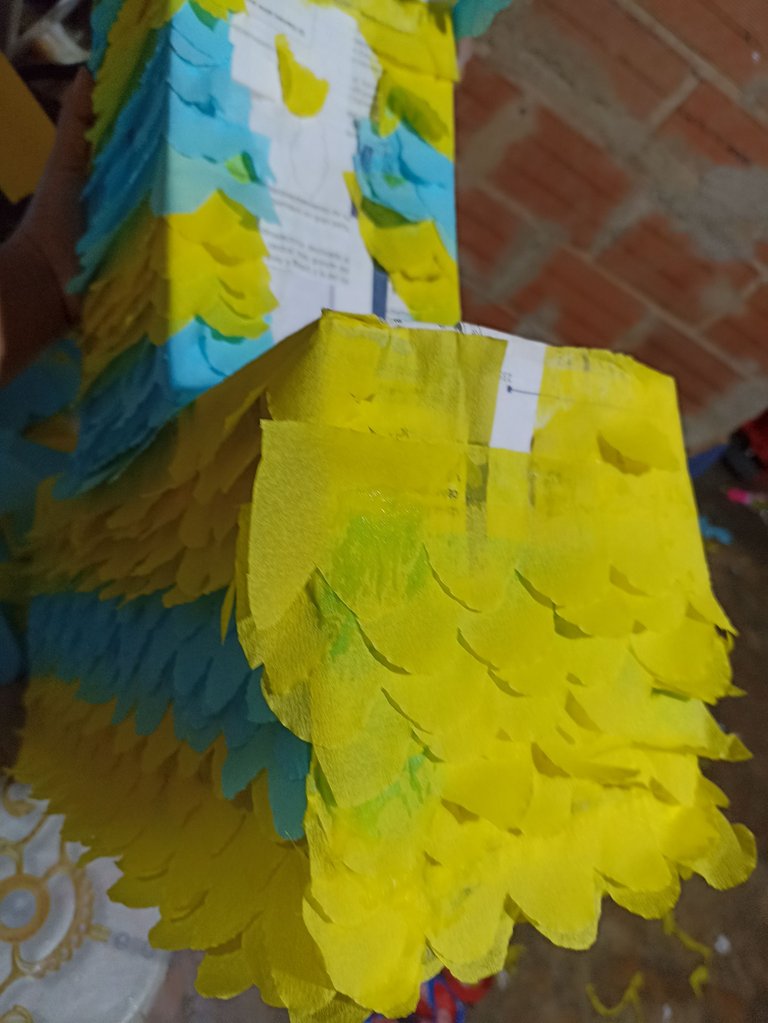
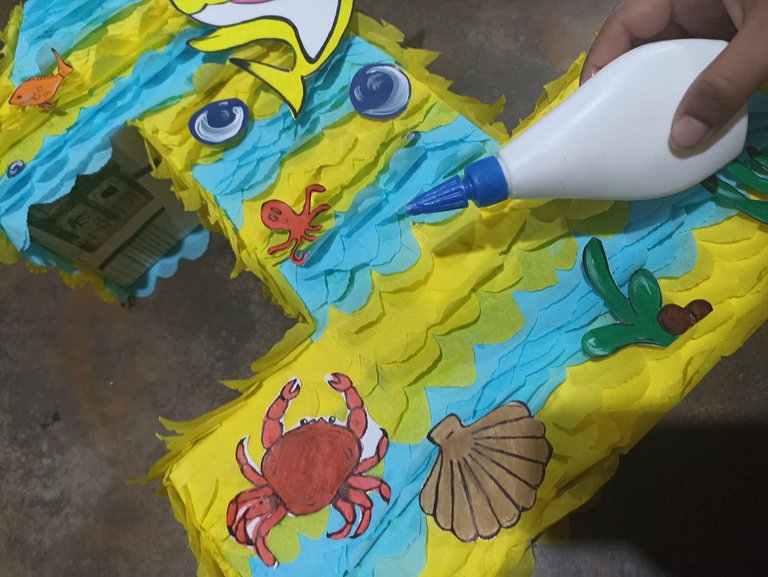
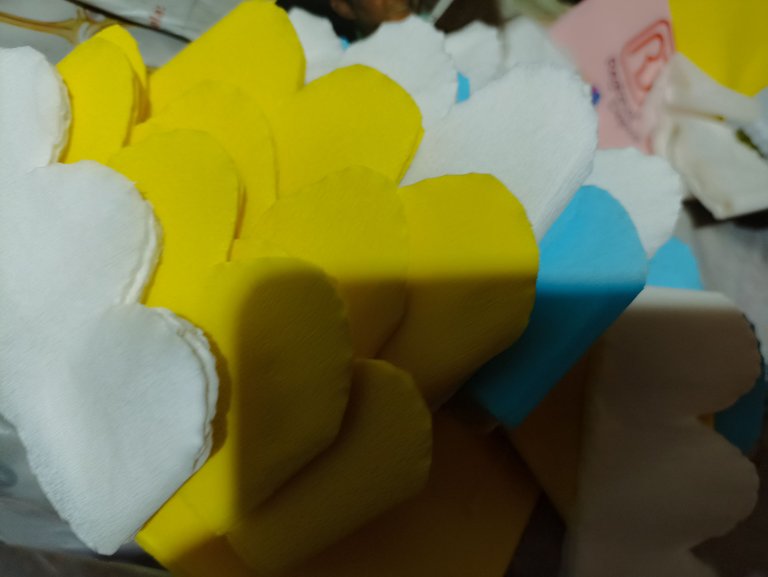
Después la deje hasta el día siguiente a que secará para luego comenzar a decorarla esto dependerá de la temática y como yo he escogido bebe tiburón los colores principales serán azul y amarillo por lo que corte pedazos de cada color y le realice detalles como ondas para hacer la ilusión de ser escamas y fui pegando desde abajo hacia arriba una casi encima de la otra dejándole un dedo de diferencia para que quedaran muy bonitas y que cubrieran cada parte de la piñata y así continúe hasta realizar las parte delantera y trasera usando amarillo y azul mientras que en las orillas solo use amarillo
Then I left it until the next day to dry and then start decorating it, this will depend on the theme and as I have chosen baby shark the main colors will be blue and yellow so I cut pieces of each color and made details such as waves to make the illusion of being scales and I was gluing from the bottom up one almost on top of the other leaving a finger of difference to be very nice and to cover every part of the piñata and so I continued to make the front and back using yellow and blue while on the edges only used yellow.
 )
)
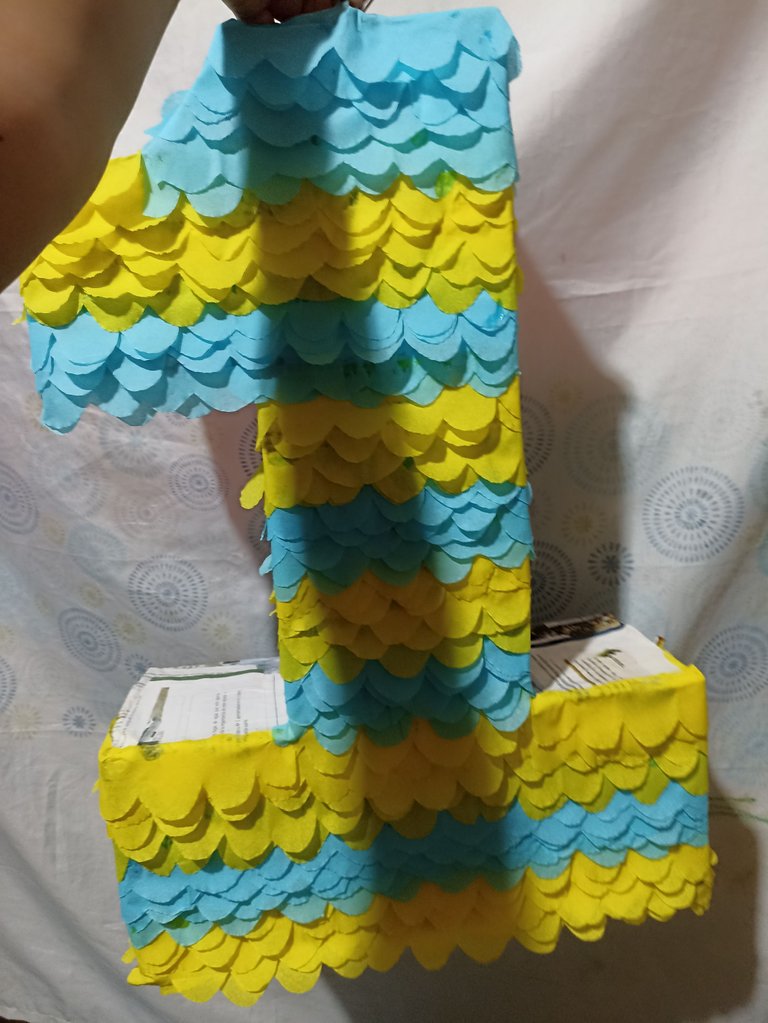
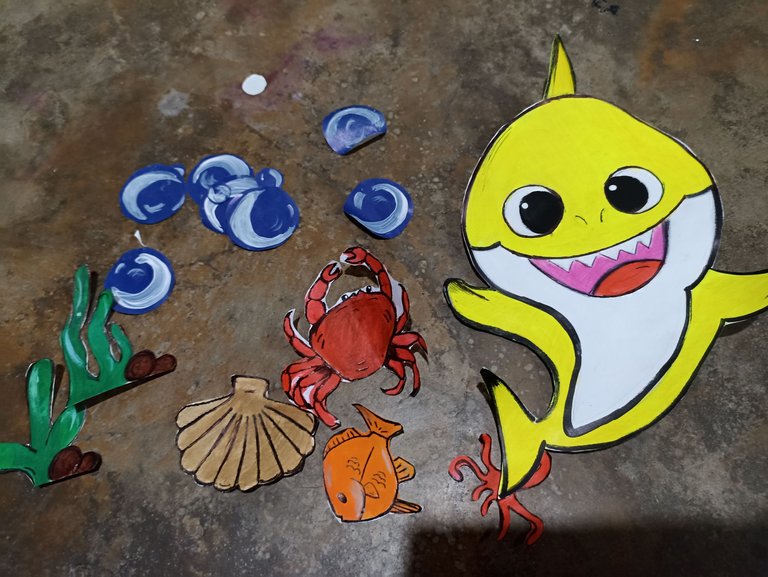
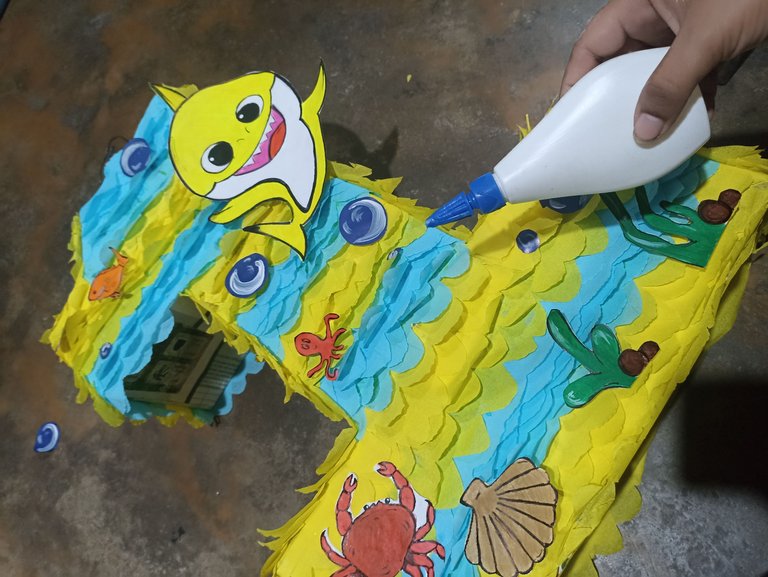
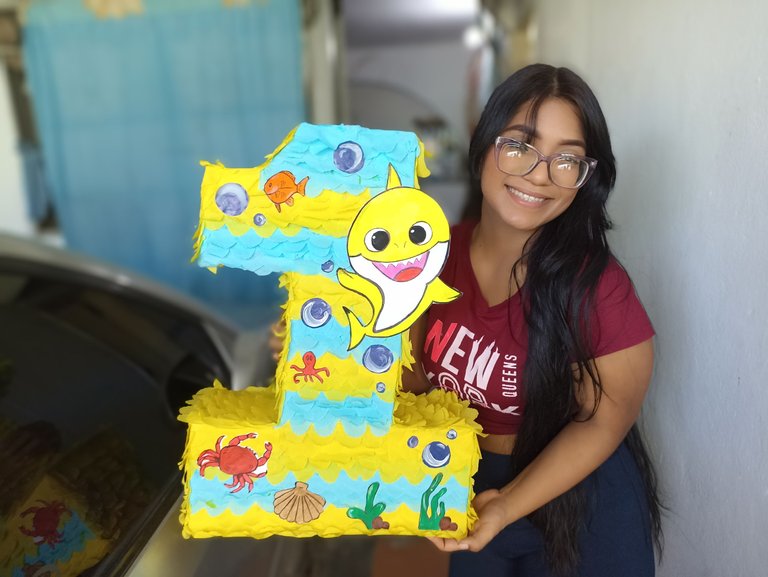
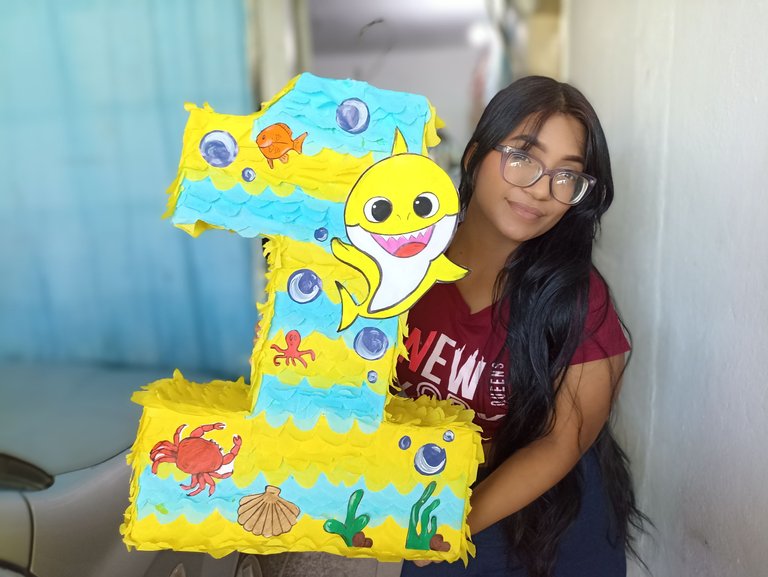
Para culminar quería darles más detalles aunque ya así se veía hermosa por lo que dibuje y imprimí algunos dibujos de mar y un bebe tiburón los pinte, recorte y luego pegue en la parte delantera de la piñata dejando un resultado súper lindo, ame esta piñata, cada vez estoy mejorando, todo lo que aprendo lo hago para mis hijos me encanta hacerle yo las cosas, siempre estoy buscando que hacerle y en esta fiestas lo voy hacer todo yo, desde las piñatas, decoraciones y la torta y me muero por compartirles todo ya que hacer estas cosas me llena de tanta felicidad, gracias por su tiempo queridos amigos espero les haya gustado, un gran abrazo nos vemos en una próxima publicación
To finish I wanted to give more details although it already looked beautiful so I drew and printed some drawings of the sea and a baby shark, I painted them, cut them out and then glued them on the front of the piñata leaving a super nice result, I love this piñata, I am getting better and better, everything I learn I do for my children, I love to make things myself, I am always looking for something to do and this holiday I am going to do it all myself, from the piñatas, decorations and the cake and I can't wait to share everything with you since doing these things fills me with so much happiness, thank you for your time dear friends I hope you liked it, a big hug see you in a future publication.