(ENG)
Hello everyone, I am pleased to bring you a very nice and easy step by step, especially for all of you DIY lovers, who make life at @diyhub, I am talking to you about some very beautiful Posa Cups, made using aluminum Aritas , and the Crochet technique, inspired by a small and adorable Owl and a beautiful blue butterfly. Ideal for decorating and setting the table or breakfast area. Promoting recycling and the conservation of spaces and the environment. I invite you to follow me and I will show you how easy and useful it is to make.

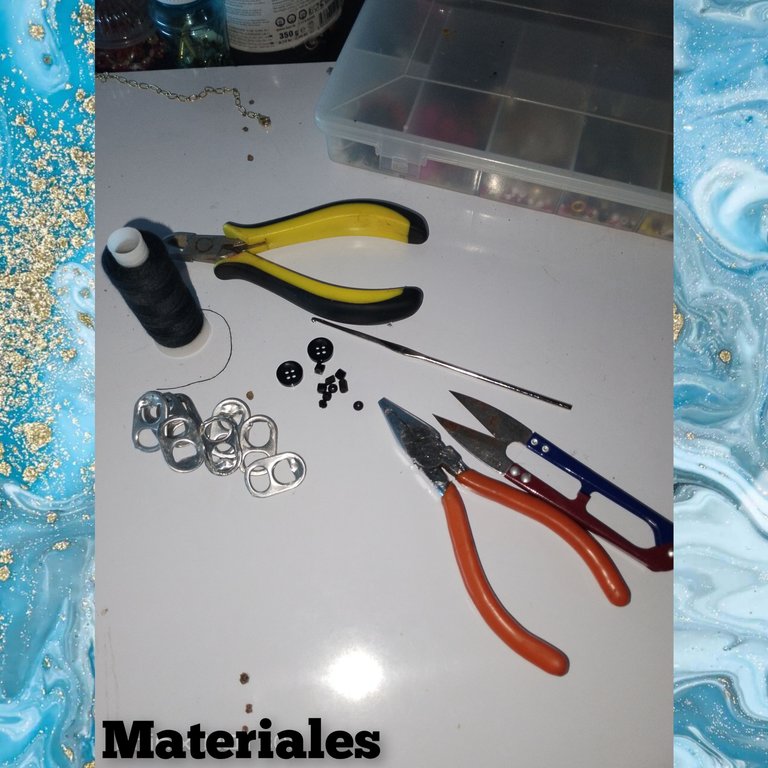
Materials.
. Blue knitting thread.
. Black sewing thread.
. Knitting needle. . Sewing needle. . Black beads.
. Two small four-hole buttons, black.
. Eight aluminum can rings. . Cutting pint.
. Flat tip tweezers.
. Scissors.
STEPS:
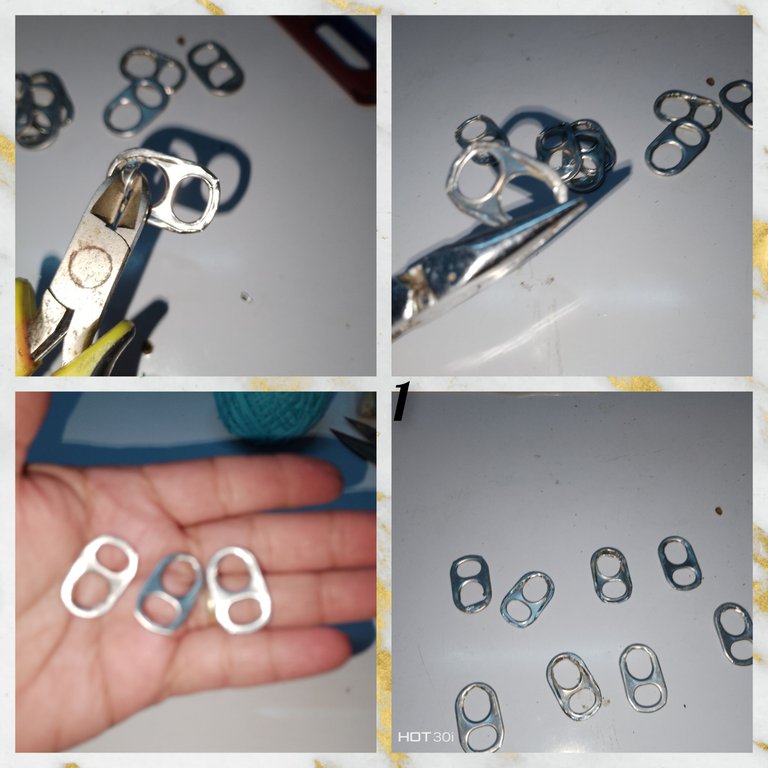
1.) Taking advantage of the fact that in the family group, they toasted on the 31st, with some canned beers, I was collecting, I sold the cans and I saved the rings to make my crafts, so after collecting, I released all the aluminum residue , which are left to be detached, through the holes of the ring, and after cutting them, I applied pressure with the flat tip pliers, to avoid cutting myself or the thread tearing when knitting.
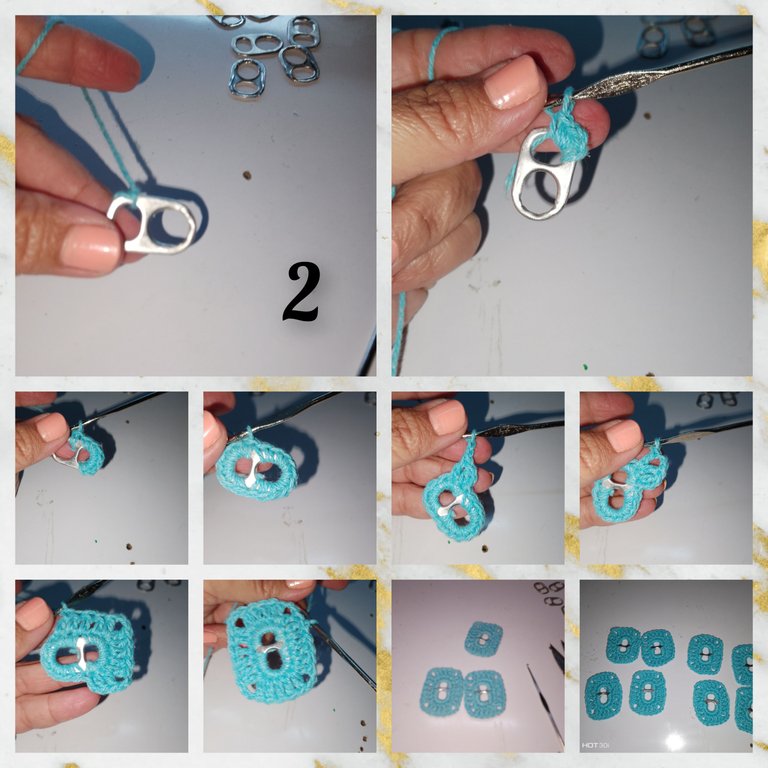
2.) Once the hoops are ready, I tie the blue knitting thread to it. I don't tie knots but rather I begin to knit half stitches, I go through it, relying on the circles that compose it, one larger than the other, but I look for balance between both extremes, which is why I knit 5 half stitches in the upper parts and on the six sides, making a total of 22 half points and ended with a running point. I knit a second round, I knit three chain stitches, equivalent to a double crochet and two more double crochets, advancing over each half stitch of the previous round, I make a stop, together in the first corner, I lift two chain stitches, and in the third double crochet, I knit one more double crochet. I go forward and knit five double crochets, fill to a new corner, pick up two chain stitches and insert in the fifth double crochet. In this way, I continue moving forward, with high points and stopping to increase in the corners. In this same way, I repeat in the following sets of aluminum rings, for a total of eight.
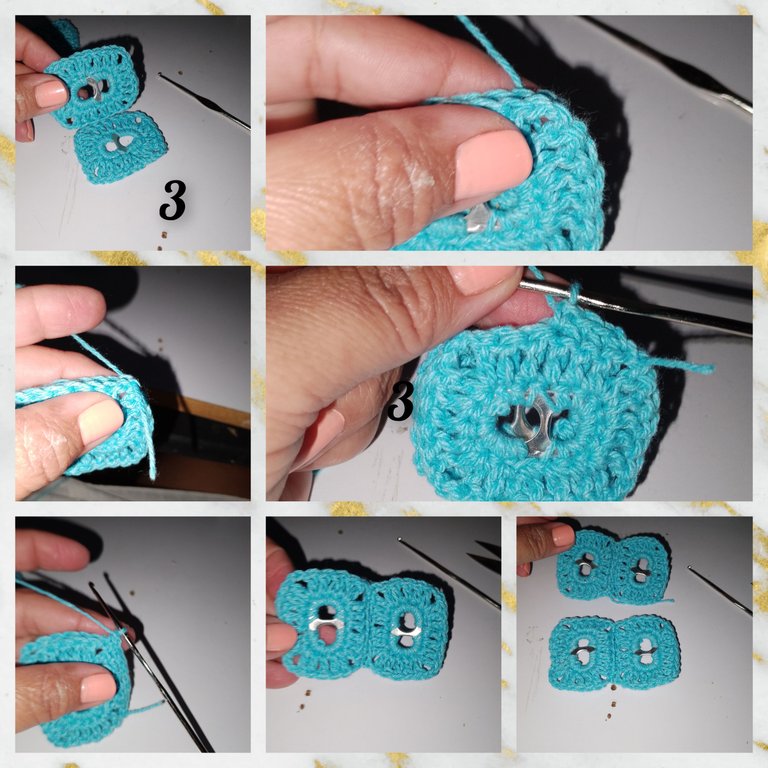
3.) In pairs, I place the woven Aritas, face to face and with thread I knit half stitches, I start with two, then two and to sleep the square, I glue the four, always with half stitches.
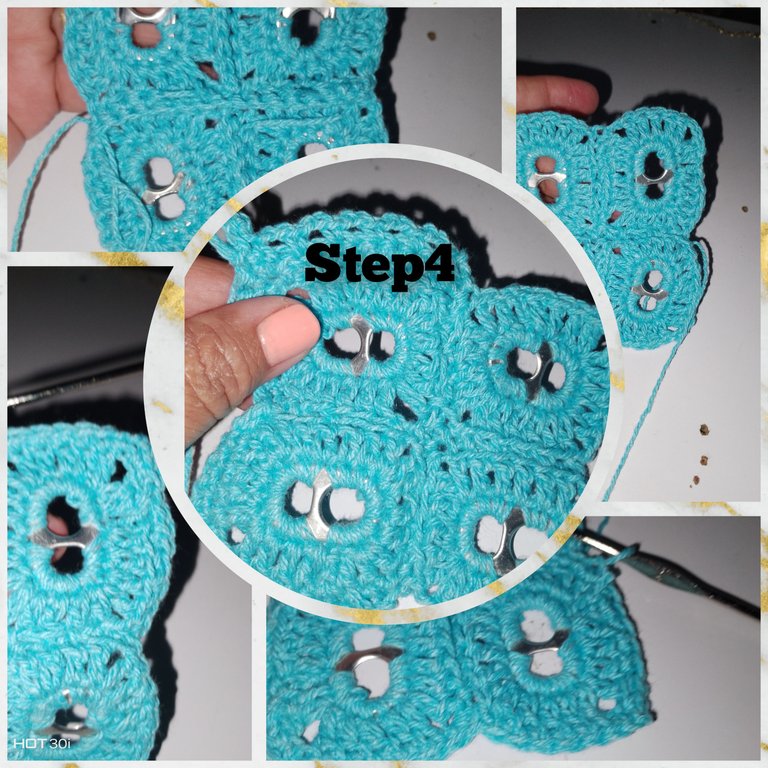
4.) I will start, shaping the Owl, so I make two turns at the bottom, of the square of four hoops, and at each end, I make an increase, that is, in the two chains of separation, I knit three half stitches , and on the next round, in the second half increase stitch I knit two half stitches. I write a somewhat pointed poem, which simulates the Owl's little legs. To locate myself at the top of the Owl, I make the next pass, and go along the bottom, lifting two chain stitches, leaving two spaces and a half point.
5.) Located at the top I make a round of half crochets and in the three separating chains, I raise five double crochets which I close together, I lift three chain stitches and go down with half a crochet again to the separating chains. I continue the route of half points and when I reach the next pint, I repeat what I did before. To complete this side, I knit half stitches, having completed this side, I cast off and cut thethread.

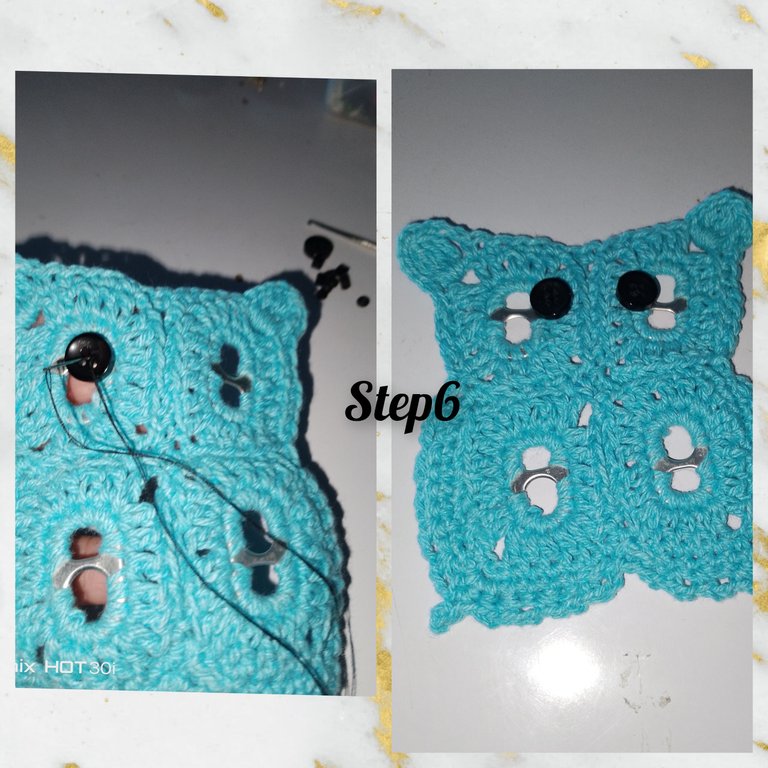
6.) With a needle and thread, I glue the buttons on the front of the Owl and in this way, I conclude with the making of the first Mug holder.
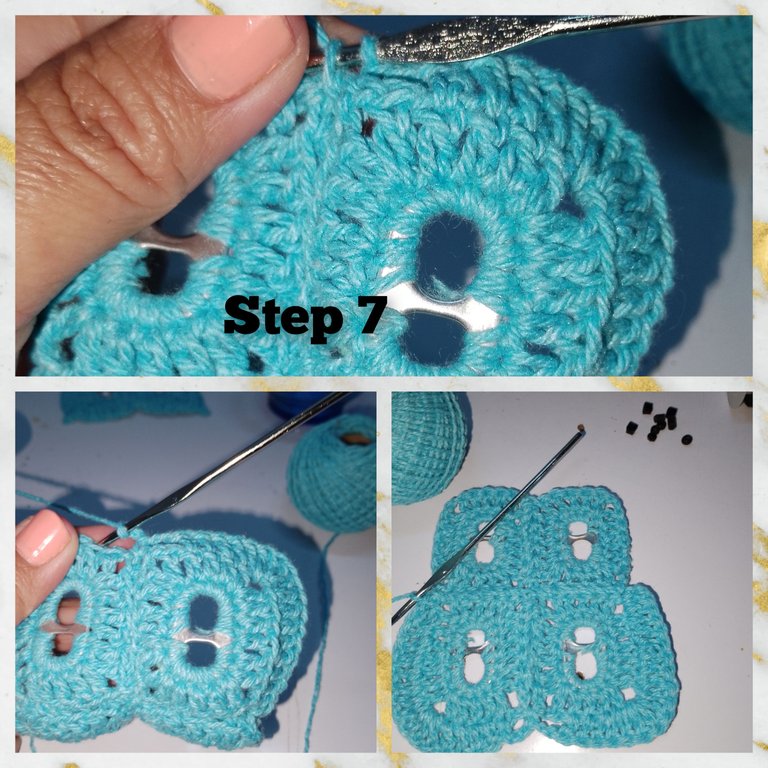
7.) I start with the bottom part of the butterfly, so I will knit a double crochet, when I reach each end of the chain increases I will make a double crochet increase, a total of three, and in the space between the knitted hoops, three chain stitches, low with a slipped stitch and to return to the next side, I pick up three chain stitches and continue with a double crochet. Already tour, the lower part.
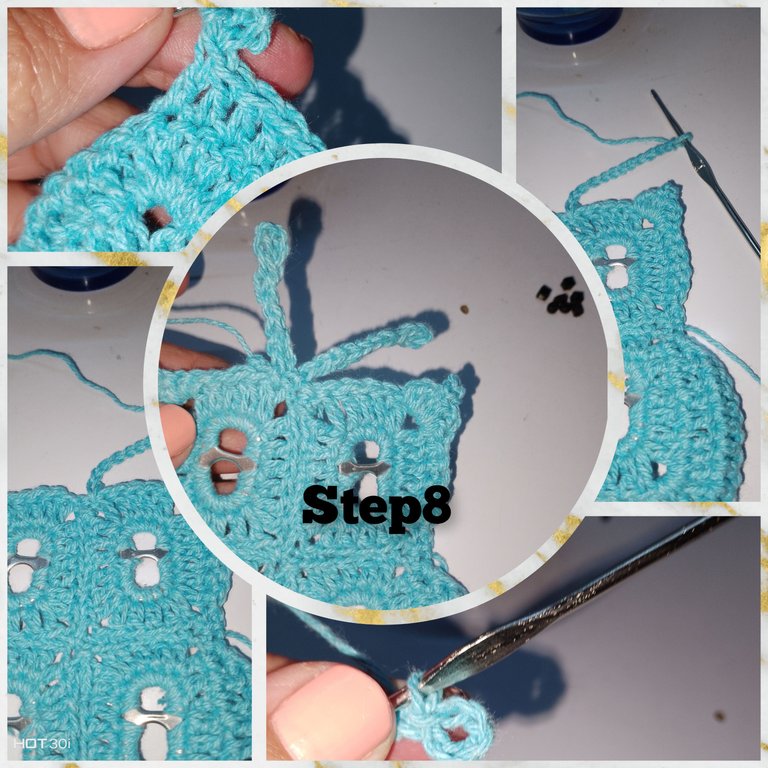
8.) I knit a second round in double crochets, making an increase in each double crochet increase of the previous round, in the third increase stitch, I pick up three chain stitches and with a slipped stitch, I cast on the double crochet and continue. I repeat the same on both ends. I continue the route in the upper part, so I start by knitting half stitches and when I reach the first chain edge, I knit five double crochets closed together, and low with a chain stitch with slipped stitches. I continue by placing myself in the center, I lift the chain stitches and go down to point n7 to knit a slip stitch, I continue going down with the slip stitch, and I repeat to obtain the two antennae of the butterflies. So I keep moving forward, finish off and cut the thread.
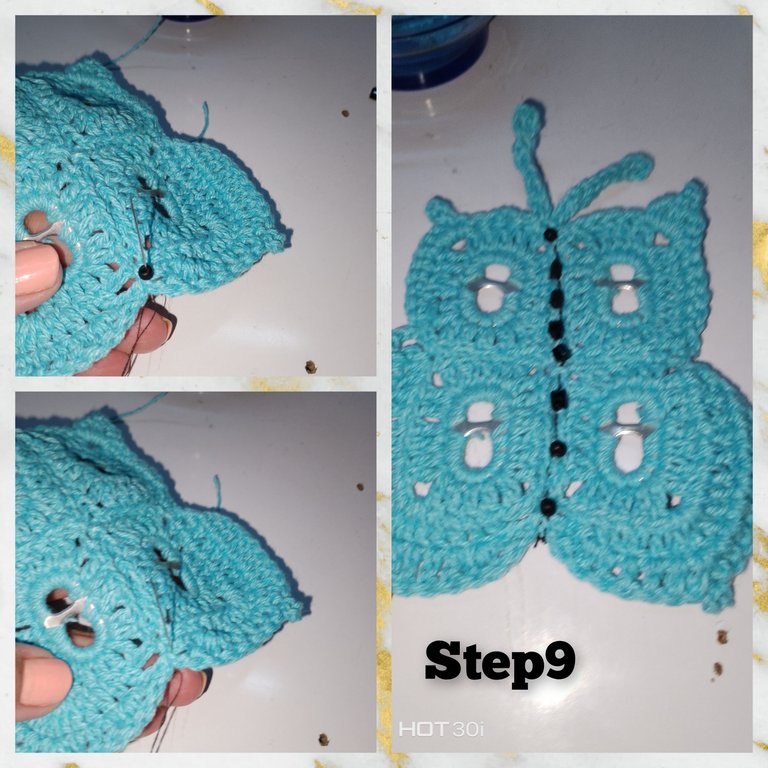
9.) You already form the figure of the butterfly, with a needle and thread, I glue the beads in the central part.
In this way I conclude today's project. Wishing this a great month of creations for everyone.
. All photos are my property, taken with my smartphone.
. Use language translator.
. Use incollage to show the steps.
Grateful for your visit to my blog, see you next time.
(ESP)
Hola a todos, me complacer, traer un muy bonito y fácil paso a paso, en especial para todos ustedes amantes de el bricolaje, que hacen vida en @diyhub, Les hablo de unos muy bonitos Posa Tazas, hechos usando Aritas de la de aluminio, y la técnica de Crochet, inspirados en un pequeño y adorable Búho y una hermosa mariposa azúl. Ideales para decorar y ambientar,la mesa o desayunador. Fomentando el reciclaje y a la conservación de los espacios y el medio ambiente. Les invito, a seguirme y les mostraré lo fácil y útil de su elaboración.
Materiales.
. Hilo para tejer color azul.
. Hilo de coser color negro.
. Aguja para tejer.
. Aguja para coser.
. Chaquiras de color negra.
. Dos botones pequeños de cuatro perforaciones, de color negro.
. Ocho aritos de lata de aluminio.
. Pinta de cortar.
. Pinza punta plana.
. Tijeras.
PASOS:
1.) Aprovechando, que en el grupo familiar, brindaron el 31, con algunas cervezas de lata, fui recogiendo, las latas las vendí y los aritos los guarde para hacer mis manualidades, así que luego de recolectar, desprendía todo el residuo de aluminio, que quedan la ser desprendido, por los hoyos de el arito, y luego de cortarlos, hice presión con la pinza punta plana, para evitar cortarme o que el hilo se me rasgue al tejer.
2.) Listos los aritos, ato a este el hilo de tejer color azul. No hago nudos sino que comienzo a tejer medios puntos, lo recorro, apoyándome en los círculos que lo componen, uno de mayor tamaño que el otro, pero busco el equilibrio, entre ambos extremos, por ello tejo en las partes superior 5 medios puntos y en los lados seis, haciendo un total de 22medios puntos y finalizó con, punto corrido. Tejo una segunda vuelta, tejo tres puntos cadenas, equivalentes a un punto alto y dos puntos altos más, avanzando sobre cada medio punto de la vuelta anterior, hago un alto, junto en la primera esquina, levanto dos puntos cadenas, y en el tercer punto alto, tejo un punto alto más. Avanzo y tejo cinco puntos altos, lleno a una nueva esquina, levanto dos puntos cadenas e introduzco en el quinto punto alto. De esta manera, sigo avanzando, con puntos altos y haciendo parada para aumentar en las esquinas. De esta misma forma, repito en las siguientes sientes Aritas de aluminio,para un total de ocho.
3.) En pares, coloco las Aritas tejidas, cara a cara y con hilo tejo medios puntos, comienzo con dos, luego dos y para dormir el cuadro, pego las cuatro, siempre con puntos medios.
4.) Iniciaré, dando forma a el Búho, así que doy dos vueltas en la parte inferior, de el cuadro de cuatro aritos,y en cada extremo, hago un aumento, es decir en las dos cadenas de separación, tejo tres medios puntos, y en la siguiente vuelta, en el el segundo medio punto de aumento tejo dos medios puntos. Pando un poema algo espuntada, que simula, las patitas de el Buho. Para ubicarme en la parte superior de el Buho, doy una siguiente pasada, y recorro la parte inferior, levantando dos puntos cadenas dejo dos espacios y un medio punto.
5.) Ubicada en la parte superior doy una vuelta de medios puntos y en las tres cadenas de separación, levanto cinco puntos altos los cuales cierro juntos, levanto tres puntos cadenas y bajo con medio punto nuevamente a las cadenas de separación. Continuo el recorrido de medios puntos y al llegar al siguiente pinta, repito lo de la anterior. Para completar este lado, tejo medios puntos, al haber completado, este lado, remato y corto el hilo.
6.) Con aguja e hilo, pego los botones, en la parte frontal de el Buho y de esta manera, concluyo, con la elaboración de el primer posa Tazas.
7.) Comienzo teniendo la parte inferior, de la mariposa, así que tejere un punto alto, al llegar a cada punta de aumentos de cadenas haré un aumento de punto altos, en total tres, y en el espacio de separación entre aritos tejidos, tres puntos cadenas, bajo con punto deslizado y para retomar el siguiente lado, levanto tres puntos cadenas y continuo con punto alto. Recorrido ya, la parte inferior.
8.) Tejo un segundo vuelta en puntos altos, haciendo aumento es n cada puntos alto de aumento de la vuelta anterior, en el tercer punto de aumento, levanto tres puntos cadenas y con un punto deslizado, monto sobre el punto alto y continuo. Repito en ambas puntas igual.
Continuo el recorrido en la parte, superior así que comienzo tejiendo medios puntos y al llegar a la primera orilla de cadenas, tejo cinco puntos altos cerrados juntos, y bajo con punto cadena con puntos deslizados. Continuo al ubicarme en el centro, levanto dice puntos cadenas y bajo al punto n7 para tejer un un punto deslizado, continuo bajando con punto deslizado, y repito para obtener las dos antenistas de las mariposas. Así sigo avanzando, remato y corto el hilo.
9.) Formas ya la figura de la mariposa, con aguja e hilo, pego en la parte central, las chaquiras.
De esta manera concluyo con el proyecto de el día de hoy. Deseando este sea un gran mes de creaciones para todos.
. Todas las fotos son de mí propiedad, tomadas con mí teléfono inteligente.
. Use traductor lenguaje.
. Use incollage para mostrar los pasos.
Agradecida por su vista a mí blog, será hasta una próxima oportunidad.
