¡Bienvenidos a mi blog!
Welcome to my blog!
Hola, queridos amigos que forman parte de esta linda comunidad #Diyhub, muy buenos días , feliz Martes, que Dios todopoderoso guíe siempre nuestras vidas por el camino del bien y tenga misericordia de cada uno de nosotros en estos tiempos difíciles.
Hello, dear friends who are part of this beautiful community #Diyhub, very good morning , happy Tuesday, may almighty God always guide our lives on the path of good and have mercy on each of us in these difficult times.
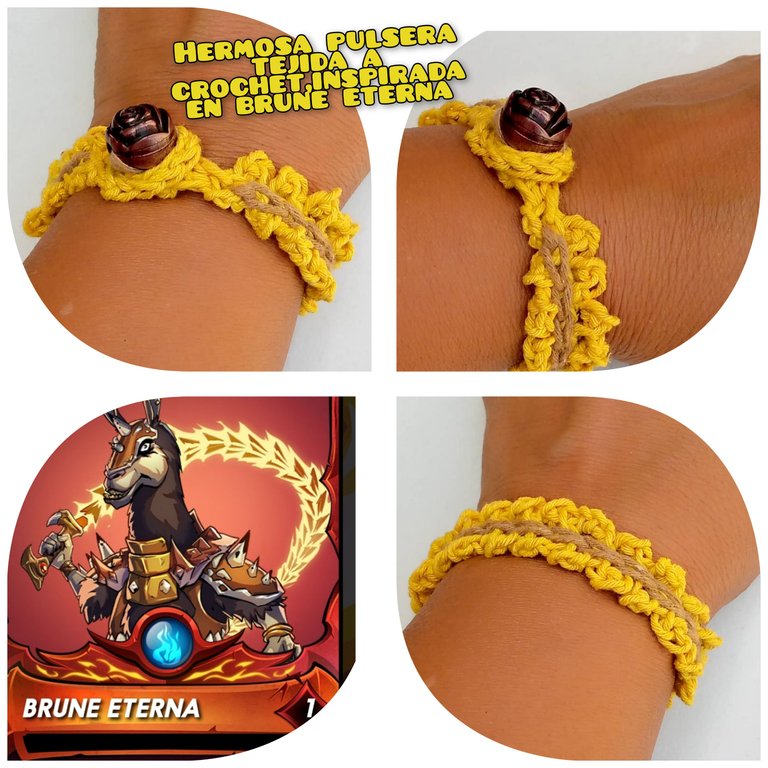
Hoy quiero mostrar a través de un tutorial, cómo tejer una linda pulsera a crochet, inspirada en el látigo del personaje Burne Eterna del juego de @Splinterlands.
Esta pulsera tiene los colores del látigo, es muy fácil de tejer , se utilizan puntos sencillos como: cadenetas,punto alto, deslizado,al final quedan puntos piquitos y se teje en muy poco tiempo, lo que sí garantizo es que luce muy bonita, además de hacer la pulsera pueden hacer el collar de la misma manera pero hacen más puntos piquitos.
Today I want to show through a tutorial, how to crochet a nice bracelet, inspired by the whip of the character Burne Eterna from @Splinterlands game.
This bracelet has the colors of the whip, it is very easy to knit, it uses simple stitches such as: chain stitches, high stitch, slipped stitch, at the end there are piquitos stitches and it is knitted in a very short time, what I guarantee is that it looks very nice, besides making the bracelet you can make the necklace in the same way but make more piquitos stitches.
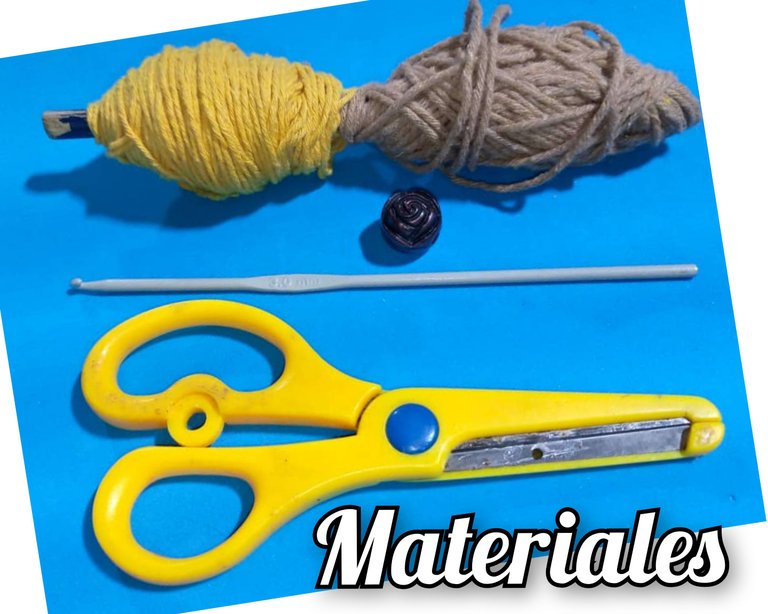
Materiales para la realización de la linda pulsera tejida a crochet:
- Hilo para tejer de colores amarillo claro y marrón claro.
- Aguja , número 3.
- Botón con forma de flor.
- Tijera.
- Aguja de coser o lanera.
Materials for the realization of the beautiful crocheted bracelet:
- Knitting yarn in light yellow and light brown colors.
- Needle, number 3.
- Flower-shaped button.
- Scissors.
- Sewing needle or wool needle.
Pasos para la realización de la pulsera:
- Lo primero en realizar es: tomar la aguja y el hilo de color amarillo claro , hacer un nudo sencillo o deslizado, luego hacer 10 cadenetas, cuando la tengamos , cerrar con punto deslizado, tienen que medir en ancho del botón , en mi caso realicé 10 cadenetas , si en su caso es mas grande o más pequeños deben medir.
Steps for the realization of the bracelet:
- The first thing to do is: take the needle and light yellow thread, make a simple knot or slipped, then make 10 chains, when we have it, close with slipped stitch, have to measure the width of the button, in my case I made 10 chains, if in your case is larger or smaller should measure.
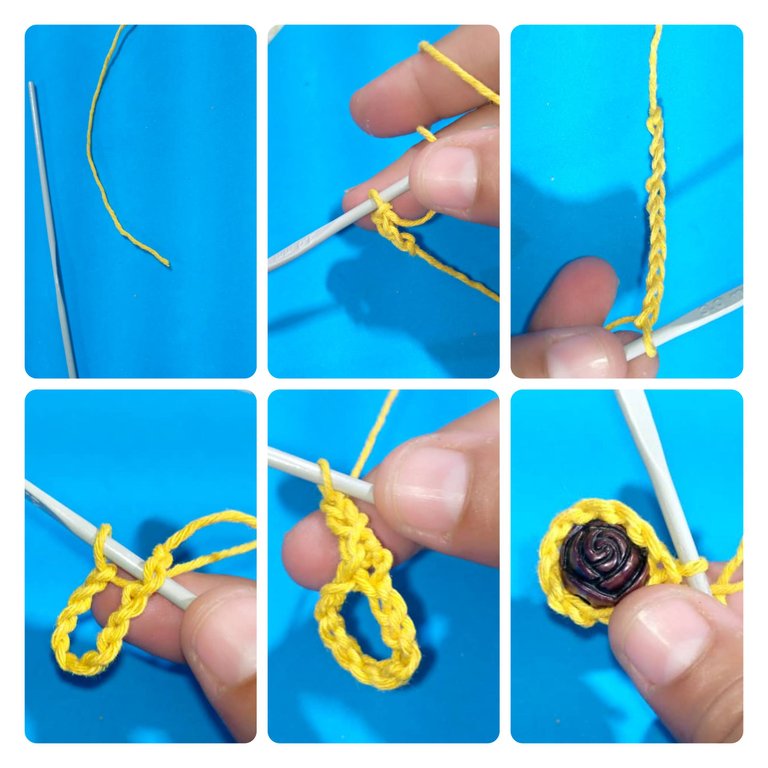
- Hacer tres cadenetas y cerrar con punto deslizado en la primera cadena,así consiste la pulsera en realizar estos piquitos, nuevamente hacer 3 cadenetas más y cerrar en la primera cadena con un punto deslizado.
- En mi caso realicé 18 puntos piquitos , deben ir midiendo su muñeca para ver cuantos puntos piquitos harán.
- Al llegar el largo de su muñeca , deben hacer 3 cadenas, luego tomar una lazada y meter la aguja en el primer punto, tomando dos hilos, tomar lazada y volver a meter la aguja en el mismo punto, agarrar dos hilos. Cuando queden 4 hilos , hacer un punto deslizado con todos, en el punto siguiente hacer un punto deslizado y en el que que sigue.
- Make three chain stitches and close with slip stitch in the first chain, this is how the bracelet consists of making these piquitos, again make 3 more chain stitches and close in the first chain with a slip stitch.
- In my case I made 18 piquitos stitches, you should measure your wrist to see how many piquitos stitches you will make.
- When you reach the length of your wrist, you should make 3 chains, then take a loop and put the needle in the first stitch, taking two threads, take a loop and put the needle in the same stitch again, taking two threads. When there are 4 strands left, make a slip stitch with all of them, in the next stitch make a slip stitch and in the next one.
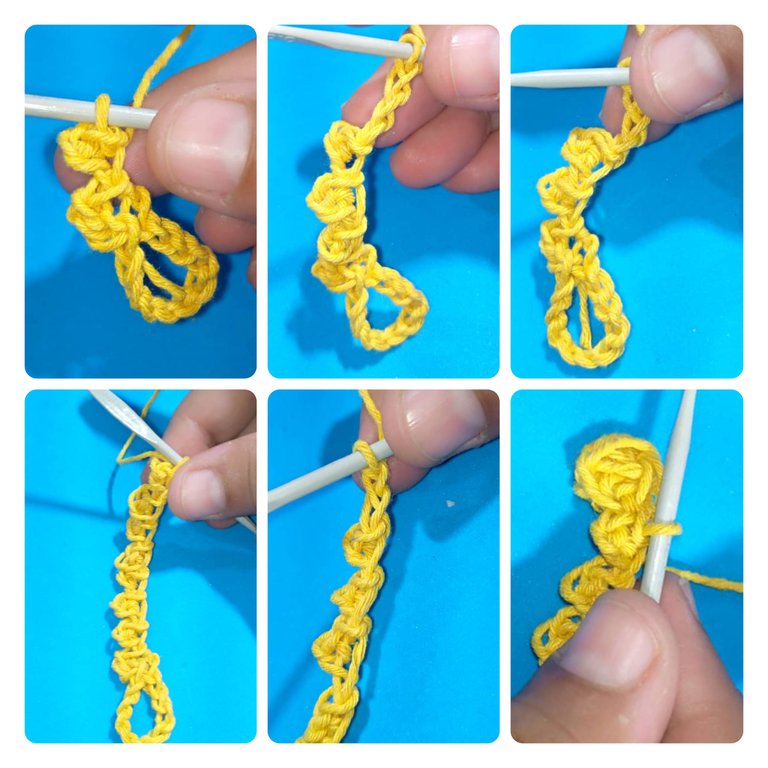
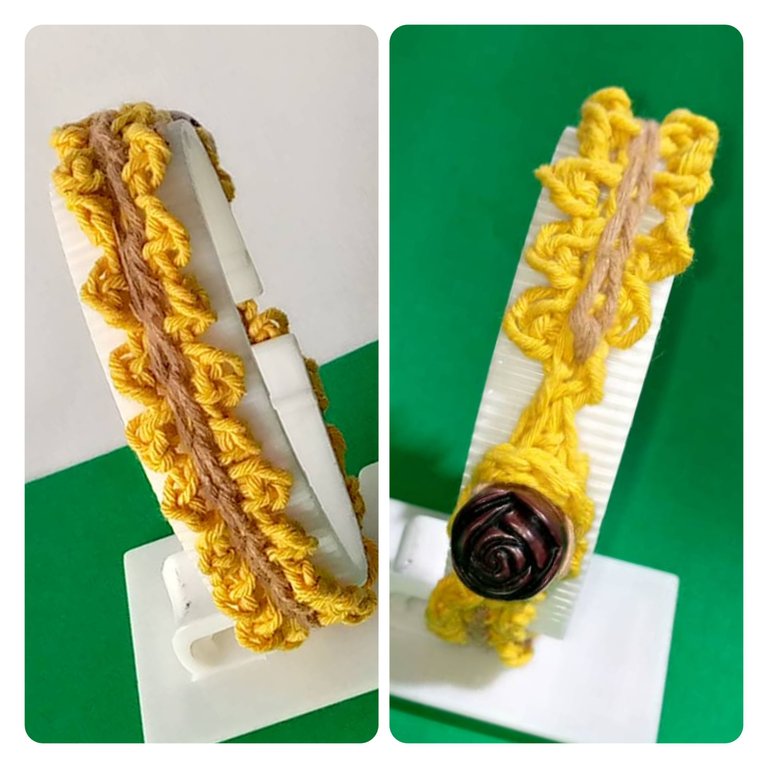
- Ya hemos hecho la primera parte de la pulsera y en donde va el botón.
- Para la última parte, hacemos lo mismo , tres cadenas, metemos la aguja por la primera y la sacamos con punto deslizado. En la primera parte hice 18 puntos piquitos en la segunda deben quedar lo mismo.
- Hacer 3 cadenas y cerrar con un punto deslizado.
- Podemos ver la pulsera que queda abierta en dos partes.Faltaria la cadena que va por el medio.
- We have already made the first part of the bracelet and where the button goes.
- For the last part, we do the same, three chains, we put the needle through the first one and take it out with slipped stitch. In the first part I made 18 piquitos stitches in the second part should be the same.
- Make 3 chains and close with a slip stitch.
- We can see that the bracelet is open in two parts, the chain that goes through the middle is missing.
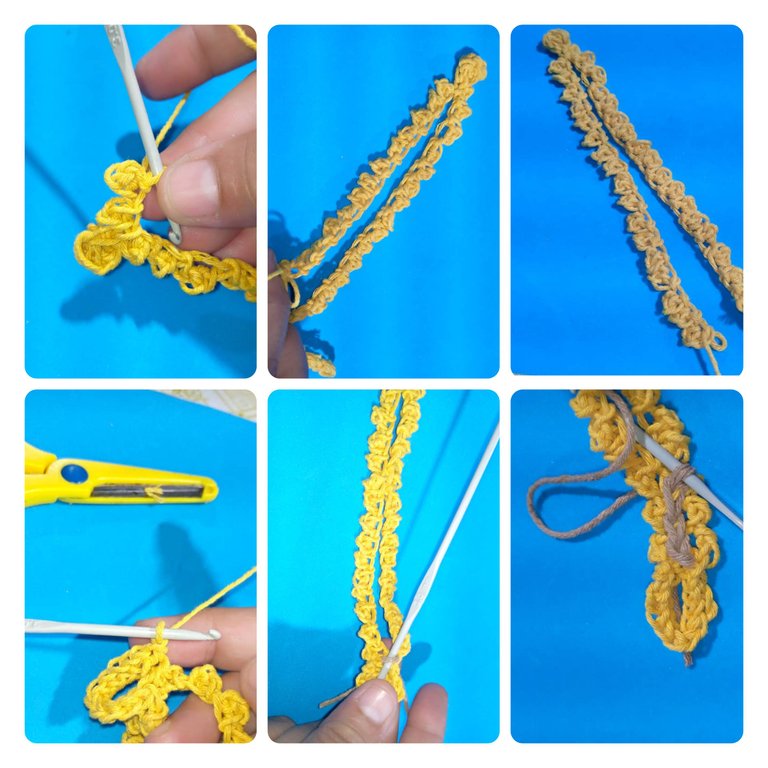
- Cambiamos de color de hilo (marrón claro) metemos la aguja de adelante hacia atrás , de esta manera jalamos el hilo , ahora tomamos el hilo de cada lado del piquito que hicimos,comenzamos de derecha y el de la izquierda metemsonla aguja hacia lampartr de atrás , tomamos hilo y queda la primera cadena, así vamos a hacer hasta llegar al final de la pulsera.
- Cerramos con punto deslizado.
- Ensartamos la aguja lanera y cosemos el botón con forma de flor.
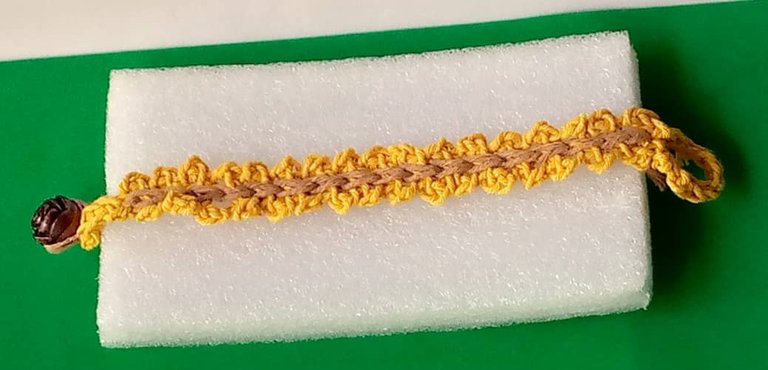
- De esta manera tenemos lista la pulsera.
- We change the color of the thread (light brown) we put the needle from the front to the back, in this way we pull the thread, now we take the thread from each side of the piquito we made, we start from the right and the one from the left we put the needle towards the back, we take the thread and the first chain remains, we will do this until we reach the end of the bracelet.
- We close with slipped stitch.
- We thread the wool needle and sew on the flower-shaped button.
- This way we have the bracelet ready.

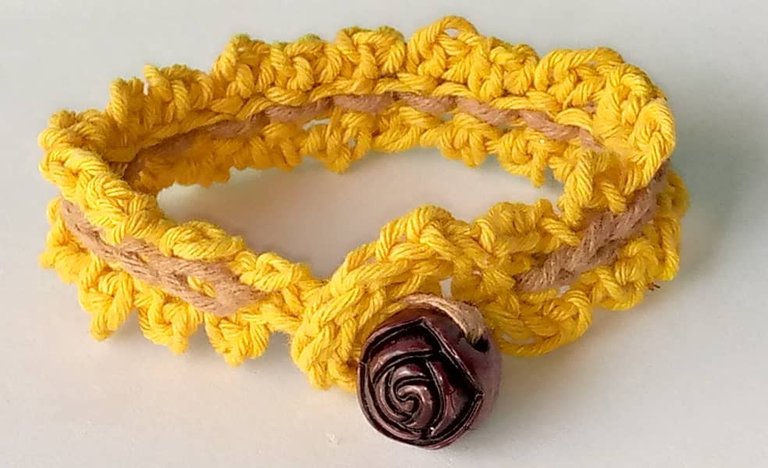
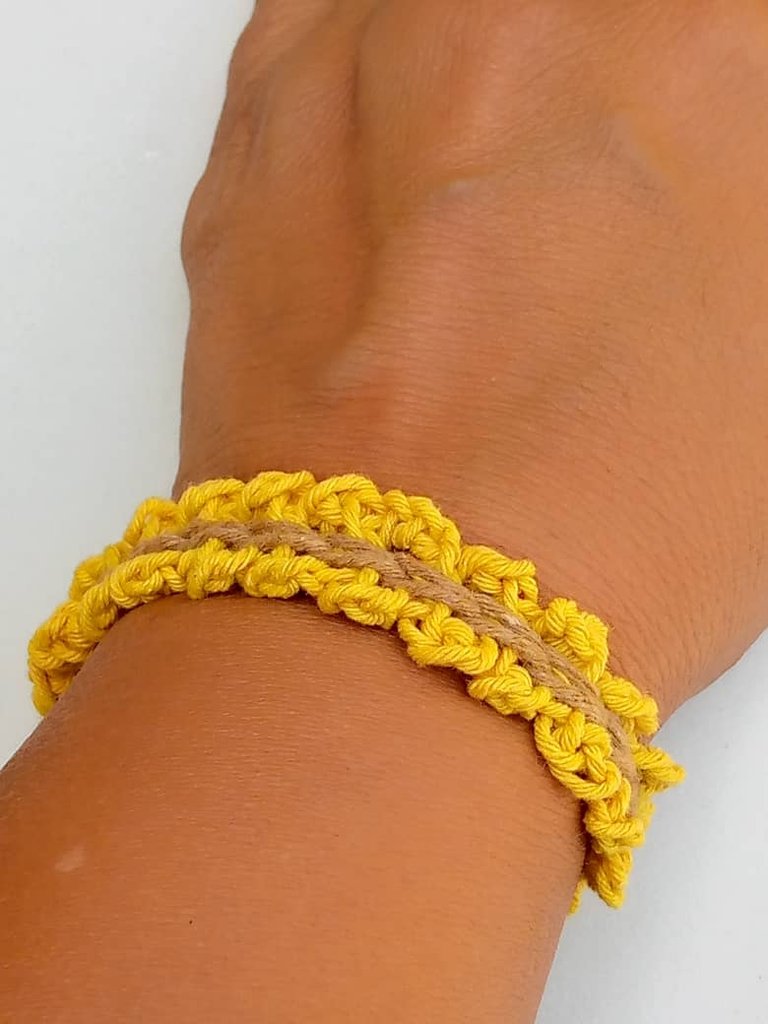
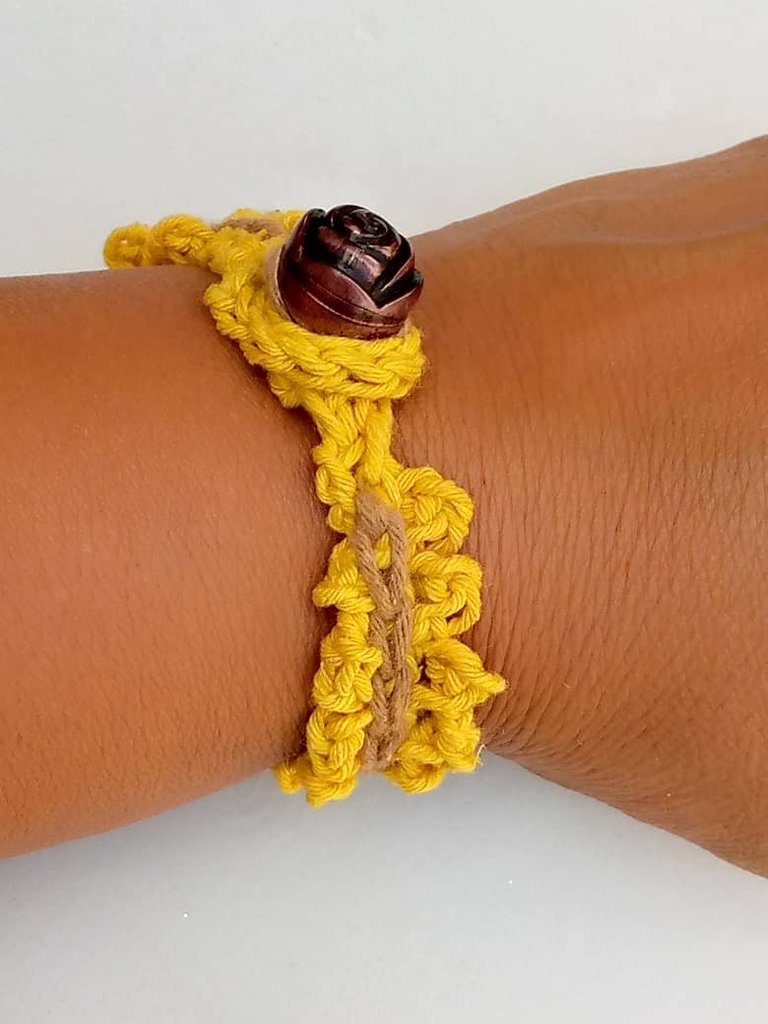
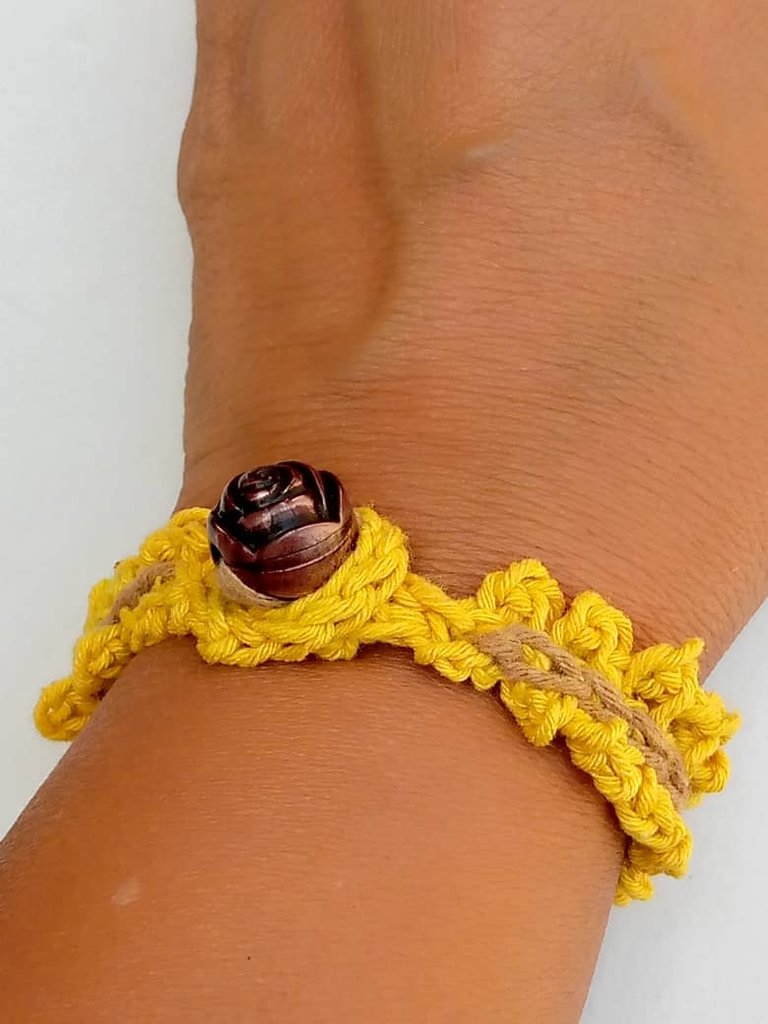
Aquí el resultado final de la linda pulsera tejida a crochet,inspirada en Burne Eterna
Here is the final result of the beautiful crocheted bracelet, inspired by Burne Eterna
Gracias por leer y comentar mi post, muchas bendiciones.Hasta la próxima. Las fotos son mias , tomadas con teléfono INfinix, edtadas por incollage y traducidas con Deepl.
Thank you for reading and commenting on my post, many blessings, see you next time. The photos are mine, taken with INfinix phone, edited by incollage and translated with Deepl.